Home Blog Page 498

Root HTC One Max International/China/Verizon/Sprint – [How to – Guide]

0
Root HTC One Max International/China/Verizon/Sprint – [How to – Guide]

Rooting your phone has always been useful when it comes to play with it beyond the boundaries and tweak it the way you want. HTC One Max is out now to compete with the rival phablets, the device is available in International, Chinese, Verizon and Sprint variants and runs on Android 4.3 Jelly Bean out of the box. Earlier, we posted a method to install CWM or TWRP recovery on the HTC One Max, but the root method was left. So, here it is. I’ve explained the method to root HTC One Max in simple and easy words below. You just got to follow this guide to the letter. In case you are not familiar with the root access, then let’s have a little intro to it first.HTC-One-max-Glacial-Silver-3V

Rooting your phone gives you complete access over all the data which is apparently locked by the manufacturers. This includes removal of the factory restrictions and making changes to the internal system and the operating system. Gaining the root access gives you the privileges to install various applications to enhance the performance of your device, allows you to remove the built-in applications/programs, helps you to upgrade the battery life of your device & install the apps which require the root access for the proper functionality and modify your device in so many other ways e.g using mods and custom roms. By installing custom recovery, you can flash custom roms in the phone easily. Custom recovery also let’s you backup your current rom and restore it in case of any mishap. There is a laundry list of things you can do after having your device rooted and installed the custom recovery, now once you’re rooted and haveinstalled custom recovery, go ahead and enjoy it on your phone. Here’s our collection of 10 Best Root Apps.

Disclaimer: The methods involved in flashing custom roms and rooting your phone is highly custom and may result in bricking your device, and has nothing to do with Google or the device manufacturer that is HTC in our case. Also rooting your device will void its warranty and you will be no longer eligible for any kind of free device services by the manufacturers/warranty providers. In case of any mishap we may not be held responsible. Follow these instructions to the letter to avoid any mishap or bricking. Make sure that whatever you do, you are doing it at your own responsibility.

Pre-requisites to Root your HTC One Max:

      • This guide is only for HTC One Max International, Chinese, Verizon & Sprint. Don’t try this on any other phone.
      • You must have a CWM or TWRP Recovery installed. Only use the one we posted. Follow our full guide here.
      • Your phone’s battery must be charged at least over 60%. This is highly recommended in order to prevent any power issues during the flashing process.
      • Follow this guide to the letter.

How to Root your HTC One Max:

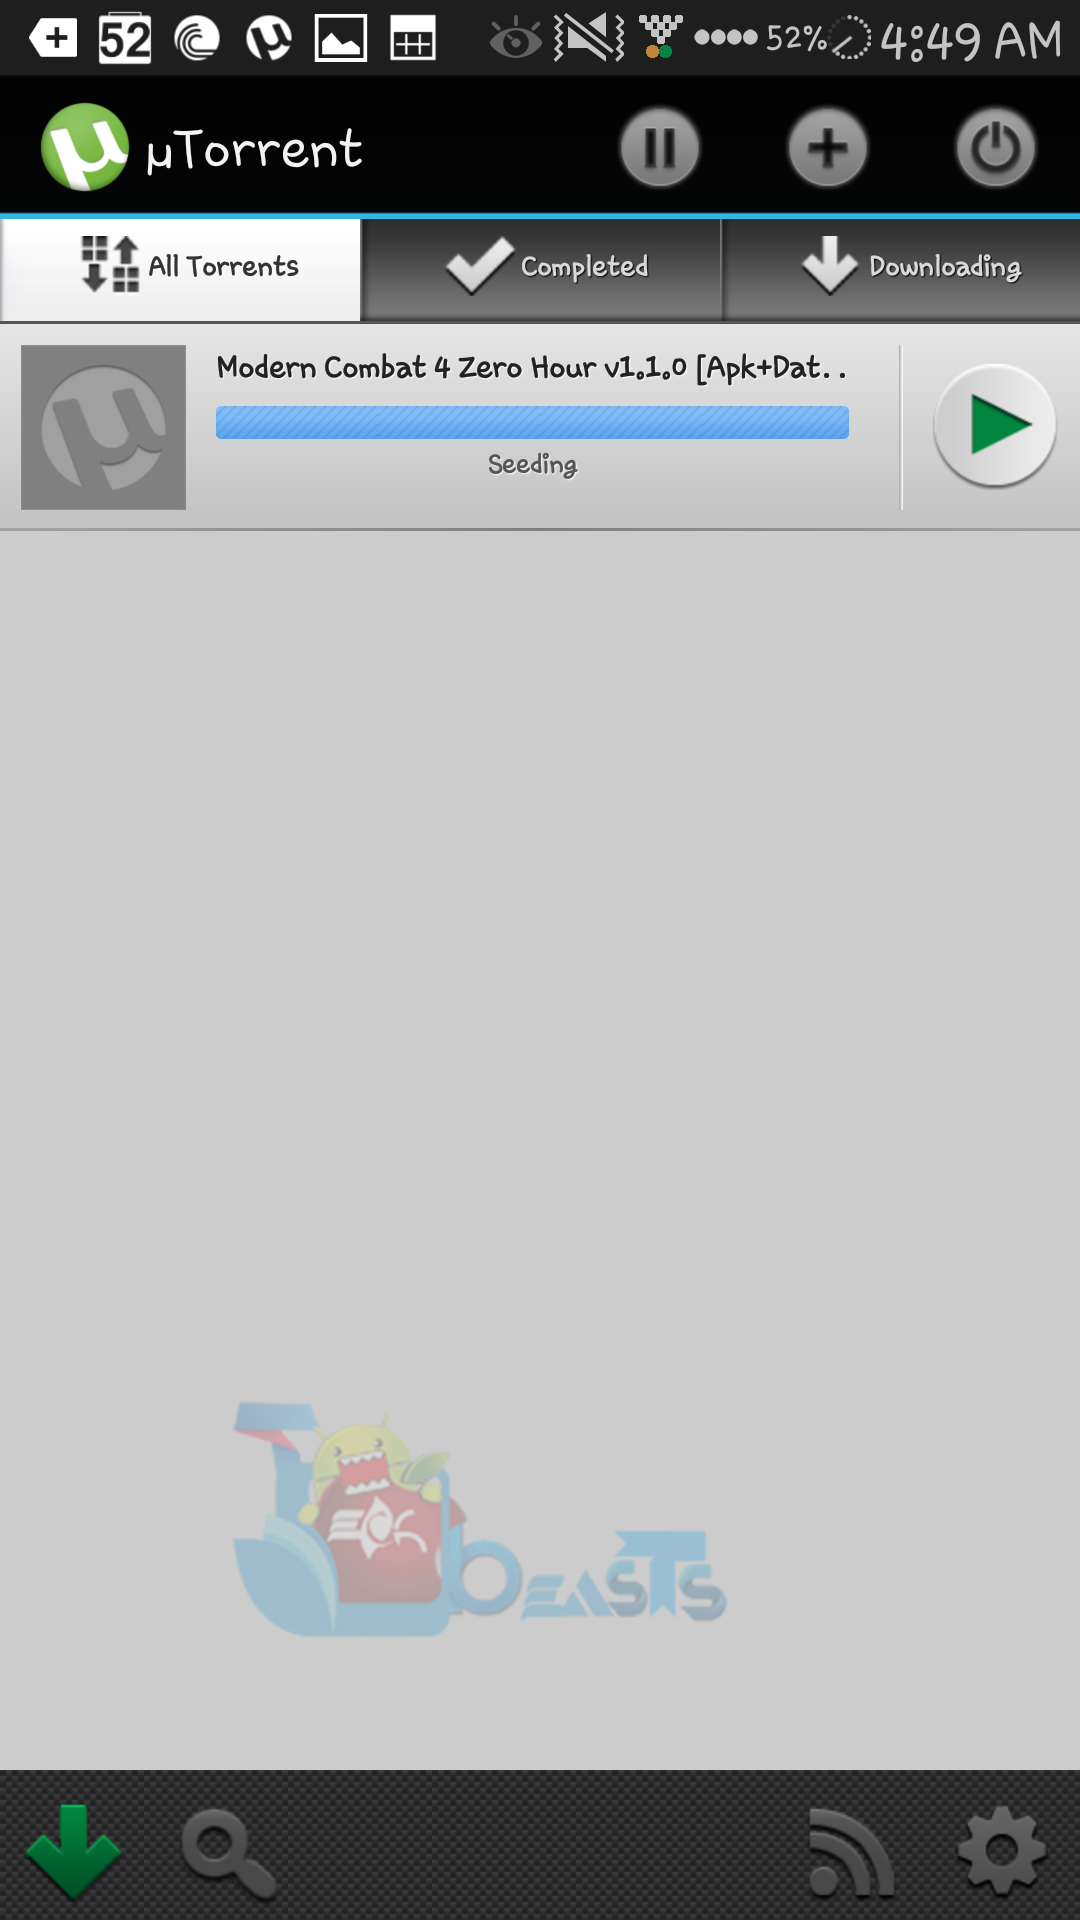
      1. Download the SuperSu.zip file.
      2. Place the downloaded file on your phone’s internal storage.
      3. Boot into Hboot mode. To do so, turn off your device completely. Now turn it on by pressing and holding Volume Down + Power Key.
      4. In Hboot mode select recovery, you should now be in the CWM or TWRP recovery depending on the one you installed from our guide.
      5. Select “Install>Select the SuperSu.zip file” and proceed.
      6. It will take a while to flash the SuperSu.zip.
      7. As soon as the flashing process is done, reboot your device.
      8. Find the SuperSu app in the app drawer.
      9. Congrats! You’re rooted now, Enjoy!

That’s All! In case you got any queries or face any difficulties regarding this post, feel free to stop by the comment box below. We will try our best to help you out. Thanks All!

Install CWM/TWRP Recovery on HTC One Max International/Sprint/Verizon/Chinese [How To – Guide]

1
Install CWM/TWRP Recovery on HTC One Max International/Sprint/Verizon/Chinese [How To – Guide]

To balance the ongoing war between the phablets, HTC brought up its One Max, the maxed out version of its flagship HTC One. The HTC One Max is quite similar to the One in terms of look, hardware specs and features, but has a bigger size only. The phone sports a full HD 5.9″ display with 373 ppi, 4 MP ultra pixel camera at the back and a 2.1 MP camera on the front. Powered up with Qualcomm Snapdragon 600 Quad Core CPU clocked at 1.7 GHz and Adreno 320 GPU. A RAM of 2 GB is there as well and under the hood it has got a 3300 mAh battery. Additionally the One Max has got a finger print scanner at the back. HTC One Max has different variants including International, China (Dual Sim), Sprint & Verizon. The device runs on Android 4.3 Jelly Bean.

Let;s get back to the topic. In the following post we will be having a look on how we can install a CWM [ClockworkMod] or TWRP recovery on the HTC One Max. You may be looking out for a method, to overcome the need I’ve explained it in simple and easy words below. In case you are not familiar with a custom recovery, then let’s learn a little about a custom recovery first.

A custom recovery allows you to install custom roms, mods etc. Along with these, you can make a Nandroid backup, this helps you a lot as you can move back to the previous working state of your phone at any time you want if you have backed up your current system. In some cases, to root the phone you need to flash SuperSu.zip file in the custom recovery, having installed the recovery may help you while in some cases to install the recovery easily, you need to have the phone rooted. You can also wipe cache and dalvik cache of your phone using a custom recovery.

HTC-One-max-Glacial-Silver-3V

Disclaimer: The methods involved in flashing custom roms and rooting your phone is highly custom and may result in bricking your device, and has nothing to do with Google or the device manufacturer that is HTC in our case. Also rooting your device will void its warranty and you will be no longer eligible for any kind of free device services by the manufacturers/warranty providers. In case of any mishap we may not be held responsible. Follow these instructions to the letter to avoid any mishap or bricking. Make sure that whatever you do, you are doing it at your own responsibility.

Pre-requisites to install CWM/TWRP Recovery:

    1. This guide is only for HTC One Max International, China, Sprint and Verizon. Don’t try this on any other phone.
    2. You must have Android ADB & Fastboot drivers installed on your computer. Follow our full guide here.
    3. Your phone’s bootloader must be unlocked. Follow our full guide here.
    4. Your phone’s battery must be charged at least over 60%. This is highly recommended in order to prevent any power issues during the flashing process.
    5. Make sure that you backup your important contacts, call logs and text messages. Although it is not necessary in case of flashing a CWM recovery, but still having backed up is a safe thing.
    6. Use the OEM data cable only to establish connection between your PC and Phone.
    7. Alright! Follow this guide to the letter now.

Downloads:

HTC One Max International:

CWM Recovery:  recovery-clockwork-touch-6.0.4.5-t6ul.img

TWRP Recovery: openrecovery-twrp-2.6.3.0-t6ul.img

HTC One Max China

CWM Recovery: recovery-clockwork-6.0.4.5-t6dug.img

HTC One Max Sprint

CWM Recovery:  recovery-clockwork-touch-6.0.4.5-t6spr.img

TWRP Recovery: openrecovery-twrp-2.6.3.0-t6spr.img

HTC One Max Verizon

CWM Recovery:  recovery-clockwork-touch-6.0.4.5-t6vzw.img

TWRP Recovery: openrecovery-twrp-2.6.3.0-t6vzw.img

How to Install CWM Recovery on your HTC One Max:

  • Download CWM Recovery for HTC One Max carefully from the above links.
  • Place the downloaded recovery.img file in the Fastboot folder that you created using our ADB & Fastboot Guide. You may rename the recovery.img file for your ease.
  • Boot into the recovery mode on your phone. To do so, turn it off completely, then turn it on by pressing and holding Volume Down + Power Button. You should be in the Hboot mode now. Select fastboot here.
  • Highlight bootloader here in Fastboot mode by pressing volume down key.
  • Connect your phone to your PC now.
  • Open the Fastboot folder and hold shift and right click on any empty area inside the Fastboot folder.
  • Click on “Open Command Window Here“.
  • Now in the command prompt type the following command:

Fastboot flash recovery recovery.im file.

  • This will flash the CWM recovery in your phone quickly. As soon as the flashing process is finished, remove your phone from your PC.
  • Boot into Hboot mode [Volume Down + Power Key].
  • Select Recovery in Hboot mode and you should see the CWM Recovery.

How to Install TWRP Recovery on HTC One Max:

  • Download TWRP Recovery for HTC One Max carefully from the links above.
  • Place the downloaded recovery.img file in the Fastboot folder that you created using our ADB & Fastboot Guide. You may rename the recovery.img file for your ease.
  • Boot into the recovery mode on your phone. To do so, turn it off completely, then turn it on by pressing and holding Volume Down + Power Button. You should be in the Hboot mode now. Select fastboot here.
  • Highlight bootloader here in Fastboot mode by pressing volume down key.
  • Connect your phone to your PC now.
  • Open the Fastboot folder and hold shift and right click on any empty area inside the Fastboot folder.
  • Click on “Open Command Window Here”.
  • Now in the command prompt type the following command:

Fastboot flash recovery recovery.im file.

  • This will flash the TWRP recovery in your phone quickly. As soon as the flashing process is finished, remove your phone from your PC.
  • Boot into Hboot mode [Volume Down + Power Key].
  • Select Recovery in Hboot mode and you should see the TWRP Recovery.

Want to Root your HTC One Max now? Check out: Root HTC One Max International/China/Verizon/Sprint – [How to – Guide]

That’s all with flashing CWM or TWRP Recovery on your HTC One Max. In case you got any queries or face any difficulties regarding this post, feel free to contact us. We will try our best to help you out. Thanks All!

How To Block Websites on Mac.

0
How To Block Websites on Mac.

If you are trying to avoid some stupid sites to show or you don’t want anyone else to open those Sites on your Mac. Despite applying many filters, still not manage to stop anyone from opening it. We can help you in this matter, there is a filter called Adobe filter that can block all the desired Keywords and Sites you want to block. We will show you different ways on different Browsers to block the necessary sites on your Mac, choose anyone you like.

logo

FireFox.

If you are using FireFox on your Mac, follow the steps to add a Blocker.

Open FireFox Browser, Navigate to Tools > Add-ons.

In the Search Bar, Search for “BlockSite”, click on the Install for Installation.

Click Restart Now to complete the Installation.

Add-ons-4

Now once again, Open Navigate to Tools > Add-Ons.

Navigate to My Add-ons and Click on Preferences of BlockSite.

In the Enable Functions Options, enable all those functions you want to enable. If you want to set a Password for a Blocked Site, Click on Enable Authentication and Set a Password in New Password Box.

Click Add and Type the URL of Site. Repeat the Process, if you want to block more than one site.

Google Chrome.

If you are using Google Chrome, then follow these Instructions.

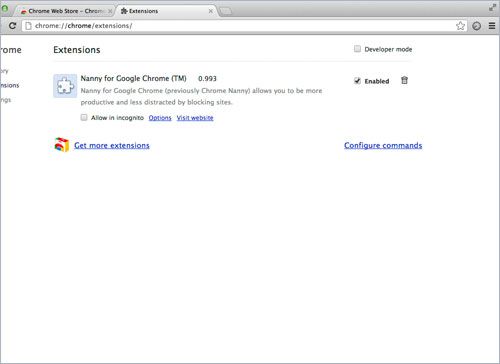
Open Google Chrome and Search for Chrome Nanny.

Right Click Add To Chrome button and click to install.

Right Click Customize and Control Google Chrome button on Right side and Navigate to Tools > Extension.

Nanny-5

Right Click Extensions to load the Extensions Page and Click Enable then Options.

Add the URLs and Name of Sites you want to block in the Blocked URLs and Click Save URL. There are many other Features of Chrome Nanny, choose according to your need.

Use Mac Filter to Block Sites.

All the Above ways, you can block sites one by one. But if you want to Block some of the High Level sites, you will need a Professional filter, Try Mac Filter, it is far powerful than the Free ones and very easy to use.

Download Mac Filter.

Open it and Run the Aobo Filter for Mac OS_V1.1.pkg.

Aobo-filter-install

Click continue to go to Installation Interface.

Enter Admin Password and Click OK to continue installation.

Aobo-filter-install-close

Click Restart to finish the installation, your Mac will Reboot automatically.

Use the shortcut key “Shift+Alt+A” to bring up the Aobo Filter Windows.

Add the Websites or Keywords ,you don’t allow to access, in the Black List and add those you allow in the White List.

Using Mac Filter you can block as many sites you want.

Install TWRP Recovery on the Oppo N1 [How to – Guide]

0
Install TWRP Recovery on the Oppo N1 [How to – Guide]

A while ago we posted a method to root the Oppo N1, but we didn’t post the method to install a custom  recovery in that post in order to make it separate and easier for you. In case you’re wondering what is a custom recovery and what you can do after having it installed, then let’s have a little intro.

A custom recovery allows you to install custom roms, mods etc. Along with these, you can make a Nandroid backup, this helps you a lot as you can move back to the previous working state of your phone at any time you want if you have backed up your current system. In some cases, to root the phone you need to flash SuperSu.zip file in the custom recovery, having installed the recovery may help you while in some cases to install the recovery easily, you need to have the phone rooted. You can also wipe cache and dalvik cache of your phone using a custom recovery.oppo-n1

The one we picked up for Oppo N1 is TWRP recovery as off now, CWM recovery is not available, perhaps TWRP works awesome as well. I’ll be explaining two methods to install TWRP recovery, pick up the one that seems easier to you.

Disclaimer: The methods involved in flashing custom roms and rooting your phone is highly custom and may result in bricking your device, and has nothing to do with Google or the device manufacturer that is OPPO in our case. Also rooting your device will void its warranty and you will be no longer eligible for any kind of free device services by the manufacturers/warranty providers. In case of any mishap we may not be held responsible. Follow these instructions to the letter to avoid any mishap or bricking. Make sure that whatever you do, you are doing it at your own responsibility.

Method 1: Install TWRP Recovery – Must have rooted your phone first.

      • As mentioned, your phone must be rooted. Follow our full guide to root here.
      • Download and install Goo Manager app on your phone – GooManager_2.1.3.apk.
      • Open the Goo Manager app and allow root access as soon as it prompts.
      • Hit the menu button and select “Open Recovery”.
      • Complete the recovery installation process.
      • Phewww you’re done.

Method 2: Install TWRP Recovery using ADB & Fastboot Method:

  • You must have installed Android ADB & Fastboot Drivers. Follow our full guide here.
  • Enable USB debugging mode on your phone. Settings > Developer Options > USB Debugging.
  • Download the TWRP Recovery.im file.
  • Place the downloaded recovery.img file in the Fastboot folder that you created using our adb and fastboot guide.
  • Connect your phone to your PC.
  • Open the Fastboot folder.
  • Hold the shift key and right click on any empty area inside the folder.
  • Select “Open Command Window Here.”
  • Now in the command prompt type.

adb reboot bootloader

  • Your phone will reboot into the bootloader now.
  • In the command prompt type

Fastboot flash recovery openrecovery.x.x.x.example.N1.img

  • Replace the name openrecovery.x.x.x.example.N1.img with the name of the recovery you downloaded.
  • As soon as the flashing is done, reboot into recovery using this command now.

adb reboot recovery.

That’s all with the recovery installation on the Oppo N1. In case you got any queries or face any difficulties regarding this post, feel free to stop by the comment box below. We will try our best to help you out.

How To Connect Two PC and Transfer Data Using LAN Cable and Wi-Fi.

How To Connect Two PC and Transfer Data Using LAN Cable and Wi-Fi.

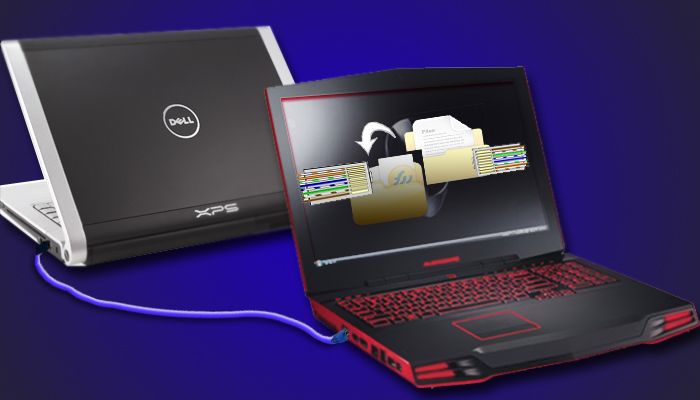
If you don’t have any way to transfer data between two PCs and don’t have enough budget to buy a USB on the Spot, or you are really far from the other Computer or you just don’t want to move yourself a lot, then follow the rest of the guide to learn how to transfer data between Two or more PCs using LAN Cable Or Wi-Fi. LAN Cable is a lot cheaper and transmit data way faster than a regular USB and you don’t have to move from one computer to another in order to give and receive the USB. You can even play games using LAN cable. Continue reading the Tutorial to find out how to connect Two PCs running Windows 7, Windows Vista or Macintosh OS.

Untitled-1

1. Windows 7 and Windows Vista:

First of all, Verify that the Cable is Cross Over. Hold both the ends of cable in the same manner. Examine the Color Pattern of both cables, if they are same then your cable is a normal one, it can only be used to connect a PC and a Router. If they don’t matchup and reflecting the pattern, then it is a Cross-Over Cable, it can be used to connect Two PCs.

  1. Plug One end in One PC, while the other end in the Other PC.
  2. Go to Start Menu and Select Control Panel.
  3. Type Network in the Search bar and press enter.
  4. Select Network and Sharing Center from the Options.
  5. Select and Open the icon labeled as UnIdentified Network from the Network Map.
  6. Click on the message prompting you as Change the settings of network discovery and file sharing, then click on “Turn on network discovery and file sharing“.
  7. Type the Admin Password, if you are asked to and press Enter.
  8. Both the Computers are now visible in Network and Sharing Center Window, you will have the Ability to Share data between them.

2. Macintosh (Mac) OS X

  1. Plug Each End of a Standard LAN Cable to the Ethernet Port of both Computers.
  2. Go to One of the Computers and Open Apple Menu.
  3. Select System Preferences then Select Sharing.
  4. Note down the Name of PC in Sharing Menu.
  5. Go to other Computer and open Finder.
  6. Select Go and Click on Connect to Server in Finder.
  7. Click on Browse and double click the name of other Computer that displays in the Window.
  8. Type the Admin Password, if you are asked to and press Enter.
  9. Both the Computers are now connected and you will have the Ability to Share data between them.

3. Using Wi-Fi.

  1. Make sure that both PCs are connected to the same Wi-Fi Network.
  2. Go to Start Menu and Select Control Panel.
  3. Type Network in the Search bar and press enter.
  4. Select Network and Sharing Center from the Options.
  5. Select and Open the icon labeled as UnIdentified Network from the Network Map.
  6. Click on the message prompting you as Change the settings of network discovery and file sharing, then click on “Turn on network discovery and file sharing“.
  7. Type the Admin Password, if you are asked to and press Enter.
  8. Both the Computers are now visible in Network and Sharing Center Window, you will have the Ability to Share data between them.


4.From/To Android To/Form PC.

  1. Make sure that PC and Android device, both are connected to the same Network.
  2. Go to Play Store and Download or Buy Wi-Fi File Transfer. Free version can upload file up-to 4MB in size and Pro version has no limit.
  3. Once installed, open it and Start the Transfer.
  4. You will be given a Specific URL, i.e 192.168.6.0:1234.
  5. Write this URL in your PC Browser.
  6. You device data will be displayed in front of you.
  7. Open any folder and download what you want and Click on Upload to upload files with High speed.

How To Access Another Computer From Your Computer.

How To Access Another Computer From Your Computer.

If you work on more than one Computer, than knowing how to access another Computer from the one you are using is quite a handful task. You need to access files form different computers or perform tasks from both computers, while being only at one location. There are many ways to Remote Access the Computers, you might look for the one suitable for you or how much you are willing to pay. Windows 7 has built-in Remote Accessing, but if you want better performance and durability, you should look for Paid Application. We will show you some ways, depending upon your need, follow anyone of them.

remote-access1

1.Windows Own Remote Accessing:

Microsoft Windows 7 allows you to connect computer and access data between them. You need both the computers to access each other and you will need to do on every computer you want to connect. Follow the Instructions to Access Remotely.

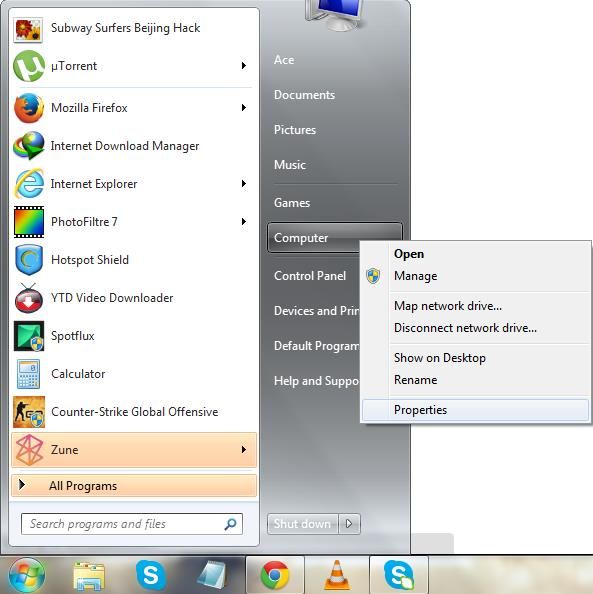
Go to Start Menu and Right-Click on My Computer, Click on Properties from the  Pop-up.

Screenshot_1

Click on Remote Settings and Select the Remote Tab.

Screenshot_2

Tick the Box Next to Allow users to connect remotely to this computer”, press OK to continue.

2. Visit any Website, Offering Remote Access:

You can visit any Website, if you don’t want to install any Heavy Software, or you are just not satisfied with Windows  Remote Access or it’s not fulfilling your needs. These sites a light and works faster than any other Software, Free too.

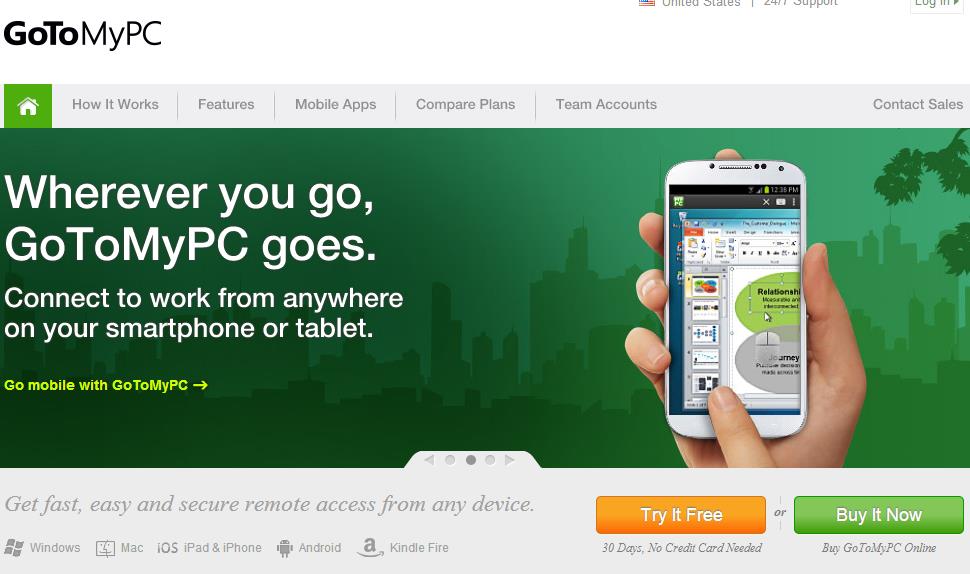
This site can be used for Both Macintosh and Windows. This Site offers apps for iPad, so you can access your computer from iPad too.

Screenshot_3

This Website offers many features and services that enable Remote Access. Some of them offers Back-up of data, that allows you to remotely store files on other storage devices. The Interface allows you to Access many computers at the same time.

Screenshot_4

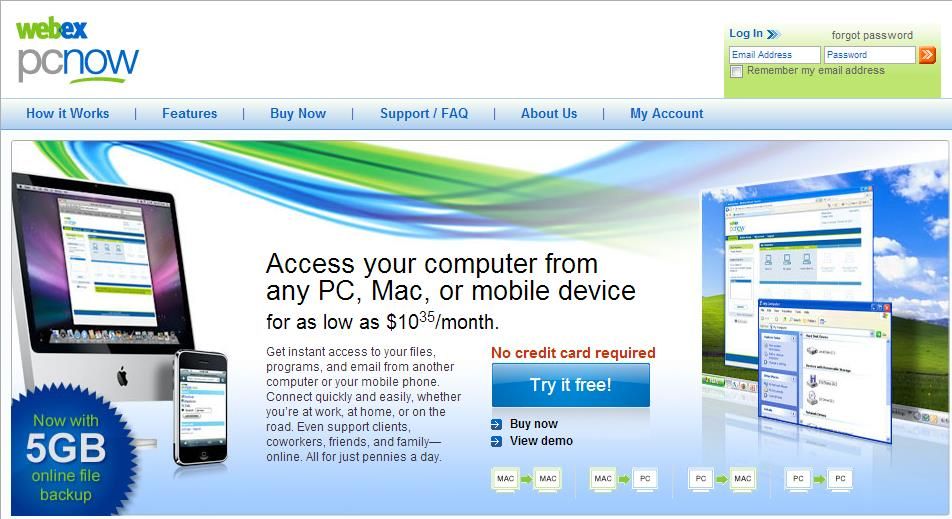
  • WebEx PCNow:

You can access other computers files and E-Mails through WebEx Website. The Set-up is easy and it will take only a minute before you get ready to start the Remote access. You can even access other Computers WebCam as Security Cameras.

Screenshot_5

3.Using Different Software:

If you want to work faster, then download a Remote Access software. Downloading a full software that allows you to connect Two computers and transfer data between them, will work even faster and without interruptions. Websites servers are,if, down then you won’t able to do anything. Windows Remote access is not very good. So, you might wanna consider the Following Options:

Using LapLink, you can access Laptops, Computers, Mobiles and other Devices. Different Computers can be accessed using their Default Browsers.

Screenshot_6

There are 3 versions of RealVNC available. Personal Edition is for Home and Small Business. Enterprise Edition is intended for Large Business, where there are a lot of computers and there is not much time for installation again and again.

Screenshot_7

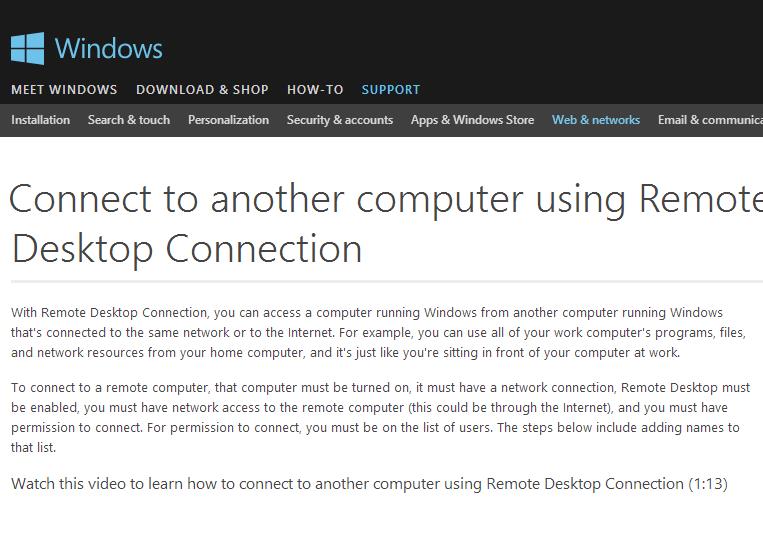
Some versions of Windows like Windows XP come with Remote desktop pre-installed. But it needs to be activate and configured before can be used. Microsoft website offers tips on how to activate it. If you want to stuck to Windows own things, then visit Microsoft.com to learn how to configured it.

Screenshot_8


Warnings:

You must Prevent the Firewall from blocking the Software you are using. When you first run the Software, you must select Unblock when the pop-up window appears asking whether you want the firewall to block or unblock the software.

The Other Computer must be open for Remote Access, otherwise it won’t be detected.


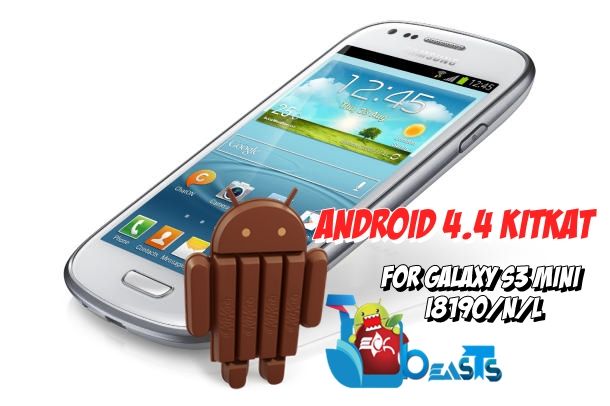
Install Android 4.4 KitKat on Galaxy S3 Mini using CyanogenMod 11 Custom ROM

Install Android 4.4 KitKat on Galaxy S3 Mini using CyanogenMod 11 Custom ROM

The mini version of the Galaxy S3 is one of the most popular cell phones today, specially when it comes to enjoy some good features in a little lower price. The device ran on Android 4.1.1 Jelly Bean out of the box and received Android 4.1.2 update later on, but there hasn’t been any official word about any further updates by Samsung since that time. Perhaps, there is no need to worry about when we have the great people working over XDA developer forums.

The Maclaw Studio, well known guys with the earlier CyanogenMod 10.2 based on Android 4.3 Jelly Bean, have once again brought us a chance to enjoy the Android 4.4 KitKat on our beloved Galaxy S3 Mini unofficially. If you are custom ROM freak and always want to have the latest and greatest version of Android running on your device, then CyanogenMod is surely for you. It’s not an official update by the manufacturers, perhaps it let’s you taste the feel, features and look of the higher version of Android unofficially as it is an open source community, the new features are dug out every day.

Update: Install Android 5.0.2 Lollipop On Your Galaxy S3 Mini With CyanogenMod 12 Custom ROMGALAXY_SIII_mini_Product_Image(4).jpg_610x406

CyanogenMod 11 based on Android 4.4 KitKat is available for Galaxy S3 Mini now. As said by the developer, the ROM is fully working and stable and may be kept for daily use. To make the installation easier for you, I’ve explained the steps to do so in simple and easy words below. You just got to follow this guide to the letter.

Disclaimer: The methods involved in flashing custom roms and rooting your phone is highly custom and may result in bricking your device, and has nothing to do with Google or the device manufacturer that is SAMSUNG in our case. Also rooting your device will void its warranty and you will be no longer eligible for any kind of free device services by the manufacturers/warranty providers. In case of any mishap we may not be held responsible. Follow these instructions to the letter to avoid any mishap or bricking. Make sure that whatever you do, you are doing it at your own responsibility.

Before we begin here are some pre requisites.

      1. This ROM works for all the variants of the Galaxy S3 Mini i8190/N/L. Do not try this on any other device. Check your device’s model under settings > About device > Model.
      2. Your device must be charged over at least 60%. This is highly recommended in order to prevent any mishap during the installation process.
      3. It is highly recommended that you make a nandroid backup of your device using a custom recovery. This is handy in case something goes wrong and you want to get your older system back immediately.
      4. Use the OEM data cable to establish connection between your PC and Phone.
      5. Make sure that you have backed up all your important ContactsCall Logs & Messages. It is highly recommended in case of any mishap or data loss to backup all your important data.
      6. Alright! follow this guide to the letter now!

You can flash this ROM using two methods.

Method 1: Through Odin.

Files you need to download: 

  1. Download Odin3 PC and extract it. – Get it Here.
  2. Download and install Samsung USB Drivers – Get Here.
  3. Download and extract Android 4.4.2 KitKat CM 11 ROM: cm11.0_golden.maclaw.20140118.ODIN_TWRP.zip

How to Install Andorid 4.4.2 KitKat CyanogenMod 11 on Galaxy S3 Mini:

      1. Open Odin.exe. 
      2. Put your phone in download mode. To do so, turn it off completely and then turn it on by pressing and holding Volume Down + Home Button + Power Key. You should see a warning now, press Volume Up to continue.
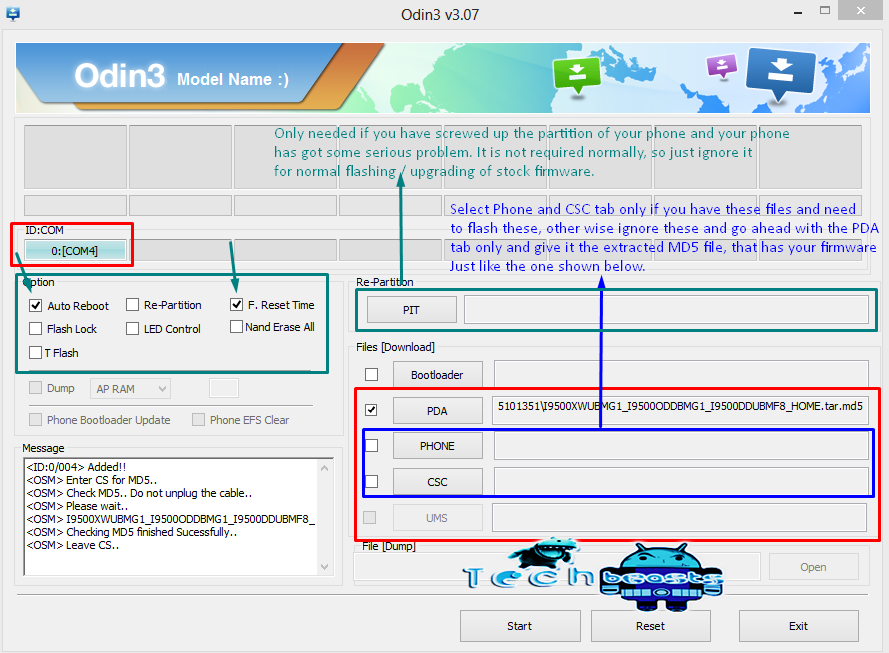
      3. Connect your phone to your PC now. The ID:COM box should turn blue in Odin now.
      4. Hit the PDA tab in Odin and select the .tar.md5 file that you got after extracting the CM11.0_golden.maclaw.20131210.ODIN_TWRP.zip. Your Odin screen should exactly like the one as shown below.odin_explained
      5. As soon as the .tar.md5 file is loaded, hit start button in Odin.
      6. The ROM installation should start now and you should see the progress in the process bar in Odin.
      7. As soon as the process is finished your device will reboot.
      8. Pull out the battery now to turn it off and boot into the TWRP recovery. The recovery is installed along with this ROM in your phone. To do so, turn on your device by pressing and holding Volume Up + Home Button + Power Key.
      9. You should see the TWRP recovery interface now.
      10. Select wipe, and wipe cache and dalvik cache.
      11. Reboot.
      12. You should see the CM logo on the bootscreen now, it might take upto 10 minutes in order to take you to the home screen, so keep patience.

Method 2: Install Android 4.4.2 KitKat CM 11 Using Custom Recovery.

      1. Your device must have a cwm recovery installed. Follow our full guide here.
      2. Download cm11.0_golden.maclaw.20140121.zip and place it on your phone’s sd card.
      3. Boot into CWM recovery. To do so turn off your device completely, now turn it on by pressing and holding Volume Up + Home Button + Power Key.
      4. In CWM recovery, select “Install Zip>Choose Zip form SD / ext SD card>Select the CM11.0_golden.maclaw.20131210.zip file” and then select Yes to proceed.
      5. It will take a short time to flash the ROM. As soon as the flashing process is done, wipe cache and dalvik cache from the recovery.
      6. Reboot!
      7. Congrats! You’ve installed Android 4.4 KitKat CM 11.0 on your Galaxy S3 Mini.

How to Install Gapps on your Galaxy S3 Mini.

In the above methods, I’ve explained the steps to install the ROM but not the Gapps, in order to install Gapps follow these steps.

      1. Download Gapps for Android 4.4 KitKat CyanogenMod 11: Gapps for Android 4.4 KitKat
      2. Place the downloaded.zip file on your phone’s sd card.
      3. Boot into the custom recovery, the one you’ve installed.
      4. Select Install>Gapps.zip file.
      5. Proceed with the installation, as soon as it is done, reboot your device.
      6. Find the Play Store and other Google Apps in your app drawer now!

That’s all. In case you got any queries/suggestions or face any difficulties regarding this post, feel free to stop by the comment box below. Thanks All!

How to Root LG G Pad 8.3 and Install Custom Recovery [Guide]

11
How to Root LG G Pad 8.3 and Install Custom Recovery [Guide]

Running on Android 4.2.2 out of the box, LG’s recently pulled out G Pad 8.3 also known as the G Pad 3 is struggling to compete the tablet world, although the G Pad 3 has got an elegant look and nice hardware features but the tablet is a little bit expensive and chances are that not so many people have bought this device while there is a number of choices from other manufacturers like Google, Samsung etc. Well, as mentioned that the device has not been owned by so many people, this brings an effect to the development as well and results in slow outputs, perhaps the developers over XDA forums have managed to gain the root access and also developed a TWRP and a CWM recovery for the G Pad 8.3.

Well, to make it even more simple and easier for you guys, I’ve explained the steps below. But before we proceed let’s have a look at what this root access is actually and the advantages of having a custom recovery installed (just in case you don’t know).LG-G-Pad-8.3

Rooting your phone gives you complete access over all the data which is apparently locked by the manufacturers. This includes removal of the factory restrictions and making changes to the internal system and the operating system. Gaining the root access gives you the privileges to install various applications to enhance the performance of your device, allows you to remove the built-in applications/programs, helps you to upgrade the battery life of your device & install the apps which require the root access for the proper functionality and modify your device in so many other ways e.g using mods and custom roms. By installing custom recovery, you can flash custom roms in the phone easily. Custom recovery also let’s you backup your current rom and restore it in case of any mishap. There is a laundry list of things you can do after having your device rooted and installed the custom recovery, now once you’re rooted and have installed custom recovery, go ahead and enjoy it on your phone. Here’s our collection of 10 Best Root Apps.

Let’s move forward….

Disclaimer: The methods involved in flashing custom roms and rooting your phone is highly custom and may result in bricking your device, and has nothing to do with Google or the device manufacturer that is LG in our case. Also rooting your device will void its warranty and you will be no longer eligible for any kind of free device services by the manufacturers/warranty providers. In case of any mishap we may not be held responsible. Follow these instructions to the letter to avoid any mishap or bricking. Make sure that whatever you do, you are doing it at your own responsibility.

Before we go ahead, here are some pre-requisites that you need to follow:

      1. This guide is only for LG G Pad 8.3 V500. Do not try this on any other, check your device’s model number in Settings > About Device > Model.
      2. Make sure that your device’s battery is charged at least over 60%. This is highly recommended in order to prevent any power issue during the rooting / flashing process.
      3. Make sure that you backup your conta
      4. Use the OEM data cable only. Do not use any other data cable.
      5. Make sure that you have backed up all your important ContactsCall Logs & Messages. It is highly recommended in case ofany mishap or data loss to backup all your important data.
      6. You must have enabled USB debugging mode on your device.
      7. Alright! Follow this guide to the letter now.

How to Root the G Pad 8.3

    1. Make sure that you’ve installed LG’s USB drivers. In case you don’t have, find the drivers here.
    2. Enable USB debugging mode on your G Pad 3. To do so open Settings>developer options > USB debugging mode > Check. In case you don’t see the developer options in the settings, then tap About device and tap the build number for 7 times and you should get the developer options enabled in settings now.
    3. Connect your device to your PC.
    4. Download the root_gpad.zip file and extract it.
    5. Run the Root.bat file and while being in the root.bat window, press Enter.
    6. Follow the on screen instructions and it should be rooted in a while.
    7. That’s All. Congrats You’re now rooted 🙂

How to Install Custom(TWRP) Recovery on the G Pad:

      • Your phone must be rooted. Follow the above guide to do so.
      • You must have adb and fastboot installed. Follow our full guide here.
      • Download the recovery package file from here and extract it.
      • Open the loki-master the one you extracted and then open the bin folder in that.
      • In the bin folder press and hold shift key + right click on an empty screen area and click on “Open Command Window Here”.
      • You should have a  command prompt open in that bin folder now.
      • Enable USB debugging mode on your G Pad and connect it to your PC.
      • Now in the command prompt type the following commands:


adb push openrecovery-twrp-2.6.3.0-awifi.img /data/local/tmp

adb push loki_flash /data/local/tmp

adb shell

su

/data/local/tmp/loki_flash recovery /data/local/tmp/openrecovery-twrp-2.6.3.0-awifi.img

exit

exit

adb reboot recovery
      • That’s All! You have installed the TWRP recovery and you should see your G Pad in the recovery mode now.
      • You can backup your current ROM, also make an efs backup and try the other useful features of the TWRP recovery.

In case you got any queries/suggestions or face any difficulties regarding this post, feel free to stop by the comment box below. We’ll try our best to get it sorted out for you.

WhatsApp for iPad and iPhone Free Download – Simple Guide.

1
WhatsApp for iPad and iPhone Free Download – Simple Guide.

There is no need to present any introduction on WhatsApp, it is the most popular messaging app in Smartphones. Available for iOS, BlackBerry, Symbian, Android and Windows. WhatsApp is a must have app for every smartphone, even if you don’t have a smartphone, there are many other ways to use WhatsApp and today I will show you how to use WhatsApp on iPad and iPhone. You can send and receive Text messages and calls using any Network Connectivity like Wi-Fi or 3G/4G.

Download-WhatsApp-for-iPad-or-iPhone-free

You can even create a Group on WhatsApp, just create a group and add people in it. WhatsApp is available for free on every platform but for only one year, after that you need to pay $0.99 for one year, the reason why they don’t sell ads. You can send and receive unlimited text messages over Wi-Fi, make and receive any call over network, the best part is that you don’t need to log-in again and again to use WhatsApp, all you need to do is to Log-in the first time and as long as the Network connectivity is available, you can Chat with your friends over WhatsApp.

Today, I will show you how to install WhatsApp on iPad, iPhone. You can create a Profile and your Phone number will be necessary for the usage of WhatsApp, because of this number your friends will reach you. WhatsApp will crawl your Phone Book and it will show you Who are on WhatsApp, So, you won’t have any trouble finding your friends on WhatsApp. You can even send Pictures, Videos, Audio Recording and update your Status like in Facebook. The Contacts process is automatic, so you don’t need to do anything as far as the Contacts are concerned.The UI is Quite simple, you will learn it in a few minutes after installing, you won’t be needing any user guide to use this app.

WhatsApp For iOS Features:

NO HIDDEN COST: Once you and your friends download the application, you can use it to chat as much as you want. Send a million messages a day to your friends for free! WhatsApp uses your Internet connection: 3G/EDGE or Wi-Fi when available.

MULTIMEDIA: Send Video, Images, and Voice notes to your friends and contacts.

GROUP CHAT: Enjoy group conversations with your contacts. Add or Remove group participants, change group subject and set a group icon.

PERSONAL: Set a profile photo which will be shown to all your contacts

NO INTERNATIONAL CHARGES: Just like there is no added cost to send an international email, there is no cost to send WhatsApp messages internationally. Chat with your friends all over the world as long as they have WhatsApp Messenger installed and avoid those pesky international SMS costs.

SAY NO TO PINS AND USERNAMES: Why even bother having to remember yet another PIN or username? WhatsApp works with your phone number, just like SMS would, and integrates flawlessly with your existing phone address book.

NO NEED TO LOG IN/OUT: No more confusion about getting logged off from another computer or device. With push notifications WhatsApp is ALWAYS ON and ALWAYS CONNECTED.

NO NEED TO ADD BUDDIES: Your Address Book is used to automatically connect you with your contacts. Your contacts who already have WhatsApp Messenger will be automatically displayed under Favorites, similar to a buddy list.

OFFLINE MESSAGES: Even if you miss your push notifications or turn off your iPhone, WhatsApp will save your messages offline until you retrieve them during the next application use.

AND MUCH MORE: Share location and places, Exchange contacts, Custom wallpaper, Custom notification sounds, Landscape mode, Message timestamps, Email chat history, Broadcast messages and media to many contacts at once, and much much more!

You can download WhatsApp for iPhone, iPad from the Download Link mentioned below. Download it and follow the on-screen instructions to Complete the Set-up

Download WhatsApp for iPad or iPhone free


Shou Screen Recorder APK: Record your Android’s screen.

1
Shou Screen Recorder APK: Record your Android’s screen.

You must have tried capturing the screen of your Android smartphone, as almost all the smartphones have this capability either by pressing power key along with the volume buttons, home button or swiping your finger on the screen. Well this feature is very handy specially when you have to tell someone about something running on your phone, show any stats of anything, or even saving some important logs in form of pictures and etc.

But did you ever think that you can also record videos on your Android smartphone/tablet’s screen? Well It’s possible. Few months ago, I had to record some videos on my Galaxy S4 to make Watchon’s tutorial, and I started looking out for a screen recorder. I found a few in the play store, bought em’ and guess what, the dollars were just wasted as the screen recorders didn’t work as they should. They were lagging and full of bugs. Finally I found Shou Screen Recorder, thanks to Vecio, Senior member on XDA forum for bringing us this wonderful application.shou-da97dee30dd7dc663f3c5ad25261c69f

Not only it records the screen, it has also got some cool features that become the cream over the cake. You can mirror your Android phone’s screen to your Apple TV using the Air Play screen mirror feature. Here are the features briefly mentioned:

      • Record you Android screen with 1080@30fps video quality.
      • Air Play screen mirror.
      • Shake your phone to take screenshots while recording.
      • Record unlimited videos, unlimited size.
      • Stereo sound on play back.
      • Use settings to change video output format, Audio source etc.

Shou Screen Recorder requires a rooted phone to run it, make sure that you’re rooted!

What are you waiting for? Go ahead and download it right now and start recording your Android’s screen 🙂

Downloads: Link 1 | Link 2

How to Download Torrents on your Android Smartphone [Guide]

0
How to Download Torrents on your Android Smartphone [Guide]

There was a time when we used to buy CDs, DVDs just to get the desired movies, sometimes for the music tracks and most of the times for games, computer softwares and other similar things but with the advent of time things have changed and got pretty much simple and easier in the computer world. The demand of CDs and DVDs is getting lowered down since a thing named Torrent has taken birth. Downloading anything that is of GBs in size, is just not hard now. As this is the era of portability and things are getting shifted to the smaller devices, whether it may be smartphone or a tablet, and when it comes to the operating system, there is no other mobile phone operating sytem like Android and it may allow you to use many features of a computer straight on your small screened phone. Ever wondered that you can download the massive files directly on your phone keeping your portability atop anytime, at any place? Well, its possible with Android now, you got to give a little time to this post.

Torrent downloading has always been a marvelous option whenever you need or want to download heavy files just as I said above,  in separate intervals of time without interrupting the file that is being downloaded and giving your PC a little rest. While it didn’t take long for Android to take over the smartphone world, most of the hands acquire an Android device today and you may own one, this tutorial is probably for you as you will learn about downloading torrents straight to your Android smartphone.

In case you still don’t know what a torrent is, and its advantages, a little googling may help you. I would like to make it short now, all you got to do in order to download torrents on Android is, you need to install an app that will do the job for you. Let’s have a look on the available apps and on their functionality.

Apps to download torrents on Android:

Using Utorrent:

Utorrent is the official app by BitTorrent Inc, the famous PC torrent client developers. The app allows you to download torrents at unlimited speed. There is a free version available in the play store, but if you want more features you may go for the Pro.

    1. Download and Install Utorrent on your Android smartphone.
    2. Open the internet browser on your phone.
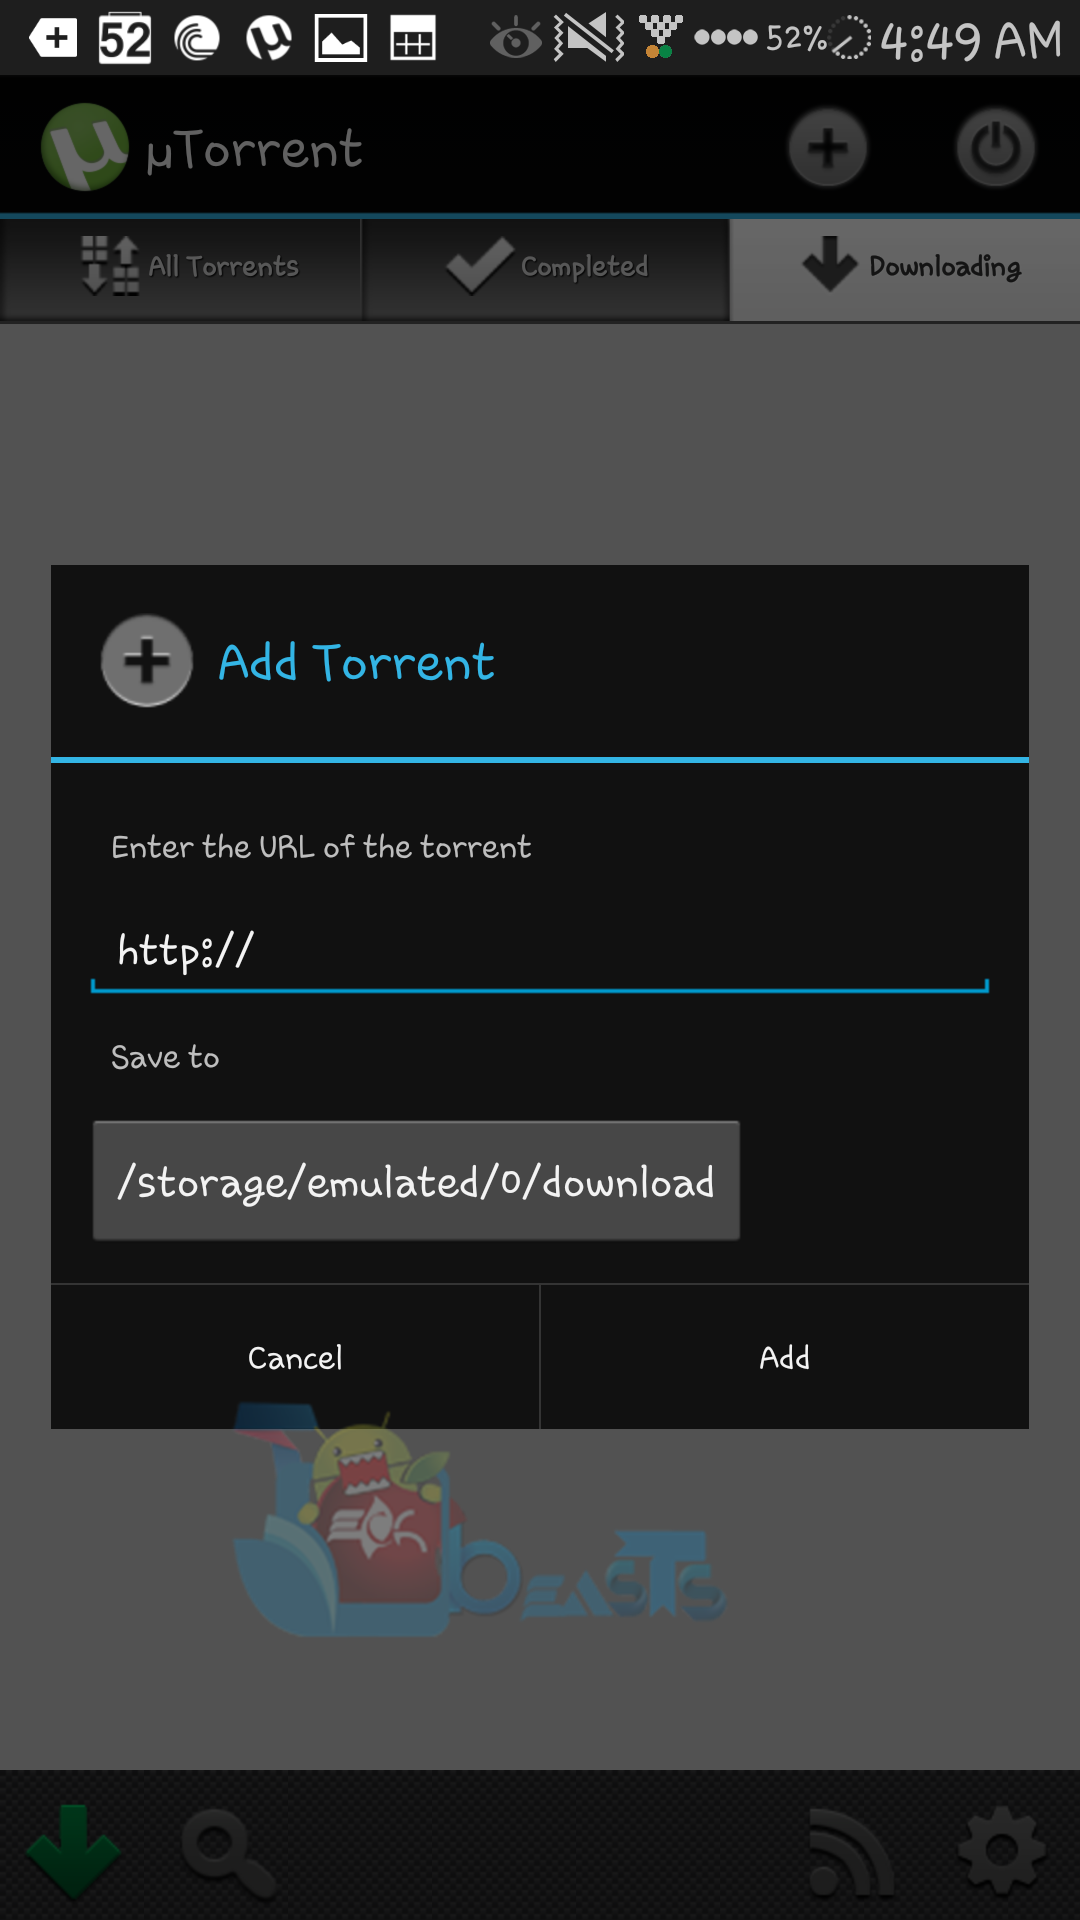
    3. Use the search button in the torrent client to find your desired torrent.
    4. Alternatively, open any torrent site like kickasstorrents, extratorrent, isohunt, mininova, h33t etc.
    5. Search your required torrent and download it.
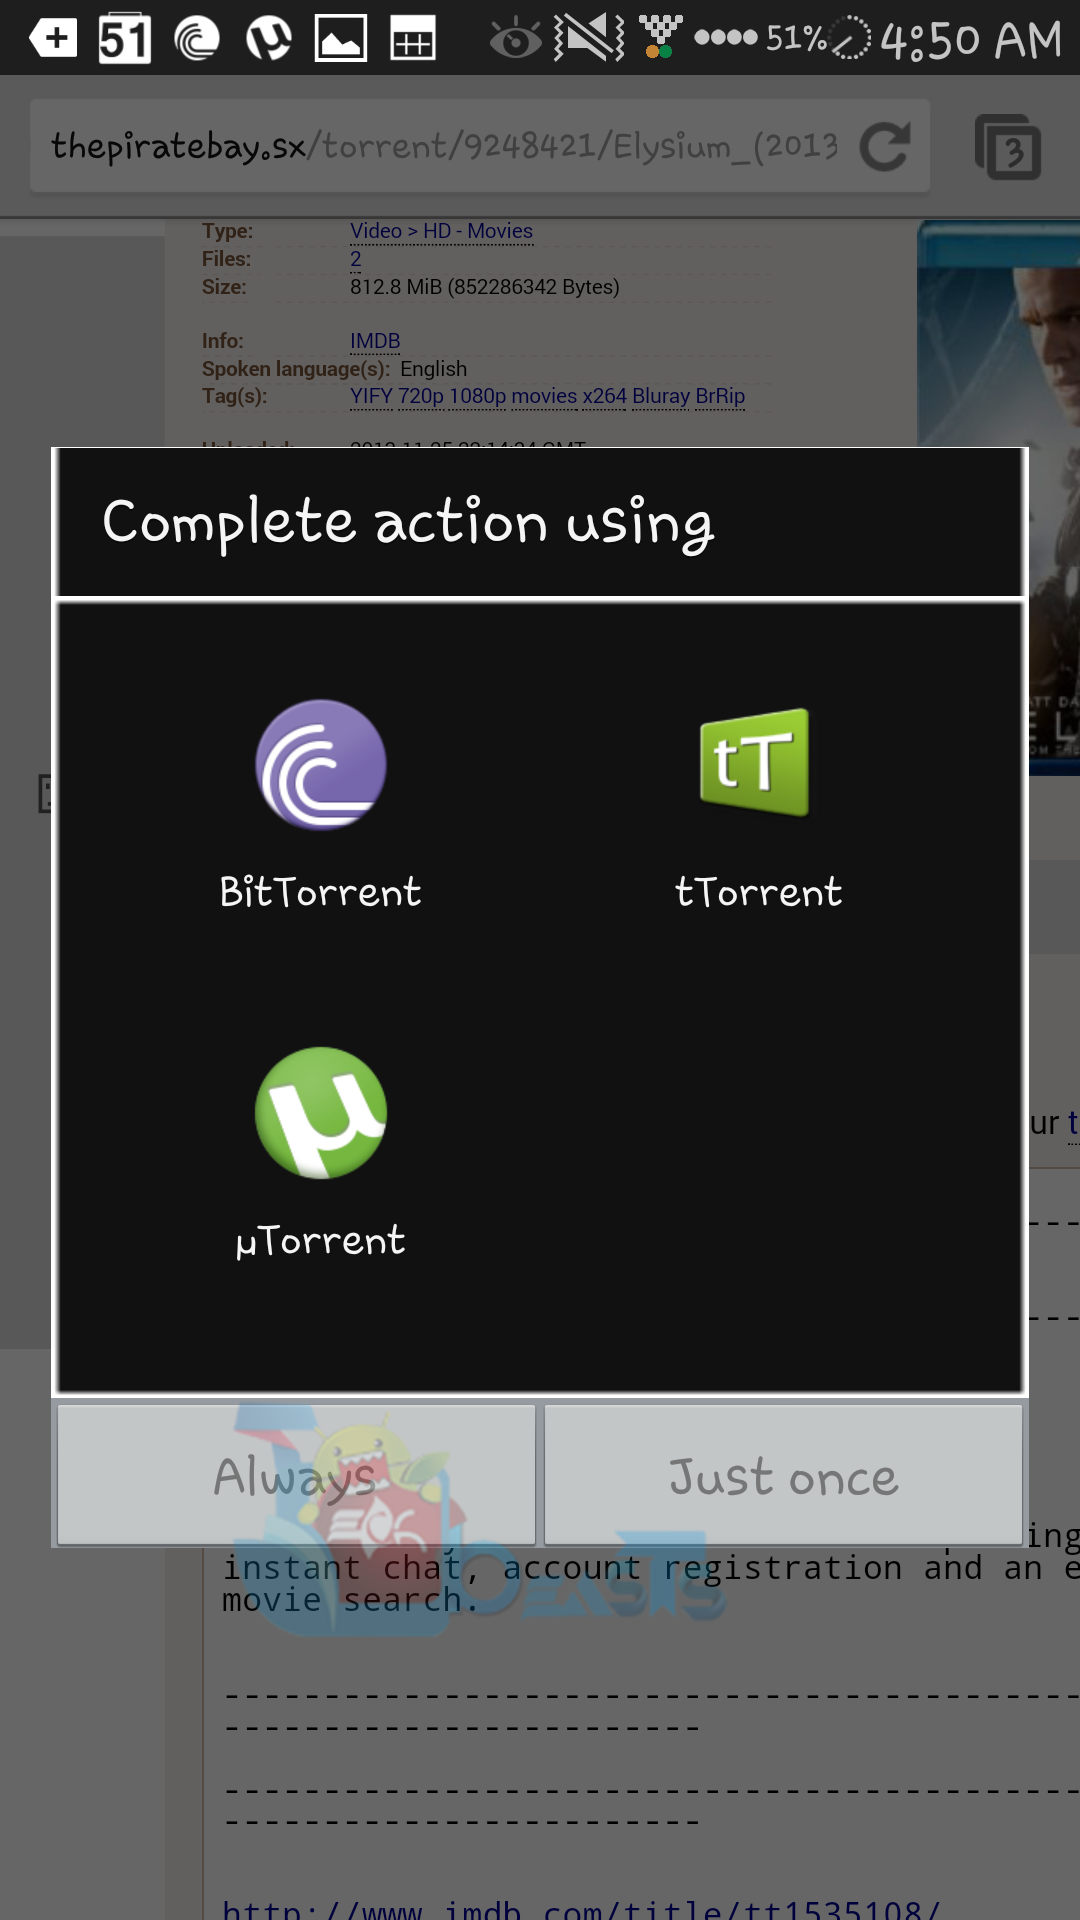
    6. Open the torrent using any file manager, select utorrent, BitTorrent or ttorrent to open it.
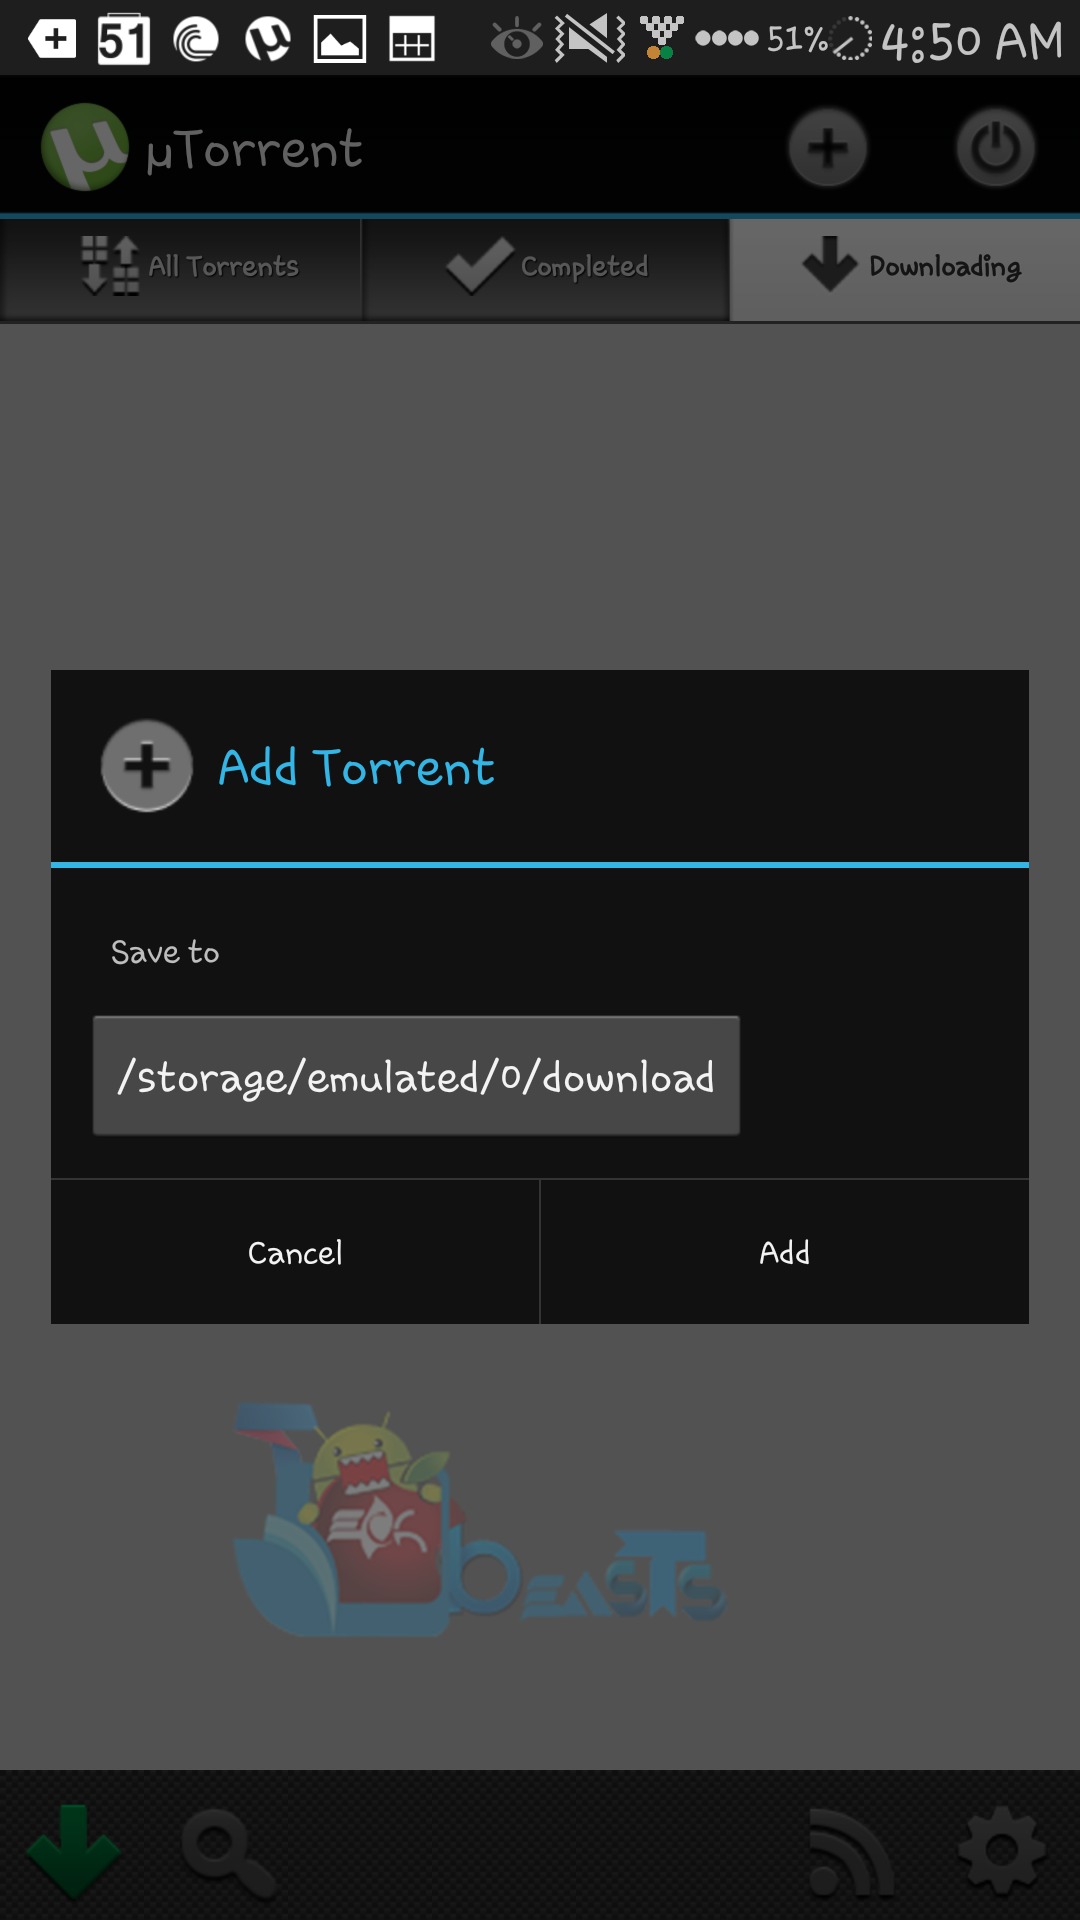
    7. As soon as you open the torrent selecting any torrent client, it will ask you for the location where you want it to be downloaded.
    8. Select the location and torrent downloading will begin.
    9. Whenever your internet gets disconnected or the connection is out of reach, the torrent will automatically pause.
    10. It will resume the download upon connecting the WiFi.
    11. Using the settings icon at the bottom, you can set download limit if you want, by default its “0” that means unlimited.
    12. You can also specify whether you want to use your data connection for downloading as well, or you just want to use the WiFi.
    13. You can download multiple files, manage the files using the uTorrent’s home screen on your phone. Screenshot_2013-12-09-04-49-20  Screenshot_2013-12-09-04-49-27Screenshot_2013-12-09-04-49-48 Screenshot_2013-12-09-04-49-34   Screenshot_2013-12-09-04-50-19 Screenshot_2013-12-09-04-50-54

Using BitTorrent:

BitTorrent is another app by the developers of uTorrent, BitTorrent Inc. The app is quite similar to uTorrent, is available for free and a paid version is there as well.

The working functionality, layout, settings are same as that of uTorrent, follow the guidelines explained above to use BitTorrent.

Using tTorrent:

tTorrent is another lite Torrent client for Android based smartphones/tablets. This app is also available in both free and paid versions. The differenceis noticeable here as the free version has a download limit and lots of ads that may bother you. While the paid version has no download / size limits and is ad free as well. Though we highly recommend using uTorrent or BitTorrent, but tTorrent may help you just in case anyone of those doens’t work properly.

That’s all. We hope that this guide helped you to download movies, games and other stuff straight to your Android smartphone. Don’t forget to recommend it to your friends. In case you got any queries, suggestions or face any difficulties regarding Torrent downloading on your Android smartphone, please feel free to stop by the comment box below. We will try our best to get back to you as soon as possible. Thanks All!

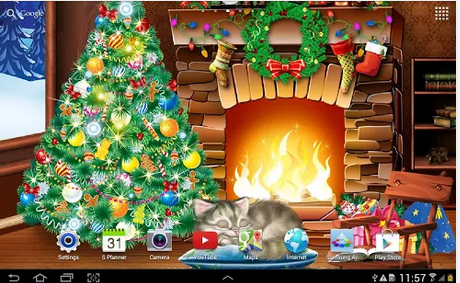
10 Christmas Live Wallpapers For Your Android Smartphone

0
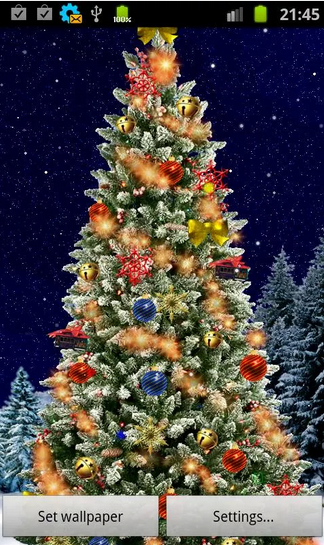
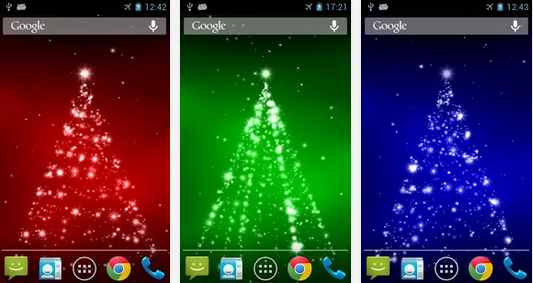
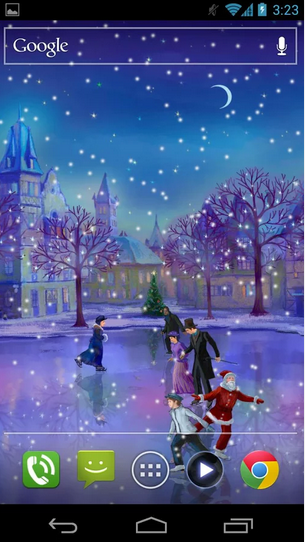
10 Christmas Live Wallpapers For Your Android Smartphone

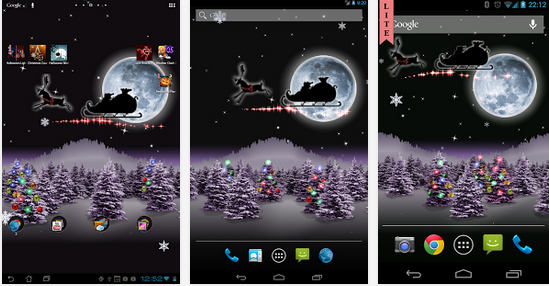
Winter is at peak and Christmas season has just arrived, the time to of joy, beautiful lights, colors and lots of gifts. While you may be busy preparing for the celebrations and bringing in the Christmas Tree to your home I’ve been collecting some special stuff to add charm to your celebrations. I guess, at this time of the year everything needs to have a Christmas make over, to do the job on your Android smartphone I’ve compiled up a set of 10 Live Wallpapers.

These Live Wallpapers can be installed on any Android smartphone / tablet. I’ve linked in the Google Play Store links and the direct download links as well, that I just uploaded to make it easier for you. You can download the APK files and install manually. Go ahead and pickup the wallpaper that fits your Android smartphone/tablet’s screen and let your phone enjoy the Xmass celebrations too :-).

1. Christmas Live Wallpaper by Jetblack Software

Christmas Live Wallpaper

Downloads: Google Play | Direct Link


2. Christmas Tree Live Wallpaper

Christmas Tree 3 Christmas Tree Christmas Tree2

Downloads: Google Play | Direct Link

3. Christmas 3D Live Wallpaper

Christmas 3D

Downloads: Google Play | Direct Link

4. Christmas Live Wallpaper by Amax LWPs

Christmas Live Wallpaper4 Christmas Live Wallpaper5 Christmas Live Wallpaper6

Downloads: Google Play | Direct Link

5. Christmas Live Wallpaper by blakit

Christmas Live Wallpaper7

Downloads: Google Play | Direct Link

6. Christmas Rink Live Wallpaper

Christmas Rink Live Wallpaper Christmas Rink Live Wallpaper2 Christmas Rink Live Wallpaper3

Downloads: Google Play | Direct Link

7. Christmas Snowfall Live Wallpaper

Christmas Snowfall Live Wallpaper

Downloads: Google Play | Direct Download

8. Merry Christmas Live Wallpaper

Merry Christmas

Downloads: Google Play | Direct Link

9. Christmas Live Wallpaper by Aqreadd Studios

Aqread Studios Christmas LWP

Downloads: Google Play | Direct Link

10. Christmas Live Wallpaper by LWP HD

Christmas Live Wallpaper21

Downloads: Google Play | Direct Download.

While installing these wallpapers, please keep in mind that these wallpapers are free and may contain a lot of ads that may bother you. We may not be held responsible if you don’t like the live wallpapers, you may uninstall immediately. This collection is based on the randomly picked live wallpapers from the Google Play Store.

That’s all. In case you have any suggestions, we would love to see some comments from you. Feel free to drop your words below. Thanks!