Home Blog Page 481

Root Galaxy S4 I9505 On Android 4.4.2 XXUFNB8 Kit-Kat Official Firmware[Guide]

2
Root Galaxy S4 I9505 On Android 4.4.2 XXUFNB8 Kit-Kat Official Firmware[Guide]

Before going any further, Follow the link to update your Galaxy S4 I9505 to XXUFNB8 Android 4.4 Kit-Kat:

Update Galaxy S4 I9505 To Android 4.4.2 XXUFNB8 Official Firmware

Now that you have Updated your device to Android 4.4 Kit-Kat and as per rule of installing Official Firmware, your device will loose its root access. The only way to get it back, is by rooting it again. Rooting allows you to get full control over your device, Stock apps and mods are good, but installing Custom Mods gives you better support and great battery life, you might need to delete some Stock apps from the device, a non-rooted device can’t do that, but a rooted one has the power to remove stock apps too.

Samsung-Galaxy-S4-I9505

If you are familiar with Odin and it’s working, then this tutorial might not be difficult for you. Otherwise read the whole tutorial first before trying it on your device. In this Article, we will show you How To Root Galaxy S4 I9505 On Android 4.4 XXUFNB8 Kit-Kat Official Firmware.But before we begin, Make sure that:

  1. That you have a Well Charged Battery, 60%-80% is better.
  2. Back-Up all your important ContactsCall Logs & Messages.It is highly recommended in case of any mishap or data loss to back up all your important data.
  3. Back-Up your Mobiles EFS DataHow To Restore and Back-Up EFS Data On Samsung Galaxy Devices.
  4. Check your device model, Go To Setting > About and Make sure that it is I9505.
  5. Do-not try it on Galaxy S4 I9500.

Disclaimer: 

The methods involved in flashing custom roms and rooting your phone is highly custom and may result in bricking your device,and has nothing to do with Google or the device manufacturers which is Samsung in our case. In case of any mishap we may not be held responsible. Follow these instructions to the letter to avoid any mishap or bricking. Make sure that whatever you do, you are doing it at your own responsibility.

Warning:

Rooting an Android device Voids Manufacturers Warranty, this Rooting method for Galaxy S4 I9505 is tested and Found Working. If you don’t follow the Procedure as we instructed, You only are responsible for your device. We won’t be liable if any damage occurs to your device and/or its components.

All done and good, let’s head towards the Next page to See, How you can Root Samsung Galaxy S4 I9505.

Pages: Page 1 | Page 2

How To Root Sony Xperia TX LT29i Running 9.2.A.0.295 Firmware

15
How To Root Sony Xperia TX LT29i Running 9.2.A.0.295 Firmware

Sony’s Xperia TX is a mid-range Android powered device that sports a nice 4.5 inches display with 323 ppi, Sony has used Dual Core Krait CPU clocked at 1.5 GHz in the device accompanied by Adreno 225 GPU and a RAM of 1 GB. What makes this device even more attractive is it’s very nice 13 MP camera shooter at the back and a 1.3 MP on the front is fixed as well. Out of the box, Xperia TX runs on Android 4.0 ICS. Xperia TX is quiet same as Xperia T, differs in some minor specs only.

Xperia TX has been recently updated to Android 4.3 Jelly Bean based on build number 9.2.A.0.295. The update packs up some UI changes, bug fixes and performance enhancements. The new firmware surely needs a new method to get rooted and the root users maybe looking out their for a way to go beyond the boundaries after updating their device to Android 4.3 Jelly Bean. Well, we’ve found a working method and in the following post we are going to explain it. You got to move a little forward with us, before we head towards the installation instructions, many of you might not be familiar with what is root access and why you should root your phone,so, to make it more clear let’s have a look on a brief intro of root access first.SuperSu

Rooting your phone gives you complete access over all the data which is apparently locked by the manufacturers. This includes removal of the factory restrictions and making changes to the internal system and the operating system. Gaining the root access gives you the privileges to install various applications to enhance the performance of your device, allows you to remove the built-in applications/programs, helps you to upgrade the battery life of your device & install the apps which require the root access for the proper functionality and modify your device in so many other ways e.g using mods and custom roms. By installing custom recovery, you can flash custom roms in the phone easily. Custom recovery also let’s you backup your current rom and restore it in case of any mishap. There is a laundry list of things you can do after having your device rooted and installed the custom recovery, now once you’re rooted and have installed custom recovery, go ahead and enjoy it on your phone. Here’s our collection of 10 Best Root Apps.

Here are installation instructions:

    1. This guide is only for Sony Xperia TX LT29i. Do not try this on any other model, please check your device’s mode in Settings > About Device.
    2. The Root instructions are only for TX LT29i running 9.2.A.0.295 firmware. Check your firmware version in Settings > About Device and make sure that it matches the one mentioned here.
    3. Please make sure that your phone’s battery is charged at least over 60%. This is highly recommended in order to prevent any power issues during the recovery flashing process.
    4. Before applying any custom treatment to your device, it is always highly recommended to backup each and everything, so that in case something goes wrong you can still have all of your important data safe and secure. Backup each and everything on your Android phone as follows:
    5. Backup all your important contacts, find the full guide here.
    6. Backup all your important sms messages, find the full guide here.
    7. Backup all your important call logs, find the full guide here.
    8. Backup all your important media content manually. (Copy to your PC.)
    9. Backup all your apps / data. If you’ve rooted your device, use Titanium Backup to do so. Follow the full guide here.
    10. Backup your current system using a custom recovery (CWM or TWRP) if you’ve flashed one. This is recommended in case something goes wrong with rooting your phone, you can use the custom recovery and return to the old working state of your system.
    11. Make sure that you read the instructions carefully and applied all precautionary measures. Let’s go ahead.

Disclaimer: The methods involved in flashing custom roms and rooting your phone is highly custom and may result in bricking your device, and has nothing to do with Google or the device manufacturer that is SONY in our case. Also rooting your device will void its warranty and you will be no longer eligible for any kind of free device services by the manufacturers/warranty providers. In case of any mishap we may not be held responsible. Follow these instructions to the letter to avoid any mishap or bricking. Make sure that whatever you do, you are doing it at your own responsibility.

How to Root Xperia TX Running Latest Android 4.3 9.2.A.0.295 Firmware:

    1. You need to install CWM recovery first. Follow our full guide here to install it on your device.
    2. Download Supersu.zip file now.
    3. Place the downloaded Supersu.zip file on your phone’s sd card.
    4. Now boot into CWM recovery on your phone. To do so, turn off your device first. Now turn it on, as soon as you see the Pink LED, press the Volume Up Key rapidly.
    5. You should see the CWM recovery interface shortly.
    6. Once in CWM, select “Install Zip > Choose Zip from SDcard > Select SuperSu.zip > Yes”.
    7. This will flash SuperSu.zip file, once flashing is complete, reboot your device.
    8. Find SuperSu in app drawer now. You can also install Root Checker app from Play Store to check root.
    9. Congrats! You’re rooted now!

That’s All! Let us know if the tutorial worked fine for you. In case you got any queries or face any issues regarding this post, please feel free to stop by the comment box below and drop us your words. We will get back to you as soon as possible. Thanks all.

Install CWM Recovery on Sony Xperia TX LT29i Running 9.2.A.0.295 Firmware

24
Install CWM Recovery on Sony Xperia TX LT29i Running 9.2.A.0.295 Firmware

Sony’s mid range device Xperia TX has been recently updated to Android 4.3 Jelly Bean. In the recent past Sony remained quite fair with the users in terms of Software updates keeping its promise atop, the Android Jelly Bean 4.3 update started reaching out the users taking the device one stop close to KitKat that is under investigation / testing by Sony at the moment. Well, the new firmware definitely needs new methods to run a CWM Recovery inside and a new method to get rooted as well. For those who have updated their devices to this new firmware and are now looking for a compatible CWM recovery, they have spotted the right place at the moment.

In the following post we are going to install CWM [ClockworkMod] Recovery on Xperia TX LT29i running Android 4.3 Jelly Bean 9.2A.0.295 firmware. Before we head towards the installation instructions, let’s have a look on a brief intro of the custom recovery that is CWM in our case and also why you should install a custom recovery on your phone.CWM Recovery

A custom recovery allows you to install custom roms, mods etc. Along with these, you can make a Nandroid backup, this helps you a lot as you can move back to the previous working state of your phone at any time you want if you have backed up your current system. In some cases, to root the phone you need to flash SuperSu.zip file in the custom recovery, having installed the recovery may help you while in some cases to install the recovery easily, you need to have the phone rooted. You can also wipe cache and dalvik cache of your phone using a custom recovery. There is alot more you can do using a custom recovery, you mayinstall one and experience it yourself for further know-how.

Here are some important installation instructions and pre-requisites:

      1. This guide is only for Sony Xperia TX. Do not try this on any other model, please check yourdevice’s mode in Settings > About Device.
      2. The CWM  recovery is only for Sony Xperia TX running stock or stock based Android 4.3 [9.2.A.0.295]. Check your firmware version in Settings > About Device and make sure that it matches the one mentioned here.
      3. You must have installed Android ADB & Fastboot drivers. Follow the quick guide here.
      4. Your device must have an unlocked bootloader. Follow our full guide here in order to unlock.
      5. Please make sure that your phone’s battery is charged at least over 60%. This is highly recommended in order to prevent any power issues during the recovery flashing process.
      6. Backup each and everything on your Android phone as follows:
      7. Backup all your important contacts, find the full guide here.
      8. Backup all your important sms messages, find the full guide here.
      9. Backup all your important call logs, find the full guide here.
      10. Backup all your important media content manually. (Copy to your PC.)
      11. Backup all your apps / data. If you’ve rooted your device, use Titanium Backup to do so. Follow the full guide here.
      12. Backup your current system using a custom recovery (CWM or TWRP) if you’ve flashed one. This is recommended in case something goes wrong with CWM installation, you can use the custom recovery and return to the old working state of your system.
      13. Enable USB debugging mode on your device.  Get it in Settings > Developer Options > USB Debugging mode.
      14. Use only OEM data cable to establish connection between your PC and Phone.
      15. Alright! Follow this guide to the letter now.
Disclaimer: The methods involved in flashing custom roms and rooting your phone is highly custom and may result in bricking your device, and has nothing to do with Google or the device manufacturer that is SONY in our case. Also rooting your device will void its warranty and you will be no longer eligible for any kind of free device services by the manufacturers/warranty providers. In case of any mishap we may not be held responsible. Follow these instructions to the letter to avoid any mishap or bricking. Make sure that whatever you do, you are doing it at your own responsibility.


How to Install CWM 6 Recovery on Sony Xperia TX:

      1. Download Kernel with CWM Recovery
      2. Extract the downloaded .zip folder, you will get a Kernel.elf file.
      3. Place the extracted Kernel.elf file in the Minimal ADB & Fastboot folder that you created using our ADB & Fastboot Quick Setup Guide.
      4. If you are using Android ADB & Fastboot full package, you can place the downloaded (Extracted) Kernel.elf file in the Fastboot folder or in the Platform-tools folder.
      5. Open the folder where you placed the Kernel.elf  file. E.g Minimal ADB & Fastboot or Fastboot or Platform Tools.
      6. Press and hold the shift key and right click on an empty area within the folder, and click on “Open Command Window Here”.
      7. Turn off your Xperia TX completely.
      8. Now press the Volume Up Key and while keeping it pressed plug in the USB cable.
      9. You should see a blue light in the notification light of your phone, that means your device is now connected in Fastboot mode.
      10. Now type the following command: fastboot flash boot Kernel.elf
      11. Hit Enter and it will quickly flash CWM recovery in your Sony Xperia TX.
      12. Once recovery is flashed, now issue this command “Fastboot Reboot”
      13. Your device will reboot now, as soon as you see the Sony logo,  and the pink LED, press Volume Up key to enter recovery.
      14. Congrats! You should now see the custom recovery.

That’s All with the recovery installation. In case you got any queries or face any difficulties regarding this post, please feel free to stop by the comment box below and let us know. We will get back to you as soon as possible. Thanks all.

Enjoy Split-View/Multi-Window On any Device With XMultiWindow

Enjoy Split-View/Multi-Window On any Device With XMultiWindow

It is obvious, that a Rooted device can give users a better support and apps that a non-rooted device can’t. There was once a time, when you need to install a custom ROM to enjoy the features of other devices on your device, even if you just want a single feature. But after the introduction of Xposed Framework, now users can enjoy a specific feature of a specific ROM on their device, without any need to install that Custom ROM, but that feature has to be available for Xposed Framework. Considering the demand of custom features and now that users have got a better way to install them, developers made a lot of Modules of Xposed Framework.

Screenshot_2014-02-22-23-20-25

LovewuChin from XDA developers shared a module called XMultiWindow, which has now been updated and works like a charm. You might have been seen the Multi-window view in Samsung Devices and if you have ever used Omni-ROM before, you must be known about the Split-View concept, in which you can open Two Windows on a Single Screen. Again Xposed Framework, will help you in installing Exclusive features of other ROMs on any device.

Untitled-1

With XMultiWindow available for Xposed Framework, LovewuChin made it possible for any Android user with Rooted device. When installed and activate, this module can split the view of a Two application on Single Screen. Your device will let the applications share half of the screen for each app. Omni-Rom multi-window has been implemented to many other ROMs, but if you don’t have this feature in your ROM, you can install this Module to try it.

Download Required:

XMultiWindow: com.lovewuchin.xposed.xmultiwindow.apk

XposedFramework Installer: de.robv.android.xposed.installer.apk

To use XMultiWindow you need to install Xposed Framework on your device, Follow:

Xposed Framework, A Unique Way To Customize Your Android Device

How To Unbrick AT&T Galaxy Note 3 SM-N900A[Guide]

7
How To Unbrick AT&T Galaxy Note 3 SM-N900A[Guide]

Rooting an Android device might give its users alot of different options to make full use of it. Install Custom ROMs, Mods,  Tweaks, Kernels, in short you can do anything to make your device fast, smooth and reliable in terms of Software. But on the other side, if there is a problem with rooting your device and installing custom mods on it. If you try to install a file which has been modified before downloading, it can brick your device, even if you are trying to root your device, installing a Custom Recovery or trying to flash a Custom Kernel or installing a Custom ROM, it can even happen if you are trying to flash an Official Firmware, So always match the Md5 hash before trying the manual flashing.Now bricking can be categorized in Two Types: Soft Brick and Hard Brick.

Galxy-Note3_031_set2-e13783168224031-610x352

Soft Brick:

In this situation, your device will Turn On, but you will see a Yellow Triangle on the Screen, or a Computer – Triangle – Mobile. Soft Brick can be solved without any problem.

Hard Brick:

In this situation , your device will not response to anything, there will be a Black Screen. You can get your device to any support center to get rid of such problem.

If you are familiar with Odin and it’s working, then this tutorial might not be difficult for you. Otherwise read the whole tutorial first before trying it on your device. In this Article, we will show you How To Unbrick AT&T Galaxy Note 3 SM-N900A.

Necessary Preparations:

After extracting the downloaded files, you will see a lot of files, instead of only an Md5 file.

att-note-3-firmware


How To Unbrick Your Galaxy Note 3.

  1. Turn off your Phone and Turn it On While Pressing, Power + Volume Down + Home button until you see some text on-screen, Press Volume Up to continue.
  2. Make Sure that the USB drivers are installed.
  3. Open Odin in Computer and connect your device to PC, while it is in the Download mode.
  4. If your Phone is successfully connected to PC, the Odin port will turn Yellow with COM port number.
  5. Click On BL/Bootloader and select the file with BL in its name, Leave this field blank if the firmware build version you are going to install is lesser than the one present of your AT&T Note 3
  6. Now Click on PDA and select the File with AP in it name or the one who has the biggest size.
  7. Click on CP/Phone and Select the file with CP in its name.
  8. Click on CSC and select the file with CSC in its name.
  9. Click on PIT and select the file with .pit extension
  10. In Odin, Check Auto reboot, Re-Partition and F-Reset Option.
  11. Now Click the start button and wait for the process to complete.
  12. After the installation is complete you device will restart and once you see the Home Screen and get the “Pass” Message on Odin, unplug the cable.

Once your device boots up, you will see the brand new Home Screen on your Galaxy Note 3 which was once gone black.

Jailbreak iOS 7.0.6 Untethered with Evasi0n7 1.0.6 [How to – Guide]

0
Jailbreak iOS 7.0.6 Untethered with Evasi0n7 1.0.6 [How to – Guide]

It looks like Apple has rolled out another minor update for iOS dubbed as 7.0.6 around the corner. The new update comes up with minor security updates. Jailbreak users are always suggested to stay away from the latest updates until and unless there is no confirmation about the new updates compatibility with Jailbreak and so did iOS 7.0.6. However after determining that the new update does not contain any restrictions and the users can still gain Jailbreak on their iOS 7.0.6 powered devices, Evasi0n7 team evad3rs has announced that they will be soon rolling out the updated version of Envasi0n7 [1.0.6] that will allow the users to Jailbreak their devices immediately.

While team Evad3rs is busy cooking up the Envasi0n7 1.0.6, you may want to know how you Jailbreak your iPhone / iPad / iPod once you’ve updated your device. So let’s have a look this simple and easy method. Evasi0n7

Update: Evas0in7 1.0.6 has been released. You can download it from the link below. 

How to Jailbreak iOS 7.0.6 Untethered with Evasi0n7 1.0.6:

Pre-Requisites:

      1. Download Evasi0n7 1.0.6 depending on your PC. [Will be available soon on the same link.]
      2. Make sure that you backup each and everything on your iOS device. It is always good to be on the safer side in case something goes wrong.
      3. Make sure that your iOS device is charged enough to perform the Jailbreak process. Say it 60%.
      4. Make sure that your laptop is charged enough as well. In case you’re using a desktop PC, make sure that you’re using an appropriate electricity connection. This is highly recommended in order to prevent any power issues while you’re Jailbreaking.
      5. Altough Evasi0n7 works flawlessly, however you still have to use it at your own risk. Do not proceed if you don’t know what you’re going to do.

Evasi0n7 is compatible with iPhone 4, iPhone 4S, iPhone 5, iPhone 5c, iPhone 5S, iPod touch, iPad 2, iPad 3, & iPad mini.

How to Jailbreak:

    1. Make sure that your device is running latest iOS 7.0.6.
    2. Connect your iPhone / iPod Touch or iPad in order to begin.
    3. Click on the Jailbreak button in Evasi0n7.
    4. Wait for the process to complete.
    5. Once complete, disconnect your phone.
    6. Find Cydia in app drawer.
    7. Phewww! you’ve Jailbroken your iOS 7.0.6 device now, you can perform your desired operations using Cydia now.

In case you can’t wait for Evasi0n7 1.0.6, you may use our Hex-Edited version of Evasion7 1.0.5 and Jailbreak your device right now:

      1. Download Hex Edited version of Evasion7 1.0.5 for Windows.
      2. Extract the downloaded folder and run Evasion7.exe file.
      3. Follow the precautions / pre-requisites explained above.
      4. Connect your iOS 7.0.6 powered device to your PC once everything is settled up and understood.
      5. Click Jailbreak.
      6. Follow on screen instructions.
      7. Phewww! You’re done.

That’s All! In case you got any queries, feel free to stop by the comment box below. We will get back to you as soon as possible. Thanks All!

Root Xperia Z C6602/C6603 Running Latest 10.4.1.B.0.101 Firmware [How To – Guide]

22
Root Xperia Z C6602/C6603 Running Latest 10.4.1.B.0.101 Firmware [How To – Guide]

Sony Xperia Z is currently running on Android 4.3 Jelly Bean 10.4.1.B.0.101 firmware. The new firmware soon followed the build number 10.4.B.0.569 and came up with some performance enhancements and bug fixes. While Sony is busy cooking up any further firmwares for it’s former flagships, you may want to root your Xperia Z in case you own one. In case you’ve failed to find any working method to root the latest Android 4.3 Jelly Bean 10.4.1.B.0.101 firmware, you may not worry as you’re on the right spot at the moment.

In the following post we’ll be going through the detailed method leading to the root access on Xperia Z C6602 / C6603 having the latest firmware atop. Before we move any further, you may want to have a brief intro of the root access as some of you might be the first timers.

Rooting your phone gives you complete access over all the data which is apparently locked by the manufacturers. This includes removal of the factory restrictions and making changes to the internal system and the operating system. Gaining the root access gives you the privileges to install various applications to enhance the performance of your device, allows you to remove the built-in applications/programs, helps you to upgrade the battery life of your device & install the apps which require the root access for the proper functionality and modify your device in so many other ways e.g using mods and custom roms. By installing custom recovery, you can flash custom roms in the phone easily. Custom recovery also let’s you backup your current rom and restore it in case of any mishap. There is a laundry list of things you can do after having your device rooted and installed the custom recovery, now once you’re rooted and have installed custom recovery, go ahead and enjoy it on your phone. Here’s our collection of 10 Best Root Apps.

Here are installation instructions:

    1. This guide is only for Sony Xperia Z C6602 / C6603. Do not try this on any other model, please check yourdevice’s mode in Settings > About Device.
    2. The Root instructions are only for Xperia Z C6602 / C6603 running latest Android 4.3 Jelly Bean 10.4.1.B.0.101 firmware. Although the firmware build number is specified here, but this guide should work on Xperia Z with all stock firmwares. Check your firmware version in Settings > About Device and make sure that it matches the one mentioned here.
    3. Please make sure that your phone’s battery is charged at least over 60%. This is highly recommended in order to prevent any power issues during the recovery flashing process.
    4. Backup each and everything on your Android phone as follows:
    5. Backup all your important contacts, find the full guide here.
    6. Backup all your important sms messages, find the full guide here.
    7. Backup all your important call logs, find the full guide here.
    8. Backup all your important media content manually. (Copy to your PC.)
    9. Backup all your apps / data. If you’ve rooted your device, use Titanium Backup to do so. Follow the full guide here.
    10. Backup your current system using a custom recovery (CWM or TWRP) if you’ve flashed one. This is recommended in case something goes wrong with rooting your phone, you can use the custom recovery and return to the old working state of your system.
    11. Make sure that you read the instructions carefully and applied all precautionary measures. Let’s go ahead.

Disclaimer: The methods involved in flashing custom roms and rooting your phone is highly custom and may result in bricking your device, and has nothing to do with Google or the device manufacturer that is SONY in our case. Also rooting your device will void its warranty and you will be no longer eligible for any kind of free device services by the manufacturers/warranty providers. In case of any mishap we may not be held responsible. Follow these instructions to the letter to avoid any mishap or bricking. Make sure that whatever you do, you are doing it at your own responsibility.

How to Root Xperia Z Running Latest Android 4.3 10.4.1.B.0.101 Firmware:

    1. You need to install CWM recovery first. Follow our full guide here to install it on your device.
    2. Download Supersu.zip file now.
    3. Place the downloaded Supersu.zip file on your phone’s sd card.
    4. Now boot into CWM recovery on your phone. To do so, turn off your device first. Now turn it on, as soon as you see the Pink LED, press the Volume Up Key rapidly.
    5. You should see the CWM recovery interface shortly.
    6. Once in CWM, select “Install Zip > Choose Zip from SDcard > Select SuperSu.zip > Yes”.
    7. This will flash SuperSu.zip file, once flashing is complete, reboot your device.
    8. Find SuperSu in app drawer now. You can also install Root Checker app from Play Store to check root.
    9. Congrats! You’re rooted now!

That’s All! Let us know if the tutorial worked fine for you. In case you got any queries or face any issues regarding this post, please feel free to stop by the comment box below and drop us your words. We will get back to you as soon as possible. Thanks all.

Install CWM 6.0.4.6 Recovery on Sony Xperia Z C6602/C6603 [How To – Guide]

63
Install CWM 6.0.4.6 Recovery on Sony Xperia Z C6602/C6603 [How To – Guide]

Sony recently updated it’s past flagship Xperia Z to Android 4.3 Jelly Bean 10.4.B.0.569 firmware and then soon rolled out some more updates packing up some bug fixes and performance enhancements. With the new update, the build number changed to 10.4.1.B.0.101The method posted earlier on our site to root Xperia Z on Android 4.3 Jelly Bean may not work with the least build number, so we’ve found a working CWM recovery which will allow you to root or flash any custom ROMs if you wish, not only on this build number, in fact it works on all stock firmwares of Xperia Z and also all variants of Xperia Z.

Before we head towards the custom recovery installation instructions, let’s first have a look at a brief intro of the custom recovery that is CWM [ClockworkMod] 6.0.4.6 in our case as many of you might be the first timers here.

A custom recovery allows you to install custom roms, mods etc. Along with these, you can make a Nandroid backup, this helps you a lot as you can move back to the previous working state of your phone at any time you want if you have backed up your current system. In some cases, to root the phone you need to flash SuperSu.zip file in the custom recovery, having installed the recovery may help you while in some cases to install the recovery easily, you need to have the phone rooted. You can also wipe cache and dalvik cache of your phone using a custom recovery. There is alot more you can do using a custom recovery, you mayinstall one and experience it yourself for further know-how.

    1. This guide is only for Sony Xperia Z C6602/C6603. Do not try this on any other model, please check yourdevice’s mode in Settings > About Device.
    2. The CWM  recovery is only for Xperia ZZ C6602/C6603 running stock or stock based Android 4.3 [10.4.1.B.0.101 / 10.4.B.0.569] / 4.2.2 or 4.1.2 Jelly Bean. Check your firmware version in Settings > About Device and make sure that it matches the one mentioned here.
    3. You must have installed Android ADB & Fastboot drivers. Follow the quick guide here.
    4. Your device must have an unlocked bootloader. Follow our full guide here in order to unlock.
    5. Please make sure that your phone’s battery is charged at least over 60%. This is highly recommended in order to prevent any power issues during the recovery flashing process.
    6. Backup each and everything on your Android phone as follows:
    7. Backup all your important contacts, find the full guide here.
    8. Backup all your important sms messages, find the full guide here.
    9. Backup all your important call logs, find the full guide here.
    10. Backup all your important media content manually. (Copy to your PC.)
    11. Backup all your apps / data. If you’ve rooted your device, use Titanium Backup to do so. Follow the full guide here.
    12. Backup your current system using a custom recovery (CWM or TWRP) if you’ve flashed one. This is recommended in case something goes wrong with CWM installation, you can use the custom recovery and return to the old working state of your system.
    13. Enable USB debugging mode on your device.  Get it in Settings > Developer Options > USB Debugging mode.
    14. Use only OEM data cable to establish connection between your PC and Phone.
    15. Alright! Follow this guide to the letter now.
Disclaimer: The methods involved in flashing custom roms and rooting your phone is highly custom and may result in bricking your device, and has nothing to do with Google or the device manufacturer that is SONY in our case. Also rooting your device will void its warranty and you will be no longer eligible for any kind of free device services by the manufacturers/warranty providers. In case of any mishap we may not be held responsible. Follow these instructions to the letter to avoid any mishap or bricking. Make sure that whatever you do, you are doing it at your own responsibility.


How to Install CWM 6 Recovery on Xperia Z:

    1. Download Doomlord’s Advanced Stock Kernel with CWM Recovery
    2. Copy the downloaded Advanced Stock Kernel.zip file to your phone’s SD card.
    3. Extract the downloaded .zip folder on your PC, you will get a Boot.img file.
    4. Place the extracted Boot.img file in the Minimal ADB & Fastboot folder that you created using our ADB & Fastboot Quick Setup Guide.
    5. If you are using Android ADB & Fastboot full package, you can place the downloaded Recovery.img file in the Fastboot folder or in the Platform-tools folder.
    6. Open the folder where you placed the Boot.img  file. E.g Minimal ADB & Fastboot or Fastboot or Platform Tools.
    7. Press and hold the shift key and right click on an empty area within the folder, and click on “Open Command Window Here”.
    8. Turn off your Xperia Z completely.
    9. Now press the Volume Up Key and while keeping it pressed plug in the USB cable.
    10. You should see a blue light in the notification light of your phone, that means your device is now connected in Fastboot mode.
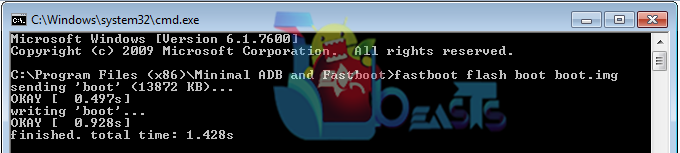
    11. Now type the following command: fastboot flash boot boot.img
    12. Hit Enter and it will quickly flash CWM 6.0.4.6 recovery in your Xperia Z.
    13. Once recovery is flashed, now issue this command “Fastboot reboot”
    14. Your device will reboot now, as soon as you see the Sony logo,  and the pink LED, press Volume Up key to enter recovery.
    15. Once you’re in recovery, select “Install Zip > Choose Zip from SD Card > Advanced Stock Kernel with CWM.zip > Yes”. [Important]
    16. This will flash the Kernel in your phone now. Once flashed, reboot your device.
    17. Congrats! You should now see the custom recovery.

Screenshot_1

That’s All with the recovery installation. In case you got any queries or face any difficulties regarding this post, please feel free to stop by the comment box below and let us know. We will get back to you as soon as possible. Thanks all.

Credits: DoomLord – XDA Recognized Developer

Root Galaxy S4 I9500 On Android 4.4.2 XXUFNB3 Official Firmware[Guide]

0
Root Galaxy S4 I9500 On Android 4.4.2 XXUFNB3 Official Firmware[Guide]

Before going any further, Follow the link to update your Galaxy S4 I9500 to XXUFNB3 Android 4.4 Kit-Kat:

Update Galaxy S4 I9500 To Android 4.4.2 XXUFNB3 Official Firmware

Now that you have Updated your device to Android 4.4 Kit-Kat and as per rule of installing Official Firmware, your device will loose its root access. The only way to get it back, is by rooting it again. Rooting allows you to get full control over your device, Stock apps and mods are good, but installing Custom Mods gives you better support and great battery life, you might need to delete some Stock apps from the device, a non-rooted device can’t do that, but a rooted one has the power to remove stock apps too.

SAMSUNG DIGITAL CAMERA

If you are familiar with Odin and it’s working, then this tutorial might not be difficult for you. Otherwise read the whole tutorial first before trying it on your device. In this Article, we will show you How To Root Galaxy S4 I9500 On Android 4.4 XXUFNB3 Kit-Kat Official Firmware.But before we begin, Make sure that:

  1. That you have a Well Charged Battery, 60%-80% is better.
  2. Back-Up all your important ContactsCall Logs & Messages.It is highly recommended in case of any mishap or data loss to back up all your important data.
  3. Back-Up your Mobiles EFS DataHow To Restore and Back-Up EFS Data On Samsung Galaxy Devices.
  4. Check your device model, Go To Setting > About and Make sure that it is I9500.
  5. Do-not try it on Galaxy S4 I9505.

Disclaimer: 

The methods involved in flashing custom roms and rooting your phone is highly custom and may result in bricking your device,and has nothing to do with Google or the device manufacturers which is Samsung in our case. In case of any mishap we may not be held responsible. Follow these instructions to the letter to avoid any mishap or bricking. Make sure that whatever you do, you are doing it at your own responsibility.

Warning:

Rooting an Android device Voids Manufacturers Warranty, this Rooting method for Galaxy S4 I9500 is tested and Found Working. If you don’t follow the Procedure as we instructed, You only are responsible for your device. We won’t be liable if any damage occurs to your device and/or its components.

All done and good, let’s head towards the Next page to See, How you can Root Samsung Galaxy S4 I9500.

Pages: Page 1 | Page 2

Xposed Framework, A Unique Way To Customize Your Android Device

Xposed Framework, A Unique Way To Customize Your Android Device

One of the Best way to Customize your Android device, is to install Custom ROM on your device. But Custom ROMs installation contains great risk and danger as it can Brick your device if not installed properly and there are not many ways to install Custom Tweaks and mods to be installed on a Rooted device on Stock Firmware. But as they said that Android is a world of possibilities and thanks to the hard working developers who are giving us the amazing Modules to install on your device. Today we will show you another application that will allow you to install Custom Mods on your device without any Custom ROM.

Screenshot_2014-02-21-21-33-38

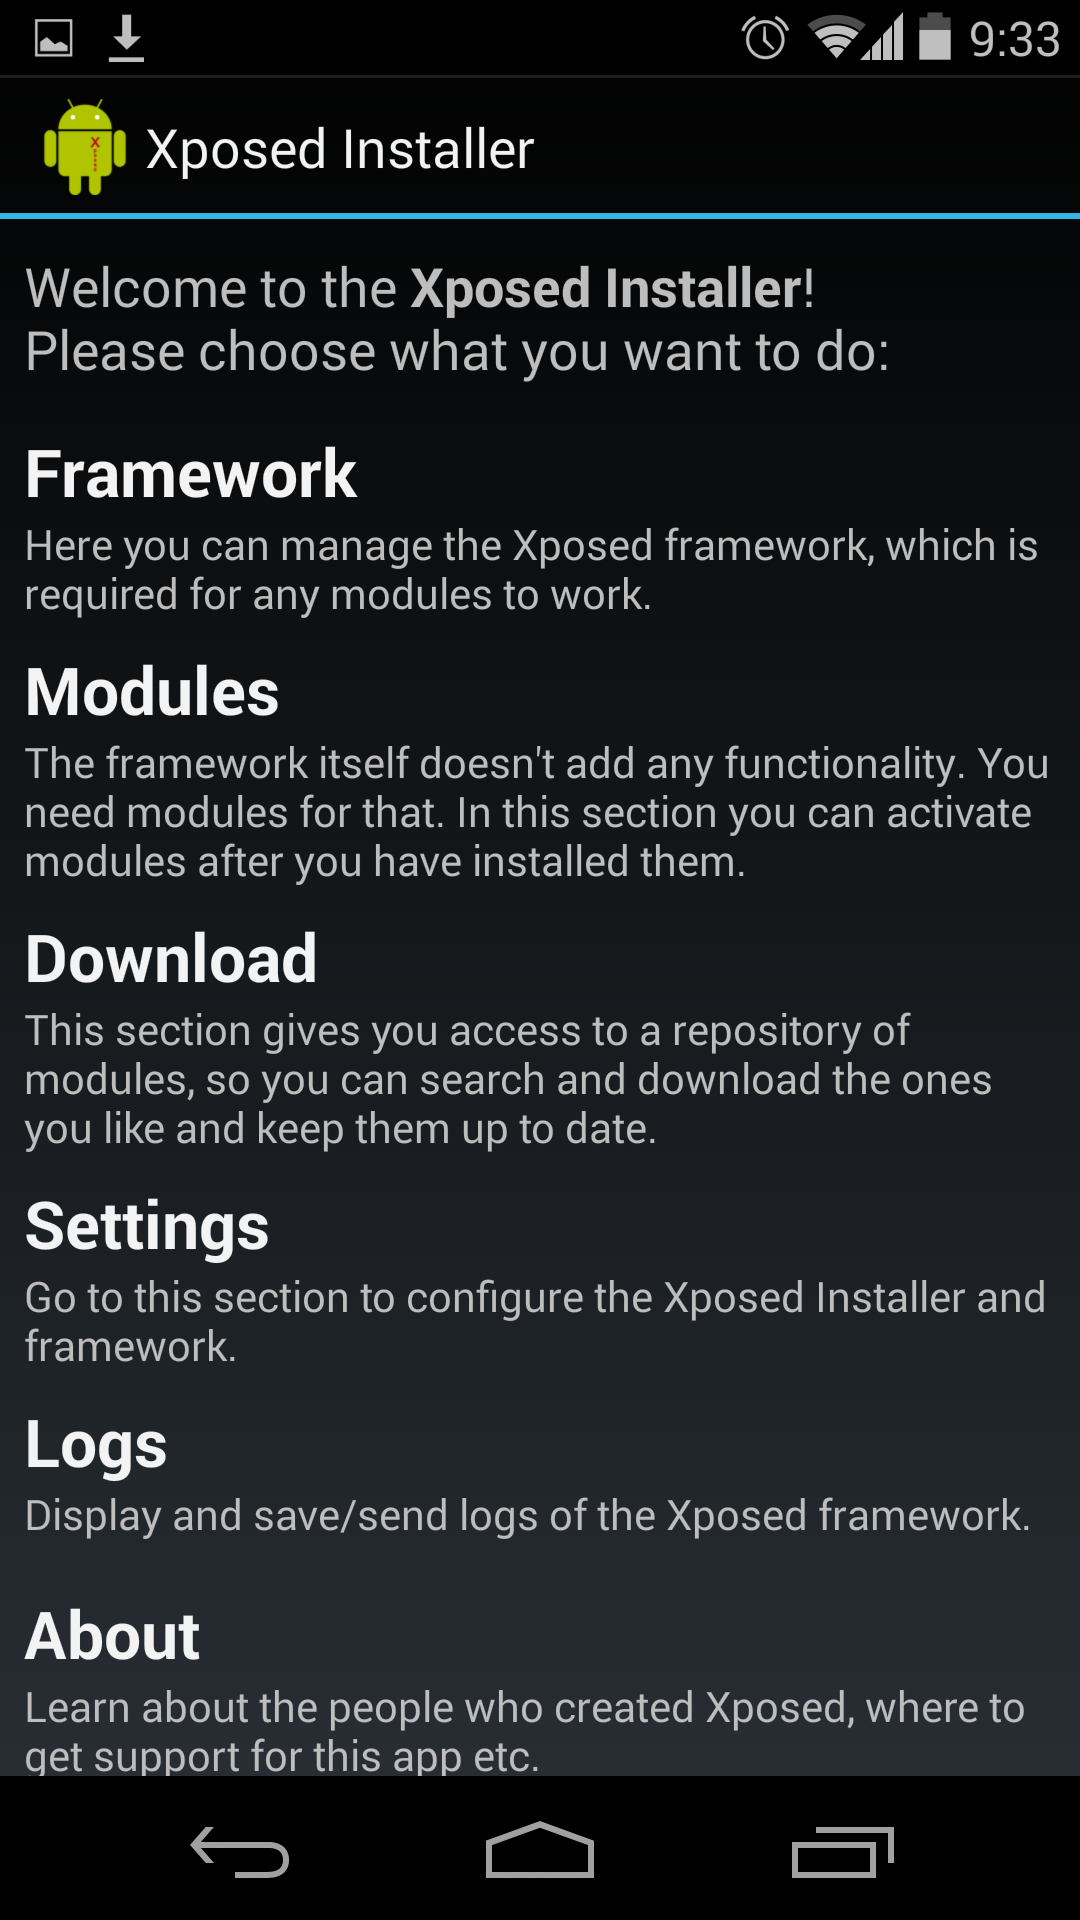
Xposed Framework is an Application that allows you to install Custom Mods on your device, with the variety of different Modules available to download, you will have no problem trying it on your device. Xposed Framework is easy to use and any module install on it can be used without any problem. Xposed Framework allows you to install different custom Modules on your device, including Onmi ROM Split View, 20MP mod for Xperia Device etc. If you want to install it on your device, just follow our guide and all is well.

Requirements:

  1. An Active Internet Connection.
  2. A Rooted device.

Downloads:

Xposed Framework Latest Apk

How To Install Xposed Framework On Your Device

  • If you think this will be a really difficult thing to do, then i can assure you that you won’t be getting through any difficulty while installing it. Just install the App and Tap Framework than Tap Install/Update, after the Root Permission granted, it will be installed, Reboot your device to take effects.

Screenshot_2014-02-21-21-32-52


  • Now that you have installed Custom Framework on your device, you are ready to install Custom Modules on your device.

How To Install Custom Modules On Xposed Framework

  • Open the App and Tap the Category called Downloads.
  • Scroll through the Downloads and Download a Module that you want the most, I have downloaded XMultiWindow, that allows you to open two apps on one screen.
  • Once the Download is done, Go to Modules Tab and Activate the Module, Reboot your device and you are ready to roll.

Screenshot_2014-02-21-22-35-06


  • That is it, once your device reboots, you are ready to use the installed modules on your device.

Restore Moto G To Stock and Downgrade Firmware[Guide]

1
Restore Moto G To Stock and Downgrade Firmware[Guide]

Rooting method sometimes can be made for all the devices using only one tool. Users of Android device cannot stand a day without a rooted device. Root toolkits are available for many devices and the methods are getting easy and easy as the time pass. Rooting allows you to get full control over your device, Stock apps and mods are good, but installing Custom Mods gives you better support and great battery life, you might need to delete some Stock apps from the device, a non-rooted device can’t do that, but a rooted one has the power to remove stock apps too.

20131209T093823

But there comes a time when you need to bring your device to the Stock Firmware, when it comes to Samsung, it is quite easy to install a Stock Firmware but when it comes to Google device, the process is easy but a little time consuming and also a little bit work required in this tutorial. Our case Begins with Moto G, where most of the users got stuck in bootloop and found no other way to get out but installing the Stock Firmware. All you need to do is to download the required files and follow the tutorial without any mistake.

Disclaimer: 

The methods involved in flashing custom roms and rooting your phone is highly custom and may result in bricking your device,and has nothing to do with Google or the device manufacturers which is Samsung in our case. In case of any mishap we may not be held responsible. Follow these instructions to the letter to avoid any mishap or bricking. Make sure that whatever you do, you are doing it at your own responsibility.

Downloads Required:

(XT1031, XT1032, XT1033, XT1034)

Click to Download

More Firmwares Here

Note: Files with _umtsds in their names are meant for Dual Sim variants of Moto G only.

Necessary Preparations:

  1. Download the necessary Firmware File and extract it somewhere.
  2. Enable USB Debugging Mode. Go-to Settings > Developers Option and Tick the USB debugging
  3. Configure ADB/Fastboot on your Computer:HOW? Follow: Link
  4. Install USB Drivers: Link

How To Restore Moto G To Stock Firmware.

Power Off your device and Open in Bootloader mode.How? Press and hold Power + Volume Down button till you see some text on screen

Moto-G-Fastboot-Mode-with-unlocked-bootloader-status-e1391962289643

Now Open the folder where you have extracted the Firmware files and open cmd there.How? Hold Shift Key and Right Click anywhere in the Fastboot folder then Click Open Command Prompt Here

If your Firmware File has tar.gz extension,

  • Then type in the following:
flashall.bat /eu
  • For Linux and Mac uses type in the Following:
chmod +x flashall.sh
./flashall.sh
  • Wait for the Firmware files to be flashed on your device, Moto G. At the end your Phone will automatically reboot.

Now if your Firmware files have xml.zip extension, then:

  • Type in the following commands the cmd/terminal window one-by-one and press enter at the end of each command.
mfastboot flash partition gpt.bin
mfastboot flash motoboot motoboot.img
mfastboot flash logo logo.bin
mfastboot flash boot boot.img
mfastboot flash recovery recovery.img
mfastboot flash system system.img_sparsechunk1
mfastboot flash system system.img_sparsechunk2
mfastboot flash system system.img_sparsechunk3
mfastboot flash modem NON-HLOS.bin
mfastboot erase modemst1 
mfastboot erase modemst2 
mfastboot flash fsg fsg.mbn
mfastboot erase cache 
mfastboot erase userdata 
mfastboot reboot
  • Your phone will reboot automatically.
  • Once your device boots up, go through the initial set-up and Enjoy

Root Galaxy Note 3 N9005 On Android 4.4.2 XXUENB3 Kit-Kat Official Firmware[Guide]

0
Root Galaxy Note 3 N9005 On Android 4.4.2 XXUENB3 Kit-Kat Official Firmware[Guide]

Before going any further, Follow the link to update your Galaxy Note 3 N9005 to XXUENB3  Android 4.4 Kit-Kat:

Update Galaxy Note 3 LTE N9005 To Android 4.4.2 XXUENB3 Kit-Kat Official Firmware

Now that you have Updated your device to Android 4.4 Kit-Kat and as per rule of installing Official Firmware, your device will loose its root access. The only way to get it back, is by rooting it again. Rooting allows you to get full control over your device, Stock apps and mods are good, but installing Custom Mods gives you better support and great battery life, you might need to delete some Stock apps from the device, a non-rooted device can’t do that, but a rooted one has the power to remove stock apps too.

179100-attnote3title

If you are familiar with Odin and it’s working, then this tutorial might not be difficult for you. Otherwise read the whole tutorial first before trying it on your device. In this Article, we will show you How To Root Galaxy Note 3 N9005 On Android 4.4 XXUENB3 Kit-Kat Official Firmware.But before we begin, Make sure that:

  1. That you have a Well Charged Battery, 60%-80% is better.
  2. Back-Up all your important ContactsCall Logs & Messages.It is highly recommended in case of any mishap or data loss to back up all your important data.
  3. Back-Up your Mobiles EFS DataHow To Restore and Back-Up EFS Data On Samsung Galaxy Devices.
  4. Check your device model, Go To Setting > About and Make sure that it is N9005.
  5. Do-not try it on Galaxy Note 3 N900.

Disclaimer: 

The methods involved in flashing custom roms and rooting your phone is highly custom and may result in bricking your device,and has nothing to do with Google or the device manufacturers which is Samsung in our case. In case of any mishap we may not be held responsible. Follow these instructions to the letter to avoid any mishap or bricking. Make sure that whatever you do, you are doing it at your own responsibility.

Warning:

Rooting an Android device Voids Manufacturers Warranty, this Rooting method for Galaxy Note 3 N9005 is tested and Found Working. If you don’t follow the Procedure as we instructed, You only are responsible for your device. We won’t be liable if any damage occurs to your device and/or its components.

All done and good, let’s head towards the Next page to See, How you can Root Samsung Note 3 N9005.

Pages: Page 1 | Page 2