Home Blog Page 453

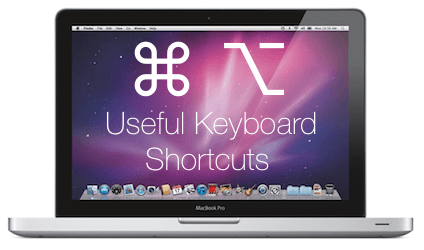
Some Of The Amazing Mac Shortcuts You Should Know
0
Some Of The Amazing Mac Shortcuts You Should Know

If you will use Mac depending on the Touch Pad completely, then most of the times you have to go through a long process to get something good. While clicking using both fingers opens a pop-up in front of you, where you can open a web page in a new tab, you can Press a drag to select the text, or if on long pages, you have to spend a lot of time scrolling down. Learning about Shortcuts is a really good practice on Mac, we have reviewed most of them in the past as well and we will share more with you.

Today, we’ll share some of the most amazing Shortcuts for Mac, while you want to use them for Applications or while starting the Mac. Some of them are specific for Mac OS X Mevericks, others are universal for every Mac. Make sure to Install OS X Mavericks First.

Mac-Shortcuts

1. Hold Shift While Tuning On

If you feel that your Mac is not performing smoothly as it was before, You need to Turn Off your Mac and turn it On while pressing the Shift Key. It will open your Mac in Safe Mode, which will perform certain Checks and clear some memory to enhance performance.

2. Hold “alt/Option” Key While Scrolling

If you are reading content on large web pages, then scrolling the normal way won’t help you as it will scroll a little. In such cases, Press and Hold Option Key while scrolling which will cover a fair distance, thus making scrolling faster than usual.

3. Press and Hold Power Button

Now this is something, that we first Saw in Mobile Devices and with the adoption of iOS, it is not long to see these features in Mac OS X too, where it is a really simple feature, yet a useful one. Instead of putting your Mac to sleep like the Old way, use the iOS way, if you want to put your Mac to sleep, just press and Hold the power button and Choose the Action from the Pop-up.

4. Click and Hold Scroll Wile Powering On

If your Mac has a Disc Drive and it is stuck because of certain reasons, all you have to do is to Press and Hold Mouse Scroll button while turning On your Mac, and your Stuck CD will be out in no time.

5. Command + Shift + /

This Shortcut is really useful in almost all the aspects of Mac, when you are in Finder or on most apps, using this shortcut will open the search field within help menu, here you can search for most commands.

6. Hold Shift While Opening an Application

If you have any app set to re-open the previous windows on launch, pressing Shift while opening it will prevent it from opening the previous session.

Create Your Own Media Server On iOS or Mac Using Plex

0
Create Your Own Media Server On iOS or Mac Using Plex

Not everyone wants to own a Media Server of his own, but the advantages of having one is a great deal, you can share a lot of Media on these servers and afterwards can stream it from different devices using different apps. if that Server is created using an Official app or site and there are a lot of services available to provide such facility, then after a little time every new service pop-ups providing even better experience, so which one to choose, if it comes to your iOS device.

Plex is another service, that offers a Media server client that you can use to create a Media server of your own. You can either use it on Mac or your iOS device and afterwards stream it from different devices with supported apps. Without further ado, let’s see how we can create a Media server of our own on iOS or Mac OS X.

How To Create Your Content Server:

Screenshot_4

  • Visit Plex Website and Downlaod the Plex Server client for Mac or any other computer that you’ll like to serve media from.
  • Before Starting the server, make sure to create Seperate Folders for best performance, Plex has its Own Support to help you in creating these categories.
  • Once your Media is ready to share, Access the Media Server from Menu bar on your Mac and Click on Media Manager to open the Interface on Web.

Plex-Media-Manager

  • They will promote to add your Media Folder, thus creating libraries. You can edit them anytime, and keep refreshing it to update the Folders with new Content.
  • You can download Plex Apps on different devices, download them straight from the Official App store of your OS.
  • When you open the app, it will immediately show all the Libraries that are available on your Network and the Content they have
  • With smooth Playback, you can run any file on your device using Plex App.
  • In Settings, you can change the Quality, add or remove subtitles.
  • If your Phone can be connected to TV, you can stream all that media to TV and watch it on a Bigger screen.


Need for Speed World 2 Wallpaper – Download Here

0
Need for Speed World 2 Wallpaper – Download Here

Need for Speed is best racing game ever, with many such great parts I like.  Every new part from now onward, I’ll be posting Need for Speed HD Wallpapers. Today I’ve collected amazing and breath-taking collection of Need for speed world 2 wallpaper. All the wallpapers will be wide and HD, so enjoy and do tell me in comments how well did you like them ?

need_for_speed_world-t2

Need for Speed World HD desktop wallpaper

need_for_speed_world_2-t2

need for speed world 2 HD desktop wallpaper

need-for-speed-world-2

Need for Speed World Wallpapers

free-need-for-speed-world-hd-desktop-wallpaper

Need for Speed World desktop wallpaper

need_for_speed_world-wide

Need for Speed World Wallpapers

screenshot-2

need for speed world 2 HD desktop wallpaper

need-for-speed-world_treasure-hunt_new-game-mode__2_

need for speed world 2 HD desktop wallpaper

Need-For-Speed-Shift-2-Wallpaper

need for speed world 2 HD desktop wallpaper

Nfs-Nfsunlimited-Net-Need-For-Speed-The-Run-Hot-Pursuit-World-Shift-Game-Wallpaper

How To Remove Red Text from Hboot Screen on HTC One M8

0
How To Remove Red Text from Hboot Screen on HTC One M8

HTC One M8 users surely can’t stop themselves from playing with their device across the barbed wires put by HTC. The annoying problem most of the users might come across is, after unlocking the bootloader or achieving S-OFF, there comes annoying Red Text on the startup splash screen of the phone. You probably won’t be able to bear it every time your device boots up, and think of getting rid of that annoying Red Text.358xhqb

Well, XDA Recognized Developer Santod40, who earlier came up with the solution to the same problem for HTC One M7 and HTC Butterfly, has provided a way to resolve this issue on HTC One M8 as well. The process requires modifying the Hboot depending on the firmware version. In the following post we will explain this method to remove Red Text from the Hboot [Splash] screen from HTC One M8 comprehensively. If you’ve been looking for this very thing, your search may come to an end now and all you need is, to follow this guide carefully.

Here are the pre-installation instructions:

  • This guide is for HTC One M8 [All Variants]. Do not try this on any other device.
  • Your phone’s battery must be charged, at least 60%. This is highly recommended in order to avoid and power issues during the flashing process.
  • Download and install Android ADB and Fastboot Drivers. Follow the guide carefully, and download the Fastboot folder separately on your desktop to avoid any complexity. You may use our Minimal ADB and Fastboot Drivers guide instead for the ease.
  • Your device must have an unlocked bootloader and achieved S-OFF. Here’s our full guide on how to unlock bootloader, achieve S-OFF.
  • Make sure that you’ve installed all the HTC Drivers and HTC Sync Manager – Download Here.
  • Make sure that you backup all your important contactsmessagescall logs and all other media content as unlocking the bootloader will completely wipe your phone.
  • Once flashed CWM, don’t forget to create a Nandroid Backup. This is highly recommended in case the system fails and you need to go back to your old system immediately.
  • Enable USB debugging mode on your phone. In order to do so go to Settings > Developer Options > Enable USB Debugging. If you couldn’t find the developer options in settings then you need to activate the developer options first. In order to do so go to Settings > About and tap the ”Build Number” 7 times and your developer options should appear now.
  • Disable your windows firewall and any anti virus programs if installed in order to prevent any interruption.
  • Use your device’s genuine data cable to connect it to your computer.

Note: All these process will result in voiding the warranty of your device. In case of any mishap, we may not be held responsible with what’s happening or what happened to your device, nor the manufacturer “HTC” will be held responsible as all these process are highly custom. Make sure that whatever you’re doing, you’ve enough knowledge of that and you’re doing it at your own risk.

How To Remove Red Text from Hboot Screen Now:

  1. Download modified Hboot “No Red Text” .zip file according to your firmware.
  2. Copy the downloaded .zip file to Fastboot folder that you created using our ADB guide or Minimal ADB and Fastboot folder in C>Program Files>Minmal ADB and Fastboot.
  3. Now put your HTC One M8 in Fastboot mode. To do so, turn it off first completley. Now turn it on by pressing and holding Volume Down + Power Key.
  4. You should be in Hboot menu now, select Fastboot using Volume Up / Down Keys.
  5. Once selected, connect your HTC One M8 to your PC.
  6. Now open the command prompt in the Fastboot / Minimal ADB and Fastboot folder. To do so, open any of these folders and then press and hold the shift key and right click on empty space within that folder. Now click on “Open Command Prompt/Window Here”.
  7. Once you’re in command windows, issue these commands: fastboot oem rebootRUU

  8. Now push this command: fastboot flash zip filename_Hboot.zip

  9. wait till the process gets completed.
  10. Now push this command: fastboot reboot-bootloader

  11. Your device will reboot and the Red Text is gone. That’s all. Enjoy!

308ekaw

How To Jailbreak iOS 4.3.1 Using Pwnage Tool

0
How To Jailbreak iOS 4.3.1 Using Pwnage Tool

Yeah we know, posting about iOS 4.3.1 is too late now, as the Apple’s latest devices are running iOS 7 or above now and even devices with iOS 6.1 installed are forced to upgrade their device to iOS7. However, let me remind you that still a large number of population of Apple users use the  iOS 4.3 or below, since most of them haven’t upgraded their devices yet, also from iPhone 3G or 3Gs these devices didn’t even receive the update of iOS 5.

Today, instead of using Redsn0w, we will use Pwnage tool to Jailbreak iOS 4.3.1. This is tethered only and you’ll have to boot into Jailbroken state after every time you reboot. Supported iPhone 3GS and iPhone 4 and other some of the tools, we will be using a combination of PwnageTool 4.2, Universal Ramdisk Fixer and tetheredboot utility, to Jailbreak your device.

iphone-4-jailbreak-cydia-mywi-jailbreakme.com_-650x4871

Requirements:

Now the Tutorial becomes a little complicated, follow the instructions till end and all will be well.

How To Jailbreak iOS 4.3.1:

PwnageTool-4.3.3-Step-3-e1304688892644

  • Download the PwnageTool bundle and Extract the Zip file.
  • You’ll find a .bundle file in it, we will be using iPhone 4 bundle iPhone3,1_4.3.1_8G4.bundle, move that file to the desktop.
  • Download the Pwnage tool and Copy it to Applications directory then Right click and Show Package Contents.
  • Navigate to Contents/Resources/FirmwareBundles/ and Paste the  iPhone 4 bundle iPhone3,1_4.3.1_8G4.bundle file there.
  • Now Download the Ramdisk Fixer and Simply Install it. It is important, just do it.
  • Now Downlaod the iOS 4.3.1 and save it anywhere you can remember.
  • Start Pwnagetool in Export mode and Select your device.
  • Browse for the iOS 4.3.1 file and select it.
  • Now select Build to create a Custom Firmware.
  • Pwnage will then create a .ipsw custom firmware for you, which is Jailbroken.
  • Put your device into DFU mode using Pwnage tool:


  1. Hold Power and Home buttons for 10 seconds
  2. Now release the Power button but continue holding the Home button for 10 more seconds
  3. You device should now be in DFU mode
  • Once the Custom Firmware is built, Open iTunes and Press and Hold “alt” and Click on Restore.
  • Select the Custom Firmware file and Click on Open.
  • Now Sit Back and prepare yourself for another ride, while iTunes install the Custom Firmware on your device.
  • Now Download the tetheredboot.zip and extract the Zip file.
  • Now change the extension of your Custom Firmware to Zip and extract that .zip file and copy kernelcache.release.n90 file, and then copy iBSS.n90ap.RELEASE.dfu files which are found under /Firmware/dfu/.
  • Move these both files to the newly created “tetheredboot” folder along with the tetheredboot file.
  • Now Turn off your device and start Terminal on OS X and run the following commands:


sudo -s

  • Enter your administrator password, then:

/Users/TaimurAsad/Desktop/tetheredboot/tetheredboot
/Users/TaimurAsad/Desktop/tetheredboot/iBSS.n90ap.RELEASE.dfu
/Users/TaimurAsad/Desktop/tetheredboot/kernelcache.release.n90

  • Now drag and drop in the terminal the tetheredboot file, then iBSS file and then kernelcache.release file.
  • You’ll see some cods running in terminal window, if it asks you to enter the DFU mode,do as what you did earlier.
  • Now wait for your device to reboot, once Terminal shows the Exiting libpois0n message, your device will be rebooted and booted with a Jailbreak tethered Mode.

Install ViperOneM8 Custom ROM On HTC One M8

0
Install ViperOneM8 Custom ROM On HTC One M8

ViperOneM8 ROM for the HTC One M8 is getting much popular and seems to be one of the best custom ROMs to go with for now. Based on Sense 6.0 UI, ViperOneM8 works on Stock kernel of the HTC One M8. This ROM is loaded with tons of features that can make your HTC One M8 go beyond the boundaries and let you test it’s tolerance. All the credits for making this great custom ROM goes to Team Venom.

Let’s head towards our target now. In the following post we are going to install Android 4.4.2 KitKat ViperOneM8 Custom ROM on HTC One M8 [All Variants]. Before you head towards the installation instructions, you need to make sure that you’re familiar with the custom ROMs, and you are capable of handling any mishap that a custom ROM may cause. A custom ROM may not be kept for everyday’s use as it has chances of bugs. Let’s move forward now.

htc-one-m8-gold

Let’s have a look on the features of this ROM and then head towards the guide:

Viperonem8 rom
  • Venom Tweaks
  • Venom Pie
  • Venom Hub
  • Venom OTA
  • Venom SuperUser
  • Venom File Manager
  • Venom CPU Usage
  • Venom Kernel Manager
  • Venom Button Manager
  • Venom Package Installer
  • Venom Download UI
  • Venom 3-Finger Gestures
  • Venom Vertical Horizontal QuickSettings

Here are the pre-installation instructions:

  • This guide is for HTC One M8 [International]. Do not try this on any other device.
  • Your phone’s battery must be charged, at least 60%. This is highly recommended in order to avoid and power issues during the flashing process.
  • Your device must have an unlocked bootloader and a custom recovery installed. Here’s our full guide on how to unlock bootloader, achieve S-OFF and install CWM recovery.
  • Make sure that you backup all your important contactsmessagescall logs and all other media content as unlocking the bootloader will completely wipe your phone.
  • Once flashed CWM, don’t forget to create a Nandroid Backup. This is highly recommended in case the new system fails and you need to go back to your old system immediately.
  • Enable USB debugging mode on your phone. In order to do so go to Settings > Developer Options > Enable USB Debugging. If you couldn’t find the developer options in settings then you need to activate the developer options first. In order to do so go to Settings > About and tap the ”Build Number” 7 times and your developer options should appear now.
  • Disable your windows firewall and any anti virus programs if installed in order to prevent any interruption.
  • Use your device’s genuine data cable to connect it to your computer.

Note: All these process will result in voiding the warranty of your device. In case of any mishap, we may not be held responsible with what’s happening or what happened to your device, nor the manufacturer “HTC” will be held responsible as all these process are highly custom. Make sure that whatever you’re doing, you’ve enough knowledge of that and you’re doing it at your own risk.

Here’s How to Flash ViperOneM8 Custom ROM on your HTC One M8:

  1. Download ViperOneM8 ROM.zip  file.
  2. Connect your phone to your PC now.
  3. Copy the downloaded .zip file to your phone’s SDcard.
  4. Once copied, unplug your phone and turn it off.
  5. Now turn it on by pressing and holding Volume Up + Down + Power Key. You should be in Hboot mode now, select Recovery here and you should be in the CWM recover that you installed above.
  6. In CWM recovery select “Install > Choose Zip from SDcard > Locate the ROM.zip file > Yes”.
  7. Proceed with the installation and complete it using the instructions in the AROMA installer.
  8. You can select the mods you want to flash during the installation with AROMA installer.
  9. You may wipe data, cache and dalvik cache for better performance results.
  10. Once done, reboot your device.
  11. Pheww! You’re on ViperOneM8 now.
  12. Enjoy!

If the ROM is good enough to impress you, please consider buying the developer a beer.

That’s all. In case you got any queries or you’re stuck somewhere regarding this post, don’t hesitate to reach us through comment box below. Thanks all.

How To Install Android 2.2.1 Froyo On iPhone 2G/3G using Bootlac in Cydia

0
How To Install Android 2.2.1 Froyo On iPhone 2G/3G using Bootlac in Cydia

A couple of days ago, one of my friend told me about installing Android software on an iOS device, despite telling him that doing such thing can destroy the device, for the least it will cause a lot of lag and glitches. But he insisted me to install it and I began the search, and so I did find it but on the old versions of iPhone, the very first iPhone 2G and the next release iPhone 3G, upon knowing that, he instantly got an iPhone 3G and we began the Process of what I think was on the web.

Since the device is old, so is the Android version, it is Android 2.2.1 Froyo. Your device must be Jailbroken for this Tutorial and for the process, you won’t require a PC. Your iOS device must be on the latest version it can support and the Jailbreaking tools must be PwnageTool, Redsn0w and Blackra1n.

original

How To Install Android on iPhone:

bootlace

  1. First Jailbreak your device.
  2. Then Open Cydia and http://repo.neonkoala.co.uk/ as repo and Tap Add Source
  3. Once the source is made, Download Bootlac from Cydia.
  4. Open the app after installation.
  5. From the Bootlac, you need to install Openibot.
  6. Once the Openibot is installed, tap the iDorid tab in the bottom to install iDroid.
  7. Once the iDroid is installed,tap the Quick boot tab and once the device is booted, it will be running Android OS.
  8. Refer to Step 6, if you want to see for future updates

Jailbreak iOS 6 Untethered With Evasi0n – iPhone 5, 4S, 4, 3GS, iPod Touch 5G, 4G, iPad Mini

0
Jailbreak iOS 6 Untethered With Evasi0n – iPhone 5, 4S, 4, 3GS, iPod Touch 5G, 4G, iPad Mini

Personally, I love iOS 6 more then iOS 7 but it’s a common thing whenever a new update comes out, more new feature arrives with it and so more people want to enjoy new things that’s why everybody update their devices, but people like us don’t think the same way. So, today for those who still are running iOS 6 on iPhone 5, 4S, 4, 3GS, iPod Touch 5G, 4G, and iPad Mini, I am posting Jailbreak Guide on iOS 6 all version from iOS 6 to iOS 6.0.6. Follow the guide carefully in order to get proper Jailbreak on your devices.

Jailbreak iOS 6 – iPhone And iPod touch

How To Jailbreak iOS 6 – 6.1.6Untethered on iPhone 5, 4S, 4, 3GS, iPod Touch 5G, 4G, iPad Mini:

First Download Evasi0n.

Jailbreak iOS 6 - iOS 6.1.6


  • Now Connect your device with PC/Mac. Evasi0n will recognize it automatically.
  • Remove the passcode form your device it came handy while Jailbreaking.
  • After your device is connected click on Jailbreak to start the Process.
  • Don’t unplug your device during the process.
  • When the process is done unlock your device and you’ll see a new icon named as Jailbreak. Tap on it and your screen goes black for few seconds and then you’ll be back on your home screen.
  • Now wait for the rest of process to be completed.
  • Once  Evasi0n say Jailbreak is completed your device will reboot few times to complete the remaining process. When all is done you’ll have Cydia on your home screen.
  • Enjoy your iPhone 5, 4S, 4, 3GS, iPod Touch 5G, 4G and iPad Mini is Jailbroken.

Follow more:

Jailbreak iOS 6.1.3, 6.1.4, 6.1.5 Untethered Using P0sixspwn, A5+ Devices Only

Jailbreak iOS 6.1.3, 6.1.4, 6.1.5 Untethered On All Devices With P0sixspwn

How To Jailbreak iOS 6.1.3 On all A4 Devices With Sn0wbreeze

iOS 4.2.1 Final Version Jailbroken Using Redsn0w 0.9.6b4

0
iOS 4.2.1 Final Version Jailbroken Using Redsn0w 0.9.6b4

I know its old but many of my users are asking about the Jailbreak tutorial of iOS 4.2.1 final version. I have collected all the links working that can help you jailbreak your Apple device running iOS 4.2.1. The main thing about it was the Redsn0w 0.9.6b4 as it was the first tool that bring proper Jailbreak for iPhone , iPod and iPad.

iOS 4.2.1 Final Version Jailbroken Using Updated Redsn0w 0.9.6b4

How To Jailbreak iOS 4.2.1 Final Version Using RedsnOw 0.9.6b4:

  • Download iOS 4.2.1. Please download the firmware according to your respective device.
  • Restore your device to iOS 4.2.1 using iTunes before continuing.
  • Download Redsn0w 0.9.6b4.
  • Now run it and browse for the iOS 4.2.1 ipsw. 
  • Now click next to start the Jailbreak process.
  • Select check Cyida and press next to proceed.
  • Now you’ve to follow the given instruction on the page to put your device in DFU Mode.
  • After getting in DFU mode, RedsnOw will start the Jailbreak Process wait for it to be completed.
  • When your device will be rebooted. iOS 4.2.1 Final Version Jailbroken Using Redsn0w 0.9.6b4.
  • You can find more Jailbreak Tutorials here and also iPhone How To on iOS 7.

How To Import Contacts To a Windows 8.1 Device

0
How To Import Contacts To a Windows 8.1 Device

People do look for a change, from an iOS device to Android or from an Android device to Windows 8.1, after all Change is innate. However, the problem users face after changing to another platform, is the importing of contacts. Since, saving contacts to SIM is too mainstream now-a-days, users mostly Sync their Contacts with the Account they are using and even restore it afterwards on the same device. Its kind of a very safe way, your contacts are saved and you don’t have to worry about loosing them even if your SIM is damaged.

But the same account cannot be used on a Different device, I mean if you have upgraded to a Windows device from an Android one, you just can’t enter your E-Mail address and expect to see all the contacts saved in that Contact. There are a lot of things to explore on a Windows Phone, but before that let’s run through the basics.

windows-phone-people1

Import Contacts From Google, iCloud or Outlook.

wp_ss_20140516_0049

If you are coming from an Android device, then you have uploaded all your contacts to Google Account. and from iOS you have synced the contacts to your iCloud account. Then this following process will be really easy for you, all you need to do is to Log-in to these services and everything will be fine.

  1. Open Settings > E-Mail and Accounts and Tap Add Account.
  2. Now select the account where you have stored the Contacts for example, enter your Google ID and Password if you were an Android user.
  3. Log-in and let the Synchronization begins.
  4. To see whether the contacts are imported or not, open the People app and see for yourself.

Import Using a CSV File.

Screenshot-150

If you have activated the Two Factor authentication, then the above process won’t work for you. Then try importing the CSV file to the Outlook, for that you first need to Export Contacts from your Google Account.

  1. Open your Gmail ID, Click the Gmail and Choose Contacts.
  2. Form the Top Menu choose More and Click Export.
  3. Choose Outlook CSV Format and Click Export

Import CSV File to Outlook.

Screen-Shot-2014-05-16-at-9.23.46-pm

  1. Go to People Hub and Log-in using your Outlook Account.
  2. If you want to merge Two accounts together, then click Google and you’ll see all the Things of Google there too.
  3. Or if you want to Import Contacts only, then Click Import and choose the CSV file you exported in the previous step.
  4. If you see any option related to Goolge after Clicking import, ignore and proceed ahead.

Import Contacts From SIM card.

  1. Open People App and Tap the Three-Dot menu button.
  2. Select Settings and Tap on Import From SIM
  3. Select the SIM card and the destination of Contacts
  4. Now the list of Contacts will appear, choose the one you wants and Tap Import.
  5. Enjoy!

Update HTC One M8 to Android 4.4.2 KitKat with Android Revolution HD Custom ROM

0
Update HTC One M8 to Android 4.4.2 KitKat with Android Revolution HD Custom ROM

HTC One M8 is already out, and is available in most of the countries now. Device’s development has also started, there’s a number of things to play with around. The best way to test the limitations is probably to try out a new custom operating system, and to do this very thing for the One M8, the famous Android Revolution HD ROM by XDA Senior Member Mike1986. has landed on the forums.

Android Revolution HD definitely is a feature-rich and one of the best custom ROMs available for the Android devices. What adds charm to the working and fuctinality of this ROM is, it’s a stock based custom ROM. That means there are less chances of any bugs, and you can make your device fly and keep this ROM for everyday’s use. In the following post, we are going to install Android Revolution HD Custom ROM on the HTC One M8, the international variant. If you’ve been looking for a good ROM and a comprehensive method, you may stop searching now and just follow this guide carefully. Let’s move forward now.htcBlinkfeed

Let’s go through the details of this ROM first:

Android revolution HD rom details
  • Removed software (CPU) rendering – full Snapdragon 801 (GPU) rendering
  • Fully optimized and tweaked
  • Root access
  • Unsecured boot.img
  • Newest BusyBox
  • RAM optimizations
  • System signatures check enabled for system security and safety
  • Improved virtual memory management
  • Speed optimizations
  • Enabled GPU UI rendering
  • Data, cache and system partitions mounting tweaks
  • Bloatware applications removed
  • All /system applications updated to latest available
  • All /data applications updated to latest available
  • Improved CPU governors performance
  • Most optimal system scheduler
  • Disabled kernel debugging for better performance
  • Zipaligned (Improved RAM management)
  • Zipalign on boot (for user applications on data partition)
  • Fully de-odexed
  • init.d scripts (BusyBox run-parts) support
  • Auto init.d permissions set on boot
  • sysro/sysrw commands support
  • Excellent battery life!
  • Improved EXT4 performance
  • OpenVPN support
  • Most up-to-date system files permissions
  • Adobe Flash Player support


Here are the pre-installation instructions:

  • This guide is for HTC One M8 [International]. Do not try this on any other device.
  • Your phone’s battery must be charged, at least 60%. This is highly recommended in order to avoid and power issues during the flashing process.
  • Your device must have an unlocked bootloader and a custom recovery installed. Here’s our full guide on how to unlock bootloader, achieve S-OFF and install CWM recovery.
  • Make sure that you backup all your important contacts, messages, call logs and all other media content as unlocking the bootloader will completely wipe your phone.
  • Once flashed CWM, don’t forget to create a Nandroid Backup. This is highly recommended in case the new system fails and you need to go back to your old system immediately.
  • Enable USB debugging mode on your phone. In order to do so go to Settings > Developer Options > Enable USB Debugging. If you couldn’t find the developer options in settings then you need to activate the developer options first. In order to do so go to Settings > About and tap the ”Build Number” 7 times and your developer options should appear now.
  • Disable your windows firewall and any anti virus programs if installed in order to prevent any interruption.
  • Use your device’s genuine data cable to connect it to your computer.

Note: All these process will result in voiding the warranty of your device. In case of any mishap, we may not be held responsible with what’s happening or what happened to your device, nor the manufacturer “HTC” will be held responsible as all these process are highly custom. Make sure that whatever you’re doing, you’ve enough knowledge of that and you’re doing it at your own risk.

Here’s How to Flash Android Revolution HD ROM on your HTC One M8:

  1. Download Android Revolution HD ROM.zip file.
  2. Connect your phone to your PC now.
  3. Copy the downloaded .zip file to your phone’s SDcard.
  4. Once copied, unplug your phone and turn it off.
  5. Now turn it on by pressing and holding Volume Up + Down + Power Key. You should be in Hboot mode now, select Recovery here and you should be in the CWM recover that you installed above.
  6. In CWM recovery select “Install > Choose Zip from SDcard > Locate the ROM.zip file > Yes”.
  7. Proceed with the installation and complete it using the instructions in the AROMA installer.
  8. You can select the mods you want to flash during the installation with AROMA installer.
  9. You may wipe data, cache and dalvik cache for better performance results.
  10. Once done, reboot your device.
  11. Pheww! You’re on Android Revolution HD now.
  12. Enjoy!

If the ROM is good enough to impress you, please consider buying the developer a beer.

That’s all. In case you got any queries or you’re stuck somewhere regarding this post, don’t hesitate to reach us through comment box below. Thanks all.

How To Use An Android Device as a Wireless Gamepad

0
How To Use An Android Device as a Wireless Gamepad

Previously, we have posted an Article about using an iPhone as a Joystick to play games on PC. However, we can see more Android devices with people rather than an iOS device. So, if there’s an app that would work with an Android device to make it as a Wireless Joystick and giving games a fair distance to play games. Owning a gaming console can solve all these problems, you can even connect them with an LED Monitor or TV  and wireless Joystick gives you the Advantage.

However, gaming consoles are not cheap, you can purchase a good PC with such money. And if  you do happen to own a PC but tired of playing games using a Mouse and a Keyboard but don’t want to use Cheap Gaming Pads, go ahead and follow our tutorial to use your Android device as a Joystick. The app was Featured on XDA portal and still in its early stage of development, you might find a little amount of features but in future developers have promised to port a lot of new features in it.

Gamepad

Use Mobile Gamepad On Android:

edit-games

  1. Download Mobile Gamepad for Android from Play Store and For PC use XDA Source, both of them are free.
  2. The drivers are signed for 64-bit version, so it will work only on a 64-bit windows.
  3. Install the app of PC and Launch it afterwards, you will see the IP address to use into Android app.
  4. Open the Android app and write the IP manually.
  5. If you see any errors, make sure the device is connected to the Same Wi-Fi network.
  6. If you don’t have any router, use  aVirtual Hotspot to connect.
  7. Once the devices are connected, you will see a very basic Gamepad on your Android screen.
  8. Configure the Keys before playing, otherwise you will be running in Circles in the First game.
  9. Press the Add button and Configure the Key Mapping.
  10. Launch the Game on PC and see how it is working.

Source: XDA