Home Blog Page 451

Root and Install TWRP Recovery on Moto E [ Guide ]

0
Root and Install TWRP Recovery on Moto E [ Guide ]

Motorola was a Google’s Company but now its under Lenovo, and now Moto E will be the last from Motorola. It’s a cheap end device and affordable. Specs are not that high much but its a Dual SIM,  with a Capacitive touchscreen, 16M colors, 4.3 inches screen with multitouch, 4 GB Internal Memory, 1 GB RAM, 5 MP, 2592 х 1944 pixels, Android OS, v4.4.2 (KitKat) and with Qualcomm Snapdragon 200 Dual-core 1.2 GHz Cortex-A7. With all these specs and cheap price, Moto E will gain a good market. As we’ve always provide Root and Install TWRP Recovery guides of newest Android devices, today I’ll tell you how you can Root and Install TWRP Recovery on Moto E.

motog-story_650_050614031804

Before Starting:

  1. That you have a Well Charged Battery, 60%-80% is better.
  2. Back-Up all your important ContactsCall Logs & Messages. It is highly recommended in case of any mishap or data loss to back up all your important data.
  3. Install ADB and Fastboot drivers on your PC.
  4. Enable USB Debugging.
  5. Install Motorola USB drivers for your Motorola E. Download
  6. Unlock your Moto E bootloader through Motorola official site. Here
  7. TWRP recovery image for your Moto E ( moto_e_twrp2.7.0.0_v1.2.img  ) 
  8. Download SuperSU for Moto E. UPDATE-SuperSU-vx.xx.zip.

How To Root and Install TWRP Recovery on Moto E:

  • Download the SuperSU from given link and place in your SD card root folder.
  • Now rename moto_e_twrp2.7.0.0_v1.2 to Recovery.img.
  • Place the Recovery.img in Android SDK folder.
  • Connect your Moto E with computer.
  • Now open the SDK folder and open a command prompt in the folder.
  • Typer the following command in command prompt.

adb reboot bootloader

  • Now when your device is in bootloader mode type in the following command.

fastboot flash recovery recovery.img

  • Wait for the process to complete. When your recovery is flashed. Type the following command.

fastboot reboot

  • Now all you have to do is now install SuperSU for that type the following command.

adb reboot recovery

  • Your device is in TWRP Recovery select install to find the UPDATE-SuperSU-vx.xx.zip.
  • After finding SuperSU tap on it to install and wait for the installation to be completed.

Here you go you have successfully Root and install TWRP Recovery on your Moto E. Join our Forum for discussion on Moto E Root, Recoveries, Custom Roms, Mods, Q&A and much more.

Install CWM Recovery and Root Sony Xperia Z 10.5.A.0.230 Firmware [How To – Guide]

Install CWM Recovery and Root Sony Xperia Z 10.5.A.0.230 Firmware [How To – Guide]

Xperia Z’s Android 4.4.2 KitKat firmware is already out, a while ago we posted the guide to update your Xperia Z to the latest firmware. To unleash the power of Xperia Z running the latest 10.5.A.0.230, famous XDA Developer DooMLord, as always, has brought up CWM 6.0.4.6 recovery for the device once again. Those of you looking for the guide may end their search now and follow this guide carefully in order to install the CWM recovery and root their device successfully.

Before we head towards the installation instructions, it is important to clear any confusions that the newbies may have. Let’s have a look on a brief intro of the custom recovery and , that is ClockworkMod in our case  and also go through a brief intro of the root access and then head towards the instructions to install ClockworkMod [CWM] recovery and root Sony Xperia Z C6602 and C6603 running latest Android 4.4.2 KitKat 10.5.A.0.230 Firmware.

CWM and Root Xperia Z KitKat

A custom recovery allows you to install custom roms, mods etc. Along with these, you can make a Nandroid backup, this helps you a lot as you can move back to the previous working state of your phone at any time you want if you have backed up your current system. In some cases, to root the phone you need to flash SuperSu.zip file in the custom recovery, having installed the recovery might be of some help for you. You can also wipe cache and dalvik cache of your phone using a custom recovery. There is alot more you can do using a custom recovery, you mayinstall one and experience it yourself for further know-how.

Rooting your phone gives you complete access over all the data which is apparently locked by the manufacturers. This includes removal of the factory restrictions and making changes to the internal system and the operating system. Gaining the root access gives you the privileges to install various applications to enhance the performance of your device, allows you to remove the built-in applications/programs, helps you to upgrade the battery life of your device & install the apps which require the root access for the proper functionality and modify your device in so many other ways e.g using mods and flashing custom recoveries and custom ROMs. There is a laundry list of things you can do after having your device rooted and installed the custom recovery, now once you’re rooted and haveinstalled custom recovery, go ahead and enjoy it on your phone. Here’s our collection of 10 Best Root Apps.


Pre-Installation Instructions:

      1. The CWM  recovery is only for Xperia Z C6602/C6603 running stock or stock based Android 4.4.2 KitKat [10.5.A.0.230] Firwmare. Check your firmware version in Settings > About Device and make sure that it matches the one mentioned here.
      2. You must have installed Android ADB & Fastboot drivers. Follow the quick guide here.
      3. Your device must have an unlocked bootloaderFollow our full guide here in order to unlock.
      4. Please make sure that your phone’s battery is charged at least over 60%. This is highly recommended in order to prevent any power issues during the recovery flashing process.
      5. Backup each and everything on your Android phone as follows:
      6. Backup all your important contacts, find the full guide here.
      7. Backup all your important sms messages, find the full guide here.
      8. Backup all your important call logs, find the full guide here.
      9. Backup all your important media content manually. (Copy to your PC.)
      10. Backup all your apps / data. If you’ve rooted your device, use Titanium Backup to do so. Follow the full guide here.
      11. Backup your current system using a custom recovery (CWM or TWRP) if you’ve flashed one. This is recommended in case something goes wrong with CWM installation, you can use the custom recovery and return to the old working state of your system.
      12. Enable USB debugging mode on your device.  Get it in Settings > Developer Options > USB Debugging mode.
      13. Use only OEM data cable to establish connection between your PC and Phone.
      14. Alright! Follow this guide to the letter now.

If you want to root your device without unlocking the bootloader, check out this post.

Disclaimer: The methods involved in flashing custom roms and rooting your phone is highly custom and may result in bricking your device, and has nothing to do with Google or the device manufacturer that is SONY in our case. Also rooting your device will void its warranty and you will be no longer eligible for any kind of free device services by the manufacturers/warranty providers. In case of any mishap we may not be held responsible. Follow these instructions to the letter to avoid any mishap or bricking. Make sure that whatever you do, you are doing it at your own responsibility.


How to Install CWM 6 Recovery on Xperia Z:

      1. Download Doomlord’s Advanced Stock Kernel with CWM Recovery
      2. Copy the downloaded Advanced Stock Kernel.zip file to your phone’s SD card.
      3. Extract the downloaded .zip folder on your PC, you will get a Boot.img file.
      4. Place the extracted Boot.img file in the Minimal ADB & Fastboot folder that you created using our ADB & Fastboot Quick Setup Guide.
      5. If you are using Android ADB & Fastboot full package, you can place the downloaded Recovery.img file in the Fastboot folder or in the Platform-tools folder.
      6. Open the folder where you placed the Boot.img  file. E.g Minimal ADB & Fastboot or Fastboot or Platform Tools.
      7. Press and hold the shift key and right click on an empty area within the folder, and click on “Open Command Window Here”.
      8. Turn off your Xperia Z completely.
      9. Now press the Volume Up Key and while keeping it pressed plug in the USB cable.
      10. You should see a blue light in the notification light of your phone, that means your device is now connected in Fastboot mode.
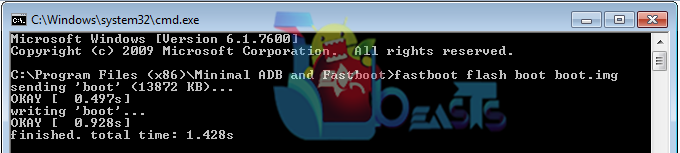
      11. Now type the following command: fastboot flash boot boot.img
      12. Hit Enter and it will quickly flash CWM 6.0.4.6 recovery in your Xperia Z.
      13. Once recovery is flashed, now issue this command “Fastboot reboot”
      14. Your device will reboot now, as soon as you see the Sony logo,  and the pink LED, press Volume Up key to enter recovery.
      15. Once you’re in recovery, select “Install Zip > Choose Zip from SD Card > Advanced Stock Kernel with CWM.zip > Yes”. [Important]
      16. This will flash the Kernel in your phone now. Once flashed, reboot your device.
      17. Congrats! You should now see the custom recovery.
Screenshot_1


How To Root Xperia Z Running Android 4.4.2 KitKat 10.5.A.0.230 Firmware:

    1. Download SuperSu.zip file.
    2. Copy the downloaded .zip file to your phone’s sd card.
    3. Boot into CWM recovery now using the method explained above.
    4. Once in recovery, select “Install >Choose Zip from SDcard > SuperSu.zip > Yes “.
    5. Wait for recovery to flash the SuperSu.zip file, once finished reboot your device.
    6. Check SuperSu in the app drawer now.
  1. SuperSu

How to install busybox now?

    1. Go to Google Play Store on your phone.
    2. Search for “Busybox Installter”.
    3. Once you find it, install it.
    4. Run the Busybox installer and proceed with the installation.
    5. That’s all!

How to check if the device is properly rooted or not?

  1. To do so, go to Google Play Store on your Xperia Z.
  2. Find “Root Checker” and install it.
  3. Open Root Checker.
  4. Tap “Verify Root”.
  5. It will ask you for SuperSu rights, tap “Grant”.
  6. It should show you Root Access Verified Now!
  7. That’s All!

1560688_10202529514651766_2061540064_n


That’s All with the recovery installation. In case you got any queries or face any difficulties regarding this post, please feel free to stop by the comment box below and let us know. We will get back to you as soon as possible. Thanks all.

Update Sony Xperia Z C6602 and C6603 to Official Android 4.4.2 KitKat 10.5.A.0.230 Firmware

15
Update Sony Xperia Z C6602 and C6603 to Official Android 4.4.2 KitKat 10.5.A.0.230 Firmware

Sony’s past flagship, the Xperia Z has finally started receiving Android 4.4.2 KitKat few days ago. According to Sony, the new software update packs up a lot of performance enhancements and bug fixes. There are some camera enhancements made as well including Creative Effect Video, colorful emojis are added to the messaging app and the in-built screenshot menu has made it easier to take screenshots on the device. Some other apps have also got minor UI updates. Android 4.4.2 KitKat for Xperia Z is based on the build number 10.5.A.0.230.

As usual, these software updates roll out depending on the regions and there might be some regions which are yet to get this update. For the Android freaks, who own this device and cannot wait for the update to reach em’ through OTA or through Sony PC Companion, we’ve made a full guide here that will let you update your Xperia Z C6602 and C6603 to Android 4.4.2 KitKat 10.5.A.0.230 firmware manually using the Sony Flashtool. All you need is, follow this guide carefully. Xperia z KitKat

Pre-Installation Instructions:

  1. As mentioned, this firmware is only for Xperia Z C6602 and C6603. Do not try this on any other phone, that may result in bricking your device. Check your device’s model number in Settings > About device.
  2. You must have installed Sony Flashtool. Find the full guide here.
  3. After installing Sony Flashtool, open the Flashtool folder from the drive where you installed it.
  4. Now open Flashtool>Drivers>Flashtool-drivers.exe and install the Flashtool, Fastboot & Xperia Z drivers from the list. [Important]
  5. Your phone must be charged at least over 60%. This is highly recommended in order to prevent any power issues during the flashing process.
  6. Enable USB debugging mode on your device. To do so, tap settings>developer options>USB debugging. If you can’t find developer options in settings, then tap settings > about device and tap “Build Number” for 7 times and you’ll get em’ activated under settings.
  7. Make sure that you back up all your important media content,  contactscall logs and text messages. This is highly recommended and important in case something goes wrong during the flashing process or in case you select the data wipe option before flashing. You can easily restore whenever you need.
  8. To flash this firmware, you do not need to root your device, you do not need to unlock the bootloader. All you need is, your device must be the one mentioned and must be running on Android 4.2.2 or 4.3 Jelly Bean.
  9. Download the firmware file properly.
  10. Use the OEM data cable to connect your phone to your PC. Using any other data cable might cause connection problems.
  11. This firmware can be flashed on Xperia Z in any region/any country.
  12. Alright! Follow this guide to the letter in order to prevent any mishap.

How to Install Android 4.4.2 KitKat 10.5.A.0.230 Firmware on Xperia Z:

  1. Before moving forward, please make sure that you’ve read the pre requisites and ensure that you are set to go ahead.
  2. Download the latest Android 4.4.2 KitKat 10.5.A.0.230 FTF file: Xperia Z C6602 | Xperia Z C6603   [Generic]
  3. Extract the downloaded rar file and you will get the ftf.
  4. Copy the file and paste in Flashtool>Firmwares folder.
  5. Open Flashtool.exe now.
  6. Hit the small lightening button on the top left corner and select Flashmode.
  7. Select the FTF firmware file that you placed in the Firmware folder.
  8. From the right side, select what do you want to wipe. Data, cache and apps log, all wipes are recommended, however you may select if you don’t want.
  9. Click on OK, and it will start preparing the firmware for flashing. This may take a little while to load.
  10. As soon as the firmware is loaded, it will prompt you to attach the phone by turning it off and keeping the back key press.
  11. For Xperia Z, Volume Down key will do the job of back key, just turn off your phone, keep the Volume Down key pressed and plug in the data cable.
  12. As soon as the phone is detected in Flashmode, the firmware will start flashing, Do not leave the Volume Down key until the process is complete.
  13. As soon as you see “Flashing ended or Finished Flashing” leave the Volume Down key, plug the cable out and reboot.
  14. That’s All! Congrats! You’ve installed latest Android 4.4.2 KitKat on your Xperia Z. Enjoy

That’s All. In case you got any queries or you face any problems regarding this post, feel free to reach us through the comment box below. We will get back to you as soon as possible. Thank you all.

Bring Facebook Chat Head To Default Messaging in iOS 7

Bring Facebook Chat Head To Default Messaging in iOS 7

Facebook Messanger was released with one motive in mind, to give the users a whole new world of chatting experience with friends without being a part of the original Facebook app. As the time progressed, they kept on giving better and better things in it, and the best one that I liked was the Chat Head. Well it allows you to minimize the conversation and if that person sends you a message you will be notified on the same Chat Head, without any need to open the app. On Android, Ninja Messanger is the app that allows you to do the same thing on text messaging app.

Since the Jailbreak community is doing everything it can to make iOS get on the top of Market again, though it is not possible but it is better to be late than never. MessageHead is a tweak that allows users to create Chat head of their conversations and stop yourself from opening the app over again. The tweaks also has some configurations, allowing you to change the design of Pop-up. You can access the Chat Head from any other app you are using by tapping the contact picture which will be anywhere on the screen. Further it is up-to you to explore the tweak.

Screenshot_5

Jailbreak your iOS Device.

Since the following tutorial needs an iOS device which is Jailbroken, you need to Jailbreak your device. If your device is still in its normal condition. Follow our Jailbreak Section to find out how to Jailbreak your device.

Download MessageHead:

messageheads

  1. Open Cydia.
  2. Search for MessageHead.
  3. Tap MessageHead once the search is over.
  4. Purchase the app and wait for the Install button to appear
  5. Tap Install on the top right corner.
  6. Tap Confirm.
  7. Restart your Device.
  8. One thing you must keep in mind is that, if you have already installed SmartClose Tweak, uninstall it for no bugs in this one

AltKeyboard 2 Is Available For iOS 7, The Best Keyboard Tweak Ever

0
AltKeyboard 2 Is Available For iOS 7, The Best Keyboard Tweak Ever

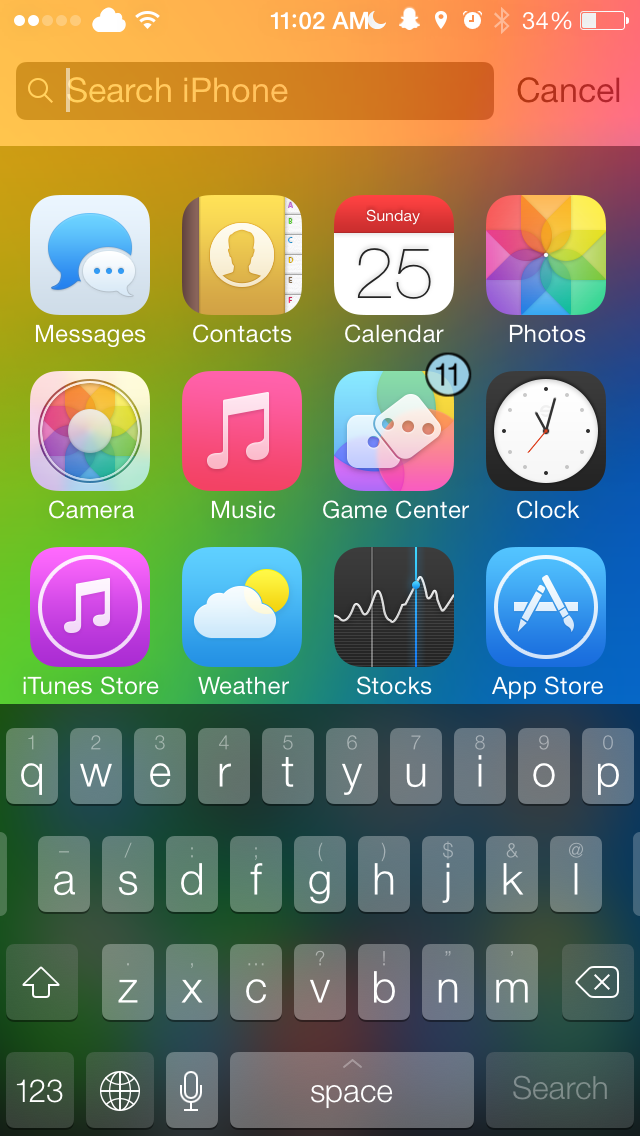
AltKeyboard was first located in iOS 6 and after a really long wait, finally it has been released for iOS 7 as well. For all those who used it on iOS 6 must have been familiar with its amazing features, despite in iOS the amount of features are added and the tweak is enhanced to an ultimate level. It replaces your default keyboard and the one that replaces the original one is far  more better than the original and something you’ve never expected. It’ll bring all the shortcuts that a Keyboard should have and also there is no need to switch between qwerty and numerical keyboard again and again.
The biggest change you will see after activating the AltKeyboard 2 is the alternate keys being placed above the original ones. This will be the best thing you will find in this keyboard and in an unusual pattern, swiping up on the key will bring the alternate one and swiping down will give you the capitalized one. With the help of Shift key you can select the text by swiping left and right. Space bar will give you the power to Copy, Cut and Paste. Backspace key will give you the undo and redo option. The best one is that you can cancel the Autocorrect with the little ‘X’ with the suggestion. Alright, further it is up to you to find out more about it.

Screenshot_5

Jailbreak your iOS Device.

Since the following tutorial needs an iOS device which is Jailbroken, you need to Jailbreak your device. If your device is still in its normal condition. Follow our Jailbreak Section to find out how to Jailbreak your device.

Download AltKeyboard 2:

AltKeyboard1

  1. Open Cydia.
  2. Search for AltKeyboard 2.
  3. Tap AltKeyboard 2 once the search is over.
  4. Purchase the app and wait for the Install button to appear
  5. Tap Install on the top right corner.
  6. Tap Confirm.
  7. Restart your Device.

How To Change Country In the iTunes and App Store

0
How To Change Country In the iTunes and App Store

Despite the fact that App Stores are offering so many apps to use, yet not all of them are available for all the Countries, some of the best ones are only available for specific countries and even if you download it from 3rd party sources, still it can’t be used outside that country. While some are only restricted till the download begins, if you download such apps from any other source than App Store you can use that app without any problem till it asks for the update.

This is exactly what we will show you, how to change your country in iTunes as well as Apple App Store, the process is quite simple, however it might require something more than editing, you will need to create a new account, every time you want to download app from some specific country, for example if you want to download apps from the USA, then you need to create an account with USA selected as a country, let’s follow the tutorial and see what happens.

App-Store-New-Accounts

Change Country In iOS device:

  1. Open Settings > iTunes and App Store.
  2. Tap on the Apple ID and Sign Out.
  3. Now Open App Store and Download the app you want.
  4. Choose Create a New ID from the Pop-up and proceed.
  5. Choose the country from where you want to download the app and Accept the Terms and Conditions.
  6. Next use an E-Mail address exclusive for this account, you will need a new Email for this process.
  7. After that complete the process and Verify the account.
  8. That is all.

Change Country On Mac:

  1. Open iTunes and Click iTunes Store.
  2. Scroll down the bottom and once you see the Flag icon, Click on it.
  3. On the next screen you will see a various Flags, choose the one from where you want to download the app from.
  4. Now log-in using the account you just created and you are good to go

Add LG Inspired Knock Gesture In iPhone

0
Add LG Inspired Knock Gesture In iPhone

LG Inspired Knock Gesture is becoming really popular among the Jailbreak community, first we saw the KnockOn inspired SmartTap Tweak by Elias Limneos and now we get to see the Knock. A simple activator, that adds two new gestures to your iPhone, you can Knock the back of the iPhone for specific action and Knock the Side of the iPhone for another one. Device accelerometer detects the Knock gesture and executes the actions according to it and by the looks of it, a lot of work has been done into this development to prevent anything wrong.

Knock Settings will be added to the Activator after installing Knock, open Activator settings and you will see two new gestures to assign actions to. However, you have to get addicted to such stuff if you want to use them for example, we mostly throw our phone on the Soft grounds, like Sofa or Bed, most of the times it activates the double tap action on the back thus executing the command given to it.

Screenshot_5

For the moment on, you can add only Two gestures and since it is the first release, I am not going to say about Bugs, because there isn’t even a single. However, the sensitivity can be changed in further updates and also the amount of gestures can be increased too. Without further ado, let’s see how we can install and activate it.

Jailbreak your iOS Device.

Since the following tutorial needs an iOS device which is Jailbroken, you need to Jailbreak your device. If your device is still in its normal condition. Follow our Jailbreak Section to find out how to Jailbreak your device.

Download Knock:

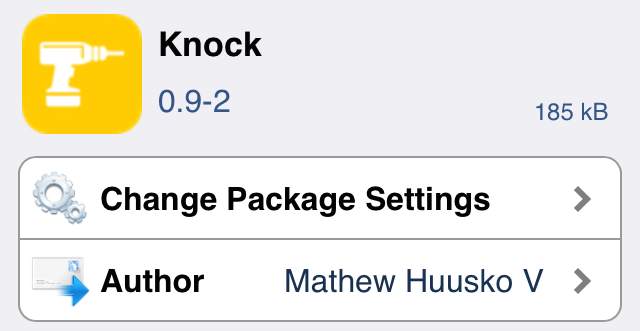
Knock-Cydia

  1. Open Cydia.
  2. Search for Knock .
  3. Tap Knock once the search is over.
  4. Purchase the app and wait for the Install button to appear
  5. Tap Install on the top right corner.
  6. Tap Confirm.
  7. Restart your Device.

How To Use Knock:

  1. Open Settings.
  2. Navigate To Activator > Anywhere
  3. Scroll down and you will see Knock/Hard Tap.
  4. Suggest the Gesture for the first Action.
  5. Suggest the Action for the Next gesture.
  6. Once done, double tap the side to see what is happening and also try the back one too.
  7. Make sure to Enjoy!

How To Unlock Moto X Running Kit Kat [ Dev Ed ]

0
How To Unlock Moto X Running Kit Kat [ Dev Ed ]

I love to poke in XDA Developer Forum and most of the time I have found interesting stuff as well. And then I also share all those helpful tips and tricks with you all. Today I’ll tell you how to Unlock and Root Moto X Developer Edition Running KitKat. Following are the step by step instruction guide for Moto X Dev Ed and for non Dev Ed. Thanks to XDA Member.

moto-x-2-hero

How To Unlock Moto X Running Kit Kat [ Dev Ed ]:

  • First unlock and root Moto X Developer Edition.
  • Use the Following link to Unlock the Moto X and also download SDK and installing Motorola Device Manager.

Unlock Moto X Bootloader

  • Now download the mfastboot.exe.
  • After download mfastboot.exe place it in same directory as fastboot.
  • Download TWRP for Moto X 4.4. Place it in same directory as fastboot.
  • After unlocking your Moto X enable USB debugging.
  • Now Download SuperSU 1.93.
  • After downloading the SuperSU put your Moto X into bootloader mode by pressing Volume Down button+power button for 3 to 4 seconds.
  • Now connect your device with PC.
  • After you device is successfully connected in bootloader mode. Open a command prompt on your PC and go to the directory where you’ve placed mfastboot.exe.
  • In command prompt writer.

mfastboot flash recovery twrp-2.6.3.1-ghost-4.4.img

  • This command will be a flash recovery on your Moto X.
  • Now in command prompt type.

fastboot reboot-bootloader

  • After your device is rebooted, disconnect your device from PC.
  • Now go into the recovery by pressing Volume down button to highlight recovery and then press volume up button to select it.
  • After getting in to the recovery tap on install button to install SuperSU.
  • Now scroll down to find SuperSU where you placed it.
  • Select the SuperSU zip file and swipe to install.

All Done. 🙂 Do tell me in comments if you face any kind of issues regarding this guide.

Images Credit | Source

How To Fix Delivery Bug in iOS 7 iMessages

0
How To Fix Delivery Bug in iOS 7 iMessages

Finally, Apple has acknowledged the problem with iMessages, that all those who have switched from Android or other devices to iPhone are experiencing a bug in their iMessages app. They’ve sent messages from their device, the app shows it as “Deleivered” but on the rear end, the person who should actually supposed to receive the message, didn’t get it. Well, of course only some of them are lucky enough to see the star trail. Apple has promised to solve this problem in near future which means in the update of iOS 7.1.2, but who can wait that long and who knows whether Apple will solve it in the next update or not.

Back to the problem, since we can’t or most of us can’t wait for the update of iOS 7.1.2,as they have to do something about it and the whole protocol runs on the iMessage priority, you won’t be able to send any message until that problem is solved. Viber and WhatsApp are the temporary solutions, but not all the times internet connectivity is there for you. So, disabling the iMessage is the best option left for all of us or there are a couple of more, but as I said the best option left and also if you want to switch to any other brand, do it on early basis, because it takes Apple 45 days to clear out all the Data and Phone number, so it is better to disassociate your Phone number ASAP.

Screenshot_5

Diable iMessages On iOS 7:

  1. Go To Settings.
  2. Scroll down and Select Messages.
  3. Toggle iMessages Off.

Screenshot_4

However, the iMessages is Wired into the whole premises of Apple, you have to make sure that your Number is not connected in any way, here are a couple of things you can try.

  1. Remove your Phone Number Form your iCloud Account using your Macbook, if you have one, Sign in and check that your number is not hidden anywhere.
  2. Call 1-800-My-Apple, and request them to remove your number from the iMessages server.
  3. Give server up-to 45 days to remove your Phone number.
  4. Reset your Apple ID and sent “Test” Stop to 48369 from your new device.

How To Identify Running Apps in iOS Using ActiveBoard

0
How To Identify Running Apps in iOS Using ActiveBoard

In Apple iOS devices, one thing which is good and something that I didn’t like, is that when you press the Home button, the applications minimizes and keep running in the Background. It should be a quit button that whenever you press it, the Application closes without running in the background, and even worse, you need to open the App Switcher to see which applications are active. In iOS 6, we saw a Jailbreak tweak named ActiveDoc, well a good news for all the iOS 7 users as its Successor ActiveBoard has arrived for the iOS 7 too.

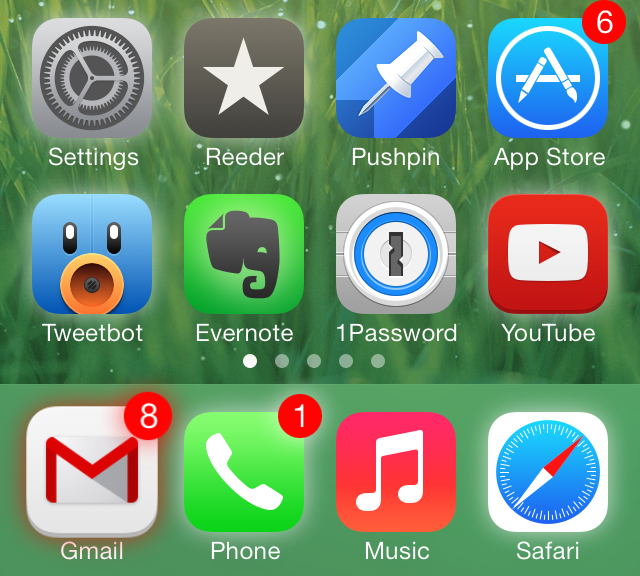
On iOS 6, ActiveDoc was applied on the applications running on the ActiveDoc only, however, ActiveBoard doesn’t imply anything like this and influences all the applications on the Entire Spring Board. Not only does it notify the running applications, but also it identifies the apps with pending notifications. There isn’t much configuration required in this tweak, once you have installed it, it will automatically start its job. All the running applications will receive a glowing perimeter, while applications with pending notifications will be having a red glowing border along with 3D Zoom animation. So, without further ado, let’s see how we can install it.

Screenshot_5

Jailbreak your iOS Device.

Since the following tutorial needs an iOS device which is Jailbroken, you need to Jailbreak your device. If your device is still in its normal condition. Follow our Jailbreak Section to find out how to Jailbreak your device.

Download ActiveBoard:

ActiveBoard-01

  1. Open Cydia.
  2. Search for ActiveBoard.
  3. Tap ActiveBoard once the search is over.
  4. Purchase the app and wait for the Install button to appear
  5. Tap Install on the top right corner.
  6. Tap Confirm.
  7. Restart your Device.

Share Any File Via AirDrop Using AnyDrop 2

0
Share Any File Via AirDrop Using AnyDrop 2

AirDrop is one of the best features introduced in iOS 7, however as Apple placed limitation on sharing, so do they have done the same on limiting of AirDrop too. AirDrop allows you to share some of the files using iFile, and that is the problem not everything can be shared using AirDrop. But since the world of Jailbreak is giving a lot of new things, they realized to increase the limitation of AirDrop too, with a Tweak called AnyDrop 2.

Now using AnyDrop 2, you can share Music App Library, Video App Libray and Photo App Library. It even has a hidden feature called YouTube Drop which allows you to download and share Youtube videos, and much more. AnyDrop 2 is a great Jailbreak tweak if you want to use AirDrop for an even great experience. Without further ado, let’s see how we can install and use it.

Screenshot_5

Jailbreak your iOS Device.

Since the following tutorial needs an iOS device which is Jailbroken, you need to Jailbreak your device. If your device is still in its normal condition. Follow our Jailbreak Section to find out how to Jailbreak your device.

Download AnyDrop 2:

  1. Open Cydia.
  2. Search for AnyDrop 2.
  3. Tap AnyDrop 2 once the search is over.
  4. Purchase the app and wait for the Install button to appear
  5. Tap Install on the top right corner.
  6. Tap Confirm.
  7. Restart your Device.

How To Use AnyDrop 2:

Screenshot_4

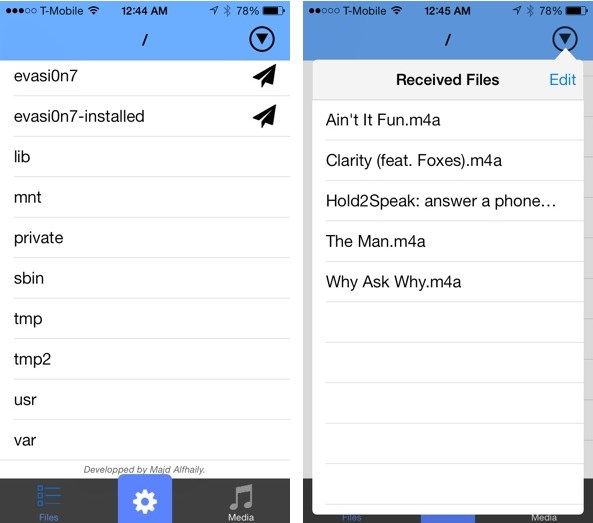
  1. There is no need to configure this app, just launch the app drawer.
  2. You will see a lot of folders, and the Play button will show you the Received files.
  3. You also see a Media tab at the bottom, allowing you to easily access all the media.
  4. All the data must be in the Phone to share not on your iCloud account.
  5. AnyDrop 2 can be used on a Non-Jailbroken devices too, but you can only send and receive the Media files, however in a Jailbroked device, you can easily send and receive, Deb files and install them using iFile.

Rumors About Apple iOS 7.1.2 Appears On The Web

0
Rumors About Apple iOS 7.1.2 Appears On The Web

Everyone, including Apple is anxiously waiting to release iOS 8 at the WWDC Keynote on June 2nd, but there is a little something that appeared on the web and has taken everyone attention, and that is the update of iOS 7.1.2. According to Macrumors, they reported that they are viweing the update of iOS 7.1.2 on several devices on the web, and since the last Friday they are seeing these hits, which afterwards Apple indicates has given to its employees for testing.

According to Macrumors:

Activity is still low, but that is typical for the early stages of update testing, particularly minor ones that may not require widespread internal or external testing.

ios-7-1-2-logo

However, the details are still a Mystery, could be only a minor bug fixes, and it is highly unlikely to see any huge change in this update, as Apple should release it in iOS 8. What we can see in this update is the iMessage Fix as Apple has acknowledged to the fact that people are suffering from it and probably the E-Mail attachment encryption to be fixed as well, since Apple confirmed to fix both of these issues in the next update.

ios_7_1_2_hits

In the meantime, users who upgraded to iOs 7.1.1 are waiting to see the official Jailbreak of these versions, which has been conquered by some hackers, but still there is no method available on the web, and it looks like the iOS 7.1.2 will delay the Jailbreak of iOS 7.1.1, but who knows that.