Home Blog Page 444

How to Root Xperia Z/ZL 10.5.A.0.230 Firmware [Locked Bootloader]

8
How to Root Xperia Z/ZL 10.5.A.0.230 Firmware [Locked Bootloader]

Xperia Z and ZL/ZQ are running on Android 4.4.2 KitKat that Sony rolled out recently based on the build number 10.5.A.0.230.  If you’ve updated to this latest firmware, and you’ve lost the root rights on your device or just in case you’re looking to root your device for the first on this latest firmware, you may find a number of methods to do so, but most probably most of them will require you to unlock the bootloader of your Sony Xperia device, but many of you might not get the root access on their device just because you don’t want to unlock the bootloader and loose the warranty and finish the official touch on the device.

Famous developer, Geohot has recently come up with Towelroot exploit that roots a number of Android devices without any hiccups here and there. The tools is a small apk file that can be installed and roots the device in just one tap, there isn’t any bootloader unlock required. A number of Xperia devices running on the kernel before 3rd of June, 2014 can be rooted using this exploit. As you move forward, we’ll be showing you how you can root your Sony Xperia Z and ZL [All variants] running on the latest Android 4.4.2 KitKat 10.5.A.0.230 firmware without unlocking the bootloader using the Towelroot.Root Xperia Z-ZL-Locked Bootloader

Here are the early preparations:

  1. This guide is only for Sony Xperia Z C6602, C6603, C6616 and Sony Xperia ZL C6502, C6503, C6506. The device must be running on the latest Android 4.4.2 KitKat firmware based on the build number 10.5.A.0.230.
  2. Make sure that your phone’s battery is charged at least over 60%. This is highly recommended in order to prevent any power issues during the rooting process.
  3. USB debugging mode must be enabled on your device. To do so, go to Settings > Developer Options > USB debugging mode > Enable. In case you can’t find the developer options, then go to Settings > About Device > Tap Build Number for 7 Times to enable the developer options.
  4. Use only on OEM data cable to establish connection between your PC and your Phone.
  5. Allow “Unknown Sources” on your phone. To do so,  go to Settings > Security > Unknown Sources > Tick.

How To Root Sony Xperia Z/ZL/ZQ Locked Bootloader:

  1. Download Towelroot apk.
  2. Connect your Xperia Z/ZL to your PC now.
  3. Copy the downloaded APK file to your device.
  4. Disconnect your device and locate the APK file on it.
  5. Tap the APK file to begin installation.
  6. Select “Package Installer” if prompted.
  7. Allow Unknown Sources from Settings > Security if required.
  8. Proceed with the installation and complete it.
  9. Now open the Towelroot application from the app drawer.
  10. Tap the button “make it ra1n” in the towelroot app.
  11. Now download SuperSu.zip file.
  12. Unzip the file, and grap Superuser.apk from the common folder in the unzipped folder.
  13. Now copy this apk to your Xperia Z/ZL, and install it using steps 2 – 8.
  14. Once installed, update Superuser or SuperSu using Google Play Store.
  15. Phewwww! That’s all, you can now enjoy your rooted Xperia Z / ZL.

TowelRoot-Verizon-At&t-SGS5

How to install busybox now?

  1. Go to Google Play Store on your phone.
  2. Search for “Busybox Installter”.
  3. Once you find it, install it.
  4. Run the Busybox installer and proceed with the installation.
  5. That’s all!

How to check if the device is properly rooted or not?

  1. To do so, go to Google Play Store on your Xperia Z/ZL.
  2. Find “Root Checker” and install it.
  3. Open Root Checker.
  4. Tap “Verify Root”.
  5. It will ask you for SuperSu rights, tap “Grant”.
  6. It should show you Root Access Verified Now!
  7. That’s All!

1560688_10202529514651766_2061540064_n


What to do once you’re rooted?

Rooting your phone gives you complete access over all the data which is apparently locked by the manufacturers. This includes removal of the factory restrictions and making changes to the internal system and the operating system. Gaining the root access gives you the privileges to install various applications to enhance the performance of your device, allows you to remove the built-in applications/programs, helps you to upgrade the battery life of your device & install the apps which require the root access for the proper functionality and modify your device in so many other ways e.g using mods and flashing custom recoveries and custom ROMs. Here’s our collection of 10 Best Root Apps.

That’s all. Please consider a donation to the developer for his hardwork on this application. Just in case you got any queries or you face any difficulties regarding this post, feel free to reach us through the comment box below. We will try our best to help you out.

Install CWM/TWRP Recovery and Root Sony Xperia ZQ/ZL C6502/3/6 10.5.A.0.230 Firmware

Install CWM/TWRP Recovery and Root Sony Xperia ZQ/ZL C6502/3/6 10.5.A.0.230 Firmware

Xperia ZL, also known as Sony Xperia ZQ is another sibling of Sony’s past flagship device Xperia Z, that also sports also same specifications as Xperia Z. Sony recently updated the Xperia Z and its siblings to latest Android 4.4.2 KitKat firmware based on the build number 10.5.A.0.230. If you’ve updated your device to this latest firmware and you happen to be an Android power user, you must be bored with the stock firmware and look out for some tweaks and modifications that you apply to your Xperia ZL/ZQ and break the stock boundaries on your device.

To do this, you will need a custom recovery and root access on your device. Before you start looking out for a recovery and root access method, we’ve done this job for you and explained the method to do so in the following comprehensive guide. As you move forward, you will find the method to install CWM or TWRP recovery on Sony Xperia ZQ/ZL running latest Android 4.4.2 KitKat 10.5.A.0.230 firmware and also learn how you can root this firmware on your device. All you need is, you need to follow this guide carefully. Before we head towards the pre-installation instructions, let’s have a look on brief introduction of the custom recovery and root access in order to remove any confusions that the newbies may have.xperia-zl-black-1240x840-c1551e96403e5f41596912654326b0b6

What is a Custom Recovery and Root Access?

A custom recovery allows you to install custom roms, mods etc. Along with these, you can make a Nandroid backup, this helps you a lot as you can move back to the previous working state of your phone at any time you want if you have backed up your current system. In some cases, to root the phone you need to flash SuperSu.zip file in the custom recovery, having installed the recovery might be of some help for you. You can also wipe cache and dalvik cache of your phone using a custom recovery. There is alot more you can do using a custom recovery, you may install one and experience it yourself for further know-how.

Rooting your phone gives you complete access over all the data which is apparently locked by the manufacturers. This includes removal of the factory restrictions and making changes to the internal system and the operating system. Gaining the root access gives you the privileges to install various applications to enhance the performance of your device, allows you to remove the built-in applications/programs, helps you to upgrade the battery life of your device & install the apps which require the root access for the proper functionality and modify your device in so many other ways e.g using mods and flashing custom recoveries and custom ROMs. Here’s our collection of 10 Best Root Apps.

Pre-Installation Instructions:

  1. The guide is only for Xperia ZL/ZQ C6502/C6503/C6506 running .230 firmware. Check your firmware version in Settings > About Device and make sure that it matches the one mentioned here.
  2. You must have installed Android ADB & Fastboot drivers. Follow the quick guide here.
  3. Your device must have an unlocked bootloaderFollow our full guide here in order to unlock.
  4. Please make sure that your phone’s battery is charged at least over 60%. This is highly recommended in order to prevent any power issues during the recovery flashing process.
  5. Backup each and everything on your Android phone as follows:
  6. Backup all your important contacts, find the full guide here.
  7. Backup all your important sms messages, find the full guide here.
  8. Backup all your important call logs, find the full guide here.
  9. Backup all your important media content manually. (Copy to your PC.)
  10. Backup all your apps / data. If you’ve rooted your device, use Titanium Backup to do so. Follow the full guide here.
  11. Backup your current system using a custom recovery (CWM or TWRP) if you’ve flashed one. This is recommended in case something goes wrong with CWM installation, you can use the custom recovery and return to the old working state of your system.
  12. Enable USB debugging mode on your device.  Get it in Settings > Developer Options > USB Debugging mode.
  13. Use only OEM data cable to establish connection between your PC and Phone.
  14. Alright! Follow this guide to the letter now.
Disclaimer: The methods involved in flashing custom roms and rooting your phone is highly custom and may result in bricking your device, and has nothing to do with Google or the device manufacturer that is SONY in our case. Also rooting your device will void its warranty and you will be no longer eligible for any kind of free device services by the manufacturers/warranty providers. In case of any mishap we may not be held responsible. Follow these instructions to the letter to avoid any mishap or bricking. Make sure that whatever you do, you are doing it at your own responsibility.


If you want to root your device without unlocking the bootloader, check out this post.

How To Install CWM/TWRP Recovery and Root Sony Xperia ZQ/ZL C6502/3/6 10.5.A.0.230 Firmware:

  1. Download  Advanced Stock Kernel with CWM Recovery
  2. Extract the downloaded .zip folder on your PC, you will get a .img file, rename this to Boot.img.
  3. Place the extracted Boot.img file in the Minimal ADB & Fastboot folder that you created using our ADB & Fastboot Quick Setup Guide.
  4. If you are using Android ADB & Fastboot full package, you can place the downloaded Recovery.img file in the Fastboot folder or in the Platform-tools folder.
  5. Open the folder where you placed the Boot.img  file. E.g Minimal ADB & Fastboot or Fastboot or Platform Tools.
  6. Press and hold the shift key and right click on an empty area within the folder, and click on “Open Command Window Here”.
  7. Turn off your Xperia ZQ/ZL completely.
  8. Now press the Volume Up Key and while keeping it pressed plug in the USB cable.
  9. You should see a blue light in the notification light of your phone, that means your device is now connected in Fastboot mode.
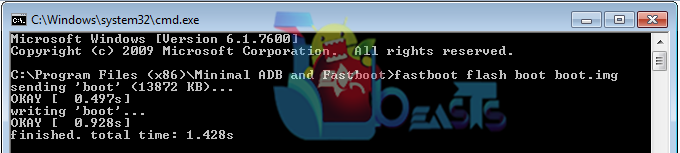
  10. Now type the following command: fastboot flash boot boot.img
  11. Hit Enter and it will quickly flash CWM and TWRP recovery in your Xperia ZQ/ZL.
  12. Once recovery is flashed, now issue this command “Fastboot reboot”
  13. Your device will reboot now, as soon as you see the Sony logo,  and the pink LED, press Volume Up key to enter CWM recovery and Volume Down to enter TWRP recovery.
  14. Congrats! You should now see the custom recovery.

Screenshot_1


How To Root Xperia ZL/ZQ Running Android 4.4.2 KitKat 10.5.A.0.230 Firmware:

    1. Download SuperSu.zip file.
    2. Copy the downloaded .zip file to your phone’s sd card.
    3. Boot into CWM recovery now using the method explained above.
    4. Once in recovery, select “Install >Choose Zip from SDcard > SuperSu.zip > Yes “.
    5. Wait for recovery to flash the SuperSu.zip file, once finished reboot your device.
    6. Check SuperSu in the app drawer now.
  1. SuperSu

How to install busybox now?

  1. Go to Google Play Store on your phone.
  2. Search for “Busybox Installter”.
  3. Once you find it, install it.
  4. Run the Busybox installer and proceed with the installation.
  5. That’s all!

How to check if the device is properly rooted or not?

  1. To do so, go to Google Play Store on your Xperia ZQ/ZL.
  2. Find “Root Checker” and install it.
  3. Open Root Checker.
  4. Tap “Verify Root”.
  5. It will ask you for SuperSu rights, tap “Grant”.
  6. It should show you Root Access Verified Now!
  7. That’s All!

1560688_10202529514651766_2061540064_n


Credits: Gustavo RD78

That’s All with the recovery installation. In case you got any queries or face any difficulties regarding this post, please feel free to stop by the comment box below and let us know. We will get back to you as soon as possible. Thanks all.

Sunrise Calendar Apk & Review

Sunrise Calendar Apk & Review

Sunrise Calendar, a smart calendar app for Android that aggregates users’ personal and work calendar. Your Facebook friends’ birthday reminders, Linkedin appointments, Evernote reminders and much more, comes all under one app. So, now you can start your day with this cool Sunrise Calendar. When the app first arrived, the default method for signing up was through Facebook which had been a good enough reason. Now, you will also have the option to sign in through your Google account.

Sunrise Calendar Apk & Review

You can also add your work and personal accounts, Google accounts and Linkedin accounts to the calendar. What makes sunrise most enjoyable is its great design to give you a layout of what your day is going to look like. So, from the beginning of the day you can see how you are going to dress according to the weather outside. And further more, you can even see what appointments and meetings you have lined up for the day or which events you are supposed to attend etc.

Beautiful Widgets

The beneficial feature about the app is that it automatically adds up icons like Skype to the calendar if you have a Skype appointment or it will put up a meal icon if you have a dinner lined up for the night.

Maps

The calendar will be updated by Google maps to make it more convenient for you to reach your destination. You’ll no longer look for the address or get late for your meetings. You can also shift between the views from month view to 2 week view and vice versa, just to have a broader eye on your schedule. To shift back to the day simply tap on the icon in the bottom left hand corner. If you tap on the sunrise icon, you will be able to see all your invitations and  also you can add a new event just by tapping on the + sign.

Birthday Reminders

If you sign in through Facebook, you will be able to add all of your friends’ birthdays to the calendar, so that you know when and whom you should be wishing. The cool feature is that you can wish your friends directly through the app. You will be given an option to either post on their timelines or send them a birthday text message right within the app.

Evernote Reminders

The app also supports updates from Evernote which is a very useful feature. All your reminders from Evernote will be shown in Sunrise calendar and can be edited with this app as well.

Travels Plans

Moreover, it gives you a Tripit information for your next flight as well as Foursquare. It also gives two-way synchronization for Github and Asana.

Songkick

You can also get updated for the concerts happening in the future by it’s Songkick services. Sunrise is a very nice organizing app especially if you have busy schedules and you fear to miss your appointments or other life events. It notifies you in time and never gets late. The app can be synchronized with many popular apps like Facebook, Evernote, Tripit, Asana and Github.

Download from Sunrise Calendar Google Play store and also you can download Sunrise Calendar apk.

Steps To Fix Samsung Galaxy S3 ‘NOT’ Booting Up

0
Steps To Fix Samsung Galaxy S3 ‘NOT’ Booting Up

Some of Samsung Galaxy S3 user’s have told us that their device is not booting up and they’ve tried everything. Samsung Galaxy S3 was the King once in smartphone world, with its awesome specs and features but as the time has passed with newer updates, many new bugs came along. Well, no need to worry our team has found all the possible solutions that can help you ” To Fix Samsung Galaxy S3 not Booting Up and stuck conditions”.

Fix Samsung Fix Galaxy Not Registered On Network

Also See: How To Fix Samsung Galaxy Not Registered On Network

How To Fix Samsung Galaxy S3 not Booting Up:

  • First start with Hard reset Samsung Galaxy S3. This will help you to recover your device from ‘Stuck’ or ‘not Booting Up condition’.
  • Press and Hold VOLUME UP + Home Button + Power together to go into recovery.
  • When you see a list and Android logo release all the buttons.
  • Now select Wipe data/Factory reset using volume button to navigate and press power button to select.
  • After selecting Wipe data/Factory reset, now choose “delete all user data”.
  • Wait for process to complete and then go back to main menu and select reboot.

Tips Might Work:

Remove your battery then press and hold power button for 15-20 seconds. After that, insert the battery back into your device and try to turn on your device.

Boot your device into Safe Mode:

  • First press the power + hold power button.
  • When Samsung logo appears on your screen release the power button and press volume for 5-7 seconds.
  • Your device will reboot if you have properly done all the steps.
  • When your device turn on  you’ll see SafeMode text in right corner of your side.
  • After trying all these steps your device is turning on then it means there is no issue with hardware. Delete all the recent apps that you’ve installed recently.

If none of this method has helped you then you should try replacing the battery. Well, for us this might be the first step that you should do when your Samsung Galaxy S3 is not booting up.

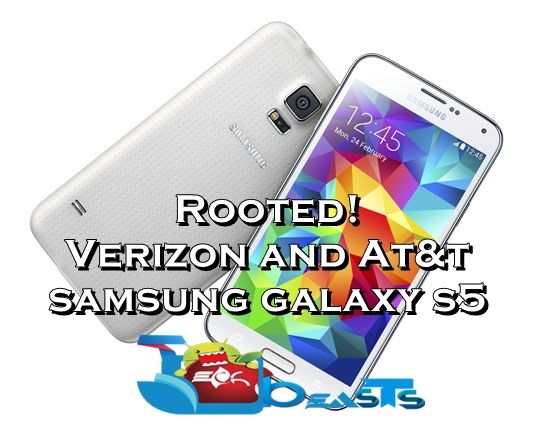
How To Root Verizon and At&t Galaxy S5 Without Voiding Knox Warranty

How To Root Verizon and At&t Galaxy S5 Without Voiding Knox Warranty

A number of the Galaxy S5 variants was rooted by the developers even before the device made its way to most of the local markets, but the two variants At&t and Verizon have always remain the toughest to gain the root access on. Earlier flagship devices of Samsung were easily rooted as the bootloaders were easily unlocked, some within hours and some within few days, but the Galaxy S5 is months old now and bounty for rooting the device reached $18000.

Finally, there is something good that made its way to the XDA-Developers forum. Famous developer Geohot has come up with an awesome application that is capable of rooting a number of devices, Samsung and Non Samsung, and luckily, this application can root the Verizon and At&t Galaxy S5. What’s even more cool is, the application doesn’t void the knox warranty counter on the device’s bootloader, you don’t need to unlock anything. This little cool app is named as TowelRoot by Geohot. Let’s have a look on how you can root your Verizon and At&t Samsung Galaxy S5 using this application and keeping your Knox Warranty safe.samsung_galaxy_s5_1

How To Root Verizon and At&t Galaxy S5 Without Voiding Knox Warranty:

    1. Download Towelroot apk.
    2. Connect your Verizon/At&t SGS 5 to your PC now.
    3. Copy the downloaded APK file to your device.
    4. Disconnect your device and locate the APK file on it.
    5. Tap the APK file to begin installation.
    6. Select “Package Installer” if prompted.
    7. Allow Unknown Sources from Settings > Security if required.
    8. Proceed with the installation and complete it.
    9. Now open the Towelroot application from the app drawer.
    10. Tap the button “make it ra1n” in the towelroot app.
    11. Now download SuperSu.zip file.
    12. Unzip the file, and grap Superuser.apk from the common folder in the unzipped folder.
    13. Now copy this apk to your Galaxy S5, and install it using steps 2 – 8.
    14. Once installed, update Superuser or SuperSu using Google Play Store.
    15. Phewwww! That’s all, you can now enjoy your rooted Verizon and At&t Galaxy S5.

TowelRoot-Verizon-At&t-SGS5

How to install busybox now?

  1. Go to Google Play Store on your phone.
  2. Search for “Busybox Installter”.
  3. Once you find it, install it.
  4. Run the Busybox installer and proceed with the installation.
  5. That’s all!

How to check if the device is properly rooted or not?

  1. To do so, go to Google Play Store on your Verizon or At&t Galaxy S5.
  2. Find “Root Checker” and install it.
  3. Open Root Checker.
  4. Tap “Verify Root”.
  5. It will ask you for SuperSu rights, tap “Grant”.
  6. It should show you Root Access Verified Now!
  7. That’s All!

1560688_10202529514651766_2061540064_n


What to do once you’re rooted?

Rooting your phone gives you complete access over all the data which is apparently locked by the manufacturers. This includes removal of the factory restrictions and making changes to the internal system and the operating system. Gaining the root access gives you the privileges to install various applications to enhance the performance of your device, allows you to remove the built-in applications/programs, helps you to upgrade the battery life of your device & install the apps which require the root access for the proper functionality and modify your device in so many other ways e.g using mods and flashing custom recoveries and custom ROMs. Here’s our collection of 10 Best Root Apps.

That’s all. Please consider a donation to the developer for his hardwork on this application. Just in case you got any queries or you face any difficulties regarding this post, feel free to reach us through the comment box below. We will try our best to help you out.
Install TWRP Recovery and Root Oppo Find 7a [How To – Guide]

Install TWRP Recovery and Root Oppo Find 7a [How To – Guide]

Oppo is currently doing quite a good job in the smartphone world as it completed its tag line of innovating the smartphone world in true meanings. The N1 gave this company the popularity and the respect it wanted to achieve and after that Oppo brought up some more great smartphones. Oppo’s Find 7a sports a beautiful 5.5 inches full HD display. 13 MP shooter is fixed at the back and a 5 MP on the front while the device is powered up with Qualcomm Snapdragon 801 Quad Core CPU clocked at 2.3 GHz accompanied by Adreno 330 GPU and a RAM of 2 GBs. These mainstream specs make this smartphone a nice choice when it comes to pick one from a set of few.

Well, if you’ve got one, or if you’re planning to get your hands on one, you may want to checkout the limitations of your device by applying different mods and custom ROMs. Before you start looking out for a way to do so, we have done the job for you as we have found the TWRP recovery and a method to root the device is explained in the following comprehensive guide. As you move forward, you will know more about a custom recovery and also why you should root your device. All you need to do for now is, follow this guide carefully.Oppo Find 7A

Custom Recovery:

A custom recovery allows you to install custom roms, mods etc. Along with these, you can make a Nandroid backup, this helps you a lot as you can move back to the previous working state of your phone at any time you want if you have backed up your current system. In some cases, to root the phone you need to flash SuperSu.zip file in the custom recovery, having installed the recovery may help you while in some cases to install the recovery easily,You can also wipe cache and dalvik cache of your phone using a custom recovery. There is a number of other options available in the custom recoveries that pave way for the device’s tweaking and deal with the problems efficiently.

Rooting an Android device:

Rooting your phone gives you complete access over all the data which is apparently locked by the manufacturers. This includes removal of the factory restrictions and making changes to the internal system and the operating system. Gaining the root access gives you the privileges to install various applications to enhance the performance of your device, allows you to remove the built-in applications/programs, helps you to upgrade the battery life of your device & install the apps which require the root access for the proper functionality and modify your device in so many other ways e.g using mods and flashing custom recoveries and custom ROMs. Here’s our collection of 10 Best Root Apps.

Pre-Installation Instructions:

  1. This guide is Oppo Find 7a only. Do not try this on any other smartphone, you may result in bricking it.
  2. You must have installed Android ADB & Fastboot drivers. Follow the quick guide here.
  3. Please make sure that your phone’s battery is charged at least over 60%. This is highly recommended in order to prevent any power issues during the recovery flashing process.
  4. Backup each and everything on your Android phone as follows:
  5. Backup all your important contacts, find the full guide here.
  6. Backup all your important sms messages, find the full guide here.
  7. Backup all your important call logs, find the full guide here.
  8. Backup all your important media content manually. (Copy to your PC.)
  9. Enable USB debugging mode on your device.  Get it in Settings > Developer Options > USB Debugging mode.
  10. Use only OEM data cable to establish connection between your PC and Phone.
  11. Alright! Follow this guide to the letter now.
Disclaimer: The methods involved in flashing custom roms and rooting your phone is highly custom and may result in bricking your device, and has nothing to do with Google or the device manufacturer that is OPPO in our case. Also rooting your device will void its warranty and you will be no longer eligible for any kind of free device services by the manufacturers/warranty providers. In case of any mishap we may not be held responsible. Follow these instructions to the letter to avoid any mishap or bricking. Make sure that whatever you do, you are doing it at your own responsibility.


How To Install TWRP Recovery and Root Oppo Find 7a:

  1. Download openrecovery-twrp-2.7.0.0-find7a.img  file.
  2. Download SuperSu.zip file and copy it to your Find 7a’s internal storage.
  3. Rename the downloaded file to twrp.img
  4. Place the renamed twrp.img file in the Minimal ADB & Fastboot folder that you created using our ADB & Fastboot Quick Setup Guide.
  5. If you are using Android ADB & Fastboot full package, you can place the downloaded Recovery.img file in the Fastboot folder or in the Platform-tools folder.
  6. Open the folder where you placed the Boot.img  file. E.g Minimal ADB & Fastboot or Fastboot or Platform Tools.
  7. Press and hold the shift key and right click on an empty area within the folder, and click on “Open Command Window Here”.
  8. Connect your Find 7a to your PC now.
  9. Now type the following commands: 

    adb reboot bootloader

    fastboot flash recovery twrp.img

    fastboot reboot

    The device will reboot now, as soon as it boots up completely, issue the following command.

    adb reboot recovery

  10. Once done with all these, you should be in the TWRP recovery.
  11. Now in TWRP recovery, select “Install > search for SuperSu.zip > flash it”.
  12. It will flash SuperSu and root your Oppo Find 7a as well now.
  13. To enter the recovery using buttons combo, turn off your Oppo Find 7a completely, now turn it on by pressing and holding Volume Down + Power Key, you should be able to see TWRP recovery.
  14. That’s all, Enjoy!

How to install busybox now?

  1. Go to Google Play Store on your phone.
  2. Search for “Busybox Installter”.
  3. Once you find it, install it.
  4. Run the Busybox installer and proceed with the installation.
  5. That’s all!

How to check if the device is properly rooted or not?

  1. To do so, go to Google Play Store on your Oppo Find 7a.
  2. Find “Root Checker” and install it.
  3. Open Root Checker.
  4. Tap “Verify Root”.
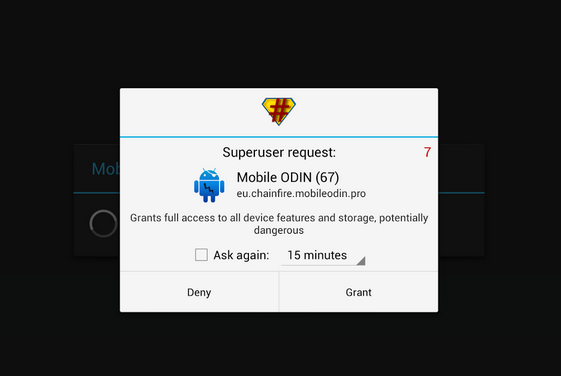
  5. It will ask you for SuperSu rights, tap “Grant”.
  6. It should show you Root Access Verified Now!
  7. That’s All!

1560688_10202529514651766_2061540064_n


That’s All with the recovery installation. In case you got any queries or face any difficulties regarding this post, please feel free to stop by the comment box below and let us know. We will get back to you as soon as possible. Thanks all.

Skater Boy for Pc – Now Skate on your Computer

Skater Boy for Pc – Now Skate on your Computer

Do you love Skating? If you really do, then Skater Boy is the game that you should play on your smartphones. Skater Boy is very simple but a highly addictive and exciting game. Both kids and adults can play this game, all you have to do is Skate and collect coins. We are sure that everybody wants to play this game but not everyone has got a smartphones. So for those people out there, today we’ll tell you how to download and install Skater Boy for PC.

Also See: showbox for pc

Skater Boy for Pc

Skater Boy for Pc Features:

When your are playing Skater Boy on PC, it will be much more easier to handle the controls and a clear view to play. You can get to choose form 3 different terrains along with the new updates in their dresses , boards and much more. You’ll get a chance to play 90 cool and exciting levels, where you’ll have to collect coins as much as you can. You can perform various cool and fun tricks to achieve high scores.

All you will need is to accelerate or jump over the obstacles on the road and score as high as possible. How to play on PC ? It’s a simple and an easy process, just click on the two buttons on your screens to get it going.

Also See: angry birds epic for pc

Download and Install Skater boy for Pc – ( Windows XP/7/8/Vista and Mac ):

  1. You need an Android emulator to run this game on your Windows PC or MAC. We recommend using BluestacksUse our guide to install it on your PC.
  2. After downloading and installing BluestacksDownload Skater Boy APK file.
  3. Also See: Install Family Guy for PC .
  4. Open the downloaded APK file now, and let Bluestacks install it.
  5. Open BlueStacks now > All Apps > Skater Boy.
  6. The app will start now, follow the on screen instructions.
  7. Follow the initial screen.
  8. Tap the screen by clicking inside the app frame.
  9. Enjoy the best Skating game.
  10. Don’t forget to let us know about your experince.
  11. That’s All!


How To Get Gmail Loading Indicator On iPhone SystemWide

0
How To Get Gmail Loading Indicator On iPhone SystemWide

If you have used Gmail app on iPhone or iPad, then you must have known the Rainbow, Circular Loading Indicator when the app is fetching some new emails or updating the Inbox. This Jailbreak tweak will set the same Loading indicator to all of the apps, making it an indicator Systemwide. This might be a Jailbreak Tweak, but you have to download it separately and install it using iFunBox or iExplorer or any other SSH supported program. We will share how to install this Tweak below.

There are both small and Large variants on this Indicator, where it can only be seen on the pages and developer is doing everything to bring it to the status bar too. You’ll find there less frames to work with the holding indicator, if you find it not much smoother as the loading indicator of the Gmail app, so without further ado, let’s see how to download and install it.

Large-Gmail-Indicator-Banner

Jailbreak your iOS Device.

Since the following tutorial needs an iOS device which is Jailbroken, you need to Jailbreak your device. If your device is still in its normal condition. Follow our Jailbreak Section to find out how to Jailbreak your device.

How To Install This Tweak:

  1. Download it from the Link
  2. Now Open either iExplorer or iFunBox.
  3. Place the Downloaded File to the /Library/Themes directory.
  4. Apple the Theme via Winterboard.
  5. After Respringing the Indicator will appera across iOS

Fix Samsung Galaxy S5 Email Sync /Unread Email Issue

0
Fix Samsung Galaxy S5 Email Sync /Unread Email Issue

After upgrading Samsung Galaxy S5 to Android 4.4.2 user’s have facing many kind of issue and not only on Samsung devices but on Google’s own Nexus device. Right our subscriber are sending mails about Samsung Galaxy s5 Unread mail issues on default Email app, Microsoft Exchange Active sync and Outlook. So i started working on it to found all possible solutions, you can check our Guide for Galaxy Note 3 Email Sync Disabled Issue that i’ve posted last month.

Fix Samsung Galaxy S5 Unread Email

Issues Reported by user’s: bwall04

If I read email on my desktop, it does not get marked as “read” on the S4.
If I DELETE email on the desktop, it DELETES on the S4
It all used to work perfectly before Kit Kat update
(Verizon Galaxy S4)
(IMAP email account)
Has anyone seen a fix yet. I have removed and recreated the account. When I do that it marks everything correctly (on the initial sync), but on subsequent syncs it does not mark the individual messages that I have read on the desktop as read.

Fix Samsung Galaxy S5 Email Sync /Unread Email Issue:

Follow all the steps carefully in order to fix Samsung Galaxy S5 Email Sync and Unread Email issues. These are very basic steps no software or app installation is required.

  • Open Settings on your Galaxy S5.
  • Then goto Account and Sync.
  • Now Enable, Turn on all.

This is will help because all of your Accounts will start the Sync and may be Unread email issue will be fixed.

  • Now goto setting again.
  • Go in to general Tab.
  • Now tap on the Accounts.
  • Select Mail app (activesync).
  • Add your login credentials.
  • Now check Ticked Synced Email.

After trying all the steps i am sure your Email Sync/Unread Email Issue will be gone for good. If there is no success after applying all these steps then try the following method.

Fix Samsung Galaxy S5 Unread Email

  • On your home screen use three finger to drag your status bar down.
  • Now you will get lot of options like Multi window, GPS, Screen Rotation, Network Restriction and many more.
  • All you’ve to do is tap on Sync and your master sync will be enabled.
  • Now apps like mails, dropbox and all the others apps will auto sync and update your mails, contacts and photos.

Join the Discussion on:

Android Central Forum | Android Forum | Digital Trends.

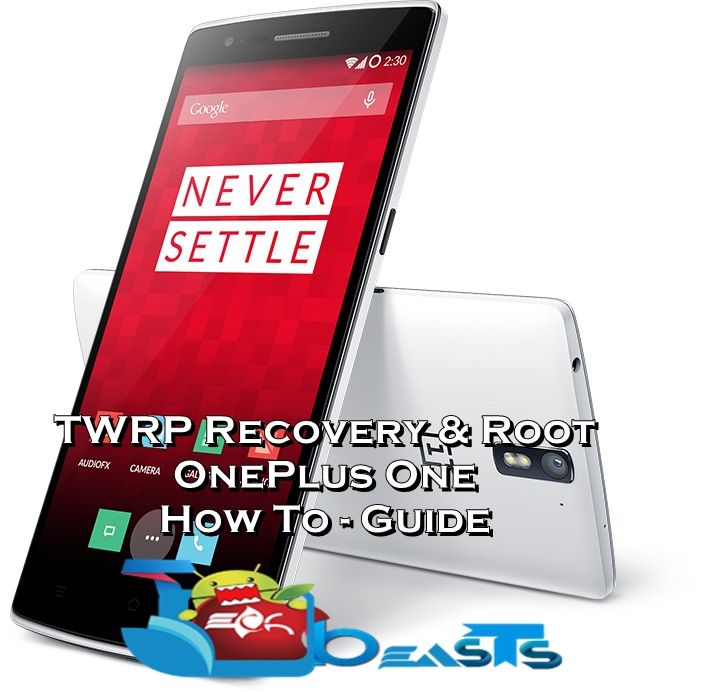
How To Install TWRP Recovery And Root OnePlus One

How To Install TWRP Recovery And Root OnePlus One

The smartphone war is at peak at the moment, all the manufacturers are bringing up their best one after another, but not everyone is able to enjoy the high end and latest smartphones available out there just because the manufacturers over-price their products. Smartphones like Galaxy S5, HTC One M8, LG G3 etc come with the high-end specifications, but there is something that gives a tough competition to all these smartphones and wins the ground when it comes to price.

OnePlus One – The Budget-Friendly Beast

If you’ve guessed it, we’re talking about the OnePlus One. OnePlus One is currently being provided to selected users who got the invitation, the phone is yet to make its way to the market. OnePlus One comes with the top-notch specifications of the time, these include Qualcomm Snapdragon 801 Quad Core CPU clocked at 2.5 GHz, Adreno 330 GPU, a RAM of 3 GB, 16 and 64 GB internal storage. A 13 MP shooter is fixed at the back while a 5 MP on the front. The phone flaunts a beautiful 5.5 inches full HD display and a battery of 3100 mAh is under the hood. Quite a nice right? Well, the thing that created hype about this smartphone was its price and it left those in thoughts always expecting high-end smartphones at a higher price. The 16 GB variant of the OnePlus One costs only $300 and you got to pay only $50 extra for the 64 GB variant as it hits the market.tWRP-Root-OnePlusOne

Well, if you ever happen to be the lucky owner of OnePlus One, you may want to test the limitations of this great smartphone. You can modify and check out the capabilities of your phone by loading a custom recovery and rooting it. Before you start looking out for both these here and there, we’ve found the methods and explained right here. In the following post, we will install TWRP recovery first and then root OnePlus One. All you need to do is, you need to follow this comprehensive guide being very careful in order to get it done successfully.

Custom Recovery:

A custom recovery allows you to install custom ROMs, mods etc. Along with these, you can make a Nandroid backup, this helps you a lot as you can move back to the previous working state of your phone at any time you want if you have backed up your current system. In some cases, to root the phone you need to flash SuperSu.zip file in the custom recovery, having installed the recovery may help you while in some cases to install the recovery easily, You can also wipe cache and Dalvik cache of your phone using a custom recovery. There is a number of other options available in the custom recoveries that pave way for the device’s tweaking and deal with the problems efficiently.

Rooting an Android device:

Rooting your phone gives you complete access over all the data which is apparently locked by the manufacturers. This includes removal of the factory restrictions and making changes to the internal system and the operating system. Gaining the root access gives you the privileges to install various applications to enhance the performance of your device, allows you to remove the built-in applications/programs, helps you to upgrade the battery life of your device & install the apps which require the root access for the proper functionality and modify your device in so many other ways e.g using mods and flashing custom recoveries and custom ROMs. Here’s our collection of 10 Best Root Apps.

OnePlus One TWRP & Root

Pre-Installation Instructions:

  1. This guide is OnePlus One only. Do not try this on any other smartphone, you may result in bricking it.
  2. You must have installed Android ADB & Fastboot drivers. Follow the quick guide here.
  3. Please make sure that your phone’s battery is charged at least over 60%. This is highly recommended in order to prevent any power issues during the recovery flashing process.
  4. Backup each and everything on your Android phone as follows:
  5. Now backup all your important contacts, find the full guide here.
  6. Also, backup all your important SMS messages, find the full guide here.
  7. Don’t forget to backup all your important call logs, find the full guide here.
  8. Backup all your important media content manually. (Copy to your PC.)
  9. Enable USB debugging mode on your device.  Get it in Settings > Developer Options > USB Debugging mode.
  10. Use only OEM data cable to establish connection between your PC and Phone.
  11. Alright! Follow this guide to the letter now.
Disclaimer: The methods involved in flashing custom roms and rooting your phone is highly custom and may result in bricking your device, and has nothing to do with Google or the device manufacturer that is OnePlus in our case. Also rooting your device will void its warranty and you will be no longer eligible for any kind of free device services by the manufacturers/warranty providers. In case of any mishap we may not be held responsible. Follow these instructions to the letter to avoid any mishap or bricking. Make sure that whatever you do, you are doing it at your own responsibility.


How To Install TWRP Recovery and Root OnePlus One:

  1. Download openrecovery-twrp-3.2.3.0-bacon.img  file.
  2. Download SuperSu.zip file and copy it to your OnePlus One’s internal storage.
  3. Rename the downloaded file to boot.img
  4. Place the renamed twrp.img file in the Minimal ADB & Fastboot folder that you created using our ADB & Fastboot Quick Setup Guide.
  5. If you are using Android ADB & Fastboot full package, you can place the downloaded Recovery.img file in the Fastboot folder or in the Platform-tools folder.
  6. Open the folder where you placed the Boot.img file. E.g Minimal ADB & Fastboot or Fastboot or Platform Tools.
  7. Press and hold the shift key and right-click on an empty area within the folder, and click on “Open Command Window Here”.
  8. Connect your OnePlus One to your PC now.
  9. Now type the following commands: 

    adb reboot bootloader

    fastboot flash recovery boot.img

    fastboot reboot

    adb reboot recovery

  10. Once done with all these, you should be in the TWRP recovery.
  11. Now in TWRP recovery, select “Install > search for SuperSu.zip > flash it”.
  12. It will flash SuperSu and root your OnePlus One as well now.
  13. That’s all, Enjoy!

How to install busybox now?

  1. Go to the Google Play Store on your phone.
  2. Search for “Busybox Installer”.
  3. Once you find it, install it.
  4. Run the Busybox installer and proceed with the installation.
  5. That’s all!

How to check if the device is properly rooted or not?

  1. To do so, go to Google Play Store on your OnePlus One.
  2. Find “Root Checker” and install it.
  3. Open Root Checker.
  4. Tap “Verify Root”.
  5. It will ask you for SuperSu rights, tap “Grant”.
  6. It should show you Root Access Verified Now!
  7. That’s All!

1560688_10202529514651766_2061540064_n


That’s All with the recovery installation. In case you got any queries or face any difficulties regarding this post, please feel free to stop by the comment box below and let us know. We will get back to you as soon as possible. Thanks all.

How To Root LG Optimus G Pro Running Android KitKat

0
How To Root LG Optimus G Pro Running Android KitKat

LG recently rolled out Android 4.4.2 KitKat update for it’s Optimus G Pro. In case you own this device and you also have updated to the latest and greatest version of Android available for this device, you may want to root it now and enhance the capabilities of your device by using root applications. We’ve found a very nice tool, that will help you to root your LG Optimus G Pro in just one click, all you need is, follow this guide carefully and get it done successfully.LG Optimus G Pro

Before we head towards the working and functionality of this tool, let’s have a look on a brief intro of the root access in order to clear any confusions that the newbies may have regarding root privileges.

Rooting your phone gives you complete access over all the data which is apparently locked by the manufacturers. This includes removal of the factory restrictions and making changes to the internal system and the operating system. Gaining the root access gives you the privileges to install various applications to enhance the performance of your device, allows you to remove the built-in applications/programs, helps you to upgrade the battery life of your device & install the apps which require the root access for the proper functionality and modify your device in so many other ways e.g using mods and custom tweaks. Here’s our collection of 10 Best Root Apps.

  Early Preparations:

  1. This method is only on for LG Optimus G Pro, for the variants listed below. Do not try this on any other device as it may result in bricking it.
  2. You must have installed LG USB drivers.
  3. Your device must be charged at least 80%. This is highly recommended in order to prevent any power issues during the rooting process.
  4. Enable USB debugging mode on your device. You can turn on developer options by tapping build number 7 times in about device, and after that enable USB debugging.
  5. Enable Flight Mode on your LG G3, Verizon LG G3 users should use Ethernet mode instead.
  6. Remove any PIN/Pattern lock from your LG G3, change the screen on time to 4 – 5 minutes from display settings.
  7. Use only on OEM datacable to establish connection between your PC and your phone.
  8. Disable any anti-virus / firewalls if activated on your PC.
  9. Make sure that your PC / Laptop has appropriate power connection or battery.

How to Root LG Optimus G Pro running KitKat:

      1. Download roottool.kitkat.zip file and extract it on your desktop.
      2. Connect your LG Optimus G Pro to your PC.
      3. Now open the file “Startroot.bat” from the roottool.kitkat.zip that you extracted.
      4. Once opened, press any key, it will quickly reboot your Optimus G Pro into recovery mode.
      5. Now in recovery, select “Sideload” using volume up and down keys and pressing the power key.
      6. Once selected “Sideload”, now select Install Zip > Chose Zip > Root.zip from the sideload.
      7. Let it flash root.zip file now, wait till it ends.
      8. Once done, go back to the main menu in recovery and select “reboot”.
      9. Once your device has booted up, open Google Play Store now and install SuperSu.
      10. You can now enjoy root privileges on your device. Enjoy!


Download Nokia lumia Wide and HD Wallpapers – All Variants

Download Nokia lumia Wide and HD Wallpapers – All Variants

Once there was a time when Nokia was the king of mobile phones world and no doubt about it that Nokia was the one who started multimedia mobiles. Nokia gave so many awesome devices in that time but now when smartphones era started Nokia is not the company as it was used to be. But now Nokia is coming back with his awesome and stylish Lumia Series device. So today i collected Nokia Lumia Wide & HD Wallpapers for all Nokia Lumia devices. 

3d-cubes


Source

butterfly-3


Source

cbbd6364-9165-44f6-88c7-df58765efe35


Source

dragon-4


Source

HD-Backgrounds-for-Lumia-3


Source

hd-wallpapers-cubes-black-wallpaper-download-1920x1080-wallpaper


Source

Lumia Wallpapers


Source

Nokia Lumia 1520 built-in HD wallpapers 1080x1920 (01)


Source

nokia-lumia-1520-wallpaper-full-hd-1


Source

nokia-lumia-1520-wallpaper-full-hd-3


Source