Home Blog Page 427

How To Root Samsung Galaxy Tab S 10.5 T800, T805 And Install TWRP Recovery

How To Root Samsung Galaxy Tab S 10.5 T800, T805 And Install TWRP Recovery

The 10.5 inches variant of the Galaxy Tab S, known as SM-T800 and SM-T805 can now be rooted and the TWRP recovery for this device is available as well. Lucky users of this device would surely love to explore it beyond the boundaries set by Samsung and for that you probably will need the root access and a custom recovery, before you start looking for it here and there, we’ve already done this job for you and compiled up the methods to root the Galaxy Tab S 10.5 SM-T800 and SM-T805 in the ongoing post and also compiled up the method to install TWRP recovery on this device.samsung-galaxy-tab-s-review

Just to give it a start, the Galaxy Tab S is Samsung’s Super AMOLED Tab series with some top notch specifications which differentiates it from the ordinary tablets. The 10.5 inches variant has 288 ppi. Samsung has used Snapdragon 800 Quad Core CPU clocked at 2.3 GHz to power this device up, and this CPU is accompanied by Adreno 330 GPU. There’s a 2 GB RAM while the internal storage is 16/32 GB and there’s a microSD card slot as well that supports up to 128 GB external memory. There’s an 8 MP shooter at the back whereas a 2.1 MP on the front. Samsung has placed a massive 7900 mAh battery under the hood to add life to this device. The Galaxy Tab S 10.5 runs on Android 4.4.2 KitKat and as mentioned, this device has two variants, the SM-T800 (WiFi) and SM-T805 (LTE).

In case you are new with a custom recovery and root process, you may go through this little introduction of both these:

A custom recovery allows you to install custom roms, mods etc. Along with these, you can make a Nandroid backup, this helps you a lot as you can move back to the previous working state of your phone at any time you want if you have backed up your current system. In some cases, to root the phone you need to flash SuperSu.zip file in the custom recovery, having installed the recovery may help you while in some cases to install the recovery easily, you need to have the phone rooted. You can also wipe cache and dalvik cache of your phone using a custom recovery.

Rooting your phone gives you complete access over all the data which is apparently locked by the manufacturers. This includes removal of the factory restrictions and making changes to the internal system and the operating system. Gaining the root access gives you the privileges to install various applications to enhance the performance of your device, allows you to remove the built-in applications/programs, helps you to upgrade the battery life of your device & install the apps which require the root access for the proper functionality and modify your device in so many other ways e.g using mods and flashing custom recoveries and custom ROMs. Here’s our collection of 10 Best Root Apps.


Early Preps:

1. This guide is only for Samsung Galaxy Tab S 10.5 SM-T800 and T805!

Make sure that your device is exactly as mentioned above. To check out what device you have, go to Settings > More/General > About Device or Settings > About Device and match the model number. Be careful about the device model number, flashing a file on a device not listed here might result in bricking it up.

2. Battery should be charged at least 60%!

Your device’s battery shouldn’t be weak. In case your device goes dead during the flashing process, your device may get soft bricked and you might be in need of flashing stock firmware and that will ultimately result in wiping up your data as well. So, make sure that you charge your device before you start the flashing process.

3. Use the OEM data cable to establish connection!

Always use the original data cable to establish connection between your Android device and your computer / laptop. Using ordinary data cables might interrupt the flashing process, so to avoid any mishap, you need to meet this requirement as well.

4. Backup everything!

Just to be on the safe side, you may consider backing up each and everything from your Android device. This is highly recommended so that in case anything goes wrong, you still have the access to all of your data and you can restore it immediately. You may backup everything as listed below.

5. Turn off Samsung Kies and other software while using Odin3!

Make sure that you turn off Samsung Kies while using Odin3 flashtool. Samsung Kies will interrupt Odin3 and will result in causing errors and may not let you flash your desired recovery or root file. Also, make sure that you turn off any antivirus software you’ve installed and also disable firewall to avoid any connection and flashing issues.

6. Disclaimer

The methods involved in flashing custom recoveries, roms and rooting your phone are highly custom and may result in bricking your device, and has nothing to do with Google or the device manufacturer that is SAMSUNG in our case. Also rooting your device will void its warranty and you will be no longer eligible for any kind of free device services by the manufacturers/warranty providers. In case of any mishap we may not be held responsible. Follow these instructions to the letter to avoid any mishap or bricking. Make sure that whatever you do, you are doing it at your own responsibility.

How To Root Samsung Galaxy Tab S 10.5 SM-T800 or SM-T805:

Downloads Required:

How to root now:

  1. Extract the downloaded CF_AutoRoot.tar.md5.zip file once to get the .tar.md5 file.
  2. Open Odin3.exe.
  3. Put your Galaxy Tab S 10.5  in download mode. To do so, turn it off and wait for 10 seconds. Turn it on by pressing and holding Volume Down + Home Button + Power Key simultaneously, You should see a warning, press Volume Up to continue. In case this method doesn’t work for you, try one from this guide.
  4. Connect your device to your PC.
  5. As soon as Odin detects your phone, the ID:COM box should turn blue.  Make sure that you’ve installed Samsung USB drivers before connecting.
  6. For Odin 3.09 hit the AP tab. Select the CF_Autoroot.tar.md5, that you downloaded and extracted above.
  7. If you’re using Odin 3.07, you will select “PDA” tab instead of the AP tab, rest of the options remain untouched.
  8. Make sure that the options selected in your Odin are exactly as shown in the pic.
  9. Odin 3.09 explained. (2)
  10. Hit start and wait till the rooting process is complete, as soon as your device restarts, remove it from PC.
  11. Find SuperSu in app drawer now.
  12. That’s all!

How To Verify Root Access:

    1. To do so, go to Google Play Store on your Galaxy Tab S.
    2. Find “Root Checker” and install it.
    3. Open Root Checker.
    4. Tap “Verify Root”.
    5. It will ask you for SuperSu rights, tap “Grant”.
    6. It should show you Root Access Verified Now!
    7. That’s All!

How To Install TWRP Recovery on Galaxy Tab S 10.5 SM-T800 or SM-T805:

    1. Make sure that you’ve rooted your Tab S using the method above.
    2. Download and install Flashify on your Galaxy Tab S.
    3. Download the recovery.img file on your device: openrecovery-twrp-2.7.1.1-chagallwifi.img
    4. Now open Flashify on your Galaxy Tab S.
    5. Tap on “Recovery Image > Choose a File > Locate the downloaded recovery.img file > flash it”.
    6. That’s all! it will quickly flash the recovery and you’re done.
    7. Once done, you may boot into recovery mode. To do so, turn off your Galaxy Tab S completely first. Now turn it on by pressing and holding Volume Up + Home + Power Key or try using any method from this guide.

Just in case you got any queries or you’re stuck with something regarding this post, make sure that you drop your words in the comment box below. We will get back to you ASAP.

Download DEAD TRIGGER 2 0.06.1 APK for Android Free [ Guide ]

0
Download DEAD TRIGGER 2 0.06.1 APK for Android Free [ Guide ]

Are you ready to kill Zombies, go into a dark world where you have to face the deadliest and infected zombies? Who’ll try to kill with whatever it takes? If you really are up-to do this then you have to download DEAD TRIGGER 2 and enjoy the high definition graphics. You can now Download DEAD TRIGGER 2 0.06.1 APK for Android Free from the following link. It will help you easily install this awesome game on your low-end devices.

com.madfingergames.deadtrigger2-0

Dead Trigger 2 Features:

MASSIVE, CONTINUOUSLY UPDATED CONTENT. EVOLVING STORYLINES.
Dead Trigger 2 is constantly evolving and expanding. Every update features new content intended to make your game even more enjoyable. Travel across 9 regions in different parts of the world and explore 30 unique environments.
Grab your favorite Zombie anihilator from 33 kinds of weapons and go for the action in more than 600 gameplay scenarios.

THE FINGER IS MIGHTIER THAN THE GUN
Choose between a touch control scheme created especially for casual players or an enhanced virtual joystick.
Do you prefer console gaming? Then go ahead, Dead Trigger 2 supports MOGA and other MFi game controllers on iPhone and iPod touch

MOUTH-WATERING GRAPHICS
You’ll be dazzled by cutting-edge graphics, including real time water reflections, dynamic vegetation and enhanced ragdolls.
Explore multiple locations and slaughter the undead in diverse places like eerie Shanghai alleyways, abandoned mines or the African desert, Europe, South America …

REAL TIME STORY DEVELOPMENT
You are not alone.
Take part in the Global Resistance, tune in to the Radio to stay informed as the global gameplay develops, directly influenced by the participation of every single player.
Enjoy different types of operations such as story or global missions and side-quests.

REWARDS FOR EVERYONE
Participate in global missions and receive rewards. Complete achievements, meet challenges and receive exclusive in-game currency.

THE HIDEOUT
Explore your personal hide-out and meet the Gunsmith, Medic, Scientist, Smuggler and Engineer. These NPCs will help you unlock incredible new weapons and gadgets.

ORIGINAL AND FUN GAMEPLAY
Forget easy-to-kill Zombies. Get ready for Kamikaze, Vomitron and other bosses – powerful Zombies with an inventive approach to your elimination. Also be sure to try out non-traditional melee weapons such as the Big Hammer, Boat Motor or Machete. What’s our favorite? You gotta try the Grenade Chickens, Rocket Chickens and special Machine-Gun Mounted Chickens. You’re gonna love them.

For More: Google Play

Download DEAD TRIGGER 2 0.06.1 APK for Android Free:

Download Options and Mirrors:

How To Download DEAD TRIGGER 2 0.06.1 APK for Android:

  1. First of all download DEAD TRIGGER 2 0.06.1 APK.
  2. Now goto downloads and tap on DEAD TRIGGER 2 apk.
  3. Before installing the apk, check the unknown source from settings.
  4. When you’ll tap on the apk file a new windows will open, follow the instruction on the screen to complete the installation.
  5. It will take a few minutes for installation process to be completed.

How To Root Samsung Galaxy Tab S 8.4 T700, T705 And Install TWRP Recovery

How To Root Samsung Galaxy Tab S 8.4 T700, T705 And Install TWRP Recovery

Root access and TWRP recovery is now available for the Galaxy Tab S series. If you happen to be a lucky owner of the 8.4 inches variant of the Galaxy Tab S and you’ve been looking for a way to break the barriers on your device, you may have spotted the right place as we will be rooting the 8.4 inches Galaxy Tab S T700 (WiFi) and T705 (LTE) and also install TWRP recovery in the succeeding post.Galaxy Tab S Root & Recovery

Just to give you a flashback, Samsung brought up its Super AMOLED tablets in July 2014. This new series of tablets, known as the Galaxy Tab S is quite different and cooler than the ordinary tablets. The Galaxy Tab S occupies some powerful specifications.

The 8.4 inches variant, with a Super AMOLED screen and 359 PPI is powered up with Qualcomm’s Snapdragon 800 Quad Core CPU clocked at 2.3 GHz and is accompanied by Adreno 330 GPU while a RAM of 3 GB is placed inside as well. Internal storage is 16/32 GB and there’s a microSD card slot as well for the additional storage that supports up to 128 GBs.

The 8.4 inches Galaxy Tab S has an 8 MP shooter at the back and a 2.1 MP on the front. A massive 4900 mAh battery is placed under the hood. Out of the box, the Tab S series runs on Android 4.4.2 KitKat and as usual, the device comes in WiFi and 4G variants.

Before we head towards the root process and the recovery installation, it is important to wipe out any confusion that the newbies may have. To do so, let’s go through a brief introduction of the root access and custom recovery and then head towards the instructions.

A custom recovery allows you to install custom roms, mods etc. Along with these, you can make a Nandroid backup, this helps you a lot as you can move back to the previous working state of your phone at any time you want if you have backed up your current system. In some cases, to root the phone you need to flash SuperSu.zip file in the custom recovery, having installed the recovery may help you while in some cases to install the recovery easily, you need to have the phone rooted. You can also wipe cache and dalvik cache of your phone using a custom recovery.

Rooting your phone gives you complete access over all the data which is apparently locked by the manufacturers. This includes removal of the factory restrictions and making changes to the internal system and the operating system. Gaining the root access gives you the privileges to install various applications to enhance the performance of your device, allows you to remove the built-in applications/programs, helps you to upgrade the battery life of your device & install the apps which require the root access for the proper functionality and modify your device in so many other ways e.g using mods and flashing custom recoveries and custom ROMs. Here’s our collection of 10 Best Root Apps.

Early Preps:

1. This guide is only for Samsung Galaxy Tab S 8.4 T700 and T705!

Make sure that your device is exactly as mentioned above. To check out what device you have, go to Settings > More/General > About Device or Settings > About Device and match the model number. Be careful about the device model number, flashing a file on a device not listed here might result in bricking it up.

2. Battery should be charged at least 60%!

Your device’s battery shouldn’t be weak. In case your device goes dead during the flashing process, your device may get soft bricked and you might be in need of flashing stock firmware and that will ultimately result in wiping up your data as well. So, make sure that you charge your device before you start the flashing process.

3. Use the OEM data cable to establish connection!

Always use the original data cable to establish connection between your Android device and your computer / laptop. Using ordinary data cables might interrupt the flashing process, so to avoid any mishap, you need to meet this requirement as well.

4. Backup everything!

Just to be on the safe side, you may consider backing up each and everything from your Android device. This is highly recommended so that in case anything goes wrong, you still have the access to all of your data and you can restore it immediately. You may backup everything as listed below.

5. Turn off Samsung Kies and other software while using Odin3!

Make sure that you turn off Samsung Kies while using Odin3 flashtool. Samsung Kies will interrupt Odin3 and will result in causing errors and may not let you flash your desired recovery or root file. Also, make sure that you turn off any antivirus software you’ve installed and also disable firewall to avoid any connection and flashing issues.

6. Disclaimer

The methods involved in flashing custom recoveries, roms and rooting your phone are highly custom and may result in bricking your device, and has nothing to do with Google or the device manufacturer that is SAMSUNG in our case. Also rooting your device will void its warranty and you will be no longer eligible for any kind of free device services by the manufacturers/warranty providers. In case of any mishap we may not be held responsible. Follow these instructions to the letter to avoid any mishap or bricking. Make sure that whatever you do, you are doing it at your own responsibility.

How To Root Samsung Galaxy Tab S 8.4 SM-T700 or SM-T705:

Downloads Required:

How to root now:

  1. Extract the downloaded CF_AutoRoot.tar.md5.zip file once to get the .tar.md5 file.
  2. Open Odin3.exe.
  3. Put your Galaxy Tab S 8.4  in download mode. To do so, turn it off and wait for 10 seconds. Turn it on by pressing and holding Volume Down + Home Button + Power Key simultaneously, You should see a warning, press Volume Up to continue. In case this method doesn’t work for you, try one from this guide.
  4. Connect your device to your PC.
  5. As soon as Odin detects your phone, the ID:COM box should turn blue.  Make sure that you’ve installed Samsung USB drivers before connecting.
  6. For Odin 3.09 hit the AP tab. Select the CF_Autoroot.tar.md5, that you downloaded and extracted above.
  7. If you’re using Odin 3.07, you will select “PDA” tab instead of the AP tab, rest of the options remain untouched.
  8. Make sure that the options selected in your Odin are exactly as shown in the pic.
  9. Odin 3.09 explained. (2)
  10. Hit start and wait till the rooting process is complete, as soon as your device restarts, remove it from PC.
  11. Find SuperSu in app drawer now.
  12. That’s all!

How To Verify Root Access:

    1. To do so, go to Google Play Store on your Galaxy Tab S.
    2. Find “Root Checker” and install it.
    3. Open Root Checker.
    4. Tap “Verify Root”.
    5. It will ask you for SuperSu rights, tap “Grant”.
    6. It should show you Root Access Verified Now!
    7. That’s All!

How To Install TWRP Recovery on Galaxy Tab S 8.4 SM-T700 or SM-T705:

    1. Make sure that you’ve rooted your Tab S using the method above.
    2. Download and install Flashify on your Galaxy Tab S.
    3. Download the recovery.img file on your device: openrecovery-twrp-2.7.1.1-klimtwifi.img
    4. Now open Flashify on your Galaxy Tab S.
    5. Tap on “Recovery Image > Choose a File > Locate the downloaded recovery.img file > flash it”.
    6. That’s all! it will quickly flash the recovery and you’re done.
    7. Once done, you may boot into recovery mode. To do so, turn off your Galaxy Tab S completely first. Now turn it on by pressing and holding Volume Up + Home + Power Key or try using any method from this guide.

Just in case you got any queries or you’re stuck with something regarding this post, make sure that you drop your words in the comment box below. We will get back to you ASAP.

Root And Install Custom Recovery On NVIDIA Shield, NVIDA Shield Tablet

0
Root And Install Custom Recovery On NVIDIA Shield, NVIDA Shield Tablet

NVIDIA Shield and NVIDIA Shield Tablet, both are quite popular among gaming geeks. The NVIDIA Shield is one of the best handheld gaming consoles with a very nice 5.o inches flip up display having a resolution of 1280 x 720p. There’s NVIDIA Tegra 4 Quad Core processor placed inside this device accompanied by a RAM of 2 GB and internal storage of the Shield is 16 GB. NVIDIA Shield is powered up with Android Jelly Bean OS that makes it a good choice to go with since Android will pave way for the modifications and breaking up the boundaries set by NVIDIA on this cool little gadget.

The sibling of NVIDIA Shield, the Shield Tablet isn’t less then a beast as well. The device sports some top notch specifications that make it sit atop of the tablets and a first choice for the gamers. Shield Tablet sports an 8 inches full HD display. There’s 2.2 GHz ARM Cortex A15 CPU accompanied by NVIDIA Tegra K1 192 core Kepler GPU and a RAM of 2 GBs. The tablet comes in 16 and 32 GB variants, and a plus point of this tablet is the NVIDIA Dabbler that allows you to do 3D oil painting on this beast. NVIDIA Shield Tablet runs on Android KitKat out of the box.

Since both these devices, as mentioned, run on Android OS, this fact won’t let the Android enthusiasts sit calm. If you happen to be a lucky owner of any of these devices and you’re willing to enhance the usability by going out of the sphere, you probably will need root access and a custom recovery running on your Shield or Shield Tablet. Before you start wondering here and there, we’ve already found the method and explained in the proceeding post that how you can root your NVIDIA Shield and Shield Tablet and get a custom recovery (CWM, TWRP or Philz Advanced CWM) running on your device. Let’s go through the early preps and then proceed with the method.

shield_tablet_shield_controller_war_thunder

Just in case you don’t know about a custom recovery and root access, here’s a little intro for you:

A custom recovery allows you to install custom roms, mods etc. Along with these, you can make a Nandroid backup, this helps you a lot as you can move back to the previous working state of your phone at any time you want if you have backed up your current system. In some cases, to root the phone you need to flash SuperSu.zip file in the custom recovery, having installed the recovery may help you while in some cases to install the recovery easily, you need to have the phone rooted. You can also wipe cache and dalvik cache of your phone using a custom recovery.

Rooting your phone gives you complete access over all the data which is apparently locked by the manufacturers. This includes removal of the factory restrictions and making changes to the internal system and the operating system. Gaining the root access gives you the privileges to install various applications to enhance the performance of your device, allows you to remove the built-in applications/programs, helps you to upgrade the battery life of your device & install the apps which require the root access for the proper functionality and modify your device in so many other ways e.g using mods and flashing custom recoveries and custom ROMs. Here’s our collection of 10 Best Root Apps.

Early Preparations:

. This guide is only for NVIDIA Shield & NVIDIA Shield Tablet!

Make sure that your device is exactly as mentioned above. To check out what device you have, go to Settings > More/General > About Device or Settings > About Device and match the model number. Be careful about the device model number, flashing a file on a device not listed here might result in bricking it up.

2. Battery should be charged at least 60%!

Your device’s battery shouldn’t be weak. In case your device goes dead during the flashing process, your device may get soft bricked and you might be in need of flashing stock firmware and that will ultimately result in wiping up your data as well. So, make sure that you charge your device before you start the flashing process.

6. Disclaimer

The methods involved in flashing custom recoveries, roms and rooting your phone are highly custom and may result in bricking your device, and has nothing to do with Google or the device manufacturer that is NVIDIA in our case. Also rooting your device will void its warranty and you will be no longer eligible for any kind of free device services by the manufacturers/warranty providers. In case of any mishap we may not be held responsible. Follow these instructions to the letter to avoid any mishap or bricking. Make sure that whatever you do, you are doing it at your own responsibility.

How To Root NVIDIA Shield & NVIDIA Shield Tablet:

    1. Download Towelroot apk  directly on your Shield or copy it to your device.
    2. Now install the downloaded apk file. To do so, locate it on your device and tap to begin.
    3. Allow “Unknown Sources” from Settings > Security if prompted. Select “Package Installer” if asked.
    4. Now open the installed Towelroot application from the app drawer.
    5. In Towelroot click on “make it ra1n”.
    6. Once clicked and done, open Google Play Store and install “SuperSu”.
    7. Once installed, open SuperSu and reboot your device when it tells you to do so.
    8. That’s all, once rebooted, your device will be rooted!
    9. Install “Root Checker” from the Play Store to verify root access.
    10. You may install “Busy Box” from the Google Play as well now.

How To Install Custom Recovery on NVIDIA Shield & NVIDIA Shield Tablet:

    1. Download and install Flashify on your NVIDIA Shield or Shield Tablet.
    2. Download the recovery.img file on your device. Here’s CWM for Shield | CWM for Shield Tablet.
    3. Now open Flashify on your Shield or Shield Tablet.
    4. Tap on “Recovery Image > Choose a File > Locate the downloaded recovery.img file > flash it”.
    5. That’s all! it will quickly flash the recovery and you’re done.

Just in case you got any queries or you’re stuck with something regarding this post, make sure that you drop your words in the comment box below. We will get back to you ASAP. In case you like the work of the developers, make sure that you manage to get them a bear. We’ve listed them below.

Game Of War – Fire Age For Windows PC And MAC

12
Game Of War – Fire Age For Windows PC And MAC

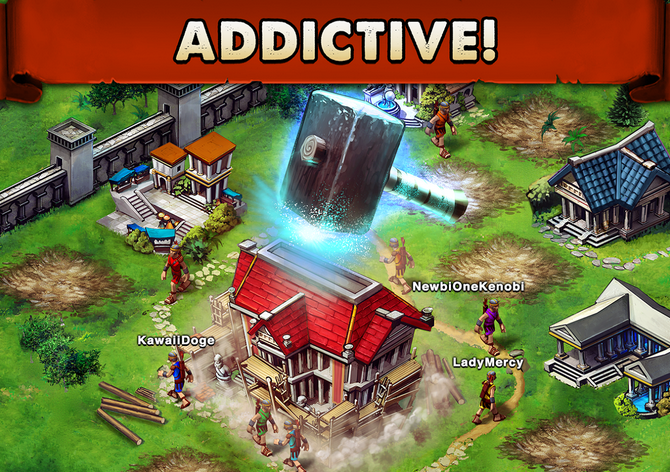
Strategy games are always the best ones to play, specially when they are the complex ones. One such game in the Google Play Store is Game of War – Fire Age.  This game is a full fledge strategy game where you got to plan each and everything and then implement to be the best. Game of War – Fire Age urges the players to create their very own Empires and level up your Hero to make him a Super Hero. Game of War also prompts the players to power up their Empires by providing them the heavy weapons they will craft and train the armies at the best potential to win the wars.

One best part of this game is, you can go online and chat with the players from all across the world in 32 different languages in real time, you can team up with them and battle against the enemies. If you’re going to play this game, you will definitely love it, but wait, playing this game on a small screen Android game makes no it no fun. You would love to play it on a Windows XP/7/8/8.1 PC or Laptop or a MAC device and that’s what we are going to teach you. Let’s go through the features of this game and then install it on the computer or a MAC.GAme OF War 1

Features:

Join the ULTIMATE Battle for Domination of the Kingdom! PLAY FOR FREE in the most addicting & interactive Action Strategy MMO GAME!!

Join millions of Online Players from around the world, BE PART OF ALLIANCE & Make FRIENDS. HELP, TRADE & CO-OP With ALLIANCE MEMBERS & Become the KING!!

Build & Customize your Empire. Train & Level-up your HERO!!

RESEARCH to make your EMPIRE more POWERFUL!

Craft Weapons & embed them with powerful Gems to Equip your Hero with Legendary Powerful Weapons!!

TRAIN vast armies to lead into BATTLE, watch the fighting in REAL-TIME on the stunning World Map as you conquer the KINGDOM!!

Forge diplomatic alliances to Conquer enemies & become the most POWERFUL Alliance in the Kingdom!

ATTACK & Conquer the WONDER to be the KING!! Get power to give TITLES to your Friends & Enemies in the Kingdom!!

Play & Chat with Millions of Players all over the World in over 32 Different Languages, all in Real-Time!!

TALK & STRATEGIZE with your ALLIANCE & FRIENDS in CHAT – Alliance Chat, 1-on-1 Chat, or Chat with the Entire World. Team Up & Join Forces with Friends or Smack-Talk & Burn your Enemies!!

UPGRADE buildings, walls & weapons to Strengthen your EMPIRE!!

Game Of War – Fire Age For Windows PC And MAC:

  1. You need an Android emulator to run this game on your Windows PC or MAC. We recommend using BluestacksUse our guide to install it on your PC.
  2. After downloading and installing Bluestacks, download Game Of War – Fire Age APK.
  3. Open the downloaded APK file now, and let Bluestacks install it.
  4. Open BlueStacks now > All Apps > Game Of War – Fire Age .
  5. The game will start now, follow the on screen instructions.
  6. Follow the initial screen,  you’ll be able to access Game Of War – Fire Age.
  7. Use arrow keys to play the game.
  8. Enjoy running dodging the vehicles!
  9. That’s all.

Rage Of The Immortals For PC – Windows XP/7/8/8.1 & MAC

0
Rage Of The Immortals For PC – Windows XP/7/8/8.1 & MAC

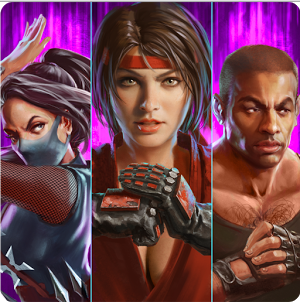
Are you getting out of the action? Well, if so, then its time to play Rage of the Immortals. Rage of the Immortals prompts the players to create a team of fighters and fight against the rivals / enemies. There are more than 190 characters that you may unlock and build a best team. The game flaunts over 20 different combat zones, you can fight the worldwide battles and train your teams at your best to win the massive battles.

Rage of the Immortals is available for free in the Google Play Store, you may install it on your Android device and start playing it straight away, but just in case you do not own an Android device or you can’t play this game on your Android device, you may want to find an alternative way to play this action-packed game and guess what? we have that alternative right here. In the proceeding post we will be presenting a method that will help you to install and play this game on your Windows XP/7/8/8.1 powered desktop PC / Laptop or a MAC device. Let’s go through the official features of this game and then install and play it.

Rage of The Immortals Poster

Features:

Create a super powered team of fighters from all over the world and get ready for battle in Rage of the Immortals, a free fast-paced action game. With over 190 characters to unlock and recruit on your journey, you can create the ultimate dream team of fighters to take on epic bosses, challenge players from around the world in weekly PvP tournaments and fight through over 20 different combat zones.

HUGE ROSTER
Unlock over 190 exclusive fighters with their own unique style and design. Intercept armored trucks to rescue rare fighters. Challenge and defeat epic bosses to recruit them to your team.

WORLDWIDE BATTLES
Test your strength against players around the globe in weekly PvP tournaments. Do you have what it takes to fight your way to the top?

CUTTING-EDGE TEAM MANAGEMENT
Choose & manage a team of fighters. Train and combine them to increase their abilities to create a powerful team that crushes the competition.

GRIPPING STORY
Complete 100’s of different quests to unravel the story of Rage of the Immortals. Explore, unlock and beat 35 areas with five different difficulty levels.

EASY TO LEARN, CHALLENGING TO MASTER
Jump into gameplay with intuitive gesture-based controls as you master the secrets of training and evolving your fighters.

Rage Of The Immortals For PC – Windows XP/7/8/8.1 & MAC:

  1. You need an Android emulator to run this game on your Windows PC or MAC. We recommend using BluestacksUse our guide to install it on your PC.
  2. After downloading and installing Bluestacks, download Rage Of The Immortals APK.
  3. Open the downloaded APK file now, and let Bluestacks install it.
  4. Open BlueStacks now > All Apps > Rage Of The Immortals .
  5. The game will start now, follow the on screen instructions.
  6. Follow the initial screen,  you’ll be able to access Rage Of The Immortals.
  7. Use arrow keys to play the game.
  8. Enjoy running dodging the vehicles!
  9. That’s all.


Bunny Run For PC – Free Download

0
Bunny Run For PC – Free Download

Bunny Run is a new game in that landed in the Google Play Store. The game is quite simple and addictive. All you got to do is, you got to run your bunny while jumping through the obstacles and collects lots of carrots. The more carrots you collect, the more score you will make in the game. What I loved about this game are its graphics. Bunny Run offers pretty much cool and eye catching graphics that do not hurt the eyes and you can play this game for as long as you want.

The game comprises of a number of levels, the higher you go, the higher is the difficulty. Although this game is available in the Google Play Store for the Android devices, but some users might not be able to enjoy this little cool game on the small screens and they would like to have it on their PCs or MAC devices. In the succeeding post, we are going to install Bunny Run on a Windows powered PC or a MAC. You just got to follow the instructions carefully and get this game running on the computer. Let’s go through the features of this game and install this game.Bunny RUn

Features:

Easy touch and tilt control,just tap the screen for jump
Collect as much carrots as possible
Mind the gap and the obstacles on the road.

3, 2, 1 go! Start your free running adventure!

Bunny Run For PC – Free Download:

  1. You need an Android emulator to run this game on your Windows PC or MAC. We recommend using BluestacksUse our guide to install it on your PC.
  2. After downloading and installing Bluestacks, download Bunny Run APK.
  3. Open the downloaded APK file now, and let Bluestacks install it.
  4. Open BlueStacks now > All Apps > Bunny Run.
  5. The game will start now, follow the on screen instructions.
  6. Follow the initial screen,  you’ll be able to access Bunny Run.
  7. Use arrow keys to play the game.
  8. Enjoy running dodging the vehicles!
  9. That’s all.

Download Race The Traffic For PC – Windows & MAC

0
Download Race The Traffic For PC – Windows & MAC

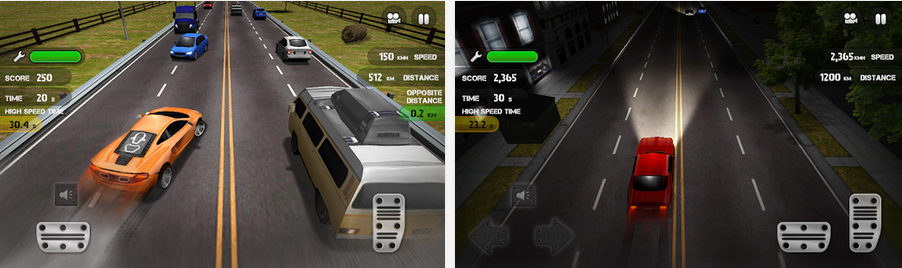
Race the traffic is a very nice, mini and impressive game and a great choice to pass the time when you’re getting bored. This game is packed up in only 19 MBs and offers cool 3D graphics. There are so man cars to drive, and 3 different game modes and awesome music to have fun on the tracks. All you need is, you got to drive the car as fast as you can and drive the incoming and on-going vehicles at your best. You can purchase new cars with the money you earn, this game also offers in-app purchases besides being free in the Google Play Store.

Some of the users may love to play this game on their desktop PC or a MAC, in that case you need a little extra effort as you won’t be able to install it directly like you do on your Android device and that’s what we are here for. We are going to install Race The Traffic on PC whether its a Windows XP/7/8/8.1 powered PC or a MAC in the succeeding post. You just need to follow the instructions carefully after we go through the game features.Race the Traffic

Features:

– 3 games modes.
– Lots of cars.
– Great 3D graphics.
– Awesome music.
– Endless fun!

Download Race The Traffic For PC – Windows & MAC:

  1. You need an Android emulator to run this game on your Windows PC or MAC. We recommend using BluestacksUse our guide to install it on your PC.
  2. After downloading and installing Bluestacks, download Race The Traffic APK.
  3. Open the downloaded APK file now, and let Bluestacks install it.
  4. Open BlueStacks now > All Apps > Race The Traffic .
  5. The game will start now, follow the on screen instructions.
  6. Follow the initial screen,  you’ll be able to access Race The Traffic.
  7. Use arrow keys to play the game.
  8. Enjoy running dodging the vehicles!
  9. That’s all.

Subway Train Rush For PC – Windows & MAC

0
Subway Train Rush For PC – Windows & MAC

Subway Train Rush follows the concept of Subway Surfers with quite different graphics. You got to run on the railway track while collecting coins, bonuses and save yourself from the incoming hurdles. The more you collect, the more score you’re going to make. Simply tap the screen to accelerate your avatar and tilt your device to move it left or right.

Unlike the avatars in Subway Surfers, the developer of Subway Train Rush has added a girl, that runs on the track. It’s a good try to make the graphics a little realistic, the game is less cartooned. Subway Train Rush is being liked by a number of users as this game is good to pass the time and makes you addictive in a while. Just in case you’re willing to play this game on your desktop PC instead of your Android device, you’ve spotted the right place as in the following post we are going to show how you can get Subway Train Rush for PC whether its a Windows XP/7/8/8.1 powered PC or a MAC. All you need is, you need to follow this guide carefully. Subway Train Rush

Let’s go through the features of this game and then install it.

Features:

Simple and addictive gameplay
Extremely smooth controls
Soothing background music and colorful graphics
Fast-paced rhythm and movement

Subway Train Rush For PC – Windows & MAC

      1. You need an Android emulator to run this game on your Windows PC or MAC. We recommend using BluestacksUse our guide to install it on your PC.
      2. After downloading and installing Bluestacks, download Subway Train Rush APK.
      3. Open the downloaded APK file now, and let Bluestacks install it.
      4. Open BlueStacks now > All Apps > Subway Train Rush .
      5. The game will start now, follow the on screen instructions.
      6. Follow the initial screen,  you’ll be able to access Subway Train Rush.
      7. Use arrow keys to play the game.
      8. Enjoy running on the railway track!
      9. That’s all.

Download Samsung Galaxy Alpha Official Wallpapers

Download Samsung Galaxy Alpha Official Wallpapers

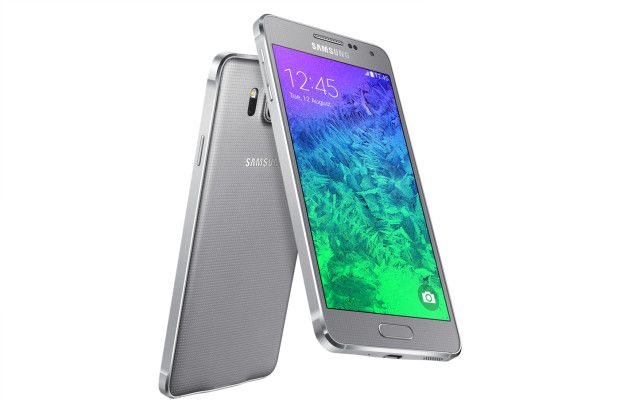
After fueling up the speculations and lots of rumors, Samsung has finally unveiled its very first metallic Galaxy smartphone, the Galaxy Alpha. With sharply curved bezel and a very graceful square metallic body, the Galaxy Alpha definitely has the potential to out-date its rivals.

The Galaxy Alpha flaunts a beautiful 4.7 inches Super AMOLED screen with the resolution of 1280 x 720p. Samsung powered this device up with its very own Exynos 5430 SoC accompanied by  Hexa-core Mali-T628 GPU. There’s a 2 GB RAM and the device got 32 GB internal storage while there’s no expandable storage option. At the back, there’s a 12 MP shooter and a 2.1 MP on the front for secondary video shooting. The Galaxy Alpha has occupied some of the features of the Galaxy S5 e.g. fingerprint scanner, ultra power saving mode etc. Atop of these nice specifications, this device runs on Android 4.4.4 KitKat out of the box.

What makes this device unique is, Samsung has built the core of this device with Aluminium and kept the device’s back perforated plastic that makes it a perfect combination of metal and plastic. Galaxy Alpha’s premium look and feel makes it a perfect rival for Apple’s upcoming iPhone 6 and it will definitely give it a tough competition. The device will be available in 5 different colors all across the world (150 countries) by September, 2014 and its expected price is going to be around 599 Euros.

To make the display of this device look even more stupendous, Samsung has put some really nice wallpapers. These wallpapers might increase your appetite once you come across em’. Sammobile has managed to extract the official wallpapers of the Galaxy Alpha and has made them available for download. Just go through the wallpapers and pick up your favorite or download using the all in one package linked below.

wallpaper_002 wallpaper_003 wallpaper_004

wallpaper_005 wallpaper_006 wallpaper_007

wallpaper_008 wallpaper_009 wallpaper_010

Download All Galaxy Alpha Wallpapers

How To Save Google Maps For Offline Navigation

0
How To Save Google Maps For Offline Navigation

Coming of the smartphones has undoubtedly taught the world to move in a completely new direction overcoming a number of technical uncertainties. Once there was a time when people had to use their desktop PCs, Laptops to perform all of their major computer tasks while most of them are now possible using a little smartphone kept inside your pocket. Advent of smartphone operating systems like Android and iOS is what actually paved way for the people to come across a broader world.

You can access your favorite videos, listen to your favorite music tracks, play so many cool games and use so many cool and productive applications and besides that, your little smartphone powered with Android or iOS can be proven as a life companion as it may help you to enhance your everyday life at an extreme level. These devices now a days are powered with tons of sensors as well and the innovation is just moving on. One of the extremely imperative features that the Android smartphones are equipped with is the navigation. No matter where in the world you are, you’ve lost you’re path, or you just want to go to some unknown place without having any prior knowledge, navigation can be a life savior here as  it will possibly provide you the shortest route to your destination and will also make you well aware of the surroundings.

You may have noticed that while you access the stock navigation application, known as Maps on your Android device, it always requires you to connect to internet first. This might cause some serious issues when you’re stuck at some unknown place or when you need to know your route to the destination and unfortunately you’ve no internet connectivity whether its mobile data or WiFi. In this case you would like to access the Maps offline. Although there’s a number of applications available in the Google Play Store that will give you the full offline navigation, but those will definitely cost you a little bit.

Since Google Maps now allows you to download the your desired Maps within the range of 50 x 50 KM, you don’t really need to spend some bucks on a navigation application. Although these Maps definitely have some certain limitations e.g (3D features, Indoor Maps etc), but it still might be of much use for some users. Just in case you are not aware of this little trick that will help you to save the Maps offline, you may go through this post and download the Maps for your desired nearest locations.

How To Save Google Maps For Offline Navigation:

    1. Make sure that your device is connected to the internet, a nice packet data plan or WiFi.
    2. Open the Google Maps application on your Android device.Maps8
    3. In the “Search” box type your destination or the place you want to route yourself to.Maps7
    4. Once you’ve found your desired location, tap it to pin point on the Map.
    5. Once you’ve seen the red pin pointing your location, pull up the location information bar (Swipe the screen downside up).Maps6
    6. Scroll to the bottom of the info bar and tap “Save map to use offline“.Maps4
    7. Name the map and save it now.
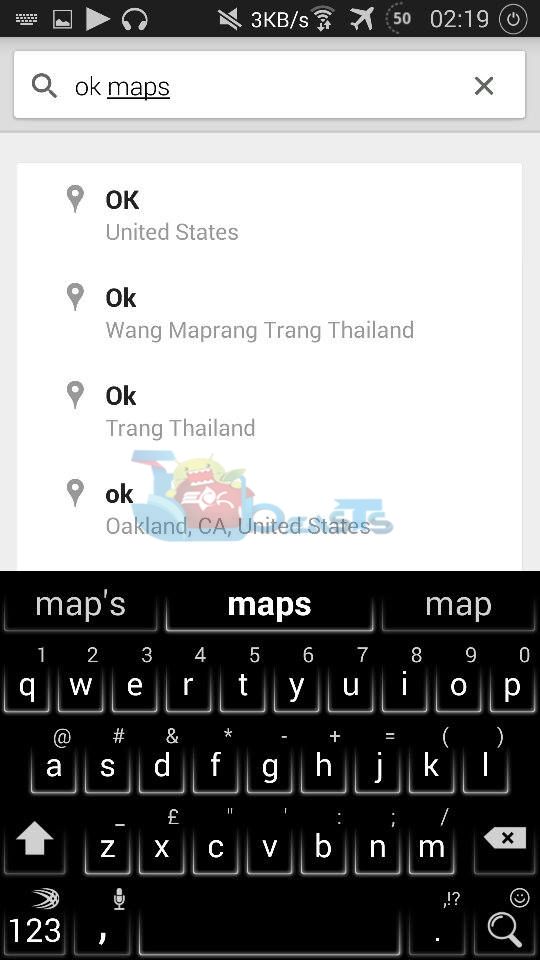
    8. Alternatively, once the Map is found, just tap the search bar again and type “ok maps” and you will instantly get the option to save the Map.
    9. Maps1 Maps2Maps3
    10. While you save the Maps for offline use, make sure that you save the area within 50 KM. Usually the area that will be saved is the only one shown on the Map. If you go out of the limit, you will get the error “The on-screen map is too large”.
    11. Another way to save the maps is to locate your desired destination on the Map and tap it. A red pin will indicate your chosen location, once it appears you can pull up the destination information bar and save it or save it using step 8.
    12. That’s all. You can access the offline Maps from the Menus in Maps > Your Places > Saved Maps.

You may also checkout some third party applications in the Google Play Store that provide complete offline navigation without any limitations and tons of features loaded in.

That’s all you got to do in order to get the Maps offline. Just in case you got any queries or you’re stuck with something regarding this post, make sure that you drop us your query in the comment box below. We will definitely get back to you immediately.

Samsung Galaxy Alpha Official Video

0
Samsung Galaxy Alpha Official Video

Samsung’s iPhone Killer smartphone and a serious answer to the critics is finally here. The Galaxy Alpha, Samsung’s first metallic smartphone and the thinnest Galaxy has landed officially today having a top notch spec sheet and a very cool and eye catching design.

With the Galaxy Alpha, Samsung has reformulated the Galaxy series design and hopefully Samsung won’t be disappointed its users with the same old design anymore. The features packed inside the Galaxy Alpha make it a perfect package for the smartphone enthusiasts. These features include finger print scanner, ultra power saving mode, improved camera and many more features that you may go through in the official video revealed by Samsung.

Source