Home Blog Page 422

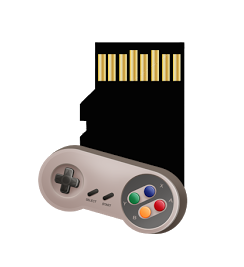
How To Move Apps, Games To SD Card On Android Using GL to SD
2
How To Move Apps, Games To SD Card On Android Using GL to SD

Google Play Store is filled with tons of applications that are way cool and if you know how to unleash the true power of an Android device, you won’t be able to refrain yourself from filling up your phone with lots of cool games and other applications. If you own a high-end Android device, you won’t face any restrictions if your device’s hardware is capable of meeting the requirements of that particular game or application.

The only problem you might come across is, your play store will display you an error “Out of Storage, low internal memory, delete some applications to free up storage or any other” as soon as the load on your phone’s internal storage goes out of control. This will probably happen when you download so many applications having no idea about the application size, or you just love to have so many applications. If your device has an external SD card slot, you can easily overcome this issue by going a little out of the way and move the data of apps from internal storage to the external storage of your phone.

Smartphone giants are putting an inbuilt feature in their latest Android software to move apps to sd card, but that option probably moves the installation files, not the obb files of an application into your phone’s external storage. I did give it a try and it wasn’t too useful as I had to go into the settings of each application individually and test it and in the end, it didn’t result in freeing up the storage. In the end, I was able to get rid of this problem using some cool applications and I was able to run 100s of my favorite games on Galaxy Note 3.

Basically, the data and obb files of the games are stored in a folder named Android > Data & obb inside your phone’s internal storage. You can mount that folder into your phone’s external storage using different applications. Once mounted, the data is moved into that new folder, it replicates the same folder in your phone’s external storage and accesses the files from within that folder. In the following post, we are going to have a look at one of these applications and the method to move games, apps to external SD card on the Android devices.

Your Android device must be rooted in order to use any of these applications.

Move apps to SD using GL to SD:

  1. Download and install GL to SD on your Android device.
  2. Open GL to SD from the App Drawer and accept the root permissions.
  3. As soon as you accept the permission, GL to SD will show you a list of applications.
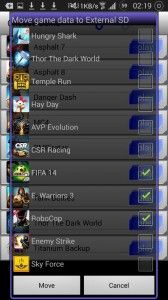
  4. Alternatively, tap the menu key at the top right corner and then tap on “move apps” and the list will pop up.
  5. Select the applications you want to move and press the move button.
  6. The process time depends upon the number and size of games/applications you are moving, hold on while it does.
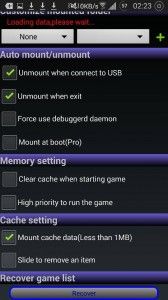
  7. Once done, mount the folder – tap the first button at the top. That’s it.
  8. Your game’s data will be accessed from external storage now.
  9. You can turn off different options by tapping the menu key at the top right corner > settings.

10656552_10204110349491649_2028340959_n10681961_10204110349091639_883609133_n
10573364_10204110349531650_514012186_n10637581_10204110348971636_565798634_n

New Apple iWatch Concepts Make It iPhone Kindred

0
New Apple iWatch Concepts Make It iPhone Kindred

Apple iWatch is one of the most highly anticipated wearable gadget of the year that has caught all eyes so far. Samsung, Motorola, LG, Pebble and some other giants are done with bringing up their smartwatches based on Andorid Wear and there’s going to be a lot of innovation by these giants in the upcoming days as well, but the biggest rival of Android, Apple has been quiet so far. It’s just a matter of a few days until Apple shows us what it has got and whether the rumors are going to be true or not.

Montre-Apple-iWatch-iPhone-6-01

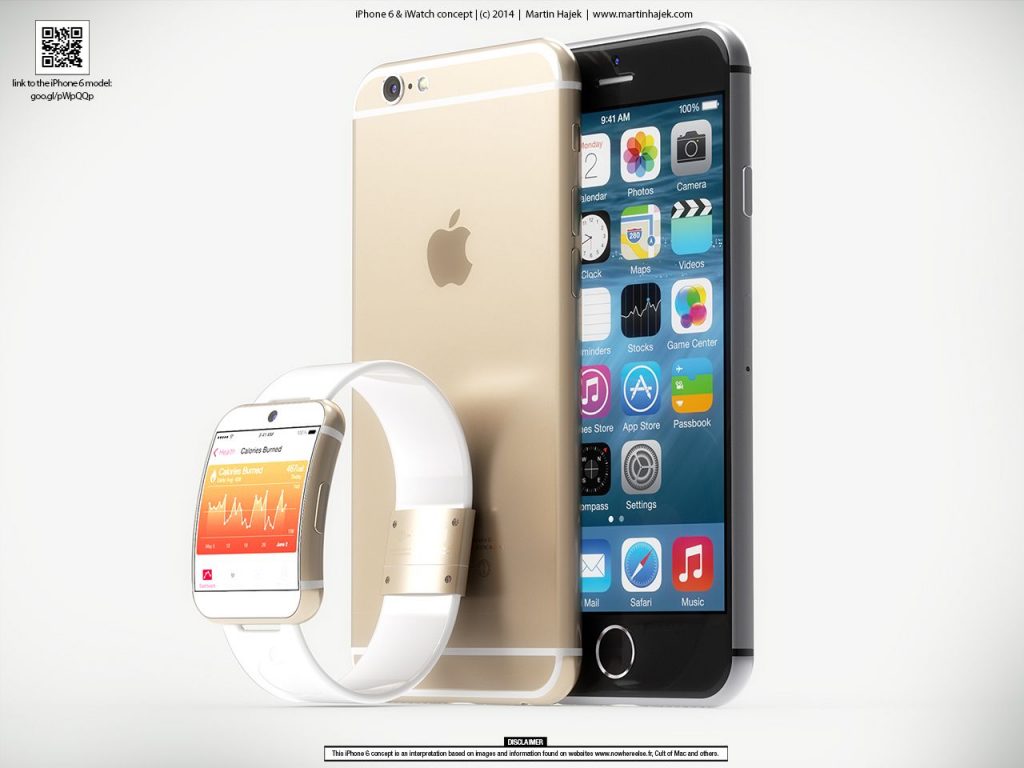
As soon as a tip arrives about a device, plethora of concepts starts showering from all around the web. Designer Martin Hajek, who has been coming up with some really nice renders of the iPhone(s) in the past, has designed the iWatch concepts that make it look alike the alleged iPhone(6) have white stripes on its body. If the concepts are to be believed, then iWatch might win the title of the most cool wearable gadget of the time so far as it looks more than resplendent.

The concept pictures show us a camera atop of the screen, just like the front facing camera on the iPhone(6), a button on the right side and a very elegant strap. Let’s go through these concepts.

Samsung Galaxy Note 4 Official Images

0
Samsung Galaxy Note 4 Official Images

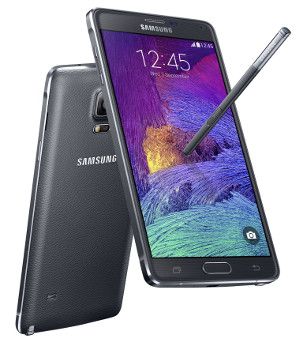
A while ago Samsung announced the Galaxy Note 4 officially and took all the attention. Galaxy Note 4 turned out to be a beast as it was expected, the device sports a stunning 5.7 inch QHD display. 16 MP shooter at the back and a 3.7 MP on the front. 3 GB RAM is packed inside, a massive battery of 3229 mAh has been placed under the hood and the evice will be powered up with Samsung’s Exynos 5 Octa Core CPU or Qualcomm’s Snapdragon 805 Quad Core CPU. Besides these massive specifications, Galaxy Note 4 is loaded with tons of features that make this device sit atop and make it the best device of the present time.

We’ve gathered all the official pictures of the Galaxy Note 4 to let you have a detailed look on this amazing device. Let’s go through em’ now.

Galaxy-Note-4 (2)Galaxy-Note-4 (1)Galaxy-Note-4 (3)Galaxy-Note-4 (4)Galaxy-Note-4 (5)Galaxy-Note-4 (6)Galaxy-Note-4 (7)Galaxy-Note-4 (8)Galaxy-Note-4 (9)Galaxy-Note-4 (10)Galaxy-Note-4 (11)Galaxy-Note-4 (12)Galaxy-Note-4 (13)Galaxy-Note-4 (14)Galaxy-Note-4 (15)Galaxy-Note-4 (16)Galaxy-Note-4 (17)Galaxy-Note-4 (18)Galaxy-Note-4 (19)Galaxy-Note-4

Samsung Galaxy Note 4, Galaxy Note Edge & Gear VR Announced

0
Samsung Galaxy Note 4, Galaxy Note Edge & Gear VR Announced

Samsung stole the show! It’s quite obvious now that Samsung has been pretty much busy since the launch of the Galaxy S5 and working hard to grab all the shine on the IFA event, 2014. Samsung successfully proves the users that it was worth waiting for this event, it’s actually a great move by Samsung to bring up great devices at this time of the year and keep its users engaged with the newer devices while all other manufacturers are also set to unpack their flagships. As soon as someone starts getting tired of the Galaxy S flagship smartphone, that for no doubt is a great addition every year, Samsung brings up something even more tempting and this is what it just did today once again. Samsung finally goes with live with the Galaxy Note 4, the 4th generation phablet, the Galaxy Note Curve and the Gear VR.

Note-4-sider

The Galaxy Note 4, as expected, turns out to be a beast. Samsung now definitely knows how to make the best use of plastic and metal, and keep its products premium and ergonomic at the same time and this is all we can realize after seeing the Galaxy Note 4. Samsung has added a metallic bezel to the Note 4 while the back of the phone is pretty much same as that of the Note 3 which is faux leather. The device sets in the hands perfectly and let’s the users have a strong grip on it without any hiccups here and there. Having a whopping 5.7-inch QHD (1440 x 2560 pixels) display with 515 ppi, the device becomes Samsung’s first one to sport this great display. A massive 3 GB RAM is placed under the hood. A 16MP shooter with OIS is fixed at the back that seems to grab some features from the Galaxy S5. Samsung has improved the front facing camera as well for better selfie experience, the shooter is 3.7 MP. The device will be either powered up with Samsung’s very own  Exynos 5433 8-core CPU, 1900 MHz, ARM Cortex-A57 and ARM Cortex-A53 accompanied by ARM Mali-T760 GPU or a Qualcomm Snapdgragon 805 CPU clocked at 2.5 GHz accompanied by Adreno 420 GPU. A massive battery of 3229 mAh is also placed under the hood. The device is equipped with an internal storage of 32 GB and is supported by an external SD card slot as well. Samsung has surely loaded the Galaxy Note 4 with plethora of sensors and software features, one of the mainstream advancement in the newest phablet is the UV sensor that intelligently helps the users to prevent their skin from the Sun using the Ultra Violet sensor integrated with the S-Health application. And last but not the least, the major selling point of the Galaxy Note series, the S-Pen is definitely a part of the Note 4 as well, which is a lot improved. Samsung claims that the Note 4’s S-Pen is even more smoother works perfectly great on the QHD display providing the users best experience.

SM-N910_Charcoal-Black_Front-Pen_002 SM-N910_Charcoal-Black_Right-side_004

Apart from the Galaxy Note 4, what helped Samsung to win today’s show before Sony comes up with its Xperia flagship, is the Galaxy Note Edge. There’s been a number of rumors and leaks over the past 1 year about a device with a display expanded towards its edges. Either the leaksters learnt something from Samsung and hints arrived, or Samsung learnt from the rumors and added life to the hype streaming around. The Galaxy Note Edge is some kind of a unique device with the display expanded towards its right edge. The device sports same specifications as the of the Galaxy Note 4, but because of the expanded display it has got an additional 160 pixels on its screen which makes it a device with maximum pixels at the moment. Both the Galaxy Note 4 and Galaxy Note Edge will run on Android 4.4 KitKat out of the box.note-edge-1


After being in the rumors for a very long time, the Gear VR finally makes its way to the world as well now. There has been a huge amount of reports pointing towards a virtual reality headset in the past but we couldn’t keep our eyes on the rumors being much serious, but again it looks like Samsung isn’t going to leave the wearable market that easily, it keeps indulging into something new. The Gear VR, Samsung brought up in collaboration with Oculus. You can simply pair the Gear VR with your Galaxy Note 4 and enter into the world of virtual gaming having an awesome experience!¡Ú¡Ú¸ÞÀÎ-R320_White_Dynamic2_007_1

We’ll be providing you a detailed preview about all these devices in a while. Stay tuned!


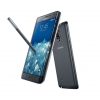
Glimpses At The Galaxy Note 4 Leaked Pictures & Concepts Before It Goes Official

0
Glimpses At The Galaxy Note 4 Leaked Pictures & Concepts Before It Goes Official

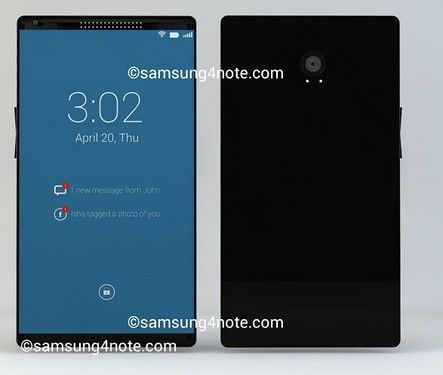
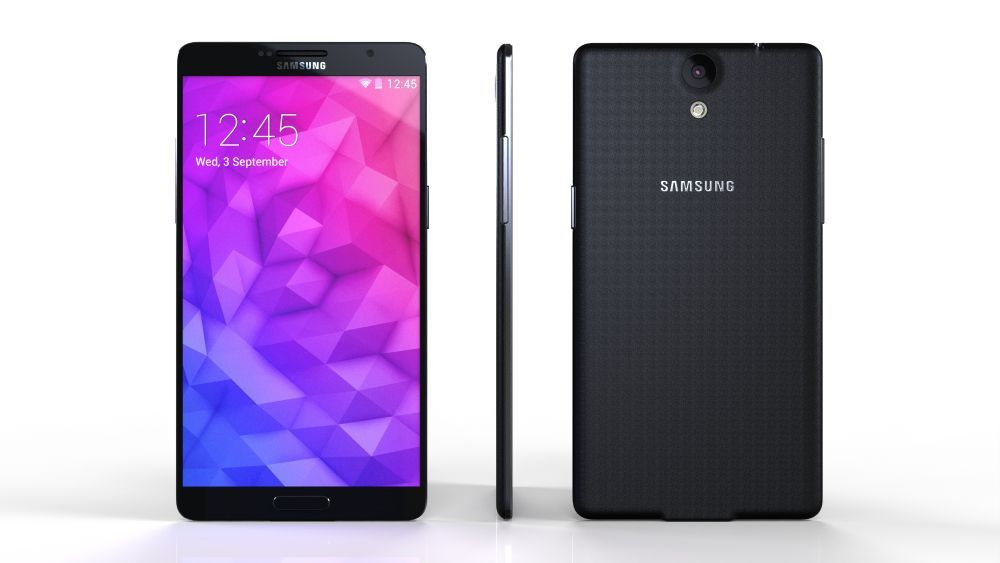
Less then 20 hours left and Samsung will be in the spotlight having the 4th Galaxy Note device unpacked. At the IFA event 2014, which is going to start later today in Berlin, Germany, Samsung and some other tech giants will be unveiling their flagship devices at their particular press events and all eyes are now waiting to see who wins the show.note-11

Samsung unpacked event episode 2 will begin at 3rd of September, 2014 at  6 am PT | 9 am EST | 2 pm GMT (London Time). The Galaxy Note 4 is expected to have 5.7-inch QHD dispaly (2560 x 1440 pixels resolution). Qualcomm’s Snapdragon 805 Quad-Core CPU or Samsung’s very own Exynos 5 Octa CPU. A RAM of 4 GB is expected to be a part of this device. 16 MP shooter at the back is suggested so far. And not to forget, the Galaxy Note 4 will have an even better and improved S-Pen Stylus with so many new features as well.

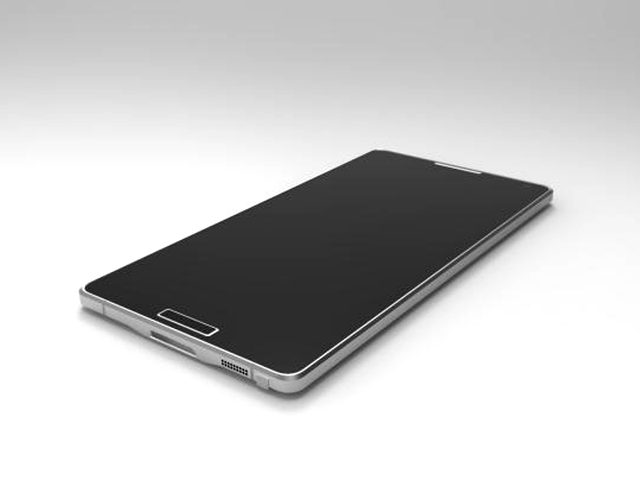
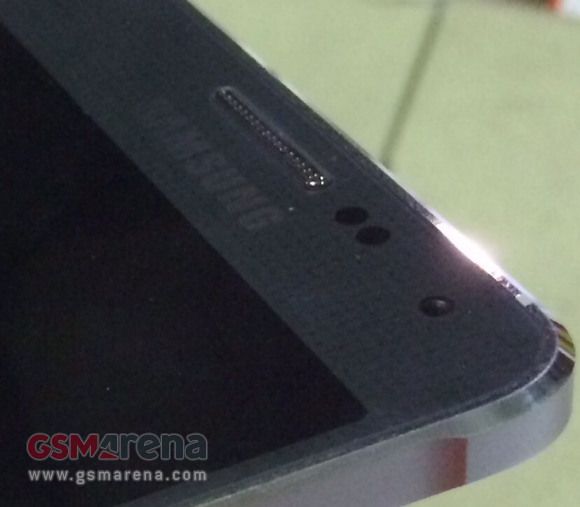
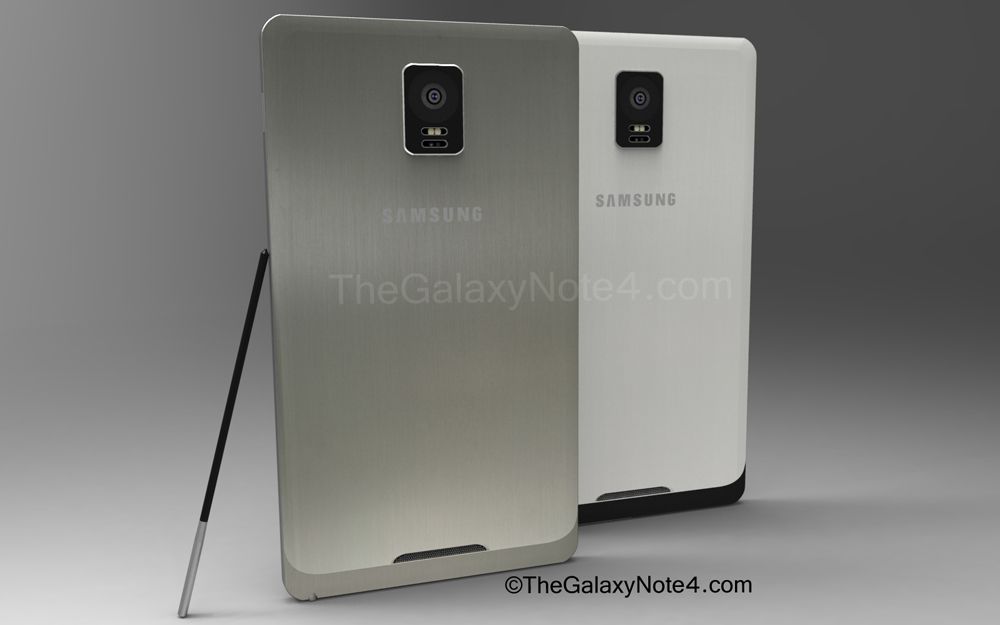
Before Samsung takes the curtains off in order to unpack the Galaxy Note 4, we collected some leaked pictures and concepts that surfaced over the web in the past few months pointing towards the Galaxy Note 4. Let’s have a look before the device makes its way officially as this is the last chance to make an assumption about the device.

Samsung_Galaxy_Note_4_leak_contentfullwidthearlier-leak-of-the-samsung-galaxy-note-4-3 galaxy-note-4 Galaxy-Note-4-Design-Concept Samsung_Galaxy_Note_4galaxy-note4-leak-2

  samsung-galaxy-note-4-leak-1 note-4-2Samsung-Galaxy-Note-4Samsung-Galaxy-Note-4-ivo-maric-1Samsung-Galaxy-Note-4-packa

How To Turn Your Android Smartphone Into A Universal TV Remote With IR 2.0

0
How To Turn Your Android Smartphone Into A Universal TV Remote With IR 2.0

The idea of making your mobile phone a universal remote control isn’t something new. In old days, the infrared placed in Nokia’s Symbian phones was intelligently utilized by the developers in order to control the TVs and other such devices, and then the era of smartphones completely changed the way things work, in which Android played an important role. Samsung took this feature seriously and introduced an IR blaster and a particular application named as “Watchon  in their Android smartphones, and Watchon is being added to all the new mainstream devices of Samsung now.

While this paves a way for jealousy among the smartphone owners who cannot taste an application like Samsung Watchon or who just don’t know how to turn their Android device into a Universal TV Remove since there’s an IR Blaster in their device as well, WaveSpark, the developer behind IR Universal Remote has come up with IR 2.0.

IR 2.0, as mentioned above, requires a device with IR Blaster. You can turn your Android smartphone into a Universal TV Remote using this application and control the supported TVs, TV Boxes, DVD Players, Air Conditioners etc. IR 2.0 is a highly customizable application and also happens to be one of the most Universal application in its category that’s capable of working with thousands of devices and the application is available for free in the Play Store, but offers some in-app purchases.

Before you start wondering how you can use this application and transform your Android smartphone into a remote control, we’ve done this for you and compiled up the comprehensive method below. Let’s go through the app’s description and then learn how to use it.

Description:

IR 2.0™ – Universal TV Remote turns your phone into a real universal remote. Use your phone’s built in IR Blaster to control infrared devices such as your TV and Cable Box (and much more). A phone or tablet with a built in IR Blaster is required. This application has thousands of supported manufacturer models with hundreds of thousands of different IR remote codes and is continuously growing in supported devices. This is one of the most universal applications in Google Play. Whether your kids have lost the TV remote or you just want to turn up the game at the bar you can always use your phone.

IR Remote IR Remote_A IR Remote_B IR Remote_C

How To Turn Your Android Smartphone Into A Universal TV Remote With IR 2.0

  1. Download & install IR 2.0 on your Android device. Google Play Link | IR 2.0 APK.
  2. Once installed open the application and accept the terms of use.
  3. You will get a pre-defined remote, you can simply use this one. Just in case the default doesn’t work for you, follow the steps below.
  4. Swipe your finger on the screen from left to right in order to pull the menu.
  5. Tap “databases” and select your device manufacturer from the list.
  6. Select your device type.
  7. Test the different codes and save the one that works for you.
  8. Save your remote!
  9. In order to unleash the true power of this application you may go with the in-app purchases.

Download Swing Copters 1.2.0 APK

0
Download Swing Copters 1.2.0 APK

The Flappy Bird Successor, Swing Copters is getting viral every minute and the game’s difficulty is much more than that of the Flappy Bird. Recently the developer reduced the difficulty level of this game in an update, and it looks like some new changes have arrived resulting in fixing some bugs and stability issues. Swing Copters v 1.2.0 is available now. The game is packed up in only 3.2 MB and can run greatly on any Android device having Android 3.0 or above.Swing Copters1

Here’s the app description by the developer:

Flying with a propeller hat is not as easy as it looks.

[HOW TO PLAY] • Tap to change direction.
• Get 4 medals to unlock more characters.

Enjoy the game.

Although the game is available in the Play Store, but some users might want to grab its APK in order to install the game manually. We’ve pulled out the Swing Copters 1.2.0 APK file from the Google Play Store and the download link is embedded below with the installation guide. Just scroll down and get it right now.

Download and install Swing Copters APK 1.2.0:

    1. Download Swing Copters APK v1.2.0
    2. Connect your phone to your laptop or PC now.
    3. Copy the APK file to your phone’s SD card.
    4. Disconnect your phone.
    5. Locate the Swing Copters APK v1.2.0 file on your phone now and tap to install it.
    6. If prompted to select installer, then select “Package Installer”.
    7. Allow “Unknown Sources” from settings > security if prompted.
    8. Proceed with the installation and complete it.
    9. Once done, access the game from app drawer.
    10. That’s all!

An Animated Look Into Android’s Material Design Future

0
An Animated Look Into Android’s Material Design Future

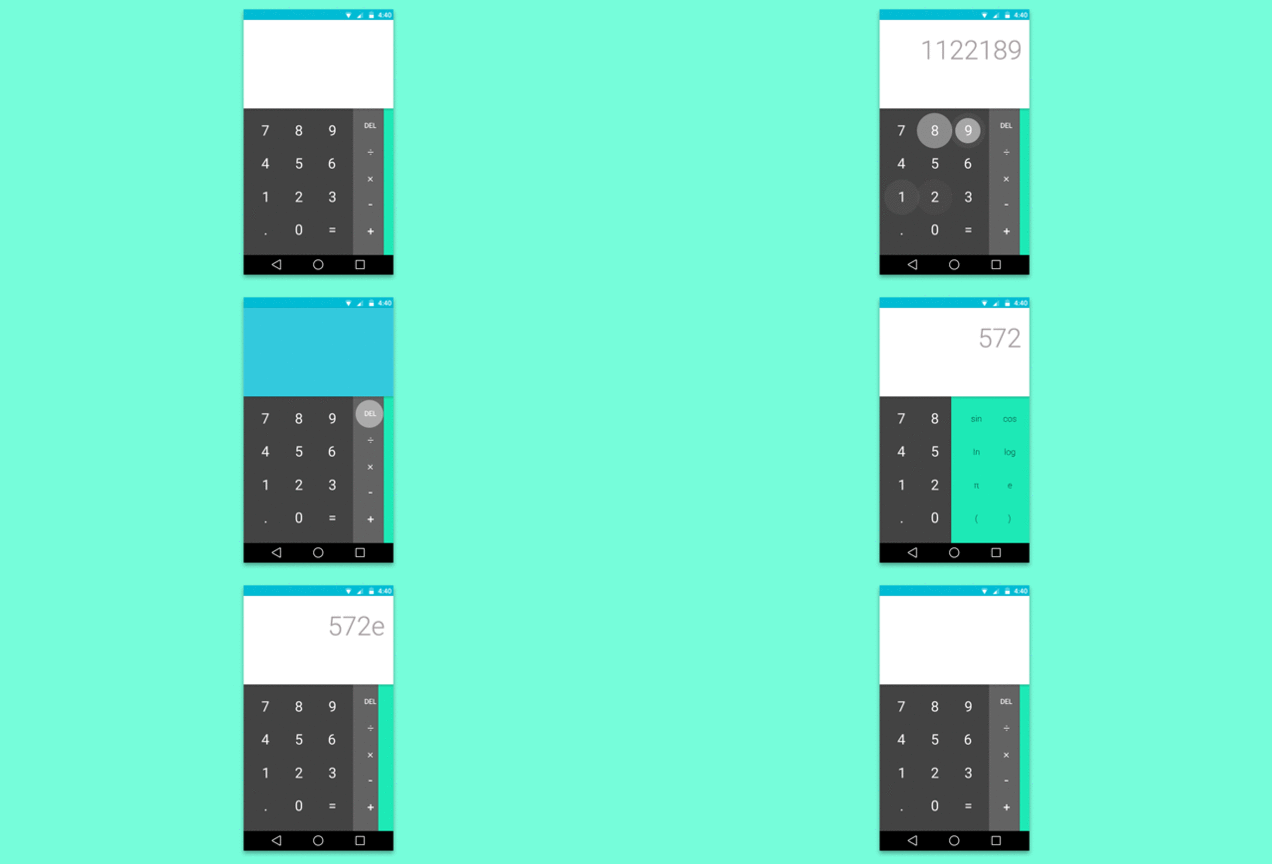
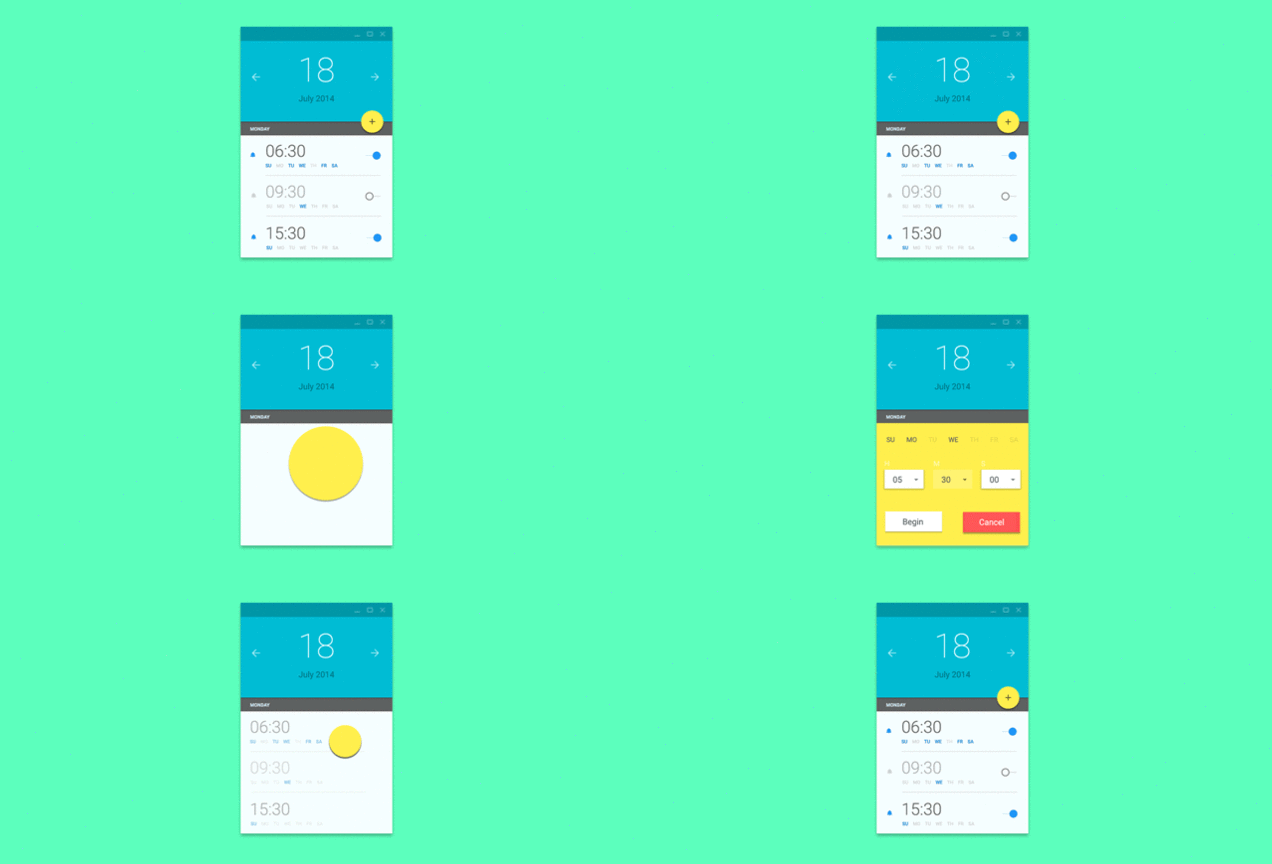
Android L HomescreenFew months back Google gave us a preview of the next version of Android, the Android L, so far known as the Android Lemon Meringue Pie. Although there’s a ponderous list of feature that Google has added to the Android L but the most exciting part of the Android L is its UI. Google is going to introduce the material design UI in the Android L, the idea behind Material Design UI is that, it lets the users interact with the elements on the screen exactly as they interact with the real life objects. Sounds exciting, right? Well, a group of graphic designers came up with some animated pictures of some applications showing the material design for the Android L. The animations give us quite a good idea about how the material design is going to work and it seems more then cool. Let’s go through these images and learn about the upcoming UI of the Android.

ns3yqnd1epjvw6xzvrvk

Search functions in the Aviasales app by Mark M

gfso1fydkdjb3feedl0n

Material Design Calculator by Jovie Brent

netflix

Material Design Netflix App by Matt Mcdowell

f73pmejcy7zaucd4velw

Material Design Alarm Menu by Ehsan Rahimi

vwkz8bwu5mcs1tu7ke8z

Evernote by Jiangping Hsu

guideline

Android L Material Design guidelines by Jelio Dimitrov

go9wa8j6ylhrquq0uxen

Consistent Choreography guideline by Min-Sang Choi

Via: Gizmodo

How To Backup Data on Samsung Galaxy S5

How To Backup Data on Samsung Galaxy S5

Samsung galaxy S5 is the latest high end flagship of Samsung, galaxy s5 came with lot of new features and new interface. Samsung used touchwiz 5 in Samsung Galaxy s5 thats is why whole interface is changed, most people find difficult to use it cause of this changed interface we’ve posted many guides on how to use new features of Samsung Galaxy s5. Today i’ll tell you how to backup data on Samsung Galaxy s5, in this guide i’ll help you with backing up application data, Wi-Fi passwords and all the others phone setting to Google servers.

2014-05-03 02.55.18

How To Backup Data on Samsung Galaxy S5 [ Wi-Fi passwords, and other phone settings ]:

  1. Goto your home screen by pressing the home button.
  2. Now Goto settings.
  3. From the setting choose Accounts.
  4. Now in accounts tab choose the backup option.
  5. Tap on ” Backup and reset “.
  6. When you choose backup and reset do check the option ” Backup my data”  and “Automatically store”.
  7. Done it will take time.

How To Backup calendar, contacts, internet data and memo:

  1. Goto your home screen by pressing the home button.
  2. Now Goto settings.
  3. From the setting choose Accounts.
  4. Now in accounts tab choose the backup option and tap on Cloud.
  5. Tap on backup to start the process, this process will use Wifi.
  6. Once the process is completed you have successfully backuped  your ” Memo/ S Memo, S Planner / Calendar, Internet app, Contacts and Scrapbook data “.

How To Backup contacts through the Contacts application:

  • From your home screen tap on application drawer icon.
  • You’ll be in main menu of your phone tap on contacts.
  • Now in contacts tap on menu button located on your phone left side.
  • Choose Import/Export for the list.
  • A pop-up comes up, you’ll have to choose from the following options.
  1. Export to USB storage
  2. Export to SD card
  3. Export to SIM card


  • After choosing one option a prompt will ask you to confirm the action. Tap Yes.
  • Now wait for exporting process finish.
  • Done.

The Apple iPhone 6 In Pictures So Far

0
The Apple iPhone 6 In Pictures So Far

10641146_10152717661587952_7836331056549869976_nApple has rolled out the official teasers for its upcoming event that is going to take place on 9th of September, 2014. For now, this event of Apple has caught all the eyes as we are expecting two new variants of the next gen iPhone, the iPhone 6. A year of rumors, speculations and anticipations is finally going to end once Apple pulls the curtains off from it’s iPhone 6, just in 10 days. Speculations and rumors have taught has that Apple has finally increased the size of the iPhone, and the iPhone 6 will have a 4.7 inches display. Not only that, to deal with the phablet series, introduced by Samsung as the Galaxy Note series, Apple is going to unveil a bigger variant of the iPhone 6 with a 5.5 inches display.

Samsung recently launched the Galaxy Alpha and it’s pretty much obvious that the Galaxy Alpha is Samsung’s answer to the upcoming iPhone 6. Before Apple launches its bigger iPhone 6, Samsung will be done with the Galaxy Note 4 as well and on the same, other smartphone manufacturers will be bringing up their flagship devices as well. So, the upcoming month is going to be full of competitions and smartphone wars and we can only tell which one sits atop once all of these giants are done with bringing up their devices in the limelight. Just for the sake of knowledge and an idea about the upcoming devices, we recently compared the Galaxy Note 4, iPhone 6 and the Nexus 6’s rumored specifications as well.

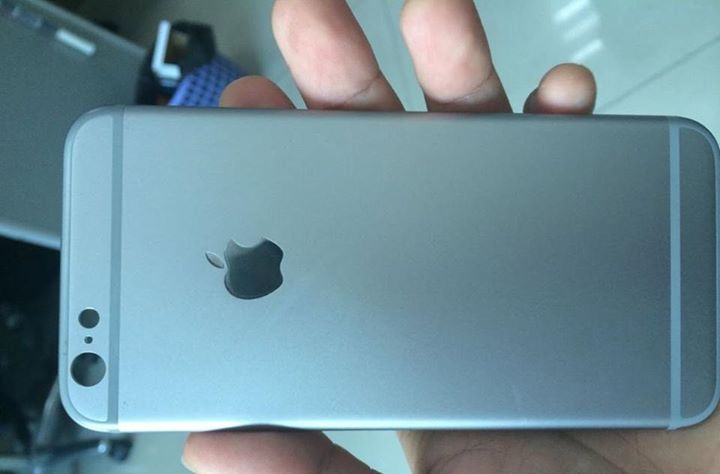
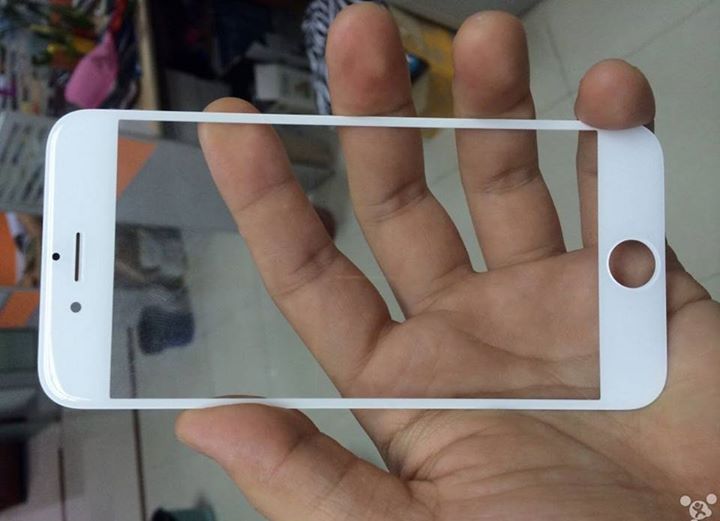
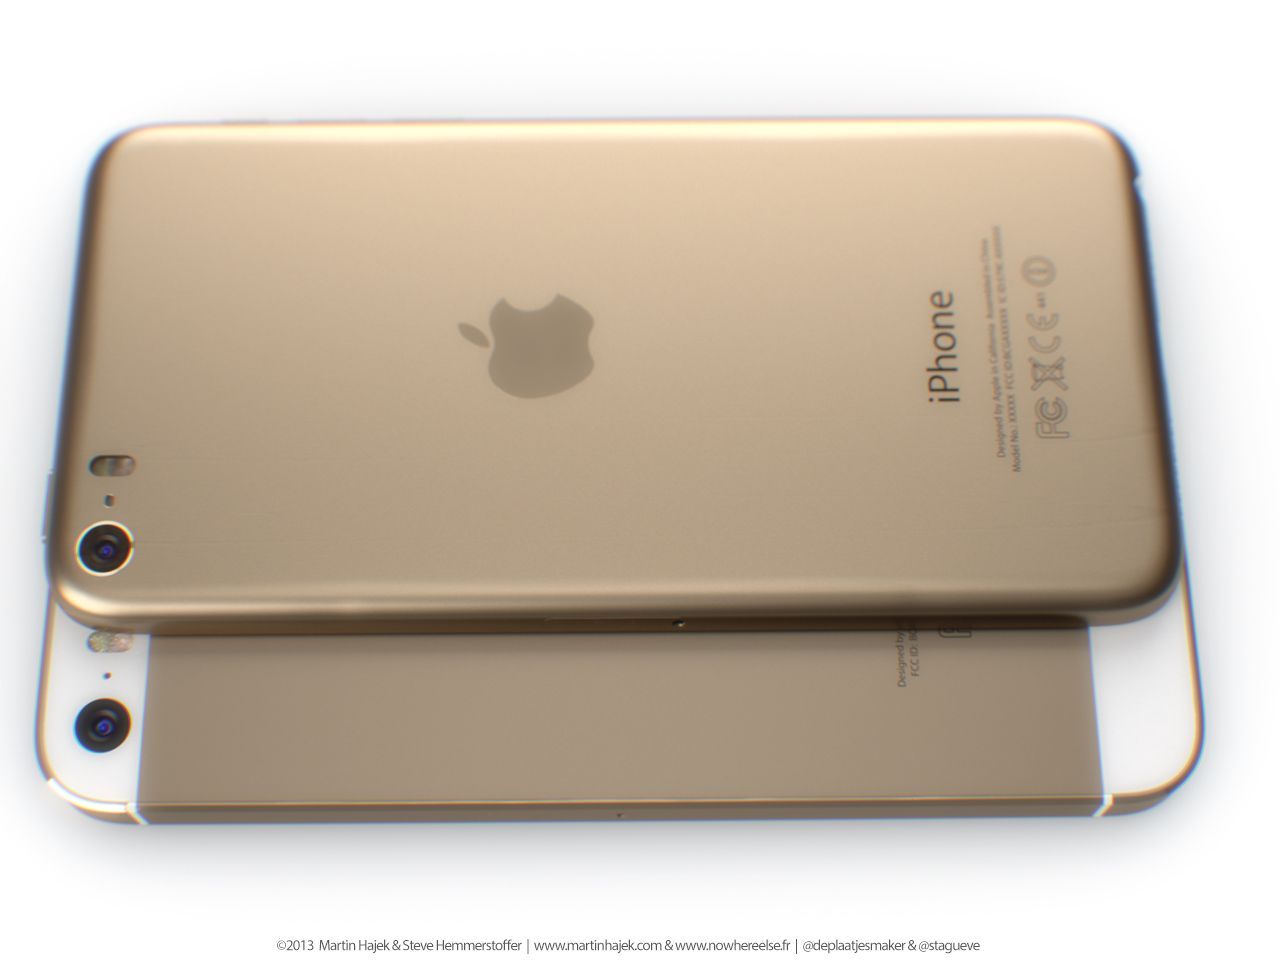
In the past we’ve seen that Apple isn’t so good with keeping the iPhone(s) away from leaks. We had a set of high detail images of the iPhone 5S and iPhone 5C before the devices came out, and there’s a plethora of leaked images of iPhone 6. You never know what’s going to be the real device when are you actually having a look on the real iPhone 6. We’ve compiled up all the available leaked, concept and mock-up images of the iPhone 6, which are displayed in the following post.

iPhone-6-vs-Galaxy-Alpha-1iPhone-6-vs-Galaxy-Alpha-3iPhone-6-vs-Galaxy-Alpha-51780625_10152717661592952_668584284763507054_n 10626463_10152717661572952_6559401399067548060_n 10636134_10152717661577952_8843509561585711841_n  10667789266_d3fd7d3a75_b iPhone-6-concept-NowhereElse-and-Martin-Hajek-002iphone6iphone_6_hajek3_5-1024x768gsmarena_001Apple-iPhone-6-Leakediphone6_image-610x343iphone6_vs_iphone5S-590x330iphone6-820x420iphone6-1024x673iphone-6-and-iphone-5-conceptiphone6-concept-hajek-4iphone-6-conceptiPhone-6-conceptiPhone-6-CWiphone-6-gold-space-grey-2iphone6iphone5s-610x343iphone-6-leakiphone-6-leakediphone-6-space-gray-mockup-1iphone-6-sideiPhone-6-mockup-silver-2iphone-6-mockup-iphone-5s-3iphone-6-leaked-casesiphone-6-vs-iphone-5siphone68iphone631photo_17926_0tech-apple-iphone-6-leaked-pictures-3

Install Android 4.4.4 KitKat On Sony Xperia Sola With CM 11

9
Install Android 4.4.4 KitKat On Sony Xperia Sola With CM 11

Sony’s 2012 low-end device, the Xperia Sola unfortunately won’t be able to taste any higher version of Android officially. The device doesn’t support compatible hardware to run any greater Android version and thus Sony stopped the updates for this device on Android 4.0 Ice Cream Sandwich. But this doesn’t mean that the device’s life ends here, at least not as long as we have some great people working over the XDA developers.

Team Xperia Site, a group of XDA developers has compiled up Android 4.4.4 KitKat for Sony Xperia Sola. The firmware is based on CyanogenMod 11, the most popular aftermarket version of Android. Using CyanogenMod 11 is a  great choice and a great way to update your Xperia Sola to the latest Android 4.4.4 KitKat. Just in case you’re wondering how can you do so, you may stop wondering as in the in proceeding guide we will install this Android 4.4.4 KitKat on Sony Xperia Sola with CM 11 custom ROM. Let’s go through the instructions and then begin with the flashing process.

Xperia Sola

Early Preparations:

1. This is only for Sony Xperia Sola!

This custom ROM is only for the device mentioned above. Make sure that your model number matches the one listed above. To do so, go to Settings > About Device on your device and see your model number. Flashing this ROM on any other device will result in bricking it so make sure that you meet this requirement first of all.

2. Battery should be charged at least over 60%.

Make sure that your battery is charged enough to complete the flashing process. In case your battery is low and your device goes dead during the flashing process, you may end up soft bricking your device as it won’t complete the flashing process.

3. Unlock Bootloader.

Your device’s bootloader must be unlocked in order to flash this custom ROM. You can unlock it by using our Sony bootloader unlock  guide.

4. Backup everything!

Just to be on the safe side, you may consider backing up each and everything from your Android device. This is highly recommended so that in case anything goes wrong, you still have the access to all of your data and you can restore it immediately. You may backup everything as listed below.

5. Disclaimer

The methods involved in flashing custom recoveries, roms and rooting your phone are highly custom and may result in bricking your device, and has nothing to do with Google or the device manufacturer that is Sony in our case. Also rooting your device will void its warranty and you will be no longer eligible for any kind of free device services by the manufacturers/warranty providers. In case of any mishap we may not be held responsible. Follow these instructions to the letter to avoid any mishap or bricking. Make sure that whatever you do, you are doing it at your own responsibility.

How To Install Android 4.4.4 KitKat On Sony Xperia Sola:

  1. Download the cm11.0-weekly-19-pepper.zip [ROM.zip] file.
  2. Download Google Gapps.zip for Android 4.4.4 KitKat Custom ROM.
  3. Place the ROM.zip file and Gapps.zip file on your phone’s internal or external sd card.
  4. Download Android ADB and Fastboot driversfollow our full guide here to make it easy.
  5. Open the downloaded ROM.zip on your PC and extract the Boot.img file only.
  6. Now place the kernel file that is boot.img  file that you extracted from the zip folder in the fastboot folder that you downloaded from the guide linked above.
  7. After placing the kernel file in the fastboot folder, open the fastboot folder. Press shift and then Right click on any empty area inside the folder, now select “Open command prompt here“. flash it using the command fastboot flash boot boot.img”. In case you are confused, follow the Android ADB & Fastboot drivers guide carefully.
  8. Boot into CWM recovery. To do so, turn off your device, now turn it on and quickly press volume up key, you will get the CWM interface.
  9. In CWM wipe the factory data, cache and dalvik cache.
  10. Now select “Install Zip>Choose Zip from Sd card / external Sd card”.
  11. Select the ROM.zip file that your placed on your phone’s Sd card.
  12. It should take a few mins to flash the ROM, now once again select “Install Zip>Choose Zip from Sd card / external Sd card”.
  13. Choose the Gapps.zip file this time and flash it.
  14. As soon as done flashing, clear cache and dalvik cache again.
  15. Reboot system now, you should see the CyanogenMod 11 ROM logo on the boot screen now, it may take upto 10 minutes in order to boot into home screen.
  16. Congrats! Enjoy unofficial Android 4.4.4 KitKat custom ROM on your Sony Xperia Sola now.

That’s all with the ROM installation. In case you’re stuck with anything or you’re facing any issues, feel free to drop your words in the comment box below. We will get back to you as soon as possible.

Install Android 4.4.4 KitKat On Sony Xperia V With OmniROM

1
Install Android 4.4.4 KitKat On Sony Xperia V With OmniROM

Sony’s 2012 mid-range device, the Xperia V sports some very nice specifications and becomes a choice for the users. On the front, the device has a great 4.3 inches display with 342 ppi. There’s a RAM of 1 GB and 8 GB internal storage. Under the hood, there’s a 1.5 GHz Dual Core CPU accompanied by Adreno 225 GPU. Sony has always done a great job when it comes to camera and it can be seen on Xperia V as well as this device sports a 13 MP shooter at the back while a VGA shooter for video calling is placed on the front. The only thing this device may lag in, is it’s software. Sony recently updated Xperia V to Android 4.3 Jelly Bean but there hasn’t been any word for any further Android update since then.

While Xperia V owners are little bit disappointed for not having the latest version of Android on their device, XDA recognized developer walter79 came up with OmniROM, one of the most popular custom ROMs available for many Android devices. Current version of OmniROM, that is based on Android 4.4.4 KitKat is a great way to update your Xperia V unofficially as you won’t get a chance to do so officially anytime soon. In case you’re wondering how can you do so, you may not worry about it as in the succeeding guide we are going to update our beloved Sony Xperia V to Android 4.4.4 KitKat using this OmniROM.Xperia V

Let’s go through the important instructions and then flash this ROM.

Early Preparations:

1. This is only for Sony Xperia V!

This custom ROM is only for the device mentioned above. Make sure that your model number matches the one listed above. To do so, go to Settings > About Device on your device and see your model number. Flashing this ROM on any other device will result in bricking it so make sure that you meet this requirement first of all.

2. Battery should be charged at least over 60%.

Make sure that your battery is charged enough to complete the flashing process. In case your battery is low and your device goes dead during the flashing process, you may end up soft bricking your device as it won’t complete the flashing process.

3. Unlock Bootloader.

Your device’s bootloader must be unlocked in order to flash this custom ROM. You can unlock it by using our Sony bootloader unlock  guide.

4. Backup everything!

Just to be on the safe side, you may consider backing up each and everything from your Android device. This is highly recommended so that in case anything goes wrong, you still have the access to all of your data and you can restore it immediately. You may backup everything as listed below.

5. Disclaimer

The methods involved in flashing custom recoveries, roms and rooting your phone are highly custom and may result in bricking your device, and has nothing to do with Google or the device manufacturer that is Sony in our case. Also rooting your device will void its warranty and you will be no longer eligible for any kind of free device services by the manufacturers/warranty providers. In case of any mishap we may not be held responsible. Follow these instructions to the letter to avoid any mishap or bricking. Make sure that whatever you do, you are doing it at your own responsibility.

How To Install Android 4.4.4 KitKat On Sony Xperia V:

  1. Download the omni-4.4.4-20140829-tsubasa-NIGHTLY.zip [ROM.zip] file.
  2. Download Google Gapps.zip for Android 4.4.4 KitKat Custom ROM.
  3. Place the ROM.zip file and Gapps.zip file on your phone’s internal or external sd card.
  4. Download Android ADB and Fastboot driversfollow our full guide here to make it easy.
  5. Open the downloaded ROM.zip on your PC and extract the Boot.img file only.
  6. Now place the kernel file that is boot.img  file that you extracted from the zip folder in the fastboot folder that you downloaded from the guide linked above.
  7. After placing the kernel file in the fastboot folder, open the fastboot folder. Press shift and then Right click on any empty area inside the folder, now select “Open command prompt here“. flash it using the command

    fastboot flash boot boot.img”. In case you are confused, follow the Android ADB & Fastboot drivers guide carefully.

  8. Boot into CWM recovery. To do so, turn off your device, now turn it on and quickly press volume up key, you will get the CWM interface.
  9. In CWM wipe the factory data, cache and dalvik cache.
  10. Now select “Install Zip>Choose Zip from Sd card / external Sd card”.
  11. Select the ROM.zip file that your placed on your phone’s Sd card.
  12. It should take a few mins to flash the ROM, now once again select “Install Zip>Choose Zip from Sd card / external Sd card”.
  13. Choose the Gapps.zip file this time and flash it.
  14. As soon as done flashing, clear cache and dalvik cache again.
  15. Reboot system now, you should see the Omni ROM logo on the boot screen now, it may take upto 10 minutes in order to boot into home screen.
  16. Congrats! Enjoy unofficial Android 4.4.4 KitKat custom ROM on your Sony Xperia V now.

That’s all with the ROM installation. In case you’re stuck with anything or you’re facing any issues, feel free to drop your words in the comment box below. We will get back to you as soon as possible.