Home Blog Page 423

Install Android 4.4.4 KitKat On Sony Xperia T With Carbon ROM

0
Install Android 4.4.4 KitKat On Sony Xperia T With Carbon ROM

Sony stopped Xperia T’s Android updates on Android 4.3 Jelly Bean and since then there hasn’t been any official word by Sony whether it will update it’s device to any further version of Android or not. Google is all set to launch Android L and since most of the high end devices are running on Android 4.4.4 KitKat, this definitely leaves the Xperia T owners in a little bit of disappointment for not having the latest Android version running on their device.

In this case, the only solution is to get a great custom ROM and give your device a new life. This job for Xperia T has been done by XDA senior member Alx31TLse who brought us up Android 4.4.4 KitKat based on Carbon ROM, a very popular and one of the most widely used Android custom ROM by Team Carbon. This ROM is available for many Android devices. In the succeeding post we are going to install this Android 4.4.4 KitKat with Carbon ROM on our beloved Sony Xperia T. In case you’ve been looking to update your device, you may have spotted the right place. Let’s go through the early preparations and then flash this ROM.

Xperia T

Early Preparations:

1. This is only for Sony Xperia T!

This custom ROM is only for the device mentioned above. Make sure that your model number matches the one listed above. To do so, go to Settings > About Device on your device and see your model number. Flashing this ROM on any other device will result in bricking it so make sure that you meet this requirement first of all.

2. Battery should be charged at least over 60%.

Make sure that your battery is charged enough to complete the flashing process. In case your battery is low and your device goes dead during the flashing process, you may end up soft bricking your device as it won’t complete the flashing process.

3. Unlock Bootloader.

Your device’s bootloader must be unlocked in order to flash this custom ROM. You can unlock it by using our Sony bootloader unlock  guide.

4. Backup everything!

Just to be on the safe side, you may consider backing up each and everything from your Android device. This is highly recommended so that in case anything goes wrong, you still have the access to all of your data and you can restore it immediately. You may backup everything as listed below.

5. Disclaimer

The methods involved in flashing custom recoveries, roms and rooting your phone are highly custom and may result in bricking your device, and has nothing to do with Google or the device manufacturer that is Sony in our case. Also rooting your device will void its warranty and you will be no longer eligible for any kind of free device services by the manufacturers/warranty providers. In case of any mishap we may not be held responsible. Follow these instructions to the letter to avoid any mishap or bricking. Make sure that whatever you do, you are doing it at your own responsibility.

How To Install Android 4.4.4 KitKat On Sony Xperia T:

    1. Download the CARBON-KK-UNOFFICIAL_Mint_build14.zip [ROM.zip] file.
    2. Download Google Gapps.zip for Android 4.4.4 KitKat Custom ROM.
    3. Place the ROM.zip file and Gapps.zip file on your phone’s internal or external sd card.
    4. Download Android ADB and Fastboot driversfollow our full guide here to make it easy.
    5. Open the downloaded ROM.zip on your PC and extract the Boot.img file only.
    6. Now place the kernel file that is boot.img  file that you extracted from the zip folder in the fastboot folder that you downloaded from the guide linked above.
    7. After placing the kernel file in the fastboot folder, open the fastboot folder. Press shift and then Right click on any empty area inside the folder, now select “Open command prompt here“. flash it using the command

      fastboot flash boot boot.img”. In case you are confused, follow the Android ADB & Fastboot drivers guide carefully.

    8. Boot into CWM recovery. To do so, turn off your device, now turn it on and quickly press volume up key, you will get the CWM interface.
    9. In CWM wipe the factory data, cache and dalvik cache.
    10. Now select “Install Zip>Choose Zip from Sd card / external Sd card”.
    11. Select the ROM.zip file that your placed on your phone’s Sd card.
    12. It should take a few mins to flash the ROM, now once again select “Install Zip>Choose Zip from Sd card / external Sd card”.
    13. Choose the Gapps.zip file this time and flash it.
    14. As soon as done flashing, clear cache and dalvik cache again.
    15. Reboot system now, you should see the Carbon ROM logo on the boot screen now, it may take upto 10 minutes in order to boot into home screen.
    16. Congrats! Enjoy unofficial Android 4.4.4 KitKat custom ROM on your Sony Xperia T now.

That’s all with the ROM installation. In case you’re stuck with anything or you’re facing any issues, feel free to drop your words in the comment box below. We will get back to you as soon as possible.
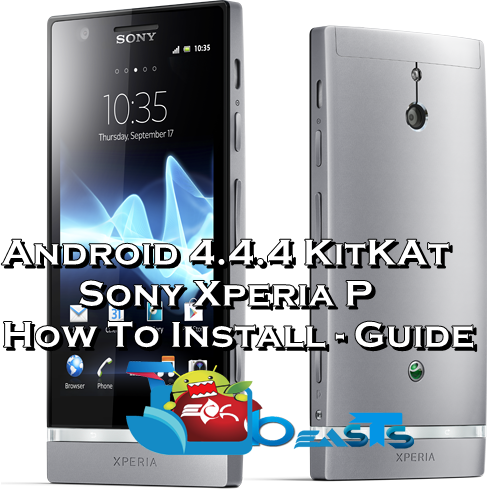
Install Android 4.4.4 KitKat On Sony Xperia P With CM 11 Custom ROM

1
Install Android 4.4.4 KitKat On Sony Xperia P With CM 11 Custom ROM

Sony’s Xperia P is a great mid-range device. Although this device is pretty much old now, but is still used by so many users across the world. Xperia P sports a 4.0 inches screen with 275 ppi. Under the hood is a 1.0 GHz dual core CPU accompanied by Mali-400 GPU. There’s a RAM of 1 GB, internal storage is ranged at 16 GB. At the back Sony has placed an 8.0 MP shooter while a VGA shooter on the front, no doubt Sony always produces the best cameras for its smartphones. The only thing this device lacks in, is its software. Xperia P ran on Android Gingerbread out of the box and the device could only get Android 4.1 Jelly Bean as its higher update.

While Google is heading towards Android L, this leaves Xperia P users in a little bit of disappointment having their device on the very old Android 4.1 Jelly Bean firmware. But this should eventually come to an end since there’s a number of great developers coming up lots of custom firmwares for so many Android devices. These custom firmwares definitely give the forgotten devices a new life by letting the users taste higher version of Android unofficially. Similar thing for the Xperia P has been done by XDA senior member percy_g2 who brought the users Android 4.4.4 KitKat based on CyanogenMod 11 custom ROM. xperia-p-silver-486x489

In case you don’t know about CyanogenMod, CyanogenMod is the most popular and widely used aftermarket Android firmware that is available for so many devices. In the following post we are going to install this Android 4.4.4 KitKat CyanogenMod 11 custom ROM on our beloved Sony Xperia P. Let’s go through the early preparations and begin with the ROM installation.

Early Preparations:

1. This is only for Sony Xperia P!

This custom ROM is only for the device mentioned above. Make sure that your model number matches the one listed above. To do so, go to Settings > About Device on your device and see your model number. Flashing this ROM on any other device will result in bricking it so make sure that you meet this requirement first of all.

2. Battery should be charged at least over 60%.

Make sure that your battery is charged enough to complete the flashing process. In case your battery is low and your device goes dead during the flashing process, you may end up soft bricking your device as it won’t complete the flashing process.

3. Unlock Bootloader.

Your device’s bootloader must be unlocked in order to flash this custom ROM. You can unlock it by using our Sony bootloader unlock  guide.

4. Backup everything!

Just to be on the safe side, you may consider backing up each and everything from your Android device. This is highly recommended so that in case anything goes wrong, you still have the access to all of your data and you can restore it immediately. You may backup everything as listed below.

5. Disclaimer

The methods involved in flashing custom recoveries, roms and rooting your phone are highly custom and may result in bricking your device, and has nothing to do with Google or the device manufacturer that is Sony in our case. Also rooting your device will void its warranty and you will be no longer eligible for any kind of free device services by the manufacturers/warranty providers. In case of any mishap we may not be held responsible. Follow these instructions to the letter to avoid any mishap or bricking. Make sure that whatever you do, you are doing it at your own responsibility.

How To Install Android 4.4.4 KitKat On Sony Xperia P:

  1. Download the cm-11-20140804-SNAPSHOT-M9-nypon.zip [ROM.zip] file.
  2. Download Google Gapps.zip for Android 4.4.4 KitKat Custom ROM.
  3. Place the ROM.zip file and Gapps.zip file on your phone’s internal or external sd card.
  4. Download Android ADB and Fastboot driversfollow our full guide here to make it easy.
  5. Open the downloaded ROM.zip on your PC and extract the Boot.img file only.
  6. Now place the kernel file that is boot.img  file that you extracted from the zip folder in the fastboot folder that you downloaded from the guide linked above.
  7. After placing the kernel file in the fastboot folder, open the fastboot folder. Press shift and then Right click on any empty area inside the folder, now select “Open command prompt here“. flash it using the command    fastboot flash boot boot.img”. In case you are confused, follow the Android ADB & Fastboot drivers guide carefully.
  8. Boot into CWM recovery. To do so, turn off your device, now turn it on and quickly press volume up key, you will get the CWM interface.
  9. In CWM wipe the factory data, cache and dalvik cache.
  10. Now select “Install Zip>Choose Zip from Sd card / external Sd card”.
  11. Select the ROM.zip file that your placed on your phone’s Sd card.
  12. It should take a few mins to flash the ROM, now once again select “Install Zip>Choose Zip from Sd card / external Sd card”.
  13. Choose the Gapps.zip file this time and flash it.
  14. As soon as done flashing, clear cache and dalvik cache again.
  15. Reboot system now, you should see the CM logo on the boot screen now, it may take upto 10 minutes in order to boot into home screen.
  16. Congrats! Enjoy unofficial Android 4.4.4 KitKat custom ROM on your Sony Xperia P now.
  1. That’s all with the ROM installation. In case you’re stuck with anything or you’re facing any issues, feel free to drop your words in the comment box below. We will get back to you as soon as possible.

Install Android 4.4.4 KitKat On Sony Xperia L With CM 11 Custom ROM

21
Install Android 4.4.4 KitKat On Sony Xperia L With CM 11 Custom ROM

Sony’s Xperia L is currently running on Android 4.2.2 Jelly Bean and it looks like this Android version will be the higher for this device. That means, Xperia L users won’t be able to taste Android 4.4.4 KitKat officially while Sony is updating most of its mainstream devices to the latest and greatest version of Android.  Even though it’s not possible to have a higher  version of Android officially for the Xperia L, but there still is a choice of using a custom firmware. That’s one of the greatest pros of Android, because of it’s open nature, it has allowed the developers to bring up a number of custom firmwares giving life to the devices forgotten by the device manufacturers.

XDA recognized developer jerpelea came up with Android 4.4.4 KitKat based on CyanogenMod 11, the most popular aftermarket Android custom firmware. Current build of the ROM is in testing stage, and is available for installation.  In the proceeding guide we are going to install this Android 4.4.4 KitKat CM 11 custom ROM on our beloved Sony Xperia L. Let’s go through the early preparations and install this ROM now.Xperia-L-black-1240x840-1fb46e1807e501498b48de744f4a5e39

Early Preparations:

1. This is only for Sony Xperia L!

This custom ROM is only for the device mentioned above. Make sure that your model number matches the one listed above. To do so, go to Settings > About Device on your device and see your model number. Flashing this ROM on any other device will result in bricking it so make sure that you meet this requirement first of all.

2. Battery should be charged at least over 60%.

Make sure that your battery is charged enough to complete the flashing process. In case your battery is low and your device goes dead during the flashing process, you may end up soft bricking your device as it won’t complete the flashing process.

3. Unlock Bootloader.

Your device’s bootloader must be unlocked in order to flash this custom ROM. You can unlock it by using our Sony bootloader unlock  guide.

4. Backup everything!

Just to be on the safe side, you may consider backing up each and everything from your Android device. This is highly recommended so that in case anything goes wrong, you still have the access to all of your data and you can restore it immediately. You may backup everything as listed below.

5. Disclaimer

The methods involved in flashing custom recoveries, roms and rooting your phone are highly custom and may result in bricking your device, and has nothing to do with Google or the device manufacturer that is Sony in our case. Also rooting your device will void its warranty and you will be no longer eligible for any kind of free device services by the manufacturers/warranty providers. In case of any mishap we may not be held responsible. Follow these instructions to the letter to avoid any mishap or bricking. Make sure that whatever you do, you are doing it at your own responsibility.

How To Install Android 4.4.4 KitKat On Sony Xperia L:

  1. Download the FXP331-cm-11-20140804-UNOFFICIAL-taoshan.zip [ROM.zip] file.
  2. Download Google Gapps.zip for Android 4.4.4 KitKat Custom ROM.
  3. Place the ROM.zip file and Gapps.zip file on your phone’s internal or external sd card.
  4. Download Android ADB and Fastboot driversfollow our full guide here to make it easy.
  5. Open the downloaded ROM.zip on your PC and extract the Boot.img file only.
  6. Now place the kernel file that is boot.img  file that you extracted from the zip folder in the fastboot folder that you downloaded from the guide linked above.
  7. After placing the kernel file in the fastboot folder, open the fastboot folder. Press shift and then Right click on any empty area inside the folder, now select “Open command prompt here“. flash it using the command

    fastboot flash boot boot.img”. In case you are confused, follow the Android ADB & Fastboot drivers guide carefully.

  8. Boot into CWM recovery. To do so, turn off your device, now turn it on and quickly press volume up and down keys, you will get the CWM interface.
  9. In CWM wipe the factory data, cache and dalvik cache.
  10. Now select “Install Zip>Choose Zip from Sd card / external Sd card”.
  11. Select the ROM.zip file that your placed on your phone’s Sd card.
  12. It should take a few mins to flash the ROM, now once again select “Install Zip>Choose Zip from Sd card / external Sd card”.
  13. Choose the Gapps.zip file this time and flash it.
  14. As soon as done flashing, clear cache and dalvik cache again.
  15. Reboot system now, you should see the CM logo on the boot screen now, it may take upto 10 minutes in order to boot into home screen.
  16. Congrats! Enjoy unofficial Android 4.4.4 KitKat custom ROM on your Sony Xperia L now.

That’s all with the ROM installation. In case you’re stuck with anything or you’re facing any issues, feel free to drop your words in the comment box below. We will get back to you as soon as possible.

How To Send Large File Attachments in Mail on iPhone and iPad

0
How To Send Large File Attachments in Mail on iPhone and iPad

Our Dev Team is well aware of one of the most common grumbles when it comes to sending large files as attachments through email on Apple iPhone and iPad. Apple’s default mail app included, many other mail clients make it easy for you to attach and send files that are a few MBs large (10 to 20MB max).

There are obviously a few things that easily cross the file size limit as attachments for instance the modern-day HD videos, images and other media, a zip file containing various of docs/pdfs. In such matters, without blowing your head off , you need more simpler and effortless ways to send your required attachments through mail. Here we, at techbeasts, come forth to solve your, this particular, problem.

How-to-Send-Large-Files-as-Mail-Attachments-on-iPhone-and-iPad

Now we know that iOS 8 and OS X Yosemite feature a unique app called MailDrop, the suitable solution to this certain complication. MailDrop will let iOS and Mac users send files of any size (up to 5GB) via Mail. Enjoy this app!!

How To Send Large File Attachments in Mail on iPhone and iPad:

  1. First Upload your file to Dropbox.
  2. Now open the file within dropbox and tap on share icon.
  3. After tapping on share icon now copy link.
  4. Now open mail app on your iPhone or iPad.
  5. Compose a mail choose a mail id whom you want to send.
  6. Now just paste the link in the mail body and send it.

This how you can send large file attachments in Mail on your iPhone or iPad. Do tell me in comments if you have any other solutions or methods.

How To Fix Failed Out of Memory Please try later on Whatsapp

0
How To Fix Failed Out of Memory Please try later on Whatsapp

Whatsapp is the best cross platform messaging app with awesome performance, the one thing i like about Whatsapp is that its fast and i never faced any problem until now last night Whatsapp started behaving a bit weird, when ever i try to send a pic to anybody a popup appears saying ” Failed Out of Memory Please try later “.  I tried alot of methods nothing work but after hours of work and research, finally i found out a way to fix Failed Out of Memory Please try later on Whatsapp.

Failed Out of Memory Please try later

How To Fix Failed Out of Memory Please try later on Whatsapp:

Following is step by step guide on how you can fix Failed Out of Memory Please try later on Whatsapp and resend images easily to any contact.

  1. First try removing few picture from Whatsapp folder located in Gallery.
  2. Move or rename Whatsapp media folder and then try again.
  3. Clear Whatsapp cache. Setting->Application Manager-> All -> Whatsapp -> Tap -> Clear Cache.
  4. Remove or un-mound the sd card, wait for 1 minute and insert it back.
  5. Try a new sd card.
  6. Now if none of this worked, try clearing cache of your Gallery app goto Setting->Application Manager-> All -> Gallery -> Tap -> Clear Cache. It worked like a charm !
  7. Done.

Most Popular HD Wallpapers For Your Mac – Free Download

Most Popular HD Wallpapers For Your Mac – Free Download

Wallpapers give a refreshing look on our screens of our Laptops, Smartphones, Macbook and Desktop. I love to see my Macbook screen colorful thats why i change my wallpaper at daily basis, so if you want HD wallpapers for your Macbook check out my collection below. I’ve collected the most popular hd wallpapers for your macbook, choose the best one and make you Macbook screen colorful and stylish.

You can check more HD Wallpapers for your Desktops and Android/iOS smartphones, also we a hd wallpapers for Android and iOS tablets. Check Our Gallery.

Also See:Most Popular HD Wallpapers For Your Desktop

Apple-Theme-Wallpaper-HD-Wide


Most Popular HD Wallpapers For Your Mac

Unlock iPhone On iOS 7 For Free [ How To ]

0
Unlock iPhone On iOS 7 For Free [ How To ]

How to unlock iPhone i think its a popular search around the globe, once there was a time Jailbreak your device open Cydia and install UltrasnOw from Cydia store Volla !  done you can use sim on your iPhone and iPhone is unlocked, but as the time passed Apple started working on security to get rid of these methods form which you can easily unlock iPhone for free. Our Techbeasts Dev team was working on iPhone Unlocking using same methods as we used to do. After such a long time finally we’ve found a working method that will unlock iPhone on iOS 7 for free, iOS 7 won’t let you unlock iPhone easily but now you can.

Also See: How To Bypass iCloud Activation Lock & Remove iCloud Account [ Guide ]

iphone_unlocked

Requirements:

  • SAM activation tickets
  • Sim that was used to save the last SAM activation tickets.
  • You’ve to Jailbreak your device using Evasion.
  • iFile from Cydia.


How To Unlock iPhone On iOS 7 For Free:

  1. You’ve to use the original sim that was used to save SAM activation tickets.
  2. Open iFile and head over to /var/root/Library .
  3. Now Tap on edit button and select lockdown folder.
  4. Create a backup using zip button on the bottom and delete the lockdown folder.
  5. Now you’ll need activation tickets that you’ve saved. 
  6. Unzip the lockdown folder with valid activation ticket (Zipped file).
  7. Copy the lockdown folder which you’ve have extracted.
  8. Goto var/root/Library then tap Edit > paste the lockdown folder.
  9. You’ve to delete SAMPrefs files form your iPhone, /User/Library/Preferences->delete com.bingner.sam.plist file.


All done you’ve successfully unlocked iPhone :).

Also See: Use DoulCi To Bypass iCloud Activation

How To Bypass iCloud Activation Lock & Remove iCloud Account [ Guide ]

5
How To Bypass iCloud Activation Lock & Remove iCloud Account [ Guide ]

Here we go again a few minutes back i’ve posted a method on Bypassing iCloud id using DoulCi servers and this i’ve a new guide that is working 100%. This time there is another tool that can Bypass iCloud Activation Lock & Remove iCloud Account and good thing is that it supports all the latest and old devices. You can use this tool for iPhone 5s,5c,5,4,4s, iPad 2/3, iPad Air, iPad Mini and iPad 4, follow my step by step guide on Bypass iCloud Activation Lock.

original

How This Tool Work ?

This tool bypass the iCloud activation lock and then remove the current id and let you add new id. After using this tool you can access apps, WiFi, sms and more. There is no rocket science in this all you have to do is download tool and install it, follow the steps that are mentioned in tool.

Compatible Devices:

  • Bypass iCloud Activation Lock iPhone 5S
  • Bypass iCloud Activation Lock iPhone 5C
  • Bypass iCloud Activation Lock iPhone 5
  • Bypass iCloud Activation Lock iPhone 4S
  • Bypass iCloud Activation LockiPhone 4
  • Bypass iCloud Activation Lock iPad Air
  • Bypass iCloud Activation Lock iPad Mini
  • Bypass iCloud Activation Lock iPad 4/3
  • Bypass iCloud Activation Lock iPad 2

Compatible iOS Firmwares:

  • Bypass iOS 8 iCloud Activation Lock
  • Bypass iOS 7.1.1 iCloud Activation Lock
  • Bypass iOS 7.1 iCloud Activation Lock
  • Bypass iOS 7.0.6 iCloud Activation Lock
  • Bypass iOS 7.0.5 iCloud Activation Lock
  • Bypass iOS 7.0.4 iCloud Activation Lock
  • Bypass iOS 7.0.3 iCloud Activation Lock
  • Bypass iOS 7.0.2/1 iCloud Activation Lock
  • Bypass iOS 7.0 iCloud Activation Lock

How To Bypass iCloud Activation Lock & Remove iCloud Account:

bypass-iOS-7-activation-lock


  1. First, download the tool from this link. [ Download here ] / If this tool is not working try this service [ Bypass Apple iCloud id ].
  2. When downloading is completed, put your device in DFU mode.
  3. Connect your device with the computer using the original USB cable and open the tool.
  4. Browse for ” activation.deb ” file located in the same folder with this tool.
  5. Now check the ” Remove iCloud Account/Activation Screen “.
  6. After checking the first option click on start.
  7. Now repeat Step 1+2 and click on Activate device.
  8. Wait for the process to finish.

After all the process is complete, connect your device with iTunes and now add new iCloud id on your iPhone, iPad and iPod touch. You can tell me in comments if you face any kind of issue.

Swing Copters APK 1.1.0

0
Swing Copters APK 1.1.0

The Flappy Bird developer thought that his previous game wasn’t enough to annoy and frustrate the Android and iPhone users. Since this didn’t satisfy him, he came up with Swing Copters, his new arcade game based on 2D graphics. It looks like Dong Ngyuyen actually knows how to make he best use of 2D graphics and come up with something that can keep the people busy and in parallel it can also frustrate them to a extent where the think of hitting their device on the floor and get rid of this game.

Swing Copters just makes the users forget all laws of physics. If you’re thinking that you can fly that propeller hat being a little intelligent and using some physical formula, you’re entirely wrong. It isn’t easy to bypass those annoying hammers. The game play apparently is simple, you just need to tap in order to fly the propeller hat and pass through those hammers, the more hammers you pass through, it will add to your score and help you unlock other characters. Swing Copters is packed up in only 3.1 MB’s, the game doesn’t comprise of a lot of complexity with the levels and upgrades, yet it’s kinda impossible to hit the score boards with a bigger number.Swing Copters

The game is available in the Play Store for free. Current version is 1.1.0. The latest update has reduced the difficulty of this game. For the users who cannot locate this game in the Play Store or who can not just see this game in the Play Store in their region, they can get this game manually. We’ve pulled out the Swing Copters v 1.1.0 APK and embedded the download link below with the installation guide. Let’s go through the game description and grab this game.

Swing Copters Description:

Flying with a propeller hat is not as easy as it looks.

[HOW TO PLAY] • Tap to change direction.
• Get 4 medals to unlock more characters.

Enjoy the game.

Download and install Swing Copters APK v1.1.0:

    1. Download Swing Copters APK v1.1.0
    2. Connect your phone to your laptop or PC now.
    3. Copy the APK file to your phone’s SD card.
    4. Disconnect your phone.
    5. Locate the Swing Copters APK v1.1.0 file on your phone now and tap to install it.
    6. If prompted to select installer, then select “Package Installer”.
    7. Allow “Unknown Sources” from settings > security if prompted.
    8. Proceed with the installation and complete it.
    9. Once done, access the game from app drawer.
    10. That’s all!

Swamp Attack for Windows PC and MAC

0
Swamp Attack for Windows PC and MAC

A while ago I got my hands on this game and I wasn’t able to leave my phone. Such an addictive and fun-having game it is. Swamp Attack by Outfit7 is a simple, mini and a great action game that can make you addictive within no time and you would love passing your time playing this game. The game prompts the players to sit back in the swamp cottage and shoot the incoming crocodiles and other predators in order to save the swamp cottage.

Players can also use explosives to kill the monsters trying to attack the swamp cottage. There are up to 10 different tools that will help you to fight with the enemies. Swamp attack has around 70 different levels and 4 episodes in order to keep the players addicted with the game. Besides the cool game play, Swam Attack’s graphics are quite impressive. The game is available  in the Google Play Store, but some users might not be able to play it on an Android device and some just won’t like to play it on a small screen, for those users we are going to install Swamp Attack on PC, whether it’s a Windows XP,7,8,8.1 PC or a MAC by Apple. Let’s go through the game’s official features and the install this game.SwapAttack 1

Description:

Defend your house! Your swamp cottage is under attack by animals gone crazy. You have to defend it and survive the oncoming attacks from the evil zombie critters who know no mercy.What’s great is that Swamp Attack is free to play with the option to purchase items to help you progress through the levels faster.

The game features 78 different levels, 4 episodes and a Quick Mission for an instant action! Defend your house with more than 10 awesome defense tools like the mighty shotgun, the reckless minigun and the super atom bomb! Witness more than 15 different critters going wild each with its own special attack!

HOW TO PLAY
– Tap the screen to shoot.
– Drag and drop the explosives onto monsters.
– Switch between weapons during the action.
– Upgrade and equip weapons before starting a new level.
– Drink potion to continue playing if you get killed or to refill the energy instantly.

Defend your house and have fun!

Download Swamp Attack for Windows PC and MAC:

    1. You need an Android emulator to run this game on your Windows PC or MAC. We recommend using BluestacksUse our guide to install it on your PC.After downloading and installing Bluestacks, download Swamp Attack apk.
    2. Open the downloaded APK file now, and let Bluestacks install it.
    3. Open BlueStacks now > All Apps > Swamp Attack.
    4. The game will start now, follow the on screen instructions.
    5. Follow the initial screen,  you’ll be able to access Swing Copters.
    6. Use space key or your mouse’s right click  to play the game.
    7. Enjoy the toughest game of Android yet.
    8. That’s all.

Alternatively, you can use the Play Store within Bluestacks to install Swamp Attack instead of using the APK file method.

New Xperia Z3 leaked images show the phone from all angles

0
New Xperia Z3 leaked images show the phone from all angles

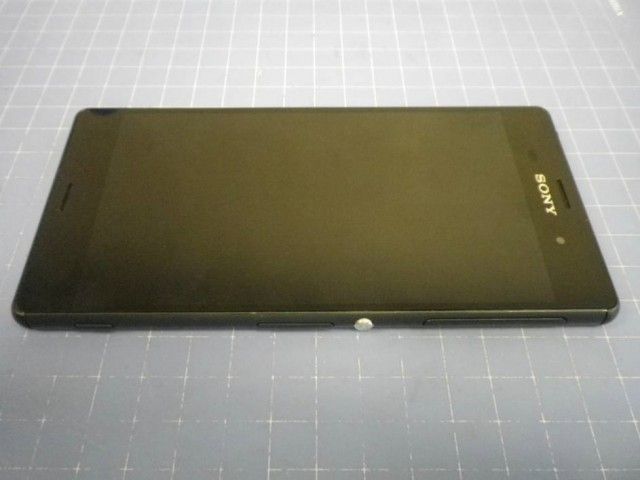
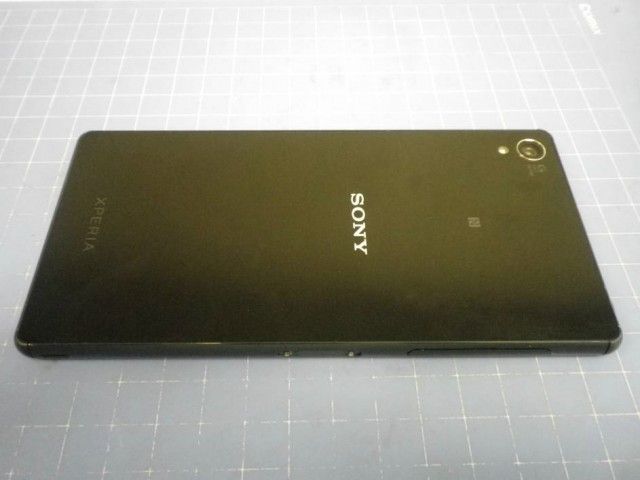
Sony Xperia Z3 leaked images have been caught up once again in the wild. We’ve seen a number of Xperia Z3 and it’s younger brother Xperia Z3 compact images, both the phones separately or posing against each other but today’s images got something potential to give us an even better idea about Sony’s upcoming flagship device.

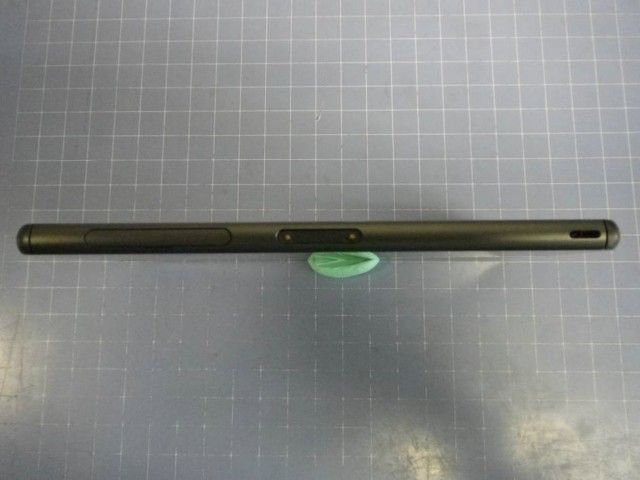
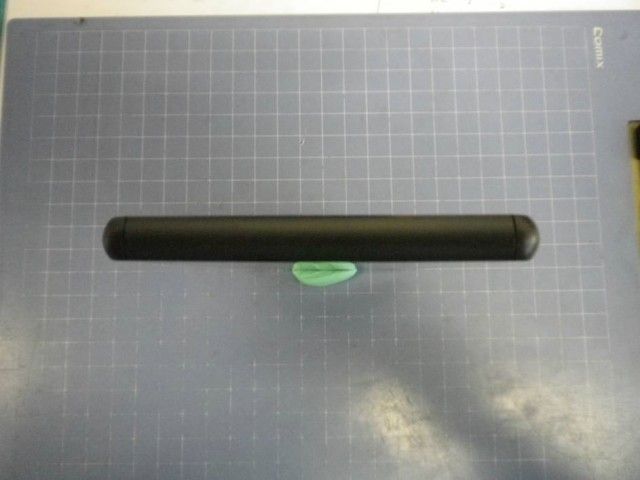
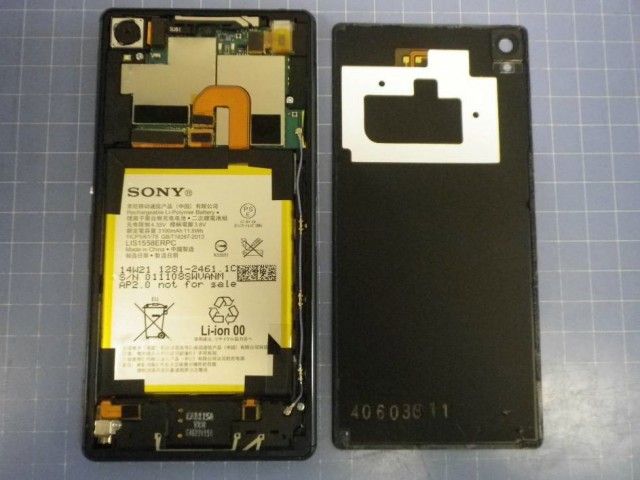
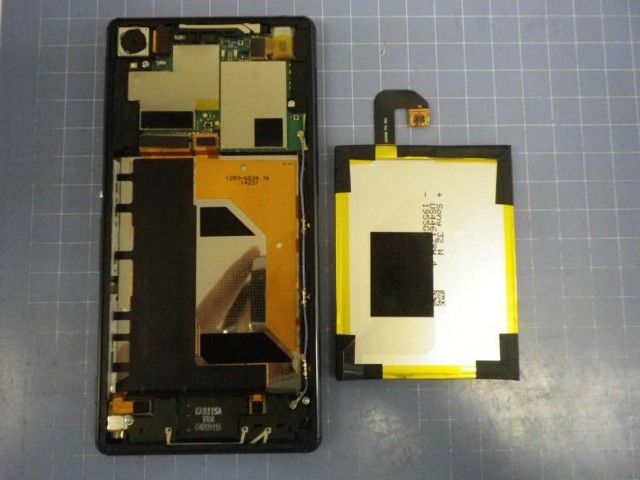
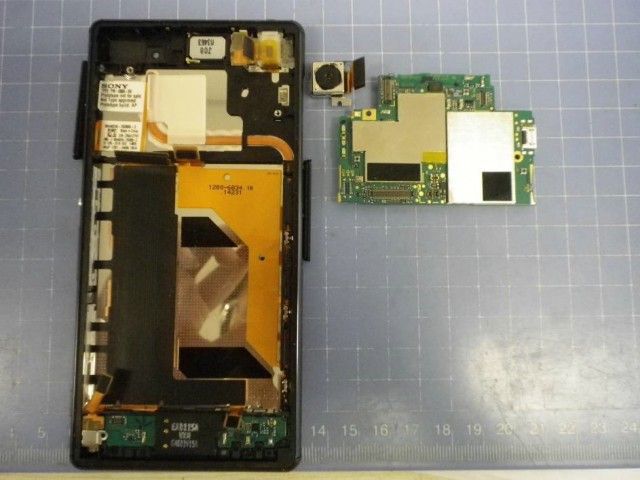
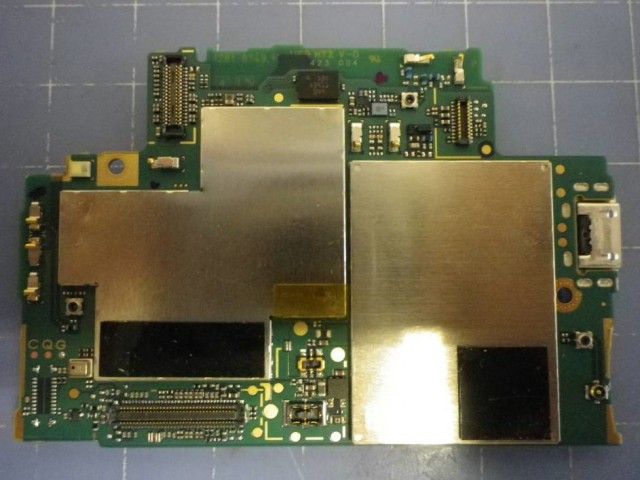
Besides showing the front and back of the Z3, the Xperia Z3 leaked images show us the sides and a detailed look inside the device which also shows that the device is going to have a massive 3100 mAh battery and it will be non-removable. The variant in the images appears to be Dual-SIM. The images also reveal that Xperia Z3’s design won’t be changed as much as expected, except for having little round sides which were flat in the earlier models.

z3-1 z3-2 z3-4 z3-5 z3-6 z3-7 z3-8 z3-9 z3-10 z3-11 z3-12 z3-13

 The Xperia Z3 is expected to sport a 5.15 inches full HD display. Qualcomm’s Snapdragon 801 Quad Core CPU clocked at 2.4 GHz is expected to power this device up, which will be accompanied by Adreno 330 GPU. A RAM of 3 GB will be placed under the hood. The primary cam, according to the rumors so far is suggested to be 20.7 MP while the front cam will be ranged at 2.1 MP. Sony is expected to pull the curtains off from this device somewhere in September or October 2014. But we surely can’t believe all this info as long as there isn’t any official word by Sony, so make sure that you take a pinch of salt while reading this.

Via: AndroidAuthority 

Sky Force 2014 For PC – Windows XP,7,8,8.1 And MAC

0
Sky Force 2014 For PC – Windows XP,7,8,8.1 And MAC

Sky Force, the only game I loved to play when I owned a Nokia 7610 in 2007. Sky Force ran very well on Nokia’s Symbian OS and it was easy for the users to spend so many hours smashing the incoming enemy jets and ships on the small screens. While going through Google Play Store, Sky Force caught my eyes and I found that the developer was same, Infinite Dreams, who were behind the same game for Nokia’s Symbian OS. As soon as I played this game, I was addicted to it.

Sky Force 2014 offers great graphics. You are all set to battle against the enemy giants and take them down order to rescue the civilians. There’s a number of upgrades available for your planes, shields, guns and other machinery. Sky Force 2014 also offers different tournaments. There’s a number of bonuses available in the game as well. Although this game is available for free in the Google Play Store and runs on all Android device having Android 4.1 or above, but some of the users would like to get this game running on your PC. For those users, we are going to install Sky Force 2014 on PC, whether it’s a Windows XP,7,8, or 8.1 PC or it’s a MAC by Apple. Let’s go through the game features and then install it on the computer.SkyForce20141

Features:

 Beautiful levels with immersive missions to complete.
* Multiple extreme boss battles.
* Upgrade your shields, guns, missiles, lasers, mega-bombs and magnets.
* Risk everything to rescue civilians.
* Brand new weekly tournaments against other players.
* Boost your final score with a host of in-game achievements.
* Rescue fallen opponents to win extra lives and stars.
* Accessible to beginners, as well as hardcore shooter addicts.
* Full voiceover and incredible electronic soundtrack.

Download Sky Force 2014 For PC – Windows XP,7,8,8.1 And MAC:

    1. You need an Android emulator to run this game on your Windows PC or MAC. We recommend using BluestacksUse our guide to install it on your PC.
    2. After downloading and installing Bluestacks, download Sky Force 2014.
    3. Open the downloaded APK file now, and let Bluestacks install it.
    4. Open BlueStacks now > All Apps > Sky Force 2014.
    5. The game will start now, follow the on screen instructions.
    6. Follow the initial screen,  you’ll be able to access Swing Copters.
    7. Use space key or your mouse’s right click  to play the game.
    8. Enjoy the toughest game of Android yet.
    9. That’s all.

Alternatively, you can use the Play Store within Bluestacks to install Sky Force 2014 instead of using the APK file method.