Home Blog Page 421

Install Xperia Z3’s Home Launcher On Your Android Device [How To]

0
Install Xperia Z3’s Home Launcher On Your Android Device [How To]

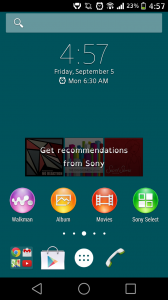
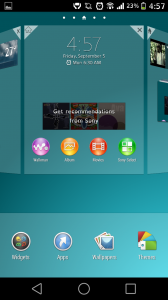
Few days back Sony brought up the Xperia Z3. The device doesn’t have a lot of stunning specifications and features and doesn’t stand really well against its rivals of the current time, but there surely is a number of enhancements as compared to the previous Xperia flagship devices. The very thing that has got a number of improvements is the UI of the Xperia Z3. Just yesterday, Sony released system dump of the Xperia Z3’s software and XDA Recognized Contributor & Themer Sahaab ported the Xperia Z3’s home launcher for other Android devices running Android 4.2 or higher.

The Home Launcher of Xperia Z3 can be installed on your Android device by simply installing the APK. The launcher works for both, rooted and non-rooted Andr0id devices. Once installed you can set it and enjoy the Xperia’s marvelous UI on your Android device. In the following post we will show you how you can install it and how you can set this Launcher on your phone.

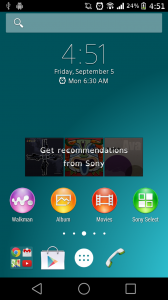
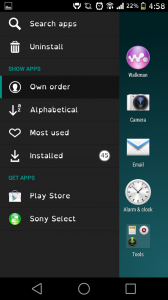
Xperia Home Launcher1Xperia Home 5Xperia Home 4
How To Install Xperia Z3’s Home Launcher On Your Android Device:

  1. Head over to the application page and download the APK according to your choice.
  2. Copy the APK file to your phone now.
  3. Locate the APK and install it, allow “Unknown Sources” if required.
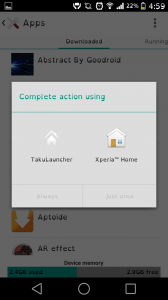
  4. Once installed, press the home key on your Android device and it should ask you to select the launcher.
  5. Select the “Xperia Home” launcher, it should launch it and set it as your default launcher.
  6. That’s all. You can now use the Xperia Home Launcher.
  7. To remove the launcher, you can simply go to Settings > Applications > All / Running > Xperia Home > Clear Defaults.
  8. That’s all.

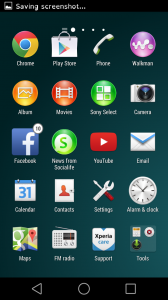
Xperia Home LauncherXperia Home 1Xperia Home 2

Dragon Mania For PC ( Windows/Mac/Computer )

0
Dragon Mania For PC ( Windows/Mac/Computer )

Dragon Mania is available for Pc not as in a program file, but you can download Dragon Mania on Pc by using a third party emulator. Dragon Mania is basically designed for iOS and Android devices. But it can be played on Pc, before starting the guide let me give you an overview on Dragon Mania.

Dragon Mania For PC

 About Dragon Mania:

Dragon Mania is basically a farm type game where you have fiercest and friendliest dragons ever. You have to feed them, take care of them and train them, so you can fight with your friends dragon. When you start this game there are only one or two dragons, so if you want all the dragons you have to breed them. After you breed your dragon you’ll get rewards and coins, form coins you can buy food for your dragon and also you buy new dragons from the market.

Original dragons with unique abilities and 11 different elemental attributes.

• Combine dragons to create new breeds! 50 dragons to collect and nurture!

• Improve their habitats, feed them, boost their level, and attract visitors to your island.

• Train your dragons for battle in an epic arena mini-game!

• Raid evil Vikings and win big rewards!

• Fight against your friends or join forces to defeat foes.

Download and Install Dragon Mania on PC:

  1. To download Dragon Mania for PC, you will need an Android emulator like Bluestacks. If you do not have it already, you can download it from the website Bluestacks.com.
  2. Open Bluestacks and search for Dragon Mania using search tool on the top of the homepage.
  3. Click on install button. The game will automatically download and install.
  4. Once the app has been installed, go to My Apps in Bluestacks homepage.
  5. The icon for the game will appear in My Apps.
  6.  Click on this icon to open Dragon Mania.

Now, you can start playing the game any time on your Pc simply by opening it from My Apps. Get mesmerized by the amazing graphics of the game and Join Stella and her super adventurous friends.

Hopefully, you will be able to install the game easily on your PC through this guide. If you still have any issues, please let us know and we will help you solve them. Enjoy !

Smash Hit For PC ( Windows/Mac/Computer )

0
Smash Hit For PC ( Windows/Mac/Computer )

Smash hit is available for PC, you people were wondering how, well in this post i’ll guide you how to install Smash Hit on PC. This game is original created for iOS and Android devices. But now you can download smash hit on Pc by the steps mentioned below, before starting the guide let me give you an overview.

Smash Hit For PC

About Smash Hit:

  • Its a journey in other dimensions where you have to smash everything that came in your way to moving forward and to pass on next level.
  • You have to be quick and tap on time in order to break the mirror that came in your way.
  • Every time you hit with a mirror you’ll lose 9 balls so while playing you have to be quick.
  • While passing through the dimensions you will get extra balls by breaking the mirrors in one shot.

* Smash your way through a beautiful futuristic dimension, smashing obstacles and targets in your path and experiencing the best destruction physics on mobile devices.

* Musically synchronized gameplay: music and audio effects change to suit each stage, obstacles move to each new tune.

* Over 50 different rooms with 11 different graphic styles, and realistic glass-breaking mechanics in every stage.

Let’s start the guide to download the smash hit for pc. Please follow all the steps carefully in order to install the game on Pc.

Download and Install Smash Hit on PC:

  1. To download Smash Hit for PC, you will need an Android emulator like Bluestacks. If you do not have it already, you can download it from the website Bluestacks.com.
  2. Open Bluestacks and search for Smash Hit using search tool on the top of the homepage.
  3. Click on install button. The game will automatically download and install.
  4. Once the app has been installed, go to My Apps in Bluestacks homepage.
  5. The icon for the game will appear in My Apps.
  6.  Click on this icon to open Smash Hit.

Now, you can start playing the game any time on your Pc simply by opening it from My Apps. Get mesmerized by the amazing graphics of the game and Join Stella and her super adventurous friends.

Hopefully, you will be able to install the game easily on your PC through this guide. If you still have any issues, please let us know and we will help you solve them. Enjoy !

Samsung Galaxy Note 4 HD Wallpapers For Free – Download Here

0
Samsung Galaxy Note 4 HD Wallpapers For Free – Download Here

Samsung Galaxy Note 4 is released on September 6 along with Galaxy Note edge, both of these device are best in specs and feature wise. When Samsung Galaxy Note 3 was released i posted HD wallpapers for you and now since Samsung Galaxy Note 4 is out, now  i’ve collected the best HD Wallpapers for Samsung Galaxy Note 4.

Also See: Samsung Galaxy Note 3 HD Wallpapers.

I’ve a huge collection of HD Wallpapers for smartphones, desktop, laptops and Macbook. You can check them in our Wallpapers category.

Samsung Galaxy Note 4 HD Wallpapers For Free

???????????????????????

Download HD Minion Wallpapers for Mobile Phones

0
Download HD Minion Wallpapers for Mobile Phones

Minions are most adorable animated characters ever came, these characters were introduced in animated movie ” Dispicable Me “. These characters made this movie awesome and everybody dreams about to have one with them. For all those are in love with these cute and funny minions i’ve collected HD Minion Wallpapers for your mobile devices. Get one from the following wallpapers and set it as a wallpaper on your device.

I’ve a huge collection of HD Wallpapers for smartphones, desktop, laptops and Macbook. You can check them in our Wallpapers category.

Download HD Minion Wallpapers for Mobile Phones

despicable-me-minions-wallpaper-wallpaper-minion-pictures-despicable-bergerak-agnes-hd-banana-minions-despicable-me-minions-cartoon-hd-wallpaper-1920x1080-7988


Install Android 4.4.4 KitKat On At&t Galaxy S2 Skyrocket With CM 11 Custom ROM

0
Install Android 4.4.4 KitKat On At&t Galaxy S2 Skyrocket With CM 11 Custom ROM

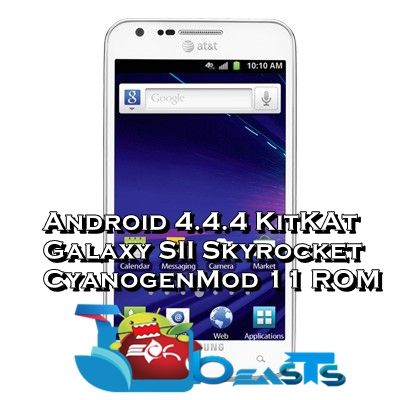
At&t’s Samsung Galaxy S2 aka Galaxy S2 Skyrocket SGH-I727 won’t be getting any higher version of Android and will stick to Android 4.1.2 Jelly Bean for the rest of its life now. If you own this device and you’re tired with the same old Android Jelly Bean, you may look for an option to get a higher version of Android on your device. The only way is to use a custom ROM. Since there’s a number of custom ROMs available, you might get confused which one you should flash. In order to make this easy for you, we’ve picked up a ROM, CyanogenMod 11’s stable build by XDA recognized developer SultanXDA.

To install Android 4.4.4 KitKat on your At&t Galaxy S2 Skyrocket with CyanogenMod 11 custom ROM, you only need to follow these instructions carefully. Although this is a stable ROM but make sure that you are good with flashing custom ROMs and you’re capable of handling the mishaps that might occur during or after flashing a custom ROM. Let’s go through the ROM features and early preparations and then flash this ROM.samsung-galaxy-s2-skyrocket

Here are some features of CyanogenMod 11 for Galaxy s2 Skyrocket:

  • Fully-functional camera and camcorder

  • Fixed available front-facing-camera camcorder resolutions (so it can record at higher resolutions)

  • Disabled LPA (as it isn’t functioning correctly on MSM8x60)

  • Enabled Qualcomm BSP (Board Support Package)

  • Enabled Qualcomm bionic optimizations

  • Uses CAF media HAL (media-caf)

  • USB mass storage mode (disabled by default; enable it in Settings -> Storage)

Early Preparations:

This is only for At&t Samsung Galaxy S2 Skyrocket SGH-I727!

This custom ROM is only for the device mentioned above. Make sure that your model number matches the one listed above. To do so, go to Settings > About Device on your device and see your model number. Flashing this ROM on any other device will result in bricking it so make sure that you meet this requirement first of all.

Battery should be charged at least over 60%

Make sure that your battery is charged enough to complete the flashing process. In case your battery is low and your device goes dead during the flashing process, you may end up soft bricking your device as it won’t complete the flashing process.

Flash a Custom Recovery

A custom recovery, whether a TWRP or  CWM is required to flash this ROM. You may find Philz Advanced CWM recovery on our site, make sure that you flash this one using the instructions explained in the guide.

4. Backup everything!

Just to be on the safe side, you may consider backing up each and everything from your Android device. This is highly recommended so that in case anything goes wrong, you still have the access to all of your data and you can restore it immediately. You may backup everything as listed below.

5. Disclaimer

The methods involved in flashing custom recoveries, roms and rooting your phone are highly custom and may result in bricking your device, and has nothing to do with Google or the device manufacturer that is SAMSUNG in our case. Also rooting your device will void its warranty and you will be no longer eligible for any kind of free device services by the manufacturers/warranty providers. In case of any mishap we may not be held responsible. Follow these instructions to the letter to avoid any mishap or bricking. Make sure that whatever you do, you are doing it at your own responsibility.

How To Install Android 4.4.4 KitKat On At&t Galaxy S2 Skyrocket With CM 11 Custom ROM:

    1. Make sure that you’ve installed a custom recovery. There’s TWRP linked above.
    2. Download  cm-11-20140821-UNOFFICIAL-skyrocket.zip file.
    3. Download pa_gapps-modular-micro-4.4.4-20140708-signed.zip file.
    4. Copy both the .zip files to your phone’s SD card.
    5. Boot into philz advanced CWM recovery mode on your phone now. To do so, turn if off completely first. Now turn it on by pressing and holding Volume Up + Home + Power Key. As soon as you see the screen turning on, leave the buttons and you should boot into the recovery mode.
    6. Once in recovery, perform and factory data reset and also wipe cache.
    7. Now select “Install Zip > Choose Zip from SDcard > locate the cm-11-20140821-UNOFFICIAL-skyrocket.zip file > Yes” and flash it.
    8. Once the ROM flashing is complete, once again select “Install Zip > Choose Zip from SDcard > locate the pa_gapps-modular-micro-4.4.4-20140708-signed.zip  file > Yes” and flash it this time.
    9. Once flashed the Gapps, wipe cache and dalvik cache from the philz advanced cwm recovery and reboot your device.
    10. As soon as your device boots up, you will see the CyanogenMod 11 Android 4.4.4. KitKat ROM.
    11. First boot may take up to 10 minutes, hold on tight till it boots up completely.
    12. That’s all. Enjoy KitKat on your device now.

That’s all. Just in case you need any help regarding this post, make sure that you drop your query in the comment box below. We surely will get back to you immediately.

Install Android 4.4.4 KitKat On Samsung Galaxy S2 Skyrocket With Dirty Unicorns Custom ROM

1
Install Android 4.4.4 KitKat On Samsung Galaxy S2 Skyrocket With Dirty Unicorns Custom ROM

Samsung’s Galaxy S2 for At&t is known as the Galaxy S2 Skyrocket having the model number SGH I727. The device initially ran on Android Ginger Bread out of the box and received updates up to Android 4.1.2 Jelly Bean and that was all. Galaxy S2 Skyrocket couldn’t become the lucky device to taste any further version of Android officially, this surely puts a lot of users in a bit disappointment but there’s no need to worry about it since there’s a number of great custom ROMs available around. That is exactly what we are going to do in the following guide.

We are going to install Android 4.4.4 KitKat on our beloved At&t Samsung Galaxy S2 Skyrocket SGH-I727 using Dirty Unicorns Custom ROM. Dirty Unicorns custom ROM happens to be one of the most famous Android custom ROMs that is available for so many devices. This ROM has been brought up for Galaxy S2 Skyrocket by XDA senior member wantowan2. Dirty Unicorn surely packs up plethora of features that will definitely make your Galaxy S2 Skyrocket fly high and give you a whole new experience. Let’s have a look on the features and then head towards the installation guide.samsung-galaxy-s2-skyrocket

Dirty Unicorns ROM Features
      -Facebook Sync Hack
      – Expanded desktop
      – Hot Reboot Option
      – Ribbons (AOKP)
      – Customizable Quick Settings
      – Custom “BAMF” Theme engine
      – Customizable power menu (Torch, Profiles, etc)
      – Customizable lockscreen buttons and sliders
      – Missed call breathing notifications
      – App Ops access in Settings
      – CM Powerwidget
      – CM Profiles
      – CM apps (Apollo, DSPManager, CMFileManager, etc)
      – SlimROMs TRDS (built in theme in settings)
      – SlimROMs Statusbar Clock options
      – Transparent Statusbar and NavBar Options
      – Halo from Paranoidandroid
      – Halo bubble color changer
      – Halo size changer
      – Multi-user support
      – Customizable Softkeys
      – 24+ Battery options
      – Network speed indicator in statusbar
      – Koush Superuser
      – Nav Bar customizations
      – Host file switcher (ad-free switch)
      – Build Propper
      – Active Display (Moto X notifications)
      – Wakelock blocker
      – Suspend Actions (power saving mod)
      – ListView Animations
      – Custom System Animations
      – Swipe to Switch in RC (toggle)
      – Lockscreen Tint Color Mod
      – Weather Panel
      – Change lockscreen wallpaper
      – OTA updates via DU Updater
      – Custom BusyDialog
      – Advanced Low Battery Indicator options
      – Music/Halo toggle/tiles
      – ScreenShot QuickTrash
      – MIUI-like carrier in statusbar

Early Preparations:

This is only for At&t Samsung Galaxy S2 Skyrocket SGH-I727!

This custom ROM is only for the device mentioned above. Make sure that your model number matches the one listed above. To do so, go to Settings > About Device on your device and see your model number. Flashing this ROM on any other device will result in bricking it so make sure that you meet this requirement first of all.

Battery should be charged at least over 60%

Make sure that your battery is charged enough to complete the flashing process. In case your battery is low and your device goes dead during the flashing process, you may end up soft bricking your device as it won’t complete the flashing process.

Flash a Custom Recovery

A custom recovery, whether a TWRP or  CWM is required to flash this ROM. You may find Philz Advanced CWM recovery on our site, make sure that you flash this one using the instructions explained in the guide.

4. Backup everything!

Just to be on the safe side, you may consider backing up each and everything from your Android device. This is highly recommended so that in case anything goes wrong, you still have the access to all of your data and you can restore it immediately. You may backup everything as listed below.

5. Disclaimer

The methods involved in flashing custom recoveries, roms and rooting your phone are highly custom and may result in bricking your device, and has nothing to do with Google or the device manufacturer that is SAMSUNG in our case. Also rooting your device will void its warranty and you will be no longer eligible for any kind of free device services by the manufacturers/warranty providers. In case of any mishap we may not be held responsible. Follow these instructions to the letter to avoid any mishap or bricking. Make sure that whatever you do, you are doing it at your own responsibility.

How To Install Android 4.4.4 KitKat On Samsung Galaxy S2 Skyrocket With Dirty Unicorns Custom ROM:

    1. Make sure that you’ve installed a custom recovery. There’s TWRP linked above.
    2. Download  du_skyrocket-OC-4.4.4_20140704-2032.zip file.
    3. Download pa_gapps-modular-micro-4.4.4-20140708-signed.zip file.
    4. Copy both the .zip files to your phone’s SD card.
    5. Boot into philz advanced CWM recovery mode on your phone now. To do so, turn if off completely first. Now turn it on by pressing and holding Volume Up + Home + Power Key. As soon as you see the screen turning on, leave the buttons and you should boot into the recovery mode.
    6. Once in recovery, perform and factory data reset and also wipe cache.
    7. Now select “Install Zip > Choose Zip from SDcard > locate the du_skyrocket-OC-4.4.4_20140704-2032.zip  file > Yes” and flash it.
    8. Once the ROM flashing is complete, once again select “Install Zip > Choose Zip from SDcard > locate the pa_gapps-modular-micro-4.4.4-20140708-signed.zip  file > Yes” and flash it this time.
    9. Once flashed the Gapps, wipe cache and dalvik cache from the philz advanced cwm recovery and reboot your device.
    10. As soon as your device boots up, you will see the Dirty Unicorns Android 4.4.4. KitKat ROM.
    11. First boot may take up to 10 minutes, hold on tight till it boots up completely.
    12. That’s all. Enjoy KitKat on your device now.

Here are some screenshots posted by the developer:

DirtyUnicorns_GalaxySII SKyRocket


That’s all. Just in case you need any help regarding this post, make sure that you drop your query in the comment box below. We surely will get back to you immediately.

HD Hacker Wallpapers for Android and iOS Devices

0
HD Hacker Wallpapers for Android and iOS Devices

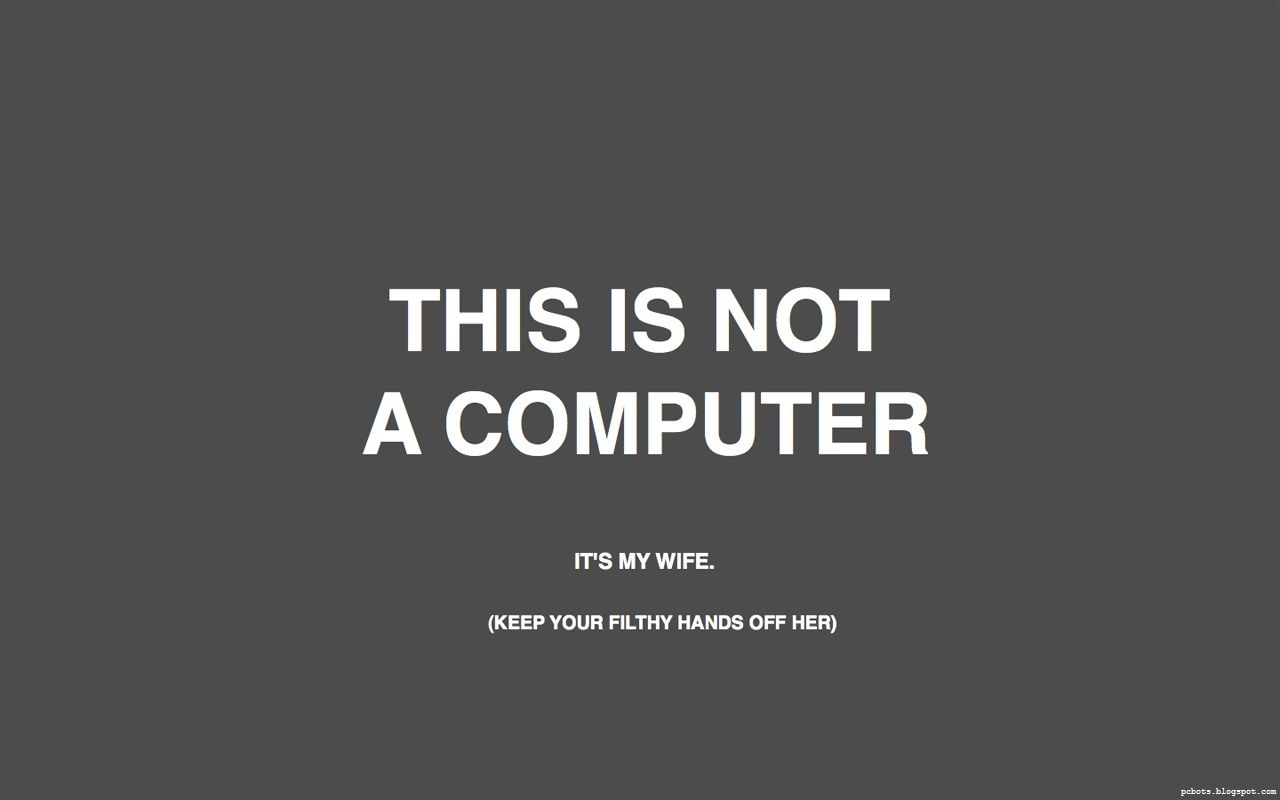
If you are geek or nerd people will call you a hacker, well i kinda like this when ever people call me geek or hacker etc. I don’t give a thought for that because what ever i do i like it and i am proud of it. This is why today i’ve collected HD Hacker Wallpapers for Android and iOS Devices. You can use these on your desktop PC and Macbook.

I’ve a huge collection of HD Wallpapers for smartphones, desktop, laptops and Macbook. You can check them in our Wallpapers category.

HD Hacker Wallpapers for Android and iOS Devices

hackers wife is there laptops

Source:googleimages.

Angry Birds Stella for PC – Windows 8,8.1,7,Xp,Vista and Mac

0
Angry Birds Stella for PC – Windows 8,8.1,7,Xp,Vista and Mac

Angry Birds Stella for PC is available you are wondering how well its easy and i’ll guide you how to install Angry Birds Stella on PC. Angry Birds all season got viral because every time they introduce a new season they add new and unique features. Before starting the guide let me give you a short intro on Angry Birds Stella.

Angry Birds Stella for PC

About Angry Birds Stella:

This game is about Stella, who is trying to protect the Golden Island from the greedy Bad Princess and her piggies army. Stella has 4 more angry birds in her team named as Dahlia, Poppy, Willow and Luca. These fearless pals have a strong bond but even stronger personalities. You could even say they’re best friends forever.

Main Features of Angry Birds Stella:

  • PLAY OVER 120 LEVELS! Slingshot your way through the treetops of Golden Island!
  • MEET THE FIERCE FLOCK! Six fun birds with unique personalities!
  • MASTER THE MOVES! New kick-ass superpowers – tap and hold to target attacks!
  • STOP BAD PRINCESS! Her pesky piggies are wreaking havoc across the island!
  • COMPLETE YOUR SCRAPBOOK! Collect pics and wacky outfits to use in the game!
  • SEE FRIENDS’ SCORES! Then try to beat them (but don’t fall out!)
  • SCAN YOUR TELEPODS! Bring extra-special birds into the game!
  • ENJOY LUSH GRAPHICS! Vivid visuals that put the “gold” in Golden Island!

Download and Install Angry Birds Stella on PC:

  1. To download Angry Birds Stella on  PC, you will need an Android emulator like Bluestacks. If you do not have it already, you can download it from the website Bluestacks.com.
  2. Open Bluestacks and search for Angry Birds Stella using search tool on the top of the homepage.
  3. Click on install button. The game will automatically download and install.
  4. Once the app has been installed, go to My Apps in Bluestacks homepage.
  5. The icon for the game will appear in My Apps.
  6.  Click on this icon to open Angry Birds Stella.

Now, you can start playing the game any time on your Pc simply by opening it from My Apps. Get mesmerized by the amazing graphics of the game and Join Stella and her super adventurous friends.

Hopefully, you will be able to install the game easily on your PC through this guide. If you still have any issues, please let us know and we will help you solve them. Enjoy !

Heroes of Dragon Age for PC – Windows 8,8.1,Xp,Vista and Mac.

0
Heroes of Dragon Age for PC – Windows 8,8.1,Xp,Vista and Mac.

Heroes of Dragon Age is now available on PC. The game let’s you collect heroes and become a legend. It’s built in superior graphics and for that reason you should have this game in your PC if you like playing games on your computer and enjoy building your party of warriors and monsters from Dragon age. For the people who have not heard about this game yet, let’s have an overview of what the game is about before on to the method to download the game on PC.

Heroes of Dragon Age for PC

About Heroes of Dragon Age:

Heroes of dragon Age is pretty much a collectible game where you need collect different characters and gems, etc. You will be in a battle mode where your enemies will be standing on the right and you along with your heroes will be on the left. Each character will be standing on its special stone that represents what type of rarity the character has. You can select each character to attack the enemies; purpose being to win the battle.

You will come to meet with a lot of famous characters from the Dragon age, previous dragon age series, games, comics or lore. You can collect hundred different characters including rare dragons, giant golems and other creatures each having unique abilities and factions. You can play epic quests and battles as you move on.

Now, let’s move on to the method to download Heroes of Dragon Age on PC.

Download and Install Heroes of Dragon Age on PC:

  1. To download Heroes of Dragon Age on  PC, you will need an Android emulator like Bluestacks. If you do not have it already, you can download it from the website Bluestacks.com.
  2. Open Bluestacks and search for Heroes of Dragon Age using search tool on the top of the homepage.
  3. Click on install button. The game will automatically download and install.
  4. Once the app has been installed, go to My Apps in Bluestacks homepage.
  5. The icon for the game will appear in My Apps.
  6.  Click on this icon to open Heroes of Dragon Age.

Now, you can start playing the game any time on your Pc simply by opening it from My Apps. Get mesmerized by the amazing graphics of the game and rock the battle field.

Hopefully, you will be able to install the game easily on your PC through this guide. If you still have any issues, please let us know and we will help you solve them. Enjoy !

Google Nexus 6 aka Nexus X: What We Know So Far

2
Google Nexus 6 aka Nexus X: What We Know So Far

At the current time, Samsung is done with its latest flagship, the Galaxy Note 4, Sony is done with it’s flagship Xperia Z3 and its younger brother Xperia Z3 compact, Motorola is done with its newest Moto G, Apple is all set to pull the curtains off from its iPhone 6 and LG is already done with its G3 earlier this year, then who’s left behind? Well, your guess is right. It’s Google. Google might be the giant that doesn’t take too much space in the rumor mill and keeps them running on low fuel as it brings up only 1 flagship smartphone in an year besides a tablet, while all others keep the users busy with a new phone every second day. The release of Nexus 5 gave birth to the rumors about Nexus 6 and since then all eyes are anxiously waiting to see the next big thing by Google that stands in line with the competitors at a great spot.

Google has been taking the wraps off from the previous Nexus devices either at the end (Nexus 5 came out on 13th of October, 2014) of the year or the start of the year (Nexus One came out on January 10, 2010), that means the Nexus 6 aka Nexus X is on the doors and might be out very soon as well. The device has been tinkering in the rumor mills as Motorola Shamu, that means LG won’t be around this time and it’s going to Motorola behind the next big thing by Google.Nexus-X
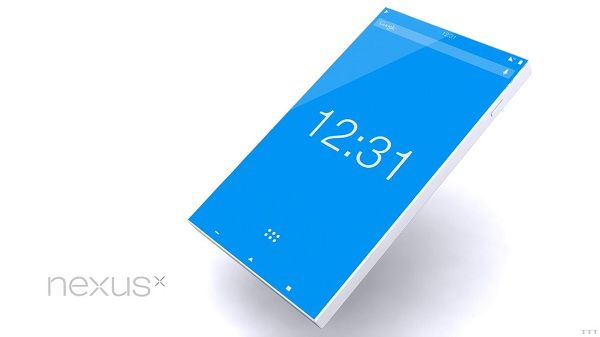
There’s quite a lot stuff to get a great idea about what Google is going to unveil for the users. To sum this up, we’ve collected all the rumors, news and reports and compiled right here. Let’s go through what we know so far about the Google Nexus 6.

Nexus 6 Specs At A Glance:Motorola-Shamu-aka-Nexus-6-specs-and-benchmarks

Google Nexus 6 Display:

Oppo, LG and Samsung have already utilized the QHD displays on their smartphones and seeing the current competition it doesn’t seem that Google will be using a full HD screen as that might result in making the device a no-choice for the users. Rumors have suggested that Google Nexus X will sport a 5.2-inch QHD display with 534 ppi and the resolution of  this device is rumored to be 2392 x 1440 pixels.

Google Nexus 6 Hardware:

Nexus 5 is powered up with Snapdragon 800 CPU clocked at 2.26 GHz, and most of the devices at the moment are running on Snapdragon 801 process. Looks like Google will be making a good move from Snapdragon 800 CPU and might ditch Snapdragon 801. A recent leak suggested that Motorola Shamu (Nexus 6) will be powered up with Snapdragon 805 CPU clocked at 2.6 GHz (according to GFXbench) that will be accompanied by Adreno 420 GPU. A RAM of 3 GB will be plugged inside that is also a great upgrade from 2 GB RAM of Nexus 5. Internal storage is supposed to be 32 GB. A 12 MP shooter will be fixed at the back whereas a 2 MP on the front. The shooter at the back will be capable of recording 4K UHD videos. Nexus 6 is also expected to be water and dust resistant have IP67 certification. A performance report by TechTastic, GFXbench test shows that Motorola Shamu outdoes Xperia Z2 and LG G3, but stood in-line with OnePlus One and a little below Galaxy S5 and HTC One M8.

motorola-shamu-performance

Google Nexus 6 Software:

Google introduced Android KitKat with the Nexus 5, and it has already shown off Android L. We believe that the best time to unveil Android L, so far known as Android Lemon Meringue Pie will be the alongwith the Nexus X. Reports have also suggested that the next Nexus flagship will be running on Android Lemon Meringue Pie. Keeping the rumors aside, there is no doubt that Nexus device have always got the edge because of having the latest and greatest version of Android at first place.

Google Nexus 6 Features:

Existence of a fingerprint scanner is streaming in the rumor mills to be a part of the Nexus X. Besides that, a smartwatch by Google is also expected to accompany the next Nexus. Google has already unveiled Android Wear, its exclusive OS for wearables, so the smartwatch might get real. Rumors have the smartwatch named as Google Gem, that might give a tough competition to Motorola Moto 360 and other rivals.

New_Nexus_6_release_date_rumoured_specs_and_features_3


Google Nexus 6 Release Date:

The release dates of the previous nexus devices give us a great idea about Nexus X as well. Let’s have a look when on those release dates

  • Nexus One – January, 2010
  • Nexus 2 aka Nexus S – December, 2010
  • Nexus aka Galaxy Nexus – November, 2011
  • Nexus 4 – November, 2012
  • Nexus 5 – October, 2013

That means the launch of Nexus 6 isn’t far. Rumors have taught us that Google will unveil the Nexus 6 / X / Motorola Shamu alongside the Nexus 8 that is prepared by HTC sometime in September, 14 on its exclusive event.


Google Nexus 6 Price:

According to the info available at the moment, Nexus 6 will cost around 419 Euros.

That’s all we know so far about the Nexus 6. We surely will be bringing you up all the latest info once it lands in. Let us know about your thoughts on Google next device.

Samsung Explained Gear VR Features In An Infographic

0
Samsung Explained Gear VR Features In An Infographic

Alongside the Galaxy Note 4, Samsung introduced its new line of accessories that includes the Gear VR, a virtual reality headset that takes gaming and watch videos on Android to a new level. Gear VR intelligently utilizes the 5.7 inches QHD screen of the Galaxy Note 4 and gives a great experience to the users. Samsung brought up this product in collaboration with Oculus VR, the guys behind the first device of this kind known as the Oculus Rift. Gear VR’s European price tag’s translation suggests it to be around $200 while adding a gamepad will cost the users $250. While not so many know about this device nor they get any idea by simply listening about this device, Samsung thought to explain the functionality and advantages of the Gear VR using an infographic and provide the users a reason to get their hands on the cool and amazing Gear VR.

Samsung-Gear-VR-Infographic

Source