Home Blog Page 418

How To Run Any Android App On PC In Chrome Browser

2
How To Run Any Android App On PC In Chrome Browser

Running Android apps on a desktop PC was possible years ago, either through Android emulators or there were some other ways, but nothing was done officially by Google in this regard. Few days back, Google introduced a new feature named as “ARC” that stands for Android Runtime for Chrome. ARC basically allows Android apps to run inside the Google Chrome Browser. Unfortunately, Google kept ARC limited to Chrome OS initially, not only that ARC is capable of running only 4 Android apps officially, that means users won’t be able to enjoy it the way they wish as long this restriction stays there.


Fortunately, when it comes to Google, great developments are expected and that’s what Google itself appreciates by putting up a number of  open source projects And when it comes to Android, the very first thing that runs in an Android power user’s mind is going beyond the boundaries. Since the only purpose of ARC was to run Android apps on a Chrome browser, some intelligent developers got their hands on this little feature and modified it to unleash its full potential. Developer Vladikoff has modified ARC and made it compatible with a number of Android applications, not only that, ARC now runs on any Chrome browser running on a Windows PC, a MAC, a Linux powered device or some others. The Chrome OS restriction isn’t there anymore. The modified version of ARC is named as ARChon by the developer, the initially build surely is buggy but it surely is acceptable.

Just in case you want to learn how is it possible for ARC to allow Android apps to run on Chrome, you may want to know that ARC works in the same way ART allows Android apps to run on Android powered devices. Using both these runtimes, ARC and ART, the developers can make their applications compatible with Chrome browser without rebuilding the code. Vladikoff seems to be making the best use of these development these runtimes and the ARChon is just a result of that. ARChon pushes Android apps in to chrome as extensions, just in case you’re worried how you can change an APK into a chrome extension, you may not wonder about it as the ARChon developer has already taken care of that and provided a solution for that too. Before you start looking out for the method here and there, you just need to scroll down and go through this post as we have the complete method up here. Let’s go through it and run some cool apps on your Chrome browser.

Install ARChon on your Google Chrome browser

  1. First of all, download  and unzip the ARChon.zip file.
  2. Once done, open your Google Chrome Browser.
  3. Click on the options key at the top right corner, and then head towards Tools > Extensions.
  4. Alternatively, you can just type “chrome://extensions/” in the address bar to open Extensions in Chrome.
  5. Once you’re in Extensions panel, enable Developer Mode that should be at the top (Right-Center)
  6. Once checked the Developer Mode, click on “Load unpacked extension” and select the unzipped ARChon folder now.Archon_Techbeasts
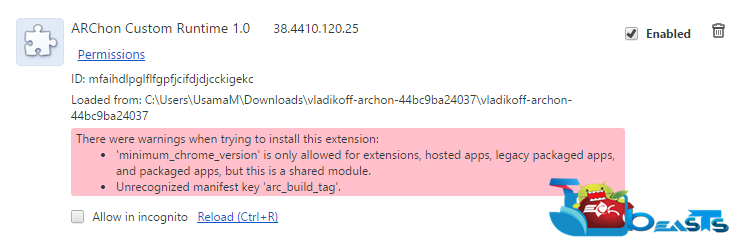
  7. It will install ARChon in your Chrome Browser now. You might come across a warning once you’re done installing ARChon, but you don’t need to worry about it, you may ignore it.Arhcone_Warning_Techbeasts

Let’s install some apps in Chrome now

As mentioned, installing applications in Google Chrome with ARChon isn’t as simple as installing apps in an Android emulator or installing apps in an Android device using the Google Play Store. A simple APK won’t work here, you will have to go a little out of the way to install an Android application in Chrome. Before you want to install an application, you need to find out which applications are compatible with Chrome at the moment. To make it easier for you, Android/Chrome community is already working on finding out the compatible applications. This Google Drive Spreadsheet might help you to find some applications of your choice. All these applications should be in .zip format.

Here’s how to install apps in Chrome

  1. Download the applications .zip file, that should have the apk file packed inside.
  2. Unzip the downloaded application.zip file at a known location in your computer.
  3. Once done, open your Google Chrome Browser.
  4. Click on the options key at the top right corner, and then head towards Tools > Extensions.
  5. Alternatively, you can just type “chrome://extensions/” in the address bar to open Extensions in Chrome.
  6. Once you’re in Extensions panel, enable Developer Mode that should be at the top (Right-Center)
  7. Once checked the Developer Mode, click on “Load unpacked extension” and select the unzipped App folder now.Chrome_Apo
  8. It will install the application in your Chrome browser, the app should appear in Apps menu “chrome://apps”.
  9. In case you see any errors below the app info in extension, ignore it and access it from apps.

Facebook Messanger Installed Chrome_Messenger Facebook Messanger_Chrome

In case the App isn’t listed for ARChon

What if the app you want to install isn’t compatible with Chrome[ARChon]? Well, you will have to do a little work around that aint’ tough at all. XDA senior member bpear96 has come up with a very nice application named as “Chrome APK Manager”. The application lists all of the applications installed on your Android device, you can simply pick your favorite one and tap the “Generate Chrome APK” button and it will do the job. Here are the steps explaining this method.

  1. Download Chrome APK Manager and install it on your Android device.
  2. Once installed, access the Chrome APK Manager through app drawer.
  3. It will list all the applications installed on your phone/tablet.
  4. Select the applications you want to run on your Chrome Browser.
  5. Tap “Generate Chrome APK” button and sit back.
  6. That’s it, all the compatible APK files are stored in zipped files in the ChromeAPK folder in your phone’s storage.
  7. You can now use the method explained above to install the application in your chrome browser.
  8. That’s all!k5B5g51

That’s all. Although there’s a number of much easier ways to run Android apps on a desktop PC, but there’s nothing more good then enhancing your Chrome Browser’s functionality at its best and unleash its true power. Using applications in your browser straight away can be helpful in a number of ways. We hope that you find this guide helpful. All the credit goes to the developers, we have just tried to explain the way it works. Thank you all.

How To Root Verizon Galaxy S5 on Android 4.4.4 Kit-Kat Official Firmware

2
How To Root Verizon Galaxy S5 on Android 4.4.4 Kit-Kat Official Firmware

We have heard a bounty on the head of a Pirate or a wanted person, but we have never seen a bounty putting on the rooting of a Specific device. Verizon Galaxy S5 is the device whose rooting caused XDA developers to pay a lump sum of $18,000 to the developers of Towel Root, geohot, who successfully rooted this device. However, the case gets worst as the updates for Verizon Galaxy S5 keeps going on and on and users kept asking for the rooting method of these updates, which aroused even a bigger challenge for developers and the Android 4.4.4 Kit-Kat update failed to be rooted by the same old method. They somehow released the rooting method for NHA build, but the surprisingly release of NI2 build once again messed things up. In this article we will show you how to retain Root on NI2 build of Android 4.4.4 Kit-Kat.

Rooting allows you to get full control over your device, Stock apps and mods are good, but installing Custom Mods gives you better support and great battery life, you might need to delete some Stock apps from the device, a non-rooted device can’t do that, but a rooted one has the power to remove stock apps too.

Galaxy-S5-Verizon

But before we begin, Make sure that:

  1. Update Your Device To Android 4.4.4 Kit-Kat:Link
  2. That you have a Well Charged Battery, 60%-80% is better.
  3. Back-Up all your important ContactsCall Logs & Messages.It is highly recommended in case of any mishap or data loss to back up all your important data.
  4. Back-Up your Mobiles EFS DataHow To Restore and Back-Up EFS Data On Samsung Galaxy Devices.
  5. Check your device model, Go To Setting > About and Make sure that it is SM-G900V .
  6. Do-not try this tutorial on any other device
  7. Back-Up all Your apps: Link

Disclaimer:

The methods involved in flashing custom roms and rooting your phone is highly custom and may result in bricking your device,and has nothing to do with Google or the device manufacturers which is Samsung in our case. In case of any mishap we may not be held responsible. Follow these instructions to the letter to avoid any mishap or bricking. Make sure that whatever you do, you are doing it at your own responsibility.

How To Root The Device.

odin_explained6

  1. After updating your device to the OTA build, follow:
  2. Download Stock Kernel of Galaxy S5: Link
  3. Download Odin.
  4. Turn off your Phone and Turn it On While Pressing, Power + Volume Down + Home button until you see some text on-screen, Press Volume Up to continue.
  5. Make Sure that the USB drivers are installed.
  6. Open Odin in Computer and connect your device to PC, while it is in the Download mode.
  7. If your Phone is successfully connected to PC, the Odin port will turn Yellow with COM port number.
  8. Now Click on PDA and select the File ‘G900V_NCG_Stock_Kernel.tar.md5
  9. In Odin, Check Auto reboot  Option.
  10. Now Click the start button and wait for the process to complete.
  11. After the installation is complete you device will restart and once you see the Home Screen and get the “Pass” Message on Odin, unplug the cable
  12. Now Keep closing apps, until you are able to run Towel root app.
  13. Click Make in Rain button to root your device.
  14. Now Once again, Download NI2 Stock Kernel: Link
  15. Follow the above Odin steps to Flash it.
  16. Restart your device and Enjoy

How To Root Sprint Galaxy Note 3 SM-N900H on Android 4.4.4 Kit-Kat Official Firmware

2
How To Root Sprint Galaxy Note 3 SM-N900H on Android 4.4.4 Kit-Kat Official Firmware

We pretty much assume that you have updated your Sprint Galaxy Note 3 to Android 4.4.4 Kit-Kat, and if not then follow the link below in the post to do. If you must know, as per rule of Updating your device to Official Firmware, you are sure to loose the root of your device, this leaving your device un-rooted and waiting for your too root it again. The only option left right now, is to root your device again, if you want to use your device with the same things you had before the update. It doesn’t matter if the update was really small in size or a huge one, if you have made amendments in the Stock system, you won’t be able to receive the OTA update and files are too big to leave any sort of root access or Stock recovery, you might be able to flee if only you receive the OTA file, nonetheless, let’s proceed and see how we can root the device again

But why you should root your device, let me ask you, Why did you root it before?.Rooting allows you to get full control over your device, Stock apps and mods are good, but installing Custom Mods gives you better support and great battery life, you might need to delete some Stock apps from the device, a non-rooted device can’t do that, but a rooted one has the power to remove stock apps too.

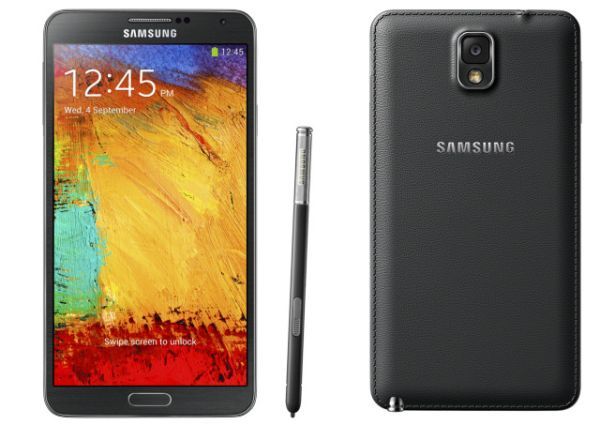
samsung-galaxy-note-32

If you are familiar with Odin and it’s working, then this tutorial might not be difficult for you. Otherwise read the whole tutorial first before trying it on your device. In this Article, we will show you How To Root Sprint Galaxy Note 3 SM-N900H on Android 4.4.4 Kit-Kat Official Firmware.But before we begin, Make sure that:

  1. Update Your Device To Android 4.4.4 Kit-Kat:Link
  2. That you have a Well Charged Battery, 60%-80% is better.
  3. Back-Up all your important ContactsCall Logs & Messages.It is highly recommended in case of any mishap or data loss to back up all your important data.
  4. Back-Up your Mobiles EFS DataHow To Restore and Back-Up EFS Data On Samsung Galaxy Devices.
  5. Check your device model, Go To Setting > About and Make sure that it is SM-N900P .
  6. Do-not try this tutorial on any other device
  7. Back-Up all Your apps: Link

Disclaimer:

The methods involved in flashing custom roms and rooting your phone is highly custom and may result in bricking your device,and has nothing to do with Google or the device manufacturers which is Samsung in our case. In case of any mishap we may not be held responsible. Follow these instructions to the letter to avoid any mishap or bricking. Make sure that whatever you do, you are doing it at your own responsibility.

How To Root The Device.

odin_explained6

  1. Download CF-Auto-Root Android 4.4.4 Package For your Galaxy Note 3 to your computer and extract the zip file.
  2. Download Odin.
  3. Turn off your Phone and Turn it On While Pressing, Power + Volume Down + Home button until you see some text on-screen, Press Volume Up to continue.
  4. Make Sure that the USB drivers are installed.
  5. Open Odin in Computer and connect your device to PC, while it is in the Download mode.
  6. If your Phone is successfully connected to PC, the Odin port will turn Yellow with COM port number.
  7. Now Click on PDA and select the File ‘CF-Auto-Root-hltespr-hltespr-smn900p.tar.md5
  8. In Odin, Check Auto reboot  Option.
  9. Now Click the start button and wait for the process to complete.
  10. After the installation is complete you device will restart and once you see the Home Screen and get the “Pass” Message on Odin, unplug the cable

How To Get Android L Lock Screen On Your Android Device

0
How To Get Android L Lock Screen On Your Android Device

Google is all set to pull the curtains off from the next version of Android, the Android L. Android L has already been shown off by Google and the improvements are good enough to tempt the users for this greatest build of Android. The name, so far is rumored to be Android Lemon Meringue Pie, but there hasn’t been any official word or hint about the real name of Android L. What makes Android L look cool are the graphical changes, that are a big move from previous Android versions. Android L will have a material design user interface, that will let the users interact with the elements on the device just like they interact with real life objects. A part from that, the lock screen on Android L has completely been revamped, the new lock screen will show all the notifications as soon as you press the lock key, just like iOS 7 and iOS 8. This means the users won’t always have to unlock the device and pull down the notification bar in order to see what’s going around the world and what notifications are left for them. There’s going to be a number of other cool features on Android L as well that will enhance the user experience on Android device better then ever before.

As off now, Android L’s release date isn’t known, but it is expected to be a part of the Nexus X, that is expected to be unveiled in sometime around October, 2014. Once Android L is out, some of the mainstream / flagship devices will get this update while some devices will never get a chance to taste the greatest Android version. Since it’s quite away and you aren’t even sure you will get this on your device or not,  you may feel a bit downcast, but let’s just not wait for the update and try to taste the Android L somehow on your current Android device having Android 4.0+.

Earlier we posted a guide to install Android L’s keyboard on your Android device and posted a some APKs of the apps that are going to be a part of the Android L, but something new that we found today will take you one step closer to Android L. If you haven’t already guessed it, we are talking about the Android L Lockscreen.

A new application, named as Android L Lockscreen Plus by Lucky Coin,  that recently landed in the Google Play Store allows the users to set Android L Lockscreen on their Android device. The only requirement for this application is Android 4.0+. The application seems to be working cool and has already been downloaded by hundreds of users. Let’s go through the app features and the method to install Android L Lockscreen and get it working on your Android device now.Android L Lockscreen

Here are the app features:

Ability to change lockscren background (10 android L wallpaper or pick from your gallery).

Ability to blur lockscreen background.

Configure swipe direction to open any apps.

Using expand action like orginal L lockscreen such as reply,call back.

Blacklist any apps from showing on lockscreen notifications.

Security to protect your phone.

How To Install Android L Lockscreen On Your Android Device

  1. Download and install Android L Lockscreen on your Android device.
  2. Once installed, disable your current lock screen first.
  3. In order to disable it, go to Settings > Lockscreen Effect > None.
  4. Once done, launch the L Lockscreen app from the app drawer.
  5. Give the L Locksreen app the access to notifications, it should pop up on start and take you to settings.
  6. Now get back to the L Lockscreen app and check “Enable L Lockscreen”.
  7. You can also preview the Lockscreen before setting it up.
  8. You can also select which the apps, from which you want to receive the notifications on Lockscreen by going into Advanced settings.
  9. You can also add custom buttons on the Lockscreen for quick access.
  10. Android L Lockscreen app also allows the users to set custom backgrounds and modify the screen according to their liking.
  11. Just in case you like this application, you may purchase the premium version in order to unlock all the locked features.
  12. That’s all with Android L Lockscreen.

Download iOS8/iPhone 6 Stock Wallpapers

0
Download iOS8/iPhone 6 Stock Wallpapers

It has been quite a while since Apple pulled the curtains off from the 6th iteration in the iPhone history, the iPhone 6 is a pretty much cool device, and the Apple fever is high once again. Everyone is willing to get a device since Apple came up with a number of improvements in all the departments with the iPhone 6.  iPhone 6 runs on iOS 8, that means the device packs up all the latest software goodies packed up by Apple. iPhone 6 is already out in the stores, but not everyone is able to get their hands on the device immediately, but you can definitely checkout of some stuff including wallpapers, ringtones from the iPhone 6.

The very thing I like on Apple devices are its wallpapers. iOS 7 packed up some nice, neat and clean wallpapers and iOS 8 packs some new and cool wallpapers as well that look amazing on your phone’s display. You can set these wallpapers on your Android or iOS device without any hiccups here and there. We’ve found the wallpapers and listed em’ right here, these wallpapers have a resolution of 755 x 1334 px and are in png format. Just go ahead and grab your favorite one or download all the wallpapers from the all-in-one link attached below.

Fix ‘No Service’ and Touch ID problems on iOS 8.0.1

0
Fix ‘No Service’ and Touch ID problems on iOS 8.0.1

Apple recently released iOS 8 new update iOS 8.0.1 with few bugs fixed, but this is not what happened. Many user’s have reported  that they are facing ‘No Service’ and Touch ID problems after upgrading to iOS 8.0.1. To Fix No Service problems after upgrading to iOS 8.0.1 you have to downgrade your device to iOS 8 manually.

ios-8-logo

How To Fix ‘No Service’ and Touch ID problems on iOS 8.0.1:

  • First of all backup your all the data before starting the process.
  • Download the iOS 8.0 firmware file for your iOS device:

iPad:

iPhone:

iPod touch:

Guide:

  • Open iTunes on your Mac or Windows
  • Connect your device with iTunes.
  • After your iPhone is connected with iTunes click on Check for Update while holding Option key (Mac) or the Shift key (Windows).
  • Now you have to select the iOS 8 iPSW file that you’ve downloaded in 2 step.
  • if you get a pop-up message telling  you that iTunes will update your iPhone and will verify with Apple. Click on OK.
  • Now wait for iTunes to download the file that is required for your device. In the meantime all you can do is wait.
  • Once the download and extracting process is done it will take few minutes to install iOS 8 on your iPhone.

How To Downgrade From iOS 8.0.1 To iOS 8 And Fix No Service & Other Issues

0
How To Downgrade From iOS 8.0.1 To iOS 8 And Fix No Service & Other Issues

Right after releasing iPhone 6 and iPhone 6 Plus, Apple started rolling iOS 8. The update was received by most of the Apple devices within a few hours, since it was the very first iteration of the iOS 8, the OS contained a number of bugs and performance issues that were supposed to be treated by Apple in another minor update.

iPhone-6-iOS-8

A few hours ago, Apple rolled out iOS 8.0.1 that apparently fixed the bugs and all the performance issues in iOS 8 but as soon as the users received this latest update, they realized that iOS 8.0.1 wasn’t less then a nightmare. The very first thing that came under the notice of users was, this update started killing the cell service, and changed the status to no service. Turning off the flightmode and then turning it on back again didn’t help, nothing else seemed to be working in this regard. Alongside that, this update also killed the functionality of touch ID, that resulted in causing problems while unlocking iPhone 5S and other devices having the Touch ID sensor. It has already been verified that these bugs were a part of this update, these weren’t caught on some particular devices.

Apple has already taken a note of this update and pulled it back from the developer’s portal and iTunes. The latest software available right at the moment is iOS 8 and most likely, Apple won’t release any further update as long as it doesn’t come up with a fix for the existing issues. Just in case, being hasty, you’ve updated your device to iOS 8.0.1 and you’ve become a victim of this buggy update, you would definitely want to revert back to the previously working state of your iOS device as soon as possible. Now that you’ve spotted this place, you may find the method below and take your device back to iOS 8 within a few minutes.

How To Downgrade From iOS 8.0.1 To iOS 8:

  1. Download and install  iTunes 11.4.
  2. Once downloaded and installed , open iTunes 11.4 on your MAC or PC now.
  3. Connect your Apple device to your PC now.
  4. Once connected and detected in iTunes, click on “Restore iPhone/iPad/iPod”.
  5. Since the latest version available is iOS 8, it will start installing the firmware right away.
  6. Once installed, unplug your device and enjoy iOS 8 running greatly on your device!10435870_10205042755898130_6883284237758660532_n

That’s all!

How To Download Instagram Photos And Videos On Mobiles [ iPhone/Android ].

0
How To Download Instagram Photos And Videos On Mobiles [ iPhone/Android ].

Instagram is the best and top photo sharing app used by millions not only by ordinary peoples also celebrities are using it. We all know the function of Instagram and how to use it. Instagram gives you effects to add on your photos, what make it more cool but you cannot download it all you can do is take a screen shot. That’s a pain but not anymore you can download Instagram Photos And Videos on iPhone and Android by using the guide below.

How To Download Instagram Photos And Videos

How To Download Instagram Photos And Videos Android:

  • First you have to download EasyDownloader.
  • Now install the Easy Downloader. This app will run in the background.

Screenshot_2014-09-25-01-49-41

  • After the installation is done open Instagram on your Android device. Now choose any picture you want to download but keep in mind that this app only download photos from public profiles. After selecting a pic tap on three dots below the photo on the right side. You’ll see a new option copy share url.

 Screenshot_2014-09-25-01-55-58 Screenshot_2014-09-25-01-56-18

  • When you tap on the copy share URL option easy downloader will automatically start downloading the photo whom you want to download. You can see the process in notifications.

 Screenshot_2014-09-25-01-56-46 Screenshot_2014-09-25-01-57-06

How To Download Instagram Photos And Videos on iPhone:

  • First downloads The app and install it on your device.
  • After installation is done open Instagram on your iPhone.
  • Select the photos and tap on three dots.

Screen Shot 2014-09-25 at 02.38.15

  • Choose Copy Share URL form the pop-up.
  • Now open the InstaSave and paste the URL in it. When photo will be appeared tap on download.
  • Your photo will be downloaded.

IMG_1382

All Done.

Download Samsung Galaxy Note 4 Apps APKs

0
Download Samsung Galaxy Note 4 Apps APKs

It isn’t been so long since Samsung introduced the 4th iteration of the Galaxy Note Phablet series. The Galaxy Note 4 packs up mouth-watering specifications and features, but the users will have have to wait till October, 2014 to get their hands on the device.

While it gets tough for the Note fans to wait for the device, they surely can enjoy some of the applications that are going to be a part of the Galaxy Note 4. Samsung has enhanced these applications for a better experience on the Note 4, and the applications include some new features while some of the applications have a new user interface.

Screenshot_2014_09_19_18_37_11 Screenshot_2014_09_19_22_10_22
Galaxy Note 4’s applications have been uploaded by XDA Senior Member Albe95. Applications include Galaxy Note 4’s S Health APK, S Voice APK, Note 4 Smart Remote APK, Note 4 GeoNews APK, Note 4 Galaxy Apps Widget APK, Note 4 Task Manager APK, Samsung Gear Manager APK, Snapbiz Card APK, All Together APK, S Memo APK, Easy Chart for S Note APK & Story Album APK from the Galaxy Note 4.

You can simply go ahead and download the APK files from the uploader’s thread and install right away on your Android device.

How To Root Android One (All Devices)

0
How To Root Android One (All Devices)

I believe in me Previous post, I have explained much about the Android One devices, Google announced them at this year I/O. Android One is to arrive with all the latest features, hardware and latest version of Android, till the next Two years. In the Previous article, I explained how to unlock Bootloader of this device and Install Custom Recovery on it. In this Article, we will show you How To root Android One, all of the devices, which are to be released till 29 November this year, only 35 days to go.

An Android device, for the most, is incomplete without root access, f your must know that, Rooting allows you to get full control over your device, Stock apps and mods are good, but installing Custom Mods gives you better support and great battery life, you might need to delete some Stock apps from the device, a non-rooted device can’t do that, but a rooted one has the power to remove stock apps too.

gsmarena_001

Disclaimer:

The methods involved in flashing custom roms and rooting your phone is highly custom and may result in bricking your device,and has nothing to do with Google or the device manufacturers. In case of any mishap we may not be held responsible. Follow these instructions to the letter to avoid any mishap or bricking. Make sure that whatever you do, you are doing it at your own responsibility.

Requirements:

An Unlocked Bootloader: Link

A rooted Device: Link

Download Super SU: Link

How To Root Android One:

  1. Download Super SU from Above link.
  2. Copy it to the Fastboot folder.
  3. Enter Recovery, Connect your device with PC and Type in command Prompt: adb reboot recovery
  4. Once in Recovery, Navigate to Install Zip > Adb Sideload
  5. Now Type: adb sideload
  6. This will root your device.

How To Unlock Bootloader and Install CWM Recovery On Android One Devices

0
How To Unlock Bootloader and Install CWM Recovery On Android One Devices

Google has always played its card at the exact right time, I mean they always release their Flagship device, with the best features that it can easily compete with other device without much problem at all, and quite funny, the Nexus devices have always keep up-to-the Flagship device of other OEMs. Well Google is about to release an Android phone for all, Android One, now according to them, sure to be ported with the latest features, the best apps, and the Hardware that perfectly matched for the apps to give you the best performance, so called a Phone with Philosophy. The device will be running Android 4.4 Kit-Kat, the latest version and will receive the latest updates, till the Hardware supports. All the latest Android features will be included in it.

It doesn’t matter which device they release, it will be running Android, and we all know, without customization Android is nothing, its just like iOS and no one wants to use Android One without a full load of Customizations and the only way you can do that is by rooting it, however, you’ll need to Unlock the Bootloader and Install Custom Recovery on your device and we are about to tell you how. This Method will work on any Android One device, so feel free to try it on anyone.

gsmarena_001

Disclaimer:

The methods involved in flashing custom ROMs and rooting your phone is highly custom and may result in bricking your device, and has nothing to do with Google or the device manufacturers. In case of any mishap we may not be held responsible. Follow these instructions to the letter to avoid any mishap or bricking. Make sure that whatever you do, you are doing it at your own responsibility.

Requirements:

Configure Fastboot and abd: Windows | Mac

How To Unlock Bootloader of Android One device:

It is quite simple, all you need is Fastboot and its drivers, which are given in link above.

  1. Open Command Prompt in Fastboot folder.
  2. Boot your Device in Bootloader mode, Power Off your device and then press and Hold Power + Vol. Down, until you are in bootloader mode.
  3. Connect your device with PC.
  4. Once the connection is successful, Type: fastboot oem unlock
  5. Then type: fastboot format userdata
  6. As Obvious, it will erase your data.

How To Install CWM Recovery:

  1. Download the CWM Recovery image from above link and rebname it to recovery.
  2. Copy it to the Fastboot folder.
  3. Once Again, Open Command Prompt in Fastboot folder
  4. Boot your Device in Bootloader mode, Power Off your device and then press and Hold Power + Vol. Down, until you are in bootloader mode.
  5. Connect your device with PC.
  6. Now in command prompt, type: fastboot flash recovery recovery.img
  7. Once the Process is over, type: fastboot reboot.
  8. Once the device boots up, the Custom recovery will be installed and bootloader is unlocked.

How to Use Your Google Contacts on Windows Phone 8/8.1

0
How to Use Your Google Contacts on Windows Phone 8/8.1

Few days back i got a Windows Phone Nokia Lumia 920 and i updated it Windows Phone 8.1, after updating it to WP8.1, I got new features and more option to customize my home screen. It means Nokia is really working hard to get a position in the smartphone market, best of luck for Nokia. Let’s get back to the topic How to Use Your Google Contacts to Windows Phone 8/8.1, this is the most commonly searched query on Google. When ever we purchase a new device rather than Android first thing we do is copy our contacts to the device. If you are using an Android device then you can easily store your phone contacts on a Gmail id, so you can use this email to transfer the contacts as i am bout to tell you how ?. Follow all the steps mentioned below in the Guide.

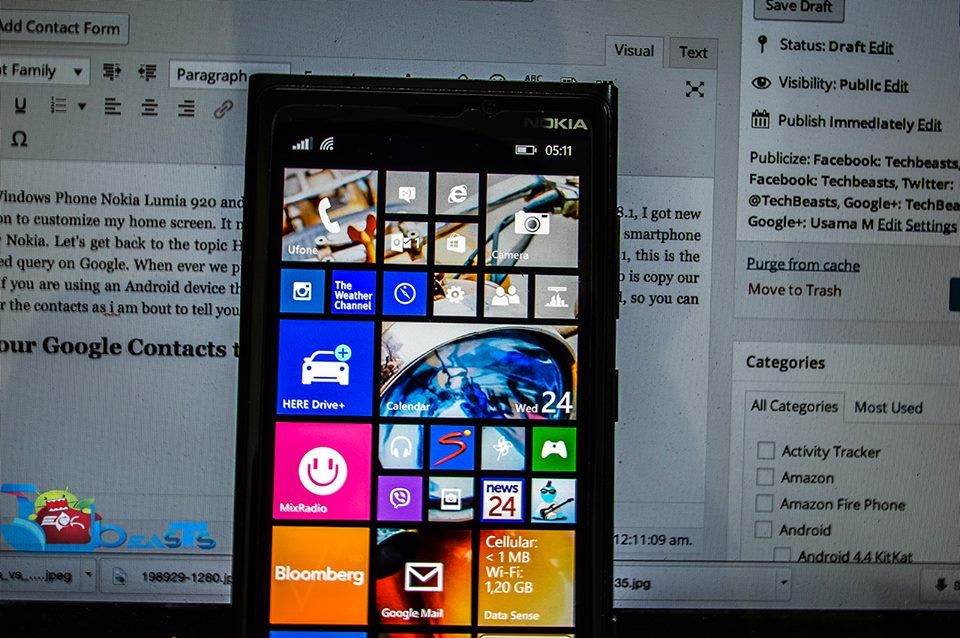
google contacts copy to windows phone 8

How to Use Your Google Contacts to Windows Phone 8/8.1:

Follow all the simple steps mentioned below in this guide in order to use your Google Contacts to Windows Phone 8/8.1. Please do tell me in the comments if you face any issue regarding this method.

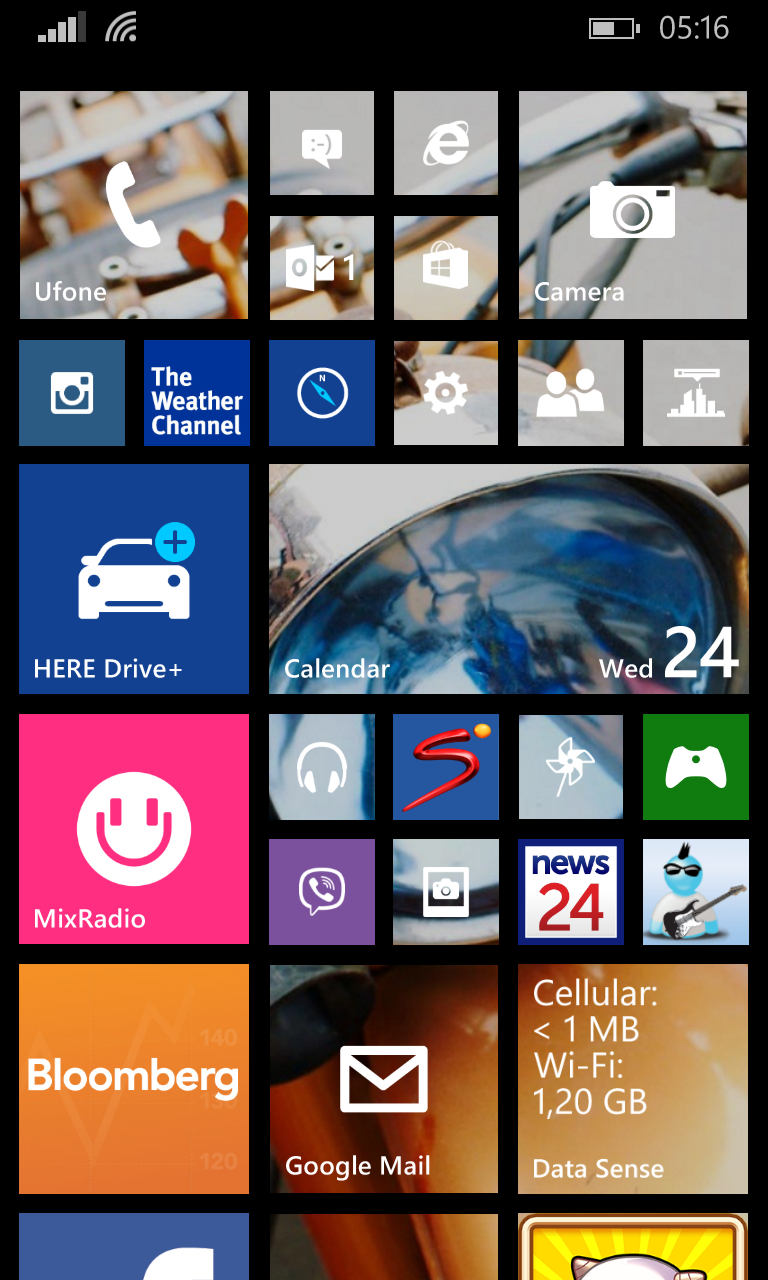
wp_ss_20140924_0001


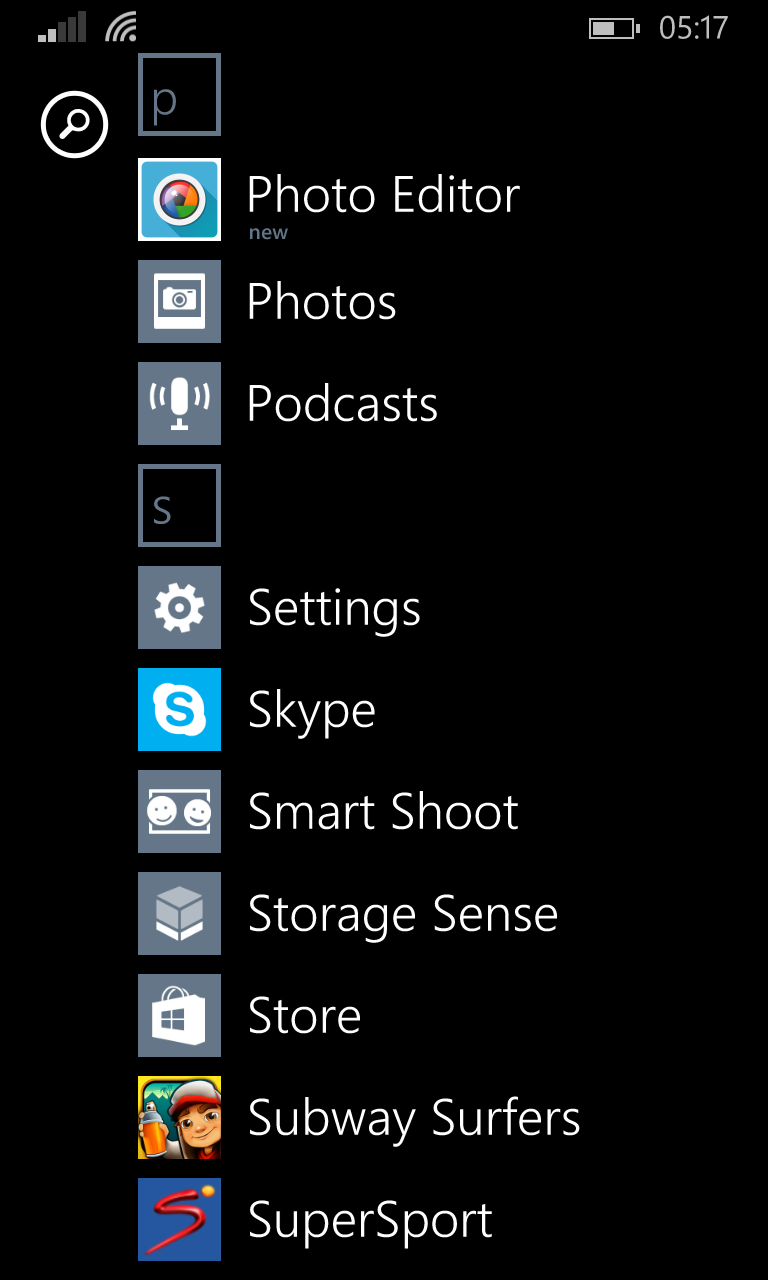
Step 1: Goto your main menu and select settings.

wp_ss_20140924_0002


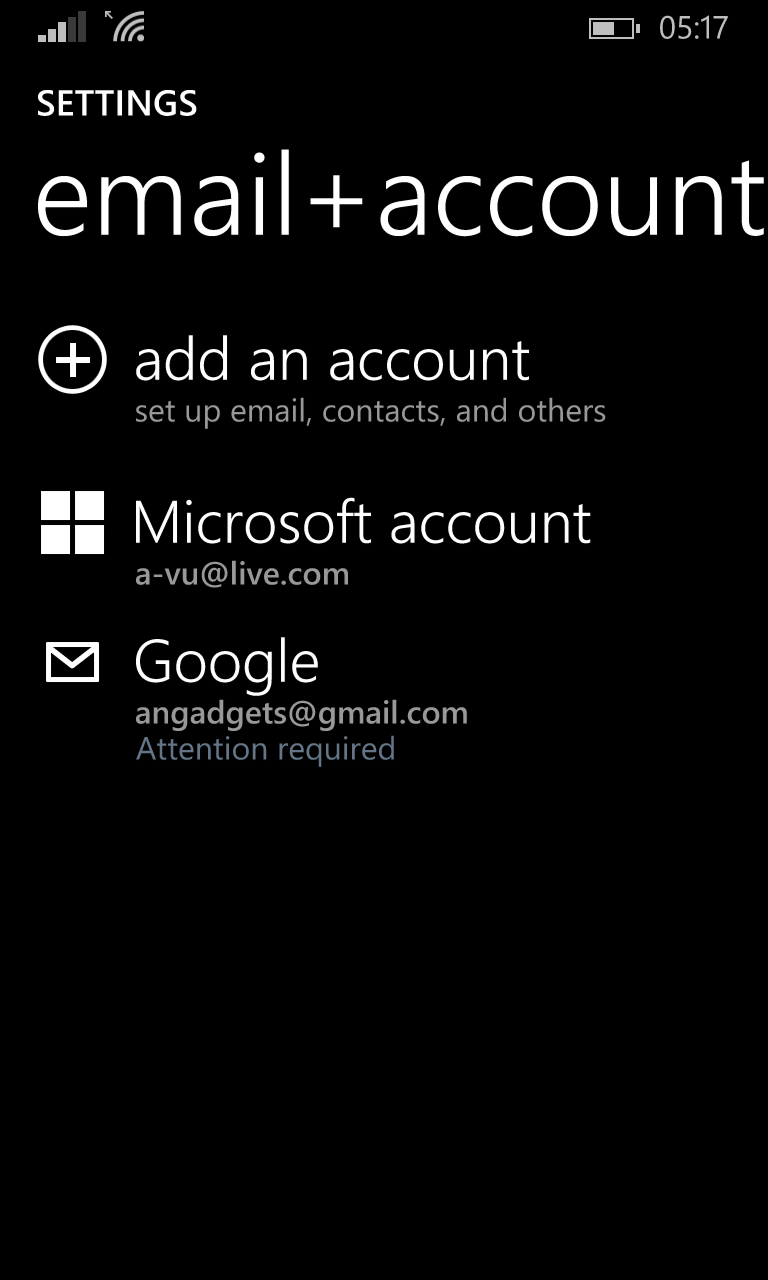
Step 2: Now select email + accounts.

wp_ss_20140924_0003Step 3: After selecting email + accounts now select add an account.

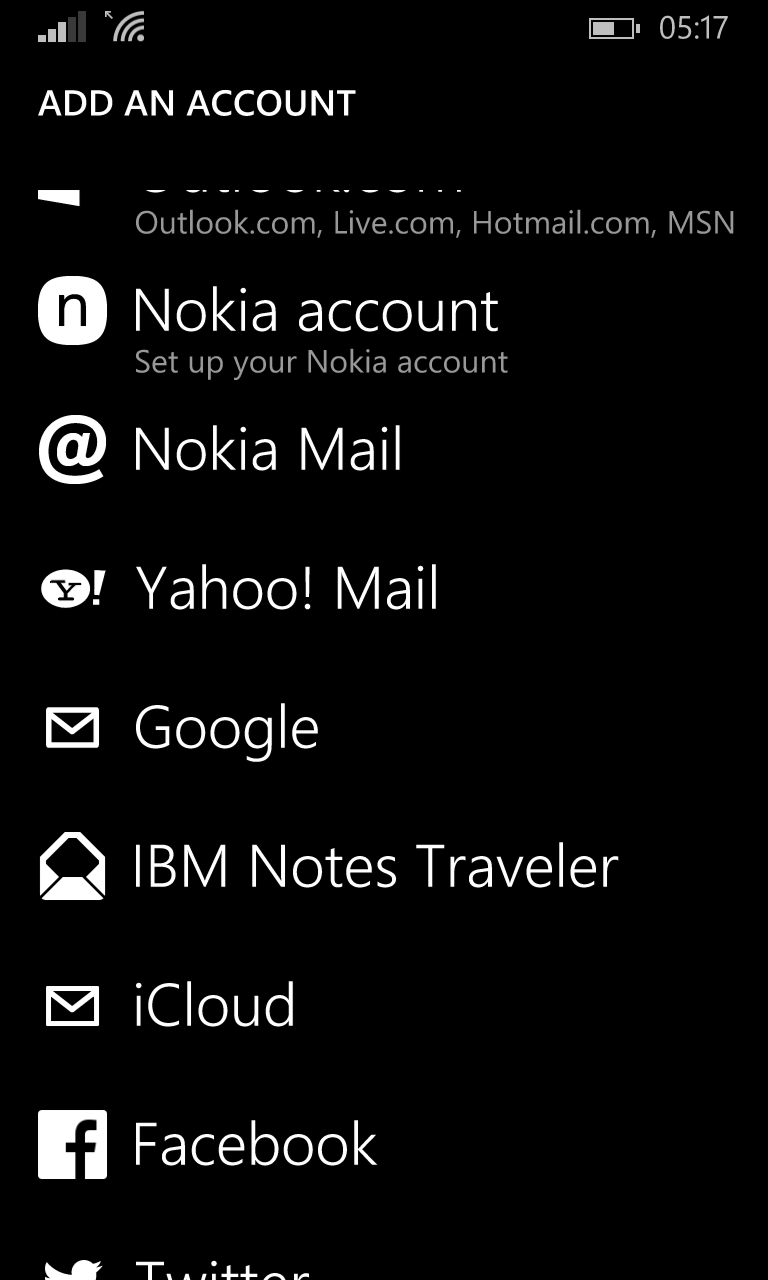
wp_ss_20140924_0004


Step 4: Choose Google from the list.

wp_ss_20140924_0005


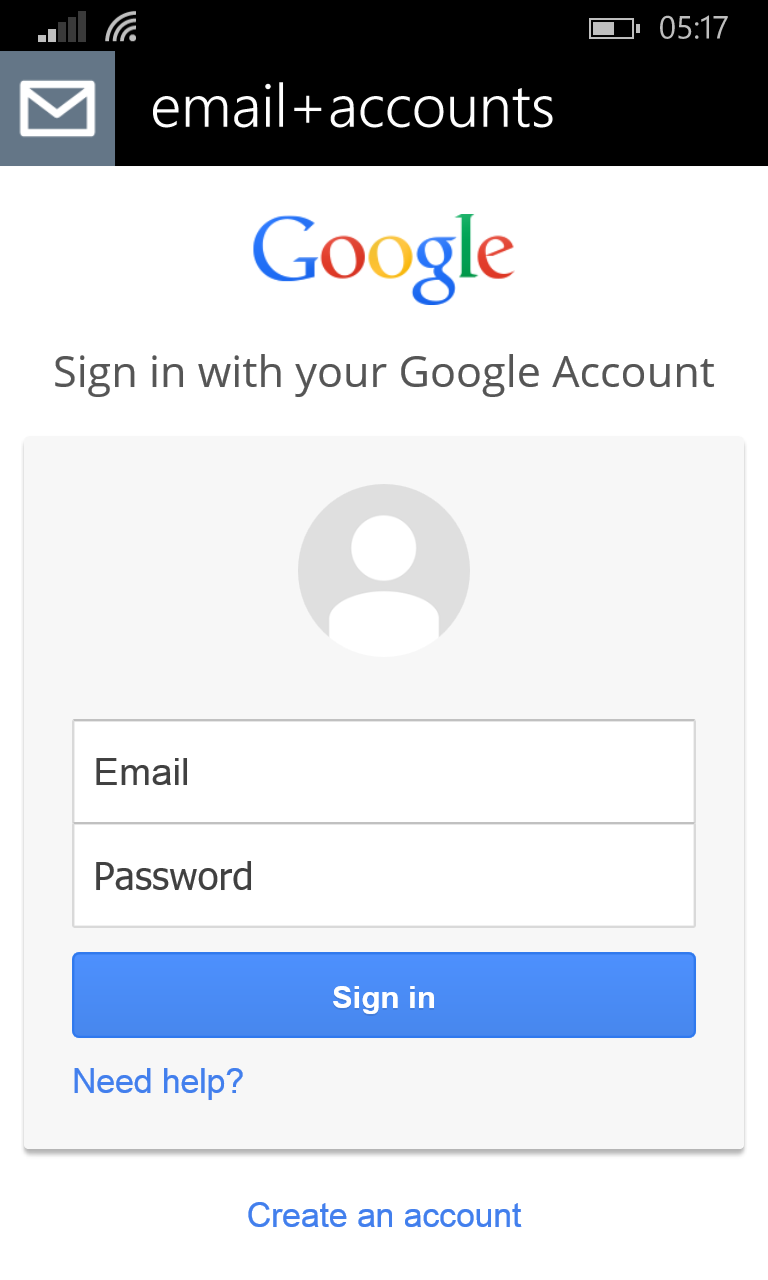
Step 5: Sign in with your Google id on which you have your phone contacts.

wp_ss_20140924_0006


Step 6: After successfully logging in you’ll get two options. Select Email, contacts and calendar to make sure your contacts get imported.