Home Blog Page 400

Google Play Store 5.1.11 APK Download – More elements of Material Design

0
Google Play Store 5.1.11 APK Download – More elements of Material Design

Google Play Store has been updated to 5.1.11, in this new update you’ll see more elements of Android 5.0 Material design. You can get the latest Google Play Store 5.1.11 app from Google Play and for those who are in no mood to get OTA update they can download Google Play Store 5.1.11 Apk from the following links. In Google Play Store 5.1.11 not only developers have fixed bugs that causing a lot of heat also they have added full-height navigation drawer.

Google Play Store 5.1.11 Apk

What’s New in Google Play Store 5.1.11:

1# Enjoy the Full height navigation drawer.

2# You can see your cards and order history in My Account.

3# You can scroll in pages and visual in My Apps.

4# Real-time card shadows on Android 5.0.

Download and Install Google Play Store 5.1.11 APK:

  1. Download Google Play Store 5.1.11 APK [ Mirror 1 ] [ Mirror 2 ]
  2. Copy the APK file to your phone, if you’ve downloaded it on your phone, that’s perfectly fine.
  3. Now on your Android device, go to settings > security > allow unknown sources.
  4. Now locate the downloaded APK file on your phone and tap it to begin installation.
  5. Proceed with the installation and finish it.
  6. That’s all!

How to Fix ” Android SDK Manager failing to open ” While using in Android Development Tools Bundle

0
How to Fix ” Android SDK Manager failing to open ” While using in Android Development Tools Bundle

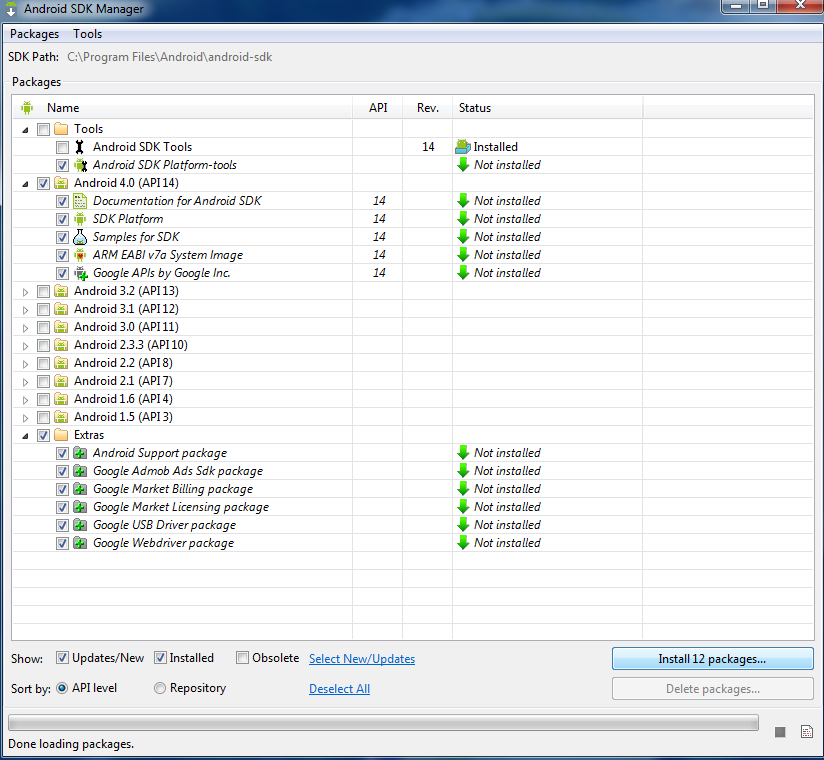
The most common error  in Android Development Tools Bundle is Android SDK Manager fails to open or closes automatically after showing a command prompt windows. In the following guide i’ll explain you how to Android SDK Manager failing to open, all you have to do is follow all the steps as mentioned.

AndroidSDK-9-SDK-Manager

 How to Fix ” Android SDK Manager failing to open ” While using in Android Development Tools Bundle:

Step 1: Open the sdk-folder then tools folder.

Step 2: Now right click on android.bat and open it with NotePad for editing.

Step 3: When the NotePad file is opened, press ctrl+F now write in search box ” java_exe. “.

Step 4: After finding the right line, set java_exe=”C:\Program Files\Java\jre7\bin\java.exe”.

android-Notepad


Step 5: After editing the line save the file and close it.

Step 6: Now to test it go to Window > Android SDK Manager.

Android-SDK-Manager


I am sure after applying these steps you not facing Android SDK Manager fails to open or closes automatically after showing a command prompt windows. Please do tell me in comments if you face any issue regarding this guide.

Credits: techathlon

Root Galaxy S5 G900F Running Android 5.0 Lollipop

0
Root Galaxy S5 G900F Running Android 5.0 Lollipop

Samsung has this habit of surprising the users with updates at an expected time. While the users were not hoping for the Android 5.0 Lollipop to hit Samsung Galaxy S5, Note 3, Note 4 or any other device anytime around December, 2014, Samsung just surprised em’ and just today, started rolling out Android 5.0 Lollipop update for the Galaxy S5’s LTE variant SM-G900F based on the build number LRX21T. It’s just been a month since Google provided the Lollipop source code to AOSP and we think that Samsung has done a very nice job by bringing up the Android 5.0 Lollipop firmware for its current flagship device. Since this is a major Android update, there’s a number of prominent changes that makes this firmware worth having on the device.

The change atop of the Android 5.0 Lollipop update is in the display department. Google introduced a new UI, named as Material Design. Material Design makes the interaction with the elements on the display pretty much natural, it looks quite flat and cool, which also makes it much smoother. Google has added animations to all the elements in the UI, which makes it look eye-catching. Because of this major change in the UI, Samsung had to re-build all the applications to meet the requirements of Material Design. Samsung has added color status bars to its own applications, new fonts. On the new feature end, there’s priority mode, heads-up notifications, Mirror Link, Smart Lock and much more. You may install Android 5.0 LRX21T on your Galaxy S5 SM-G900F using our guide here.

In case you’re an Android power user and you’ve lost root access after flashing Android 5.0 Lollipop on your Galaxy S5 G900F, you would like to obtain the root access ASAP again. That’s what we are here for currently. In the proceeding guide we are going to root the Galaxy S5 G900F powered up with the Lollipop Android 5.0. Let’s go through the early preparations and then begin with the rooting process.

galaxy-s5-copper


Early Preps:

1. This guide is only for Samsung Galaxy S5 SM-G900F

Make sure that your device is exactly as mentioned above. To check out what device you have, go to Settings > More/General > About Device or Settings > About Device and match the model number. Be careful about the device model number, flashing a file on a device not listed here might result in bricking it up.

2. Battery should be charged at least 60%!

Your device’s battery shouldn’t be weak. In case your device goes dead during the flashing process, your device may get soft bricked and you might be in need of flashing stock firmware and that will ultimately result in wiping up your data as well. So, make sure that you charge your device before you start the flashing process.

3. Use the OEM datacable to establish connection!

Always use the original data cable to establish connection between your Android device and your computer / laptop. Using ordinary data cables might interrupt the flashing process, so to avoid any mishap, you need to meet this requirement as well.

4. Backup everything!

Just to be on the safe side, you may consider backing up each and everything from your Android device. This is highly recommended so that in case anything goes wrong, you still have the access to all of your data and you can restore it immediately. You may backup everything as listed below.

Backup SMS Messages
Backup Call Logs
Backup Contacts
Backup Media – Copy your files manually to your PC or Laptop.

5. Turn off Samsung Kies and other softwares while using Odin3!

Make sure that you turn off Samsung Kies while using Odin3 flashtool. Samsung Kies will interrupt Odin3 and will result in causing errors and may not let you flash your desired recovery or root file. Also, make sure that you turn off any antivirus software you’ve installed and also disable firewall to avoid any connection and flashing issues.

6. Disclaimer

The methods involved in flashing custom recoveries, roms and rooting your phone are highly custom and may result in bricking your device, and has nothing to do with Google or the device manufacturer that is SAMSUNG in our case. Also rooting your device will void its warranty and you will be no longer eligible for any kind of free device services by the manufacturers/warranty providers. If your device comes with a Knox counter on the bootloader, it will be tripped and you won’t be able to reset it again. In case of any mishap we may not be held responsible. Follow these instructions to the letter to avoid any mishap or bricking. Make sure that whatever you do, you are doing it at your own responsibility.

Downloads Required:

How To Root Samsung Galaxy S5 SM-G900F Running Android 5.0 Lollipop

  1. Extract the downloaded CF-Auto-Root  file once only to get the .tar.md5 file.
  2. Open Odin3.exe.
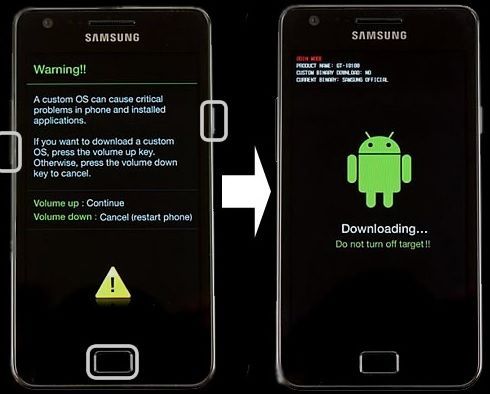
  3. Put your Galaxy Note S5 SM-G900F in download mode. To do so, turn it off and wait for 10 seconds. Turn it on by pressing and
    holding Volume Down + Home Button + Power Key simultaneously, You should see a warning, press Volume Up to continue. In case this method doesn’t work for you, try one from this guide.
  4. Connect your device to your PC.
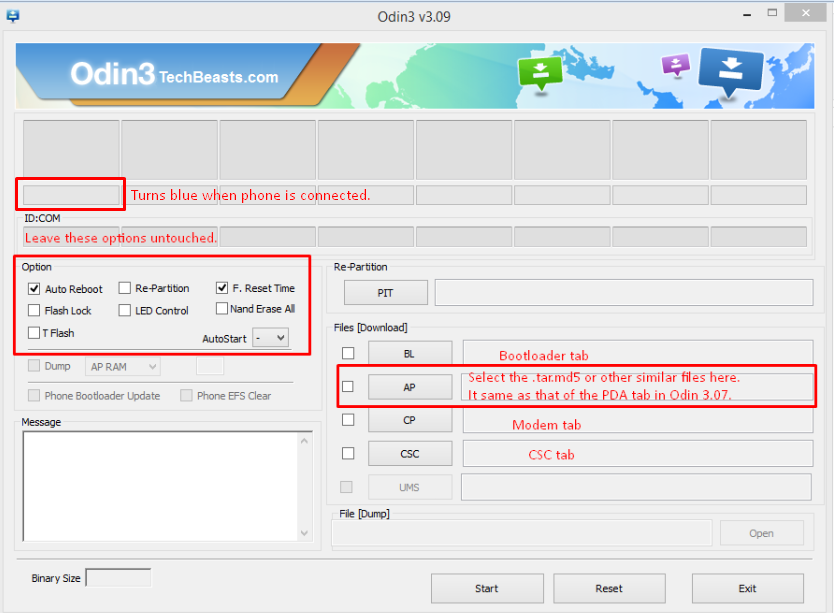
  5. As soon as Odin detects your phone, the ID:COM box should turn blue.  Make sure that you’ve installed Samsung USB drivers before connecting.
  6. For Odin 3.09 hit the AP tab. Select the CF-Auto-Root.tar.md5, that you downloaded and extracted above.
  7. If you’re using Odin 3.07, you will select “PDA” tab instead of the AP tab, rest of the options remain untouched.
  8. Make sure that the options selected in your Odin are exactly as shown in the pic. Odin-3.09-explained.-2
  9. Hit start and wait till the rooting process is complete, as soon as your device restarts, remove it from PC.
  10. Find SuperSu in app drawer now.
  11. That’s all with the rooting, let’s verify the root access now.

How To Verify Root Access:

  1. To do so, go to Google Play Store on your Galaxy S5 G900F.
  2. Find “Root Checker” and install it.
  3. Open Root Checker.
  4. Tap “Verify Root”.
  5. It will ask you for SuperSu rights, tap “Grant”.
  6. It should show you Root Access Verified Now!
  7. That’s All!

Screenshot_1

If you’re stuck with anything regarding this guide, feel free to utilize the comment box below and reach us. We will get back to you immediately. Thank you all.

Credits: Chainfire XDA

Best HD Christmas Wallpapers for OS X Yosemite

Best HD Christmas Wallpapers for OS X Yosemite

Christmas is around the corner and celebration planning is running wild, we never forget our users in these kind of events. Few days back we have posted Best HD Merry Christmas Wallpapers For Your Desktop PC and now toady we have collect the best HD Wallpapers for OS X Yosemite. These Wallpapers can be used on iMac, Macbook Pro and Macbook Air, choose the best for your Mac devices.

Apple-Mac-Christmas-Holiday-Desktop-wallpaper

Note: All these images are collected from random sources. We do not own any of these images, these are the property of their rightful owners. We have just collected the images and compiled in a set here. To download the wallpapers, just go ahead and click on your desired image, then right click and save the image on your OS X Yosemite.

Best HD Christmas Wallpapers for OS X Yosemite

How To Fix Unknown Baseband/no imei On Samsung Galaxy Note 3

0
How To Fix Unknown Baseband/no imei On Samsung Galaxy Note 3

In the following guide i’ll tell you how to fix Unknown Baseband/no IMEI On Samsung Galaxy Note 3. It’s a common error in Samsung Galaxy devices, we have covered other devices in past you can find all these guides here. Please follow all the steps in order to fix unknown baseband and no imei on Galaxy Note 3.

Also See: How to Restore Galaxy Null IMEI # & Fix Not Registered on Network

Imei-On-Galaxy-Note-3

How To Fix Unknown Baseband/no imei On Samsung Galaxy Note 3:

Step1: Go To Settings on Samsung Galaxy Note 3.

Step2: Tap on About Device.

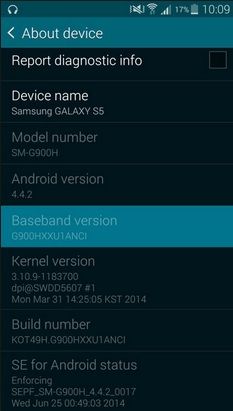
Step3: Now Check “Baseband Version” and “IMEI Number”.

Step4: If IMEI and Baseband both are null means IMEI number is corrupted.

Step5: First install try to restore your IMEI from backup.

Step6: Try flashing another custom Rom.

Step7: Before flashing other custom rom, perform wipe data and factory reset before installing the new ROM.

Step8: Try to flash other modem’s baseband on your Galaxy Note 3, flash them one by one until the phone finally fixes the problem.

Step9: If nothing is working i would suggest you, try the stock Firmware on your Samsung Galaxy Note 3.

All Done !!

Also See: How To Fix mobile data connectivity problems (3G/H/H+) on Samsung Galaxy S5

How To Fix Samsung Galaxy S5 Stuck In Download Mode

How To Fix Samsung Galaxy S5 Stuck In Download Mode

In the following guide i’ll explain you how to fix Samsung Galaxy S5 Stuck In Download Mode. There are many reason that can cause Samsung Galaxy S5 Stuck In Download Mode. Follow all the steps as mentioned in the order to get rid of Galaxy S5 Stuck In Download Mode.

Also See: Fix Galaxy S5 Email Sync issue

Galaxy-S5-Stuck-In-Download-Mode

How To Fix Samsung Galaxy S5 Stuck In Download Mode:

Step1: Take out the battery from Samsung Galaxy s5.

Step2: Wait for 1 min, put the battery back in Samsung Galaxy S5.

Step3: Turn on your Galaxy S5, wait until your device boot up properly.

Step4: Now connect your device with PC using USB cable.

Step5: If your Samsung Galaxy S5 shows as a storage device means the Stuck in Download Mode issue is fixed.

Solution # 2.

Step1: Download Stock Firmware for Samsung Galaxy S5.

Step2: Download latest Odin.

Step3: Now put your device in download mode. Home button +power button + Volume Down button together.

Step4: Extract Stock firmware file on your desktop.

Step5: Connect your device with PC. [ Download USB Drivers for Samsung Galaxy S5 ]

Step6: Open Odin, Click AP button on Odin and browse .tar.md5 firmware file.

Step7: Now Press Start button and the flashing procedure will start.

Step8: Wait until you see a pass on Odin port.

All Done !

Also See: How to Turn on Screen Mirroring on Samsung Galaxy S5 and Connect With SmartTV

Best HD Merry Christmas Wallpapers For Your Desktop PC

0
Best HD Merry Christmas Wallpapers For Your Desktop PC

Xmass 2015 is on the door. Everyone’s probably busy preparing for the best to welcome this great day and celebrate the moments. While you’re busy bringing the Holiday tree in your house, decorate your house with a lot of lights, colors and all set to welcome the 25th of December, 2015, we have done something as well to add a little charm to your celebrations. Just like last year, we, once again have collected some cool wallpapers for  Merry Christmas and help you to do a little make up to the screens of your gadgets by applying these wallpapers.

Beautiful-Merry-Christmas

All these images are collected from random sources. We do not own any of these images, these are the property of their rightful owners. We have just collected the images and compiled in a set here. To download the wallpapers, just go ahead and click on your desired image, then right click and save the image on your PC. Although these wallpapers are for desktop PC, but you may set them as wallpaper on your Android or iOS device as well as they will set perfectly on those devices as well.


Also check out:  Best HD Happy New Year 2015 Wallpapers For Your Desktop PC

Best HD Happy New Year 2015 Wallpapers For Your Desktop PC

0
Best HD Happy New Year 2015 Wallpapers For Your Desktop PC

The year 2014 is about to end. The year might have left some moments of joy & sorrows for some people, but while we are about to say goodbye to this great year, we must be prepared to welcome the year 2015 in a great way and make the best out of it as it begins. In the tech world, 2014 remained pretty awesome. We came across some greatest innovations of all the times, we saw a lot of cool gadgets coming after one another and having something unique for the users and we hope that this innovation will see a whole new level in the year 2015. While we are actually concerned with tech only, just like last year, we, once again have collected some cool Happy New Year wallpapers for the year 2015 in order to add some colors to the screens of your Desktop PCs and help you to prepare better to welcome the year 2015.

Checkout: 

HD Happy New Year Wallpapers For Your Desktop PC

Happy-New-year-2015-cards-quotes-hd-Wallpapers-images-celebration copyAll these wallpapers are collecting from random sources and are the property of their rightful owners. We do not own any of these images, we have just collected and compiled in a collection here for our users. In order to save the wallpapers, simply go ahead, and open your desired wallpaper. Once opened, you need to click on the wallpaper and then right click > save image and save it to your PC. Although these wallpapers are for desktop PC, but you may set them as wallpaper on your Android or iOS device as well as they will set perfectly on those devices as well.

And we would also like to wish you a very Happy New Year 2015!


How To Add A Dedicated Numeric Row To Google Keyboard

0
How To Add A Dedicated Numeric Row To Google Keyboard

There’s a number of cool and enchanting third party keyboards available in the Google Play Store that can enhance your typing experience to a great level, but if you don’t want to fall for complexity and you want like simple and light keyboard, Google Keyboard is a great choice to go with. Google Keyboard is available as a standalone application in the Play Store, and can be installed on any Android device running Android 4.0 ICS or higher. The only thing that you may dislike on the Google Keyboard is, it doesn’t have a dedicated numeric key atop of the keyboard, and not only Google Keyboard, even some third party keyboards (e.g. Swift Key) do not have a dedicated number row atop of the Keyboard.

Although a dedicated number row is available in Samsung’s very own stock keyboard, but I personally don’t like using it and I’ve installed the Google Keyboard on my Galaxy Note 4, and while playing around with it, I came across a little trick to add a dedicated number row to the Google keyboard on my phone. Now that I’ve got it done successfully, I would like to share the same trick with all of the users on our site. In case you’ve been looking for such guide, this might be the right spot for you. Let’s move ahead and learn how to add a dedicated a number/numeric row in the Google keyboard on your Android device.

You must have Google Keyboard installed on your Android device in order to use this little trick. If you don’t have it yet,  you can install it directly from the Google Play Store.

  1. Once the Google Keyboard has been installed on your device, go to settings.
  2. Now in Settings, go to Language & Input settings.
  3. Now tap the small settings icon in front of the Google Keyboard option here.10833890_10204736820833041_889981081_n
  4. Once you’re on the Google Keyboard settings menu, tap Appearance & layouts.
  5. Under Appearance & layouts, tap Custom input styles.
  6. Under Custom input styles, tap the “+” button on the center-bottom of the screen.
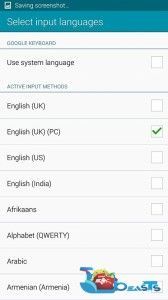
  7. Now tap Language and select your desired language.
  8. Now tap “Layout” and select “PC”.
  9. 10822561_10204736820593035_945393641_n10836216_10204736820393030_1187487878_n
  10. In the next step, tap “Enable” in order to enable your custom keyboard style.10841313_10204736819913018_1691393057_n
  11. Now go back to the Google Keyboard Settings menu and tap “Languages”.
  12. Untick “Use system language”.
  13. Now select the “PC” type of your selected language.10574461_10152622550325435_1378815536609355417_n
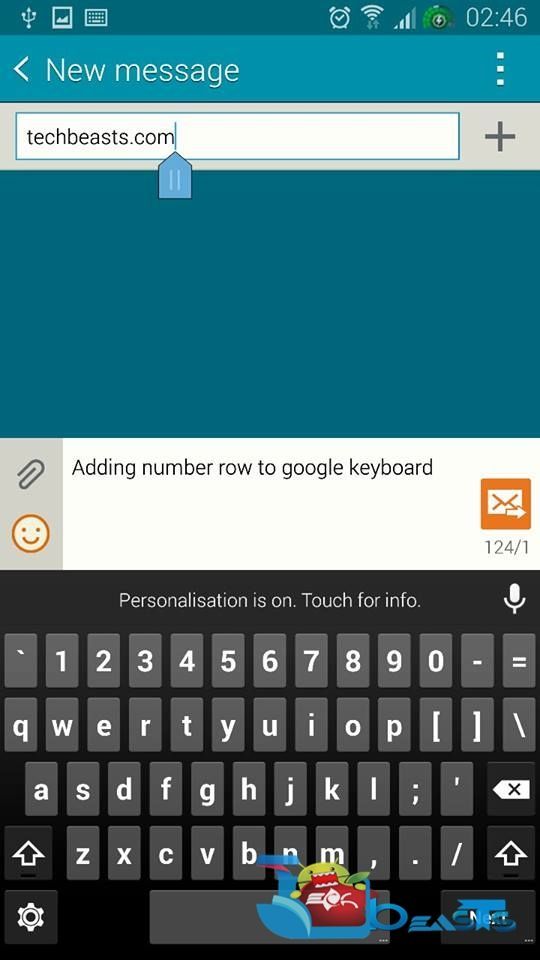
  14. Open the keyboard in any messaging or any other application now, and you will find the number row at the top of the keyboard now.
  15. That’s all.

10799574_10204736830913293_686859409_n

HTC M9 Rumors Hint At Snapdragon 805, 16 MP Camera & 5.5″ QHD Display

0
HTC M9 Rumors Hint At Snapdragon 805, 16 MP Camera & 5.5″ QHD Display

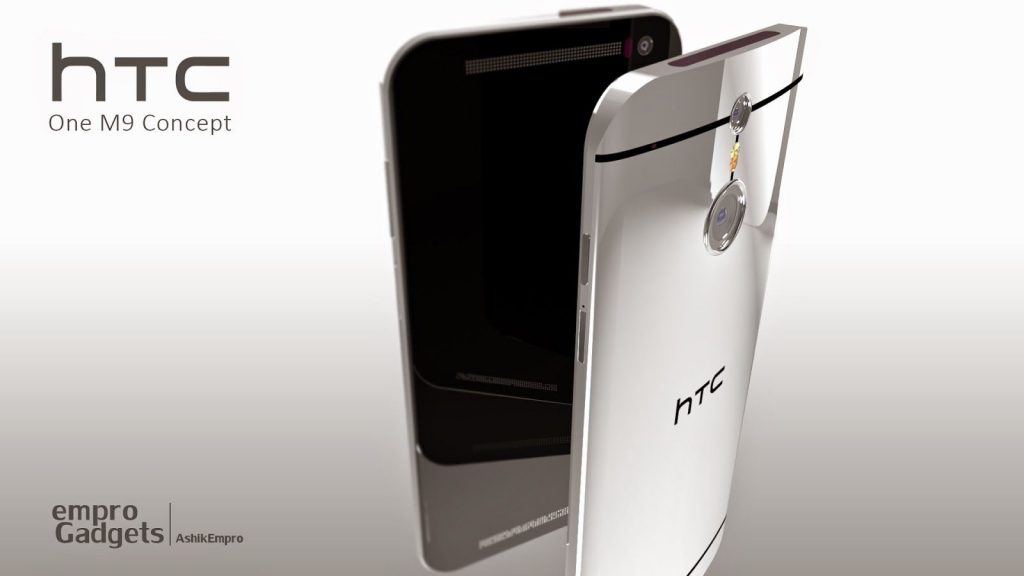
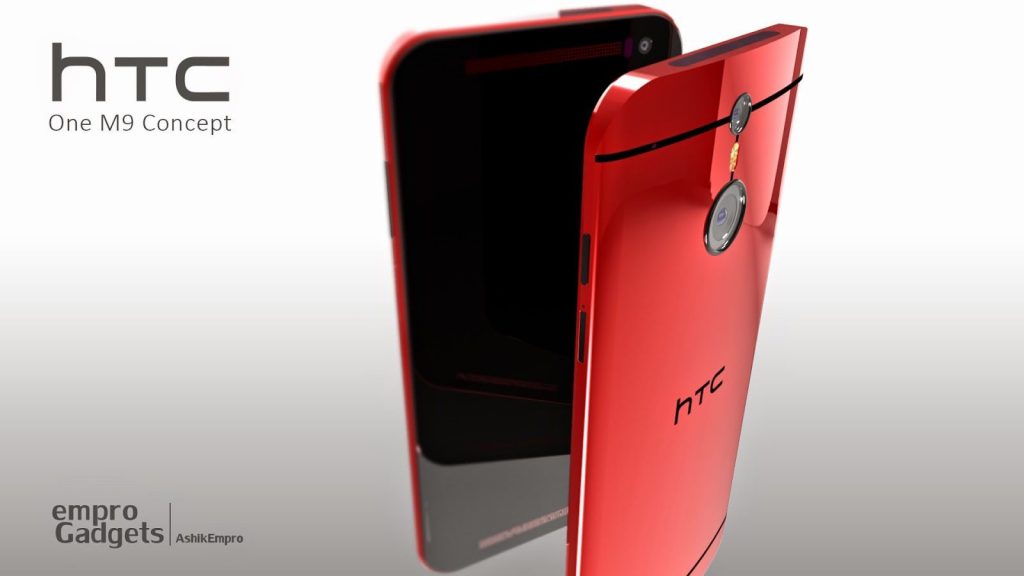
HTC_One_M9_Prime-660x330Rumors about the upcoming HTC One M9 have been making rounds today.  Well it would be interesting to see what the Taiwaneese Tech giants have in store for us. The M9’s predecessor, HTC One M8 is considered one of the best performing smartphone’s of 2014 and it even won award, the Global Mobile Award for Beat Smartphone at the Mobile World Congress. This definitely adds to the pressure to brining out an edgier device with ultra specs, do the rumored specifications fall make us say WOW! Let’s see.

According to the reports that have come in till yet, the HTC One M9 will be powered by a 2.7 GHz quad-core Snapgragon 805 processor. This is the same processor that the Samsung Galaxy Note 4 is equipped with. Well we had hoped that they would introduce a new processor for their new smartphone. The smartphone will have a 3 GB RAM and an internal memory of 64 or 128GB.

The smartphone will sport a 5.5’ inch 2560 x 1440 QHD display. It will have a 16- megapixel camera with optical image stabilization. The smartphone will most probably run on the latest Android Lollipop 5.0. Apart from this the company has teamed up with the audio giant’s Bose to amp up their device’s audio. This is one of the aspects that the company rigorously works on, improving the multimedia, for M8 the company partnered up with BoomAudios, and the smartphones’ audio is considered one of the best in the market. It looks like they will be keeping the edge on this front.

Till yet the release date is not confirmed but as per previous years, the company would release the new flagship a few weeks after the device’s official launch in the MWC (Mobile World Conference). MWC will take place in March, from 2-5th, so most probably it will be released in the last week of March.

Even though the HTC One series smartphones are at the top of their game, they do not cash this aspect very well in the market. Globally the I-Phone and the Samsung smartphones dominate the sales, HTC seriously has to rework their marketing and sales strategy to gain edge over its competitors.

hasan-kaymak-htc-one-x2

HTC-One-M9-design-sees-changes-564x630

HTC-one-M9-13

htc-one-m9-conceptHTC-One-M9-concept-by-Rishi-Ramesh


HTC-M9_thumb


Also checkout:  HTC One M9: All You Need To Know

WhatsApp for PC Download Windows 7/8/8.1 without Bluestacks

0
WhatsApp for PC Download Windows 7/8/8.1 without Bluestacks

As we all know that WhatsApp is not available as a Pc version, although we really need it bad. But there is no sign of it because the developers of WhatsApp wants it to be on Smartphones, may they have some sort plans for WhatsApp Pc version. I have posted about how to download WhatsApp for PC a long time ago using BlueStacks emulator it worked for so many, but now people are reporting issues that BlueStacks is not working and more. So here’s the guide to get WhatsApp for PC Download Windows 7/8/8.1 without Bluestacks.

WhatsApp

About WhatsApp:

# WhatsApp is the best available cross messaging platform for all Smartphone.

# You can send messages using mobile data and WiFi, also you can use WhatsApp as a default SMS App.

# You can send and receive messages, pictures, audio notes, and video messages.

# There are no hidden charges all you have to do is download WhatsApp on your mobile, enter your number to activate it.

# You can create Groups in WhatsApp with your specific contacts.

For More Visit Google Play.

Try: Miracast for PC, Windows 10 and macOS X – Free Download

How Install WhatsApp for PC via Andy:

Andy is a new emulator for Android apps and games. All you have to do is download Andy from their official website, after installing the Andy on your PC follow the steps mentioned below in order to install WhatsApp on PC.

Step 1: Download the Andy from here.

Step 2: After downloading is complete, install Andy on PC.

Step 3: Andy installation process will take few minutes, When installation is finished launch Andy on you PC.

Step 4: When Andy is open, you’ll see an Android tablet interface head over to Google Play.

Step 5: Open Google Play->Search->WhatsApp->Install.

Step 6: when the installation process is complete, go to the home screen there you’ll see WhatsApp icon.

Step 7: Double click on WhatsApp icon, now enter your number when asked. Wait for the confirmation text, when received enter the given code.

Step 8: Now your WhatsApp is successfully installed on your PC, to sync you contacts you can add a Gmail account as you do on your Android Phone.

All Done 🙂 !

Clash of Kings for PC Download ( Windows 9,8.1,7,8 – Mac )

0
Clash of Kings for PC Download ( Windows 9,8.1,7,8 – Mac )

Strategy games are every where not only on Pc, also on Smartphones and Tablets. I’ve seen many apps whom are rocking the App Store charts Android, iOS and Amazon. Today we have another Strategy game which is worth playing Clash of Kings, a perfect Strategy killer game. It would be perfect to play Clash of Kings on Pc, in the following guide we’ll tell you how to download Clash of Kings for PC. You can install the Clash of Kings on Windows 8,8.1,9 and  Mac. Before proceeding any further let me clear one thing Clash of Kings has no PC version, we will use a third party emulator to install Clash of Kings for PC.

Also See: download Castle Clash for Pc

Clash of Kings for PC Download ( Windows 9,8.1,7,8 - Mac )

About Clash of Kings:

@ As the name goes Clash of Kings that means to survive you have to fight and defeat other kings to conquer their kingdoms.

@ Clash of kings has a multiplayer option so it means you can play with your friends. Also, you’ve to fight enemies from all over the world! Build massive empires, stand among kings and clash with enemies in these fantasy war games.

@ Clash of kings is the best online,multiplayer and real time strategy game for your Android.

@ You have to build a fancy kingdom and to protect your kingdom you’ve to upgrade your defense tools as well as your Kingdom.

For more info Please Visit Google Play.

Download and Install Clash of Kings for PC ( Windows Xp,8,8.1,7 – Mac ):

  1. To download Clash of kings for PC, you will need an Android emulator like Bluestacks. If you do not have it already, you can download it from the website Bluestacks.com.
  2. Open Bluestacks and search for clash of kings using search tool on the top of the homepage.
  3. Click on instalbutton. The game will automatically download and install.
  4. Once the app has been installed, go to My Apps in Bluestacks homepage.
  5. The icon for the game will appear in My Apps.
  6.  Click on this icon to open Clash of kings.

Also See: Race The Traffic For PC