Home Blog Page 401

Castle Clash for PC Download ( Windows 9,8,8.1,7 – Mac )

0
Castle Clash for PC Download ( Windows 9,8,8.1,7 – Mac )

Strategy games are getting popular day by day one smartphones, we have posted many guides on how to install Android apps and games for Pc. Today we have another Android Strategy game Castle Clash and in this guide we’ll tell you how to download Castle Clash for Pc. The method we are about to tell you is compatible with Windows 7, 8, 8.1, 9 and Mac. Before proceeding any further let me clear one thing Castle Clash is basically designed for Android devices, there is no such Pc version is available for Castle Clash.

Castle Clash for PC Download

About Castle Clash:

@ As we all know that Castle Clash is Strategy type game, you have to build your army and defend your castle.

@ Main concept of Castle Clash is that you have to fight to become the world’s greatest Warlord.

@ While Playing Castle Clash you’ll enjoy Fast-paced, thrilling, and realistic battles.

@ You can create your very own Guild and lead it to victory in Guild Wars.

@ Join other players and conquer Team Dungeons.

Download and Install Castle Clash for PC ( Windows Xp,8,8.1,7 – Mac ):

  1. To download Castle clash for PC, you will need an Android emulator like Bluestacks. If you do not have it already, you can download it from the website Bluestacks.com.
  2. Open Bluestacks and search for Castle clash using search tool on the top of the homepage.
  3. Click on instalbutton. The game will automatically download and install.
  4. Once the app has been installed, go to My Apps in Bluestacks homepage.
  5. The icon for the game will appear in My Apps.
  6.  Click on this icon to open Castle Clash.

How To Enable Fast Charging Mode On Galaxy Note 4

3
How To Enable Fast Charging Mode On Galaxy Note 4

The Galaxy Note 4 is a pure beast. Once you get your hands on this device, you’re going to come across a plethora of features that won’t let you get your hands off from Samsung’s latest and the best iteration in the Galaxy Note series so far. While you’re checking out the cool features and making the best use of your Galaxy Note 4, you may worry about your device’s battery, that will be eaten up by certain applications and certain features of the device. Ordinarily, you will have to plug in the charger and then wait for hours and get your device charged and only then you will be able to continue what you were previously doing on your device, but waiting for a long time may kill the charm of using the device. It looks like Samsung doesn’t want the users to feel bad about the battery life and a right job has been done by Samsung in the Galaxy Note 4.

Galaxy Note 4 comes with a feature named as “Fast Charging Mode” and the device gets shipped with an Adaptive Fast Charger inside the box. The fast charging mode takes the device from 0 – 50% within half an hour and takes the battery to 100% in 1 hour. This feature happens to be pretty much handy when you’re running short of the time you need a quick boost to your device’s battery life. Giving it 1 hour having the charger plugged in won’t be a big deal. By default, the Fast Charging is enabled on the device and you will find it working when you plug in the charger for the very first time, but just in case you’ve got it disabled somehow and you now you don’t know from where you can enable it once again, you will have to locate it and activate it this little how that we just made in this on-going post.

10841567_10204729467969224_1018701958_n

How To Enable Fast Charging Mode On Galaxy Note 4

  1. On your Galaxy Note 4 go to Settings.
  2. In Settings, go to System.
  3. Under System, tap “Power Saving”.
  4. Under Power Saving the third option should be “Fast Charging”, check the little box in front of this option.
  5. That’s it, you’ve enabled it now.
  6. Now plug in the original data cable connected to the original charger.
  7. Make sure that you’re using the original cable and original charger that shipped along with the phone, other wise you won’t find the fast charging mode working on your device. As soon as the cable is plugged in, a message will appear in the status bar saying “Fast charger connected”.
  8. That’s all.

10816026_10204729461209055_1048346834_n10836278_10204729461089052_290342073_n

Google has Hidden a Game in Lollipop, Here is How You Can Play it

0
Google has Hidden a Game in Lollipop, Here is How You Can Play it

Android 5.0 Lollipop is full of surprises, some of the surprises are reserved for future but there is one that is hidden in it and using a very simple way you can bring it out. I used to hear that Electricians and makers of ICs, integrated circuits, were used to hide the Cartoon Characters in them and the only way you could see those was under a microscope or using the Reverse lens method or use the Extension Tubes of DSLR, which magnifies the view thus allowing you to see small things in a larger frame. You might have heard that tapping the Android version in Settings > About > About Device reveals an easter egg. The feature was seen in Android 2.3 GB for the first time and now it has become a part of Android OS. With the release of Andorid 5.0 Lollipop, Google took it to another level.

This feature can be found at the same place as usual, however, as the time passed those Easter eggs implemented in Android 2.3 GB have become slightly advanced. These are pretty easy to access, yet neglected by a lot of users. Let’s go ahead and see how to access that Hidden game in Android 5.0 Lollipop.

Google has Hidden a Game in Lollipop

How To Find Hidden game in Android 5.0 Lollipop:

  1. Navigate to Device settings.
  2. Navigate to About > About Device.
  3. Locate your Android version and start Tapping it.
  4. That is it, you’ll see your Android version in Graphical shape.

Now you’ll see the Lollipop on your device screen, but that is not it. Start tapping the Screen again and you’ll see Lollipop changing colours. Long press the screen and you’ll be taken to a little game that Google has hidden in this OS. It resembles Flappy Bird. The only difference is that here you have a Bugdriod that you’ll carry and dodge the obstacles throughout the way.

How To Jailbreak iOS 8.1.1Untethered On Mac OS X Using Taig

0
How To Jailbreak iOS 8.1.1Untethered On Mac OS X Using Taig

Windows users are enjoying iOS 8.1.1 Untethered Jailbreak, but on the other hand Mac OS x users are waiting for Taig for Mac. Well there is no such version till now, I hope soon we’ll see a Mac compatible TaiG tool. I’ve a good new for Mac OS X users you can Jailbreak iOS 8.1.1 Untethered On Mac OS X Using Taig for Windows. You’ll all be wondering how is that possible, we’ll follow the post and see for yourself.

Jailbreak iOS 8.1.1 Untethered using Taig

How To Install Windows 10 Technical Preview on Mac OS X.

Windows-10-official-logo11

Step 1: First you have to downloading Windows 10 Technical Preview and install it on Mac OS X.

Step 2: Download Parallels Desktop from your Mac from here.

Step 3: Download Windows 10 Technical Preview VM shell from here.

Now Extract the ZIP file to~/Documents/Parallels/,  Now in the Parallels folder you’ll have Windows 10 TP VM shell file. Double click on the file and then click on Copied. Now follow the steps below.

1> After clicking on Copied, now click on select Don’t Change.

2> Now you’ll be in Preboot eXecution Environment screen, click on Action form the menu.

3> Click on Stop from the menu.

4> Again click on Actions , followed by Configure > Hardware > CD/DVD 1 page > Connect to: > Choose an image file.

5> Now proceed with your Windows installation.

6> Once process is finished, create your user account.

7> Now you need to install Parallels Tools. Please click on Actions tab -> Install Parallels Tools.

How To Jailbreak iOS 8.1.1Untethered On Mac OS X Using Taig:

Now that you have installed Windows 10 Technical Preview on Mac OS X. Follow the guide to Jailbreak iOS 8.1.1 Untethered On Mac OS X Using Taig.

  1. Download the Taig Jailbreak tool from here
  2. Connect your iDevice with PC, make sure to use the Original Lightning cable.
  3. Run Taig.
  4. Tick the First Option i.e Cydia 1.1.16
  5. Un-tick the seconds option i.e 3KOuEO | 1.0.0, otherwise this option will install the Taig App store on your device.
  6. See the Big Green button, just Click it.
  7. Now the Jailbreak process will start, don’t disconnect your device.
  8. After the process is complete, your iOS device will reboot.
  9. After a successful reboot, just see the Cydia app on Home-Screen to verify the Jailbreak
  10. Enjoy!

Jailbreak iOS 8.1.1 Untethered using Taig – How to

0
Jailbreak iOS 8.1.1 Untethered using Taig – How to

Apple released the iOS 8.1.1 quite a time ago, although not a very long time and as we all wait for the root of a device when it comes to Android, the iOS users wait for the Jailbreak tutorial. Although rooting an Android gives you a whole lot control over your device, while Jailbreaking opens your world to some of the basics that you can easily see in any of the Android device.

Jailbreak iOS 8.1.1 Untethered using Taig


Finally the most awaited iOS 8.1.1 Jailbreak tutorial is here. This tutorial will help you in Jailbreaking iOS 8.1.1 Untethered on your iOS device and this tutorial is compatible with all devices running iOS 8.0 ,  iOS 8.1.1 and even the iOS 8.2 Beta. I would suggest to back-up all your important data, including your Contacts, Messages, media etc. to make sure that your data is completely secure in case something goes wrong. In this article we will show you How to Jailbreak iOS 8.1.1 Untethered using Taig. You can also Jailbreak iOS 8.0 or iOS 8.2 beta, but the main focus is this post is the iOS 8.1. Without further ado, let’s continue below and see what we need or to do before the process.

Requirements:

  1. Turn-Off any Touch ID or Passcode on your device.
  2. Turn-Off the Find my iPhone from Settings > iCloud > Find my iPhone.
  3. If you have updated your device to iOS 8.1.1 using the OTA, then you might need to restore it, cause Jailbreak won’t go good with the OTA

How To Jailbreak iOS 8.1.1 on Windows:

  1. Download the Taig Jailbreak tool from here
  2. Connect your iDevice with PC, make sure to use the Original Lightning cable.
  3. Run Taig.
  4. Tick the First Option i.e Cydia 1.1.16
  5. Un-tick the seconds option i.e 3KOuEO | 1.0.0, otherwise this option will install the Taig App store on your device.
  6. See the Big Green button, just Click it.
  7. Now the Jailbreak process will start, don’t disconnect your device.
  8. After the process is complete, your iOS device will reboot.
  9. After a successful reboot, just see the Cydia app on Home-Screen to verify the Jailbreak
  10. Enjoy!

Install TWRP Recovery on Micromax Canvas Magnus

0
Install TWRP Recovery on Micromax Canvas Magnus

With the release of Android One devices, users who want to use a not-so-bad Android device, but don’t have enough budget to get a high-end or atleast a device which can get all the necessary and latest updates, can get a device which is not that bad in specs and sure to get every latest update of Android version for as long as the Hardware supports it. However, the problem is not the Official support because the Official support doesn’t let you go beyond the limits. If you want to use an Android you have to rely on the Custom development to get the best and extreme out of it and the very first step towards the custom development is the Bootloader unlocking. After that comes the Custom Recovery, then the Root access. Official TWRP recovery is now available for Micromax Canvas Magnus, which happens to be a part of Android One devices.

The installation method is made simple because of the official TWRP application, so all you need to do is to download and install the app, choose the right device and let the magic happen. In this Article, we will show you How to Install TWRP Recovery on Micromax Canvas Magnus A117, the process is not difficult at all, but still we are going to give step-by-step instructions on how to install it.

Install TWRP Recovery on Micromax Canvas Magnus

Early Preparations:

1. This is only for Micromax Canvas Magnus!

This custom ROM is only for the device mentioned above. Make sure that your model number matches the one listed above. To do so, go to Settings > About Device on your device and see your model number. Flashing this ROM on any other device will result in bricking it so make sure that you meet this requirement first of all.

2. Battery should be charged at least over 60%

Make sure that your battery is charged enough to complete the flashing process. In case your battery is low and your device goes dead during the flashing process, you may end up soft bricking your device as it won’t complete the flashing process.

3. Backup everything!

Just to be on the safe side, you may consider backing up each and everything from your Android device. This is highly recommended so that in case anything goes wrong, you still have the access to all of your data and you can restore it immediately. You may backup everything as listed below.

4. Unlock Bootloader and Root your device!

Since this recovery or any other Custom Mod or tweak can’t be installed without unlocking the Bootloader first, you’ll need to unlock the bootoader, follow the link to do so: Link and also Root your device: Link

5. Disclaimer

The methods involved in flashing custom recoveries, roms and rooting your phone are highly custom and may result in bricking your device, and has nothing to do with Google or the device manufacturer that is Google in our case. Also rooting your device will void its warranty and you will be no longer eligible for any kind of free device services by the manufacturers/warranty providers. In case of any mishap we may not be held responsible. Follow these instructions to the letter to avoid any mishap or bricking. Make sure that whatever you do, you are doing it at your own responsibility

Downloads Required:

TWRP Manager: Play Store Link

How to Install TWRP Recovery:

  1. Download and Install the TWRP Manager.
  2. Once installed, open the app.
  3. Grant Root permission.
  4. Navigate to advance.
  5. Tap Install Recovery.
  6. You’ll be prompted to Verify the device, if the device model matches the one mentioned in the Window, Tap Install Recovery.
  7. Wait as the Manager installs the recovery for you.
  8. Once done, reboot the device
  9. Enjoy!

How to Root Huawei Ascend P7 using RootGenius

0
How to Root Huawei Ascend P7 using RootGenius

Rooting is now the most important task for an Android user, no matter which device he owns; whether it is a high-end device or a device which is not even supported by the officials any-more. Whether the rooting method is claimed to be a danger to your device or not, no matter what happens, users want to root their device. Almost every device  has it’s own rooting method. Developers are paying much attention to the rooting methods. Once you get used to a rooted device, you won’t be able to survive a day without root access on yoru device. Rooted devices have counltess possibilities which make it very fun to use. There are number of custom mods available for rooted deviced which can dramatically enhance the functionality of simple devices.

For those who are still wondering why should they root their device, rooting allows you to get full control over your device. Stock apps and mods are good, but installing Custom Mods gives you better support and great battery life. You might want to delete some Stock apps from the device and a non-rooted device can’t do that, but a rooted one has the power to remove stock apps too. If you happen to own a Huawei Ascend P7, then get ready to root it. In this article we will show you How to Root Huawei Ascend P7 using RootGenius.

How to Root Huawei Ascend P7 using RootGenius

Early Preparations:

1. This is only for Huawei Ascend P7!

This custom ROM is only for the device mentioned above. Make sure that your model number matches the one listed above. To do so, go to Settings > About Device on your device and see your model number. Flashing this ROM on any other device will result in bricking it so make sure that you meet this requirement first of all.

2. Battery should be charged at least over 60%

Make sure that your battery is charged enough to complete the flashing process. In case your battery is low and your device goes dead during the flashing process, you may end up soft bricking your device as it won’t complete the flashing process.

3. Backup everything!

Just to be on the safe side, you may consider backing up each and everything from your Android device. This is highly recommended so that in case anything goes wrong, you still have the access to all of your data and you can restore it immediately. You may backup everything as listed below.

4.Install USB Drivers:

Lack of USB drivers installed on computer can lead to failed connections and rooting process won’t be complete. You can download USB drivers for your phone from the download link given here. Download these and install on your device. Make sure that you connect your devicde after installing USB drivers. It will make sure that your device is properly set up and ready to go!

Download USB Drivers for Huawei Ascend P7

Disclaimer

The methods involved in flashing custom recoveries, roms and rooting your phone are highly custom and may result in bricking your device, and has nothing to do with Google or the device manufacturer that is Huawei in our case. Also rooting your device will void its warranty and you will be no longer eligible for any kind of free device services by the manufacturers/warranty providers. In case of any mishap we may not be held responsible. Follow these instructions to the letter to avoid any mishap or bricking. Make sure that whatever you do, you are doing it at your own responsibility.

Downloads Required:

RootGenius: Link

Huawei HiSuite: Link

How To Root Ascend P7:

Huawei HiSuite!

  1. Navigate to settings of your device and Enable USB Debugging from Developers Options.
  2. If you cannot see the developer Options in Settings, tap on build number 7 times (In About Phone in Settings)
  3. Start Huawei HiSuite and connect your device with PC.
  4. Huawei HiSuite will install a Deamon on P7.
  5. Choose the connection mode on HiSuite.
  6. Once everything is OK, disconnect the USB cable.

RootGenius!

  1. Start the RootGenius as Admin.
  2. Connect your device with PC.
  3. Choose as you chose the connection mode in HiSuite.
  4. Click Next in RootGenius.
  5. After a few seconds, A7 will reboot and start the rooting process.
  6. After the reboot, Rooted will be stated in the Bottom left corner.
  7. In App drawer check Super SU to verify.
  8. Enjoy!

Most Popular Christmas 2014 HD Wallpapers – Download Here

0
Most Popular Christmas 2014 HD Wallpapers – Download Here

December is on its way and when December is here that means snow, Jingle bells, Christmas tree, Holidays and New Year. Christmas is celebrated all over the world, its an annual religious and cultural holiday celebrated on December 25th. I love Christmas its fun, so that’s why i’ve collected the most popular Christmas 2014 HD Wallpapers for free.

Merry-Christmas-2014-wallpapers

Most Popular Christmas 2014 HD Wallpapers

Black Friday 2014 Best Deals for iPhone, iPad and Mac

0
Black Friday 2014 Best Deals for iPhone, iPad and Mac

On the Web you’ll see that hundreds of Black Friday 2014 deals are available. Every company is offering Black Friday deals. This year we are getting great discount on iOS and Android apps because of Black Friday 2014. I’ve a good news for Apple lovers as well. We have collected the best deals listed for iPhone, iPad and Mac. This year we have seen unbelievable discounts on smartphones, LEDs, Laptops, Games, Home Appliances and more. Following is the list of Black Friday 2014 Best Deals for iPhone, iPad and Mac.

Apple-black-friday-2014

Phone 5s

  • iPhone 5s 16 GB on AT&T, Sprint, Verizon – $1 on contract, or $98 saved (Best Buy)
  • iPhone 5s 16 GB on AT&T, Sprint, Verizon – $79 on contract with $75 gift card, or $95 saved (Walmart)
  • iPhone 5s 16 GB on AT&T, Sprint, Verizon – $79 on contract with $30 gift card, or $50 saved (Target)

iPhone 6

  • iPhone 6 16 GB on AT&T, Sprint, Verizon – $99 on contract with trade-in, or $100 saved (Best Buy)
  • iPhone 6 16 GB on AT&T, Sprint, Verizon – $179 on contract with $75 gift card, or $95 saved (Walmart)
  • iPhone 6 16 GB on AT&T, Sprint, Verizon – $179 on contract with $30 gift card, or $50 saved (Target)
  • iPhone 6 16GB (unlocked) – $639.99, or $10 off (eBay Daily Deals)

iPad Air

  • iPad Air 16GB Wi-Fi, with $100 gift card – $397, or $102 saved (Walmart)
  • iPad Air 16GB Wi-Fi, with $100 gift card – $399, or $100 saved (Target)
  • iPad Air 16GB Wi-Fi – $319, or $80 saved (Staples)
  • iPad Air 16GB Wi-Fi – $299, or $100 saved (hhgregg, Sam’s Club)

iPad Air 2

  • $100 off all models (Best Buy)
  • iPad Air 2 16GB Wi-Fi, with $140 gift card – $499, or $140 saved (Target)

iPad mini

  • iPad mini 16GB Wi-Fi, with $30 gift card – $199, or $80 saved (Walmart)
  • iPad mini 16GB Wi-Fi, with $80 gift card – $249, or $80 saved (Target)

iPad mini 2

  • iPad mini 2 16GB Wi-Fi, with $100 gift card – $299, or $100 saved (Target)
  • iPad mini 2 16GB Wi-Fi – $239, or $60 saved (Staples)

iPad mini 3

  • $75 off all models (Best Buy)
  • iPad mini 3 16GB Wi-Fi, with $100 gift card – $399, or $100 saved (Target)

MacBook Air

  • MacBook Air 11.6-inch 1.4 GHz, 4GB RAM, 128GB storage – $779.99, or $120 saved (Best Buy)
  • MacBook Air 13.3-inch 1.4 GHz, 4GB RAM, 256GB storage – $1,049.99, or $150 saved (Best Buy)

MacBook Pro

  • MacBook Pro (2011) 13.3-inch 2.5GHz, 4GB RAM, 500GB storage – $899.99, or $200 saved (Best Buy)
  • MacBook Pro (Retina) 13.3-inch 2.6 GHz, 8GB RAM, 256GB storage – $1,349.99, or $150 saved (Best Buy)

iMac

  • iMac 21.5-inch 1.4GHz, 8GB RAM, 500GB storage – $899.99, or $200 saved (Best Buy)
  • iMac 27-inch 3.2GHz, 8GB RAM, 1TB storage – $1,649.99, or $150 saved (Best Buy)

iMac with Retina 5K display

  • 27-inch iMac with Retina 5K Retina display, starting from $2,348, with savings up to $201 (MacMall)

Mac Pro

  • Mac Pro, starting from $2798, with savings up to $601 (MacMall)

VIA

Download SuperSU v2.35 Apk for Android

0
Download SuperSU v2.35 Apk for Android

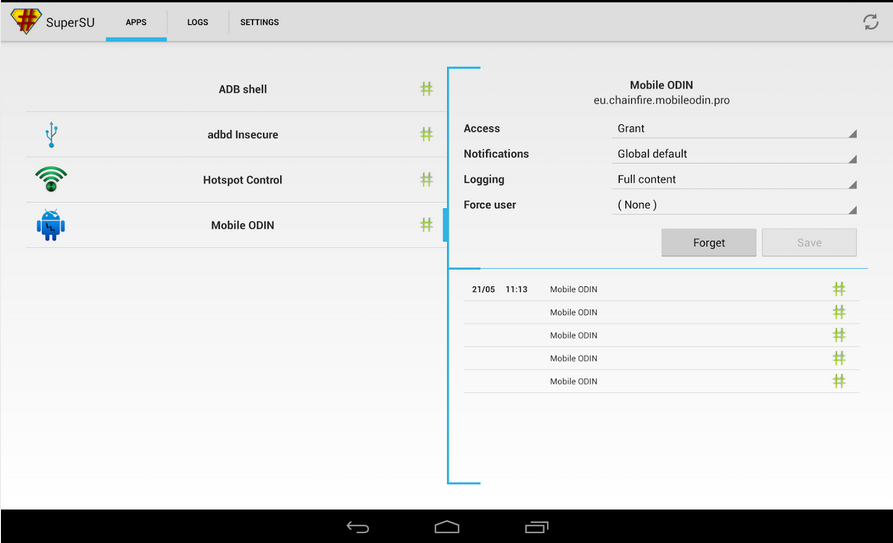
Android 5.0 is giving a hard time to developers who are working on Rooting Android 5.0 lollipop because of enhanced SELinux suppport. Chainfire worked out the solution and He has finally updated his legendary SuperSU app for Android 5.0 Lollipop running devices. Now you can download SuperSU from Google Play Store. SuperSU is updated with the version 2.35 especially for Android 5.0 Lollipop, those who were having issues before while downloading SuperSU on their devices running Android 5.0. Now they can download it Google Play Store. We are adding SuperSU v2.35 Apk, you can download from the following links.

Download SuperSU v2.35 Apk for Android

SuperSU Main Features:

– Superuser access prompt
– Superuser access logging
– Superuser access notifications
– Per-app notification configuration
– Temporary unroot
– Deep process detection (no more unknowns)
– Works in recovery (no more segfaulting)
– Works when Android isn’t properly booted
– Works with non-standard shell locations
– Always runs in ghost mode
– Wake on prompt
– Convert to /system app
– Complete unroot
– Backup script to survive CyanogenMod nightlies
– Icon selectable from 5 options + invisible
– Theme selectable from 4 options

What’s New:

* If you get two icons for SuperSU, go into SuperSU’s settings and select which one you want, the other one will disappear.

You can install SuperSU v2.35 from Google Play Store or you can download SuperSU v2.35 apk directly on your device from the following link.

Download SuperSU v2.35 apk 

How To Install SuperSU v2.35 Apk on Android:

  1. Copy the downloaded APK file to your phone.
  2. On your Android device, go to settings > security > unknown sources > allow.
  3. Now locate the APK file on your phone and tap it to start installation.
  4. Complete the installation, once done, start the application from the app drawer.
  5. Follow the on-screen instructions.

Call of Duty®: Heroes for PC ( Windows 8,8.1,7,Xp-Mac )

3
Call of Duty®: Heroes for PC ( Windows 8,8.1,7,Xp-Mac )

Call of Duty Heroes is available for PC. Yes, you can install Call of Duty Heroes on your PC. There is no .EXE or .Dmg format for Call of Duty Heroes, but we can install Android games and Apps on our PC using third party emulators like Bluestacks. Call of Duty Heroes is basically designed for iOS and Android devices. In the following guide we’ll explain how to install Call of Duty Heroes for Pc using Bluestacks. Before starting the guide let me give you an overview on Call of Duty Heroes.

Call of Duty®: Heroes for PC ( Windows 8,8.1,7,Xp-Mac )

About Call of Duty Heroes:

* Call of Duty Heroes is a combination of all the Call of Duty franchise, including Call of Duty 4: Modern Warfare, Call of Duty: Black Ops II, and more.

* Call of Duty Heroes comes with 3 army units Juggernauts, Dragonfires, and CLAWs.

* You can use different strike packages such as the drone strike, UAV, care package, and chopper gunner to devastate opponents.

* You can upgrade your weapons, Guardians, SAM turrets, howitzers, mines, and over 30 other upgradable structures.

* Call of Duty Heroes has the multiplayer option so you can join your friends in battles.

For more information please visit Google Play Store.

Also See: Retry for PC Download

Download and Install Call of Duty Heroes for PC ( Windows Xp,8,8.1,7 – Mac ):

  1. To download Call of Duty Heroes for PC, you will need an Android emulator like Bluestacks. If you do not have it already, you can download it from the website Bluestacks.com.
  2. Open Bluestacks and search for Call of Duty Heroes using search tool on the top of the homepage.
  3. Click on install button. The game will automatically download and install.
  4. Once the app has been installed, go to My Apps in Bluestacks homepage.
  5. The icon for the game will appear in My Apps.
  6.  Click on this icon to open Call of Duty Heroes.

How To Disable Forced Encryption On Google Nexus 6

0
How To Disable Forced Encryption On Google Nexus 6

There may be a plethora of devices coming out every second day from so many great manufacturers, but the Nexus line-up by Google is one its-own-kind. Google took a start in collaboration with HTC in 2010, and the Nexus series has greatly improved after going through the hands of Samsung, LG and for now the full stop is at Motorola. Just a month back, Google pulled the curtains off from the Nexus 6 in association with Motorola, the Nexus 6 won much of the spotlight. Nexus 6 is just a great upgrade over the Nexus 5, there’s nothing that will be disappointing the users with Google’s efforts on the Nexus 6. On the front we have a whopping 5.9-inch QHD display, Google has gone pretty big this time and the Nexus 6 stands perfectly in front of Samsung’s latest phablet, the Galaxy Note 4. The device is powered up with Qualcomm’s Snapdragon 805 SoC accompanied by Adreno 420 GPU and a RAM of 3 GBs is fixed inside. Internal storage begins at 32 GB. A 13 MP shooter can be found at the back, while a 2 MP on the front. A battery of 3220 mAh can be found inside. Also, the Nexus 6 is water-resistant, which makes it Google’s first water resistant smartphone. These mouth watering specifications won’t let the Android freaks keep themselves away, specially when the device will be found running on Android 5.0 Lollipop out of the box, and what’s more better than the stock Android, that always is the winning feature for the Nexus devices.

While some of you might have got your hands on the Nexus 6 and some might be planning to do so, you won’t be able to actually resist yourself from playing with the device beyond the limits set by Google. If you’re planning something like that, you may unlike the enhanced encryption system on your Nexus 6, that forcefully enables encryption on your Google Nexus 6 while your device boots up for the very first time. Wondering what’s this encryption? Well, let’s have a look on the answer first.

A brief intro to Encryption on Android devices

Encryption on Android devices is a little process that encodes the user data using an encryption key. Basically, encryption feature encrypts the data before it’s called in or any sort of change in the data is comitted, and if you want to read any data, it will be decrypted and then processed. This feature has been greatly enhanced in Android 5.0 Lollipop and Google has already provided all the details as well.

XDA recognized developer bbedward came up with a modified boot.img file that allows the users to disable this forced encryption feature in the Google Nexus 6. If you’re looking to disable it, this might be the right spot for you. Let’s go through the method now and learn how you can disable forced-encryption on your Google Nexus 6 running Android 5.0 Lollipop.nexus-6-product-photo
Here are some early preparations to begin with this process

1. This Guide Is Only For Google Nexus 6.

This custom ROM is only for the device mentioned above. Make sure that your model number matches the one listed above. To do so, go to Settings > About Device on your device and see your model number. Flashing a file on another device will result in bricking it.

2. Battery should be charged at least over 60%

Make sure that your battery is charged enough to complete the flashing process. In case your battery is low and your device goes dead during the flashing process, you may end up soft bricking your device as it won’t complete the flashing process.

3. Your Nexus 6’s Bootloader must be unlocked

You won’t be able to flash the boot.img if your Nexus 6’s bootloader is locked. You can unlock it using Wug’s Nexus Root Toolkit. You may also flash a custom recovery and root your Nexus 6 using the same Toolkit.

4. Install ADB & Fastboot

Android ADB & Fastboot are required for flashing the boot.img file through the command interface. You may follow our Minimal ADB & Fastboot guide in order to install the ADB & Fastboot drivers quickly.

5. Backup everything!

Just to be on the safe side, you may consider backing up each and everything from your Android device. This is highly recommended so that in case anything goes wrong, you still have the access to all of your data and you can restore it immediately. You may backup everything as listed below.

6. Disclaimer

The methods involved in flashing custom recoveries, custom Boot.img files, ROMs and rooting your phone are highly custom and may result in bricking your device, and has nothing to do with Google or the device manufacturer that is also Google in our case. Also rooting your device will void its warranty and you will be no longer eligible for any kind of free device services by the manufacturers/warranty providers. In case of any mishap we may not be held responsible. Follow these instructions to the letter to avoid any mishap or bricking. Make sure that whatever you do, you are doing it at your own responsibility.

How To Disable Forced Encryption On Google Nexus 6

  1. Download the modified boot_noforceencrypt.img file for LRX210 build. Link
  2. Rename the downloaded file to only “boot.img” in order to make it easy for yourself.
  3. Now copy the renamed boot.img file in Minimal ADB & Fastboot folder that should be located under program files in your Windows installation disk.
  4. Open the Minimal ADB & Fastboot.exe file from your desktop. It should open up the command interface.
  5. Now put reboot your Nexus 6 into bootloader mode. To do so, turn off your device completely. Now turn it on by pressing and holding Volume Down + Power Key, your phone’s screen will light up showing the Android logo.
  6. If this doesn’t work, simply connect your Nexus 6 to your PC and in the Minimal ADB & Fastboot command interface, type “adb reboot bootloader
  7. Once in bootloader mode, enter the following commands in the Minimal ADB & Fastboot interface.
    1. fastboot flash boot boot.img

    2. fastboot reboot

  8. This will flash the boot.img file and also reboot your device once done. That’s all.

Phewww! You’re done. Your device won’t enable force enryption feature anymore, but you can still enable the encryption from Settings > Security if you want. If you’re stuck with anything regarding this post, make sure that you reach us using the comment box below. We would love to help you out. Thanks all.