Home Blog Page 393

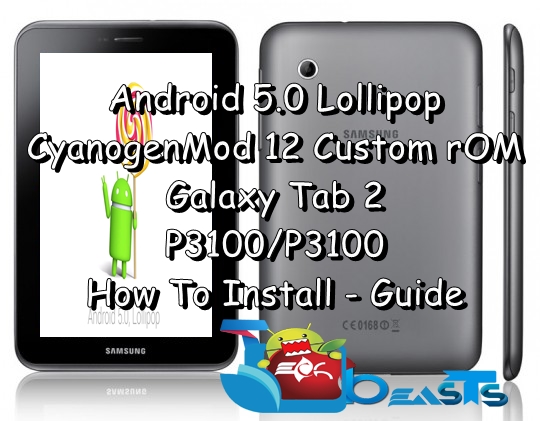
Install Android 5.0.2 Lollipop On Galaxy Tab 2 P3100/P3110 Using CyanogenMod 12 Custom ROM
21
Install Android 5.0.2 Lollipop On Galaxy Tab 2 P3100/P3110 Using CyanogenMod 12 Custom ROM

Galaxy Tab 2’s software life ends on Android 4.2.2 Jelly Bean. The device won’t be getting any further official Android updates because of its hardware limitations that make the device incompatible with any other Android version higher than 4.2.2 Jelly Bean. Users who want to run a higher version of Android on their Galaxy Tab 2 can do it easily using a custom operating system. There are quite many famous custom ROMs based on Android 4.4.2 KitKat and now on Android 5.0 Lollipop available for the device. The latest iteration in Android’s line is Android 5.0 Lollipop, so we’ve selected it to install on our beloved Galaxy Tab 2 for now.

We are going to install Android 5.0.2 Lollipop on our beloved Galaxy Tab 2 P3100 and P3110 using CyanogeMod 12 Custom ROM. Those who are not aware about the CyanogenMod custom ROMs, they may want to know that CyanogenMod is the aftermarket distribution of Android OS and happens to be the most popular and most widely used custom operating system. The ROM is available for almost all the device which have been forgotten by the device manufacturers in the software regards. The ROM we’re going to install in the on-going guide is stable, but it may not be kept for everyday use, and newbies are recommended to stay away from it. Let’s go through some quick early preps and then install it right away.

samsung_galaxy_tab_2_7-0-540x421

Here are the early preparations:

  1. This ROM is only for Samsung Galaxy Tab 2 7.0 P3100 and P3110. Do not try this on any other device, please check your device’s model in Settings > About Device > Model.
  2. Your device must have a custom recovery installed, in case you’re missing it you may Follow our full guide here to install CWM or TWRP recovery on your Galaxy Tab 2.
  3. Your device’s battery should be charged at least over 60%. This is highly recommended in order to prevent any power issues during the flashing process.
  4. Make sure that you backup your important media content, ContactsCall Logs Messages. This is highly recommended just in case something goes wrong and you need to reset your phone.
  5. If you already have rooted your device, use Titanium Backup to back up all your important apps + system data.
  6. Also if you are using a custom recovery, it is recommended that you backup your current system using that first. [Just for the sake of safety]. Here’s our full Nandroid Backup guide.
  7. You will have to go through Data Wipes during installation of this ROM, so make sure that you have backed up all the mentioned data.
  8. Make an EFS backup of your phone before you flash this ROM.
  9. You need enough confidence to flash this ROM.
  10. Alright! Go ahead and flash the custom firmware, follow this guide to the letter.

Disclaimer: The methods involved in flashing custom roms and rooting your phone are highly custom and may result in bricking your device, and has nothing to do with Google or the device manufacturer that is SAMSUNG in our case. Also rooting your device will void its warranty and you will be no longer eligible for any kind of free device services by the manufacturers/warranty providers. In case of any mishap we may not be held responsible. Follow these instructions to the letter to avoid any mishap or bricking. Make sure that whatever you do, you are doing it at your own responsibility.

How To Install Android 5.0.2 Lollipop On Samsung Galaxy Tab 2 Using CM 12 Custom ROM

  1. Download Android 5.0 CM 12.zip file for your device
    1. cm-12-20150227-0607-UNOFFICIAL-p3100.zip
    2. cm-12-20150227-0440-UNOFFICIAL-p3110.zip
  2. Download Gapps.zip file for Android 5.0 Lollipop.
  3. Connect your Tab to your PC now.
  4. Copy the both the .zip files to the storage of your Tab.
  5. Now disconnect your Tab and turn it off complete.
  6. Boot into CWM / TWRP recovery now, in order to do so, turn it on by pressing and holding Volume Up + Home Button + Power Key. You should see the recovery mode in a while.
  7. Now in CWM/ TWRP  recovery, wipe cache, factory data reset and advanced options > dalvik cache.
  8. After wiping all these three, select “Install” option.
  9. Now select “Install > Choose Zip from SD card > Select cm-12-…….Unofficial.zip file > Yes”.
  10. This will flash the ROM in your Tab, once done get back to the main menu in recovery.
  11. Now once again select “Install > Choose Zip from SD card > Select Gapps.zip file > Yes”
  12. This will flash the Gapps in your Tab.
  13. Reboot your device.
  14. You should see the Android 5.0 Lollipop running on your device in a while.
  15. That’s all!

d7AXWCN7edyoq61Pw37aU
3otNtEPScreenshot_12 zaNQR06

First boot may take up to 10 minutes, you may not worry if it’s taking that much long. In case it’s taking too long, you may boot into TWRP or CWM recovery and wipe cache and dalvik cache and reboot your device as it may fix the issue. In case your device is having issues, you may return to your old system using the Nandroid backup or follow our guide here to install stock firmware.

Got any queries? Reach us out through the comment box below.

Credits: Android Andi [We recommend a donation to the developer for his hard work. Thank you all]

HTC A55: 5.5-inch QHD display, 20-megapixel camera and Octa-core processor

0
HTC A55: 5.5-inch QHD display, 20-megapixel camera and Octa-core processor

A new HTC device is making rounds around tech-town today and that is HTC A55. With the MWC just a couple of weeks ahead more everyone currently is more focused on HTC One (M9) that is expected to be announced at the event. Now it looks like that HTC had been quite busy, not only working on their flagship but on other device like A55 as well. The tipster @upleaks HAS provided extensive information about the product.

HTC A55-we hope that the device does get a spiffy name- will sport a 5.5-inch Quad HD 1440 x 2560p display. Earlier we were questioning the fact that why would HTC bring two out two HTC One (M9) variants so close in size (5.2 and 5.0-inch), now we seem to have an answer, with this handset at 5.5-inch the company wants to provide a variety in their product and this is a good strategy to make every product different. HTC A55 will be powered by a 64-bit MediaTek chip and will have a 3GB RAM and a 32 GB internal storage.

The device will sport a 20-megapixel main camera with an LED flash and either a 4-megapixel UltraPixel or 13-megapixel front shooter. HTC A55’s specifications do share some similarities with HTC One (M9)’s variants. The smartphone will run on Android 5.0 Lollipop with Desire Sense 7.0, apart from that BoomSound stereo will compliment the device. HTC A55 will be available in three different colors: gray, white rose gold and brown gold.

According to the reported information the smartphone will be available from this month, we do not have the conformed date yet but we do know that it will be available in Europe, Middle East and Asia. Stay tuned, we will update you as soon as we have more information on HTC A55.

Source: @upleaks

Download PPSSPP – PSP emulator v 1.0 Apk for Android – Play PSP games

0
Download PPSSPP – PSP emulator v 1.0 Apk for Android – Play PSP games

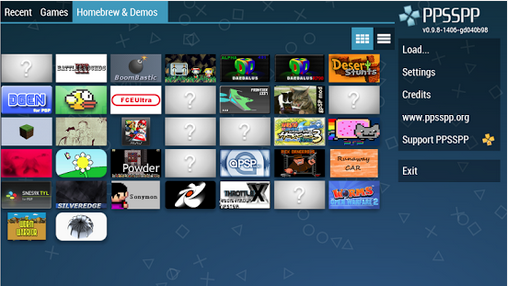
Finally good news for PSP game lovers, now you can download official PPSSPP – PSP emulator from Google Play Store. Yes you can play Dragon Ball Z, Little Big Planet and many more games using PPSSPP. PPSSPP is only PSP* emulator for Android and this time you don’t need to root to use it, for those who cannot download it from Google Play they can Download PPSSPP – PSP emulator v 1.0 Apk for Android. Before going any further let me give you an overview on PPSSPP – PSP emulator.

About PPSSPP – PSP emulator:

1# PPSSPP runs a lot of games, but depending on the power of your device all may not run at full speed.

2# Good thing is that you can download you own PSP games and turn them into .ISO or .CSO files.

3# If you don’t want to install your own games, then free homebrew games, which are available online.

Download PPSSPP - PSP emulator v 1.0 Apk for Android

Following are the list of games which you can play using PPSSPP – PSP emulator:

-Persona 2, Persona 3 Portable
-Dragon Ball Z
-Little Big Planet
-Burnout Legends, Burnout Dominator
-Final Fantasy : Crisis Core
-Final Fantasy : Type-0
-Monster Hunter 2 Unite and 3: HD Remake
-Soul Calibur
-Tekken: Dark Resurrection and Tekken 6
-Grand Theft Auto LCS / VCS
-Lumines
-Worms
-Wipeout

Download and Install PPSSPP – PSP emulator v 1.0 Apk for Android:

Step#1: Download PPSSPP – PSP emulator v 1.0 Apk for Android.

Step#2: Now goto downloads folder and tap on PSP emulator v 1.0 Apk.

Step#3: Proceed with installation steps shown on your screen.

Step#4: After few seconds PPSSPP – PSP emulator will be successfully installed.

Enable Calling Option in WhatsApp with Root Access

1
Enable Calling Option in WhatsApp with Root Access

WhatsApp is one of the most famous Social Chatting Platform available on almost all the Famous OS, like Android, iOS, Symbian, Windows, BB OS etc. not only does it provides an amazing Online Chatting experience, but unlike any other Social Chatting app, WhatsApp doesn’t sell ads instead they ask you to pay $0.99 per year and keep enjoying the service, in my opinion paying such amount is nothing, if you get to enjoy an ad free and uninterrupted Chating experience. But if you don’t want to pay this amount, then after a year just change your number and all is well to be used, totally free again

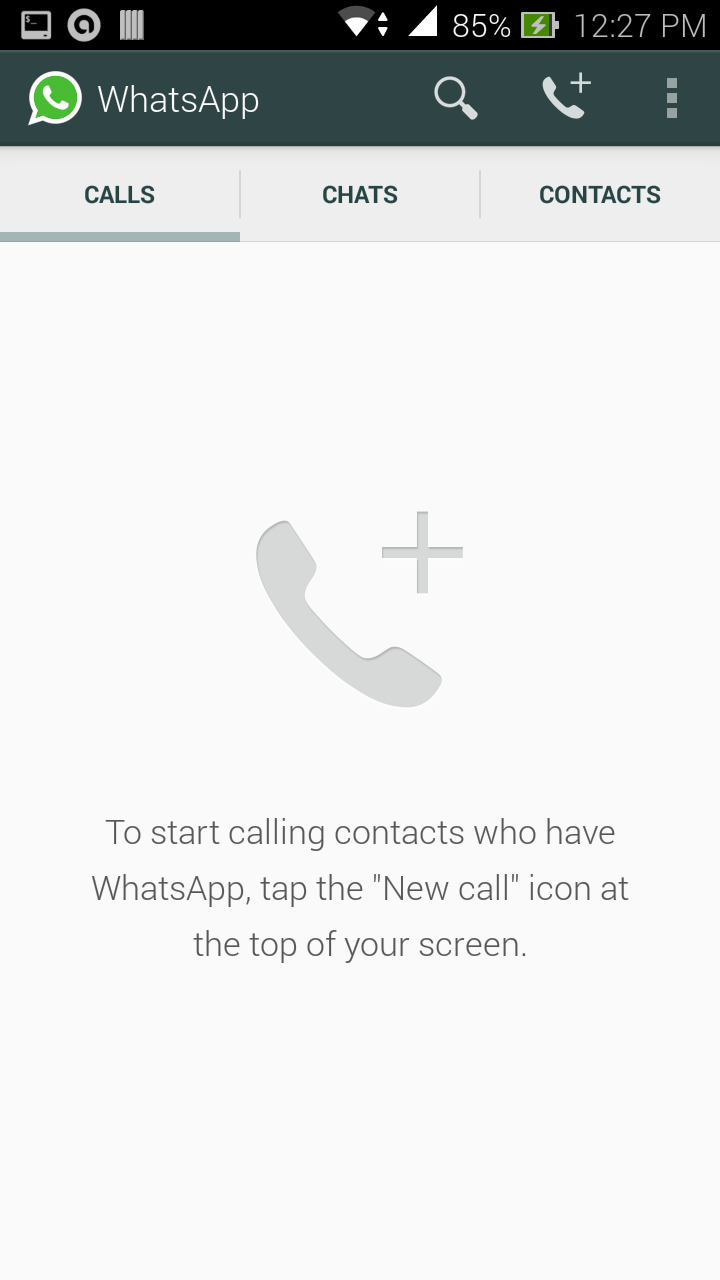
Although, there is one thing that distinguish WhatsApp from all the other Apps, is that this social chatting app doesn’t feature any Wi-Fi call option. Unlike any other app like Viber, Line, this app only lets you communicate with others on Terms of Text only. However, this is the world of Android, all type of things are possible in it as long as there is a way to do it, no matter how hard. XDA member shashanksetty, has found a way to enable Calling option in WhatsApp, however, there is a problem, if you want to call the other person, make sure they also have enable this option, using the same tutorial we are about to share with you. Without further ado, let us continue.

Enable Calling Option in WhatsApp with Root Access

Requirements:

  • A Rooted Device.
  • WhatsApp v2.11.508  or above, make sure to update it.
  • The Terminal Emulator

How to Enable Calling Option in WhatsApp:

  • Make Sure you have the right version of WhatsApp.
  • Open Terminal emulator in your Phone.
  • Type the Following command:
su
am start -n com.whatsapp/com.whatsapp.HomeActivity
  • That is it.
  • WhatsApp should now be open ready to make calls.
  • Enjoy!
  • Make Sure to do the same with other device too, otherwise it won’t work

Apple ID, How to Change in App Store on iDevice

0
Apple ID, How to Change in App Store on iDevice

We all know, like in Android, you are nothing without a G-Mail ID, the same is the case with Apple. Apple ID is the backbone of the whole system of iDevices, a single Apple ID can be used on Multiple Apple devices and anything that is installed on one iDevice is automatically Installed on the other one. Now in Such cases, most of the users think to use a Separate Apple ID, so they can live a life in peace, not all the users wants to install a Dozen of apps. On the other hand, you can’t use one Apple ID to accomplish some tasks, sometimes you need another ID, who knows wants to purchase any other app.

The good news is that you can change your Apple ID mentioned in App Store,although not much users knows about it. There are two methods you can use to change the Apple ID that you have entered in App store. Both of the methods are quite simple, so if you are a native Apple users, even you won’t find them complex and difficult.

Apple ID, How to Change in App Store on iDevice

How to Change Apple ID:

  1. Open Settings.
  2. Navigate to iTunes and App Store.
  3. At the Top you’ll see your Apple ID.
  4. Tap on It.
  5. In the Pop-up Window, Tap Sign-out.
  6. You are now Logged-out.
  7. Log-in using any other Apple ID.
  8. If you Create a New one, you’ll automatically logged-in using that ID.
  9. Although if you are consistent in switching between Apple IDs, there is another, yet more convenient way

IDBox Cydia Tweak:

  1. Download and Install IDBox from Cydia Store.
  2. Open the App Store and Locate the button IDBox.
  3. Tap on it.
  4. Tap and you’ll see all the IDs that you have used to Log-in the App Store
  5. Just Tap on any account and you’ll be logged-in using that.
  6. Using this Tweak, you can switch between IDs with one Tap.
  7. The Tweak is Not free, it will cost $1.49, with the support up-to 3 iDevices
  8. Enjoy!

Set Up Remote Play on your Sony Xperia Smartphone [ How To ]

0
Set Up Remote Play on your Sony Xperia Smartphone [ How To ]

Sony Xperia devices have many awesome features, but there is one which is basically added for gamers. You can setup remote play on your Sony Xperia smartphones and Play Station games like you play on console. Most of you don’t know how to step up the remote play, no need to worry about that in the following guide i’ll tell you how to Set Up Remote Play on your Sony Xperia Smartphone or tablet.

This guide is for Sony Xperia Z2, Xperia Z3 and Xperia Z3 compact. In the following guide i am using Xperia Z2 to Set Up Remote Play on your Sony Xperia Smartphone.

Set Up Remote Play on your Sony Xperia Smartphone

How To Set Up Remote Play on your Sony Xperia Smartphone:

Step#1: First you have to download Remote Play app form Google Play Store.

Step#2: You must have DualShock 4 controller.

Step#3: Now open Remote Play App form app tray.

How To Set Up Remote Play on your Sony Xperia Smartphone

Step#4: Tap on Settings.

Step#5: Select View Controller Guide.

Step#6: Now you’ve to register.

Step#7: Press PS and Share button together in order to connect DualShock 4 controller.

Step#8: After successfully paring DualShock 4 controller, now you have to connect your smartphone with your PS4.

Step#8: Make sure they both are using the same WiFi network.

Step#9: Your Xperia Z2 will automatically find PS4 and if by chance it doesn’t then you need to use a pin code.

All Done..!!

Install Latest CWM/TWRP Recovery On Galaxy Tab 2 P3100/P3110

19
Install Latest CWM/TWRP Recovery On Galaxy Tab 2 P3100/P3110

Samsung’s 2nd iteration in the Galaxy Tab series is one of the most widely used Tablets till the date. Galaxy Tab 2’s 7.0 inches variant comes modeled as P3100/P3110. Tab 2 is powered up with a 1 GHz Dual Core CPU and a 1 GB RAM. Internal storage is 8/16/32 GB and a microSD card slot is available as well. A 3.15 MP camera can be found at the back while a VGA shooter is fixed on the front for video calling. Galaxy Tab 2 is currently running on Android 4.2.2 Jelly Bean, the device won’t be receiving any further Android update. Since the device is pretty old now, there’s quite a lot stuff available on the development forums to play around with the Galaxy Tab 2. Just in case you’re planning to tweak it, you will need a custom recovery first of all to begin with it.

A custom recovery will allow you to flash any MODs, custom ROMs, root your Galaxy Tab 2, make Nandroid or EFS backup and perform a lot of other functions on your Galaxy Tab 2. It can also become handy in case you’ve soft bricked your Galaxy Tab 2, you can simply restore the Nandroid backup. Latest versions of both CWM and TWRP recovery are available for the WiFi and GSM variants of the Galaxy Tab 2. The purpose of both the recoveries is same, these only differ when it comes to interface and there are some additional features that make TWRP recovery a better choice over the CWM recovery.

samsung-galaxy-tab-2-

Wondering how you can install your desired recovery on your Galaxy Tab 2? Well, that’s our purpose for being here right now. In the following guide, we are about to install CWM 6.0.5.1 or TWRP 2.8.4.0 on our beloved Galaxy Tab 2 P3100 and P3110. All you need is, you need to follow this guide to the letter to avoid any mishaps and get the installation done successfully.

Early Preps

1. This guide is intended for the Galaxy Tab 2 users having the model number listed above only. In case you don’t have the device listed here, do not proceed. Using the files and method listed here will result in bricking it. You can check your device’s model number in Settings > General > About device.

2. Your phone’s battery must be charged at least over 60%. In case your phone goes dead during the flashing process, it might result in bricking it. Charge your device before you proceed.

3. Always use OEM data cable to establish a connection between your phone and your computer. Using third-party data cables might cause connection issues.

4. While using Odin3, turn off Samsung Kies, Windows Firewall, and any Antivirus software if you’re using.

5. It is always recommended to backup your important data before you flash anything on your device. You may backup using the following guides on our site.

6. Follow the guidelines carefully. In case of a mishap, we may not be held responsible.

Disclaimer: The methods involved in flashing custom recoveries, ROMs and rooting your phone are highly custom and may result in bricking your device, and has nothing to do with Google or the device manufacturer that is SAMSUNG in our case. Also rooting your device will void its warranty and you will be no longer eligible for any kind of free device services by the manufacturers/warranty providers. In case of any mishap we may not be held responsible. Follow these instructions to the letter to avoid any mishap or bricking. Make sure that whatever you do, you are doing it at your own responsibility.

Files you need to download and install


Also, Download recovery for Tab 2 P3100

Download recovery for Tab 2 P3110

How to Install CWM/TWRP on your Galaxy Tab 2 P3100 / P3110

  1. Download the file for your variant carefully.
  2. Open Odin3.exe.
  3. Put your Tab in download mode, to do so, turn it off completely. Now turn it on by pressing and holding Volume Down + Home Button + Power Key, you should see a warning now, press Volume Up to continue.
  4. In case the download mode method doesn’t work for your device, try one of the methods from this guide.
  5. Connect your phone to your PC.
  6. The ID:COM box in Odin should turn blue now, that means your phone is connected properly in download mode.
  7. Click on the “AP” tab in Odin 3.09 and select the downloaded Recovery.tar file.
  8. In case you’re using Odin 3.07, click on the PDA tab in Odin and select the downloaded Recovery.tar file and let it load.
  9. Make sure that all options in Odin are unticked except “F.Reset Time”.
  10. Hit start now and sit back, it will take a few seconds to flash the recovery, once finished, disconnect your device from your PC.
  11. Press and hold Volume Up + Home Button + Power Key to access the TWRP or CWM Recovery that you just installed.
  12. You can backup your current ROM and do a lot of other things using the options in TWRP or CWM Recovery.
  13. Make sure that you make Nandroid and EFS backup and save it on your PC as well. Find the option in TWRP or CWM Recovery.
  14. That’s All.

How to Root Now [Optional]

  1. If you want to root your device now, you can download the SuperSu.zip file.
  2. Place the downloaded file on your phone’s sd card.
  3. Open TWRP/CWM and select Install > Select / Choose Zip > SuperSu.zip and flash it.
  4. Reboot your device and find SuperSu in app drawer.
  5. Congrats! You’re now rooted as well.

That’s All! We hope that you found this guide of much help. In case you got any queries or face any difficulties regarding this guide, don’t hesitate to stop by the comment box below and leave us your message. We will try our best to help you out.

Recovery Credits: Android Andi [We recommend donation to the developer for his hard work. Thank you all]
Download Latest Google GApps For Android 5.0.X Lollipop [All ROMs]

19
Download Latest Google GApps For Android 5.0.X Lollipop [All ROMs]

Google’s latest and greatest version of Android OS is available now. The latest version, Android 5.0 Lollipop came out as the biggest update in the history of Android. Lollipop carries the biggest changes in the graphics department.

It happens to be the biggest UI update after Android 4.0.1 Ice Cream Sandwich. Apart from that, Google introduced quite a lot of features in Android 5.0 Lollipop including new lockscreen with notifications on it, new security enhancements, a lot of bugs got fixed, battery performance got a lot better as compared to the previous version of Android. The new UI introduced in the Android 5.0 Lollipop is named as Material Design. As the name suggests, Material Design makes the interaction with the elements on the device’s screen, just like an interaction with the real-life objects.

Google updated all of its Nexus 4 and onward devices to Android 5.0 Lollipop. Sony is set to update its entire Xperia Z series to Android 5.0 Lollipop, and Samsung is rolling out this update for its flagship devices from Galaxy S4 onwards. Other manufacturers are also updating their mainstream devices. But it looks like the old and low-end devices won’t be getting a chance to taste this update.

The only way for the unlucky device owners to update their device to Android 5.0 Lollipop will be using custom ROMs. CyanogenMod 12 is there, other popular custom ROMs including Paranoid Android, Omni ROM, Carbon ROM, SlimKat ROM etc are also coming up having Android 5.0 Lollipop atop for various devices. These custom ROMs are light and do not contain and bloatware or applications, one of the major components, that these custom ROMs are missing are the Google GApps.

Users always have to flash Google GApps as a separate package after flashing a custom ROM on their Android device. Just in case you’re planning to flash CyanogenMod 12, Paranoid Android, Omni ROM or any other ROM based on Android 5.0 Lollipop, you will have to flash the compatible Google GApps after flashing your desired custom operating system.

You may be facing some difficulties finding the proper and working GApps for your Android device, to overcome this difficulty, we’ve found the working and compatible GApps with all the custom ROMs and linked right here. These GApps are the hard work of XDA-senior member TKruzze, who also brought us the GApps for Android KitKat earlier. These GApps are named as PA-GApps [Paranoid Android] but as mentioned, these are compatible with all custom ROMs and all Android 5.0 Lollipop version including Android 5.0.1, 5.0.2 and any other coming ahead Android 5.0.X.

Download Latest Google GApps For Android 5.0.X Lollipop [All ROMs]

PA-GApps are available in the form of multiple packages. You may download the one that suites you the best depending on your convenience and the Google applications you want. Let’s head towards the downloads now and grab your desired one.


Here’s a comparison chart by the developer showing what the applications are packed up in the packages.

Credits: Tkruzze [XDA Senior Member]

PA Gapps Pico Modular Package For Android 5.0 Lollipop

The pico version of PA Gapps for Android 5.0 Lollipop comes with the absolute minimum Google applications. These include Google system base, Google Play Store, Google Calendar Sync only, Google Play Services. This version of GApps is intended for the users who don’t like all other Google applications and want the basic ones only.

Size: 81 MB | | Download  | Modular Pico (Uni – 39 MB): Canada Mirror 1Download

PA Gapps Nano Modular Package For Android 5.0 Lollipop

This version of Google GApps is intended for the users who want to use the minimum possible Google GApps having the “Okay Google” and “Google Search” features. Other GApps include Google system base, off-line speech files, Google Play Store, Google Calendar Sync and of course, Google Play Services.

Size: 116 MB| Download

PA Gapps Micro Modular Package For Android 5.0 Lollipop

Intended for legacy devices having small partitions. This package included applications like Google system base, off-line speech files, Google Play Store, Google Exchange Services, Face Unlock, Google Calendar, Gmail, Google Text-to-speech, Google Now Launcher, Google Search and Google Play Services.

Size: 172 MB ||Download

PA Gapps Mini Modular Package For Android 5.0 Lollipop

For the users who use limited Google applications. This package includes almost all basic Google applications including core Google system base, off-line speech files, Google Play Store, Google Exchange Services, FaceUnlock, Google+, Google Calendar, Google Now Launcher, Google Play services, Google (Search), Google Text-to-Speech, Gmail, Hangouts, Maps, Street View on Google Maps & YouTube
Size: 221 MB | Download

PA Gapps Full Modular Package For Android 5.0 Lollipop

This package is similar to the stock Google GApps. It only misses Google Camera, Google Keyboard, Google Sheets, and Google Slides applications while includes almost all other Google GApps.

Size: 353 MB | Download

Gapps Stock Modular Package For Android 5.0 Lollipop 

Stock Google GApps package. Includes all Google applications. Intended for the users who do not want to miss any application.

Size: 421 MB| Download

Source: Tkruzze [XDA Senior Member | We recommend a donation to the developer for his hard work. Thank you all.]

Best HD Happy Valentine’s Day 2015 Wallpapers For Your Desktop PC

0
Best HD Happy Valentine’s Day 2015 Wallpapers For Your Desktop PC

Valentine Day 2015 is on the door and Love is in the air once again. The most special day for the love birds to express their deepest feelings to their loved ones is there once again. Roses, cards and other such stuff will be coming up and everyone will be trying their best to make this day unforgettable and filled with a lot of love. While you’re busy preparing and finding a way to surprise your other significant on this Valentine, we’ve picked up some cool wallpapers to add the Valentine charm to your desktop PC.

We’ve collected some cool wallpapers, that will let you bring the Valentine Day 2015 colors to your computer’s screen. These wallpapers can be used on your smartphones and tablets as well. We do not own any of these images. These images are a collected from random sources using Google image search and these are the copyrights of their rightful owners. To download these images, simply go ahead, pick up your favorite one, right click and then save into your computer.

cute-valentines-day-couple-imageLove-is-Happy-Valentines-Day-2015


happy-valentines-day-hearts-wallpaper-2015

Prevent Apps from Being Deleted from iDevice

0
Prevent Apps from Being Deleted from iDevice

For all those who have kids in their house running around, messing with their devices, doing whatever they like. Since they are kids, they don’t know what they are doing, even if they delete some of your installed apps. On the other hand, if you have some naughty friends, who likes to mess with your device, they also don’t care, how important a game or an app to you, who knows how high your score was in it, that you can’t able to reach the same level again Or sometimes you just remove an app without thinking and afterwards realize that you need it. In such cases, you need something to remind you that you are going to delete this app and also for others put something that they won’t be able to mess with your apps so simply.

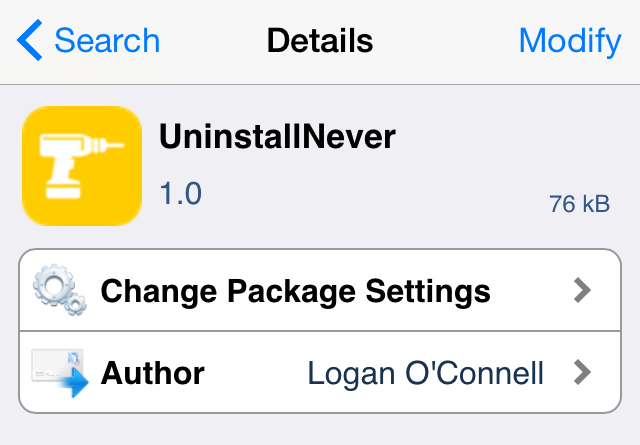
The UninstallNever, helps you in this matter, it is a jailbreak tweak that removes the X button, that uninstall the app. Usually, when you tap and hold onto an app, a red X button appears on the top of the app, tapping on which will remove the app. The UninstallNever will disable this option, and once you have installed this tweak, tap and hold onto the app won’t expose the X button, thus minimizing the risk of deleting the app without your permission, without further ado let us continue.

Prevent App from Being Deleted from iDevice

Prevent App from Being Deleted in iPhone:

  1. Make Sure your device is running the iOS 7 or above.
  2. Open Cyida.
  3. Search for UninstallNever
  4. Once found, Install the tweak.
  5. Respring the device.
  6. After installing the tweak, its primary feature will be activated without any work.
  7. Although the problem is, that there is no way to disable this tweak, once installed.
  8. To disable this tweak, you need to uninstall this tweak from Cydia.
  9. Enjoy saving your apps from toddlers and your friends.

Galaxy Note 3 SM-N9005 Camera Mod brings Multidpi

0
Galaxy Note 3 SM-N9005 Camera Mod brings Multidpi

In past we have seen many of the Camera Mods for different devices, every mod brings something new in the device. Mostly they are made to increase the Picture quality or to give a little more options or to gain a little more control over the Video making. However, this camera mod for Galaxy Note 3 SM-N9005 also brings the Dip enhancement too along with the No Limitations on Low Battery, uncompressed photos brings more detail and less artifact in the pictures, along with the no limitations on the 4K video Mod and the noticeable thing in this mod is the Change in Dpi.

Since the Mod is going to mess with the Root of the device, making some changes under the hood, you’ll need a rooted device. Also make sure to create a Back-up of your device, so in case of any mishap you can always go back to your previous ROM without any tension. The Mod is available in Flashable Zip file. Now all you need is a Custom Recovery, whether TWRP or CWM or PhilZ touch recovery, just make sure they are updated to the latest version. Without further ado, let us continue.

Screenshot_8

Disclaimer

The methods involved in flashing custom recoveries, roms and rooting your phone are highly custom and may result in bricking your device, and has nothing to do with Google or the device manufacturer that is SAMSUNG in our case. Also rooting your device will void its warranty and you will be no longer eligible for any kind of free device services by the manufacturers/warranty providers. In case of any mishap we may not be held responsible. Follow these instructions to the letter to avoid any mishap or bricking. Make sure that whatever you do, you are doing it at your own responsibility

Downloads Required:

 Camera Mod: Link

Installation Process:

  • Connect your device with PC.
  • Copy and Paste the Above zip files to the root of your sdcard.
  • Disconnect the cable.
  • Turn Off your Device
  • Open Recovery mode. How? Press and hold the Volume Up + Home + Power buttons until you see some text on screen.

CWM/PhilZ Touch Recovery Users.

  1. Back-up your ROM using the Recovery.
  2. To Perform a Back-up, Navigate to Back-up and Restore on Next screen, Choose Back-up again.
  3. Go back to Main Screen after the Back-up is complete.
  4. Navigate to ‘Install zip from sd card’ another windows will open in front of you.
  5. Select ‘choose zip from sd card’ from the Options.
  6. Select the Camera Mod.zip file and confirm the installation on next screen.
  7. Once the Installation is Over, Select +++++Go Back+++++
  8. Select Reboot Now to Reboot the System.

TWRP Users (Recommended)

  1. Tap On Back-Up and Select System and Data
  2. Swipe the Confirmation Slider
  3. Go back to Main Menu and Tap Install Button.
  4. Locate the Camera Mod.zip and Swipe the Slider To install it.
  5. Once the Installation is Over, you will be promoted to Reboot System Now
  6. Select Reboot Now to Reboot the System.
  7. Enjoy!