Home Blog Page 390

Enable Two-Step Verification for Apple ID [ How To ]

0
Enable Two-Step Verification for Apple ID [ How To ]

Here’s how to enable Two-Step verification for Apple ID, it will help you to secure your Apple ID more then ever. Apple ID is the main ingredient for people who love iDevices, with out Apple ID you cannot download apps on iPhone/iPad, cannot use iMessage and FaceTime, cannot sync your Apple devices, you cannot download apps from Mac and last but no least you cannot use iCloud services. Two-Step verification will make your Apple id more secure and nobody can use it without your permission.

To Enable Two-Step Verification for Apple ID there is no special method, its same as we do on Gmail or any other services. But for those who don’t know how to do it, all they have to do is follow my step by step guide below.

Enable Two-Step Verification for Apple ID

How To Enable Two-Step Verification for Apple ID:

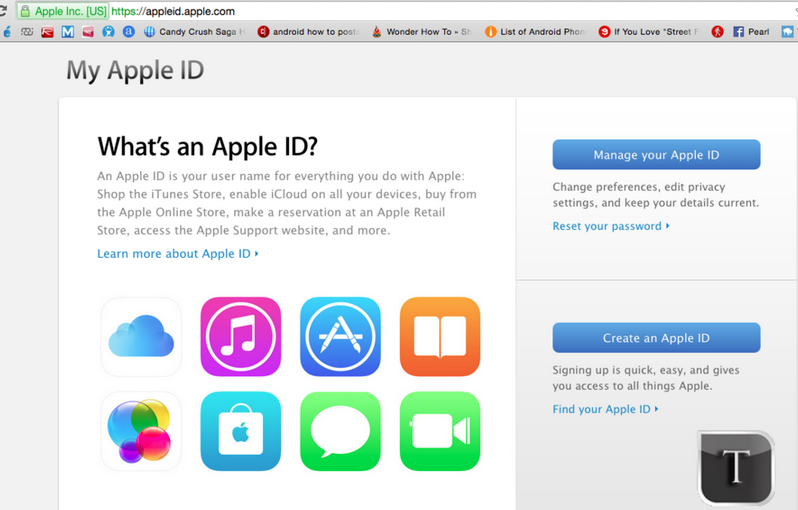
Step#1: First open https://appleid.apple.com/ from your browser.

How To Enable Two-Step Verification for Apple ID

Step#2: Now click on Manage your ID.

Step#3: Now add your Apple ID credentials.

Step#4: Once your are logged in, Click on Password and Security.

Step#5: Click on Get Started… > Continue > Continue > Get Started.

Step#6: To Enable Two-Step verification. Add your Phone Number and Click on Ok.

Step#7: Now you’ll receive a 4 digit security code to verify your number add the code in the given box. Click on Continue.

Step#8: You’ll be given a Recovery Key, Click on Continue.

Step#9: Now enter your Recovery Key and Click on Confirm.

Step#10: Click on checkbox to agree the terms and conditions.

Step#11: Click on Enable two-step Verification.

All Done !!

Monster Dash for PC Download – ( Windows 8,8.1,7,Xp – Mac )

0
Monster Dash for PC Download – ( Windows 8,8.1,7,Xp – Mac )

Monster Dash for PC is available for download, but Monster Dash is not available in Pc games format. Monster Dash is high addictive arcade game for iOS and Android devices and now we can Monster Dash on PC. We can install Android Apps on PC using third party emulators like BlueStacks and Andy. In the following guide i’ll tell you how to install Monster Dash for PC, but before going any further let me give you an overview on Monster Dash.

About Monster Dash:

#: Monster Dash is the combination of famous game like Barry Steakfries Trilogy along with Jetpack Joyride and Age of Zombies

#: Monsters across six worlds will be chasing you down while your are running.

#: You’ll get weapons like Pacifier and Rocket Launcher.

Monster Dash for PC Download


How To Download Monster Dash for Pc Using Andy Emulator

Step 1: Download the Andy from here.

Step 2: After downloading is complete, install Andy on PC.

Step 3: Andy installation process will take few minutes, When installation is finished launch Andy on you PC.

Step 4: When Andy is open, you’ll see an Android tablet interface head over to Google Play.

Step 5: Open Google Play->Search->Monster Dash – Daybreak->Install.

Step 6: when the installation process is complete, go to the home screen there you’ll see Monster Das.

Step 7: Double click on Monster Dash icon and start playing the game.

Step 8: Now Monster Dash is successfully installed on your PC, Enjoy the the game.

BlueStacks01


Download and Install Monster Dash for PC ( Windows Xp,8,8.1,7,10 – Mac ):

  1. To download Monster Dash for PC, you will need an Android emulator like Bluestacks. If you do not have it already, you can download it from the website Bluestacks.com.
  2. Open Bluestacks and search for Monster Dash using search tool on the top of the homepage.
  3. Click on install button. The game will automatically download and install.
  4. Once the app has been installed, go to My Apps in Bluestacks homepage.
  5. The icon for the game will appear in My Apps.
  6.  Click on this icon to open Monster Dash.

Add Instant Message Profiles to iPhone Contacts App [ How To ]

0
Add Instant Message Profiles to iPhone Contacts App [ How To ]

Now a days people use social media communication more then ever, long gone the days when people relay on network messages. Instant messaging give more freedom as compared to the default messaging system. In offices, schools, universities or in friends group chatting is used more then calls. There are many instant messages services that have been doing their best to provide us free services.

Since more and more instant messaging service are joining the app stores an its gets more difficult to manage that many contacts. Today i’ll tell you to add Instant Message Profiles to iPhone Contacts App, so that by just one tap you can start quick conversation.

Screen Shot 2015-02-13 at 05.11.14


How To Add Instant Message Profiles to iPhone Contacts App:

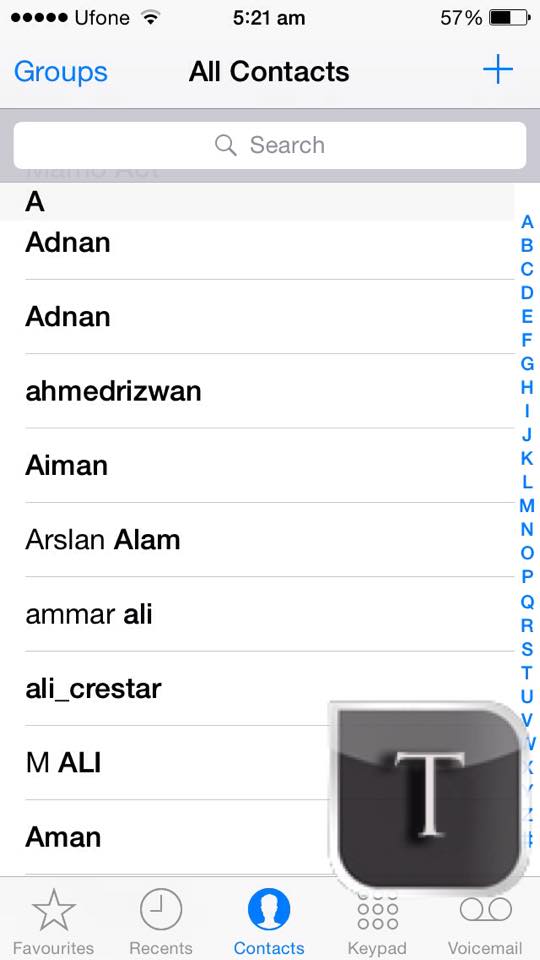
Step#1: Open Contacts App on your iPhone.

1600232_10206013697684848_784681377_n (1)

Step#2: Now select a contact.

Step#3: Tap on Edit located on top right corner.

10979441_10206013697444842_971414690_n

Step#4: Tap on Add Instant Message.

10965777_10206013697164835_1501874360_n

Step#5: By default you’ll see Skype, Tap on it and you see all the social medias list.

Step#6: Now you’ve have enter the social media profile and Tap on Done.

10966869_10206013696924829_1164354021_n

All Done !!.

Now if by some means you want to delete the instant media profiles from your contact app, you have to follow the steps below.

Step#1: Open Contacts App on your iPhone.

Step#2: Now select a contact.

Step#3: Tap on Edit located on top right corner.

Step#4: Scroll down and tap on the social media profile, you’ll see delete button right next to it. Tap on Delete.

All Done!!

Root Galaxy Note 4 Running Android 5.0.1 Lollipop

63
Root Galaxy Note 4 Running Android 5.0.1 Lollipop

Samsung has recently started updating the Galaxy Note 4 series to Android 5.0 Lollipop. If you’re an Android power user and you’re planning to update your device or you’ve already updated it to Android 5.0 Lollipop, you must have lost root access and you will be willing to gain it as soon as possible now. We’ve already tried using a method and found it working perfectly, and its time for you guys to go ahead with it and root your Galaxy Note 4 running Android 5.0.1 Lollipop.

Screenshot_3

Here are some early preparations

1. This guide is for the following versions of Galaxy Note 4 running Android 5.0.1 Lollipop.

  • Root Galaxy Note 4 SM-N910C running Android 5.0.1 Lollipop
  • Root Galaxy Note 4 SM-N910S running Android 5.0.1 Lollipop
  • Root Galaxy Note 4 SM-N910G running Android 5.0.1 Lollipop
  • Root Galaxy Note 4 SM-N910F running Android 5.0.1 Lollipop
  • Root Galaxy Note 4 SM-N910U running Android 5.0.1 Lollipop
  • Root Galaxy Note 4 SM-N910W running Android 5.0.1 Lollipop
  • Root Galaxy Note 4 SM-N910L running Android 5.0.1 Lollipop
  • Root Galaxy Note 4 SM-N910K running Android 5.0.1 Lollipop
  • Root Galaxy Note 4 SM-N910H running Android 5.0.1 Lollipop
  • Root Galaxy Note 4 SM-N910P running Android 5.0.1 Lollipop
  • Root Galaxy Note 4 SM-N910T running Android 5.0.1 Lollipop

2. Although this guide is for Galaxy Note 4 running Android 5.0.1 Lollipop, but it will root any previous version of Android on Galaxy Note 4 as well. If you are looking for a way to update your Galaxy Note 4 to android 5.0.1 Lollipop, you may use following guides.

3. Battery should be charged at least 60%!

Your device’s battery shouldn’t be weak. In case your device goes dead during the flashing process, your device may get soft bricked and you might be in need of flashing stock firmware and that will ultimately result in wiping up your data as well. So, make sure that you charge your device before you start the flashing process.

4. Use the OEM data cable to establish connection!

Always use the original data cable to establish connection between your Android device and your computer / laptop. Using ordinary data cables might interrupt the flashing process, so to avoid any mishap, you need to meet this requirement as well.

5. Backup everything!

Just to be on the safe side, you may consider backing up each and everything from your Android device. This is highly recommended so that in case anything goes wrong, you still have the access to all of your data and you can restore it immediately. You may backup everything as listed below.

6. Turn off Samsung Kies and other softwares while using Odin3!

Make sure that you turn off Samsung Kies while using Odin3 flashtool. Samsung Kies will interrupt Odin3 and will result in causing errors and may not let you flash your desired recovery or root file. Also, make sure that you turn off any antivirus software you’ve installed and also disable firewall to avoid any connection and flashing issues.

7. Disclaimer

The methods involved in flashing custom recoveries, roms and rooting your phone are highly custom and may result in bricking your device, and has nothing to do with Google or the device manufacturer that is SAMSUNG in our case. Also rooting your device will void its warranty and you will be no longer eligible for any kind of free device services by the manufacturers/warranty providers. If your device comes with a Knox counter on the bootloader, it will be tripped and you won’t be able to reset it again. In case of any mishap we may not be held responsible. Follow these instructions to the letter to avoid any mishap or bricking. Make sure that whatever you do, you are doing it at your own responsibility.

Downloads Required

  1. Download and extract Odin3 v3.10.6.
  2. Download and Install Samsung USB drivers.
  3. Download and copy SuperSu.zip file to your phone’s internal or external storage.
  4. Download CWM recovery.tar file according to your device from here: English version N910c CWM Recovery 6.0.5.1

*The method has been updated after verifying!*

How To Root Your Galaxy Note 4 Running Android 5.0.1 Lollipop Now

  1. Open Odin3.exe.
  2. Put your Galaxy Note 4 SM-N910X in download mode. To do so, turn it off and wait for 10 seconds. Turn it on by pressing and holding Volume Down + Home Button + Power Key simultaneously, You should see a warning, press Volume Up to continue. In case this method doesn’t work for you, try one from this guide.
  3. Connect your device to your PC.
  4. As soon as Odin detects your phone, the ID:COM box should turn blue.  Make sure that you’ve installed Samsung USB drivers before connecting.
  5. For Odin 3.10.6 or Odin 3.09 hit the AP tab. Select the CWM Recovery.tar file, that you downloaded  above.
  6. If you’re using Odin 3.07, you will select “PDA” tab instead of the AP tab, rest of the options remain untouched.
  7. Make sure that the options selected in your Odin are exactly as shown in the pic.Odin 3.10.6 Explained_Techbeasts
  8. Hit start and wait till the rooting process is complete.
  9. Once the process has been finished, plug the battery of your device, wait for around 20 seconds and put it back in.
  10. Now boot into CWM recovery. To do so, turn on your device by pressing and holding Volume Up + Home + Power Key.
  11. Once you are in CWM recovery, select “Install zip > choose zip from /sdcard or /extSdCard > select SuperSu.zip file that you copied above > select Yes to flash it”.
  12. Once SuperSu.zip flashing has been finished, reboot your device.
  13. That’s all with the rooting find SuperSu in your app drawer, let’s verify the root access now.

How to check if the device is properly rooted or not?

  1. To do so, go to Google Play Store on your Galaxy Note 4.
  2. Find “Root Checker” and install it.
  3. Open Root Checker.
  4. Tap “Verify Root”.
  5. It will ask you for SuperSu rights, tap “Grant”.
  6. It should show you Root Access Verified Now!Screenshot_1

Now make sure that you backup your EFS Partition and Nandroid.

That’s all. We hope that you found this guide helpful. If you’re stuck with anything or got any queries, make sure that you use the comment box below and reach us. Thank you all.

Special Thanks to our friend Simon Rampp for verifying this method and letting us know.

Root Credits: Chainfire

Update Galaxy Note 4 N910S To Android 5.0.1 Lollipop [Official Firmware]

3
Update Galaxy Note 4 N910S To Android 5.0.1 Lollipop [Official Firmware]

Galaxy Note 4 N910S has started receiving Android 5.0.1 Lollipop in South Korea. This happens to be the second variant of the Galaxy Note 4 N910C to receive the Android 5.0 update. The update has caught some major changes. First of all, there’s a new TouchWiz UI inspired by Google’s Material Design. New notifications on the lock screen, enhanced device security and performance, stability and the battery performance has been improved.

The update is rolling out through OTA and through Samsung Kies at the moment. Users living outside South Korea can update to this firmware using Odin3 or else wait for the update to hit their regions, that sure is going to take pretty long. The firmware is SK Telecom branded, but we expect it to work fine on all the SM-N910S variants of the Galaxy Note 4. If you’re looking for a method to flash this firmware using Odin3, you may like to stay tuned with us for a while as we are about to install this official Android 5.0.1 Lollipop firmware on our beloved Galaxy Note 4 SM-N910S. Let’s go through firmware details and then flash the firmware right away.Screenshot_3

Firmware Details:

  • Model Number: SM-N910S
  • Region: South Korea (SKC)
  • Version: Android 5.0.1 Lollipop
  • Build: N910SKSU1BOB4

Early Preparations

1. This guide is only for Galaxy Note 4 SM-N910S!

Make sure that your device is exactly as mentioned above. To check out what device you have, go to Settings > More/General > About Device or Settings > About Device and match the model number. Be careful about the device model number, flashing a file on a device not listed here might result in bricking it up. In that case, we may not be held responsible.

2. Battery should be charged at least 60%!

Your device’s battery should not be weak. In case your device goes dead during the flashing process, your device may get soft bricked and you might be in need of flashing stock firmware and that will ultimately result in wiping up your data as well. So, make sure that you charge your device before you start the flashing process.

3. Use the OEM data cable to establish connection!

Always use the original data cable to establish connection between your Android device and your computer / laptop. Using ordinary data cables might interrupt the flashing process, so to avoid any mishap, you need to meet this requirement as well.

4. Backup everything!

Just to be on the safe side, you may consider backing up each and everything from your Android device. This is highly recommended so that in case anything goes wrong, you still have the access to all of your data and you can restore it immediately. Also, clean install is always recommended, that means you will probably have to wipe your device to install the new firmware. So, you may backup everything as listed below.

Backup SMS Messages
Backup Call Logs
Backup Contacts
Backup Media – Copy your files manually to your PC or Laptop.
Backup EFS – If rooted, otherwise skip this step.

5. Install Samsung USB drivers

In order to be able to establish connection between your PC and your Galaxy S4, you need to have the Samsung USB drivers installed on your PC. You can find all Android USB drivers here on our site.

6. Turn off Samsung Kies and other softwares while using Odin3!

Make sure that you turn off Samsung Kies while using Odin3 flashtool. Samsung Kies will interrupt Odin3 and will result in causing errors and may not let you flash your desired firwmrae. Also, make sure that you turn off any antivirus software you’ve installed and also disable firewall to avoid any connection and flashing issues.

Required Downloads & Installations

  1. Download and extract Odin3 v3.10.6.
  2. Download and extract firmware file to get the .tar.md5 file.

How To Install Official Android 5.0.1 Lollipop On Galaxy Note 4 SM-N910S

  1. Make sure that you read the instructions listed above carefully and you’re all set to go ahead now.
  2. Wipe your device complete in order to attain a neat installation. You may boot into the recovery mode and perform a factory data reset.
  3. Open Odin3.exe.
  4. Put your N910S Note 4 in download mode. To do so, turn it off and wait for 10 seconds. Turn it on by pressing and holding Volume Down + Home Button + Power Key simultaneously, You should see a warning, press Volume Up to continue. In case this method doesn’t work for you, try one from this guide.
  5. Connect your device to your PC.
  6. As soon as Odin detects your phone, the ID:COM box should turn blue.  Make sure that you’ve installed Samsung USB drivers before connecting.
  7. For Odin 3.09 or 3.10.6 hit the AP tab. Select the firmware.tar.md5 or firmware.tar, that you downloaded and extracted above.
  8. If you’re using Odin 3.07, you will select “PDA” tab instead of the AP tab, rest of the options remain untouched.
  9. Make sure that the options selected in your Odin are exactly as shown in the pic.Odin 3.10.6 Explained_Techbeasts
  10. Hit start and wait till the firmware  flashing is complete, The flashing process box will turn green upon successful flashing.
  11. Once the flashing process has been completed successfully, disconnect your device and reboot it manually. You can pull out the battery, place it back and turn on.
  12. Once the device boots up, checkout the new firmware now.
  13. Your device will be running on official Android 5.0.1 Lollipop firmware.
  14. Once updated, do not try to downgrade, or else you will result in messing up EFS partition of your device.
  15. That’s all!

Got any queries? Make sure that you drop em’ in the comment box below. Good Luck!

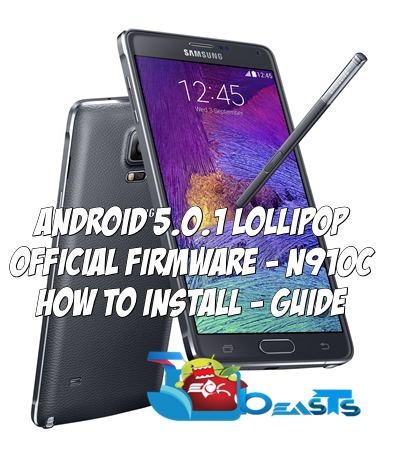
Install Android 5.0.1 Lollipop On Galaxy Note 4 N910C

1
Install Android 5.0.1 Lollipop On Galaxy Note 4 N910C

In the recent few days, Samsung has been very just with the users. We’ve been seeing Lollipops landing in for almost all the flagship devices including the Galaxy S4, Galaxy S5, Galaxy Note 3. The only device missing it so far was the Galaxy Note 4, it was still running on Android 4.4.4 KitKat with Samsung’s same old boring TouchWiz UI. It looks like, the luck of Galaxy Note 4 users started working out.

Just yesterday, Samsung started rolling out Android 5.0.1 Lollipop for Galaxy Note 4’s Exynos Variant, N910C, in Poland. The update at first is the latest and greatest version of Android. Samsung has revamped the whole TouchWiz UI according to Google’s newly introduced Material Design UI. A part from that, there’s a new notification view on the lock screen. New performance and security enhancements have been made in this firmware as well and the battery life has got a boost.

The update knocked Samsung Kies today, and the firmware files have been acquired by different sources. If you’re living outside Poland and you still want to get your hands on this Lollipop update running on your device, you will have to flash it using Odin3. Wondering about the procedure? Well, that’s not going to be tough at all. We are about to update our beloved Galaxy Note 4 N910C to this latest Android 5.0.1 Lollipop update right away. Let’s go through firmware details and head towards the guide then.Screenshot_19
Firmware details

  • Model: Galaxy Note 4 SM-N910C
  • Region: Poland (XEO)
  • Version: Android 5.0.1 Lollipop
  • Build Date: 6/2/2015
  • PDA: N910CXXU1BOB4
  • CSC: N910COXA1BOB4
  • MODEM: N910CXXU1BOB4

Early Preparations

1. This guide is only for Galaxy Note 4 SM-N910C!

Make sure that your device is exactly as mentioned above. To check out what device you have, go to Settings > More/General > About Device or Settings > About Device and match the model number. Be careful about the device model number, flashing a file on a device not listed here might result in bricking it up. In that case, we may not be held responsible.

2. Battery should be charged at least 60%!

Your device’s battery should not be weak. In case your device goes dead during the flashing process, your device may get soft bricked and you might be in need of flashing stock firmware and that will ultimately result in wiping up your data as well. So, make sure that you charge your device before you start the flashing process.

3. Use the OEM data cable to establish connection!

Always use the original data cable to establish connection between your Android device and your computer / laptop. Using ordinary data cables might interrupt the flashing process, so to avoid any mishap, you need to meet this requirement as well.

4. Backup everything!

Just to be on the safe side, you may consider backing up each and everything from your Android device. This is highly recommended so that in case anything goes wrong, you still have the access to all of your data and you can restore it immediately. Also, clean install is always recommended, that means you will probably have to wipe your device to install the new firmware. So, you may backup everything as listed below.

Backup SMS Messages
Backup Call Logs
Backup Contacts
Backup Media – Copy your files manually to your PC or Laptop.
Backup EFS – If rooted, otherwise skip this step.

5. Install Samsung USB drivers

In order to be able to establish connection between your PC and your Galaxy S4, you need to have the Samsung USB drivers installed on your PC. You can find all Android USB drivers here on our site.

6. Turn off Samsung Kies and other softwares while using Odin3!

Make sure that you turn off Samsung Kies while using Odin3 flashtool. Samsung Kies will interrupt Odin3 and will result in causing errors and may not let you flash your desired firwmrae. Also, make sure that you turn off any antivirus software you’ve installed and also disable firewall to avoid any connection and flashing issues.

Required Downloads & Installations

  1. Download and extract Odin3 v3.10.6.
  2. Download and extract firmware file to get the .tar.md5 file.

How To Install Official Android 5.0.1 Lollipop On Galaxy Note 4 SM-N910C

  1. Make sure that you read the instructions listed above carefully and you’re all set to go ahead now.
  2. Wipe your device complete in order to attain a neat installation. You may boot into the recovery mode and perform a factory data reset.
  3. Open Odin3.exe.
  4. Put your N910C Note 4 in download mode. To do so, turn it off and wait for 10 seconds. Turn it on by pressing and holding Volume Down + Home Button + Power Key simultaneously, You should see a warning, press Volume Up to continue. In case this method doesn’t work for you, try one from this guide.
  5. Connect your device to your PC.
  6. As soon as Odin detects your phone, the ID:COM box should turn blue.  Make sure that you’ve installed Samsung USB drivers before connecting.
  7. For Odin 3.09 or 3.10.6 hit the AP tab. Select the firmware.tar.md5 or firmware.tar, that you downloaded and extracted above.
  8. If you’re using Odin 3.07, you will select “PDA” tab instead of the AP tab, rest of the options remain untouched.
  9. Make sure that the options selected in your Odin are exactly as shown in the pic.Odin 3.10.6 Explained_Techbeasts
  10. Hit start and wait till the firmware  flashing is complete, The flashing process box will turn green upon successful flashing.
  11. Once the flashing process has been completed successfully, disconnect your device and reboot it manually. You can pull out the battery, place it back and turn on.
  12. Once the device boots up, checkout the new firmware now.
  13. Your device will be running on official Android 5.0.1 Lollipop firmware.
  14. Once updated, do not try to downgrade, or else you will result in messing up EFS partition of your device.
  15. That’s all!

Got any queries? Make sure that you drop em’ in the comment box below. Good Luck!

Legend of Empire – Daybreak for PC Download – ( Windows 8,8.1,7-Mac )

0
Legend of Empire – Daybreak for PC Download – ( Windows 8,8.1,7-Mac )

Legend of Empire – Daybreak for PC is available, but not in extension like .EXE. Legend of Empire – Daybreak is a strategy game designed for Android devices, but we can also download Legend of Empire – Daybreak for PC using emulators like BlueStacks and Andy. In the following guide i’ll tell you how to download Legend of Empire – Daybreak for PC. Before proceeding any further let me give you an overview on Legend of Empire – Daybreak.

About Legend of Empire – Daybreak:

#:Build and Customize your own mighty Empire.
#:Train vast troops of Swordman, Assassin, Paladin & Mage.
#:Upgrade Dwarf, Treant, and even Faerie Dragon to fortify your Empire!
#:Raise a cruel army, plan attack to expand your territory.

Legend of Empire - Daybreak for PC

How To Download Legend of Empire – Daybreak for Pc Using Andy Emulator

Step 1: Download the Andy from here.

Step 2: After downloading is complete, install Andy on PC.

Step 3: Andy installation process will take few minutes, When installation is finished launch Andy on you PC.

Step 4: When Andy is open, you’ll see an Android tablet interface head over to Google Play.

Step 5: Open Google Play->Search->Legend of Empire – Daybreak->Install.

Step 6: when the installation process is complete, go to the home screen there you’ll see Legend of Empire – Daybreak.

Step 7: Double click on Legend of Empire – Daybreak icon and start playing the game.

Step 8: Now Legend of Empire – Daybreak is successfully installed on your PC, Enjoy the the game.

Download and Legend of Empire - Daybreak for PC

Download and Legend of Empire – Daybreak for PC ( Windows Xp,8,8.1,7,10 – Mac ):

  1. To download Legend of Empire – Daybreak for PC, you will need an Android emulator like Bluestacks. If you do not have it already, you can download it from the website Bluestacks.com.
  2. Open Bluestacks and search for Legend of Empire – Daybreak using search tool on the top of the homepage.
  3. Click on install button. The game will automatically download and install.
  4. Once the app has been installed, go to My Apps in Bluestacks homepage.
  5. The icon for the game will appear in My Apps.
  6.  Click on this icon to open Legend of Empire – Daybreakg.

Super Tank-iron force for PC Download – ( Windows 8,8.1,7-Mac )

0
Super Tank-iron force for PC Download – ( Windows 8,8.1,7-Mac )

Super Tank-iron force for PC Download is available, Super Tank-iron force is a Strategy game for Android and iOS. There is no such PC version of Super Tank-iron force available, but thanks to third party emulators like BlueStacks and Andy we can install Android apps on PC. We’ve prepared guide a step by step guide in order to install Super Tank-iron force for PC . Before going any further let me give you an overview on Super Tank-iron force.

About Super Tank-iron force:

#: Tank-iron force is a shooting game.

#: You have to use rocket, missile tracking and lightning gun to make your tank cool.

#: Its free and super quick hand.

Super Tank-iron force for PC


How To Download Super Tank-iron force for Pc Using Andy Emulator

Step 1: Download the Andy from here.

Step 2: After downloading is complete, install Andy on PC.

Step 3: Andy installation process will take few minutes, When installation is finished launch Andy on you PC.

Step 4: When Andy is open, you’ll see an Android tablet interface head over to Google Play.

Step 5: Open Google Play->Search->Super Tank-iron force->Install.

Step 6: when the installation process is complete, go to the home screen there you’ll see Super Tank-iron force.

Step 7: Double click on Super Tank-iron force icon and start playing the game.

Step 8: Now Super Tank-iron force is successfully installed on your PC, Enjoy the the game.

Super Tank-iron force

Download and Super Tank-iron force for PC ( Windows Xp,8,8.1,7,10 – Mac ):

  1. To download Super Tank-iron force for PC, you will need an Android emulator like Bluestacks. If you do not have it already, you can download it from the website Bluestacks.com.
  2. Open Bluestacks and search for Super Tank-iron force using search tool on the top of the homepage.
  3. Click on install button. The game will automatically download and install.
  4. Once the app has been installed, go to My Apps in Bluestacks homepage.
  5. The icon for the game will appear in My Apps.
  6.  Click on this icon to open Super Tank-iron force.

How to Disable Lock Screen Notification on iPhone/iPad

0
How to Disable Lock Screen Notification on iPhone/iPad

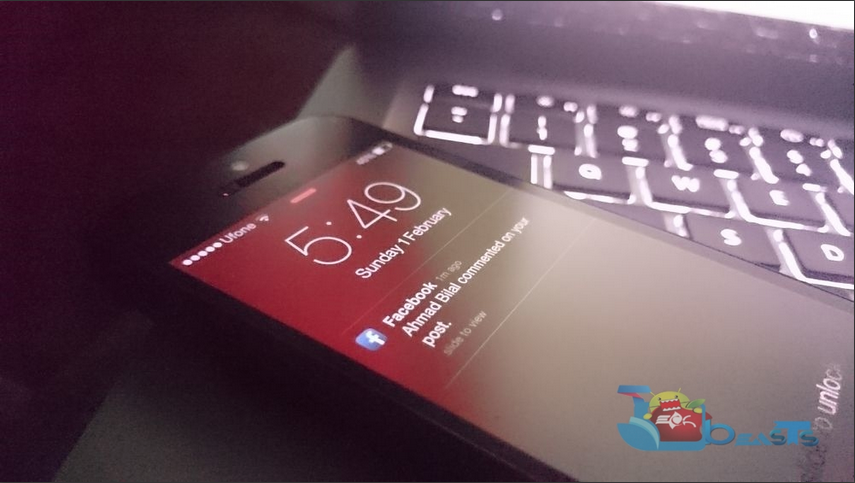
Here’s how you can disable lock screen notification on iPhone/iPad, not every one finds this helping. Most of us know how to do so, but not every one know how to disable lock screen notification on iPhone and iPad. Whenever you receive any message or update on Whatsapp, Facebook or on any other app you’ll see notification on your lock screen. Its helpful in many ways like you don’t need to unlock your iPhone in order to see the notification.

Some people find it annoying and feel their is no privacy, that every time they receive text message it shows on lock screen, they are not so found of it. In order to disable the lock screen notification follow our step by step guide.

disable lock screen notification on iPhone and iPad.

How to Disable Lock Screen Notification on iPhone/iPad:

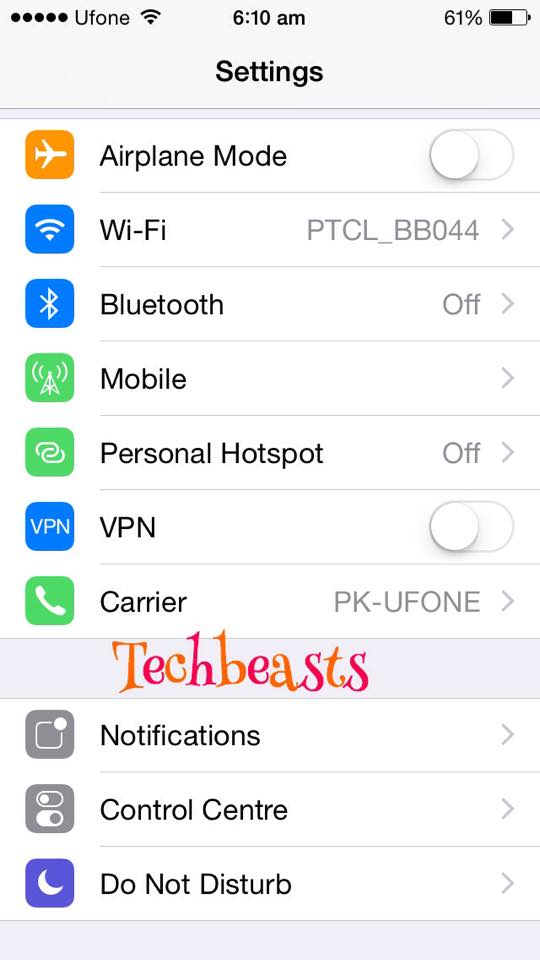
Step#1: Tap on Settings on your iPhone.

How to Disable Lock Screen Notification on iPhone/iPad


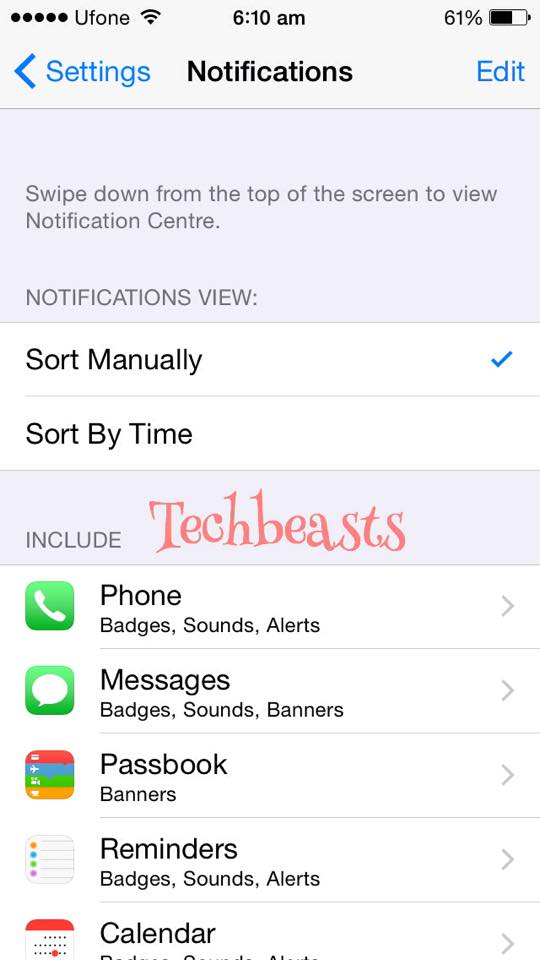
Step#2: Now tap on Notification.

How to Disable Lock Screen Notification on iPhone/iPad


Step#3: Now Tap on the Application e.g Messages or Phone.

Step#4: In the setting of the app tap on Show on lock screen to disable it.

disable lock screen notification on iPhone/iPad

Step#5: You can also disable Sound Notification by tapping on Notification Sound and select None.

All Done !!

How To Fix Camera App Freezes on iPhone 6/6 Plus

0
How To Fix Camera App Freezes on iPhone 6/6 Plus

People who are facing camera app freezes issues on iPhone 6 / 6 Plus we have found few working solutions. People are reporting when ever they open camera app on iPhone 6, it suddenly freezes all they can see is the black screen. Also we have seen on some forums users reporting that their camera app is not opening.

There are many reason which can cause Camera App Freezes on iPhone 6 and iPhone 6 Plus. It can be technical glitches or bad software update. Here’s how you can fix Camera App Freezes on iPhone 6/6 Plus.

How To Fix Camera App Freezes on iPhone 6/6 Plus

How To Fix Camera App Freezes on iPhone 6/6 Plus:

Step#1: First you to update your iPhone 6 to latest iOS.

Step#2: Go to settings on your iPhone 6/6Plus.

Step#3: Now Tap on General.

Step#4: Tap on Software Update.

Step#5: After updating you have to perform Hard Reset.

Perform a Reset:

Step#6: Open Setting.

Step#7: Tap on General.

Step#8: Now Tap on Reset.

Step#9: Tap on Reset All Settings.

Manual Restore your iPhone 6 – 6 Plus.

Step#10: Now perform a manual Restore.

Step#11: Connect your device to PC or Mac.

Step#12: Open iTunes.

Step#13: Now select your iPhone from the menu.

Step#14 Click on Restore.

All Done!

At this moment these are all the possible solutions to fix Camera App Freezes on iPhone 6/6 Plus.

How To Root Galaxy A3 A3000, A3009, A300F, A300H, A300M & A300YZ

0
How To Root Galaxy A3 A3000, A3009, A300F, A300H, A300M & A300YZ

A full metal unibody mid-ranger by Samsung, the Galaxy A3 is a great smartphone to go with. Galaxy A3 sports a unique design that makes it eye-catching. On the front we have a 4.5 inch qHD Super AMOLED nature screen. Under the hood we’ve got a 1.2 GHz Qualcomm Snapdragon 410 Quad Core CPU accopanied by Adreno 306 GPU and a RAM of 1.5 GB. Internal storage begins from 16 GB, but there’s an external SD card slot available on-board. Galaxy A3 has a 1900 mAh battery, that’s enough for mid-range device users. Samsung has used a 5 MP shooter on the front for Selfie lovers, and an 8 MP shooter is fixed at the back. We can find the Galaxy A3 running on Android 4.4.4 KitKat running out of the box.

Well, that was all about the device. Let’s get back to our purpose for being here now. If you’ve got your hands on the Galaxy A3 and now you’re looking for a way to unleash the real power of the Android OS running on your device, you will have to gain the root access and pave a way for root applications to maximize the performance and customization options for yourself on the device. Root can be achieved on the Galaxy A3 by loading Chainfire’s all time famous CF Auto-root script through Samsung’s flash tool, Odin3. If you’ve been looking for a guide to do so, you may have spotted the right place. As you will scroll down, you will find a comprehensive guide to root your Galaxy A3 A3000, A3009, A300F, A300H, A300M & A300YZ using CF Auto-root. Make sure that you follow this guide to the letter, let’s go through some early preps and then root the device.

a3009setwhite

Early Preps:

1. This guide is only for Samsung Galaxy A3, the variants listed above!

Make sure that your device is exactly as mentioned above. To check out what device you have, go to Settings > More/General > About Device or Settings > About Device and match the model number. Be careful about the device model number, flashing a file on a device not listed here might result in bricking it up.

2. Battery should be charged at least 60%!

Your device’s battery shouldn’t be weak. In case your device goes dead during the flashing process, your device may get soft bricked and you might be in need of flashing stock firmware and that will ultimately result in wiping up your data as well. So, make sure that you charge your device before you start the flashing process.

3. Use the OEM data cable to establish connection!

Always use the original data cable to establish connection between your Android device and your computer / laptop. Using ordinary data cables might interrupt the flashing process, so to avoid any mishap, you need to meet this requirement as well.

4. Backup everything!

Just to be on the safe side, you may consider backing up each and everything from your Android device. This is highly recommended so that in case anything goes wrong, you still have the access to all of your data and you can restore it immediately. You may backup everything as listed below.

5. Turn off Samsung Kies and other softwares while using Odin3!

Make sure that you turn off Samsung Kies while using Odin3 flashtool. Samsung Kies will interrupt Odin3 and will result in causing errors and may not let you flash your desired recovery or root file. Also, make sure that you turn off any antivirus software you’ve installed and also disable firewall to avoid any connection and flashing issues.

6. Disclaimer

The methods involved in flashing custom recoveries, roms and rooting your phone are highly custom and may result in bricking your device, and has nothing to do with Google or the device manufacturer that is SAMSUNG in our case. Also rooting your device will void its warranty and you will be no longer eligible for any kind of free device services by the manufacturers/warranty providers. If your device comes with a Knox counter on the bootloader, it will be tripped and you won’t be able to reset it again. In case of any mishap we may not be held responsible. Follow these instructions to the letter to avoid any mishap or bricking. Make sure that whatever you do, you are doing it at your own responsibility.

Downloads Required:

Download and extract Odin3 v3.09.
Download and Install Samsung USB drivers
Download and extract CF-Auto-Root file.


How To Root Galaxy A3 A3000, A3009, A300F, A300H, A300M & A300YZUsing CF-Autoroot

  1. Extract the downloaded CF-Auto-Root file once only to get the .tar.md5 file.
  2. Open Odin3.exe.
  3. Put your Galaxy A3 in download mode. To do so, turn it off and wait for 10 seconds. Turn it on by pressing and
    holding Volume Down + Home Button + Power Key simultaneously, You should see a warning, press Volume Up to continue. In case this method doesn’t work for you, try one from this guide.
  4. Connect your device to your PC.
  5. As soon as Odin detects your phone, the ID:COM box should turn blue.  Make sure that you’ve installed Samsung USB drivers before connecting.
  6. For Odin 3.09 hit the AP tab. Select the CF-Auto-Root.tar.md5, that you downloaded and extracted above.
  7. If you’re using Odin 3.07, you will select “PDA” tab instead of the AP tab, rest of the options remain untouched.
  8. Make sure that the options selected in your Odin are exactly as shown in the pic.Odin 3.09 explained. (2)
  9. Hit start and wait till the rooting process is complete, as soon as your device restarts, remove it from PC.
  10. Find SuperSu in app drawer now.
  11. That’s all with the rooting, let’s verify the root access now.

How To Verify Root Access:

  1. To do so, go to Google Play Store on your Galaxy A3.
  2. Find “Root Checker” and install it.
  3. Open Root Checker.
  4. Tap “Verify Root”.
  5. It will ask you for SuperSu rights, tap “Grant”.
  6. It should show you Root Access Verified Now!
  7. That’s All!

Screenshot_1

If you’re stuck with anything regarding this guide, feel free to utilize the comment box below and reach us. We will get back to you immediately. Thank you all.

Credits: Chainfire XDA

How To Root Galaxy A5 A5000, A5009, A500G & A500H

0
How To Root Galaxy A5 A5000, A5009, A500G & A500H

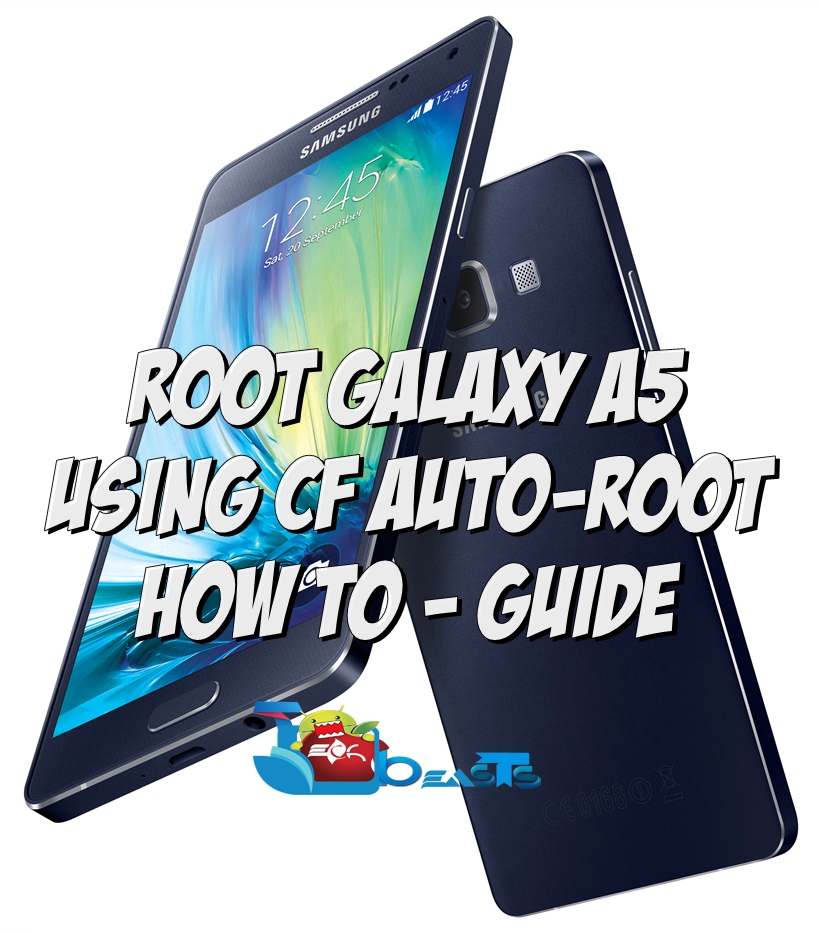
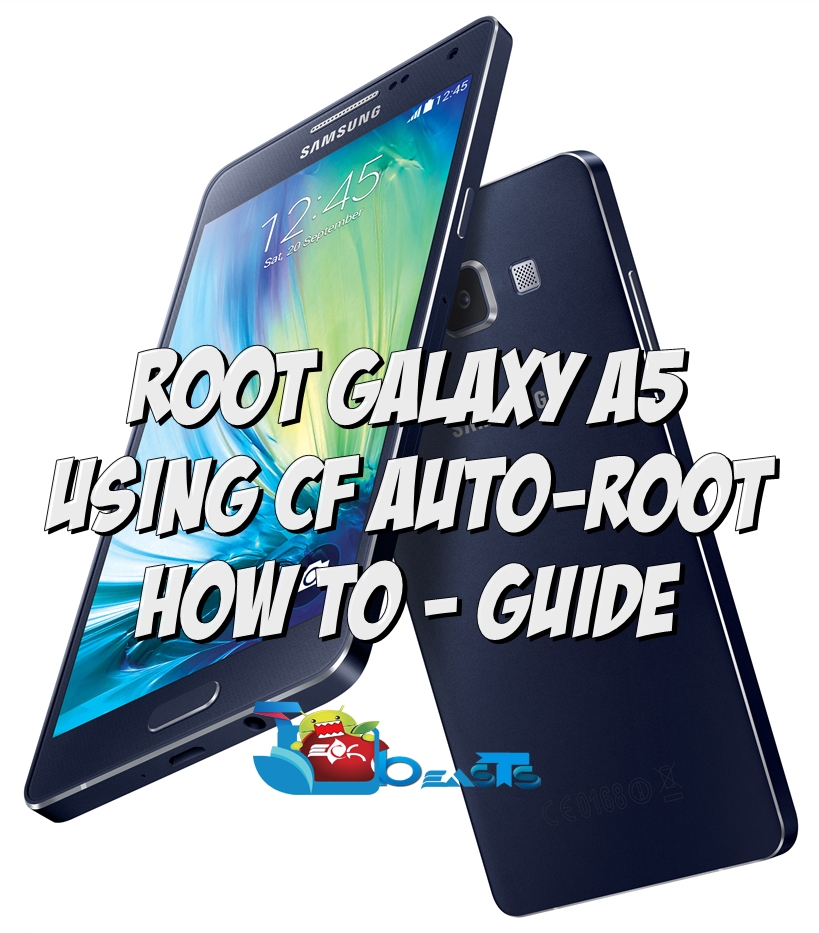
Samsung launched a series of metallic smartphones a few months back. Galaxy A5 is one of those smartphones, it’s a mid-ranger with a very slim body and a great design. As mentioned, it’s all metallic. Samsung launched these devices to help its drowning boat of market shares, it did win Samsung some respect for bringing up something different and unique. Galaxy A5 has got some nice specifications. On the front we have a 5.0 inch 720p screen. A 5 MP shooter is fixed on the front for cool selfies. A 13 MP shooter is fixed at the back. Samsung used Qulacomm’s Snapdragon 410 Quad Core CPU clocked at 1.2 GHz to power this device up. A RAM of 2 GB’s can be found inside as well. A 2300 mAh is there, internal storage begins at 16 GB accompanied by an external SD card slot. Out of the box, it runs on Android 4.4.4 KitKat. Nice specifications, aren’t they? Well, if you’re planning to get your hands on this beautiful beast, you sure would like to go ahead unleashing the true power of your device and add some charm to its functionality by applying some tweaks and MODs.

To begin with all the out-of-boundaries stuff, the very first thing you need is, you need to gain the root access in order take the entire control over your device. Rooting your device well let you install various applications on it, which cannot be installed on a non-rooted device. The functionality of those applications will help you to get the maximum out of your device by making performance tweaks and customize your device the way you wish. To root the Galaxy A500, famous developer Chainfire has already released his popular CF Auto Root script that roots a lot of Galaxy devices with the help of Samsung’s flash tool Odin3. If you just came here finding a way to root your Galaxy A5, you need to move forward with us in order to learn how you can root your Galaxy A5 A5000,  A5009, A500G & A500H using Chainfire’s CF Autroot in Odin3. Make sure that you follow the guide carefully, let’s go through the early preparations now.

Root Galaxy A5

Early Preps:

1. This guide is only for Samsung Galaxy A5, the variants listed above.

Make sure that your device is exactly as mentioned above. To check out what device you have, go to Settings > More/General > About Device or Settings > About Device and match the model number. Be careful about the device model number, flashing a file on a device not listed here might result in bricking it up.

2. Battery should be charged at least 60%!

Your device’s battery shouldn’t be weak. In case your device goes dead during the flashing process, your device may get soft bricked and you might be in need of flashing stock firmware and that will ultimately result in wiping up your data as well. So, make sure that you charge your device before you start the flashing process.

3. Use the OEM datacable to establish connection!

Always use the original data cable to establish connection between your Android device and your computer / laptop. Using ordinary data cables might interrupt the flashing process, so to avoid any mishap, you need to meet this requirement as well.

4. Backup everything!

Just to be on the safe side, you may consider backing up each and everything from your Android device. This is highly recommended so that in case anything goes wrong, you still have the access to all of your data and you can restore it immediately. You may backup everything as listed below.

5. Turn off Samsung Kies and other softwares while using Odin3!

Make sure that you turn off Samsung Kies while using Odin3 flashtool. Samsung Kies will interrupt Odin3 and will result in causing errors and may not let you flash your desired recovery or root file. Also, make sure that you turn off any antivirus software you’ve installed and also disable firewall to avoid any connection and flashing issues.

6. Disclaimer

The methods involved in flashing custom recoveries, roms and rooting your phone are highly custom and may result in bricking your device, and has nothing to do with Google or the device manufacturer that is SAMSUNG in our case. Also rooting your device will void its warranty and you will be no longer eligible for any kind of free device services by the manufacturers/warranty providers. If your device comes with a Knox counter on the bootloader, it will be tripped and you won’t be able to reset it again. In case of any mishap we may not be held responsible. Follow these instructions to the letter to avoid any mishap or bricking. Make sure that whatever you do, you are doing it at your own responsibility.

Downloads Required:

Download and extract Odin3 v3.09.
Download and Install Samsung USB drivers
Download and extract CF-Auto-Root file.


How To Root Galaxy A5 A5000, A5009, A500G & A500H Using CF-Autoroot

  1. Extract the downloaded CF-Auto-Root file once only to get the .tar.md5 file.
  2. Open Odin3.exe.
  3. Put your Galaxy A5 in download mode. To do so, turn it off and wait for 10 seconds. Turn it on by pressing and
    holding Volume Down + Home Button + Power Key simultaneously, You should see a warning, press Volume Up to continue. In case this method doesn’t work for you, try one from this guide.
  4. Connect your device to your PC.
  5. As soon as Odin detects your phone, the ID:COM box should turn blue.  Make sure that you’ve installed Samsung USB drivers before connecting.
  6. For Odin 3.09 hit the AP tab. Select the CF-Auto-Root.tar.md5, that you downloaded and extracted above.
  7. If you’re using Odin 3.07, you will select “PDA” tab instead of the AP tab, rest of the options remain untouched.
  8. Make sure that the options selected in your Odin are exactly as shown in the pic.Odin 3.09 explained. (2)
  9. Hit start and wait till the rooting process is complete, as soon as your device restarts, remove it from PC.
  10. Find SuperSu in app drawer now.
  11. That’s all with the rooting, let’s verify the root access now.

How To Verify Root Access:

  1. To do so, go to Google Play Store on your Galaxy A5.
  2. Find “Root Checker” and install it.
  3. Open Root Checker.
  4. Tap “Verify Root”.
  5. It will ask you for SuperSu rights, tap “Grant”.
  6. It should show you Root Access Verified Now!
  7. That’s All!

Screenshot_1

If you’re stuck with anything regarding this guide, feel free to utilize the comment box below and reach us. We will get back to you immediately. Thank you all.

Credits: Chainfire XDA