Home Blog Page 391

How To Add A Custom Wallpaper To S-View On Galaxy S5, Note 3 & Note 4

2
How To Add A Custom Wallpaper To S-View On Galaxy S5, Note 3 & Note 4

Samsung introduced this S-View sensor in the Galaxy S4 and brought a new concept to life. The S-View in the Galaxy S4 was very basic and wasn’t too good initially, but Samsung’s later devices, including the Galaxy S5, Galaxy Note 3 and Galaxy Note 4 received a much better version of the S-View with a lot of options to customize that little screen showing the notifications, battery status, weather updates, pedometer, and allowing the users to pick up the calls straight from the small window of their S-View cover.

The S-View screen has some wallpapers in different colors, you may pick up one to set on your device if you’re using an S-View cover, but what if you want to set a custom wallpaper in the S-View screen? You will probably end up failing to do so as Samsung hasn’t given this option in the settings of S-View cover, in shot, Samsung has locked this option. You must be bored of those limited colors and wallpapers on your S-View screen and wanting to get rid of now. Keeping this need of the Galaxy device owners in view, our friend Dr Ketan has developed a little application that enables a custom wallpaper option for S-View cover in Galaxy S5, Note 3 and Note 4. The application doesn’t require root access. All you need is, you need to follow the instructions listed below carefully and you will be able to set a custom wallpaper in the S-View screen right away. Let’s go ahead and learn how you can do so.Screenshot_2015-01-31-18-16-50

How To Add A Custom Wallpaper To S-View On Galaxy S5, Note 3 & Note 4

  1. Make sure that you’re using a right S-View cover on your device and it’s working properly.
  2. Now download the SView_WP_1.2.apk file.
  3. Copy the downloaded APK file to your phone’s SD card.
  4. Now go to settings > system > security > allow unknown sources > tick.
  5. Now open file manager and locate teh downloaded SView_WP_1.2.apk file.
  6. Tap the APK file, begin the installation and proceed to finish it.
  7. Once installed, access the application from App drawer.
  8. Set the custom wallpaper.
  9. Close S-View case and check it out now.
  10. That’s all.

How To Stop Apps to Access iCloud Drive on iPhone, iPad and Mac

0
How To Stop Apps to Access iCloud Drive on iPhone, iPad and Mac

Here’s how you can stop apps to access iCloud drive on iPhone, iPad and Mac. Few days back we have posted about how to access files from iCloud drive on iPhone and iPad. Today we have come up with an interesting guide for those who don’t know how to stop apps to access iCloud drive. iCloud drive was introduced with iOS 8 and OS X Yosemite, this cloud storage drive has quite unique features, but cannot be compared with other big guns.

If you own more then 1 Apple device and want to use a single Apple id then it would really good to select specific apps which can have access to iCloud Drive. In the following guide i’ll tell you How To Stop Apps to Access iCloud Drive on iPhone, iPad and Mac.

How To Stop Apps Have Access to iCloud Drive on iPhone, iPad and Mac

How To Stop Apps to Access iCloud Drive on iPhone and iPad :

Step#1: Open Settings Apps form your iPhone.

Step#2: Now scroll down from the list and Tap on iCloud.

Step#3: Tap on iCloud Drive.

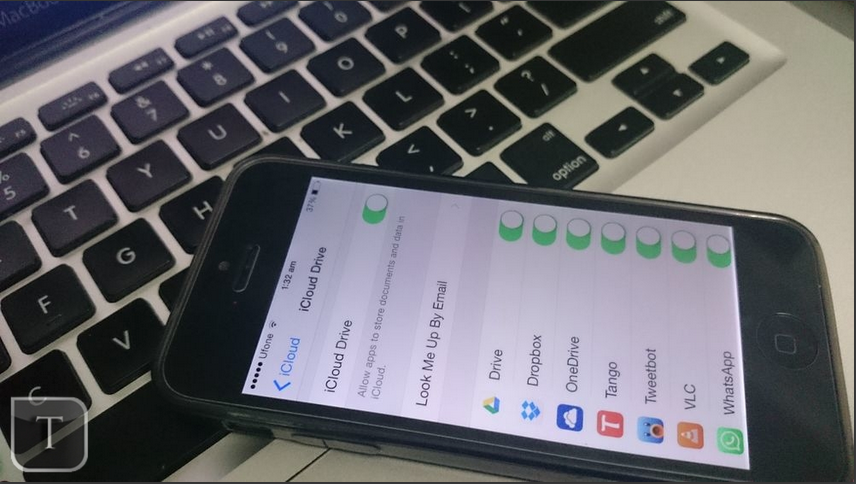
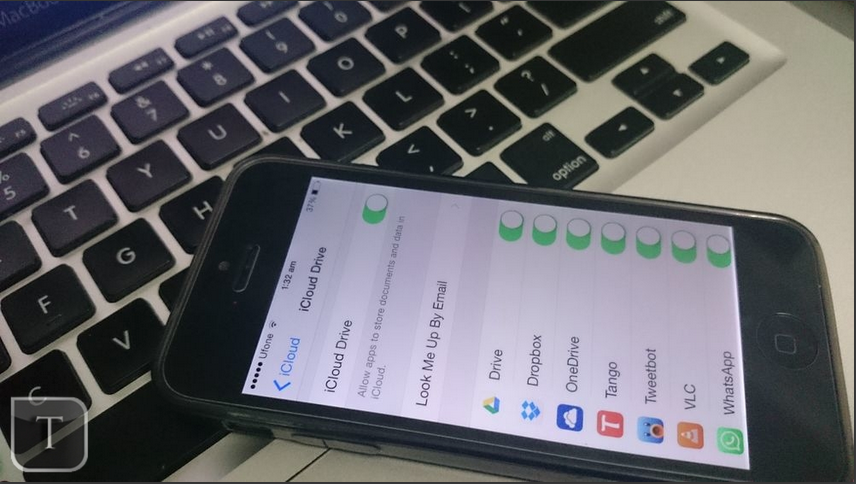
Step#4: There you’ll see a list of apps which are currently access iCloud drive to store date. If you want that nothing access iCloud Drive, tap on iCloud drive to turn off.

Step#5: You can also choose the app whom you don’t want to give access to iCloud by just tap to disable it.

How To Stop Apps to Access iCloud Drive on Mac:

Step#1: Click on the Apple logo located on the top left corner.

Step#2: Now select System Preferences.

Step#3: Select iCloud from the System Preferences windows.

Step#4: Click on the option of iCloud, located right next to it.

Step#5: List of all the apps will show up, uncheck the whom you don’t want to give iCloud Drive access.

All Done !.

How to manually create folders iCloud Drive on your Mac and move files

0
How to manually create folders iCloud Drive on your Mac and move files

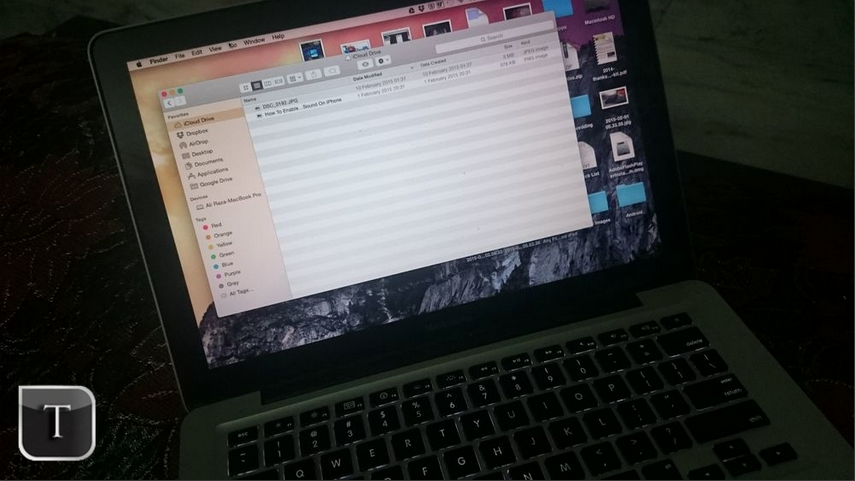
Here’s how you can manually create folders in iCloud Drive on your Mac and move files in those folders. Creating folders in iCloud Drive helps to manage files easily, iCloud drive save your files and photos to Apple server so you can easily access on every Apple device you use. It will come really handy to create different folders and move our files to specific folders.

This guide is only for Mac user’s we’ll add a separate guide for Windows users soon. Following is a step by step guide on How to manually create folders in iCloud Drive on your Mac and move files.

How to manually create folders iCloud Drive on your Mac and move files

How to manually create folders in iCloud Drive on your Mac and move files:

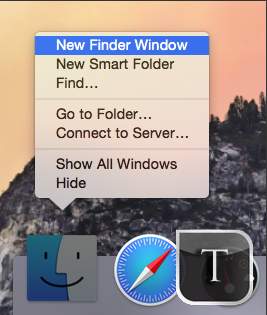
Step#1: First Launch the finder on you Mac.

How to manually create folders iCloud Drive on your Mac and move files

Step#2: On the left side of your Finder select iCloud Drive.

How to manually create folders iCloud Drive on your Mac and move files


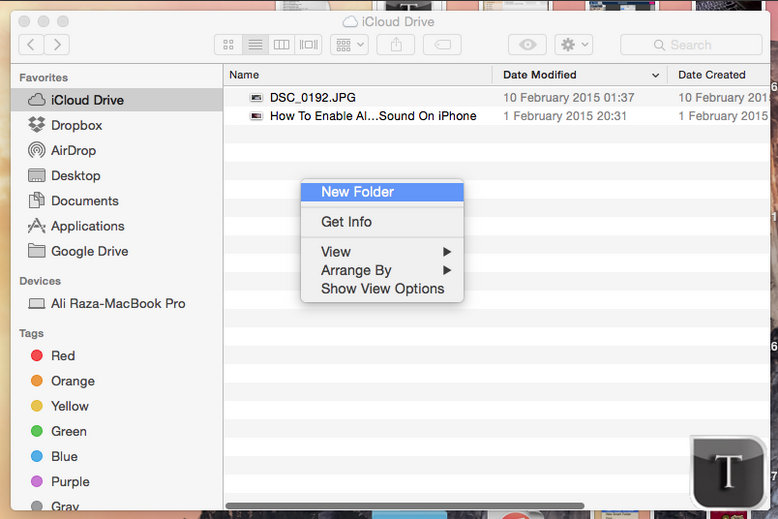
Step#3: Now right click in iCloud Drive windows to create a new folder. Click on New Folder.

Screen Shot 2015-02-10 at 04.54.49


Step#4: Now that New Folder is created, drag and drop the files on New Folder to move files.

How to manually create folders iCloud Drive on your Mac and move files

Here you go as simple as it looks, create as many folders you can and move your files in them. Enjoy !!

How to Access Any File from iCloud Drive on iPhone and iPad

0
How to Access Any File from iCloud Drive on iPhone and iPad

Here’s how you can Access Any File from iCloud Drive on iPhone and iPad, iCloud drive is the Apple Cloud storage service. It’s not that good if we compare it with other apps like Dropbox, Box and Google Drive. But it has its own unique features, today i’ll tell you how to access any file from iCloud drive on iPhone and iPad.

Most of us know how to Access Files from iCloud Drive, but not everyone. Because for some reason you cannot easily access files from iCloud drive. let’s start the guide on how to Access Any File from iCloud Drive on iPhone and iPad.

How to Access Any File from iCloud Drive on iPhone and iPad

How to Access Any File from iCloud Drive on iPhone and iPad:

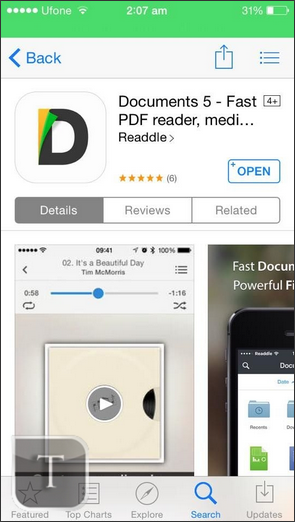
In order to access files from iCloud drive on iPhone and iPad, i am using apps like Documents 5 and Google reader. You can download these app from App Store.

Step#1: First you have to download Documents 5 on your iPhone and iPad.

How to Access Any File from iCloud Drive on iPhone and iPad

Step#2: After the installing the Documents 5 app, Tap on Documents 5 to open it.

How to Access Any File from iCloud Drive on iPhone and iPad

Step#3: Now tap Cloud icon located bottom left corner.

How to Access Any File from iCloud Drive on iPhone and iPad

Step#4: Tap on iCloud Drive on Top left corner.

Step#5: There you go, now you can access files that you have saved on your iCloud Drive.

How to Access Any File from iCloud Drive on iPhone and iPad

Method #2:

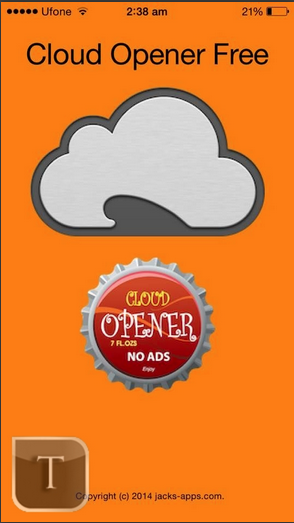
Step#1: Download Cloud Opener on your iPhone and iPad.

Step#2: After Cloud Opener is installed.

Step#3: Tap on Cloud Opener icon to open it.

How to Access Any File from iCloud Drive on iPhone and iPad

Step#4: Tap on White Cloud icon.

How to Access Any File from iCloud Drive on iPhone and iPad

Step#5: There you have, now you can easily access files on iCloud Drive.

How to Access Any File from iCloud Drive on iPhone and iPad


Boost Sound On Your Xperia Z1/Z2 With This Sound MOD

6
Boost Sound On Your Xperia Z1/Z2 With This Sound MOD

Sony Xperia Z2 and Z1 sport nice specifications, but Sony hasn’t shown any improvements work in the sound department. Xperia devices have a pretty low volume, and there’s nothing you can actually do about it without making a tweak to your device. There always has been a need for the users to cross the boundaries and do something  to boost the sound on the Xperia devices. For the Xperia Z 1 and Z2, XDA recognized contributor  olokos has done this job.

Olokos has developed a SoundMod that boosts up almost all sounds coming out of your Xperia Z2 and Xperia Z1, whether it is notification or ringtone sound, it is music player sound, it is in-call voice, or it is some other sound, the MOD adds stereo speakers effect everywhere. Both the speakers of your device will provide the sound after flashing this MOD. The MOD even boosts up the headphone sound as well. The best thing about this MOD is, it won’t result in any quality loss, your device’s sound quality will remain the same as it was before flashing this MOD, there will be a stereo speaker boost only. The SoundMod has been through a number of versions and has been getting better and better with time, in case you haven’t tried it yet, it may be the best time for you to experiment with the sound of your Sony Xperia smartphone and get the best out of it. Let’s go ahead and learn how to install this MOD in order to boost the call, notification, headset, and speaker sound of your Sony Xperia Z1, Z1 Compact, Z1 Ultra and Xperia Z2.

sony-xperia-z2-vs-xperia-z1

Here are some early preparations

  1. This guide is only intended for Sony Xperia Z1, Z1 Compact, Z1 Ultra and Xperia Z2 [All variants]. Do not try flashing any of these files on another device, otherwise you will end up bricking it. Choose the file for your device carefully and follow the method for your device carefully as well. Do check the model number before going ahead, you can check it in settings > about phone on your device.
  2. Make sure that you’ve your phone charged at least over 60%. This is recommended in order to prevent any power issues during the flashing/installation process.
  3. Your device must have a custom recovery installed on it. You may try looking for a recovery on our site here.
  4. This is a custom MOD. In case of any mishap after flashing this MOD, we or the developer may not be held responsible. Make sure that you’re going ahead on your own risk and you’re taking all the responsibility.
  5. Follow the instructions to the letter to avoid any mishap.

How To Boost Sound On Sony Xperia Z2 [Stereo Speakers Effect]

Supported devices: 

  • Xperia Z2 D6502, D6503, D6543
  1. Download the Xperia Z2_soundmod_1.5_BOOST_EVERYTHING.zip [.167 firmware as it is latest].
  2. Copy the downloaded MOD.zip file to your phone’s SD card [external or internal].
  3. Now boot your device into recovery mode. To do so, turn it off completely first. Now turn it on by pressing the power key. As soon as your device powers up, press the volume up or down key simultaneously to boot into recovery mode.
  4. Now that you’re in recovery mode, select “install zip > choose zip from sd card > select MOD.zip file > yes”.
  5. Proceed with the flashing process, follow the on-screen instructions and complete it.
  6. Once the installation process has been finished, wipe cache and dalvik cache from recovery.
  7. Reboot your  device and checkout the sound now.
  8. That’s all.

How To Boost Sound On Sony Xperiz Z1/Z1C/Z1U

Supported devices: 

  • Xperia Z1 C6902/C6903/C6906/C6943
  • Xperia Z1 Compat D5503
  • Xperia Z1 Ultra C6802/C6803/C6833
  1. Download the latest Z1 volume mod 2.5 JB&KK AROMA.zip. [Supports all firmwares from Jelly Bean to KitKat]
  2. Copy the downloaded MOD.zip file to your phone’s SD card [external or internal].
  3. Now boot your device into recovery mode. To do so, turn it off completely first. Now turn it on by pressing the power key. As soon as your device powers up, press the volume up or down key simultaneously to boot into recovery mode.
  4. Now that you’re in recovery mode, select “install zip > choose zip from sd card > select MOD.zip file > yes”.
  5. Proceed with the flashing process, follow the on-screen instructions and complete it.
  6. Once the installation process has been finished, wipe cache and dalvik cache from recovery.
  7. Reboot your  device and checkout the sound now.
  8. That’s all.

Credits: olokos [We recommend a donation to the developer for his hard work. Thank you all.]

How To Boost Sound On Your Galaxy Note 4 [Surround Sound MOD]

4
How To Boost Sound On Your Galaxy Note 4 [Surround Sound MOD]

Galaxy Note 4 has its speaker at the back. If you’ve played some music on your device and you’re going to put it down on a bed or a table, it may result in lowering down the volume and you may hate your device for having the speaker at the back. Samsung placed a speaker at bottom on Galaxy Note 3, but the same didn’t happen with the Galaxy Note 4. Some users just like to have a louder volume coming out of their device. One can’t go above the volume limit and produce louder sound on a Galaxy Note 4, but this is actually possible by means of some MOD or tweak. Keeping this rear speaker thing in mind, XDA senior member sshafranko came up with his very own Sound MOD named as Surround Sound MOD for our beloved Galaxy Note 4.

Surround Sound MOD activates the front earpiece speaker in conjunction with the rear speaker and creates a surround sound effect. It increases the Sound of the device and makes it much more audible. If you’re looking for a way to boost volume on your Galaxy Note 4, you may want to flash this MOD right away. Wondering how you can do so? Well, that’s what we are about to do. Let’s go ahead and learn how you can boot sound on your Galaxy Note 4 SM-N910C, N910F, N910T or N910G.

Note 4

Here’s what you will be able to do

1) Stock volume values approximately 84 with activated surround sound type effect.
2) Very Loud volume values approximately 90 with activated surround sound type effect.
3) Revert back to stock sound volume values and stock speaker functions and effect.

Here some early preparations that you need to take care of

  1. This MOD is only for Samsung Galaxy Note N910C (Asian Exynos), N910G (Indian Snaprdagon) N910F (Snapdragon) and N910T (T-Mobile ). Do not try this on any other device. Check your device’ model number in settings > general > about device.
  2. Make sure that your device’s battery is charged at least over 60%. This is important to avoid any power issues during the flashing process.
  3. Your device must have a custom recovery installed. Follow these guides to install it on your device.
    1. Install CWM Recovery On Samsung Galaxy Note 4 SM-N910S, N910F, N910G & Root It[Snapdragon]
    2. How To Install CWM Recovery & Root Samsung Galaxy Note 4 SM-N910U/C/K [Exynos]
    3. How To Install TWRP Recovery On T-Mobile Galaxy Note 4 SM-N910T
  4. This is a custom MOD. Flashing it will result in voiding the warranty of your device. In case of any mishap, we may not be held responsible. Make sure that you’re going to do this at your own risk.

How To Boost Sound On Your Galaxy Note 4[Surround Sound MOD]

Download the SoundMod.zip file for your device.

For N910C

  • Medium Volume Surround.zip [If you want to boost the sound to a medium level with surround sound effect.]
  • Stock.zip [If you want to get rid of the mods and return back to stock volume.]

For N910G

For N910F


For N910T

  • Copy the downloaded file to your Galaxy Note 4’s SD card [internal or external].
  • Now boot into CWM recovery or TWRP recovery depending on the one you’ve installed. To boot into recovery turn off your device completely first of all. Now turn it on be pressing and holding Volume Up + Home + Power Key simultaneously. As soon as the device boots up, leave the keys. You should be in the recovery mode now.
  • In recovery, choose “Install > select the zip file > proceed and flash it”.
  • Once flashed, reboot your device.
  • Play something in the music player, and checkout the sound after the mod you just flashed.
  • That’s all!

Just in case something goes wrong or you’re facing any issues, reach us through the comment box below. We sure will help you at our best.

Credits: sshafranko [We recommend a donation to the developer for his hard work. Thank you all.]

Boost Sound On Your Galaxy Note Edge N915G/P/T [Surround Sound MOD]

0
Boost Sound On Your Galaxy Note Edge N915G/P/T [Surround Sound MOD]

Galaxy Note Edge is one of the unique Android devices you may find around. If you’re planning to get your hands on this device, it’s going to be a great deal and if you’ve already got it, you must be proud of it. The high specifications joining an amazing display are pretty cool. Samsung has successfully sold over 600K Galaxy Note Edge units and that makes us believe that the device is caught up by a number of Android power users as well. Samsung’s Galaxy devices have been packing up great specifications and features, but the what the users may not like in the Galaxy devices is not seeing any improvement in the sound department, and Galaxy Note Edge one of the devices with no improvements in the sound department.

While manufacturers have been busy introducing new type of speakers, new sound technologies in their smartphones, Samsung isn’t improving the sound specifications of their devices. At first, it’s the sound of speakers, that is not too high enough, and then it is the location of speakers on devices, that is usually at the back and when you’re going to place your phone on the bed or on your table while having the music played, the sound is going to get caged and you may not be able to listen anything, in this case you will have to place your in the opposite direction and that won’t let you keep a track of what’s going on, on your phone’s screen. Some work around is required in this case to boost the speaker sound of your Galaxy Note Edge its speaker is at the back. Samsung placed Galaxy Note 3’s speaker on the bottom, but the placed it at the back in Galaxy Note 4 and Galaxy Note Edge. If you’re having sound issues on your Galaxy Note Edge, you can tweak your device and activate the front speaker for sound. This way, you will be able to listen the sound coming out of your front call speaker + the rear speaker, and the sound will be boosted up by a very good percentage, it will be pretty high and audible as well. This work around for the Galaxy Note Edge and some other devices has been done by XDA senior member  sshafranko.Screenshot_7

The MOD is named as Surround Sound. As mentioned earlier, this MOD activates the front earpiece speaker besides the rear speaker of your Galaxy Note Edge, and it will create a surround sound like effect. The MOD is used for Music Player sound, Videos, Movies, Youtube and other applications with sound activities. Here’s what this MOD exactly does.

1) Stock volume values approximately 84 with activated surround sound type effect.
2) Very Loud volume values approximately 90 with activated surround sound type effect.
3) Revert back to stock sound volume values and stock speaker functions and effect.

Here some early preparations that you need to take care of

  1. This MOD is only for Samsung Galaxy Note Edge N915G (Indian Snapdragon), N915P (Sprint Galaxy Note Edge) and N915T (T-Mobile Galaxy Note Edge). Do not try this on any other device. Check your device’ model number in settings > general > about device.
  2. Make sure that your device’s battery is charged at least over 60%. This is important to avoid any power issues during the flashing process.
  3. Your device must have a custom recovery installed. Follow the guide here to install one on your device.
  4. This is a custom MOD. Flashing it will result in voiding the warranty of your device. In case of any mishap, we may not be held responsible. Make sure that you’re going to do this at your own risk.

How To Boost Sound On Your Galaxy Note Edge N915G/P/T [Surround Sound MOD]

Download the SoundMod.zip file for your device.

For N915P and N915T

For N915G

  • Copy the downloaded file to your Galaxy Note Edge’s SD card [internal or external].
  • Now boot into CWM recovery or TWRP recovery depending on the one you’ve installed. To boot into recovery turn off your device completely first of all. Now turn it on be pressing and holding Volume Up + Home + Power Key simultaneously. As soon as the device boots up, leave the keys. You should be in the recovery mode now.
  • In recovery, choose “Install > select the zip file > proceed and flash it”.
  • Once flashed, reboot your device.
  • Play something in the music player, and checkout the sound after the mod you just flashed.
  • That’s all!

Just in case something goes wrong or you’re facing any issues, reach us through the comment box below. We sure will help you at our best.

Credits: sshafranko [We recommend a donation to the developer for his hard work. Thank you all.]

Mac OS X Yosemite: Save Photos from Messages App

0
Mac OS X Yosemite: Save Photos from Messages App

Now a days, I believe talking has transformed from text into Photos only, well quite about right, cause words can’t express emotions and expressions like graphics or Photos can. Words can give you a moment of joy or sorrow, while pictures can live up-to eternity, no wonder it is said”A picture tells a Thousand words”, ever wonder why selfies became a craze and every other person wants to become a photographer and also the reason why chats have become more popular. It will take alot of words to describe a single subject, while a single photo can do it for you without even letting you write a single thing.

Whether you are using a 3rd part app to chat or the stock apps provided by the OEM, all have the option to send and receive photos, although if you are using the Messages App Mac OS X Yosemite, then saving photos might become a little difficult for you, however, it is as easy as taking out a Hair from a Bar of butter. There is no Download option though, but that doesn’t mean you can’t save it, there are other ways and we are about to share one of them with you. In this Article, we will show you How to Save Photos from Messages App in Mac OS X Yosemite, without further ado, let us continue.

Mac OS X Yosemite Save Photos from Messages App


Image Credits: igeeksblog

How to Save Photos in Mac OS X Yosemite:

  1. Open Messages App in Mac.
  2. Now locate any thread or conversation, which has a minimum of 1 photo in it.
  3. Now Select the photo you want to save.
  4. After the Selection, simply Click on it.
  5. Now Drag and Drop the photo on the Desktop or any other folder
  6. That is it, the photo has been saved now.
  7. You can do that with any other media like a GIF image, zip files, audio messages, archive files and even videos
  8. Enjoy!

ZigZag for PC Download ( Windows 8,8.1,10,Xp – Mac )

0
ZigZag for PC Download ( Windows 8,8.1,10,Xp – Mac )

ZigZag is available for PC Download, but not in proper Windows or Mac format. ZigZag is rocking iOS App Store and no doubt about it, this game is very addictive yet very simple. ZigZag is basically designed for iOS and Android devices, but thanks to the third party emulators like BlueStacks and Andy we can install Android Apps&Games on our PC. Following is a step by step guide on how to install ZigZag for PC using BlueStacks and Andy.

About ZigZag:

* Stay on the wall and do as many zigzags as you can!

* Just tap the screen to change the direction of the ball. Try not to fall off the edges!

ZigZag for PC

How To Download ZigZag for Pc Using Andy Emulator

Step 1: Download the Andy from here.

Step 2: After downloading is complete, install Andy on PC.

Step 3: Andy installation process will take few minutes, When installation is finished launch Andy on you PC.

Step 4: When Andy is open, you’ll see an Android tablet interface head over to Google Play.

Step 5: Open Google Play->Search->ZigZag->Install.

Step 6: when the installation process is complete, go to the home screen there you’ll see Club Penguin.

Step 7: Double click on ZigZag icon and start playing the game.

Step 8: Now ZigZag is successfully installed on your PC, Enjoy the the game.

Download and ZigZag for PC ( Windows Xp,8,8.1,7,10 – Mac ):

  1. To download ZigZag for PC, you will need an Android emulator like Bluestacks. If you do not have it already, you can download it from the website Bluestacks.com.
  2. Open Bluestacks and search for ZigZag using search tool on the top of the homepage.
  3. Click on install button. The game will automatically download and install.
  4. Once the app has been installed, go to My Apps in Bluestacks homepage.
  5. The icon for the game will appear in My Apps.
  6.  Click on this icon to open ZigZag.

Install Custom Android 5.0.2 Lollipop On Galaxy Grand 2 G7102

25
Install Custom Android 5.0.2 Lollipop On Galaxy Grand 2 G7102

Galaxy Grand 2 is a great improvement over its predecessor, the very first Galaxy Grand device. The device sports a beautiful 5.25 inch display with 280 ppi. Qualcomm’s Snapdragon 400 Quad Core CPU clocked at 1.2 GHz accompanied by Adreno 305 GPU is powering up this device. On the front we have a 1.9 MP shooter and an 8 MP shooter is there at the back. Out of the box, the device ran on Android 4.3 Jelly Bean, but received Android 4.4.2 KitKat update later on as well. At the moment, we are not sure whether the Galaxy Grand 2 will qualify for receiving the Android 5.0 Lollipop update or not, and there hasn’t been a hint by Samsung regarding the Lollipop update for this device. While the latest Android firmware is on the roll for so many flagship devices of different manufacturers including Samsung as well, Galaxy Grand 2 users would definitely want to get a lollipop for their device as well and checkout what’s new in this firmware. While they can’t do this officially, an alternative is required and in this case, it’s possible using a custom ROM.

For the Galaxy Grand 2 SM-G7102, this job has been done by XDA senior member mukulsoni, who managed to compile up a stable version of Android 5.0.2 Lollipop based on the all time famous CyanogenMod 12 custom ROM unofficially. The ROM has been through a number of builds, and the current build is pretty good to go with, however, there still are chances of so many bugs and we do not recommend this ROM as a daily dose. Almost everything is working in this ROM, except for the second SIM’s incoming voice. We expect the next update to fix that issue as well. If you are willing to go ahead with the installation of this ROM, you may follow us and install the Android 5.0.2 Lollipop CyanogenMod 12 Custom ROM on your Galaxy Grand 2 SM-G7102. Let’s go through early preps and flash it right away.

11252013124803PM_635_samsung-galaxy-grand-2

Early Preps

  1. his ROM is only for Samsung Galaxy Grand 2 SM-G7102. Do not try this on any other device, please check your device’s model in Settings > About Device > Model.
  2. Your device must have a custom recovery installed, in case you’re missing it you may Follow our full guide here to install CWM/TWRP on your Galaxy Grand 2.
  3. Your device must be running stock Android 4.4.2 KitKat before flashing this ROM.
  4. Your device’s battery should be charged at least over 60%. This is highly recommended in order to prevent any power issues during the flashing process.
  5. Make sure that you backup your important media content, ContactsCall Logs Messages. This is highly recommended just in case something goes wrong and you need to reset your phone.
  6. If you already have rooted your device, use Titanium Backup to back up all your important apps + system data.
  7. Also if you are using a custom recovery, it is recommended that you backup your current system using that first. [Just for the sake of safety]. Here’s our full Nandroid Backup guide.
  8. You will have to go through Data Wipes during installation of this ROM, so make sure that you have backed up all the mentioned data.
  9. Make an EFS backup of your phone before you flash this ROM.
  10. You need enough confidence to flash this ROM.
  11. Alright! Go ahead and flash the custom firmware, follow this guide to the letter.

Disclaimer: The methods involved in flashing custom roms and rooting your phone are highly custom and may result in bricking your device, and has nothing to do with Google or the device manufacturer that is SAMSUNG in our case. Also rooting your device will void its warranty and you will be no longer eligible for any kind of free device services by the manufacturers/warranty providers. In case of any mishap we may not be held responsible. Follow these instructions to the letter to avoid any mishap or bricking. Make sure that whatever you do, you are doing it at your own responsibility.

How To Install Android 5.0.2 Lollipop On Samsung Galaxy Grand 2 with CyanogenMod 12

  1. Download ROM according to your liking
    1. cm-12-20150206-UNOFFICIAL-ms013g. [CyanogenMod 12]
  2. Download Gapps.zip file for Android 5.0 Lollipop.
  3. Connect your phone to your PC now.
  4. Copy the both the .zip files to the storage of your phone.
  5. Now disconnect your phone and turn it off complete.
  6. Boot into CWM recovery now, in order to do so, turn it on by pressing and holding Volume Up + Home Button + Power Key. You should see the recovery mode in a while.
  7. Now in CWM recovery, wipe cache, factory data reset and advanced options > dalvik cache.
  8. After wiping all these three, select “Install” option.
  9. Now select “Install > Choose Zip from SD card > Select cm-12-…..UNOFFICIAL-ms013g.zip file > Yes”.
  10. This will flash the ROM in your phone, once done get back to the main menu in recovery.
  11. Now once again select “Install > Choose Zip from SD card > Select Gapps.zip file > Yes”
  12. This will flash the Gapps in your phone.
  13. Reboot your device.
  14. You should see the Android 5.0.2 Lollipop running on your device in a while.
  15. That’s all!

Screenshot_2014-01-01-07-53-54 Screenshot_2014-11-16-17-05-29 Screenshot_2014-12-29-00-05-52

First boot may take up to 10 minutes, you may not worry if it’s taking that much long. In case it’s taking too long, you may boot into CWM recovery and wipe cache and dalvik cache and reboot your device as it may fix the issue. In case your device is having issues, you may return to your old system using the Nandroid backup or follow our guide here to install stock firmware.

Got any queries? Reach us out through the comment box below.

Credits: mukulsoni [We recommend a donation to the developer for his hard work. Thank you all.]

iOS 8 Tutorial: Enable iCloud Back-up on iPhone/iPad

0
iOS 8 Tutorial: Enable iCloud Back-up on iPhone/iPad

Despite that most people don’t like Apple because of their restrictions an security, however, there are alot of reasons to like Apple too, especially if you are just a typical users and wants to use the device in its basic way, then Apple iDevice is one of the best thing to own, but if you are into customization and looking for different apps and being an open source, then you should keep yourself away from Apple devices. One of the best thing I loved in Apple is the power of Back-up it provides,one can easily amend his device after creating a back-up and the best part it back-ups everything and restore it like your device was before, even the saved games will be restored like they were before.

Apple allows you to create back-up via Tow methods, one via iTunes and the other one is via iCloud. I prefer the iTunes back-up if you are looking to restore your device, saving the Back-up to PC would be a nice idea. Although, most of the Apple users are not aware of this iCloud back-up feature and looking for a way to enable this in iOS 8 and in this article, we will show you How to Enable iCloud Back-up on iPhone/iPad in iOS 8.

iOS 8 Tutorial Enable iCloud Back-up on iPhoneiPad

How to Enable iCloud Back-up on in iOS 8:

Automatically Back-up:

  1. Launch Settings.
  2. Scroll Down.
  3. Locate and Tap iCloud.
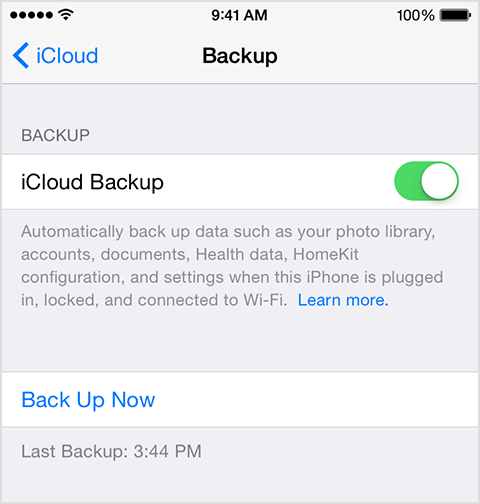
  4. Tap Back-up.
  5. Tap the Toggle to Turn on the iCloud Back-up.
  6. That’s It

Manually Back-Up:

If you don’t want to enable Automatic iCloud Back-up, just do it manually.

  1. Navigate to Settings.
  2. Scroll and Tap iCloud
  3. Scroll down and locate Back-up now.
  4. Tap it to create a back-up
  5. Enjoy

Restore Back-up From iCloud:

After Either restoring your device or Purchasing a new one, you can restore the back-up.

  1. On the Hello Screen, pass it.
  2. On the Next Screen, Tap Restore From iCloud Back-up.
  3. Tap on Back-up and that is it

Download Latest Odin3 v3.10.6

10
Download Latest Odin3 v3.10.6

Odin 3.10.6 is compatible with all Samsung phones released in 2016 and prior. If your device is not working with Odin 3.13.1, use Odin 3.10.6.

As a Samsung user, you must be well aware of Odin3, Samsung’s very own flash tool. In case you don’t know much about it, you may want to know that Odin3 is Samsung’s little flash tool that is intended for loading stock firmware or other system files e.g. Modem, CSC features Bootloader or PIT files on a Samsung Galaxy device. The tool is pretty much handy. If your device gets stuck in a bootloop, gets soft bricked, or encounters a firmware upgrade issue, Odin3 can be a life savior.

Why do you need Odin?

At times, Samsung Kies fails as well and it doesn’t let you recover your soft-bricked Galaxy device, as it may result in connection errors. All you need to do is, you need to acquire the firmware.tar.md5 or firmware.tar file of for your device and flash it using Odin3.

Odin3 also helps the users to load custom recoveries on their phones, and Chainfire’s famous CF-Autoroot is also flashed using Odin3 in order to root a Samsung Galaxy device. Other options like PIT, Bootloader, Modem, & CSC are required in specific cases. Most of the times, the only option used is the PDA or AP tab that allows the users to load all the .tar, .md5, .smd, .gz. ,tgz files and then allows flashing.

Odin3 v3.10.6

Until now, the latest official version of Odin3 was Odin3 v.3.09 that came up with support for some new devices that weren’t supported by previous versions of Odin3. Recently, a new version of Odin3 has been floating over the web, on different forums and websites, which appears to be Odin3 v3.10.6. The new version has a new UI and according to different sources, it is said to be much more stable and better in terms of performance.

While we are not sure yet whether this Odin 3.10.6 is official and we haven’t found any way to confirm it, we still went ahead and gave a try using Odin3 v3.10.6 and it worked perfectly great. We tried using PIT file option, Modem (CP) and AP options. As we’ve been providing our users a plethora of guides that require the use of Odin3, we’ll be using Odin3 3.10.6 in our guides and you will need it, so we’ve embedded the download link here. Go ahead, grab it and follow instructions below to use Odin3 3.10.6.

Latest Odin3 v3.10.6

New Odin 3.12.3 and 3.11.1 Available:

Download Odin3 v3.10.6: Use latest version