Home Blog Page 385

Sony Xperia Z3, Z3 Compact Receives Android 5.0.2 Lollipop Finally!

0
Sony Xperia Z3, Z3 Compact Receives Android 5.0.2 Lollipop Finally!

Update Nexus 7 to Android 5.0.2 Lollipop Factory ImagesBig day, big news for the Xperia users. Sony has finally left the comfort zone of software updates and started rolling out Android 5.0.2 Lollipop for Xperia Z3 and Xperia Z3 Compact, while rest of the Xperia Z family will be receiving the update in two weeks. The update carries the build number 23.1.A.0.690 while runs on Kernel 3.4 and Android version, as mentioned above, is Android 5.0.2 Lollipop. This also happens to be one of the biggest updates in the Xperia history since it’s based on Google’s new Material Design UI. Applications and other elements on the device are designed to comply the new UI, it is smoother, faster, flat and eye-soothing now, but as always, Sony has kept the changes minimal.

Other then that, there’s a new lockscreen with lockscreen notifications having full customisation options. Multi User and Guest Mode have been added. Performance and battery life have been enhanced as well. Ability to move apps to SD card has been added as well in this release. The update is rolling out for Xperia Z3 D6603 and Xperia Z3 Compact D5803 users. It will be rolling out to other variants anytime soon now. You can update your device using the guides posted on our site for now, or just wait for the OTA update to wait.

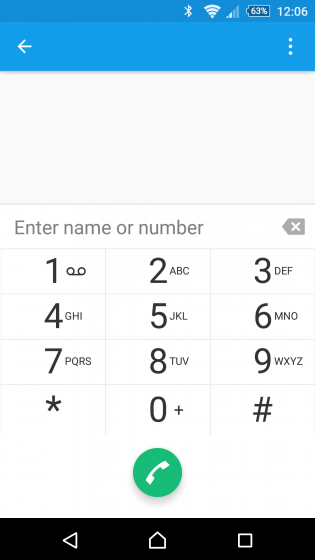
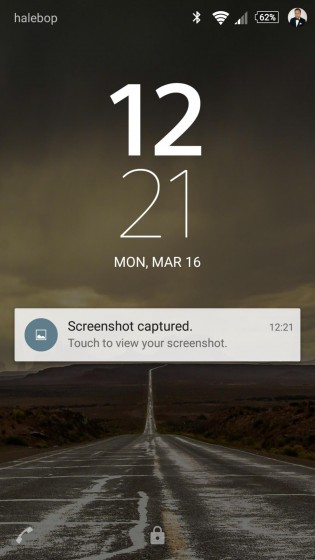
AnHere are the Android 5.0.2 Lollipop screenshots, and Sony’s promo video.

Lollipop_2-315x560 Lollipop_3-315x560 Lollipop_4-315x560
Lollipop_5-315x560 Lollipop_6-315x560 Lollipop_7-315x560
More-Lollipop_1-315x560 More-Lollipop_2-315x560 More-Lollipop_3-315x560
More-Lollipop_4-315x560 More-Lollipop_6-315x560

Install CyanogenMod 12 Android Lollipop 5.0.1 On Samsung Galaxy Note 4 N910F/N910G

10
Install CyanogenMod 12 Android Lollipop 5.0.1 On Samsung Galaxy Note 4 N910F/N910G

Google is already rolling out Android 5.1 Lollipop for Nexus devices, and the aftermarket version of Android, CyanogenMod 12 has reached Android 5.0.1 officially now. CM 12 is being compiled for a handful of devices by some great devlopers. Manufacturers are doing their best to update their flagships to the latest and greatest version of Android at the moment, but if you own some flagship device of Samsung, HTC, Sony, LG or Motorola or any other manufacturer and your device hasn’t received update to Android 5.0 Lollipop yet, CyanogenMod 12 might be able to save your device a life if its available for your device. Let’s talk a little bit about Samsung for now, Samsung is already done rolling out the update for Galaxy S4, S5, Note 3 & Note 4, but some variants of these devices are missing the update. One of the unlucky variants is the Indian variant of the Galaxy Note 4, that comes labeled as N910G. Samsung has rolled out Lollipop update for almost all variants of the Note 4, but the N910G owners are still drowned in disappointment.

Official CyanogenMod 12 is now available for the Galaxy Note 4 N910F/N910G. Although this is a custom ROM, but it’s worth upgrading to have a taste and feel of Android 5.0.1 Lollipop for the Galaxy Note 4 N910G owners, while N910F users also have the official firmware. In the following post, we are going to install this official CyangenMod 12 Android 5.0.1 Lollipop firmware on our beloved Galaxy Note 4 N910F & N910G. If you’ve been looking for a way to do so, this maybe the chance for you. Let’s go through some quick early preparations and then flash this firmware.

Early Preparations

  1. This custom ROM is only for the Galaxy Note 4 SM-N910G & SM-N910F. Do not try installing it on any other device as it may result in bricking it. Check your device’s model number in settings > general > about device.
  2. Proceed with the installation only if you’re an Android power user. This ROM is a nightly build, and may not be kept for everyday use. We may not be held responsible if something goes wrong, make sure that you’re doing everything at your own risk.
  3. Your phone’s battery must be charged, at least 60% in order to prevent any power issues during the flashing process.
  4. Your device must have a custom recovery installed first. We recommend TWRP, use our guide to install it right now.
  5. You need to backup each and everything before you proceed. Use the following links to be on the safe side.
    1. Backup EFS
    2. Backup Nandroid
    3. Backup Media Content
    4. Backup Contacts
    5. Backup Call Logs
    6. Backup Text Messages
  6. Follow the instructions carefully.

Disclaimer: The methods involved in flashing custom roms and rooting your phone are highly custom and may result in bricking your device, and has nothing to do with Google or the device manufacturer that is SAMSUNG in our case. Also rooting your device will void its warranty and you will be no longer eligible for any kind of free device services by the manufacturers/warranty providers. In case of any mishap we may not be held responsible. Follow these instructions to the letter to avoid any mishap or bricking. Make sure that whatever you do, you are doing it at your own responsibility.

samsung-galaxy-note-4-press-photo

How To Install CyanogenMod 12 Custom Android 5.0.1 Lollipop On Galaxy Note 4 N910F/G

  1. Download latest CM-12-ROM.zip file.
  2. Download Gapps.zip file for Android 5.0 Lollipop.
  3. Connect your phone to your PC now.
  4. Copy the both the .zip files to the storage of your phone.
  5. Now disconnect your phone and turn it off complete.
  6. Boot into TWRP recovery now, in order to do so, turn it on by pressing and holding Volume Up + Home Button + Power Key. You should see the recovery mode in a while.
  7. Now in TWRP  recovery, wipe cache, factory data reset and advanced options > dalvik cache.
  8. After wiping all these three, select “Install” option.
  9. Now select “Install > Choose Zip from SD card > Select cm-12…file.zip > Yes”.
  10. This will flash the ROM in your phone, once done get back to the main menu in recovery.
  11. Now once again select “Install > Choose Zip from SD card > Select Gapps.zip file > Yes”
  12. This will flash the Gapps in your phone.
  13. Reboot your device.
  14. You should see the Android 5.0.1 Lollipop running on your device in a while.
  15. That’s all!

Turn Off Auto-App Update from Google Play Store [ How To Guide ]

Turn Off Auto-App Update from Google Play Store [ How To Guide ]

Here’s how to turn off auto app updates from Google Play store right away without any hassle. Find out the more details below in the Guide.

Google Play store is loaded with 12.5+ million apps and each day number is going up, we are getting more and more games and apps for our Android devices. In the following guide i’ll tell you how you can turn off auto app updates from Google Play store because every time an app is updated it download the new data, if our device is connected with a WiFi then its not a big issue but if we are using mobile data then it will cost more.

Turn Off Auto-App Update from Google Play Store

While using Android we have freedom to do anything, most of us use modded app version in order to get unlimited stuff, if auto app updates are turned on you’ll lose all of your unlimited stuff etc. In order to Turn Off Auto-App Update from Google Play Store follow the steps mentioned below.

How To Turn Off Auto-App Update from Google Play Store:

Step#1: Open Google Play on your Android device.

Step#2: Now goto Google Play store settings by tapping on “Hamburger bar” located on top left side.

Step#3: From the list tap on Settings.

Step#4: Now Tap on Auto Update.

Step#5: A popup window will open, showing you three options.

Step#6: Select Do not auto-update apps option.

Step#7: After selecting the first option tap on Ok.

Now you’ve successfully disable auto update for all apps. If you want to disable auto update for individual apps follow the procedure below.

Step#1: Open Google Play Store on your device.

Step#2: Go to My Apps. There you’ll see all your installed apps.

Step#3: Tap on the app for which you want to disable auto update.

Step#4: Now tap the 3-dot menu icon on the top-right corner.

Step#5: Tap on auto update to uncheck it.

How To Enable/Activate WhatsApp Voice Calling Feature On Android [ Update 1x ]

How To Enable/Activate WhatsApp Voice Calling Feature On Android [ Update 1x ]

Now a days all i am seeing is that people are waiting to get their WhatsApp Voice Calling Feature On Android. WhatsApp is making it more interesting and also it free advertisement, you can enable your WhatsApp Voice Calling Feature On Android  after some one give you a call. For those who don’t know yet what to do, Here’s how you can Enable/Activate WhatsApp Voice Calling Feature On Android .

In the following step by step i’ll tell you how you can enable WhatsApp voice calling feature on Android, sorry for iOS user they have to wait a bit longer to avail WhatsApp voice calling feature.

whatsapp-calling

How To Enable/Activate WhatsApp Voice Calling Feature On Android:

Step#1: First of all you have to download the latest WhatsApp version.

Step#2: Now you have to ask your friend to call you, who has already got the voice calling feature.

Step#3: Once you receive the call, close your WhatsApp messenger and restart your device.

Step#4: After you restart your device and open WhatsApp you’ll see a new tab as shown in the above image. Calls.

Now that you’ve successfully activated WhatsApp calling feature, you can call everyone in your WhatsApp contact list. Also, help your friends who are waiting to get their hands on WhatsApp calling feature. In case something went wrong and your WhatsApp calling feature is not enabled, follow the steps below to fix it.

Step#1: Make a backup of your WhatsApp and uninstall it.

Step#2: Now download and install the latest WhatsApp from the Play Store or find its APK online.

Step#3: Try rooting your device.

Step#4: Deactivate your account then reactivate it.

Step#5: Update your device to latest OS.

How to enable WhatsApp voice calls (with root):

Step#1: First make sure your device is rooted.

Step#2: Now goto Google Play Store and install Android terminal emulator.

Step#3: Type following command and press enter.

su -c am start -n com.whatsapp/com.whatsapp.HomeActivity

Step#4: Now close your WhatsApp and restart your device.

All Done !.

Install TWRP 2.8 Recovery On LG G Pad 7.0 V400 & V410

18
Install TWRP 2.8 Recovery On LG G Pad 7.0 V400 & V410

LG G Pad 7.0’s high end specifications make it a great tablet device to play with. We have got this device powered up with Qualcomm’s Snapdragon 400 Quad Core CPU clocked at 1.2 GHz accompanied by a RAM of 1 GB and 8 GB internal storage. A 3.5 MP camera is fixed at the back and a 1.3 MP camera shooter is fixed on the front of a 7.0 inch IPS display with 216 ppi. Under the hood we’ve got a huge 4000 mAh battery and the device can be found running on Android 4.4.2 KitKat out of the box. If  you happen to be a lucky G Pad 7.0 owner and you also happen to be an Android power user, you would definitely love to explore the vast world of Android where no limits can be found. A very good way to test your device is by tweaking it at a maximum level, for this purpose you may take a start by flashing small tweaks, MODs, different customisations and obviously, a plethora of a custom ROMs that is available for this device out there. But to pave a way for all the customisations on your device, you need root access and then a custom recovery. You will be wondering about both these things right now, but let us move forward and you’re going to understand all.

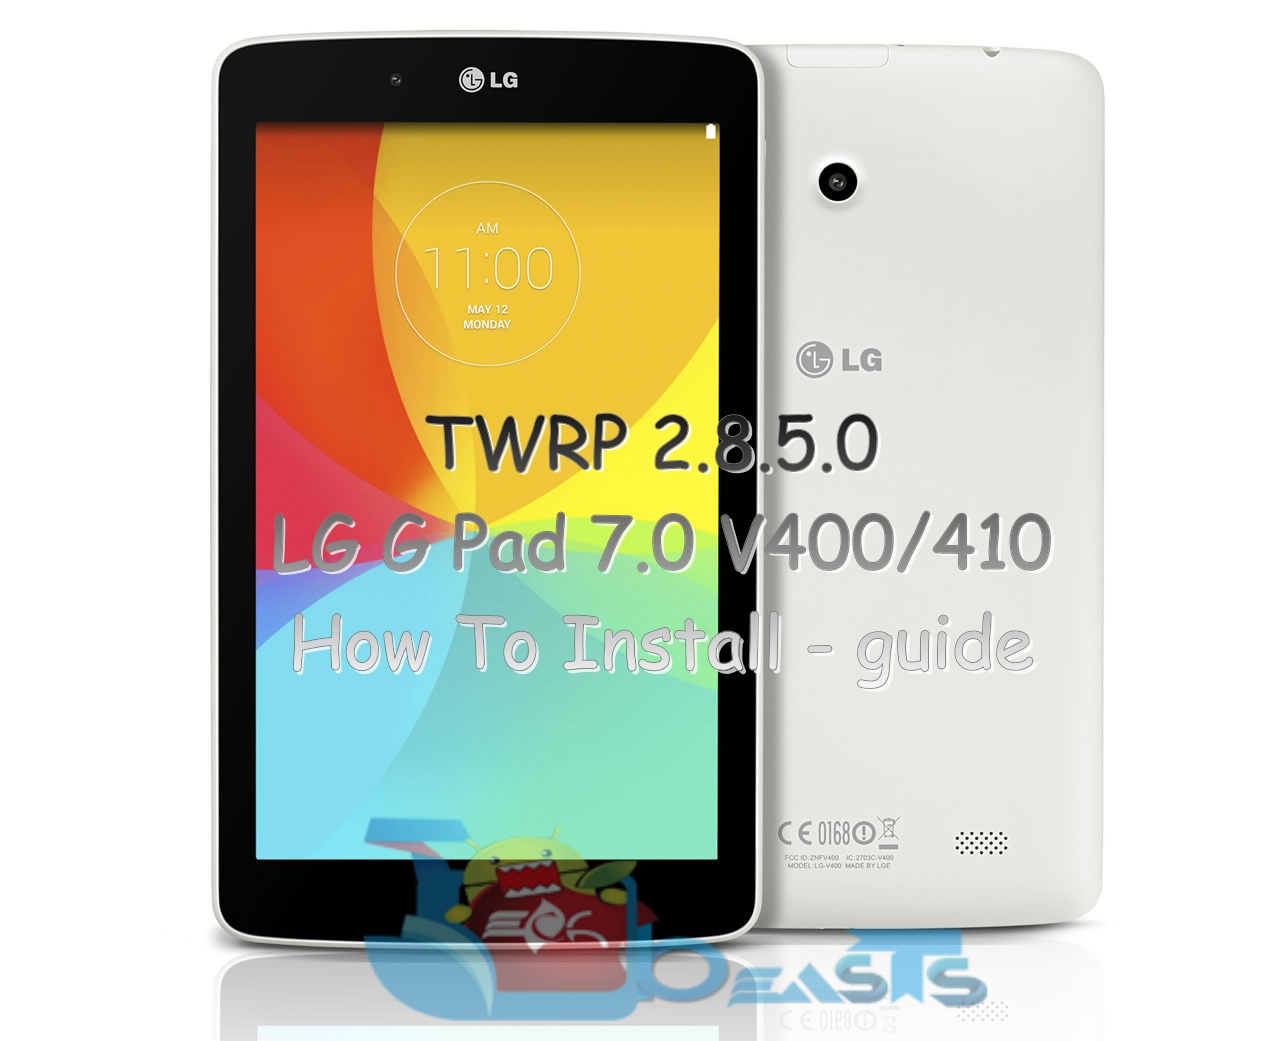
Root access on your G Pad 7.0 will allow you to explore the root directory of your device and load root required applications to enhance the capabilites of your device, while a custom recovery can do the similar from the boot menu of your device. It will simply allow you to flash tweaks, MODs, custom ROMs and the most important part, it will allow you to create or restore Nandroid backup. You can also wipe cache and dalvik cache, a number of other features is there to try out. When it comes to custom recoveries, there are only two big names CWM and TWRP, and when it comes to pick up the best one, I personally love to go with TWRP since it has a great and easy to use UI. Luckily, latest version of TWRP, TWRP 2.8.5.0 is now available for LG G Pad 7.0 V400 & V410. In this guide, we will flash this latest TWRP 2.8.5.0 on the LG G Pad 7.0. Let’s go through some quick preparations and then flash this recovery.

LG-G-Pad-8

Early Preparations:

  1. This guide is only intended for LG G Pad 7 V400 & V410 owners. Don’t try it on any other device. Check your device’s model number in Settings > About Device > Model.
  2. Root your LG G Pad 7.0 [Important]
  3. Download & Install Flashify on your LG G Pad 7.0.
  4. Back up all your important data, contacts, text messages and call logs. This is highly recommended so that in case of any mishap, you’re able to restore all of your important data.
  5. Follow this guide to the letter to avoid any mishap.

Disclaimer: The methods involved in flashing custom recoveries, roms and rooting your phone are highly custom and may result in bricking your device, and has nothing to do with Google or the device manufacturer that is LG in our case. Also rooting your device will void its warranty and you will be no longer eligible for any kind of free device services by the manufacturers/warranty providers.  Follow these instructions to the letter to avoid any mishap or bricking. Make sure that whatever you do, you are doing it at your own responsibility.

How To Install TWRP 2.8.5.0 On Your LG G Pad 7.0 V400 or V410

  1. Make sure that you’ve rooted your device using the guide linked above.
  2. Make sure that you’ve installed Flashify using the guide linked above.
  3. Download the TWRP recovery.img file according to your device.
    1. TWRP 2.8.5.0 for G Pad 7.0 V400
    2. TWRP 2.8.5.0 for G Pad 7.0 V410
  4. Copy the downloaded recovery.img file to the internal or external storage of your G Pad 7.0.
  5. Now open the Flashify application from app drawer on your G Pad.
  6. Allow root permissions and proceed to the main menu of Flashify.
  7. Tap Recovery image, and locate the downloaded recovery.img file.
  8. Proceed with the on-screen instructions to finish flashing.
  9. Flashify will also allow you to boot into recovery mode from the options on the top right corner.
  10. That’s all.

Recovery Credits

How To Root LG G Pad 7 V400 & V410

1
How To Root LG G Pad 7 V400 & V410

fLG G Pad is LG’s 2014 tablet. G Pad 7.0 emerged up as a great competitor to Samsung’s Galaxy Tab 3. A good choice it is for kids specially. On the front of this tab we have a 7.0 IPS display with 800 x 1200 pixels and 216 ppi. Under the hood we have 8 GB internal storage and 1 GB of RAM. On the front there’s a 1.3 MP shooter while on the back there’s a  3.5 MP shooter for pictures. G Pad 7 is powered up with Qualcomm’s Snapdragon 400 Quad Core CPU clocked at 1.2 GHz. LG has added a massive 4000 mAh battery to give life to the G Pad 7. Out of the box, G Pad 7 can be found running on Android 4.4.2 KitKat.

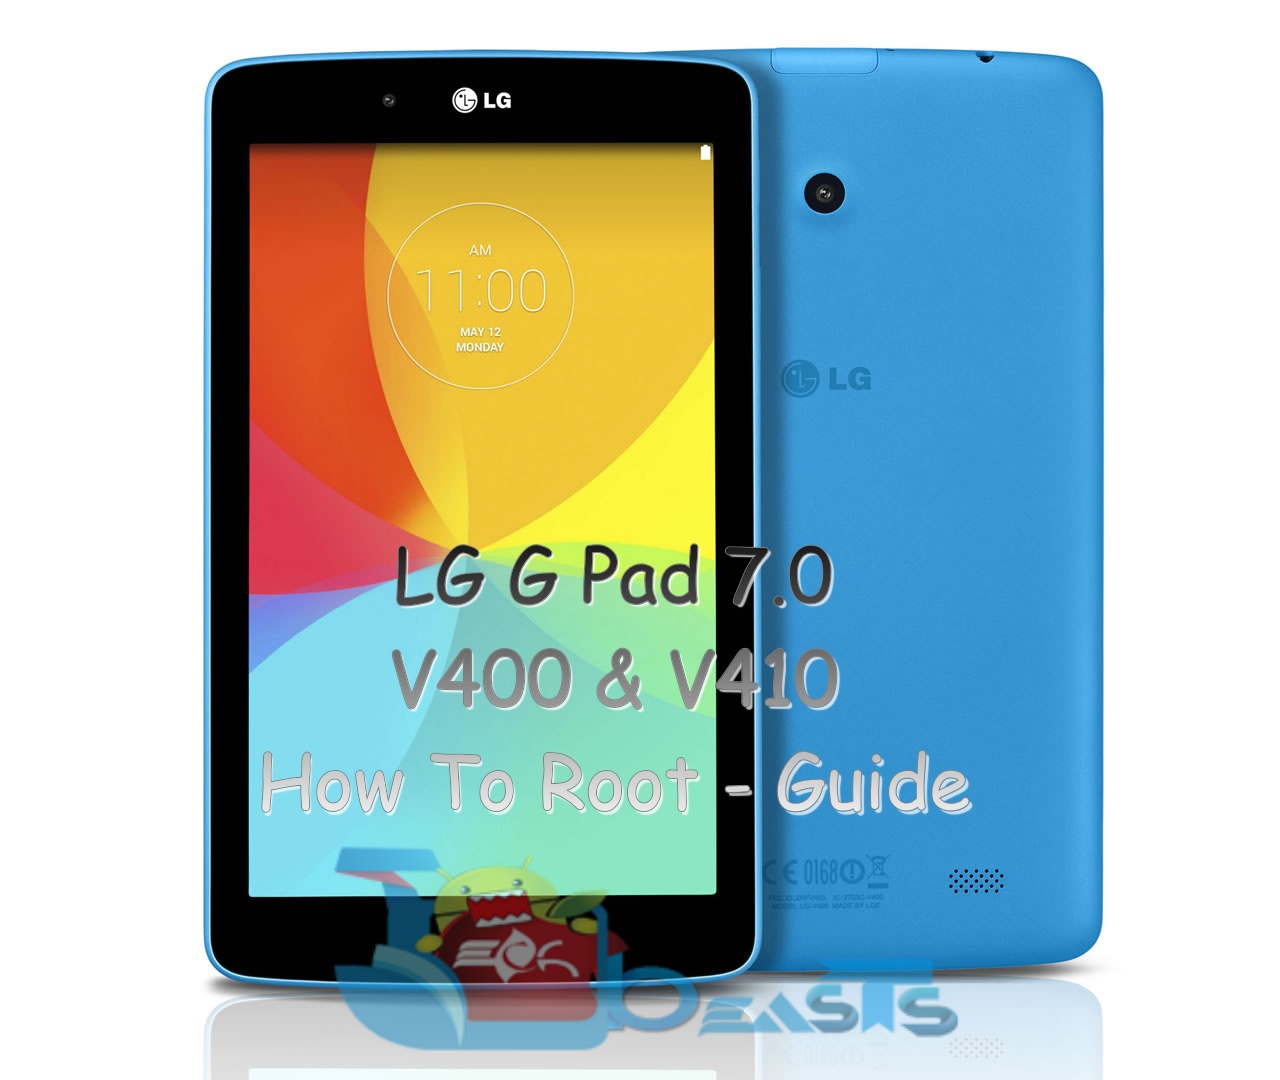
LG sure has done a great done with the G Pad series. The G Pad 7 is a choice of thousands of users, just in case you happen to be one of those happy G Pad 7.0 users, you would love to explore your device a bit more by going a little out of the boundaries set by LG. Since Android is a vast world, there are no impossibilities and no limits. But to achieve that limitless behaviour on your device, you need to gain the root access first of all, and that is the purpose for us being here right now. In the following guide we are going to root the LG G Pad 7.0 V400 & LTE or AT&T G Pad 7 V410 using Towelroot and PurpleDrake. If you’ve been looking for a method to root your device, this may be the best one to go with. Let’s go through some early installation preparations and then root the device.

LG-G-Pad-7

Early Preparations:

  1. This guide is only intended for LG G Pad 7 V400 & V410 owners. Don’t try it on any other device. Check your device’s model number in Settings > About Device > Model.
  2. Download and install LG USB drivers.
  3. Back up all your important data, contacts, text messages and call logs. This is highly recommended so that in case of any mishap, you’re able to restore all of your important data.
  4. Follow this guide to the letter to avoid any mishap.

Disclaimer: The methods involved in flashing custom recoveries, roms and rooting your phone are highly custom and may result in bricking your device, and has nothing to do with Google or the device manufacturer that is LG in our case. Also rooting your device will void its warranty and you will be no longer eligible for any kind of free device services by the manufacturers/warranty providers.  Follow these instructions to the letter to avoid any mishap or bricking. Make sure that whatever you do, you are doing it at your own responsibility.

Root LG G Pad 7 V400 Using TowelRoot

  1. Download TowelRoot APK.
  2. Copy the downloaded APK to your LG G Pad 7.
  3. Now go to settings > security > allow unknown sources.
  4. Now locate the copied TowelRoot APK using a file manager.
  5. Tap the APK and begin the installation.
  6. Proceed with the on-screen instructions and finish the installation.
  7. Once done, locate TowelRoot from app drawer & open it.
  8. Follow the on-screen instructions and root your device now.
  9. That’s all.

Root LG G Pad 7 V410 Using PurpleDrake

  1. Make sure that you’ve installed LG USB drivers.
  2. Disable USB Debugging mode if it’s enabled on your LG G Pad v410 (At&t/LTE).
  3. Download the PurpleDrake-Lite root tool on your PC.
  4. Extract the downloaded file.
  5. Connect your LG G Pad 7.0 to your PC or MAC using original data cable now.
  6. Now launch the tool according to your device. i.e PurpleDrake_Linux for Linux, PurpleDrake_OSX for MAC, PurpleDrake_Windows.bat for Windows.
  7. Now follow the on-screen instructions as the tool is self explanatory.
  8. Once you’ve achieved root on your device, verify it using the method listed below.

How To Verify Root On Your LG G Pad 7.0 V400 or V410

  1. To do so, go to Google Play Store on your LG G Pad 7.0.
  2. Find “Root Checker” and install it.
  3. Open Root Checker.
  4. Tap “Verify Root”.
  5. It will ask you for SuperSu rights, tap “Grant”.
  6. It should show you Root Access Verified Now!
  7. Screenshot_1
    This screenshot has been attached only as a reference.


Don’t forget to checkout the 10 best apps for rooted Android tablets/smartphones now.

That’s all. In case you’re facing any issues with the rooting process, feel free to reach us through the comment box below. We will try our best to help you out. Thank you all.

How to fix ‘Unfortunately SuperSU has Stopped’ on Android

0
How to fix ‘Unfortunately SuperSU has Stopped’ on Android

Few days back i’ve posted about how to fix unfortunately Facebook has stopped, today i’ll tell you how to fix unfortunately SuperSU has stopped. There are many reason which can cause this error “unfortunately SuperSU has stopped “. Once you start getting this error you cannot use Line properly so in order to get rid of this annoying situation follow my step by step guide below.

fix unfortunately SuperSU has stopped

How To Fix Unfortunately SuperSU Has Stopped on Android:

Step#1: Download the latest UPDATE-SuperSU-vx.xx.zip

Step#2: Now you have to flash the SuperSU file using recovery.

Step#3: You can also install SuperSU directly as you install any apk.

Step#4: After the installation is done go to Google Play and install the SuperSU app.

Step#5: Now Reboot your device.

Method #2:

Step#1: Open Settings on your Android device.

Step#2: Now tap on More tab. [ I am using Galaxy Note 3 ]

Step#3: Tap on Application Manager form the list.

Step#4: Now select All Application by swipe to left.

Step#5: There you’ll see all your installed apps, Tap on SuperSU.

Step#6: Now all you have to do tap on Clear Cache and Clear data.

Step#7: Now goto home screen and restart your device.

All Done ….

If this method is not working for you then you have to uninstall the SuperSU app and install the latest updated version from Google Play. If by any means still you are facing the same issue, i think you should try to install the old version of SuperSU app that will help you to get rid of Unfortunately SuperSU Has Stopped.

How To Fix Unfortunately Line Has Stopped on Android

How To Fix Unfortunately Line Has Stopped on Android

Few days back i’ve posted about how to fix unfortunately Facebook has stopped, today i’ll tell you how to fix unfortunately Line has stopped. There are many reason which can cause this error “unfortunately Line has stopped “. Once you start getting this error you cannot use Line properly so in order to get rid of this annoying situation follow my step by step guide below.

download

How To Fix Unfortunately LINE Has Stopped on Android:

Step#1: Open Settings on your Android device.

Step#2: Now tap on More tab. [ I am using Galaxy Note 3 ]

Step#3: Tap on Application Manager form the list.

Step#4: Now select All Application by swipe to left.

Step#5: There you’ll see all your installed apps, Tap on Line.

Step#6: Now all you have to do tap on Clear Cache and Clear data.

Step#7: Now goto home screen and restart your device.

All Done ….

If this method is not working for you then you have to uninstall the Line app and install the latest updated version from Google Play. If by any means still you are facing the same issue, i think you should try to install the old version of LINE app that will help you to get rid of Unfortunately LINE Has Stopped.

How To Unbrick The LG F60

0
How To Unbrick The LG F60

The LG F60 is a mid-ranged Android smartphone, however, its specs don’t stop the thousands of Android enthusiasts owning the LG F60 to root and install a Custom ROM on it. Many-a-times, you succeed while flashing a ROM, or a simple tweak. But, not everyone is perfect. So if you happen to be one of the many people who just tried to root your LG F60, but accidentally bricked it, then this guide right here is made for specifically you.

Instructions

  1. Firstly, make sure that your battery is above 60% to prevent any interruptions in the process.
  2. Now, backup everything that is important to you, as this process will wipe off every single bit of data that is stored on your LG F60.
  3. Once you’re good to go, power off your LG F60.
  4. Now, head into the Recovery mode which can be accessed by holding down the Power+Volume Down keys simultaneously.
  5. Once in recovery mode, you can navigate by clicking the Volume Up and Volume Down buttons.
  6. Locate and select the ‘Factory Reset’ option, and go ahead with it. This will simply wipe off every single bit of data on your Android device.
  7. Now, select ‘Clear Cache’ and select yes.
  8. Head into the ‘Advance Mode’, and select ‘Clear Dalvik Cache’ and tap on ‘Ok’.
  9. Reboot your LG F60.

If this process doesn’t work for your device, then follow this simple guide to flash the Stock Firmware on it.

Link.

Great work! You’ve successfully unbricked your LG F60! If you have any queries regarding this article, make sure you leave a comment below!

How To Downgrade LG F60 To Stock Firmware

0
How To Downgrade LG F60 To Stock Firmware

If you happen to be one of the thousand people who own the LG F60, and want to downgrade your device to Stock Android that it previously came with, then this guide is specifically made for you! In this small and easy guide, we show you all how to downgrade/flash the Stock ROM on your LG F60, in case you have flashed a Custom ROM on it! Follow the guide with caution.

Banner---LG-F60-revert-stock

Pre-Requisite

  • Make sure that you backup everything that is important on your LG F60, as this process is going to wipe off every single bit of data from your smartphone!
  • Make sure you have the developer options enabled. If not, navigate to Settings>About Phone, and tap the ‘Build Number’ about 7 times rapidly. This should enable developer settings. Now, make sure it is turned on by navigating to Settings>Developer Options, and checking the toggle.
  • Now, you need a computer with the LG PC Suite installed on it. You can download it by clicking here.
  • Also, make sure that you have all the proper drivers installed on your computer.
  • You also need the official Android OS file. You can download it from any trusted source.

Now that everything is set to go, you may start the procedure down below.

Flash Stock Firmware On LG F60

In order to revert back your LG F60 to Stock Android, you need to follow the given steps and flash the stock OS on your LG F60.

  1. First of all, make sure that you have all the files downloaded on your PC.
  2. Install the LG PC Suite that you downloaded earlier.
  3. Now, connect your LG F60 to your PC using the Data cable.
  4. Run the LG PC Suite.
  5. Follow the On-Screen tutorial, and click on the button to start flashing the Stock firmware.
  6. This process may take upto 5 minutes, so don’t hesitate and give it some time to work.
  7. Once the process is done, unplug your LG F60 from your PC, and reboot it.

Great! You’ve just flashed the Stock ROM on your LG F60! With the Stock ROM thus installed, you need not worry about voiding the warranty that came with your device! If this guide helped you, make sure to leave a comment below!

Update Xperia Sola MT27i to Android 5.0.2 Lollipop with SlimLP Custom ROM

3
Update Xperia Sola MT27i to Android 5.0.2 Lollipop with SlimLP Custom ROM

Android Power users are well aware of the SlimKat custom ROM. It was a modification of the Stock Android to remove all useless features and make a light and blazing fast firmware for smartphones. SlimLP is the updated version based on Android 5.0.x Lollipop and it is now available for Xperia Sola MT27i. SlimLP for Xperia Sola is officially supported and weekly released are there so this is one of the recommended Lollipop based custom ROMs for Xperia Sola. If you are looking for a custom ROM that is both fast and light, then this is the best choice at this time. Xperia Sola can be updated to Android 5.0.2 Lollipop with SlimLP custom ROM. Note that this ROM is for MT27i only. Do not attempt to install it on any other smartphone or another variant of Xperia Sola. Now just follow the guide given below to install SlimLP custom ROM on MT27i Xperia Sola.

Requirements

  • Unlock Bootloader of Xperia Sola. If you do not know how to do it or you have no idea about what it is, then follow this guide to unlock Bootloader of your phone. How to Unlock Bootloader of Xperia Smartphones
  • Install USB Drivers for Xperia Sola using the drivers installer from the Flashtool installation folder. Download Flashtool from here. After installing USB Drivers, connect phone to PC using the USB cable so that USB drivers are installed properly and connection is established properly.
  • Install ADB and Fastboot Drivers. | Mac ADB And Fastboot Drivers. To avoid the lengthy installation, use the Minimal ADB and Fastboot tools for your PC to make the installation quick. ADB Drivers work best on Windows 7. ADB and Fastboot Drivers might not work on Windows 8 or Windows 8.1.
  • Charge your phone up to 50%. It is very important because phone should not turn off during flashing process. If the phone turns off during the flashing process, it can damage the device.
  • Make a backup of all Contacts and Messages on phone. – Guide
  • Backup SMS Messages
  • Backup Call Logs
  • Make a Nandroid Backup if any custom Recovery is installed already. If not, you will find a custom recovery later in this guide. – Guide
  • Copy all the media files and anything else stored in the internal memory to a PC before flashing to save this data.

Disclaimer

The methods involved in flashing custom recoveries, ROMs and rooting your phone are highly custom and may result in bricking your device, and has nothing to do with Google or the device manufacturer that is SONY in our case. Also rooting your device will void its warranty and you will be no longer eligible for any kind of free device services by the manufacturers/warranty providers. In case of any mishap we may not be held responsible. Follow these instructions to the letter to avoid any mishap or bricking. Make sure that whatever you do, you are doing it at your own responsibility.

Required Downloads

Steps to Install SlimLP on Xperia Sola MT27i

  1. Make sure that bootloader is unlocked and phone is charged to 50% at least.
  2. Extract boot.img from ROM zip.
  3. Copy ROM zip and Gapps zip to phone’s internal memory.
  4. Now turn off phone wait for 5 seconds.
  5. Hold volume up button and connect phone to PC.
  6. The LED should remain blue, which means that phone is in fastboot mode.
  7. Now copy boot.img to Fastboot folder or Minimal ADB and Fastboot installation folder.
  8. Open that folder, hold shift button on keyboard and right-click on mouse.
  9. Click on Open Command Window Here.
  10. Type fastboot devices and press Enter.
  11. It should only one fastboot connected device in return. If it showing more that one, then disconnect any other connected device or close any Android Emulator. Also make sure that PC Companion is completely disabled if installed.
  12. Now type fastboot flash boot boot.img and press Enter.
  13. Type fastboot reboot and press Enter.
  14. While phone is booting up, press Volume up/down/power to enter recovery mode.
  15. Go to Mount and uncheck System.
  16. Wipe Dalvik Cache from Advanced.
  17. In the recovery mode, select Install and navigate to the folder where ROM zip is placed.
  18. Install the ROM zip.
  19. Install Gapps zip the same way and reboot the phone.
  20. Performing factory reset and wiping Dalvik cache after installing ROM is highly recommended!
  21. The phone will boot up to home screen in 5 minutes.
  22. To install Google Applications, copy downloaded Gapps zip file to phone and flash it the same way as ROM. Factory reset is not required this time.
  23. That’s all!

Got any question? Ask me in the comments below 🙂

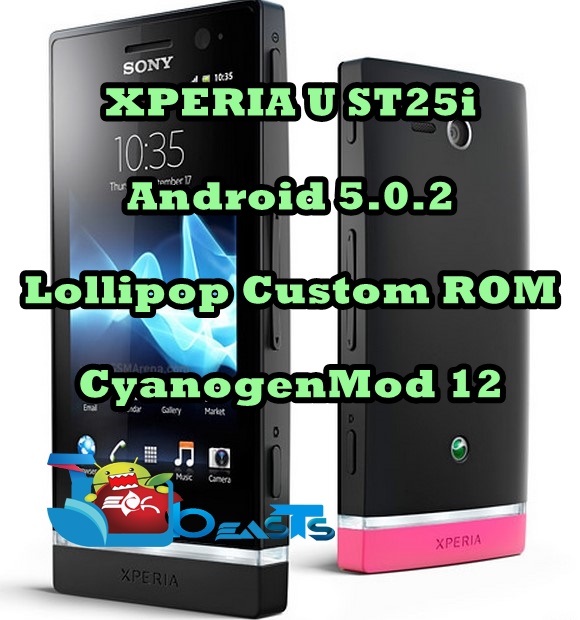
Update Xperia U ST25i to Android 5.0.2 Lollipop With CM 12 Custom ROM

6
Update Xperia U ST25i to Android 5.0.2 Lollipop With CM 12 Custom ROM

Previously we posted a guide to update Xperia U to Android 5.0.2 Lollipop using OmniROM custom ROM. In this guide, we bring the CyanogenMod 12 based custom ROM to update Xperia U to Android 5.0.2 Lollipop. There are lot differences between CyanogenMod and OmniROM and there is a big user fan base for both of these custom ROMs. Both of these custom ROMs are WIP and supported by developers. Both ROMs receive weekly updates. Users can try both ROMs and choose the best one for themselves. This CM 12 custom ROM is for Xperia U ST25i only. It should not be installed on any other smartphone or variant of Xperia U. It is based on stock Android, stock Android users will find it better for use. All the steps involved in installing this custom ROM on Xperia U are given below. Make sure that you follow every step to avoid any blockage during installation.

Requirements

  • Unlock Bootloader of Xperia U. If you do not know how to do it or you have no idea about what it is, then follow this guide to unlock Bootloader of your phone. How to Unlock Bootloader of Xperia Smartphones
  • Install USB Drivers for Xperia U using the drivers installer from the Flashtool installation folder. Download Flashtool from here. After installing USB Drivers, connect phone to PC using the USB cable so that USB drivers are installed properly and connection is established properly.
  • Install ADB and Fastboot Drivers. | Mac ADB And Fastboot Drivers. To avoid the lengthy installation, use the Minimal ADB and Fastboot tools for your PC to make the installation quick. ADB Drivers work best on Windows 7. ADB and Fastboot Drivers might not work on Windows 8 or Windows 8.1.
  • Charge your phone up to 50%. It is very important because phone should not turn off during flashing process. If the phone turns off during the flashing process, it can damage the device.
  • Make a backup of all Contacts and Messages on phone. – Guide
  • Backup SMS Messages
  • Backup Call Logs
  • Make a Nandroid Backup if any custom Recovery is installed already. If not, you will find a custom recovery later in this guide. – Guide
  • Copy all the media files and anything else stored in the internal memory to a PC before flashing to save this data.

Disclaimer

The methods involved in flashing custom recoveries, ROMs and rooting your phone are highly custom and may result in bricking your device, and has nothing to do with Google or the device manufacturer that is SONY in our case. Also rooting your device will void its warranty and you will be no longer eligible for any kind of free device services by the manufacturers/warranty providers. In case of any mishap we may not be held responsible. Follow these instructions to the letter to avoid any mishap or bricking. Make sure that whatever you do, you are doing it at your own responsibility.

Required Downloads

Steps to Install CM 12 on Xperia U ST25i

  1. Make sure that bootloader is unlocked and phone is charged to 50% at least.
  2. Extract boot.img from ROM zip.
  3. Copy ROM zip and Gapps zip to phone’s internal memory.
  4. Now turn off phone wait for 5 seconds.
  5. Hold volume up button and connect phone to PC.
  6. The LED should remain blue, which means that phone is in fastboot mode.
  7. Now copy boot.img to Fastboot folder or Minimal ADB and Fastboot installation folder.
  8. Open that folder, hold shift button on keyboard and right-click on mouse.
  9. Click on Open Command Window Here.
  10. Type fastboot devices and press Enter.
  11. It should only one fastboot connected device in return. If it showing more that one, then disconnect any other connected device or close any Android Emulator. Also make sure that PC Companion is completely disabled if installed.
  12. Now type fastboot flash boot boot.img and press Enter.
  13. Type fastboot reboot and press Enter.
  14. While phone is booting up, press Volume up/down/power to enter recovery mode.
  15. In the recovery mode, select Install and navigate to the folder where ROM zip is placed.
  16. Install the ROM zip.
  17. Install Gapps zip the same way and reboot the phone.
  18. Performing factory reset and wiping Dalvik cache after installing ROM is highly recommended!
  19. The phone will boot up to home screen in 5 minutes.
  20. To install Google Applications, copy downloaded Gapps zip file to phone and flash it the same way as ROM. Factory reset is not required this time.
  21. That’s all!

Got any question? Ask me in the comments below 🙂