Home Blog Page 377

Download Dubsmash For PC & MAC

0
Download Dubsmash For PC & MAC

Dubsmash is one of the most fun having application in the Google Play and Apple App Stores at the moment. The application allows people record videos while having some music played over it. Users can dub their voices over the played sound and then share the video with their friends or on social networks like Facebook. Dubsmash aims to provide the funniest way to communicate with your friends. The application has a list of categories form which you may choose your desired quote and then record a video over it. In the recent while, Dubsmash has become viral and the application has gained a lot of popularity in a very short span of time.

If you’re wishing to check out this application and have some fun, you will need an Android or Apple device. In case you don’t have access to these devices, you may want to checkout this application on your Windows PC or on your MAC. You must be wondering how you can use this application on a computer and that’s what we are here for right now. Installing Dubsmash for PC (Windows XP, Vista, 7, 8, 8.1 ) or MAC is pretty easy using an Android emulator. You can use this application flawlessly on your PC just as you would use on a smartphone. The method to install this app is quite simple. In the succeeding post we will go through different methods that will help you to install Dubsmash on your Windows PC or a MAC. Dubsmash

Dubsmash Description:

The funniest way to communicate
1. Choose a famous quote
2. Record a video on it
3. Send the dubbed video to your friends

How To Install Dubsmash For PC or MAC Using Blackstacks

Method 1:

  1. Install Bluestacks on your PC or MAC.
  2. Download Dubsmash 1.3.6 APK on your PC.
  3. Make sure that you have installed Bluestacks. Double click the downloaded Dubsmash APK to install it.
  4. The APK will be installed through Bluestacks, once the notification pop ups determining the installation completion, open Bluestacks.
  5. Now click on My Apps and then click on Dubsmash.
  6. The application will open up. Now follow on-screen instructions to use Dubsmash.

Method 2:

  1. Install Bluestacks on your PC or MAC.
  2. Open Bluestacks and setup your Google Play Store account.
  3. Now open Google Play Store and search for “Dubsmash”.
  4. Once found, install Dubsmash.
  5. Now click on My Apps and then click on Dubsmash.
  6. The application will open up. Now follow on-screen instructions to use Dubsmash.

How To Install Dubsmash For PC or MAC Using Andy OS

  1. Download and install Andy OS on your Windows PC or MAC.
  2. Once downloaded, open Andy OS.
  3. Setup Google Play Account on it.
  4. Now open Apps > Google Play Store and search for “Dubsmash”.
  5. Install Dubsmash and wait for it to finish installation.
  6. Once done, open “Uncategorized” portion in Andy and click on Dubsmash to use it.
  7. Follow on-screen instructions to record videos on Dubsmash now.
  8. That’s all.

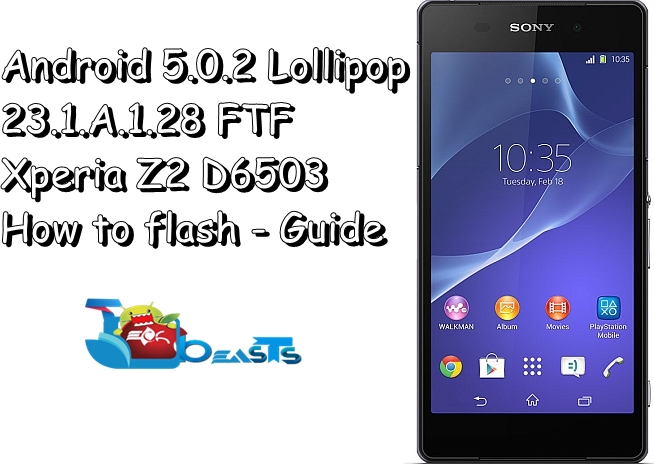
Update Xperia Z2 D6503 to Android Lollipop 23.1.A.1.28 Firmware

2
Update Xperia Z2 D6503 to Android Lollipop 23.1.A.1.28 Firmware

Xperia Z2 D6503 is receiving a new Android 5.0.2 Lollipop update. Sony is focusing on improving the Lollipop firmware for its mainstream devices, keeping the missing features and bugs in view, Sony has started rolling out this new update. The update carries the build number 23.1.A.1.28. The only change we can spot in this update is the addition of missing “Clear All” button and its right placement in the recent apps panel. The update has hit Nordic region and will be hitting other regions pretty soon. If you are anxious to update your device to this latest build right away, you may want to use some manual method. In the succeeding guide we will flash the new Android 5.0.2 Lollipop with the build number 23.1.A.1.28 on our beloved Sony Xperia Z2 D6503 using Sony Flashtool.

The firmware is official and flashing it involves no risks at all. To make sure that no mishap occurs, please follow this guide to the letter. Let’s go through some precautions and pre-requisites and then flash this latest firmware.


Early Preparations:

1. This is only for Sony Xperia Z2 D6503

This ROM is only for the device mentioned above. Make sure that your model number matches the one listed above. To do so, go to Settings > About Device on your device and see your model number. Flashing this firmware on any other device will result in bricking it so make sure that you meet this requirement first of all.

2. Battery should be charged at least over 60%.

Make sure that your battery is charged enough to complete the flashing process. In case your battery is low and your device goes dead during the flashing process, you may end up soft bricking your device as it won’t complete the flashing process.

3. Backup everything!

Just to be on the safe side, you may consider backing up each and everything from your Android device. This is highly recommended so that in case anything goes wrong, you still have the access to all of your data and you can restore it immediately. You may backup everything as listed below.

4. Enable USB Debugging Mode on your device.

Enable USB debugging mode on your device. To do so, tap settings>developer options>USB debugging. If you can’t find developer options in settings, then tap settings > about device and tap “Build Number” for 7 times and you’ll get em’ activated under settings.

5. Install and setup Sony Flashtool.

You must have installed Sony Flashtool. Find the full guide here.

After installing Sony Flashtool, open the Flashtool folder from the drive where you installed it. Now open Flashtool>Drivers>Flashtool-drivers.exe and install the Flashtool, Fastboot & Xperia Z2 D6503 drivers from the list. [Important]

6. Use OEM data cable to establish connection.

Make sure that you use the phone’s original data cable to establish connection between your phone and the PC. Using a different data cable might result in interrupting the firmware installation.

xperia_z2_front_side

Steps to Install  23.1.A.1.28 FTF on Xperia Z2 D6503

Before moving forward, please make sure that you’ve read the pre requisites and ensure that you are set to go ahead.

  1. Download the latest firmware Android 5.0.2 Lollipop  23.1.A.1.28 FTF file.
    1. D6503 23.1.A.1.28 FTF Download [Non Branded / Generic FTF]
  2. Copy the file and paste in Flashtool>Firmwares folder.
  3. Open Flashtool.exe now.
  4. Hit the small lightening button on the top left corner and select Flashmode.
  5. Select the FTF firmware file that you placed in the Firmware folder.
  6. From the right side, select what do you want to wipe. Data, cache and apps log, all wipes are recommended, perhaps you may select if you don’t want.
  7. Click on OK, and it will start preparing the firmware for flashing. This may take a little while to load.
  8. As soon as the firmware is loaded, it will prompt you to attach the phone by turning it off and keeping the back key press.
  9. For Xperia Z2 Volume Down key will do the job of back key, just turn off your phone, keep the Volume Down key pressed and plug in the data cable.
  10. As soon as the phone is detected in Flashmode, the firmware will start flashing, Do not leave the Volume Down key until the process is complete.
  11. As soon as you see “Flashing ended or Finished Flashing” leave the Volume Down key, plug the cable out and reboot.
  12. That’s All! Congrats! You’ve installed latest Android 5.0.2 Lollipop on your Xperia Z2. Enjoy!

Something went wrong? Don’t worry, reach us out through the comment box below and we will help you at our best. Thanks all!

Backup/Restore EFS/IMEI on Samsung Galaxy S6 & S6 Edge [how to]

17
Backup/Restore EFS/IMEI on Samsung Galaxy S6 & S6 Edge [how to]

Here’s How To Backup/Restore EFS/IMEI on Samsung Galaxy S6 & S6 Edge!

Galaxy S6 and S6 Edge are now accessible for users all across the globe. Samsung has learned a lot from its past mistakes. The result is pretty prominent in the form of the all-metal and the beautiful S6 & S6 Edge. Samsung once again has won all its lost respect and provided the users many reasons to buy a new Galaxy S6 or S6 Edge. Both of the devices come with great specifications on the board. Once you get your hands on this device, you will not be able to resist yourself from experimenting on this device and check out what your new Galaxy S6 and S6 Edge are capable of. As the device gets older, there will be loads of custom stuff available which will allow you to test different aspects of your device. This custom stuff includes custom ROMs, MODs, tweaks, custom recoveries, etc.

Manufacturers forbade their customers from loading custom stuff on their devices since it involves many complications and risks. But it really isn’t harmful if you have taken all the precautionary measures before flashing anything custom. One of the greatest risks involved in tweaking the Samsung Galaxy device is the corruption of EFS partition. EFS partition, which stands for Encryption File System includes all RADIOS, MAC addresses of your device including those of WiFi, Bluetooth. It also includes Network parameters and most importantly it contains the IMEI partition information of your device. You must have got an idea about the drawbacks of messing up this partition. Damaging the EFS partition will simply wipe up the communication capabilities of your device. Your device won’t be able to use the “Phone” feature anymore and it will result in showing “NULL IMEI” or simply “0000” as IMEI.

If you’re wondering how the EFS partition can get corrupt, this only happens because of flashing an invalid file. An invalid file that may contain invalid bootloader and modem. Also, attempting a firmware downgrade also causes the null IMEI issue. It is never recommended to flash an older firmware over a newly installed firmware. Backing up EFS partition will put you at ease. Even if you have caused the IMEI of your device to go null, simply restoring the EFS will bring the network capabilities of your device back.

The fear of EFS partition restricts many Samsung Galaxy owners from unleashing the power their device has got. But there is nothing to worry about if you do things in the right way. Backing up the EFS partition makes you safe and secure and all good to flash any custom ROM or MODs on your device. There’s a number of methods available for backing up and restoring EFS partition on your Samsung Galaxy devices. Some methods are device-specific while some work for many devices. The good news for Galaxy S6 and S6 Edge owners is, they can back up and restore the EFS partition of their device now using Wanam’s EFS Backup application. It won’t take more than a minute to back up the EFS partition and then you’re all set to roll in the open-source world of Android Lollipop. In case you are wondering how you will be able to use this application and backup the EFS partition of your S6 or S6 Edge, the following tutorial is going to help you.

e_1_edge_pc

Here are some pre-requisites and precautions.

How to Backup EFS/IMEI partition on Samsung Galaxy S6 or S6 Edge

  1. Make sure that you’ve rooted your device.
  2. Now download and install Wanam’s Partitions Backup application on your device.
  3. Open the application now and grant SuperSu rights.
  4. Now click the small tool settings button at the top besides the information button and select the format in which you want to backup the EFS partition. (select .tar and .img formats)
  5. Now from the partitions list select EFS and RADIO  partition.
  6. Now tap the small arrow in the circle at the lower right corner.
  7. It will prompt a confirmation message, tap BACKUP here.
  8. That’s all. You will have your EFS files in the “Partitions Backup” folder located in your internet storage.

How to Restore EFS/IMEI partition on Samsung Galaxy S6 or S6 Edge

  1. If you have accidentally corrupted your EFS partition, you can simply restore it using the same application.
  2. Make sure that you have already backed up the EFS partition in .img format.
  3. Now open the partitions backup application and tap the small options button at the top right corner.
  4. Select restore a partition, and then select your radio and efs.img files from the partitions backup folder inside your internal storage.
  5. Once you’ve selected the files, follow on-screen instructions to restore your lost IMEI.
  6. That’s all.

Screenshot_2015-05-05-00-24-22 Screenshot_2015-05-05-00-26-56Screenshot_2015-05-05-00-26-48

Q: How To Change IMEI Samsung S6 :

  1. Go to your settings in Samsung S6&S6 Edge and enable the USB debugging mode.
  2. Now Turn off your device.
  3. Connect your device with your PC.
  4. Download the EFS Restorer Express
  5. Open EFS restore express and run the EFS-BACK.BAT file.
  6. After that you have to choose the method to restore EFS via Odin.

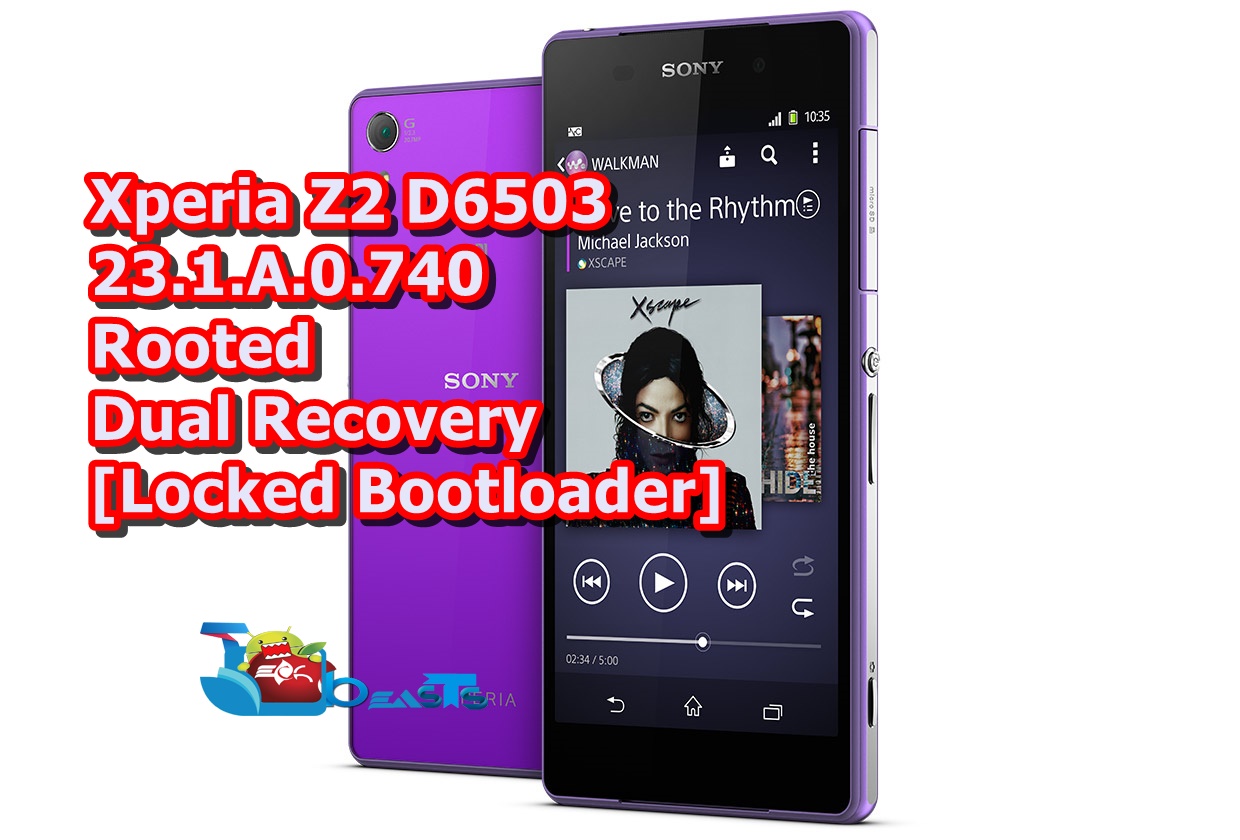
How To Root 23.1.A.0.740 5.0.2 LP on Xperia Z2 D6503

7
How To Root 23.1.A.0.740 5.0.2 LP on Xperia Z2 D6503

After in initial Lollipop release for the Xperia smartphones, many devices faced unexpected issues like battery drain, problems with headphones connectivity. Sony Xperia Z2 D6503 also faced some issues on Lollipop update. Therefore Sony has released an update for Xperia Z2 with build number 23.1.A.0.740. This is an update over the previous .726 firmware for Xperia Z2. Everyone is advised to update their devices even if they have not received the OTA update yet. You can update your device using this guide. After updating, root access is wiped. This guide explains how to regain root access on .740 firmware on Xperia Z2 D6503 after Lollipop update. The root access can be gained on locked bootloader so the warranty of device will not be void. The Sony exclusive functionalities like X-Reality and some camera features will keep working even after rooting. Every stock feature will remain undamaged and you will get to enjoy root access on your device.

The rooting guide for 23.1.A.0.74 D6503 Lollipop firmware consists of three main steps. The first steps requires users to downgrade their devices to an older firmware. Second step involves creating a pre-rooted flashable firmware of your own. The third step includes the updating and rooting of 23.1.A.0.74 firmware again. All of these steps are explained in detail in this article. Even if you have no technical knowledge, you will be able to root your phone using this guide flawlessly. Below are given some pre-cautions that must be followed by those who are rooting their device for the first time especially. We recommend that everyone must follow these precautionary steps to make sure that rooting process is safe and secure.

1. This is only for Sony Xperia Z2 D6503

This rooting method is only for the device mentioned above. Make sure that your model number matches the one listed above. To do so, go to Settings > About Device on your device and see your model number. Flashing this firmware on any other device will result in bricking it so make sure that you meet this requirement first of all.

2. Battery should be charged at least over 60%.

Make sure that your battery is charged enough to complete the flashing process. In case your battery is low and your device goes dead during the flashing process, you may end up soft bricking your device as it won’t complete the flashing process.

3. Backup everything!

Just to be on the safe side, you may consider backing up each and everything from your Android device. This is highly recommended so that in case anything goes wrong, you still have the access to all of your data and you can restore it immediately. You may backup everything as listed below.

  • Backup SMS Messages
  • Backup Call Logs
  • Backup Contacts
  • Backup Media – Copy your files manually to your PC or Laptop.
  • Titanium Backup – If already rooted, use Titanium Backup to backup all of your apps, system data and other important content. If you haven’t rooted your device previously, skip this step.
  • Backup Nandroid  If CWM  or TWRP installed previously, otherwise skip this step and perform this at the end of flashing.

4. Enable USB Debugging Mode on your device.

Enable USB debugging mode on your device. To do so, tap settings>developer options>USB debugging. If you can’t find developer options in settings, then tap settings > about device and tap “Build Number” for 7 times and you’ll get em’ activated under settings.

5. Install and setup Sony Flashtool.

You must have installed Sony Flashtool. Find the full guide here.

After installing Sony Flashtool, open the Flashtool folder from the drive where you installed it. Now open Flashtool>Drivers>Flashtool-drivers.exe and install the Flashtool, Fastboot & Xperia Z2 drivers from the list. If you do not find the Flashtool drivers in Flashmode, skip this step and install Sony PC Companion instead, for drivers support. [Important]

6. Use OEM data cable to establish connection.

Make sure that you use the phone’s original data cable to establish connection between your phone and the PC. Using a different data cable might result in interrupting the firmware installation.

7. Unlock Bootloader (Optional)

Use the following guide to unlock the bootloader of your Xperia device before proceeding.

Steps For Rooting Xperia Z2 D6503 23.1.A.0.740 Firmware

1. Downgrade to .167 Firmware and Root It

  1. If you have already updated your smartphone to Android 5.0.2 Lollipop, then you have to downgrade your device to KitKat OS and Root it.
  2. Use this guide to Install .167 firmware.
  3. Root using this guide.
  4. Now Install XZ Dual Recovery.
  5. Now phone is rooted, USB Debugging must be enabled.
  6. Download latest installer for Xperia Z2 from here. (Z2-lockeddualrecovery2.8.10-RELEASE.installer.zip)
  7. Connect phone to PC using OEM date cable and run install.bat.
  8. It will install the custom recovery.
  9. Now work here is done. Lets move on to next step.

2. Make A Pre-Rooted Flashable Firmware For .740 FTF

  1. Download PRF Creator and install on your system.
  2. Download SuperSU zip and place anywhere on PC.
  3. Download .740 FTF and place it anywhere on PC.
  4. Download Z2-lockeddualrecovery2.8.10-RELEASE.flashable.zip
  5. Now run PRFC and add all three required files in it.
  6. Then click on Create.
  7. Once the Flashable ROM is created, it will show the successful message.
  8. Do not touch any other option while creating the pre-rooted firmware.
  9. Now copy the pre-rooted firmware to the phone’s internal storage.
  10. Our work in this step is now done. Move on to next step.


3. Root and Install Recovery on Z2 D6503 5.0.2 Lollipop Firmware

  1. Custom recovery was installed in the first step.
  2. The pre-rooted firmware was created and copied to phone in next step.
  3. Now you have to turn off phone.
  4. Turn it on again and press volume up or down repeatedly to enter custom recovery.
  5. Click on install and locate the folder where you placed the flashable zip earlier.
  6. Tap on it and install it.
  7. Now reboot the phone.
  8. If phone is still connected to PC via USB cable, disconnect it.
  9. Now go back to the .740 ftf you downloaded in second step and copy it to /flashtool/fimrwares
  10. Open flashtool and click on lightning icon in the top left.
  11. Click on it and click on flashmode.
  12. Select the .740 firmware.
  13. In the right bar, in the exclude options, exclude System only while flashing. Leave every other options as it is.
  14. While flashtool prepares the software for flashing, turn off your phone.
  15. Keep the volume down button pressed and connect it to PC via USB cable.
  16. The button must be pressed during it.
  17. The phone will enter flashmode.
  18. Flashtool will automatically detect it and start flashing.
  19. After flashing phone will reboot and you will be done 🙂
  20. That’s all 🙂 Enjoy
  21. Now your phone has a dual custom recovery, root access and of course latest Android 5.0.2 Lollipop Firmware.

Got any questions? Ask me in the comments below

Update Xperia Z3 Compact D5803 to 23.1.A.0.740 Lollipop (.740 FTF)

1
Update Xperia Z3 Compact D5803 to 23.1.A.0.740 Lollipop (.740 FTF)


Recently, Sony has released another Android 5.0.2 Lollipop based firmware for Xperia Z3 Compact D5803, with model number 23.1.A.0.740. This is released after .726 firmware for Z3 Compact. The main reason for releasing this update is to remove the bugs that have been spotted in the initial Lollipop release for Xperia Z3 Compact. In this guide, you can download and install the 23.1.A.0.740 FTF on D5803. This is the official firmware for Xperia Z3C with all the latest features and fixes. Those who had issues with laggy UI or high battery drain, must install 23.1.A.0.740 ftf on D5803.

This guide explains all the steps involved in installing .740 FTF in Z3 Compact. This is basically a flashing process. Those who are afraid of it or those who think that this will void warranty, then should know that this is official release from Sony and non-customised FTF. It installs the official firmware with no changed in the firmware. This firmware is not rooted therefore you do not need to worry about voiding the warranty or losing TA Partition. Moreover, after flashing the firmware, phone will keep receiving the future OTA updates as well. Those who have rooted their phones, they will lose the root access after flashing the firmware. The rooting guide for .740 firmware will be provided as well. The rest of the necessary steps involved in installing 23.1.A.0.740 ftf on D5803 are explained below.

Early Preparations:

1. This is only for Sony Xperia Z3 Compact D5803

This ROM is only for the device mentioned above. Make sure that your model number matches the one listed above. To do so, go to Settings > About Device on your device and see your model number. Flashing this firmware on any other device will result in bricking it so make sure that you meet this requirement first of all.

2. Battery should be charged at least over 60%.

Make sure that your battery is charged enough to complete the flashing process. In case your battery is low and your device goes dead during the flashing process, you may end up soft bricking your device as it won’t complete the flashing process.

3. Backup everything!

Just to be on the safe side, you may consider backing up each and everything from your Android device. This is highly recommended so that in case anything goes wrong, you still have the access to all of your data and you can restore it immediately. You may backup everything as listed below.

  • Backup SMS Messages
  • Backup Call Logs
  • Backup Contacts
  • Backup Media – Copy your files manually to your PC or Laptop.
  • Titanium Backup – If already rooted, use Titanium Backup to backup all of your apps, system data and other important content. If you haven’t rooted your device previously, skip this step.
  • Backup Nandroid – If CWM  or TWRP installed previously, otherwise skip this step and perform this at the end of flashing.

4. Enable USB Debugging Mode on your device.

Enable USB debugging mode on your device. To do so, tap settings>developer options>USB debugging. If you can’t find developer options in settings, then tap settings > about device and tap “Build Number” for 7 times and you’ll get em’ activated under settings.

5. Install and setup Sony Flashtool.

You must have installed Sony Flashtool. Find the full guide here.

After installing Sony Flashtool, open the Flashtool folder from the drive where you installed it. Now open Flashtool>Drivers>Flashtool-drivers.exe and install the Flashtool, Fastboot & Xperia Z3 Compact drivers from the list. [Important]

6. Use OEM data cable to establish connection.

Make sure that you use the phone’s original data cable to establish connection between your phone and the PC. Using a different data cable might result in interrupting the firmware installation.

Steps to Install 23.1.A.0.740 FTF on Xperia Z3 Compact D5803 [.740 FTF Download]

Before moving forward, please make sure that you’ve read the pre requisites and ensure that you are set to go ahead.

  1. Download the latest firmware Android 5.0.2 Lollipop 23.1.A.0.740 FTF file.
    1. D5803 23.1.A.0.740 FTF Download
  2. Copy the file and paste in Flashtool>Firmwares folder.
  3. Open Flashtool.exe now.
  4. Hit the small lightening button on the top left corner and select Flashmode.
  5. Select the FTF firmware file that you placed in the Firmware folder.
  6. From the right side, select what do you want to wipe. Data, cache and apps log, all wipes are recommended, perhaps you may select if you don’t want.
  7. Click on OK, and it will start preparing the firmware for flashing. This may take a little while to load.
  8. As soon as the firmware is loaded, it will prompt you to attach the phone by turning it off and keeping the back key press.
  9. For Z3 Compact Volume Down key will do the job of back key, just turn off your phone, keep the Volume Down key pressed and plug in the data cable.
  10. As soon as the phone is detected in Flashmode, the firmware will start flashing, Do not leave the Volume Down key until the process is complete.
  11. As soon as you see “Flashing ended or Finished Flashing” leave the Volume Down key, plug the cable out and reboot.
  12. That’s All! Congrats! You’ve installed latest Android 5.0.2 Lollipop on your Xperia Z3 Compact. Enjoy.

Got any questions? Ask me in the comments below

How To Install 23.1.A.0.740 FTF Lollipop On Xperia Z2 D6503

0
How To Install 23.1.A.0.740 FTF Lollipop On Xperia Z2 D6503


Sony has released the 23.1.A.0.740 firmware for Xperia Z2 D6503. It is the latest firmware release for Xperia Z2 based on Android 5.0.2 Lollipop. People know that there have been other Lollipop releases for Xperia Z2 as well but this one is the latest. Sony has released 23.1.A.0.740 firmware for Xperia Z2 which contains several bugs found in the initial Lollipop firmware. Moreover, the .740 Lollipop update is even more stable and battery friendly than previous firmware. The older firmware had some bugs like the phone heated up sometimes and the phone would drain battery pretty fast. All of these issues are apparently resolved by Sony in 23.1.A.0.740 update for D6503. Those who faced these problems in .726 firmware for Xperia Z2, must update their devices.

This update will be released as an OTA update but there is not ETA for when your device will receive this update. To update D6503 to 23.1.A.0.740 ftf, download it from the links given below and install it on your phone using the Flashtool guide. Note that this is an official firmware therefore you do not need to worry about the warranty or TA Partition of device. Your phone will also keep receiving future OTA updates (If you haven’t unlocked bootloader already: Power Users). If phone is rooted, then root access will be wiped after flashing this firmware. The rooting guide for 23.1.A.0.740 firmware will be provided as well. This is a step by step guide so you do not need to have any technical knowledge beforehand.

Early Preparations:

1. This is only for Sony Xperia Z2 D6503

This ROM is only for the device mentioned above. Make sure that your model number matches the one listed above. To do so, go to Settings > About Device on your device and see your model number. Flashing this firmware on any other device will result in bricking it so make sure that you meet this requirement first of all.

2. Battery should be charged at least over 60%.

Make sure that your battery is charged enough to complete the flashing process. In case your battery is low and your device goes dead during the flashing process, you may end up soft bricking your device as it won’t complete the flashing process.

3. Backup everything!

Just to be on the safe side, you may consider backing up each and everything from your Android device. This is highly recommended so that in case anything goes wrong, you still have the access to all of your data and you can restore it immediately. You may backup everything as listed below.

  • Backup SMS Messages
  • Backup Call Logs
  • Backup Contacts
  • Backup Media – Copy your files manually to your PC or Laptop.
  • Titanium Backup – If already rooted, use Titanium Backup to backup all of your apps, system data and other important content. If you haven’t rooted your device previously, skip this step.
  • Backup Nandroid – If CWM  or TWRP installed previously, otherwise skip this step and perform this at the end of flashing.

4. Enable USB Debugging Mode on your device.

Enable USB debugging mode on your device. To do so, tap settings>developer options>USB debugging. If you can’t find developer options in settings, then tap settings > about device and tap “Build Number” for 7 times and you’ll get em’ activated under settings.

5. Install and setup Sony Flashtool.

You must have installed Sony Flashtool. Find the full guide here.

After installing Sony Flashtool, open the Flashtool folder from the drive where you installed it. Now open Flashtool>Drivers>Flashtool-drivers.exe and install the Flashtool, Fastboot & Xperia Z2 drivers from the list. [Important]

6. Use OEM data cable to establish connection.

Make sure that you use the phone’s original data cable to establish connection between your phone and the PC. Using a different data cable might result in interrupting the firmware installation.

Steps to Install 23.1.A.0.740 FTF on Xperia Z2 D6503

Before moving forward, please make sure that you’ve read the pre requisites and ensure that you are set to go ahead.

  1. Download the latest firmware Android 5.0.2 Lollipop 23.1.A.0.740 FTF file.
    1. D6503 23.1.A.0.740 FTF Download
  2. Copy the file and paste in Flashtool>Firmwares folder.
  3. Open Flashtool.exe now.
  4. Hit the small lightening button on the top left corner and select Flashmode.
  5. Select the FTF firmware file that you placed in the Firmware folder.
  6. From the right side, select what do you want to wipe. Data, cache and apps log, all wipes are recommended, perhaps you may select if you don’t want.
  7. Click on OK, and it will start preparing the firmware for flashing. This may take a little while to load.
  8. As soon as the firmware is loaded, it will prompt you to attach the phone by turning it off and keeping the back key press.
  9. For Z2 Volume Down key will do the job of back key, just turn off your phone, keep the Volume Down key pressed and plug in the data cable.
  10. As soon as the phone is detected in Flashmode, the firmware will start flashing, Do not leave the Volume Down key until the process is complete.
  11. As soon as you see “Flashing ended or Finished Flashing” leave the Volume Down key, plug the cable out and reboot.
  12. That’s All! Congrats! You’ve installed latest Android 5.0.2 Lollipop on your Xperia Z2. Enjoy.

Got any questions? Ask me in the comments below

Next: How To Root 23.1.A.0.740 5.0.2 LP on Xperia Z2 D6503

Install TWRP Recovery & Root Galaxy Tab S 10.5 Running Android Lollipop

Install TWRP Recovery & Root Galaxy Tab S 10.5 Running Android Lollipop

Galaxy Tab S 10.5 one of the lucky Sammy devices that received Android 5.0.2 Lollipop in the very early stages. The update made Galaxy Tab S 10.5 owners pretty happy as it gave them a whole new UI along with a lot of goodies. Samsung has managed to keep the Galaxy Tab S series at the top-of-the-line by updating it to the latest and greatest Android version. Android power users who have updated or who are going to update their device to Android Lollipop, they may want to root it in order to customise the device. Previous methods which helped users to root the device running KitKat may not work with Lollipop. You need a different method now. Before you start looking out for the method, we’ve found it already in order to save some time of yours. In the succeeding guide we will be installing TWRP Recovery 2.8.6.2 and we will also gain root access on our beloved Galaxy Tab S 10.5 on Lollipop.SMT800-White

If you have no idea about TWRP recovery and root access so far, let’s learn about both these things first. TWRP recovery is one of the famous custom recoveries out of the only two available for Android. TWRP will allow you to flash .zip files on your device. Basically it allows the users to load custom stuff on device which includes MODs, tweaks and most importantly custom ROMs. TWRP will also allow you to create and restore Nandroid Backup. You will be able to wipe system, data, cache and dalvik cache and a lot more using advanced options. Root access will allow you to install root specific applications and enhance your device performance, battery life and add new features to the software as well.

Let’s go ahead now and start with the process now. We will go through some quick early preparations and pre-cautions to make the method safe and secure.

Following are some precautions and early preparations.

  • This guide is only for Galaxy Tab S 10.5, the variants listed below.
    • Root & Install TWRP 3.0.x Recovery On Galaxy Tab S 10.5 SM-T800/SM-T805/SM-807 Running Android 5.0.2 Lollipop
  • Do not try this method on any other smart phone. Doing so will brick your device. Check your device’s model number in settings > system > about device.
  • Make sure that your phone is charged at least over 50%.
  • Use only original data cable to connect your phone to your PC.
  • Backup your important contacts, call logs, sms messages and media content. This is recommended in case something goes wrong, you will still have all of your data safe and secure.
  • While using Odin3, turn off Samsung KIES, any Antivirus or Firewalls if active.
  • Enable USB debugging on your device. To do so, you need to enable developer options first by going to settings > system > about device > tap build number for 7 times. Once you’ve the developer options enabled under settings > system > developer options > enable USB debugging.

Disclaimer: The methods involved in flashing custom recoveries, roms and rooting your phone are highly custom and may result in bricking your device, and has nothing to do with Google or the device manufacturer that is SAMSUNG in our case. Also rooting your device will void its warranty and you will be no longer eligible for any kind of free device services by the manufacturers/warranty providers. In case of any mishap we may not be held responsible. Follow these instructions to the letter to avoid any mishap or bricking. Make sure that whatever you do, you are doing it at your own responsibility.

Required Downloads & Installations

How To Root & Install TWRP Recovery On Galaxy Tab S 10.5 Running Android Lollipop

  1. Put your Galaxy Tab S 10.5 in download mode. To do so, turn it off completely. Now turn it on by pressing and holding Volume Down + Home + Power Key. Once it boots up and shows warning, press Volume Up to continue.
  2. Now open Odin3 v3.10.6.exe file on your PC.
  3. Click on “AP” tab in Odin and select the TWRP.tar file that you downloaded above.
  4. Let Odin load the file and connect your phone to your PC in the meanwhile.
  5. If Aut0-reboot option is unticked in your Odin, tick it. Leave all other options untouched.Odin 3.10.6 Explained_Techbeasts
  6. As soon as Odin has detected your phone in download mode, the “ID:COM” box on the top-right corner will turn blue.
  7. Now click on the Start button. Odin will start flashing the twrp file.
  8. As soon as the flashing ends, your phone will reboot.
  9. Now reboot your phone into the TWRP Recovery mode.
  10. In TWRP Recovery, tap Install > Install Zip > Locate Zip at the bottom of the list > Swipe finger to flash. This will flash SuperSu in your tab. Once done, reboot into system.
  11. Once your tab has booted up, check out the SuperSu application in the app drawer. If it asks you to update SU binary, update it.
  12.  Also install BusyBox from Play Store.
  13. Verify root access using Root Checker.
  14. That’s all. You’re now set to unleash the open source nature of Android.

Just in case you’re facing any difficulties following this procedure or you’re stuck with something, feel free to reach me out in the comment box below. Thank you.

Credit:  ashyx

Root & Install TWRP Recovery On Galaxy Tab S 8.4 Running Android Lollipop

Root & Install TWRP Recovery On Galaxy Tab S 8.4 Running Android Lollipop

Galaxy Tab S 8.4 has started receiving the Android 5.0.2 Lollipop update. New update has brought a lot of changes go the device.  Android 5.0.2 Lollipop has a completely new UI, new features include notifications on lock-screen, multi-user and guest modes and etc. It also turned out to be the biggest update in the history of Android yet. Keeping in view the changes and goodies in this new firmware, Galaxy Tab S 8.4 users won’t be able to resist themselves from updating their device to the all new Android 5.0.2 Lollipop. If you’re planning to update your device and you want to check out what your device is capable of running this latest and greatest Android version, you will need to gain the root access.

Rooting your device will allow you to bring all the root-required applications on it. You will be able to modify your device, apply different tweaks and enhance its performance to a greater extent. Rooting is recommended for Android power users, if you’re a novice user, you may proceed if you’re confident about it, otherwise you may not root your device.  The methods to root Galaxy Tab S 8.4 SM-T700, T705 & T707 are available now. If you’ve already updated your device and now you need to root it now, you may follow this guide to the letter. We are about to root and install TWRP 2.8.6.2 recovery our beloved Galaxy Tab S T700, T705 & T707 running official Android 5.0.2 Lollipop. We will use Odin3 to flash the file that contains both, root and recovery for Galaxy Tab S 8.4. We will go through some precautions and early preparations to make the method safe and secure. Let’s move forwards now.SMT700-White

Following are some precautions and early preparations.

  • This guide is only for Galaxy Tab S 8.4, the variants listed below.
    • Root & Install TWRP 2.8.6.2 Recovery On Galaxy Tab S 8.4 SM-T700/SM-T705/SM-707 Running Android 5.0.2 Lollipop
  • Do not try this method on any other smart phone. Doing so will brick your device. Check your device’s model number in settings > system > about device.
  • Make sure that your phone is charged at least over 50%.
  • Use only original data cable to connect your phone to your PC.
  • Backup your important contacts, call logs, sms messages and media content. This is recommended in case something goes wrong, you will still have all of your data safe and secure.
  • While using Odin3, turn off Samsung KIES, any Antivirus or Firewalls if active.
  • Enable USB debugging on your device. To do so, you need to enable developer options first by going to settings > system > about device > tap build number for 7 times. Once you’ve the developer options enabled under settings > system > developer options > enable USB debugging.

Disclaimer: The methods involved in flashing custom recoveries, roms and rooting your phone are highly custom and may result in bricking your device, and has nothing to do with Google or the device manufacturer that is SAMSUNG in our case. Also rooting your device will void its warranty and you will be no longer eligible for any kind of free device services by the manufacturers/warranty providers. In case of any mishap we may not be held responsible. Follow these instructions to the letter to avoid any mishap or bricking. Make sure that whatever you do, you are doing it at your own responsibility.

Required Downloads & Installations

How To Root & Install TWRP Recovery On Galaxy Tab S 8.4 Running Android Lollipop

  1. Put your Galaxy Tab S 8.4 in download mode. To do so, turn it off completely. Now turn it on by pressing and holding Volume Down + Home + Power Key. Once it boots up and shows warning, press Volume Up to continue.
  2. Now open Odin3 v3.10.6.exe file on your PC.
  3. Click on “AP” tab in Odin and select the CF-Autoroot.tar file that you got after downloaded.
  4. Let Odin load the file and connect your phone to your PC in the meanwhile.
  5. If Auto-reboot option is unticked in your Odin, tick it. Leave all other options untouched.Odin 3.10.6 Explained_Techbeasts
  6. As soon as Odin has detected your phone in download mode, the “ID:COM” box on the top-right corner will turn blue.
  7. Now click on the Start button. Odin will start flashing the Auto-Root file.
  8. As soon as the flashing ends, your phone will reboot.
  9. Once it has booted up, check out the SuperSu application in the app drawer. If it asks you to update SU binary, update it.
  10.  Also install BusyBox from Play Store.
  11. Verify root access using Root Checker.
  12. That’s all. You’re now set to unleash the open source nature of Android.

Just in case you’re facing any difficulties following this procedure or you’re stuck with something, feel free to reach me out in the comment box below. Thank you.

Credit:  ashyx

Root Galaxy A3 Running Android Lollipop

Root Galaxy A3 Running Android Lollipop

Galaxy A3 has started receiving the Android 5.0.2 Lollipop. Android power users, who have already updated their device to this latest update, they might be missing the root access on their device. To unleash the true power of Lollipop on your device, you will need to gain the root access if its wiped or in case you haven’t rooted your device yet at all. Samsung has made a lot of changes in the new firmware, old rooting methods may not work and you need to find a working one. To save some time of yours, we’ve already found a working method. You need to follow this guide to the letter in order to gain root access on your Samsung Galaxy A3 running Android 5.0.2 Lollipop.

531063.samsung-a300f-galaxy-a3

Following are some precautions and early preparations.

  • This guide is only for Galaxy A3, the variants listed below.
    • Galaxy A3 A300F – Android 5.0.2 Lollipop already available for this device.
    • Galaxy A3 A300H – yet to receive the update.
    • Galaxy A3 A300M – yet to receive the update.
    • Galaxy A3 A300Y – yet to receive the update.
    • Galaxy A3 A3000 – yet to receive the update.
    • Galaxy A3 A3009 – yet to receive the update.
  • Do not try this method on any other smart phone. Doing so will brick your device. Check your device’s model number in settings > system > about device.
  • Make sure that your phone is charged at least over 50%.
  • Use only original data cable to connect your phone to your PC.
  • Backup your important contacts, call logs, sms messages and media content. This is recommended in case something goes wrong, you will still have all of your data safe and secure.
  • While using Odin3, turn off Samsung KIES, any Antivirus or Firewalls if active.
  • Enable USB debugging on your device. To do so, you need to enable developer options first by going to settings > system > about device > tap build number for 7 times. Once you’ve the developer options enabled under settings > system > developer options > enable USB debugging.

Disclaimer: The methods involved in flashing custom recoveries, roms and rooting your phone are highly custom and may result in bricking your device, and has nothing to do with Google or the device manufacturer that is SAMSUNG in our case. Also rooting your device will void its warranty and you will be no longer eligible for any kind of free device services by the manufacturers/warranty providers. In case of any mishap we may not be held responsible. Follow these instructions to the letter to avoid any mishap or bricking. Make sure that whatever you do, you are doing it at your own responsibility.

***We have removed the method as rooting Galaxy A3 was resulting in bricking it. We will add a new method as soon as we come across something safe and secure. Thank you.***


How to easily clear the cache on the Samsung Galaxy S6 and Galaxy 6 Edge

How to easily clear the cache on the Samsung Galaxy S6 and Galaxy 6 Edge

Here’s how to clear cache on the Samsung Galaxy S6 and S6 Edge, clearing cache on any smartphone came handy in many ways. Not every one of us know how to clear cache on Samsung devices, today i’ll give you a walk through on clearing cache on Samsung Galaxy S6 and S6 Edge. In the following guide i’ll tell you how to clear apps cache and device cache.

There is no need for root or using any third party apps, although there are some pretty good apps to use but let’s not go there, please follow all the steps carefully in order to clear cache on Samsung Galaxy S6 and S6 Edge.

Samsung Galaxy S6 Edge

How to easily clear the cache on the Samsung Galaxy S6 and Galaxy 6 Edge:

Step#1: First Goto your app drawer on your device.

Step#2: Now tap on Settings icon.

Step#3: In Settings menu scroll down and tap on Application Manager.

Step#4: Now here you’ll see the list of all Apps on your device.

Step#5: To clear a single app cache tap on the app form the list.

Step#6: Now Tap on Clear Cache.

Step#7: If you want to clear all the apps cache and data. Then goto Storage from the settings menu.

Step#8: Tap on Cached Data.

Step#9: Tap Ok to clear all the cached data.

All Done !!

How to wipe the system cache on the Galaxy S6 and S6 Edge:

Step#1: Turn off your Samsung Galaxy S6.

Step#2: Now press and hold Power, Volume Up and the Home button together.

Step#3: When you see blue screen with Android logo release the buttons.

Step#4: You’ll be in recovery mode now, use volume buttons to scroll and highlight the Wipe Cache Partition, Press power button to confirm it.

Step#5: It will take few seconds to complete the process.

Step#6: Once the process is completed, Reboot your device.

All Done !

How To Update Galaxy Tab S 10.5 To Official Android Lollipop

14
How To Update Galaxy Tab S 10.5 To Official Android Lollipop

Official Android 5.0.2 Lollipop is now available for several variants of Galaxy Tab S 10.5. If you own this device and you haven’t already received the new update through OTA or through Samsung Kies, you may want to update your device manually. If you’re looking for such method, you’ve already spotted the right place. In the following post we are going to update all variants of the Galaxy Tab S 10.5 to Android 5.0.2 Lollipop official firmware. This guide will work for both, WiFi only and LTE variants of this device. Let’s go through some quick early preparations and then flash the firmware right away. Samsung-Galaxy-Tab-S-10.5-2a

Early Preparations & Precautions

  • This guide is only for the Galaxy Tab S 10.5. Do not try this on any other device. Make sure that you check your device’s model number in settings > system > about device. Following variants are compatible
    • SM-T800 (GALAXY TAB S 10.5 LTE)
    • SM-T805 (GALAXY TAB S 10.5 LTE)
    • SM-T805C (GALAXY TAB S 10.5 LTE)
    • SM-T805M (GALAXY TAB S 10.5 LTE)
    • SM-T805W (GALAXY TAB S 10.5 LTE)
    • SM-T805Y (GALAXY TAB S 10.5 LTE)
  • Make sure that your batter has 50% of its battery. This is recommended in order to avoid any power issues during the installation process.
  • Enable USB debugging on your device. To do so, you need to enable developer options first by going to settings > system > about device > tap build number for 7 times. Once you’ve the developer options enabled under settings > system > developer options > enable USB debugging.
  • Backup all of your important stuff. This includes contacts, call logs, text messages and your important media content. This is important since you need to wipe your phone to achieve a neat and clean installation.
  • Make sure that you’ve backed up your EFS partition [Strongly recommended].
  • If your device has a custom recovery installed previously, you may create a Nandroid backup. Otherwise, skip this step.
  • Factory reset your phone by booting into recovery mode. To do so, turn off your phone completely. Now turn it on by pressing and holding Volume Up + Home + Power Key. Once you’re in recovery mode, wipe factory data.
  • While using Odin3, turn off Samsung Kies if you’ve installed it. Also turn off your Firewall or any Antivirus software if enabled.
  • Use original data cable to establish connection between your device and your PC.
  • This is official firmware and it won’t void the warranty of your phone. It will not cause any damage to your phone either.
  • Follow these instructions to the letter to make it happen successfully.

Required Downloads

  1. Download & Install Samsung USB drivers. MAC users do not need to install drivers or Samsung Kies.
  2. Download & extract Odin3 v3.10.6. MAC users may use JOdin.
  3. Download & extract firmware for your device.

How To Update Galaxy Tab S 10.5 To Android 5.0.2 Lollipop Official Firmware

  1. Make sure that you’ve carefully prepared according to the instructions listed above. Also make sure that you’ve made the necessary downloads and installs as explained.
  2. Open Odin3 V3.10.6.exe on your PC. MAC users will use JOdin.
  3. Connect your phone to your PC or MAC in download mode now. To do so, turn off your phone completely first. Now turn it on by pressing and holding Volume Down + Home + Power Key. Once your phone turns on and shows you warning, press Volume Up to continue. You are in download mode now. Plug in the data-cable now. As soon as Odin3 detects your phone, the ID:COM bar in the top-right corner should turn blue or yellow depending upon your version of Odin.
  4. Load the downloaded and extracted firmware file, which should be in .tar format. To do so, click the “AP” tab and locate the extracted .tar firmware file. If you’re using an older version of Odin, you will use “PDA” tab to load the firmware file. Once you’ve selected the file, it will take a while for Odin to load it. Wait patiently at this point.
  5. If the Auto-reboot option is un-ticked, tick  it. Leave all other options as it is. The picture below can explain you further.Odin 3.10.6 Explained_Techbeasts
  6. Once you’re done with it according to the steps explained above, you’re set to flash the firmware now. Simply click the “Start” button now.
  7. This will start flashing the firmware on your device. It will take a few minutes for Odin to complete installation. Once the installation is finished, Odin will show “Finished” status in the installation box, the ID:COM bar will turn green now. Your device will reboot automatically if you ticked the Auto-reboot option before the installation. Disconnect your device now.
  8. If your device doesn’t reboot automatically, you may reboot it manually now. To do so, disconnect it from your PC and keep the power key pressed for a while and your device will turn off. Now turn it on by pressing power key only.
  9. For the first boot it may take up to 10 minutes, so hold on tighter. Once your device boots up, set it up and enjoy the all new Android 5.0.2 Lollipop on it. That’s all 🙂

If you’re stuck with anything or facing any issues, make sure that you reach us out through the comment box below. We’d love to help you out. Thank you 🙂

Install Android 5.0.2 Lollipop On Galaxy Tab S 8.4 T700

0
Install Android 5.0.2 Lollipop On Galaxy Tab S 8.4 T700

WiFi variant of the Galaxy Tab S, SM-T700 started receiving the Android 5.0.2 Lollipop update a few days back.The new update brings a lot of changes to the device including a new UI, new notifications on lock screen, multi-user and guest modes. Android 5.0.2 Lollipop is is the biggest update in the history of Android yet, so many of the users will be pretty anxious to get this update running on their device. At the time of writing this post, the Android 5.0.2 Lollipop update for the Tab S 8.4 SM-T700 has hit only two regions. That means it’s going to take while to reach your region. If you can’t wait for the OTA or Samsung KIES to bring this update to you, you may want to do this using an alternative method. To save your time finding the method, we’ve written down this guide.

As you move forward, you will come across a comprehensive method that will help you to update your Galaxy Tab S 8.4 SM-T700 to Android 5.0.2 Lollipop firmware using Samsung’s flashtool Odin3. Let’s go through some early preparations and precautions and then begin with the procedure. 613201494231AM_635_samsung_galaxy_tab_s_8_4

Early Preparations & Precautions

  • This guide is only for the Galaxy Tab S 8.4 T700. Do not try this on any other device. Make sure that you check your device’s model number in settings > system > about device.
  • Make sure that your batter has 50% of its battery. This is recommended in order to avoid any power issues during the installation process.
  • Enable USB debugging on your device. To do so, you need to enable developer options first by going to settings > system > about device > tap build number for 7 times. Once you’ve the developer options enabled under settings > system > developer options > enable USB debugging.
  • Backup all of your important stuff. This includes contacts, call logs, text messages and your important media content. This is important since you need to wipe your phone to achieve a neat and clean installation.
  • Make sure that you’ve backed up your EFS partition [Strongly recommended].
  • If your device has a custom recovery installed previously, you may create a Nandroid backup. Otherwise, skip this step.
  • Factory reset your phone by booting into recovery mode. To do so, turn off your phone completely. Now turn it on by pressing and holding Volume Up + Home + Power Key. Once you’re in recovery mode, wipe factory data.
  • While using Odin3, turn off Samsung Kies if you’ve installed it. Also turn off your Firewall or any Antivirus software if enabled.
  • Use original data cable to establish connection between your device and your PC.
  • This is official firmware and it won’t void the warranty of your phone. It will not cause any damage to your phone either.
  • Follow these instructions to the letter to make it happen successfully.

Required Downloads

  1. Download & Install Samsung USB drivers. MAC users do not need to install drivers or Samsung Kies.
  2. Download & extract Odin3 v3.10.6. MAC users may use JOdin.
  3. Download & extract firmware for your device.

Firmware Details

  • Model: SM-T700
  • Version: Android 5.0.2 Lollipop
  • Build date: 9/04/2015
  • Code: TPA
  • PDA: T700XXU1BOD5
  • CSC: T700UVS1BOD5

How To Update Galaxy Tab S 8.4 T700 To Android 5.0.2 Lollipop Official Firmware

  1. Make sure that you’ve carefully prepared according to the instructions listed above. Also make sure that you’ve made the necessary downloads and installs as explained.
  2. Open Odin3 V3.10.6.exe on your PC. MAC users will use JOdin.
  3. Connect your phone to your PC or MAC in download mode now. To do so, turn off your phone completely first. Now turn it on by pressing and holding Volume Down + Home + Power Key. Once your phone turns on and shows you warning, press Volume Up to continue. You are in download mode now. Plug in the data-cable now. As soon as Odin3 detects your phone, the ID:COM bar in the top-right corner should turn blue or yellow depending upon your version of Odin.
  4. Load the downloaded and extracted firmware file, which should be in .tar format. To do so, click the “AP” tab and locate the extracted .tar firmware file. If you’re using an older version of Odin, you will use “PDA” tab to load the firmware file. Once you’ve selected the file, it will take a while for Odin to load it. Wait patiently at this point.
  5. If the Auto-reboot option is un-ticked, tick  it. Leave all other options as it is. The picture below can explain you further.Odin 3.10.6 Explained_Techbeasts
  6. Once you’re done with it according to the steps explained above, you’re set to flash the firmware now. Simply click the “Start” button now.
  7. This will start flashing the firmware on your device. It will take a few minutes for Odin to complete installation. Once the installation is finished, Odin will show “Finished” status in the installation box, the ID:COM bar will turn green now. Your device will reboot automatically if you ticked the Auto-reboot option before the installation. Disconnect your device now.
  8. If your device doesn’t reboot automatically, you may reboot it manually now. To do so, disconnect it from your PC and keep the power key pressed for a while and your device will turn off. Now turn it on by pressing power key only.
  9. For the first boot it may take up to 10 minutes, so hold on tighter. Once your device boots up, set it up and enjoy the all new Android 5.0.2 Lollipop on it. That’s all 🙂

If you’re stuck with anything or facing any issues, make sure that you reach us out through the comment box below. We’d love to help you out. Thank you 🙂