Home Blog Page 371

Get Free Windows 10 Upgrade Without Windows 8 Or 7 [ How To ]

0
Get Free Windows 10 Upgrade Without Windows 8 Or 7 [ How To ]

Windows users have been looking forward to the Windows update. Good news is that the new update of Windows is coming out on July 29th. Windows 8 and Windows 7 users can get Windows 10 for free. However, anyone of you who does not have Windows 8 and Windows 7 will have to spend as much as $199 to get hold of the new Windows 10. Getting Windows 10 for that much amount sounds a little obscene. Here is the catch; you can save your $199 and get a copy of Windows 10 instead. Here I will be explaining the method on how to get Windows 10 for Free irrelevant of what version of Windows you are currently using at the moment.

Windows-10-upgrade

Upgrading to Windows 10 means that you will be able to get a complete and genuine product that will be for life. You will get the product for life and will be able to receive updates efficiently with no activation problems. These are reasons enough to make you want to get the new Windows 10 even if you are not using Windows 8 or 7.

Here is the guide on how to get Windows 10.

  • Firstly, you need to register at Windows 10 Insider Preview Program.
  • Download Windows 10 Technical Preview.
  • Next, make sure you have been updated to latest build 10130 or later of Windows 10 Insider Preview.
  • Now, Run your PC using Windows 10 build 10130 or later with Microsoft Account.

That’s all. Now you will be able to receive real time updates with no issues as well as you will get Windows 10 as soon as it gets released for public. You are advised to get your Windows 10 Insider Preview now as its window for downloading is set to limited.

How To Install Official Android 5.1.1 Lollipop On T-Mobile Galaxy S6, S6 Edge

0
How To Install Official Android 5.1.1 Lollipop On T-Mobile Galaxy S6, S6 Edge

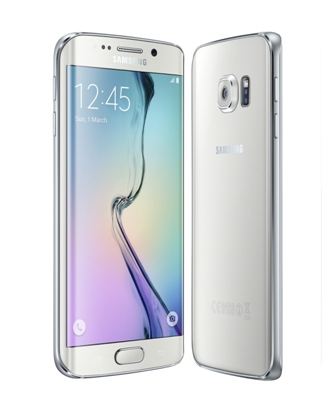
T-Mobile released the official Android 5.1.1 Lollipop update for the Galaxy S6 Edge 2 days ago. this happens to be the very first Samsung device and the very first carrier to update their device to the latest iteration of Android. Android 5.1.1 brings some minor changes. The changes at the top of the list include parallex wallpaper effect, option to remove the S Finder and Quick Connect from notification bar, simplified exposure control system. Performance of the device has also seen a boost.

This update is rolling out to the users through OTA or through Samsung Kies. If you haven’t received it yet, you may want to flash it manually. Manual update can be done using Odin3. In the following guide we will be explaining how you can update your T-Mobile Galaxy S6 or Galaxy S6 Edge to Android 5.1.1 Lollipop using Odin3. Let’s go ahead and flash it now.

Here are some early preparations:

  • This guide is only for the T-Mobile Galaxy S6 G920T & S6 Edge G925T. Do not try this on any other device. Make sure that you check your device’s model number in settings > system > about device.
  • Make sure that your batter has 50% of its battery. This is recommended in order to avoid any power issues during the installation process.
  • Enable USB debugging on your device. To do so, you need to enable developer options first by going to settings > system > about device > tap build number for 7 times. Once you’ve the developer options enabled under settings > system > developer options > enable USB debugging.
  • Backup all of your important stuff. This includes contacts, call logs, text messages and your important media content. This is important since you need to wipe your phone to achieve a neat and clean installation.
  • Make sure that you’ve backed up your EFS partition [Strongly recommended].
  • If your device has a custom recovery installed previously, you may create a Nandroid backup. Otherwise, skip this step.
  • Factory reset your phone by booting into recovery mode. To do so, turn off your phone completely. Now turn it on by pressing and holding Volume Up + Home + Power Key. Once you’re in recovery mode, wipe factory data.
  • While using Odin3, turn off Samsung Kies if you’ve installed it. Also turn off your Firewall or any Antivirus software if enabled.
  • Use original data cable to establish connection between your device and your PC.
  • This is official firmware and it won’t void the warranty of your phone. It will not cause any damage to your phone either.
  • Follow these instructions to the letter to make it happen successfully.

Required Downloads

  1. Download & Install Samsung USB drivers. MAC users do not need to install drivers or Samsung Kies.
  2. Download & extract Odin3 v3.10.6. MAC users may use JOdin.
  3. Download & extract firmware for your device.

How To Install Official Android 5.1.1 Lollipop On T-Mobile Galaxy S6, S6 Edge

  1. Make sure that you’ve carefully prepared according to the instructions listed above. Also make sure that you’ve made the necessary downloads and installs as explained.
  2. Open Odin3 V3.10.6.exe on your PC. MAC users will use JOdin.
  3. Connect your phone to your PC or MAC in download mode now. To do so, turn off your phone completely first. Now turn it on by pressing and holding Volume Down + Home + Power Key. Once your phone turns on and shows you warning, press Volume Up to continue. You are in download mode now. Plug in the data-cable now. As soon as Odin3 detects your phone, the ID:COM bar in the top-right corner should turn blue or yellow depending upon your version of Odin.
  4. Load the downloaded and extracted firmware file, which should be in .tar format. To do so, click the “AP” tab and locate the extracted .tar firmware file. If you’re using an older version of Odin, you will use “PDA” tab to load the firmware file. Once you’ve selected the file, it will take a while for Odin to load it. Wait patiently at this point.
  5. If the Auto-reboot option is un-ticked, tick  it. Leave all other options as it is. The picture below can explain you further.Odin 3.10.6 Explained_Techbeasts
  6. Once you’re done with it according to the steps explained above, you’re set to flash the firmware now. Simply click the “Start” button now.
  7. This will start flashing the firmware on your device. It will take a few minutes for Odin to complete installation. Once the installation is finished, Odin will show “Finished” status in the installation box, the ID:COM bar will turn green now. Your device will reboot automatically if you ticked the Auto-reboot option before the installation. Disconnect your device now.
  8. If your device doesn’t reboot automatically, you may reboot it manually now. To do so, disconnect it from your PC and keep the power key pressed for a while and your device will turn off. Now turn it on by pressing power key only.
  9. For the first boot it may take up to 10 minutes, so hold on tighter. Once your device boots up, set it up and enjoy the all new Android 5.1.1 Lollipop on it. That’s all 🙂

If you’re stuck with anything or facing any issues, make sure that you reach us out through the comment box below. We’d love to help you out. Thank you 🙂

PicMix for Pc Download – ( Windows 8,8.1,7-Mac )

0
PicMix for Pc Download – ( Windows 8,8.1,7-Mac )

If you love to edit your photos on your mobile devices then i am sure you have used Pic Mix the famous social photo sharing and editing application. PicMix gives you many options to make your photos looks more professional and also you can make collage using PicMix. Now What if you can use PicMix on Pc and edit your photos on Pc, sounds fun ! Today i’ll guide you how to install PicMix for Pc using third party emulators like BlueStacks and Andy. Before going any further let me tell you the main features of PicMix for Pc.

PicMix for Pc.

PicMix Main Features:

• PHOTO CONTEST: Join regularly held photo contest! your selfie or your style can win you lots of actual prizes, from smartphones to concert ticket! the ONLY apps with photo contest that gives you real prizes!

• VISUAL TAGGING!: TAG what matters in your photo! TAG your friends, TAG your favorite brands, TAG your fashion, TAG your mood, TAG your pets, TAG your new hair, TAG everything! and find out what TAG is trending

• 30+ Photo Effects: enhance your photos with our selection of photo effects, each will bring different mood and feels.

• Photo Collage: combine two or thirty photos in one collaged frame! imagine your #30dayselfie into one image! or show your three different pose in one image!

• Photo Frame: hundreds of fancy and uniquely designed frame to choose for every ocassion, love frame for valentine, scary frame for halloween, magazine frame, branded frame and many others! new frames added regularly from our lovely design team

• Custom Collage Frame: no more boring regular collage photos, create your very own frame! simply drag the border between the frame to adjust it the way you like

• Cute Stickers: add stickers to make your photo even cuter! sunglasses, bunny head, popping eyes, funny characters, and etc

• BE FAMOUS: make the best photo, get featured in POPULAR section, instantly get hundreds and thousands follower and be FAMOUS

• Social: share your photo to Path, Facebook, Twitter, Instagram and KakaoTalk

• PicMix Mall: get the latest heavy discount on favorite item from various online stores

How To Install PicMix For PC or MAC Using Blackstacks

Method 1:

  1. Install Bluestacks on your PC or MAC.
  2. Download PicMix Apk on your PC.
  3. Make sure that you have installed Bluestacks. Double click the downloaded PicMix apk to install it.
  4. The APK will be installed through Bluestacks, once the notification pop ups determining the installation completion, open Bluestacks.
  5. Now click on My Apps and then click on PicMix.
  6. The application will open up. Now follow on-screen instructions to use PicMix.

Method 2:

  1. Install Bluestacks on your PC or MAC.
  2. Open Bluestacks and setup your Google Play Store account.
  3. Now open Google Play Store and search for “PicMix“.
  4. Once found, install PicMix.
  5. Now click on My Apps and then click on PicMix.
  6. The game will open up. Now follow on-screen instructions to use PicMix.

How To Install PicMix For PC or MAC Using Andy OS

  1. Download and install Andy OS on your Windows PC or MAC.
  2. Once downloaded, open Andy OS.
  3. Setup Google Play Account on it.
  4. Now open Apps > Google Play Store and search for “PicMix“.
  5. Install PicMix and wait for it to finish installation.
  6. Once done, open “Uncategorized” portion in Andy and click on PicMix to use it.
  7. That’s all.

InsText -Textgram for Pc ( Windows 8,8.1,7 – Mac )

0
InsText -Textgram for Pc ( Windows 8,8.1,7 – Mac )

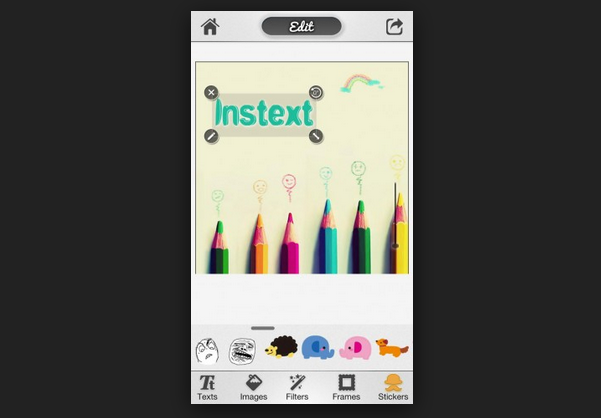
Here’s how you can download and install InsText -Textgram for PC and play it on Windows 7,8,8.1/Mac. InsText -Textgram lets you add text on photos and you can easily share it on social networks.Today i will tell you how you can play and install InsText -Textgram for PC Windows and Mac. Officially InsText -Textgram for PC is not available, but we can still install Android Apps for PC using third party emulators. Before going any further let me give you an overview on the features of InsText -Textgram for PC.

InsText -Textgram for pc

InsText -Textgram Features:

— Beautiful collection of backgrounds, frames and stickers
— Variety of fonts for all your verses and prose
— Loads of cutie stickers, filters and image effects to add to your pictures
— 60+ Great Backgrounds
— 190+ Cool Stickers
— 60+ Nice Fonts
— 15+ Creative Frames
— 10+ Image Effects

How To Install InsText -Textgram For PC or MAC Using Blackstacks

Method 1:

  1. Install Bluestacks on your PC or MAC.
  2. Download InsText -Textgram Apk on your PC.
  3. Make sure that you have installed Bluestacks. Double click the downloaded InsText -Textgram apk to install it.
  4. The APK will be installed through Bluestacks, once the notification pop ups determining the installation completion, open Bluestacks.
  5. Now click on My Apps and then click on InsText -Textgram.
  6. The application will open up. Now follow on-screen instructions to use InsText -Textgram.

Method 2:

  1. Install Bluestacks on your PC or MAC.
  2. Open Bluestacks and setup your Google Play Store account.
  3. Now open Google Play Store and search for “InsText -Textgram“.
  4. Once found, install InsText -Textgram.
  5. Now click on My Apps and then click on InsText -Textgram.
  6. The game will open up. Now follow on-screen instructions to use InsText -Textgram.

How To Install InsText -Textgram For PC or MAC Using Andy OS

  1. Download and install Andy OS on your Windows PC or MAC.
  2. Once downloaded, open Andy OS.
  3. Setup Google Play Account on it.
  4. Now open Apps > Google Play Store and search for “InsText -Textgram“.
  5. Install InsText -Textgram and wait for it to finish installation.
  6. Once done, open “Uncategorized” portion in Andy and click on InsText -Textgram to use it.
  7. That’s all.

Download Gears of War 4 HD Wallpapers for Desktop and Mobile

Download Gears of War 4 HD Wallpapers for Desktop and Mobile

I am back again with Wallpapers madness and this time i’ve collect the Gears of War 4 HD Wallpapers for your desktop and mobiles. At the moment we only have a glimpse of Gears of War 4 first game play, hope to see it soon but right now its release date is not yet confirmed. Enjoy the Gears of War 4 HD Wallpapers for Desktop and Mobile and please share it with gaming freaks.

gears_of_war_4-wallpaper-1280x800

Download Gears of War 4 HD Wallpapers for Desktop and Mobile:

gears_of_war_6-wallpaper-1280x800

gears_of_war_4-wallpaper-1280x800

gears-of-war-2-wallpaper-hd-1-774045

gears_of_war_hd_1080p-HD

gears_of_war_dvd_cover-normal

gears_of_war_judgement_wallpaper-1080p

Best wallpaper database with papers, computer, wallpapers, game

gears-of-war-judgment-game-hd-wallpaper-1920x1080-482

gears-war-xbox-one-rumor

Install TWRP Recovery On LG G4 & Root It

Install TWRP Recovery On LG G4 & Root It

LG G4 is the hot topic right now. The phone came out in April 2015. With LG G4, LG managed to keep maintain its reputation easily. LG G4 sports a 5.5 inch QHD display with 538 ppi. Under the hood we have a Snapdragon 808 Hexa-Core CPU powering up this device. A RAM of 3 GB can be found inside. LG has placed a whopping 3000 mAh battery inside this device. At the back we can find a 16 MP shooter loaded with tons of new features enhancing the lives of photographers. On the front we have an 8 MP shooter, which is a great choice for taking selfies. LG G4 runs on Android 5.1 Lollipop out of the box.lg-g4-press-render-710

LG G4 is hitting the shelves already. A number of users have got their hands on this device. The great news is, the device has been caught up by some developers as well and its power is being unleashed now. TWRP recovery is already available for the LG G4, that means you can root it as well. Flashing TWRP means you are all set to create a Nandroid Backup of your device, you are able to flash custom ROMs, MODs on your device. You can wipe cache, dalvik cache and a lot of other things can be done easily. The recovery will pave your way towards the power of open nature of Android Lollipop. Have you got your hands on this device? Well, if so, and you also happen to be an Android power user, it is the time to flash TWRP and root your device now.

Before you proceed towards the recovery installation and root instructions, you need to unlock the bootloader of your device. If you’re confident enough to unlock the bootloader and you don’t care about the warranty of your device, you can unlock it using this link.

Here are the pre-requisites for rooting your device now.

  1. This guide is only for LG G4 H815. Do not try this on any other variant of LG G4. As soon as the recovery comes up for other variants of LG G4, we will update this post. Check your device’s model number in settings > about device > model.
  2. Your phone’s battery must be charged up to 50% at the least.
  3. Make sure that you’re using original data cable to establish connection between your PC and your phone.
  4. Make sure that you’ve turned off Firewall or Antivirus enabled on your PC.

Disclaimer: Flashing custom recoveries and rooting your devices, both these are done by following highly custom methods, which are never recommended by device manufacturers. In case something goes wrong while flashing the recovery or rooting your device, we or LG may not be held responsible. Make sure that you’re going to do everything on your own responsibility.

How To Install TWRP Recovery & Root LG G4

  1. Install Minimal ADB & Fastboot drivers on your PC.
  2. Download TWRP Recovery.img file for LG G4 and rename it to recovery.img.
  3. Copy the renamed recovery.img file to your phone’s internal storage as well. You should have this file on your phone and PC both.
  4. Also, download SuperSu.zip and copy it to your phone’s internal storage.
  5. Also, copy the renamed file to Minimal ADB & Fastboot folder under C: Program Files > Minimal ADB & Fastboot
  6. Connect your LG G4 to your PC.
  7. Now open Minimal ADB & Fastboot.exe from the Minimal ADB & Fastboot folder where you copied the renamed recovery.img file.
  8. A command prompt will open up now.
  9. Now in the command prompt, issue this command: adb devices to check whether your phone has been connected or not.
  10. Now issue reboot your device in Fastboot mode using this command:

    adb reboot bootloader

  11. Once your device has rebooted in Fastboot mode, the next step is to boot LG G4 in TWRP recovery mode from the file that you copied in your phone. To do so, issue the following command in command window:

    fastboot boot recovery.img

  12. Now your phone will boot in TWRP recovery mode, but this TWRP is temporary. Now we will flash the TWRP recovery on your device through the recovery that you’re booted in.
  13. Now on your device, tap the “Install > images (on the bottom right)” and select the copied recovery.img file.
  14. Once you’ve selected recovery.img file, in the next screen select “Recovery” as partition. Do not select any other partition here. Be careful while selecting recovery.
  15. Now “Swipe to confirm flash” and sit back and wait for the recovery flashing to finish.
  16. Once done, go back to main menu in TWRP recovery and select “Reboot>Recovery”.
  17. Now your phone will reboot into the TWRP recovery you just flashed properly. Once again, select “Install >  Select SuperSu.zip file that you copied on your phone”.
  18. “Swipe to Confirm Flash” and wait for SuperSu to be flashed. Once done, reboot your device into system now.
  19. Once rebooted, find SuperSu in app drawer, update Su Binary if required.
  20. That’s all. You’ve install TWRP recovery + rooted your device as well.
  21. Don’t forget to create a Nandroid Backup and save it on your PC now. You can use the Backup option in TWRP recovery to do so.

Just in case you’re facing any difficulties with TWRP recovery and root installation, feel free to reach us out through the comment box below. Thank you!

Download Destiny HD Wallpapers for your Desktop [ Free ]

Download Destiny HD Wallpapers for your Desktop [ Free ]

Destiny is the best role-playing with massive multiplayer game for Pc, its also available for Play Station 3,4 and Xbox 360 and One. Today i’ve collected the Full HD Destiny Wallpapers for your desktop and Mac. You can also use these Wallpapers for your smartphones.

About Destiny:

Destiny‍ ’​s style has been described as a first-person shooter that incorporates role-playing and massively multiplayer online game (MMO) elements, but Bungie has avoided defining Destiny as a traditional MMO game. Instead, the game has been referred to as a “shared-world shooter,” as it lacks many of the characteristics of a traditional MMO game. For instance, rather than players being able to see and interact with all other players in the game or on a particular server—as is the case in many conventional MMO games—Destiny includes on-the-fly matchmaking that allows players to see and interact only with other players with whom they are “matched” by the game. Events may happen in-game that are not necessarily controlled or planned by the developer, which will help to create a dynamic developing experience for Bungie and a dynamic playing experience for gamers.

Download Destiny HD Wallpapers for your Desktop:

Best Tips To Improve Battery Life On Galaxy S6 & S6 Edge

Best Tips To Improve Battery Life On Galaxy S6 & S6 Edge

Samsung did a great job with the Galaxy S6 and S6 Edge. This might be the very first time in the last 2 or 3 years that Samsung users finally saw something new, very different which cheered them up. The Galaxy S6 and S6 Edge have a premium build, a cool design and some top-notch features. Samsung has improved the devices greatly, but it did compromise some of its features that always won it a lot of respect. Samsung has loaded these devices with tons of features, but the battery isn’t good enough to keep everything running for a long time. Galaxy S6 and S6 Edge have a 2550 and 2600 mAh battery respectively, which is not enough for power users or game freaks at all. Many users have disliked the devices, specifically the Galaxy S6 Edge because of a poor battery life, and many have already changed the devices as well.

If you own a Galaxy S6 or S6 Edge and you’re having a poor battery life, and you also don’t want to change the device because of the mesmerising features on these two, you may want to sort out the issues by applying some changes or tweaks to the device.

We have discovered some tips, which are proved to be improving the battery life of the Galaxy S6 and S6 Edge to a very good extent. Some of the tips are for root users, but if you haven’t rooted your device some of these will work for you as well. Let’s go through those and improve battery life on your new Samsung Galaxy.

1. Use a static wallpaper – disable live wallpaper if enabled     

Some people like to use a live wallpaper on their devices. A live wallpaper has animations and higher graphics, which put some load on your device’s battery and result in consuming it. A live wallpaper also slows the device a little bit down, so avoid using a live wallpaper on your S6 or S6 Edge.

Instead of using a live wallpaper, use a static wallpaper. There are million of cool wallpapers to choose from. Another tip for saving the battery a little bit more is to use a black wallpaper. Samsung uses Super AMOLED displays on its phones, which are much battery friendly when used with a black wallpaper. A bright or light wallpaper has to produce more brightness from the screen, which results in consuming more battery, while a black wallpaper doesn’t produce that much of brightness and saves the battery life.batch_11542566_10206215739485083_1587278263_o

2. Uninstall Un-necessary apps

On Android, there’s a number of processes running in the background all the time. At times you aren’t even aware of the background process and the applications which are making these processes run. It is always recommended to uninstall un-necessary apps which you never use or you don’t need on your phone. Any suspicious process that are eating up your battery might be in run because of one of the applications that you don’t use. So keeping such apps out of the phone is one option to improve the battery life.

You can also find out which apps are eating more battery by simply accessing battery stats in settings application.batch_11638594_10206215740085098_1519265805_o

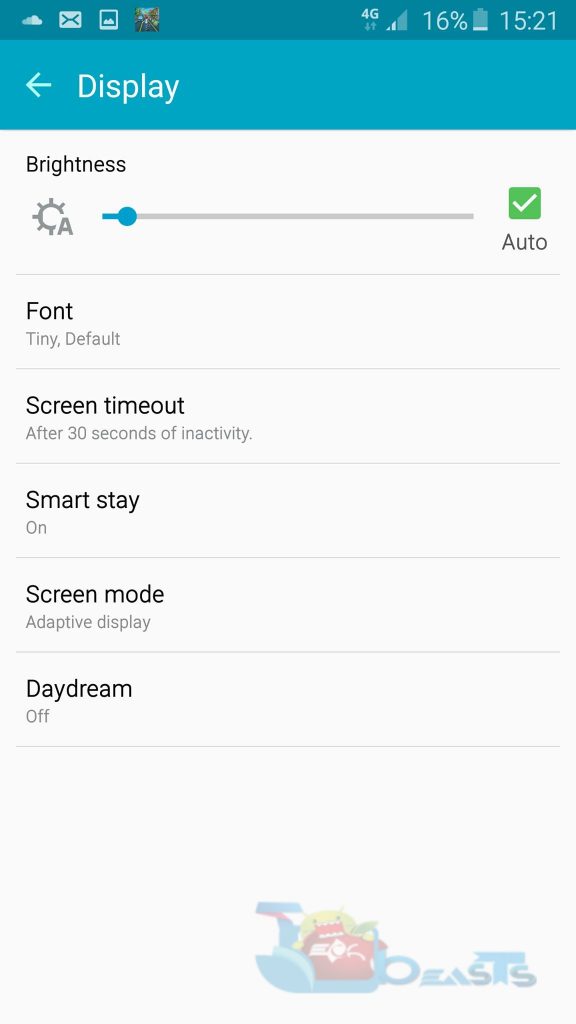
3. Use Auto Brightness

This is one of the key features. Using Auto-brightness puts your device at ease. It automatically adjusts your screen’s battery according to the light in the background and thus results in improving the battery life by producing the required brightness only.

If you’re using a specific brightness, then you should turn on Auto-brightness and let your phone do the job.
batch_11638675_10206215739565085_1311991816_o

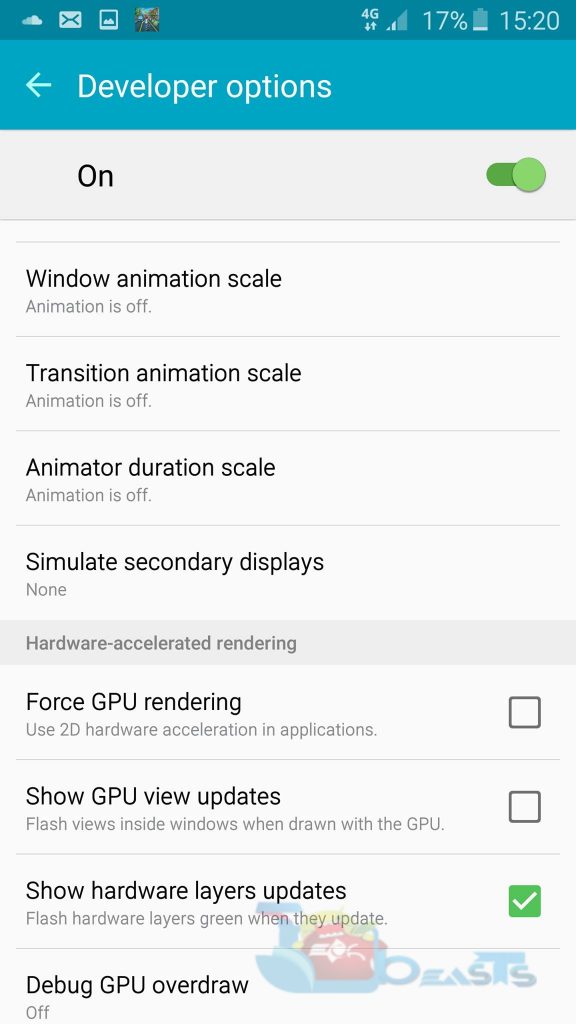
4. Disable Animations

Most of the users do not have an idea about Animations. These animations appear when you’re opening or switching between apps, scaling or transitioning. You can get rid of animations by turning them off. Turning off animations will help your device’s battery up to a very good extent for sure.

To turn off Animations, you need to enable developer options first of all. To do so, go to settings > about device > tap build number for 7 times to enable developer options. Once enabled, open developer options and do this.

  • Window Animation Scale > Animation is off
  • Transition Animation Scale > Animation is off
  • Animator Duration Scale > Animation is off
batch_11639717_10206215739765090_136768054_o


5. Disable Edge Screen on S6 Edge

Galaxy S6 Edge’s edges make it one of its-own-kind device. S6 Edge has become one of the most desirable devices in just a few months. S6 Edge owners have been complaining about a poor battery life. The edge screen makes the device look beautiful, but it really is not an everyday-use feature and most of the S6 Edge owners do not bother about the beautiful edges on their phone. If you own this device and you don’t use its edges, its time to turn the edges off.

Turning of edge screen will significantly improve your battery life. To turn it off, simply go to settings > Edge screen > turn off Edge lightning, People Edge and Notifications.batch_11639817_10206215739725089_1990503084_o

6.Use Power Saving Mode when possible

Power saving mode saves up to 10% of your battery life. Once you’ve enabled it, Power Saving mode disables all un-necessary and battery eating features. This includes lowering down the brightness, limiting the CPU performance, turning off touch key light, disabling vibration and some background processes.

To enable power saving mode, go to settings > Power saving mode > turn on.batch_11294411_10206215739845092_1941322739_o

7. Use original data cable and original charger to charge

Whenever your’e going to charge your S6 or S6 Edge, make sure that you use original or a high quality data cable and an original charger to charge it. Using an after market data cable won’t charge your phone as good as compared the original one, which will also result in consuming the battery faster.

8. Use Greenify to freeze apps (Root users & now non-root users as well)

If you’re a root user, you can install Greenify from Google Play Store and hibernate or freeze the applications you don’t use. Greenify is much useful when you’ve a plethora of applications installed, and you need to use some applications occasionally. Greenify has eased the lives of a number of power users. ku-xlarge1

9. Disable 4G/3G/Edge when not needed – Use WiFi if possible

4G/3G both have faster data rates which results in consuming the battery much more faster. If you don’t need 4G/3G or Edge all the time, do not keep these activated. Always turn off 4G or 3G when you’re done using it.

If you’ve WiFi access, it is recommended to use it instead of 4G/3G/Edge. WiFi won’t consume your battery as much as that of the cellular services.

10. Turn on Airplane/Flight Mode in low signal mode

This is one interesting fact. Whenever you enter a low signal zone, your device’s radio stresses up more to catch the signals which has a straight-away effect on your phone’s battery. To get rid of the battery drainage here, turn on Flight Mode when you’re in a low signal zone and turn it off as soon as you’re in a high signal zone.batch_11542547_10206215738605061_2015736208_o

That’s all. If you have anything to add to the above post, make sure that you reach us out through the comment box below. Also, let us know if these tips have helped your device’s battery or not. Thank you all.

FarmVille : Harvest Swap For PC Download – Windows 8,7,8.1/Mac

0
FarmVille : Harvest Swap For PC Download – Windows 8,7,8.1/Mac

Here’s how you can download and install FarmVille : Harvest Swap for PC and play it on Windows 7,8,8.1/Mac. FarmVille : Harvest Swap is the latest sensation from the creator’s of Looney Tunes Dash and FarmVille 2: Country Escape. Today i will tell you how you can play and install FarmVille : Harvest Swap for PC Windows and Mac. Officially FarmVille : Harvest Swap for PC is not available, but we can still install Android Apps for PC using third party emulators. Before going any further let me give you an overview on the features of FarmVille : Harvest Swap for PC.

FarmVille : Harvest Swap for PC

FarmVille : Harvest Swap Features:

· SWAP-OR-SWIPE to choose how you clear your board

· MATCH & EXPAND your game board for more ways to win

· EXPERIENCE FARMVILLE in delightful story-driven progression

· JOIN YOUR FRIENDS to share the fun!

How To Install FarmVille : Harvest Swap For PC or MAC Using Blackstacks

Method 1:

  1. Install Bluestacks on your PC or MAC.
  2. Download FarmVille : Harvest Swap Apk on your PC.
  3. Make sure that you have installed Bluestacks. Double click the downloaded FarmVille : Harvest Swap apk to install it.
  4. The APK will be installed through Bluestacks, once the notification pop ups determining the installation completion, open Bluestacks.
  5. Now click on My Apps and then click on FarmVille : Harvest Swap.
  6. The application will open up. Now follow on-screen instructions to Play FarmVille : Harvest Swap.

Method 2:

  1. Install Bluestacks on your PC or MAC.
  2. Open Bluestacks and setup your Google Play Store account.
  3. Now open Google Play Store and search for “FarmVille : Harvest Swap“.
  4. Once found, install FarmVille : Harvest Swap.
  5. Now click on My Apps and then click on FarmVille : Harvest Swap.
  6. The game will open up. Now follow on-screen instructions to Play FarmVille : Harvest Swap.

How To Install FarmVille : Harvest Swap For PC or MAC Using Andy OS

  1. Download and install Andy OS on your Windows PC or MAC.
  2. Once downloaded, open Andy OS.
  3. Setup Google Play Account on it.
  4. Now open Apps > Google Play Store and search for “FarmVille : Harvest Swap“.
  5. Install FarmVille : Harvest Swap and wait for it to finish installation.
  6. Once done, open “Uncategorized” portion in Andy and click on FarmVille : Harvest Swap to play it.
  7. That’s all.

AlphaBetty Saga for PC Download – Windows 8,8.1,7/Mac

0
AlphaBetty Saga for PC Download – Windows 8,8.1,7/Mac

Here’s how you can download and install AlphaBetty Saga for PC and play it on Windows 7,8,8.1/Mac. AlphaBetty Saga is the latest sensation from the creator’s of Candy Crush Saga and Farm Heroes Saga. Today i will tell you how you can play and install AlphaBetty Saga for PC Windows and Mac. Officially AlphaBetty Saga for PC is not available, but we can still install Android Apps for PC using third party emulators. Before going any further let me give you an overview on the features of AlphaBetty Saga for PC.

AlphaBetty Saga for PC.

 AlphaBetty Saga Features:

● Link letters in any direction – up, down, diagonally, in fact, any way you want – even multiple directions!
● Bright and colorful graphics that will transport you to the far reaches of the mouse world
● Three intrepid explorers on an epic journey
●Powerful boosters to help you crack challenging levels
● Unlock boosters and unique characters with special abilities to help you along the way
● Easy and fun to play, challenging to master
● Over 100 cheesetastic levels of letter-linking fun!
● Play your way – long words or short words, race through levels or take your time, impress your friends or play by yourself, quick fun or leisurely indulgence – you choose.
● Leaderboards to follow your friends and competitors’ progress! Give lives, add friends and see your friends’ progress on the map in game.
● Easily sync the game between devices and unlock full game features when connected to the internet

How To Install AlphaBetty Saga For PC or MAC Using Blackstacks

Method 1:

  1. Install Bluestacks on your PC or MAC.
  2. Download AlphaBetty Saga Apk on your PC.
  3. Make sure that you have installed Bluestacks. Double click the downloaded AlphaBetty Saga apk to install it.
  4. The APK will be installed through Bluestacks, once the notification pop ups determining the installation completion, open Bluestacks.
  5. Now click on My Apps and then click on AlphaBetty Saga.
  6. The application will open up. Now follow on-screen instructions to Play AlphaBetty Saga.

Method 2:

  1. Install Bluestacks on your PC or MAC.
  2. Open Bluestacks and setup your Google Play Store account.
  3. Now open Google Play Store and search for “AlphaBetty Saga“.
  4. Once found, install AlphaBetty Saga.
  5. Now click on My Apps and then click on AlphaBetty Saga.
  6. The game will open up. Now follow on-screen instructions to Play AlphaBetty Saga.

How To Install AlphaBetty Saga For PC or MAC Using Andy OS

  1. Download and install Andy OS on your Windows PC or MAC.
  2. Once downloaded, open Andy OS.
  3. Setup Google Play Account on it.
  4. Now open Apps > Google Play Store and search for “AlphaBetty Saga“.
  5. Install AlphaBetty Saga and wait for it to finish installation.
  6. Once done, open “Uncategorized” portion in Andy and click on AlphaBetty Saga to play it.
  7. That’s all.

How To Fix “Unfortunately, TouchWiz Home has stopped” On Samsung Galaxy

37
How To Fix “Unfortunately, TouchWiz Home has stopped” On Samsung Galaxy

Samsung always remained under severe criticism because of its TouchWiz Home launcher. Over the past few years, we saw great improvements in the Galaxy devices, but users always got disappointed when it came to the software running on these devices. At first, Samsung Galaxy devices include a lot of bloatware apps, and then its the TouchWiz Home launcher that slows it down further. TouchWiz Home is lags at times and doesn’t respond. A very simple solution to get rid of the TouchWiz issues is to use some other launcher from the Play Store, but then you will loose the stock touch, look and feel of the device. While most of the users chose to stick to the stock TouchWiz Home launcher, they need to resolve the issues with this launcher.

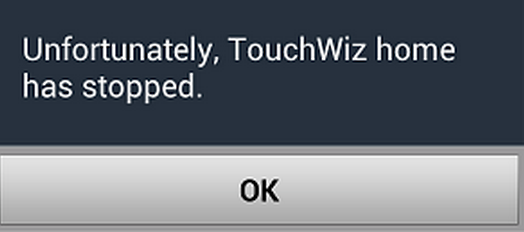
A very common issue that occurs with the TouchWiz Home Launcher is the force stop error. You might come across this “Unfortunately, TouchWiz Home has stopped” error while using your device normally, and you might have to restart your device to get rid of this as it simply hangs the device. But what if the issue comes up again after restarting the device and doesn’t go away at any cost? You need a different solution in this case. If you’re having this issue right at the moment and you came here while looking for a solution. You made the right choice.Screenshot at Jun 15 17-59-55

We are going to fix the “Unfortunately, TouchWiz Home has stopped” issue in the following post. Let’s move ahead and solve this right away. The following solutions will work on all Samsung Galaxy Devices whether your device is running on Android Gingerbread, JellyBean, KitKat or Lollipop. 

How To Fix “Unfortunately, TouchWiz Home has stopped” On Samsung Galaxy

  1. First of all you need to boot your device in safe mode. To do so turn off your device completely.
  2. Now turn it on, while it boots up, keep the volume down key pressed.
  3. Leave the key as soon as your phone completely boots up. You will find “Safe Mode” notification on the bottom left. Now you’re set to fix the TouchWiz Home.
  4. Now while you’re in the safe mode, tap the app drawer and navigate to settings app.
  5. In settings open application manager > now open all applications > select TouchWiz Home.
  6. You will have TouchWiz Home settings now. Wipe TouchWiz Home data and cache.
  7. Now reboot your device.
  8. Your issue should be resolve now.

11354527_10206209937700042_1091202624_o-side

Method#2: 

  1. If the solution written above doesn’t help you, you may try wiping your device’s cache.
  2. To do so, simply turn off your phone.
  3. Now turn it on while pressing and holding Volume Up + Home + Power Key.
  4. Leave the keys as soon as your device boots up.
  5. Now using Volume Up & Down keys navigate to Wipe Cache Partition, select it using Power Key and wipe it.
  6. Once you’ve wiped it, reboot your device and check if your issue has been resolved or not.
  7. That’s all.

That’s all. If your issue still persists, reach us out through the comment box below. We will try to help you out. Thank you all.

Turn any song into a ringtone on your Android [ How To ]

0
Turn any song into a ringtone on your Android [ How To ]

Here’s how you can turn any song into a ringtone on your Android phone, its seems very hard but its not. In the following guide i will explain you how to create a ringtone from any song stored on your Android device. We’ll be using an Android app called Ringdroid to create ringtone from any song. Please follow all the steps as stated below in order to successfully get the desired ringtone you want from any specific song.

turn any song in to ringtone on android phone


Turn any song into a ringtone on your Android [ How To ]:

Step 1: First download the Ringdroid from Google Play its free.

Step 2: Once the app is installed, Tap on its icon to open it.

Step 3: You’ll see all the list of songs on your device, you can also view all sounds on your device. Tap on the action menu and select all sounds.

Step 4: Now choose a song from which you want to create the ringtone.

Step 5: Once the song is selected you’ll see the waveform on your screen, use the two slider button and select the start point and end point for your ringtone.

Step 6: Once done now save the sound by clicking on the disk icon show on the top of it.

All done ! you have successfully created a ringtone for your Android device using Ringdroid app. You can trun any song into a ringtone by using the Ringdroid app, its supports all the formats. If you face any issue regarding this guide please do tell me in comments.