Home Blog Page 358

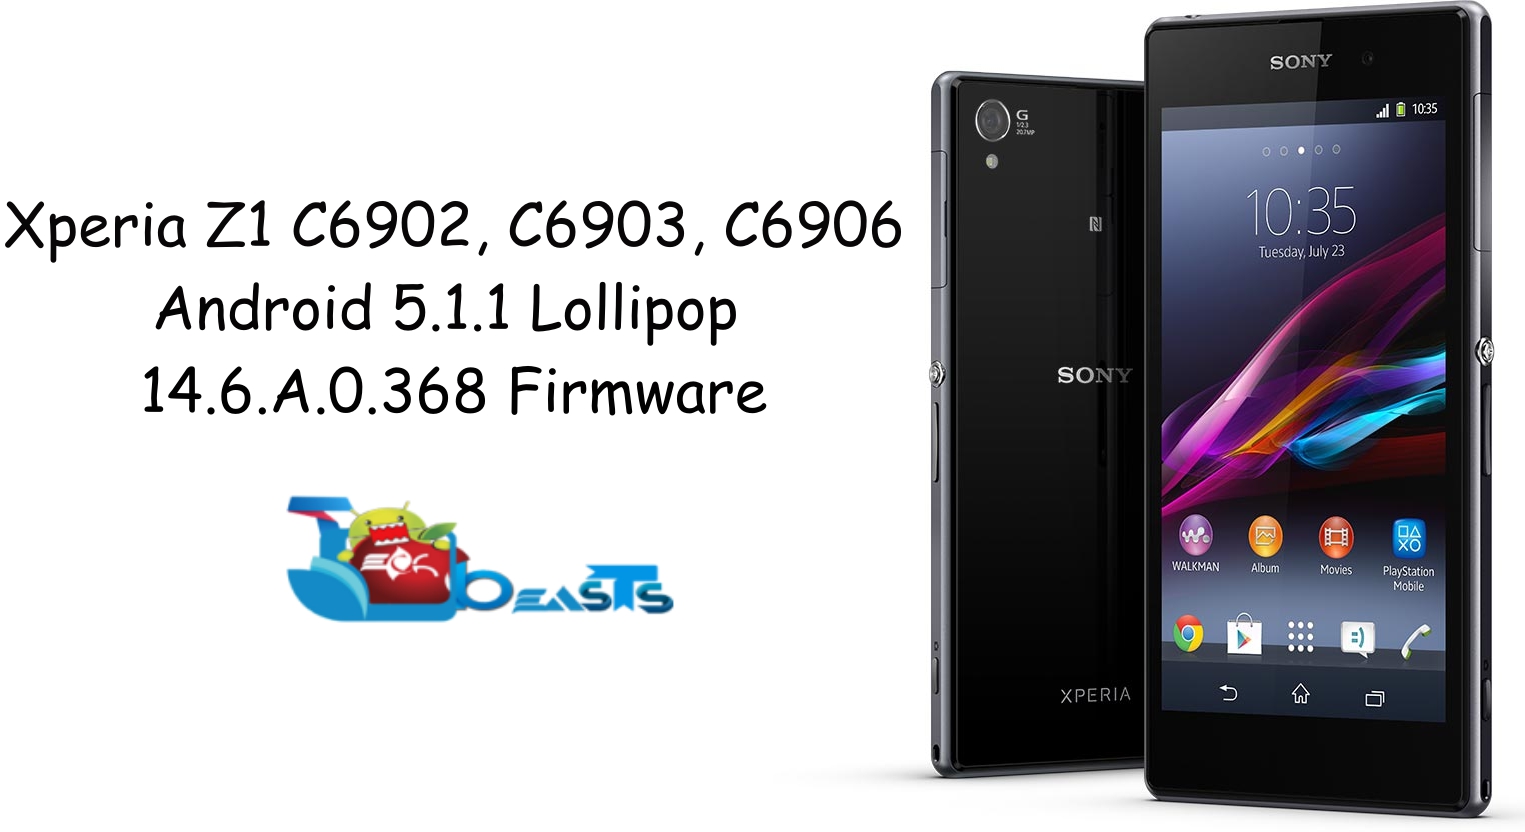
Update Xperia Z1 C6902, C6903, C6906 To Android 5.1.1 Lollipop 14.6.A.0.368 Firmware
29
Update Xperia Z1 C6902, C6903, C6906 To Android 5.1.1 Lollipop 14.6.A.0.368 Firmware

Xperia Z1Good day for Xperia Z1 owners. Sony just started rolling out the awaited Android 5.1.1 Lollipop update for the Xperia Z1. The update is currently reaching out the C6902 and C6903 variants of this device. Sony already made the major changes to the OS of this device by pushing Android 5.0.2 Lollipop update. The new update in the first place takes the version number to Android 5.1.1 Lollipop and the build number to 14.6.A.0.368, which happens to be the latest and greatest version of Android. There are some core enhancements which improve the stability and performance of the device.

The new update provides a full fix to the wide-spread stagefright vulnerability. It also integrates LinkedIn with your Calendar and Contacts Camera focus, speed and accuracy improvements in Superior Auto Mode have been made. There are quite many changes and enhancements that you may come across upon installing this update.

At the time of writing this post, this update is rolling out to a few regions through OTA or through Sony PC Companion. If you haven’t been lucky enough to get this update yet, it may take a few days for Sony to cook this update and roll out for your region. If you happen to be an Android freak like me, you may want to skip the wait and update your device right away and that is what we are here for.

We are going to show you how you can update your Xperia Z1 C6902, C6903 & C6906 to the latest Android 5.1.1 Lollipop 14.6.A.0.368 Firmware using Sony Flashtool. Let’s skip the talk and head towards the method right away.

Early Preparations:

1. This is only for Sony Xperia Z1 C6902, C6903 & C6906.

This ROM is only for the device mentioned above. Make sure that your model number matches the one listed above. To do so, go to Settings > About Device on your device and see your model number. Flashing this firmware on any other device will result in bricking it so make sure that you meet this requirement first of all.

2. Battery should be charged at least over 60%.

Make sure that your battery is charged enough to complete the flashing process. In case your battery is low and your device goes dead during the flashing process, you may end up soft bricking your device as it won’t complete the flashing process.

3. Backup everything!

Just to be on the safe side, you may consider backing up each and everything from your Android device. This is highly recommended so that in case anything goes wrong, you still have the access to all of your data and you can restore it immediately. You may backup everything as listed below.

  • Backup SMS Messages
  • Backup Call Logs
  • Backup Contacts
  • Backup Media – Copy your files manually to your PC or Laptop.
  • Titanium Backup – If already rooted, use Titanium Backup to backup all of your apps, system data and other important content. If you haven’t rooted your device previously, skip this step.
  • Backup Nandroid – If CWM  or TWRP installed previously, otherwise skip this step and perform this at the end of flashing.

4. Enable USB Debugging Mode on your device.

Enable USB debugging mode on your device. To do so, tap settings>developer options>USB debugging. If you can’t find developer options in settings, then tap settings > about device and tap “Build Number” for 7 times and you’ll get em’ activated under settings.

5. Install and setup Sony Flashtool.

You must have installed Sony Flashtool. Find the full guide here.

After installing Sony Flashtool, open the Flashtool folder from the drive where you installed it. Now open Flashtool>Drivers>Flashtool-drivers.exe and install the Flashtool, Fastboot & Xperia Z1 drivers from the list. [Important]

6. Use OEM data cable to establish connection.

Make sure that you use the phone’s original data cable to establish connection between your phone and the PC. Using a different data cable might result in interrupting the firmware installation.


How To Update Sony Xperia Z1 To Official Android 5.1.1 14.6.A.0.368 Lollipop  Firmware

Before moving forward, please make sure that you’ve read the pre requisites and ensure that you are set to go ahead.

  1. Download the latest firmware Android 5.1.1 Lollipop 14.6.A.0.368 FTF file.
    1. For Xperia Z1 C6902 [Generic/Unbranded. Link 1 | Create your own FTF using this guide.
    2. For Xperia Z1 C6903[Generic/Unbranded] Link 1 | You can also create your own FTF using this guide.
    3. For Xperia Z1 C6906 [Generic/Unbranded] Link 1
  2. Copy the file and paste in Flashtool>Firmwares folder.
  3. Open Flashtool.exe now.
  4. Hit the small lightening button on the top left corner and select Flashmode.
  5. Select the FTF firmware file that you placed in the Firmware folder.
  6. From the right side, select what do you want to wipe. Data, cache and apps log, all wipes are recommended, perhaps you may select if you don’t want.
  7. Click on OK, and it will start preparing the firmware for flashing. This may take a little while to load.
  8. As soon as the firmware is loaded, it will prompt you to attach the phone by turning it off and keeping the back key press.
  9. For Xperia Z1 Volume Down key will do the job of back key, just turn off your phone, keep the Volume Down key pressed and plug in the data cable.
  10. As soon as the phone is detected in Flashmode, the firmware will start flashing, Do not leave the Volume Down key until the process is complete.
  11. As soon as you see “Flashing ended or Finished Flashing” leave the Volume Down key, plug the cable out and reboot.
  12. That’s All! Congrats! You’ve installed latest Android 5.1.1 Lollipop on your Xperia Z1. Enjoy

In case you got any queries or face any problems regarding this guide, please feel free to stop by the comment box below and let us know. We will get back to you as soon as possible. Thanks all!

Complete changelog:

Improvements to volume and silent mode control, more control of your alerts, simplified and enhanced design
– Integration of LinkedIn with your Calendar and Contacts
– Camera focus, speed and accuracy improvements in Superior Auto mode
– Many new features for Xperia in Business, enhancing enterprise support for Xperia
– Now take pictures from the camera using Sony SmartWatch 3; use the SW3 as a remote shutter button
– Instant calendar events – create & share smart events directly from any email
– Calendar agenda in Email – no need to switch apps to check upcoming events
– Richer Xperia themes
– New Settings menu icons
– Additional options for Wi-Fi and Bluetooth in notification menu

Slow Down Online for PC – Windows and Mac

0
Slow Down Online for PC – Windows and Mac

Following are the instruction on how to install Slow Down for PC running Windows and Mac, right now there is no PC version available for Slow Down but we can install Android apps on Pc using,  third-party emulators. Slow Down is an arcade game for the famous developers of Ketchapp, basically it’s designed for Android and iOS.

Slow Down Online for PC

About Slow Down:

Control time with the tip of your finger! Just tap the screen to Slow Down.

Avoid all obstacles and collect stars to unlock new balls!

You are in control… But how far can you go?

For more visit Google Play.

How To Install Slow Down For PC or MAC Using BlackStacks

Method 1:

  1. Install Bluestacks on your PC or MAC.
  2. Download Slow Down Apk on your PC.
  3. Make sure that you have installed Bluestacks. Double-click the downloaded Slow Down Apk to install it.
  4. The APK will be installed through Bluestacks, once the notification pop-ups determining the installation completion, open Bluestacks.
  5. Now click on My Apps and then click on Slow Down.
  6. The application will open up. Now follow on-screen instructions to Slow Down.

Method 2:

  1. Install Bluestacks on your PC or MAC.
  2. Open Bluestacks and setup your Google Play Store account.
  3. Now open Google Play Store and search for “Slow Down“.
  4. Once found, install Slow Down.
  5. Now click on My Apps and then click on Slow Down.
  6. The game will open up. Now follow on-screen instructions to Play Slow Down.

How To Install Slow Down For PC or MAC Using Andy OS

  1. Download and install Andy OS on your Windows PC or MAC.
  2. Once downloaded, open Andy OS.
  3. Setup Google Play Account on it.
  4. Now open Apps > Google Play Store and search for “Slow Down“.
  5. Install Slow Down and wait for it to finish the installation.
  6. Once done, open “Uncategorized” portion in Andy and click on Slow Down to play it.
  7. That’s all.

Update Galaxy E5 To Android 5.1.1 Lollipop

0
Update Galaxy E5 To Android 5.1.1 Lollipop

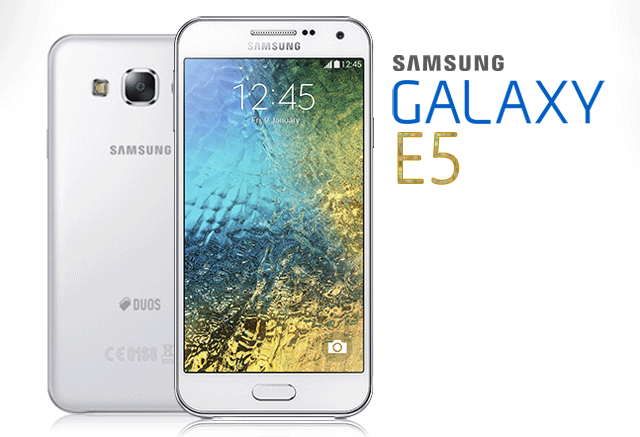
Samsung’s new metallic series, that took birth with the Galaxy Alpha. Samsung Later on introduced Galaxy A series and Galaxy E series. Unlike the Galaxy Alpha, these devices were packed up completely in metallic build. Samsung used a very elegant design for all these devices. Galaxy E series falls in mid-rangers, which prompted a hefty number of users to get their hands on this device. The device’s specifications meet the user of an average Android user. An elegant design and premium build negates all the criticism that Samsung has had in the past for making cheap plastic-build smartphones.

The Galaxy E5 flaunts a beautiful 5.0-inch 720p screen. Samsung used a Quad Core 1.2 GHz CPU to power this device up. A camera of 8 megapixels is fixed at the back, selfie shooter is 5 megapixels. A RAM of 1.5 GB, internal storage 16 GB and microSD card slot were also a part of this device. Galaxy E5 packs up a battery of 2400 mAh. Out of the box, the Galaxy E5 ran on Android 4.4.4 KitKat out of the box.

When the Galaxy E5 made its first appearance, Android 4.4.4 KitKat was the latest firmware that Samsung could use in its handset. Galaxy E5 happened to be pretty lucky, Samsung promised its users to update the device to Android 5.0.2 Lollipop and Android 5.1.1 Lollipop as well. Good news for Galaxy E5 landed a month ago when Samsung finally started rolling out the Android 5.1.1 Lollipop for the device.

Android 5.1.1 Lollipop brought all the lollipop sweetness to this device. It brought a completely new and enhanced TouchWiz UI that was design according to Google’s Material design. The new firmware also brought application enhancements. Core enhancements improved the battery life and performance of the device. Galaxy E5 itself sports a smooth build and design, so having a smooth software running on the screen must have added to the comfort of this device.

Android 5.1.1 Lollipop is around for quite a while, but it hasn’t landed in so many regions yet. Only a few lucky regions have come under the influence of this update. Update rolled out through OTA and Samsung Kies. If you haven’t got it yet, you may want to skip the wait and update your device right away. At the moment, the only way to update maybe through Odin. You can now easily update your Galaxy E5 E500H to Android 5.1.1 Lollipop regardless of your region. Firmware links and the necessary guides are linked below that will help you to take your Galaxy E5 E500F, E500H form Android 4.4.4 KitKat or Android 5.0.2 Lollipop to Android 5.1.1 Lollipop.

At the time of writing this post, this update is available for Galaxy E5 E500F and E500H, so the firmware linked is for these two variants only. As soon as this update makes its way for other variants, we will link those firmwares in the same guide below.

Firmware Links:

Download your device’s firmware and extract it to get .tar.md5 file.

How To Update:

How To Flash Stock Firmware On Samsung Galaxy With Odin

How To Install Android 5.1.1 Lollipop On Galaxy Grand Prime

0
How To Install Android 5.1.1 Lollipop On Galaxy Grand Prime

Surprised? Maybe you need to re-read the title, its true. Android 5.1.1 Lollipop is now available for our beloved Galaxy Grand Prime. Samsung’s famous selfie phone is now enjoying the latest and greatest version of Android. Galaxy Grand Prime originated running Android 4.4.4 KitKat out of the box. As Samsung promised, it updated the device to Android 5.0.2 Lollipop and the Android 5.1.1 Lollipop firmware landed on this device on September 2, 2015.

Just in case you don’t know much about the Galaxy Grand Prime, it is Samsung’s 2015 mid-ranger. This device sports a 5.0 inch display with 540 x 960 pixels. Samsung used a Qualcomm Snapdragon 410 CPU clocked at 1.2 GHz. A RAM of 1 GB, 8 GB internal storage supported by microSD card slot is there. Galaxy Grand Prime occupies a 2600 mAh battery. This device turned out to be a perfect choices for average Android users.

The new Android 5.1.1 Lollipop update has hit only a few regions so  far. This update reached the users out through OTA or through Samsung Kies. If you haven’t got this update, it may take some time for Samsung to cook this firmware and push it towards your region. If you happen to be an Android freak, you may want to skip the wait and update your Galaxy Grand Prime to Android 5.1.1 Lollipop right away. In case you’ve been looking for such a method, you have spotted the right place.

We have linked all the firmwares and necessary guides, that will help you to take your Galaxy Grand Prime from Android KitKat to Android 5.1.1 Lollipop right away. This process will be done using Samsung’s flashtool Odin3.

At the time of writing this post, this update is available for Sprint Galaxy Grand Prime, so the firmware linked is for Sprint Galaxy Grand Prime SM-G530P. As soon as this update makes its way for other variants, we will link those firmwares in the same guide below.

Firmware Links:

Android 5.1.1 Lollipop For Galaxy Grand Prime SM-G530P

Download your device’s firmware and extract it to get .tar.md5 file.

How To Update:

How To Flash Stock Firmware On Samsung Galaxy With Odin

Install Official Android 5.1.1 Lollipop On Galaxy Note 4

0
Install Official Android 5.1.1 Lollipop On Galaxy Note 4

Last year when Samsung pulled the curtains off from the Galaxy Note 4, it ran on Android 4.4.4 KitKat out of the box. Android 4.4.4 KitKat was the latest firmware of that time, later on Samsung updated the device to Android 5.0.2 Lollipop. Samsung is always quite slow with rolling out the latest updates for its devices, so the Android 5.0.2 Lollipop also took a lot of time to hit the device. This update brought all new Lollipop goodies to the Galaxy Note 4.

Changes in the Lollipop firmware included a completely new and revamped TouchWiz UI which stood parallel to Google’s all new Material Design introduced in the Lollipop firmware. Lollipop also brought changes to the core, which enhanced the performance and battery life of the Galaxy Note 5. There were quite many changes that made this update worthy. Lollipop’s flat UI and smooth performance added charm to its beauty.

Samsung updated all variants of Galaxy Note 4 to Android 5.0.2 Lollipop. All the users have been keeping their eyes on Android 5.1.1 Lollipop. Samsung didn’t get too much late this time and managed to roll out the Android 5.1.1 Lollipop update almost on time for the Galaxy Note 4. This update is now available for SM-N910F and SM-N910C variants of the device. There are not notable changes in this update, the changes are in the core system of Android. Android 5.1.1 Lollipop brings a smart manager that helps you to keep a track of your device’s battery, storage and other such components. Users have also reported a better battery life and better memory management.

This update is currently rolling out through OTA or through Samsung Kies to the users. Only a few regions have been lucky to come under this update’s umbrella. If you haven’t received this update yet, you’re going to need to wait for quite a while as it takes some time for manufacturers to roll out region-wide updates. In case you’re an Android enthusiast like me, you may not be able to wait and you may want to get your hands on this latest and greatest version of Android. The good news is, you can update your Galaxy Note 4 to Android 5.1.1 Lollipop,  no matter what region you belong to. The method to update your device will be entirely manual, but don’t worry, we have got your back.

Here are all the links and necessary guides, that will help you to update your Galaxy Note 4 SM-N910C, SM-N910F to Android 5.1.1 Lollipop manually using Samsung’s flashtool Odin3.

Firmware Links:

Download your device’s firmware and extract it to get .tar.md5 file.

How To Update:

How To Flash Stock Firmware On Samsung Galaxy With Odin

Star Wars™: Uprising Online for PC – Windows and Mac.

1
Star Wars™: Uprising Online for PC – Windows and Mac.

Following are the instruction on how to install Star Wars™: Uprising for PC, at the moment there is no PC version for Star Wars™: Uprising but we can install Star Wars™: Uprising on PC using third-party emulators like BlueStacks and Andy. Star Wars™: Uprising is basically launched for Android and iOS devices, before going any further let me give you an overview on Star Wars™: Uprising.

Star Wars™: Uprising Online for PC, Star Wars™: Uprising PC, Star Wars™: Uprising for PC, Star Wars™: Uprising para pc

About Star Wars™: Uprising:

CREATE THE HERO THE GALAXY NEEDS
Choose from a wide range of abilities, species, visual customizations and classic Star Wars™ gear to become the next Han Solo, Boba Fett or entirely unique hero of your own design with a unique open class system.

SHAPE THE FUTURE OF THE GAME UNIVERSE
Join players worldwide in massive Sector Battles to dictate the expansion of in-game content, including new planets, exclusive gear, higher level caps and unique crew members.

A NEW CHAPTER IN STAR WARS
Play the first mobile game in the Star Wars universe that takes place between Star Wars™: Episode VI: Return of the Jedi™ and Star Wars™: The Force Awakens™.

REAL-TIME CO-OP AGAINST THE EMPIRE
Explore the secrets of the sector, build a powerful cartel with allies, and play alongside friends in synchronous cooperative play.

BRAVE CHALLENGES ON CLASSIC AND NEW WORLDS
Battle your way through missions on Hoth, Cloud City and more, fighting against powerful bosses led by an ominous new adversary.

For more visit Google Play.

How To Install Star Wars™: Uprising For PC or MAC Using Blackstacks

Method 1:

  1. Install Bluestacks on your PC or MAC.
  2. Download Star Wars™: Uprising Apk on your PC.
  3. Make sure that you have installed Bluestacks. Double-click the downloaded Star Wars™: Uprising Apk to install it.
  4. The APK will be installed through Bluestacks, once the notification pop-ups determining the installation completion, open Bluestacks.
  5. Now click on My Apps and then click on Star Wars™: Uprising.
  6. The application will open up. Now follow on-screen instructions to Star Wars™: Uprising.

Method 2:

  1. Install Bluestacks on your PC or MAC.
  2. Open Bluestacks and setup your Google Play Store account.
  3. Now open Google Play Store and search for “Star Wars™: Uprising“.
  4. Once found, install Star Wars™: Uprising.
  5. Now click on My Apps and then click on Star Wars™: Uprising.
  6. The game will open up. Now follow on-screen instructions to Play Star Wars™: Uprising.

How To Install Star Wars™: Uprising For PC or MAC Using Andy OS

  1. Download and install Andy OS on your Windows PC or MAC.
  2. Once downloaded, open Andy OS.
  3. Setup Google Play Account on it.
  4. Now open Apps > Google Play Store and search for “Star Wars™: Uprising“.
  5. Install Star Wars™: Uprising and wait for it to finish installation.
  6. Once done, open “Uncategorized” portion in Andy and click on Star Wars™: Uprising to play it.
  7. That’s all.

Root & Install CWM/TWRP On Xperia Tablet Z Android 5.1.1 Lollipop 10.7.A.0.222 Firmware

4
Root & Install CWM/TWRP On Xperia Tablet Z Android 5.1.1 Lollipop 10.7.A.0.222 Firmware

Tablet ZWhen Sony launched the Xperia Z family back in 2013, it revamped its tablet devices as well. As a part of the Z family, Sony launched the Xperia Tablet Z. The eldest sibling in the Z family flaunted a 10.1 inch screen. Sony powered it up with Qualcomm Snapdragon 600 CPU. A camera of 8.1 MP was fixed at the back and a 2.2 MP shooter on the front. Xperia Tablet Z ran on Android 4.1.2 JellyBean out of the box.

Recently Sony updated the entire Xperia Z family to Android 5.1.1 Lollipop. The Xperia Tablet Z also happens to be lucky enough to receive this update. New update brings some performance enhancements and bug fixes. This update rolled out through Sony PC companion and OTA. Those who haven’t received the update yet, we have already posted the guide to update Xperia Tablet Z to latest Android 5.1.1 Lollipop 10.7.A.0.222 firmware manually. Upon updating your device, you will loose the root access. Users who want to root the device running Android 5.1.1 Lollipop, they may have spotted the right place as we are going to help you out.

In the proceeding guide, we will root and install CWM/TWRP recovery on your  Xperia Tablet Z SGP 511, 512 and 521 running latest Android 5.1.1 Lollipop 10.7.A.0.222 firmware. Let’s go ahead and get it done right away.

Steps For Rooting Xperia Tablet Z SGP 511, 512 and 521 10.7.A.0.222 Firmware

1. Downgrade to .283 Firmware and Root It

  1. If you have already updated your smartphone to Android 5.1.1 Lollipop, then you have to downgrade your device to KitKat OS and Root it.
  2. Use this guide to Install .283 firmware.
  3. Root using this guide.
  4. Now you have to Install XZ Dual Recovery (Steps below).
  5. Now phone is rooted, USB Debugging must be enabled.
  6. Download latest installer for Xperia Tablet Z from here. (Z-lockeddualrecovery2.8.xx-RELEASE.installer.zip)
  7. Connect phone to PC using OEM date cable and run install.bat.
  8. It will install the custom recovery.
  9. Now work here is done. Lets move on to next step.

2. Make A Pre-Rooted Flashable Firmware For 10.7.A.0.222 FTF

3. Root and Install Recovery on Xperia Tablet Z SGP 511, 512 and 521 Android 5.1.1 10.7.A.0.222 Lollipop Firmware

  1. Custom recovery was installed in the first step.
  2. The pre-rooted firmware was created and copied to phone in next step.
  3. Now you have to turn off phone.
  4. Turn it on again and press volume up or down to enter either TWRP or CWM recovery.
    1. Now for TWRP recovery, tap Install > scroll all the way to bottom and select the copied pre-rooted firmware.zip file.
    2. After selecting the file, swipe finger from left to right on the bottom to flash.
    3. Once flashed, reboot your device and you will have pre-rooted 10.7.A.0.222 Lollipop firmware.
      1. For CWM, select Install Zip > Choose Zip from SD card > locate pre-rooted firmware.zip file > select yes to flash.
      2. Once flashed, reboot your phone and you will have 10.7.A.0.222 rooted Lollipop firmware.
  5. Now verify root access using an app like Root Checker.
  6. That’s all.

Stuck with something? Reach us out through the comment box below. We would love to help you out.

Root & Install TWRP/CWM On Xperia ZR Android 5.1.1 Lollipop 10.7.A.0.222 Firmware

Root & Install TWRP/CWM On Xperia ZR Android 5.1.1 Lollipop 10.7.A.0.222 Firmware

xperia-zrSony’s 2013 mid-ranger, the Xperia ZR took birth running Android 4.1.2 JellyBean. Being a part of Sony’s flagship Xperia Z series, this device happens to be pretty lucky. Sony update the Xperia ZR to Android 4.2.2, 4.3 JellyBean. The device also received Android 4.4 KitKat and Android 5.0.2 Lollipop. It looks like Sony wants to keep the Xperia ZR users happy, so it rolled out Android 5.1.1 Lollipop update as well. The new update brings a lot of performance enhancements and bug fixes. It also brings the missing close all button back in the recent apps menu of the phone. The battery life has become a little better as compared to Android 5.0.2 Lollipop.

In case you’ve updated your phone or you are going to update your Xperia ZR to this latest Android 5.1.1 Lollipop, you may loose the root access on your device. The new system is not directly root-able, so, in order to gain root access you will have to use a different path. Before you start finding a method here and there, we have already written this comprehensive guide for our Xperia ZR users. In the proceeding post we will show you a detailed method which will help you to root & install TWRP/CWM recovery on your Xperia ZR C5503, C5502 running latest Android 5.1.1 Lollipop 10.7.A.0.222 firmware.

Let’s go ahead and gain the root access on Xperia ZR running Android 5.1.1 Lollipop right away.

Steps For Rooting Xperia ZR C5503, C5502 10.7.A.0.222 Firmware

1. Downgrade to .283 Firmware and Root It

  1. If you have already updated your smartphone to Android 5.1.1 Lollipop, then you have to downgrade your device to KitKat OS and Root it.
  2. Use this guide to Install .283 firmware.
  3. Root using this guide.
  4. Now you have to Install XZ Dual Recovery (Steps below).
  5. Now phone is rooted, USB Debugging must be enabled.
  6. Download latest installer for Xperia ZR from here. (Z-lockeddualrecovery2.8.xx-RELEASE.installer.zip)
  7. Connect phone to PC using OEM date cable and run install.bat.
  8. It will install the custom recovery.
  9. Now work here is done. Lets move on to next step.

2. Make A Pre-Rooted Flashable Firmware For 10.7.A.0.222 FTF

3. Root and Install Recovery on ZR C5503, C5502 5.1.1 10.7.A.0.222 Lollipop Firmware

  1. Custom recovery was installed in the first step.
  2. The pre-rooted firmware was created and copied to phone in next step.
  3. Now you have to turn off phone.
  4. Turn it on again and press volume up or down to enter either TWRP or CWM recovery.
    1. Now for TWRP recovery, tap Install > scroll all the way to bottom and select the copied pre-rooted firmware.zip file.
    2. After selecting the file, swipe finger from left to right on the bottom to flash.
    3. Once flashed, reboot your device and you will have pre-rooted 10.7.A.0.222 Lollipop firmware.
      1. For CWM, select Install Zip > Choose Zip from SD card > locate pre-rooted firmware.zip file > select yes to flash.
      2. Once flashed, reboot your phone and you will have 10.7.A.0.222 rooted Lollipop firmware.
  5. Now verify root access using an app like Root Checker.
  6. That’s all.

Stuck with something? Reach us out through the comment box below. We would love to help you out.

Root & Install CWM/TWRP On Xperia ZL On Android 5.1.1 Lollipop 10.7.A.0.222 Firmware

Root & Install CWM/TWRP On Xperia ZL On Android 5.1.1 Lollipop 10.7.A.0.222 Firmware

xperia-zlFew days back Sony rolled out the Android 5.1.1 Lollipop update for the original Xperia Z family. The new update reached out Xperia Z, ZL, ZR and Tablet Z. This new update brings Google’s new Material Design UI, new notifications on lock screen, some performance enhancements and bug fixes. The new update also seems to bring the missing close all button back in the recent apps menu, the button was missing in Android 5.0.2 Lollipop as well, but in Android 5.1.1 Lollipop, Sony has added it back. Apart from these enhancements, the battery life of Xperia Z family is quite better as compared to previous versions of Android.

We have already posted the guides to update your Xperia Z, ZL, ZR or Tablet Z to Android 5.1.1 Lollipop. Those users who have already updated their Xperia ZL, they must have noticed the loss of root access. And the novice users, who haven’t rooted their phone ever before, they may want to gain root access on their device running Android 5.1.1 Lollipop. Unfortunately, the new limitations set by Google do not allow direct rooting on Android Lollipop. You will have to go through a little bit complex method in order to attain root access. In order to help you out, we have made a comprehensive guide, that will help you to easily root and install CWM or TWRP recovery on your Xperia ZL C6503 and C6506 running Android 5.1.1 Lollipop 10.7.A.0.222 firmware.

Let’s put a full stop to our conservation here and root our beloved Xperia ZL running Android Lollipop 5.1.1 now.

Steps For Rooting Xperia ZL C6503, C6506 10.7.A.0.222 Firmware

1. Downgrade to .283 Firmware and Root It

  1. If you have already updated your smartphone to Android 5.1.1 Lollipop, then you have to downgrade your device to KitKat OS and Root it.
  2. Use this guide to Install .283 firmware.
  3. Root using this guide.
  4. Now you have to Install XZ Dual Recovery (Steps below).
  5. Now phone is rooted, USB Debugging must be enabled.
  6. Download latest installer for Xperia ZL from here. (Z-lockeddualrecovery2.8.xx-RELEASE.installer.zip)
  7. Connect phone to PC using OEM date cable and run install.bat.
  8. It will install the custom recovery.
  9. Now work here is done. Lets move on to next step.

2. Make A Pre-Rooted Flashable Firmware For 10.7.A.0.222 FTF

3. Root and Install Recovery on Xperia ZL ZL C6503, C6506 5.1.1 10.7.A.0.222 Lollipop Firmware

  1. Custom recovery was installed in the first step.
  2. The pre-rooted firmware was created and copied to phone in next step.
  3. Now you have to turn off phone.
  4. Turn it on again and press volume up or down to enter either TWRP or CWM recovery.
    1. Now for TWRP recovery, tap Install > scroll all the way to bottom and select the copied pre-rooted firmware.zip file.
    2. After selecting the file, swipe finger from left to right on the bottom to flash.
    3. Once flashed, reboot your device and you will have pre-rooted 10.7.A.0.222 Lollipop firmware.
      1. For CWM, select Install Zip > Choose Zip from SD card > locate pre-rooted firmware.zip file > select yes to flash.
      2. Once flashed, reboot your phone and you will have 10.7.A.0.222 rooted Lollipop firmware.
  5. Now verify root access using an app like Root Checker.
  6. That’s all.

Stuck with something? Reach us out through the comment box below. We would love to help you out.

Perfect Shift Online for PC – Windows,7,8,10 and Mac

0
Perfect Shift Online for PC – Windows,7,8,10 and Mac

Following are the instruction for how to install Perfect Shift for Pc, Perfect Shift is racing game available on both iOS and Android PlayStore. Perfect Shift is basically designed for iOS and Android device, there is not PC format is available yet, But we can still download and install Perfect Shift for PC using third-party emulators, in the following guide I’ll tell you how to install Perfect Shift for PC.

Perfect Shift Online for PC

About Perfect Shift:

– Highest quality graphics in breathtaking 3D urban environments with superb sound & light effects
– Race 25 unique cars race through a range of urban settings – from tunnels, city streets and industrial areas
– Challenge your fearless opponents in regular races, club tournaments, challenging daily competitions, ladders and time races to achieve world domination
– Strategically tune your car: upgrade your engine, turbo, gear box, tires, nitro, weight and aerodynamics
– Customize your dream car to your personal taste!

How To Install Perfect Shift For PC or MAC Using Blackstacks

Method 1:

  1. Install Bluestacks on your PC or MAC.
  2. Download Perfect Shift Apk on your PC.
  3. Make sure that you have installed Bluestacks. Double-click the downloaded Perfect Shift Apk to install it.
  4. The APK will be installed through Bluestacks, once the notification pop-ups determining the installation completion, open Bluestacks.
  5. Now click on My Apps and then click on Perfect Shift.
  6. The application will open up. Now follow on-screen instructions to Perfect Shift.

Method 2:

  1. Install Bluestacks on your PC or MAC.
  2. Open Bluestacks and setup your Google Play Store account.
  3. Now open Google Play Store and search for “Perfect Shift“.
  4. Once found, install Perfect Shift.
  5. Now click on My Apps and then click on Perfect Shift.
  6. The game will open up. Now follow on-screen instructions to Play Perfect Shift.

How To Install Perfect Shift For PC or MAC Using Andy OS

  1. Download and install Andy OS on your Windows PC or MAC.
  2. Once downloaded, open Andy OS.
  3. Setup Google Play Account on it.
  4. Now open Apps > Google Play Store and search for “Perfect Shift“.
  5. Install Perfect Shift and wait for it to finish installation.
  6. Once done, open “Uncategorized” portion in Andy and click on Perfect Shift to play it.
  7. That’s all.

Root Xperia Z C6602, C6603 On Android 5.1.1 10.7.A.0.222 Firmware

Root Xperia Z C6602, C6603 On Android 5.1.1 10.7.A.0.222 Firmware

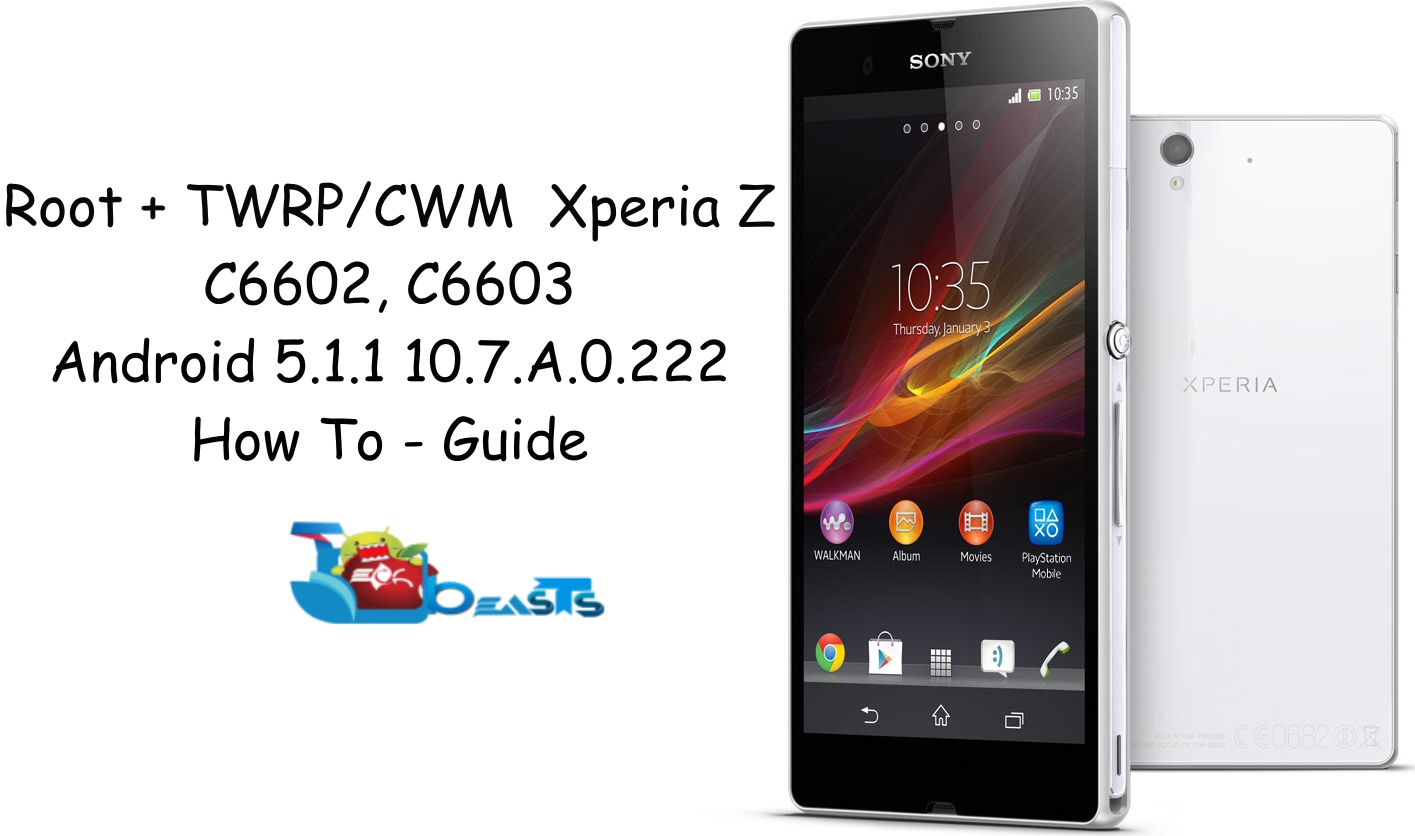
Sony just rolled out the latest and greatest Android update for its original Xperia Z. The device is now updated to Android 5.1.1 Lollipop, the new build number is 10.7.A.0.222. This new firmware brings some performance enhancements and bug fixes. Android 5.1.1 Lollipop includes a new UI according to Google’s Material Design. New Notifications on lock screen and other application enhancements. Earlier, the device was updated to Android 5.0.2 Lollipop, but as Sony promised, it rolled out Android 5.1.1 2 days ago. The new firmware is now rolling out through OTA or through Sony PC Companion, but if you haven’t got this update yet, you can also update your device using the guide available on our site.

Android power users, who updated their device to this latest firmware, they must have experienced the loss of root access. In order to gain the root access again, you’ve to go through a little different process as no straight forward methods work on Android Lollipop. As requested by our loyal users, we are going to show you the step-by-step method to root your Xperia Z C6602, C6603 running latest Android 5.1.1 Lollipop 10.7.A.0.222 firmware. You will also get CWM & TWRP recovery on your phone running Android 5.1.1 Lollipop.xperia-hero-z-white-1240x840-ab088c2ace16c071689825e41d1d3c69 (1)

Steps For Rooting Xperia Z C6602, C6603 10.7.A.0.222 Firmware

1. Downgrade to .283 Firmware and Root It

  1. If you have already updated your smartphone to Android 5.1.1 Lollipop, then you have to downgrade your device to KitKat OS and Root it.
  2. Use this guide to Install .283 firmware.
  3. Root using this guide.
  4. Now you have to Install XZ Dual Recovery (Steps below).
  5. Now phone is rooted, USB Debugging must be enabled.
  6. Download latest installer for Xperia Z from here. (Z-lockeddualrecovery2.8.xx-RELEASE.installer.zip)
  7. Connect phone to PC using OEM date cable and run install.bat.
  8. It will install the custom recovery.
  9. Now work here is done. Lets move on to next step.

2. Make A Pre-Rooted Flashable Firmware For 10.7.A.0.222 FTF

3. Root and Install Recovery on Z C6603, C6602 5.1.1 10.7.A.0.222 Lollipop Firmware

  1. Custom recovery was installed in the first step.
  2. The pre-rooted firmware was created and copied to phone in next step.
  3. Now you have to turn off phone.
  4. Turn it on again and press volume up or down to enter either TWRP or CWM recovery.
    1. Now for TWRP recovery, tap Install > scroll all the way to bottom and select the copied pre-rooted firmware.zip file.
    2. After selecting the file, swipe finger from left to right on the bottom to flash.
    3. Once flashed, reboot your device and you will have pre-rooted 10.7.A.0.222 Lollipop firmware.
      1. For CWM, select Install Zip > Choose Zip from SD card > locate pre-rooted firmware.zip file > select yes to flash.
      2. Once flashed, reboot your phone and you will have 10.7.A.0.222 rooted Lollipop firmware.
  5. Now verify root access using an app like Root Checker.
  6. That’s all.

Stuck with something? Reach us out through the comment box below. We would love to help you out.

Pre-rooted Firmware Credits:  Ben Ling | cdou2391

Download Sony Xperia Z5 Stock Wallpapers

0
Download Sony Xperia Z5 Stock Wallpapers

Few days back Sony released its latest flagship, the all new Xperia Z5. Sony launched three different variants of this device, the Xperia Z5, Xperia Z5 Premium and Xperia Z5 Compact. All these variants sport same specifications, the only difference is screen size and screen resolution. On the standard Xperia Z5, Sony used a 1080p resolution on a 5.2-inch screen. To make the display look beautiful, Sony added a number of stock wallpapers. These wallpapers add charm to the display of Xperia Z5 and make it look awesome.

The Xperia Z5 may take quite a while to find place in market, but you may enjoy having some components from the Xperia Z5. Right now, we have the stock wallpapers of Xperia Z5 for all of our users. All these wallpapers are in 2048 x 1820 pixels resolution, you can downloaded the wallpapers separately by clicking on your desired picture and saving it to your phone or computer and you can also downloaded the wallpapers from the all-in-one link attached at the bottom of this post.

Download All Xperia Z5 Stock Wallpapers