Home Blog Page 357

Install Official Android 5.1.1 Lollipop On Galaxy Tab 4 7.0

14
Install Official Android 5.1.1 Lollipop On Galaxy Tab 4 7.0

Samsung is trying its best to make sure that its users do not loose their faith in the company. Recently Samsung rolled out the long-awaited Android 5.1.1 Lollipop update for the Galaxy Tab 4 7.0’s LTE variant. Then new update all Lollipop goodies to this device as well now. The enhancements include a completely new UI based on Google’s Material Design. New notifications on lockscreen, new user profiles. There’s a number of core enhancements that improve the performance and battery life of the Galaxy Tab 4 on this latest firmware. Android 5.1.1 Lollipop also fixes the security flaws including the popular Stagefright vulnerability as well. The new update is rolling out to users in selected regions via OTA or through Samsung Kies.

Samsung takes a long time to roll out update to all the regions. We expect something similar to happen in the case of the Galaxy Tab 4. If you’re an Android freak like me, you probably won’t like to wait for the update to reach your region. If you’re willing to update your Galaxy Tab 4 7.0 to Android 5.1.1 Lollipop, you may do so manually. Using the instructions linked in the following guide, you will be able to flash Android 5.1.1 Lollipop official firmware on your Galaxy Tab 4 LTE SM-T235. The firmware isn’t available for 3G and WiFi variants of this device at the moment, but as soon as those arrive, we will link those in the following post as well and same methods will be used to update those variants.

Those who do not have an idea about the Galaxy Tab 4, Galaxy Tab 4 is Samsung’s 2014 mid-range tablet series, which happens to be a successor of the Tab 3 series. The series has Tab 4 7.0, Tab 4 8.0 and Tab 4 10.1. The 7.0 inch variant of this series sports a 7.0 inch display with a 1.3 MP shooter on the front and a 3.5 MP shooter at the back. Samsung used a Quad Core CPU clocked at 1.2 GHz to power this device up and a RAM of 1.5 GB is also there. Tab 4 7.0 comes in WiFi only, 3G and LTE variants. The device ran on Android KitKat out of the box, but now its being updated to Android 5.1.1 Lollipop. Let’s get back to our purpose for being here and update the Tab 4 7.0 to Android 5.1.1 Lollipop now.

Download Firmware:

Tab 4 T235 Android 5.1.1._T235XXU1BOH7_T235OXA1BOH7_NEE

Download your device’s firmware and extract it to get .tar.md5 file.

How To Update:

How To Install Official Android 5.1.1 Lollipop On Galaxy S5 Mini

0
How To Install Official Android 5.1.1 Lollipop On Galaxy S5 Mini

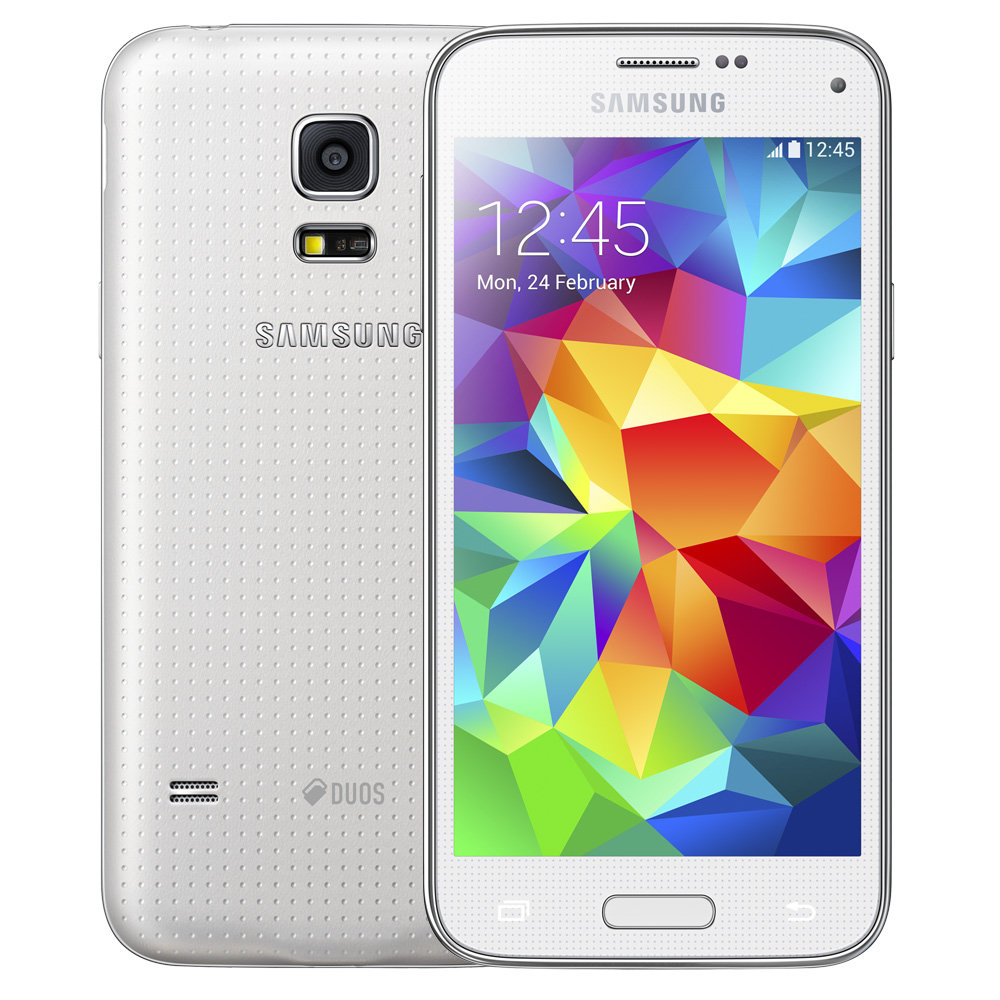
The younger sibling of Galaxy S5 is now being updated to Android 5.1.1 Lollipop. Samsung started rolling out this update to the G800R4 variant of the device in United States, which means the update will be finding its way to the other variants pretty soon. The new update beings all sweetness of the Lollipop to Galaxy S5 Mini. New stuff includes a completely revamped TouchWiz UI in accordance with the Material Design. New notifications on lockscreen have been introduced. Lollipop also improves the performance and battery life of the Galaxy S5 Mini. Some security flaws have been kicked out from the firmware which also includes elimination of Stagefirght vulnerability. This update is making its way to the users through OTA and Samsung Kies at the moment.

It’s going to take while for the software guys at Samsung to cook this update for other regions and other variants and then push it towards the users. While they do so, some Android freaks like me who own the G800R4 variant of the Galaxy S5 Mini, they may not want to wait and update their device right away. It doesn’t matter what region you’re from, you update your Galaxy S5 Mini to this latest and greatest version of Android through Samsung’s flashtool Odin. In the succeeding guide we’ve linked in all the important links and guides that will help  you to update your Galaxy S5 Mini to Android 5.1.1 Lollipop via Odin. For now you will be able to update the G800R4, G800H Galaxy S5 Mini only, but as soon as this update makes its way for other variants, we will link the firmwares for those variants in the very guide as well. Let’s go ahead and get it done now.

Download Firmware:

Download your device’s firmware and extract it to get .tar.md5 file.

How To Update:

How To Remove Unlocked Bootloader Warning From Moto G 2015, Moto X Style & Moto X Play

0
How To Remove Unlocked Bootloader Warning From Moto G 2015, Moto X Style & Moto X Play

bootlogo_1Manufacturers like Sony, Motorola and others  lock the bootloader of their Android smartphones in order to restrict their users to the stock system. It isn’t recommended by the manufacturers to unlock the bootloader as it involves certain risks, loosing the warranty is atop. But still manufacturers officially allow unlocking the bootloader in order to allow its users to get the maximum out of their devices and customise em’ the way they want. Without unlocking the bootlaoder of your device, you cannot install custom images, custom ROMs or at times you’re not able to root your device without removing the booltoader restrictions. So, for Android freaks, unlocking the bootloader of their device is a must. Motorola also provides an official guide to unlock the bootloader of its devices. Developers and normal users can easily unlock the bootloader of their Moto G 2015, Moto X Style & Moto X Play using the guidelines available at Motorola’s official page.

Motorola will keep you informed about the risks involved in unlocking the bootloader of your device before doing it and even after you’re done unlocking. Android power users do not really care about the risks as they know how to play with the device keeping at a safe end, the warnings can get really annoying at times. After unlocking the bootloader of your Moto X Play, Style or Moto G 2015, a warning will stick to the bootloader of your device. Everytime you will reboot your device, a warning of “Unlocked Bootloader” and its risks will be displayed on the phone. Basically the M logo on your device is replaced by a new image that carries the unlocked bootloader warning. If this warning is annoying you, you must remove it right away. In order to remove this warning, you’ve to replace this image with the M logo again. Wondering how? Well, that’s exactly what we are about to do.

Let’s go ahead and learn to remove the unlocked bootloader warning from your Moto G 2015, Moto X Play & Moto X Style.

Preps

  • Download & Install Motorola USB drivers
  • Download ADB & Fastboot file with new logo file and unzip it on your desktop.
  • Enable USB Debugging mode on your Moto G 2015, Moto X Play or Moto X Style. To do so, go to settings > about device > tap build number for 7 times. You will have the developer options in settings now. Open developer options and check the USB debugging mode option.

How To Remove Unlocked Bootloader Warning From Your Moto G 2015, Moto X Style & Moto X Play

Step#1: Make sure that you’ve performed necessary downloads and installations attached above.

Step#2: Now connect your Moto device to your PC. If it asks for some permission on the phone, check allow this PC and tap ok.

Step#3: Now open the extracted/unzipped Minimal ADB & Fastboot folder.

Step#4: Now click on py_cmd.exe file in order to open the command prompt.

Step#5: Enter the following commands in command prompt one by one.

Step#6: adb devices

This command will list the connected adb devices. You can verify whether your device is connected properly or not.

Step#7: adb reboot-bootloader 

This command will reboot your Moto device in bootloader mode.

Step#8: fastboot flash logo logo.bin

This will flash new logo image on your Moto smartphone.

Step#9: As the logo flashing is over, reboot your device. The unlocked bootloader warning will be gone. That’s all.

Stuck with something? Reach us out through the comment box below. We would love to help you out.

Install TWRP Recovery On Moto X Play & Root It

3
Install TWRP Recovery On Moto X Play & Root It

Moto X SyleMotorola is still following the trend set by Google which it introduced while owning Motorola. Pulling out smartphones with decent specifications under a very nice price tag was what helped Google to lift up Motorola’s boat that was about to drown. The recent flagship series of Motorola also shows the same. The new Moto X series has come up carrying some very nice specifications with an affordable price tag, which is liked by quite many users. One of the smartphones which is a part of the new Motorola trio is Moto X Play.

Moto X Play(2015) sports a 5.5 inch 1920 x 1080p display. This device carries a 21 MP shooter at its back and a 5 MP selfie shooter. Motorola used a Qualcomm Snapdragon 615 chipset to power up this device and a RAM of 2 GB. Moto X Play is available in 16/32 GB storage options. This device has a microSD card slot as well that supports up to 128 GB. Motorola has packed a huge 3630 mAh battery inside this device. Moto X Play runs on Android 5.1.1 Lollipop out of the box.

Moto X Play has a close-to-stock Android experience. Motorola doesn’t load any bloatware in its smartphones which is the reason for the efficient performance of these devices. In case you want to unleash the real potential of your Moto X Play, you will have to go a little beyond the boundaries. Gaining root access on your Moto X Play and the installing a TWRP recovery is what you can do to step inside the open-source experimental world of Android. Luckily, a TWRP recovery has already landed for the Moto X Play, that means you can also root your device now.

Users who are new to the term root access and custom recovery, they may want to know that root access is what basically helps you to unlock all the features that are apparently locked by the device manufacturers. After rooting your device, you can install root-specific applications and boost the performance and battery life of your Moto X Play. After installing a custom recovery like TWRP recovery, you can flash Custom ROMs, Mods, create & restore Nandroid backups and a lot more. In the succeeding post we are going to install a TWRP recovery on our beloved Moto X Play, after installing TWRP, we will also root this device.

Early preps:

  • This guide is only on for Moto X Play(2015). Do not try this method on any other device, otherwise you might result in bricking it.
  • Backup your important contacts, call logs, media content and text messages as a safety measure.
  • Charge your phone up to 60% in order to avoid any power issues during the recovery installation and rooting process.
  • Enable USB debugging on your phone. To do so, go to settings > about device > tap build number for 7 times. You will have developer options in settings now. Open developer options > check USB debugging mode.
  • Use original data cable to establish connection between your device and your PC.
  • Follow this guide to the letter to avoid and mishap.

Disclaimer: Methods involved in flashing custom recoveries and rooting the device are highly custom. In case of a mishap, Techbeasts or Motorola may not be held responsible. Make sure that you’re doing everything at your own risk.

Required downloads & installations

  1. Unlock the bootloader of your Moto X Play.
  2. Download and install Motorola USB drivers.
  3. Download ADB & Fastboot packege with TWRP recovery.img file. Extract this ADB & Fastboot file on your desktop to access its contents.
  4. Download SuperSu.zip file and copy it to your phone’s internal storage.

How To Install TWRP Recovery on Moto X Play

Step#1: Make sure that you’ve followed all the steps explained above.

Step#2: Now connect your Moto G to your PC. If it asks for some permission on the phone, check allow this PC and tap ok.

Step#3: Now open the extracted Minimal ADB & Fastboot folder.

Step#4: Now click on py_cmd.exe file in order to open the command prompt.

Step#5: Enter the following commands in command prompt one by one.

Step#6: adb devices

This command will list the connected adb devices. You can verify whether your device is connected properly or not.

Step#7: adb reboot-bootloader 

This command will reboot your Moto X Play in bootloader mode.

Step#8: fastboot flash recovery recovery.img

This will flash TWRP recovery on your Moto X Play.

Step#9: As the recovery flashing is over, select recovery from Fastboot mode on your phone. You will now see the TWRP logo on the screen, that means you’ve successfully flashed TWRP recovery.

Step#10: Tap Reboot > System in TWRP recovery in order to reboot your Moto X Play now & let’s root it now.

How To Root Moto X Play

Step#1: Make sure that you’ve copied SuperSu.zip file to your phone. In case you haven’t, do it now.

Step#2: Now boot your phone in to TWRP recovery mode. To do so, turn it off completely first. Now turn it on by pressing and holding Volume Down + Power Key.

Step#3: As you see TWRP recovery, tap “Install > Locate the copied SuperSu.zip file (should be at bottom) > tap this file > Swipe the bar at the bottom of screen to confirm flash”.

Step#4: As soon as SuperSu.zip file is flashed, go back to main menu in TWRP and tap reboot > system.

Step#5: Your device will boot up now. Find SuperSu in app drawer. Install Root Checker app to verify root access.

Also See: How To Remove Unlocked Bootloader Warning From Moto G 2015, Moto X Style & Moto X Play

That’s all. Stuck with something? Don’t worry! Reach us out through the comment box below.

Install TWRP Recovery On Moto X Style(Pure) & Root It

0
Install TWRP Recovery On Moto X Style(Pure) & Root It

Moto X PureMoto X Pure 2015, more commonly known as Moto X Style all around the world is one of the smartphones to come out of the curtains in Motorola’s new flagship line up for the year 2015. Moto X Pure is the top-notch model in the new trio that Motorola recently unveiled. Moto X Style or Moto X Pure comes with a very nice spec-sheet tagged under an affordable price tag. Moto X Pure comes in unlocked form and is designed to work with all variants all across the world. That means you won’t be facing any carrier restrictions anymore. Moreover, this device’s design, build and hardware make it worth having.

Moto X Pure sports a 5.7 inch QHD display, which is similar to that of the Galaxy Note 4 & 5’s in terms of size and resolution. Motorola used Qualcomm’s Snapdragon 808 Hexacore CPU to power this device up. Its RAM is 3 GB, the internal storage options are 16/32/64 GB with a microSD card slot that supports up to 128 GB. Moto X Style (Pure) carries a 21 MP shooter at the back and 5 MP shooter on the front. This device can be found running Android 5.1.1 Lollipop having Motorola’s Minimal Software atop. Luckily, Motorola doesn’t push any bloatware in its smartphones, that means you will be getting a very close-to-stock Android experience on this device.

Having a device like Motorola Moto X Style means you can explore the vast open-nature world of Android by breaking the limits set by manufacturers. This is possible by means of root access and custom recovery. One of the advantages of root access is to remove the in-build applications which are known as bloatware. Although Motorola has already done this job for you, but there’s a lot more you can do after rooting your Android smartphone. You can bring in a number of root-specific applications and boost up the performance, battery life of your Moto X Style. By means of a custom recovery you can flash custom ROMs, flash MODs, create & restore Nandroid Backup etc.

TWRP recovery and root method is already available for our beloved Motorola Moto X Style. If you’ve been looking to unleash the true power of your Moto X Style, this may be the right time for you to go ahead. In the succeeding post we are going to help you to install TWRP recovery on your Moto X Style 2015 and then gain the root access on it. Let’s go ahead and get it done without any further ado.

Early preps:

  • This guide is only on for Moto X Style. Do not try this method on any other device, otherwise you might result in bricking it.
  • Backup your important contacts, call logs, media content and text messages as a safety measure.
  • Charge your phone up to 60% in order to avoid any power issues during the recovery installation and rooting process.
  • Enable USB debugging on your phone. To do so, go to settings > about device > tap build number for 7 times. You will have developer options in settings now. Open developer options > check USB debugging mode.
  • Use original data cable to establish connection between your device and your PC.
  • Follow this guide to the letter to avoid and mishap.

Disclaimer: Methods involved in flashing custom recoveries and rooting the device are highly custom. In case of a mishap, Techbeasts or Motorola may not be held responsible. Make sure that you’re doing everything at your own risk.

Required downloads & installations

  1. Unlock the bootloader of your Moto X Style.
  2. Download and install Motorola USB drivers.
  3. Download ADB & Fastboot packege with TWRP recovery.img file. Extract this ADB & Fastboot file on your desktop to access its contents.
  4. Download SuperSu.zip file and copy it to your phone’s internal storage.

How To Install TWRP Recovery on Moto X Style

Step#1: Make sure that you’ve followed all the steps explained above.

Step#2: Now connect your Moto X Style to your PC. If it asks for some permission on the phone, check allow this PC and tap ok.

Step#3: Now open the extracted Minimal ADB & Fastboot folder.

Step#4: Now click on py_cmd.exe file in order to open the command prompt.

Step#5: Enter the following commands in command prompt one by one.

Step#6: adb devices

This command will list the connected adb devices. You can verify whether your device is connected properly or not.

Step#7: adb reboot-bootloader 

This command will reboot your Moto X Style in bootloader mode.

Step#8: fastboot flash recovery recovery.img

This will flash TWRP recovery on your Moto X Style.

Step#9: As the recovery flashing is over, select recovery from Fastboot mode on your phone. You will now see the TWRP logo on the screen, that means you’ve successfully flashed TWRP recovery.

Step#10: Tap Reboot > System in TWRP recovery in order to reboot your Moto X Style now & let’s root it now.

How To Root Moto X Style(Pure)

Step#1: Make sure that you’ve copied SuperSu.zip file to your phone. In case you haven’t, do it now.

Step#2: Now boot your phone in to TWRP recovery mode. To do so, turn it off completely first. Now turn it on by pressing and holding Volume Down + Power Key.

Step#3: As you see TWRP recovery, tap “Install > Locate the copied SuperSu.zip file (should be at bottom) > tap this file > Swipe the bar at the bottom of screen to confirm flash”.

Step#4: As soon as SuperSu.zip file is flashed, go back to main menu in TWRP and tap reboot > system.

Step#5: Your device will boot up now. Find SuperSu in app drawer. Install Root Checker app to verify root access.

Also See: How To Remove Unlocked Bootloader Warning From Moto G 2015, Moto X Style & Moto X Play


That’s all. Stuck with something? Don’t worry! Reach us out through the comment box below.
Download Root Genius APK For Android & Windows Version

0
Download Root Genius APK For Android & Windows Version

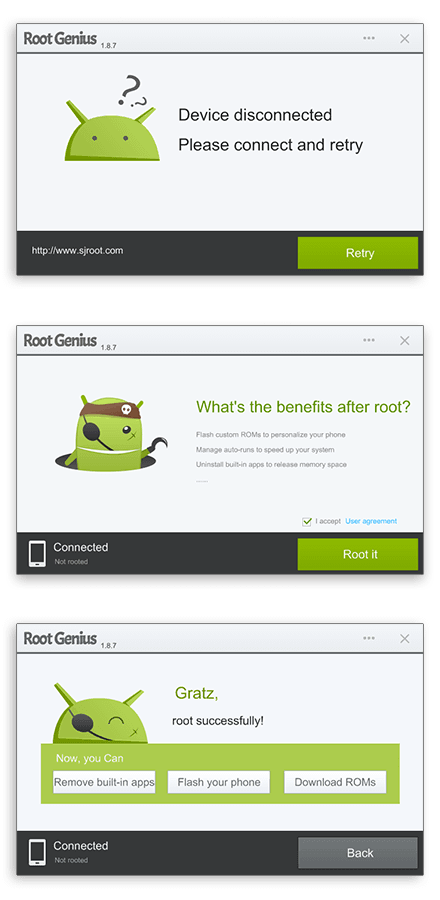
Just like KingRoot & Framaroot, Root Genius is another application that allows the users to root their device in just one click. Root Genius is available for both, Android & Windows. You can use the version that seems convenient to your and root your phone in the blink of an eye. Root Genius supports more then 10,000 Android devices. The application doesn’t require the users to go through anything complex. All you’ve to do is to get your hands on the Android or Windows version of Root Genius and follow on-screen instructions to unleash the real power your Android smartphone has got.

Users who are new to the word root access, they may want to have a little knowledge about it. Root access has a number of advantages. After gaining root access on your device, you can remove the in-build applications which are known as bloatware. You can also flash custom ROMs, custom recoveries, create Nandroid Backups, EFS/IMEI Backups, improve the battery life and performance of your device. Rooting your device voids the warranty, but for Android power users it doesn’t really matter as the advantages of root access are worth having.

If you’ve been looking for Root Genius’s APK & Windows versions’s latest download links, you may stop doing so. We’ve already grabbed all versions of Root Genius APK and Windows version. You can go ahead and download it and gain root access on your device right away.

Root Genius APK for Android – All Versions

Download Root Genius V1.0.21 APK

Download Root Genius V1.0.22 APK

Download Root Genius V1.0.23 APK

Download Root Genius V1.1.33 APK

Download Root Genius V1.3.47 APK

Download Root Genius V1.3.48 APK

Download Root Genius V1.4.51 APK

Download Root Genius V1.4.55 APK

Download Root Genius V1.6.64 APK

Download Root Genius V1.6.69 APK 

How To Root Your Device Using Root Genius:

  • Download the APK file directly to your phone or copy it to your phone from your PC.
  • Locate the APK file in your phone using a file manager and install it.
  • Now open the installed Root Genius from App drawer.
  • Follow on-screen instructions to root your Android smartphone now.

Note: It depends on your phone’s model number and firmware version to be compatible with root genius. Root genius is not guaranteed to work with all Android smartphones.

Root Genius For Windows1-down

Download Root Genius V2.2.6 For Windows

  • Download the tool and install it on your Windows PC.
  • Enable USB debugging mode on your phone and connect it to your PC.
  • Now open the Root Genius tool and follow on-screen instructions to root your Android phone using Root Genius.

Source

Install TWRP Recovery & Root Galaxy Tab S 10.5 T807

22
Install TWRP Recovery & Root Galaxy Tab S 10.5 T807

Galaxy Tab S came tagged under a list of variants. One of the LTE variants of Galaxy Tab S is T807. Samsung has now rolled out Android 5.0 Lollipop for almost all variants of the Galaxy Tab S, and T807 is also enjoying the Lollipop sweetness now. Earlier we posted the method to root and install TWRP recovery on other variants of Galaxy Tab S 10.5, but the method wasn’t available for T807 running Lollipop at that time. The good news for SM-T807 users is, root and TWRP recovery are now available for SM-T807.

If you’ve been waiting to root your Galaxy Tab S 10.5 SM-T807, this may be the right time for you. In the following post we are going to show you how can install TWRP recovery and then easily root your Galaxy Tab S 10.5 T807 on Android Lollipop. This method will also work with Tab S 10.5 running older versions of Android.

Preparations

  • This guide is only for Galaxy Tab S 10.5 T807. Do not try this on any other device.
  • Charge your device up to 50%.
  • Use original data cable to establish connection between your PC and your phone.
  • Backup your important data as a safety measure.
  • Follow this guide to the letter to avoid any mishap.

Disclaimer: Flashing custom recovery and rooting the device void its warranty. In case of a mishap, TechBeasts or Samsung may not be held responsible. Make sure that you’re doing everything at your own risk and with your full understanding.

Required Downloads:

Install TWRP & Root Galaxy Tab S 10.5 T807 On Android Lollipop

  1. Open Odin3 V3.10.6.exe that you extracted on your PC.
  2. Put your Tab S 10.5 in download mode now. To do so, turn it off completely. Now turn it on by pressing and holding Volume Down + Home + Power Key. Once your phone boots up, press the Volume Up key to continue.
  3. Connect your phone to your PC now. The ID:COM box in the top-left corner of Odin3 should  turn blue. This indicates that your phone is connected properly.
  4. Now click the “AP” tab in Odin and select the TWRP Recovery.tar file that you downloaded. It will take a second or two for Odin3 to load this file.
  5. If the Auto-reboot option is unticked, tick it. Leave all other options in Odin3 as they are.Odin 3.10.6 Explained_Techbeasts
  6. Now you’re all set to flash the recovery. Just click the start button in Odin3 and sit back.
  7. Once the process box above ID:COM box shows green light and flashing process is finished, disconnect your device.
  8. Now turn off your device properly as we are going to boot into recovery mode.
  9. Now turn it on by pressing and holding Volume Up + Home + Power Key. This will boot your device in recovery mode. It should be TWRP recovery that you just installed.
  10. Now in TWRP recovery, select Install > locate the SuperSu.zip file and flash it.
  11. Once flashed, reboot your device.
  12. Checkout the SuperSu in application drawer. Also install BusyBox from Play Store.
  13. Verify root access using Root Checker.
  14. That’s all. You’re now set to unleash the open source nature of Android.

Stuck with anything? Reach us out through the comment box below!

Credits: ashyx

Root & Install Recovery On Xperia Z1 Compact Android 5.1.1 14.6.A.0.368 Firmware

Root & Install Recovery On Xperia Z1 Compact Android 5.1.1 14.6.A.0.368 Firmware

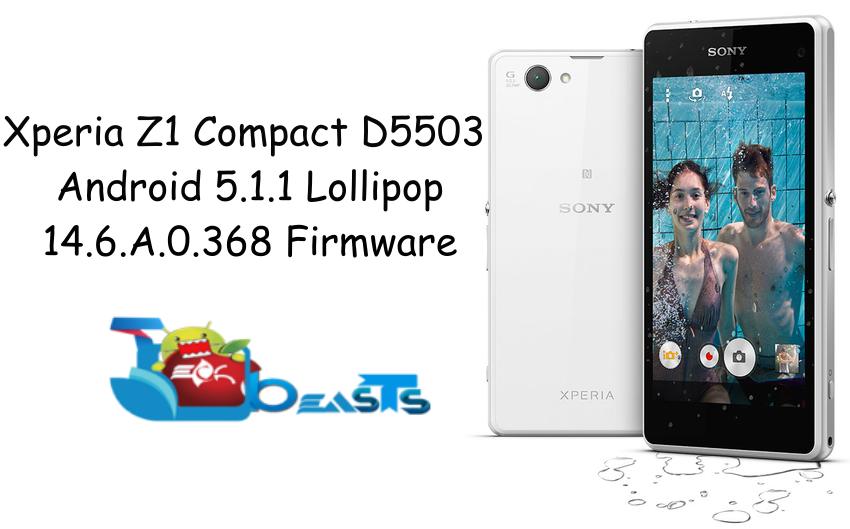
Just a few days ago Sony updated the Xperia Z1 family to Android 5.1.1 Lollipop. Xperia Z1 Compact’s D5503 variant received the update. The new build number is 14.6.A.0.368. New firmware brings a handful of improvements and performance enhancements. If you’re planning to update your device and you also happen to be a power user, you may want to root it later on. Due to some limitations set by Google in the core Android 5.1.1 Lollipop system, directly rooting the phone is not possible anymore. Rooting the device requires following a little bit different and complex method. If you’re already looking for a way to root your Xperia Z1 Compact D5503 running this latest Android 5.1.1 Lollipop firmware, you may cheer up to know that you’ve spotted the right place.

In the succeeding guide we are going to root and install CWM/TWRP recovery on our beloved Xperia Z1 Compact running latest Android 5.1.1 Lollipop 14.6.A.0.368 firmware. Let’s go ahead and root the device now.

1. This is only for Sony Xperia Z1 Compact D5503

This rooting method is only for the device mentioned above. Make sure that your model number matches the one listed above. To do so, go to Settings > About Device on your device and see your model number. Flashing this firmware on any other device will result in bricking it so make sure that you meet this requirement first of all.

2. Battery should be charged at least over 60%.

Make sure that your battery is charged enough to complete the flashing process. In case your battery is low and your device goes dead during the flashing process, you may end up soft bricking your device as it won’t complete the flashing process.

3. Backup everything!

Just to be on the safe side, you may consider backing up each and everything from your Android device. This is highly recommended so that in case anything goes wrong, you still have the access to all of your data and you can restore it immediately. You may backup everything as listed below.

  • Backup SMS Messages
  • Backup Call Logs
  • Backup Contacts
  • Backup Media – Copy your files manually to your PC or Laptop.
  • Titanium Backup – If already rooted, use Titanium Backup to backup all of your apps, system data and other important content. If you haven’t rooted your device previously, skip this step.
  • Backup Nandroid  If CWM  or TWRP installed previously, otherwise skip this step and perform this at the end of flashing.

Note: This method will work for both, Locked & Unlocked bootloaders.

How To Root & Install Recovery On Xperia Z1 Compact Android 5.1.1 14.6.A.0.368 Firmware

1. Downgrade to .108 Firmware and Root It

  1. If you have already updated your smartphone to Android 5.1.1 Lollipop, then you have to downgrade your device to KitKat OS and Root it.
  2. Use this guide to Install .108 firmware.
  3. Root using this guide.
  4. Now Install XZ Dual Recovery.
  5. Now phone is rooted, USB Debugging must be enabled.
  6. Download latest installer for Xperia Z1 Compact from here. (Z1 Compact-lockeddualrecovery2.8.X-RELEASE.installer.zip)
  7. Connect phone to PC using OEM date cable and run install.bat.
  8. It will install the custom recovery.
  9. Now work here is done. Lets move on to next step.

2. Make A Pre-Rooted Flashable Firmware For .368 FTF

  1. Download 14.6.A.0.368 FTF and place it anywhere on PC.
  2. Download Z1 Compact-lockeddualrecovery2.8.X-RELEASE.flashable.zip
  3. Now create a pre-rooted firmware using this guide: How To Create Sony Xperia Pre-Rooted Firmware With PRF Creator
  4. Once the Flashable ROM is created, it will show the successful message.
  5. Do not touch any other option while creating the pre-rooted firmware.
  6. Now copy the pre-rooted firmware to the phone’s internal storage.
  7. Our work in this step is now done. Move on to next step.

Note: If you do not want to create a pre-rooted flashable zip for your phone yourself, then you can download it for your phone’s specific model number and use it in the guide.

D5503 14.5.A.0.368 Pre-Rooted Flashable Zip

3. Root and Install Recovery on Z1 Compact D5503 5.1.1 Lollipop Firmware

  1. Custom recovery was installed in the first step.
  2. The pre-rooted firmware was created and copied to phone in next step.
  3. Now you have to turn off phone.
  4. Turn it on again and press volume up or down repeatedly to enter custom recovery.
  5. Click on install and locate the folder where you placed the flashable zip earlier.
  6. Tap on it and install it.
  7. Now reboot the phone and find SuperSu in app drawer.
  8. Install Root Checker from the Play Store to verify root access now.
  9. Pheww! That’s all. You’re rooted and have the custom recovery installed.

Got any questions? Ask me in the comments below

Root & Install Recovery On Xperia Z1 Android 5.1.1 14.6.A.0.368 Firmware

Root & Install Recovery On Xperia Z1 Android 5.1.1 14.6.A.0.368 Firmware

Xperia Z1 has been updated to Android 5.1.1 Lollipop. Because of some changes in the core of Android 5.1.1 Lollipop, directly rooting this firmware is not possible. Users who are looking to root their Xperia Z1 running Android 5.1.1 Lollipop 14.6.A.0.368 firmware, they will have to use a little different method which involves downgrading to a previous firmware and then flashing a pre-rooted zip file of the new Android 5.1.1 Lollipop. If you’ve been looking for a method, you’ve already spotted the right place.

In the following post we are going to help you to root & install CWM/TWRP recovery on your Xperia Z1 C6902, C6903, C6906 running latest Android 5.1.1 Lollipop 14.6.A.0.368 firmware. Let’s go ahead and get it done right away.

1. This is only for Sony Xperia Z1 C6902, C6903 and Xperia Z1 C6906

This rooting method is only for the device mentioned above. Make sure that your model number matches the one listed above. To do so, go to Settings > About Device on your device and see your model number. Flashing this firmware on any other device will result in bricking it so make sure that you meet this requirement first of all.

2. Battery should be charged at least over 60%.

Make sure that your battery is charged enough to complete the flashing process. In case your battery is low and your device goes dead during the flashing process, you may end up soft bricking your device as it won’t complete the flashing process.

3. Backup everything!

Just to be on the safe side, you may consider backing up each and everything from your Android device. This is highly recommended so that in case anything goes wrong, you still have the access to all of your data and you can restore it immediately. You may backup everything as listed below.

  • Backup SMS Messages
  • Backup Call Logs
  • Backup Contacts
  • Backup Media – Copy your files manually to your PC or Laptop.
  • Titanium Backup – If already rooted, use Titanium Backup to backup all of your apps, system data and other important content. If you haven’t rooted your device previously, skip this step.
  • Backup Nandroid  If CWM  or TWRP installed previously, otherwise skip this step and perform this at the end of flashing.

Note: This method will work for both, Locked & Unlocked bootloaders.

How To Root & Install Recovery On Xperia Z1 Android 5.1.1 14.6.A.0.368 Firmware

1. Downgrade to .108 Firmware and Root It

  1. If you have already updated your smartphone to Android 5.1.1 Lollipop, then you have to downgrade your device to KitKat OS and Root it.
  2. Use this guide to Install .108 firmware.
  3. Root using this guide.
  4. Now Install XZ Dual Recovery.
  5. Now phone is rooted, USB Debugging must be enabled.
  6. Download latest installer for Xperia Z1 from here. (Z1-lockeddualrecovery2.8.X-RELEASE.installer.zip)
  7. Connect phone to PC using OEM date cable and run install.bat.
  8. It will install the custom recovery.
  9. Now work here is done. Lets move on to next step.

2. Make A Pre-Rooted Flashable Firmware For .368 FTF

  1. Download 14.6.A.0.368 FTF and place it anywhere on PC.
  2. Download Z1-lockeddualrecovery2.8.10-RELEASE.flashable.zip
  3. Now create a pre-rooted firmware using this guide: How To Create Sony Xperia Pre-Rooted Firmware With PRF Creator
  4. Once the Flashable ROM is created, it will show the successful message.
  5. Do not touch any other option while creating the pre-rooted firmware.
  6. Now copy the pre-rooted firmware to the phone’s internal storage.
  7. Our work in this step is now done. Move on to next step.

Note: If you do not want to create a pre-rooted flashable zip for your phone yourself, then you can download it for your phone’s specific model number and use it in the guide.

C6902 14.5.A.0.368 Pre-Rooted Flashable Zip | C6903 14.6.A.0.368 Pre-Rooted Flashable Zip  | C6906 14.6.A.0.368 Pre-Rooted Flashable Zip

3. Root and Install Recovery on Z1 C6902/C6903/C6906 5.1.1 Lollipop Firmware

  1. Custom recovery was installed in the first step.
  2. The pre-rooted firmware was created and copied to phone in next step.
  3. Now you have to turn off phone.
  4. Turn it on again and press volume up or down repeatedly to enter custom recovery.
  5. Click on install and locate the folder where you placed the flashable zip earlier.
  6. Tap on it and install it.
  7. Now reboot the phone and find SuperSu in app drawer.
  8. Install Root Checker from the Play Store to verify root access now.
  9. Pheww! That’s all. You’re rooted and have the custom recovery installed.

Got any questions? Ask me in the comments below

Root & Install CWM/TWRP On Xperia Z Ultra Android 5.1.1 Lollipop 14.6.A.0.368

28
Root & Install CWM/TWRP On Xperia Z Ultra Android 5.1.1 Lollipop 14.6.A.0.368

Xperia Z Ultra started receiving Android 5.1.1 Lollipop update 2 days ago. The update brings a handful of changes and enhances the performance of this device up to the greatest extent. The new update takes the build number of 14.6.A.0.368. We have already posted the guides that will help you to update your Xperia Z Ultra C6833, C6802 & C6806 to this latest Android 5.1.1 Lollipop 14.6.A.0.368 firmware. Android freaks, who have already updated or who are going to update their device to the latest firmware, they will loose the root access if they have already rooted their device. The new firmware will wipe root access from the device and you won’t be able to root it using any direct method again. Android 5.1.1 Lollipop on Xperia devices requires a little different method to be rooted. If you’re already looking for a method to root your Z Ultra running Android 5.1.1 Lollipop, you may feel happy knowing that you’ve spotted the right place.Xperia_Z_Ultra_04

In the succeeding guide, we are going to teach you to root your Xperia Z Ultra C6802, C6806 & C6833 running latest Android 5.1.1 Lollipop 14.6.A.0.368 firmware. Let’s go ahead and get this done right away.

Note: This method will work for both, locked & unlocked bootloaders.

1. This is only for Sony Xperia Z Ultra C6802, Z Ultra C6806 and Z Ultra C6833

This rooting method is only for the device mentioned above. Make sure that your model number matches the one listed above. To do so, go to Settings > About Device on your device and see your model number. Flashing this firmware on any other device will result in bricking it so make sure that you meet this requirement first of all.

2. Battery should be charged at least over 60%.

Make sure that your battery is charged enough to complete the flashing process. In case your battery is low and your device goes dead during the flashing process, you may end up soft bricking your device as it won’t complete the flashing process.

3. Backup everything!

Just to be on the safe side, you may consider backing up each and everything from your Android device. This is highly recommended so that in case anything goes wrong, you still have the access to all of your data and you can restore it immediately. You may backup everything as listed below.

  • Backup SMS Messages
  • Backup Call Logs
  • Backup Contacts
  • Backup Media – Copy your files manually to your PC or Laptop.
  • Titanium Backup – If already rooted, use Titanium Backup to backup all of your apps, system data and other important content. If you haven’t rooted your device previously, skip this step.
  • Backup Nandroid  If CWM  or TWRP installed previously, otherwise skip this step and perform this at the end of flashing.

4. Enable USB Debugging Mode on your device.

Enable USB debugging mode on your device. To do so, tap settings>developer options>USB debugging. If you can’t find developer options in settings, then tap settings > about device and tap “Build Number” for 7 times and you’ll get em’ activated under settings.

5. Install and setup Sony Flashtool.

You must have installed Sony Flashtool. Find the full guide here.

After installing Sony Flashtool, open the Flashtool folder from the drive where you installed it. Now open Flashtool>Drivers>Flashtool-drivers.exe and install the Flashtool, Fastboot & Xperia Z Ultra drivers from the list. If you do not find the Flashtool drivers in Flashmode, skip this step and install Sony PC Companion instead, for drivers support. [Important]

6. Use OEM data cable to establish connection.

Make sure that you use the phone’s original data cable to establish connection between your phone and the PC. Using a different data cable might result in interrupting the firmware installation.


Steps For Rooting Xperia Z Ultra 14.6.A.0.368 Firmware

1. Downgrade to .108 Firmware and Root It

  1. If you have already updated your smartphone to Android 5.1.1 Lollipop, then you have to downgrade your device to KitKat OS and Root it.
  2. Use this guide to Install .108 firmware.
  3. Root using this guide.
  4. Now Install XZ Dual Recovery.
  5. Now phone is rooted, USB Debugging must be enabled.
  6. Download latest installer for Xperia Z Ultra from here. (ZU-lockeddualrecovery2.8.10-RELEASE.installer.zip)
  7. Connect phone to PC using OEM date cable and run install.bat.
  8. It will install the custom recovery.
  9. Now work here is done. Lets move on to next step.

2. Make A Pre-Rooted Flashable Firmware For 14.6.A.0.368 FTF

  1. Download 14.6.A.0.368 FTF and place it anywhere on PC (The Firmware must be specific to your device).
  2. Download ZU-lockeddualrecovery2.8.x-RELEASE.flashable.zip
  3. Now create a pre-rooted firmware using this complete guide.
  4. Now copy the pre-rooted firmware to the phone’s internal storage.
  5. Our work in this step is now done. Move on to next step.


3. Root and Install Recovery on Z Ultra C6802/C6806/C6833 5.1.1 Lollipop Firmware

  1. Custom recovery was installed in the first step.
  2. The pre-rooted firmware was created and copied to phone in next step.
  3. Now you have to turn off phone.
  4. Turn it on again and press volume up or down repeatedly to enter custom recovery.
  5. Click on install and locate the folder where you placed the flashable zip earlier.
  6. Tap on it and install it.
  7. Now reboot the phone.
  8. Your phone will boot up, find out SuperSu in app drawer.
  9. Phewww! You’re rooted with TWRP & CWM recovery installed on your Z Ultra. That’s all.

Let us know how did it go for you. In case you’re stuck with something, reach us out through the comment box below. We would love to help you out.

Update Xperia Z Ultra C6833, C6806 & C6802 To Android 5.1.1 Lollipop 14.6.A.0.368 Firmware

7
Update Xperia Z Ultra C6833, C6806 & C6802 To Android 5.1.1 Lollipop 14.6.A.0.368 Firmware

xperia-z-ultraTreat time for the Xperia Z Ultra owners. The Android 5.1.1 Lollipop update is finally rolling out for Xperia Z Ultra C6833 and C6806. The new update takes the build number to 14.6.A.0.368. Sony has completely fixed the wide-spread Stagefright exploit in this update, which happens to be quite a good move. The update brings a number of changes which include integration of LinkedIn in Calendar and Contacts, Camera focus, speed and accuracy enhancements, new Xperia themes, new settings menu icons, additional options for Wi-Fi and Bluetooth in notification menu. This new update is currently rolling out to the users in selected regions through OTA or through Sony PC Companion.

Those Xperia Z Ultra owners who do not want to wait for this update to hit their region through OTA or through PC Companion, they may want to update their device right away using a manual method. As usual, we are here once again with a method to update your Xperia Z Ultra to the latest and greatest available version of Android.

In the succeeding post, we are going to guide you to update your Xperia Z Ultra C6833, C6802 & C6806 to Android 5.1.1 Lollipop 14.6.A.0.368 firmware using Sony Flashtool. Let’s go ahead and get it done right now.

Early Preparations:

1. This is only for Sony Xperia Z Ultra C6802, C6806 & C6833

This ROM is only for the device mentioned above. Make sure that your model number matches the one listed above. To do so, go to Settings > About Device on your device and see your model number. Flashing this firmware on any other device will result in bricking it so make sure that you meet this requirement first of all.

2. Battery should be charged at least over 60%.

Make sure that your battery is charged enough to complete the flashing process. In case your battery is low and your device goes dead during the flashing process, you may end up soft bricking your device as it won’t complete the flashing process.

3. Backup everything!

Just to be on the safe side, you may consider backing up each and everything from your Android device. This is highly recommended so that in case anything goes wrong, you still have the access to all of your data and you can restore it immediately. You may backup everything as listed below.

  • Backup SMS Messages
  • Backup Call Logs
  • Backup Contacts
  • Backup Media – Copy your files manually to your PC or Laptop.
  • Titanium Backup – If already rooted, use Titanium Backup to backup all of your apps, system data and other important content. If you haven’t rooted your device previously, skip this step.
  • Backup Nandroid – If CWM  or TWRP installed previously, otherwise skip this step and perform this at the end of flashing.

4. Enable USB Debugging Mode on your device.

Enable USB debugging mode on your device. To do so, tap settings>developer options>USB debugging. If you can’t find developer options in settings, then tap settings > about device and tap “Build Number” for 7 times and you’ll get em’ activated under settings.

5. Install and setup Sony Flashtool.

You must have installed Sony Flashtool. Find the full guide here.

After installing Sony Flashtool, open the Flashtool folder from the drive where you installed it. Now open Flashtool>Drivers>Flashtool-drivers.exe and install the Flashtool, Fastboot & Xperia Z Ultra drivers from the list. [Important]

6. Use OEM data cable to establish connection.

Make sure that you use the phone’s original data cable to establish connection between your phone and the PC. Using a different data cable might result in interrupting the firmware installation.


How To Update Sony Xperia Z Ultra C6802, C6806, C6833 To Official Android 5.1.1 14.6.A.0.368 Lollipop  Firmware

Before moving forward, please make sure that you’ve read the pre requisites and ensure that you are set to go ahead.

  1. Download the latest firmware Android 5.1.1 Lollipop 14.6.A.0.368 FTF file.
    1. For Xperia Z Ultra C6802 [Generic/Unbranded. Link 1 | Create your own FTF using this guide.
    2. For Xperia Z Ultra C6806[Generic/Unbranded] Link 1  | You can also create your own FTF using this guide.
    3. For Xperia Z Ultra C6833 [Generic/Unbranded] Link 1  | You can also create your own FTF using this guide.
  2. Copy the file and paste in Flashtool>Firmwares folder.
  3. Open Flashtool.exe now.
  4. Hit the small lightening button on the top left corner and select Flashmode.
  5. Select the FTF firmware file that you placed in the Firmware folder.
  6. From the right side, select what do you want to wipe. Data, cache and apps log, all wipes are recommended, perhaps you may select if you don’t want.
  7. Click on OK, and it will start preparing the firmware for flashing. This may take a little while to load.
  8. As soon as the firmware is loaded, it will prompt you to attach the phone by turning it off and keeping the back key press.
  9. For Xperia Z Ultra Volume Down key will do the job of back key, just turn off your phone, keep the Volume Down key pressed and plug in the data cable.
  10. As soon as the phone is detected in Flashmode, the firmware will start flashing, Do not leave the Volume Down key until the process is complete.
  11. As soon as you see “Flashing ended or Finished Flashing” leave the Volume Down key, plug the cable out and reboot.
  12. That’s All! Congrats! You’ve installed latest Android 5.1.1 Lollipop on your Xperia Z Ultra. Enjoy

In case you got any queries or face any problems regarding this guide, please feel free to stop by the comment box below and let us know. We will get back to you as soon as possible. Thanks all!

Here’s the complete changelog of this update:

Improvements to volume and silent mode control, more control of your alerts, simplified and enhanced design
– Integration of LinkedIn with your Calendar and Contacts
– Camera focus, speed and accuracy improvements in Superior Auto mode
– Many new features for Xperia in Business, enhancing enterprise support for Xperia
– Now take pictures from the camera using Sony SmartWatch 3; use the SW3 as a remote shutter button
– Instant calendar events – create & share smart events directly from any email
– Calendar agenda in Email – no need to switch apps to check upcoming events
– Richer Xperia themes
– New Settings menu icons
– Additional options for Wi-Fi and Bluetooth in notification menu

Update Xperia Z1 Compact D5503 To Android 5.1.1 Lollipop 14.6.A.0.368 Firmware

0
Update Xperia Z1 Compact D5503 To Android 5.1.1 Lollipop 14.6.A.0.368 Firmware

Xperia Z1 CompactSony finally made the move and updated the Xperia Z1 Compact to the latest and greatest available version of Android, the Andorid 5.1.1 Lollipop. The new update takes the build number to 14.6.A.0.368. It’s quite a good news for Xperia Z1 Compact as they were pretty much disappointed after seeing Sony rolling out the update for Xperia Z family before Xperia Z1 family. But it didn’t take quite long for Sony to roll out this update, the update is here just after a week. This new update brings a number of enhancements and bug fixes to the device. Atop of the list is the complete fix to stagefright vulnerability that has been eating up many Android users.

Other improvements in this update include Camera focus, speed and accuracy. New features have been introduced for Xperia in Business, you can also take pictures from camera using Sony SmartWatch 3. Calendar agenda in Email, Richer Xperia Themes and some other new stuff has been added. You may have a look on the changes upon installing this update.

Currently Sony is rolling out this update to Xperia Z1 Compact D5503 in a few regions only. It will take quite a while for this update to reach all the regions through OTA or through Sony PC Companion. If you happen to be an Android enthusiast just as I am, you may dislike waiting and you may want to update your phone right away. We are about to serve this very purpose in the on-going post.

We will be showing you a comprehensive guide that will help you to update your Xperia Z1 Compact D5503 from Android 5.0.2 Lollipop to Android 5.1.1 Lollipop 4.6.A.0.368 using Sony Flashtool. Let’s go ahead without any further ado and flash the firmware right away.

Early Preparations:

1. This is only for Sony Xperia Z1 Compact D5503

This ROM is only for the device mentioned above. Make sure that your model number matches the one listed above. To do so, go to Settings > About Device on your device and see your model number. Flashing this firmware on any other device will result in bricking it so make sure that you meet this requirement first of all.

2. Battery should be charged at least over 60%.

Make sure that your battery is charged enough to complete the flashing process. In case your battery is low and your device goes dead during the flashing process, you may end up soft bricking your device as it won’t complete the flashing process.

3. Backup everything!

Just to be on the safe side, you may consider backing up each and everything from your Android device. This is highly recommended so that in case anything goes wrong, you still have the access to all of your data and you can restore it immediately. You may backup everything as listed below.

  • Backup SMS Messages
  • Backup Call Logs
  • Backup Contacts
  • Backup Media – Copy your files manually to your PC or Laptop.
  • Titanium Backup – If already rooted, use Titanium Backup to backup all of your apps, system data and other important content. If you haven’t rooted your device previously, skip this step.
  • Backup Nandroid – If CWM  or TWRP installed previously, otherwise skip this step and perform this at the end of flashing.

4. Enable USB Debugging Mode on your device.

Enable USB debugging mode on your device. To do so, tap settings>developer options>USB debugging. If you can’t find developer options in settings, then tap settings > about device and tap “Build Number” for 7 times and you’ll get em’ activated under settings.

5. Install and setup Sony Flashtool.

You must have installed Sony Flashtool. Find the full guide here.

After installing Sony Flashtool, open the Flashtool folder from the drive where you installed it. Now open Flashtool>Drivers>Flashtool-drivers.exe and install the Flashtool, Fastboot & Xperia Z1 Compact drivers from the list. [Important]

6. Use OEM data cable to establish connection.

Make sure that you use the phone’s original data cable to establish connection between your phone and the PC. Using a different data cable might result in interrupting the firmware installation.

How To Update Sony Xperia Z1C To Official Android 5.1.1 14.6.A.0.368 Lollipop  Firmware

Before moving forward, please make sure that you’ve read the pre requisites and ensure that you are set to go ahead.

  1. Download the latest firmware Android 5.1.1 Lollipop 14.6.A.0.368 FTF file.
    1. For Xperia Z1 Compact D5503 [Generic/Unbranded. Link 1   Link2  | Create your own FTF using this guide.
  2. Copy the file and paste in Flashtool>Firmwares folder.
  3. Open Flashtool.exe now.
  4. Hit the small lightening button on the top left corner and select Flashmode.
  5. Select the FTF firmware file that you placed in the Firmware folder.
  6. From the right side, select what do you want to wipe. Data, cache and apps log, all wipes are recommended, perhaps you may select if you don’t want.
  7. Click on OK, and it will start preparing the firmware for flashing. This may take a little while to load.
  8. As soon as the firmware is loaded, it will prompt you to attach the phone by turning it off and keeping the back key press.
  9. For Xperia Z1 Compact Volume Down key will do the job of back key, just turn off your phone, keep the Volume Down key pressed and plug in the data cable.
  10. As soon as the phone is detected in Flashmode, the firmware will start flashing, Do not leave the Volume Down key until the process is complete.
  11. As soon as you see “Flashing ended or Finished Flashing” leave the Volume Down key, plug the cable out and reboot.
  12. That’s All! Congrats! You’ve installed latest Android 5.1.1 Lollipop on your Xperia Z1C. Enjoy!

In case you got any queries or face any problems regarding this guide, please feel free to stop by the comment box below and let us know. We will get back to you as soon as possible. Thanks all!

Here the complete changelog of this new update:

Improvements to volume and silent mode control, more control of your alerts, simplified and enhanced design
– Integration of LinkedIn with your Calendar and Contacts
– Camera focus, speed and accuracy improvements in Superior Auto mode
– Many new features for Xperia in Business, enhancing enterprise support for Xperia
– Now take pictures from the camera using Sony SmartWatch 3; use the SW3 as a remote shutter button
– Instant calendar events – create & share smart events directly from any email
– Calendar agenda in Email – no need to switch apps to check upcoming events
– Richer Xperia themes
– New Settings menu icons
– Additional options for Wi-Fi and Bluetooth in notification menu