Home Blog Page 332

How to fix “Waiting for device” error in Android ADB & Fastboot
0
How to fix “Waiting for device” error in Android ADB & Fastboot

How to fix “Waiting for device” error in Android ADB & Fastboot:

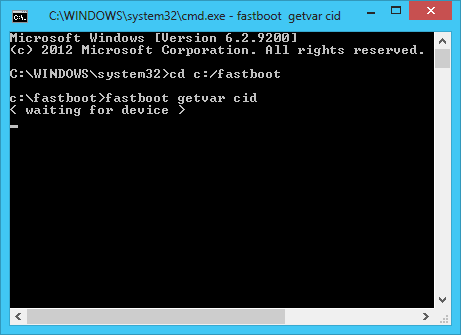
Waiting for the device is one of the most annoying errors that you might come across while trying to establish a connection between your Android smartphone/tablet and your PC. This error doesn’t let the connection get established and thus you won’t be able to perform any operations through the ADB command line.

fix "Waiting for device"
fix “Waiting for device”

Overview:

A lot of users have reported this issue. It seems to be a problem with the USB drivers of an Android smartphone. Waiting for device error comes up in the ADB command line whenever your computer fails to recognize the USB drivers and the connection of your phone with your computer. It can easily by fixed by keeping a check on a few things. Here’s a complete list of solutions that will help you to get rid of “Waiting for device” error in Android ADB & Fastboot.

How to fix “Waiting for device” error in Android ADB & Fastboot

Method#1: Check your Android device’s USB drivers 

  1. First of all, you need to make sure that you’ve properly installed the USB drivers for your Android smartphone.
  2. The Android ADB & Fastboot drivers should be properly setup on your device.
  3. If you’re facing issues while installing drivers, disable driver signature verification using this guide.
  4. If the issue still persists after properly installing the drivers, you can try the steps listed ahead.
  5. Uninstall the PC suites or PC companions like Samsung Kies, Sony PC Companion, and others.
  6. Connect your phone to your PC in fastboot mode

Keep Going:

  1. Open device manager on your computer by right clicking on my computer or this PC icon. You can also access device manager using the Control Panel.
  2. The device manager will show your phone in the list of attached devices only for a few seconds.
  3. Right click on the “Fastboot device” and install its drivers from the following path C:\Android\sdk\extras\google\usb_driver.
  4. Disconnect your phone and connect it again in fastboot mode.
  5. Try using the ADB commands now.

Method#2: Enable USB debugging on your phone

Try enabling USB debugging on your phone and connect it to your PC. You can enable USB debugging by simply going to settings > developer options > Enable USB debugging. If the option doesn’t appear in settings, then you will have to enable developer options by going into settings > about device > tap the build number 7 times. You will have the developer options enabled right above the about device option.

Method#3: Use original data cable to connect your Android phone to your PC

Always use the original or near to original data cable to establish a connection between your Android device and your PC. This shouldn’t be an issue, but this still is a good idea to prevent any kind of annoying issues like the one mentioned above.

Method#4: Kill adb server and start it again

At times, the adb server itself can create quite many issues and act as a hurdle between your Android device and your computer. You can easily kill the adb server and start it again by pushing the following commands into the command prompt.

  1. Disconnect your phone.
  2. adb kill-server
  3. adb start-server
  4. Connect your phone now.
  5. Try pushing any command into the ADB command line.

Method#5: Unplug unnecessary USB devices

Sometimes the system doesn’t recognize your Android device because of unnecessary USB devices attached to it. You can simply unplug all unnecessary USB devices and then try to connect your Android phone or tablet again.

Method#6: Disable your Antivirus and Windows Firewall

Disable your Antivirus software and Windows Firewall is enabled. Try connecting your device after you’ve done this. This might work out for you.

Method#7: Restart your PC

The last option, you can try restarting your PC. It is the easiest thing you can do, but it’s probability to fix this issue is quite less as compared to the solutions listed above. You can try restarting your PC and connecting your device again to see if you can bypass the waiting for device issue or not.

If you’re on Windows 8.1 on a laptop with USB 3.0, you might find this guide helpful: How to Install ADB & Fastboot drivers on Windows 8/8.1 with USB 3.0

That’s all. We hope that one of the solutions works out for yours. Don’t forget to let us know which one helped you to get rid of this bug.

How To Fix Sony Xperia Bootloop after Bootloader Unlock

17
How To Fix Sony Xperia Bootloop after Bootloader Unlock

How To Fix Sony Xperia Bootloop after Bootloader Unlock:

Got your Sony Xperia smartphone stuck in a bootloop right after unlocking its bootloader? Well, if so, then you’re not alone. This issue seems to be very common with Xperia smartphones. Over the past few months, we’ve come across a number of queries from our viewers regarding the solution to this issue.

We’ve got a fix for Sony Xperia smartphones bootloop issue after bootloader unlock. Before jumping up to the solution, let’s learn a little bit more about bootloader unlocking and this issue.

maxresdefault

Overview:

In order to perform any sort of custom operations like flashing a custom recovery or a custom ROM, you will have to unlock the bootloader of your Sony Xperia smartphone. There are methods available for rooting and flashing custom recoveries on certain Sony Xperia smartphones without unlocking the bootloaders, but as said, those methods are either certain to the device or certain to the firmware. In most of the cases, you will have to break the barrier set on the bootloader to unleash the power of your Xperia phone.

This restriction on bootloader is set by smartphone manufacturers to forbade the users from loading anything custom on the phone to make the firmware safe and secure.

Manufacturers like Sony, Google and LG do allow unlocking the bootloader officially, but before doing so the want the users to undergo the agreement and do everything at their own responsibility. So, just in case you’ve soft bricked your Sony Xperia smartphone or got it stuck in an annoying bootloop, you’re at your own now. You’ve got to fix the phone at your own, there ain’t going to be any magic fixing your phone.

A Bit More:

In case you’ve no idea about what is a bootloop, you may be interested in knowing that in bootloop your phone doesn’t bypass the bootscreen. The phone gets stuck on the animation screen and that’s all. The phone will eventually go dead when its battery has completely drained but it won’t boot up in any case.

The guide illustrated here will take you through a step-by-step method fix this Sony Xperia bootloop issue on bootloader unlock. The method basically requires you to flash stock firmware on your Sony Xperia smartphone.

The method to download and create an official FTF are also linked below. It’s completely safe to follow and involves no risk at all. All you’ve to do is to follow the steps carefully to avoid any mishaps while the process moves on.

Early Preparations:

1. This is only for Sony Xperia Smartphones!

This ROM is only for the device mentioned above. Make sure that your phone is a Sony Xperia.

2. Battery should be charged at least over 60%.

Make sure that your battery is charged enough to complete the flashing process.

3. Backup everything!

Nothing to do here. While your phone is stuck in bootloop after unlocking the bootloader, it has already lost of all its data since bootloader performs a factory reset. So just skip this step.


5. Install and setup Sony Flashtool.

You must have installed Sony Flashtool. Find the full guide here. After installing Sony Flashtool, open the Flashtool folder from the drive where you installed it.Now open Flashtool>Drivers>Flashtool-drivers.exe and install the Flashtool, Fastboot & your Xperia device drivers from the list. [Important]

6. Download official Sony Xperia Firmware & create FTF file.

The next step is to get the FTF file for your desired firmware, in case you’ve already obtained the FTF, you may skip this step and just in case you haven’t, follow this guide to download official Sony Xperia Firmware & create the FTF file.

7. Use OEM data cable to establish a connection.

Make sure that you use the phone’s original data cable to establish a connection between your phone and the PC. Using a different data cable might result in interrupting the firmware installation.

How To Fix Sony Xperia Bootloop after Bootloader Unlock

  1. Before moving forward, please make sure that you’ve read the prerequisites and ensure that you are set to go ahead.
  2. Download the latest firmware and create the FTF file using the guide linked above.
  3. Copy the file and paste in Flashtool>Firmwares folder.
  4. Open Flashtool.exe now.
  5. Hit the small lightning button on the top left corner and select Flashmode.
  6. Select the FTF firmware file that you placed in the Firmware folder.
  7. From the right side, select what do you want to wipe. Data, cache and apps log, all wipes are recommended, perhaps you may select if you don’t want.
  8. Click on OK, and it will start preparing the firmware for flashing. This may take a little while to load.
  9. As soon as the firmware is loaded, it will prompt you to attach the phone by turning it off and keeping the back key press.
  10. For Xperia devices that came after 2011, Volume Down key will do the job of back key, just turn off your phone, keep the Volume Down key pressed and plug in the data cable.
  11. As soon as the phone is detected in Flashmode, the firmware will start flashing, Do not leave the Volume Down key until the process is complete.
  12. As soon as you see “Flashing ended or Finished Flashing” leave the Volume Down key, plug the cable out and reboot.
  13. That’s All! Congrats! You’ve installed latest official Android on your Xperia smartphone. Your smartphone will now bootup and you won’t face any bootloop issues at all. Enjoy!

In case you got any queries or face any problems regarding this guide, feel free to stop by the comment box below and let us know. We will get back to you as soon as possible. Thanks all!

tTorrent for PC Windows 10 & Mac using BlueStacks

0
tTorrent for PC Windows 10 & Mac using BlueStacks

Here’s how to download tTorrent for PC running Windows and Mac OS X. !

We have many torrent apps in Play Store, every app has its own unique features but there is one app who is far better from others. I am talking about famous tTorrent, today I will tell you how you can download tTorrent for PC.

Overview:

tTorrent Pro is a downpour application for Android and PC, which offers a download chief for the P2P convention (deluge). With it, you can download motion pictures, music, projects, accumulations, and numerous others. Despite the extent of the download records are done rapidly, on the grounds that there is no constraint with regards to the speed.

Notwithstanding boundless downloads with speed discharged, it is conceivable to pick between different individual records contained inside a downpour, for example, need line the executives, seek deluge documents specifically from the application, set Wi-Fi just when wanted, limit most extreme transfer speed, and that’s only the tip of the iceberg.

TTorrent interface is very much enhanced for cell phones and tablets, and at first, there is a menu of capacities on the left that is accessed constantly, while the second shows up when pulling movement from left to right.

Read More: Install Android Apps for PC

tTorrent for pc

Also See: Clash Royale for PC

Download tTorrent For PC-Windows PC & Mac:

tTorrent for PC with Nox App Player – Windows/Mac

  1. Download and install Nox App Player on your computer.
  2. Now download the tTorrent APK.
  3. Double-click the downloaded tTorrent APK to start its installation via Nox App Player.
  4. Wait a minute and let Nox install the APK file now.
  5. Once the APK has been installed, it will appear on the home-screen of Nox.
  6. You can now click on the tTorrent icon in Nox to launch it.

Download tTorrent for PC using BlueStacks 3 – Windows only

  1. Download, install and setup BlueStacks 3 on your computer. Mac users can download and install BlueStacks instead.
  2. Download tTorrent APK.
  3. Now open BlueStacks 3 and then open My Apps tab.
  4. Click on the “Install APK” button located inside BlueStacks 3.
  5. Locate and select the tTorrent APK. Let BlueStacks 3 install it.
  6. Once the installation comes to an end, tTorrent will appear in the My Apps section. It will also appear as a shortcut on your computer’s desktop.
  7. You can open tTorrent now. Follow on-screen instructions to run it within BlueStacks 3.

Install Android 6.0.1 Marshmallow on Sony Xperia SP via CyanogenMod 13

19
Install Android 6.0.1 Marshmallow on Sony Xperia SP via CyanogenMod 13

Install Android 6.0.1 Marshmallow on Sony Xperia SP via CyanogenMod 13:

Sony Xperia SP, which came out back in back in April 2013 ran on Android 4.1 Jelly Bean out of the box. The device was later updated to Android 4.3 Jelly Bean and that’s where Sony forgot it. Sony is usually pretty good when it comes to software updates, but it looks like Xperia SP didn’t happen to be Sony’s umbrella of Kindness.

Details:

Xperia owners have always been looking for custom methods to update their phone to a higher version of Android. Sony Xperia SP did get a chance to live on Android KitKat and Lollipop by means of custom ROMs. Now that Android Marshmallow is also out, Xperia SP owners must be willing to update their device to this latest most version of Android as soon as possible. The good news here for Xperia SP owners is that they can now easily update this phone to Android 6.0.1 Marshmallow. This has been made possible using CyanogenMod 13 custom ROM.

Android 6.0.1 Marshmallow on Sony Xperia SP

Overview:

CyanogenMod 13 is responsible for brining new lives to many devices which have been forgotten by their manufacturers. While this happens to be the most widely used aftermarket distribution of Android OS, this also might be the best choice for you to update your Xperia SP to Android Marshmallow right now.

The current version of CyanogenMod 13 for Sony Xperia SP is in beta stage. Most of the mainstream features like RIL, Camera, WiFi and Bluetooth are found to be working fine. Even though this ROM is in the working stage, it may still not be good enough to be kept as a daily driver. We will only recommend you flashing this ROM if you are an Android power user.

If you’re a total newbie, you need to follow this guide carefully in order to avoid any sort of mishaps. We can now go through some early preparations and then install Android 6.0.1 Marshmallow on our beloved Sony Xperia SP via CyanogenMod 13 custom ROM.

Early Preparations:

  1. This custom ROM is only for Sony Xperia SP C5302 and C5303. Do not try this on any other device. Check your device’s model number in settings > about the device.
  2. Charge your phone up to 50% in order to prevent any power issues during the flashing process.
  3. Your device’s bootloader must be unlocked. Here’s a guide on how to unlock it.
  4. Your device must have a custom recovery installed on it. You can install custom recovery. A method to install custom recovery is listed below.
  5. Once you’ve installed a custom recovery, don’t forget to create a Nandroid backup of your current system. This is highly recommended so that in case something goes wrong with the new custom ROM, you can still revert everything back and get your old system back.
  6. Backup your important contacts, messages, call logs and all media content as you will have to wipe your phone before flashing latest firmware.
  7. Follow this guide to the letter to avoid any mishap.

DISCLAIMER: THIS IS A CUSTOM ROM. LOADING CUSTOM STUFF ON YOUR ANDROID DEVICE IS HIGHLY RISKY. IN CASE SOMETHING GOES WRONG WHILE OR AFTER FLASHING THIS CUSTOM ROM, WE OR THE DEVICE MANUFACTURERS MAY NOT BE HELD RESPONSIBLE. MAKE SURE THAT WHATEVER YOU’RE GOING TO DO, YOU’RE DOING AT YOUR OWN RISK.

Install Android 6.0.1 Marshmallow on Sony Xperia SP via CyanogenMod 13:

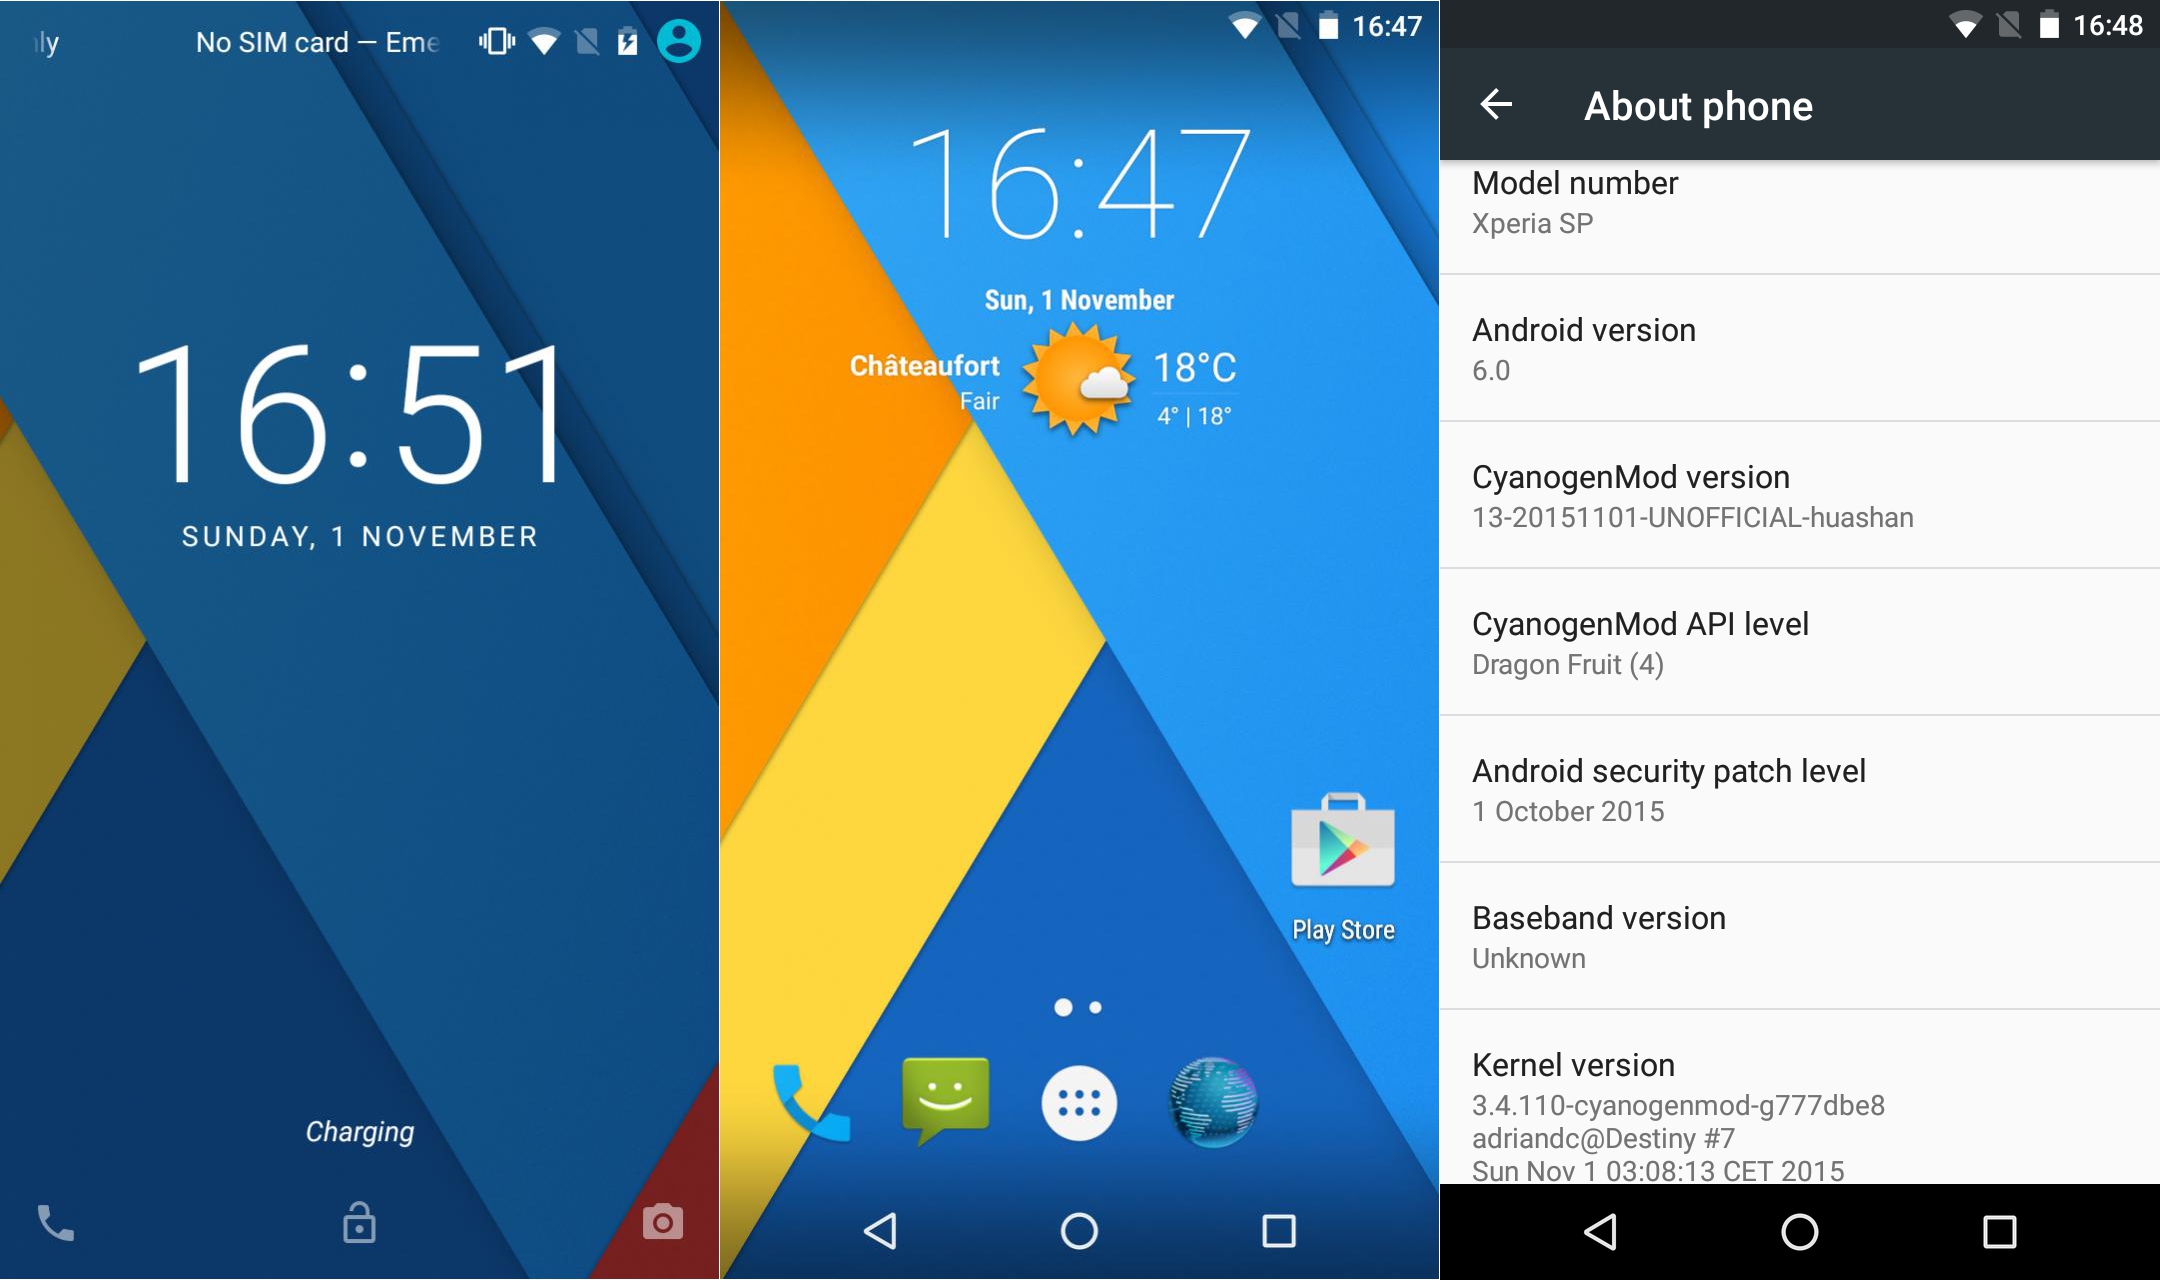
Screenshot_20151101-165114-tile

  1. First of all, you need a custom recovery on your device. And to install a custom recovery, you need to root your Xperia SP first of all.
  2. Once you’re rooted, download twrp-3.0.2.1-huashan.img file and copy it to your phone’s SD card.
  3. Now download and install Rashr – Flashtool on your phone.
  4. Now open Rashr from the app drawer.
  5. Tap “Select Recovery From Storage” option and select the copied twrp-3.0.2.1-huashan.img file.
  6. Grant SuperSu right and follow on-screen instructions to flash the recovery.

Here’s how to install the ROM now:

  1. Download cm-13.0-xxxxxxxx-UNOFFICIAL-BETA-huashan.zip  file.
  2. Download GApps.zip [micro-ARM-Android 6.0 Marshmallow] for Android 5.1 Lollipop.
  3. Copy both the downloaded .zip files to your phone’s SD card.
  4. Now turn off your phone completely. Now turn on your phone, as soon as the Sony logo appears, press the volume up key to boot into recovery mode.
  5. As you’ve booted into the recovery mode, tap the “Wipe & Format Option” and perform a factory reset.
  6. Go back to the main menu in recovery and tap “Install zip > Choose zip from SD card > locate the CM-13-ROM.zip file that you copied to your SD card.”.
  7. Similarly, flash GApps for Android 6.0.1 Marshmallow using the “Install Zip” option.
  8. Once done, reboot your device.
  9. It will now boot up running CyanogenMod 13 Android 6.0.1 Marshmallow. That’s all. Enjoy!

Stuck with something? Don’t worry. Reach us out through the comment box below. We will help you at our best!

Install Android 6.0.1 Marshmallow on Sony Xperia L via CyanogenMod 13

0
Install Android 6.0.1 Marshmallow on Sony Xperia L via CyanogenMod 13

Install Android 6.0.1 Marshmallow on Sony Xperia L via CyanogenMod 13:

Sony Xperia L is pretty much of an old device with its software update lifecycle officially ended at Android 4.4.2 Jelly Bean. Sony is quite kind to its users when it comes to Android updates, but it looks like kindness is limited to Xperia Z series or other recent flagship and mid-ranges.

Let’s start:

Xperia L users haven’t been able to enjoy any higher version of Android version in the official form, but thanks to the developers keeping this device alive and letting the users flash latest and greatest versions of Android on their Xperia L by means of custom ROMs. Sony Xperia L did have the opportunity to enjoy Android 4.4 KitKat and also Android 5.0 Lollipop. Now that the Android 6.0.1 Marshmallow is there, Xperia L owners might be looking for a way to enjoy the highest Android version now. The good news is, you can actually get Android Marshmallow on your Xperia L.

Android 6.0.1 Marshmallow on Sony Xperia L

Overview:

If you own an Xperia L and you’ve put it on a side, it might be the time for you pick it up, wipe the dust off from it and get ready to flash the latest available CyanogenMod 13 custom ROM on it. The current version of this ROM is in early development stages, but you should find most of the mainstream features working on it.

We recommend the power users only to flash this custom ROM. If you’re a newbie, you’ve to follow the instructions attached in this guide being very careful. Let’s have a look on some early preparations and then move forward to install latest Android 6.0.1 Marshmallow on your Sony Xperia L via CyanogenMod 13 custom ROM.

Early Preparations:

1. This is only for Sony Xperia L!

This custom ROM is only for the device mentioned above. Make sure that your model number matches the one listed above. To do so, go to Settings > About Device on your device and see your model number. Flashing this ROM on any other device will result in bricking it so make sure that you meet this requirement first of all.

2. The battery should be charged at least over 60%.

Make sure that your battery is charged enough to complete the flashing process. In case your battery is low and your device goes dead during the flashing process, you may end up soft bricking your device as it won’t complete the flashing process.

3. Unlock Bootloader.

Your device’s bootloader must be unlocked in order to flash this custom ROM. You can unlock it by using our Sony bootloader unlock guide.

4. Install Custom Recovery

A custom recovery is required for installing this ROM. You may install Philz advanced touch using this thread.

5. Backup everything!

Just to be on the safe side, you may consider backing up each and everything from your Android device. This is highly recommended so that in case anything goes wrong, you still have the access to all of your data and you can restore it immediately. You may backup everything as listed below.

1: Backup SMS Messages
2: Backup Call Logs
3: Backup Contacts.
Titanium Backup – If already rooted, use Titanium Backup to backup all of your apps, system data, and other important content.
Backup Nandroid – If CWM  or TWRP installed previously, otherwise skip this step and perform this at the end of flashing.

6. Disclaimer

THE METHODS INVOLVED IN FLASHING CUSTOM RECOVERIES, ROMS AND ROOTING YOUR PHONE ARE HIGHLY CUSTOM AND MAY RESULT IN BRICKING YOUR DEVICE, AND HAS NOTHING TO DO WITH GOOGLE OR THE DEVICE MANUFACTURER THAT IS SONY IN OUR CASE. ALSO ROOTING YOUR DEVICE WILL VOID ITS WARRANTY AND YOU WILL BE NO LONGER ELIGIBLE FOR ANY KIND OF FREE DEVICE SERVICES BY THE MANUFACTURERS/WARRANTY PROVIDERS. IN CASE OF ANY MISHAP WE MAY NOT BE HELD RESPONSIBLE. FOLLOW THESE INSTRUCTIONS TO THE LETTER TO AVOID ANY MISHAP OR BRICKING. MAKE SURE THAT WHATEVER YOU DO, YOU ARE DOING IT AT YOUR OWN RESPONSIBILITY.

Update Xperia L To Android 6.0.1 Marshmallow:

  1. Perform a factory data reset on your phone before proceeding.
  2. Download latest CM 13 Custom ROM.zip file for Xperia L
  3. Download Gapps.zip  [Pico – Arm – Android 6.0 Marshmallow] file for Android 5.0 Lollipop.
  4. Copy both the .zip files to the internal storage of your phone.
  5. Turn off your phone now and boot into Philz advanced touch recovery. To do so, turn on your phone and then quickly press the Volume Up Key.
  6. Now that you’re in recovery mode, wipe your phone completely (factory reset).
  7. Now tap “install zip > choose zip from sd card > select CM 13 .zip file > yes”.
  8. Once you’ve flashed the CM 13 file, now flash the Gapps file similarly.
  9. Now wipe cache and dalvik cache from the recovery mode.
  10. Reboot your Xperia L now.
  11. The first boot may take up to 10 minutes, hold on tighter unless you see the CM logo.
  12. That’s all.

Final Words:

In order to avoid bricking your device, avoid repartitioning your SD card. Repartitioning can result in potential harm. You can simply perform factory data reset in order to flash the firmware on your phone. In case something goes wrong, we will recommend you to return to your stock firmware immediately.

We hope that you find this guide helpful. If you’re stuck with anything or you got any queries regarding this post, make sure that you reach us by using the comment box below. We would love to help you out immediately. Thank you all.

Download Solid Explorer File Manager APK

0
Download Solid Explorer File Manager APK

Download Solid Explorer File Manager APK: When it comes to choosing a file manager for your Android-powered smartphone or tablet, you will come across famous titles like ES File Explorer, Astro File Manager etc.

Solid Explorer File Manager:

While there is this kind of great and smooth file explorers available around, it’s quite hard to go after another file manager and it’s also hard to find a file explorer worth replacing the mentioned two. It looks like, a tough rival has just landed in for all existing file explorers in the Google Play Store. The file explorer that we are talking about is Solid Explorer File Manager.

Features:

Solid Explorer File Manager, which is initially free to download the application in the Google Play Store comes from NeatBytes. The reason for Solid Explorer File Manager to attract a huge number of users in a very short span is its neat and simplistic UI. It sports material design.

Apart from the internal file storage and root access, Solid File Explorer File Manager also brings a number of integrated cloud connections including Google Drive, DropBox and other such cloud drives. It also supports FTP and SFTP connections which means you can connect to your server and access the files, download, copy or upload on the go. Solid Explorer can unzip the zipped files and unrar the rared files for you.

Solid Explorer is a highly customizable software. You can change every single aspect of this application from its icon to its outlook using the options available in the settings. This little software is capable of doing much more then you’ve ever thought of regarding a file manager.

Solid Explorer File Manager APK

Download Solid Explorer File Manager APK:

You can download the 14-day free trial version of Solid Explorer File Manager from the Google Play Store. In case the Play Store isn’t working well for you, we’ve pulled out the APK file of this file manager for all of our viewers. You can simply go ahead and download Solid Explorer File Manager APK and then go through the instructions to install it.

Method:

  1. Download Solid Explorer File Manager APK
  2. Download the file to your phone straight away, or copy it to your phone from your PC.
  3. Now on your phone, go to settings > security > allow unknown sources > check this.
  4. Now using a file manager, locate the APK file that you’re just copied or downloaded.
  5. Tap the APK file and finish installation using the on-screen instructions.
  6. Once installed, access the newly installed game through app drawer.
  7. That’s all. Enjoy Solid Explorer File Manager!

Download Dub Dash for PC Windows and Mac

0
Download Dub Dash for PC Windows and Mac

Download Dub Dash for PC on Windows, Mac, laptop, & Computer.

Dub Dash:

The Dub Dash is one of the coolest mobile game that you will ever come across. Dub Dash, which was available for only iOS earlier is now available for Android as well. The game brings a whole new concept into the iOS and Android gaming world. In this game, you’ve to spin a wheel through a beautiful and also a strange multi-color track.

Overview:

The track has got quite many obstacles. You’ve to tap the left or right part of the screen just in time to avoid hitting the obstacle. One blink of an eye and the game is over for you. The wheel spins way fast, so keep your eyes totally on the screen if you want to succeed.

The wheel doesn’t only spin, but it can also fly as the game mode changes. There are 7 exciting game modes and each mode has got its own uniqueness. There are other objects as well with what you will be playing this game. Dub Dash comes from Heads Up games. The game is absolutely free. You can either download it from the iOS App Store or from the Google Play Store depending on the OS running inside your smartphone.

Dub Dash for PC

Download Dub Dash For Windows PC & Mac:

The good thing about Dub Dash is, you can also play this game on your computer as well. In order to play Dub Dash for PC, you need to follow the instructions listed below. Dub Dash for PC is found working pretty great on a Windows XP/7/8/8.1/10 Desktop PC / Laptop and also a Mac OS X powered MacBook Air, MacBook Pro, and iMac. We are all set to help you play Dub Dash for PC using BlueStacks and Andy OS Android emulator. Time for us to take you through the guide now.

Dub Dash for PC using Nox App Player – Windows/Mac

  1. Download and install Nox App Player on your computer.
  2. Now download the Dub Dash APK.
  3. Double-click the downloaded Dub Dash APK to start its installation via Nox App Player.
  4. Wait a minute and let Nox install the APK file now.
  5. Once the APK has been installed, it will appear on the home-screen of Nox.
  6. You can now click on the Dub Dash icon in Nox to launch it.
  7. Download the game data and proceed with the on-screen instructions now.
  8. The game won’t take too long to run now. You’re all set to play it now. That’s all.

Download Dub Dash for PC using BlueStacks 3 – Windows only

  1. Download, install and setup BlueStacks 3 on your computer. Mac users can download and install BlueStacks instead.
  2. Download Dub Dash APK.
  3. Now open BlueStacks 3 and then open My Apps tab.
  4. Click on the “Install APK” button located inside BlueStacks 3.
  5. Locate and select the Dub Dash APK. Let BlueStacks 3 install it.
  6. Once the installation comes to an end, Dub Dash will appear in the My Apps section. It will also appear as a shortcut on your computer’s desktop.
  7. You can open Dub Dash now. Follow on-screen instructions to run it within BlueStacks 3.

Download Clash Royale for PC Windows & Mac

1
Download Clash Royale for PC Windows & Mac

Download & Install Clash Royale for PC on Windows, Mac, Laptop, & Computer.

Clash Royale:

The Clash Royale’s concept is quite the same as that of the Clash of Clans. In this game, the battle is between kingdoms. You’ve to defeat the enemy king and take over his reign. You can use some characters from the Clash of Clans alongside the characters of Clash Royale. The game also brings troops, defenses, and towers from Clash of Clans.

Overview:

You will be seeing a lot of similarities between Clash Royale and Clash of Clans. This might keep your interest alive in this new game. Clash Royale also happens to be a real-time multiplayer game which won’t let you get bored. You can engage with the players from all across the world to get hold of a stronger team in the battle arena. It’s all up to you now how do you defeat the enemy Kings and snatch their Crown chests.

You can perform various upgrades in this game like upgrading your card collection with Clash Royale family’s troops, spells, and defenses. You can also do some construction to defend yourself and make your enemies bite the dust. The game brings a number of Arenas to keep you busy playing it. Clash Royale is an absolutely free-to-play game. You can get it from the Google Play Store, but that works only for an Android device.

If you’re willing to play Clash Royale on a computer, you will have to follow this little guide that we have for you right here.

Clash-royale-for-pc-image-2

Download Clash Royale For Windows PC & Mac:

Clash Royale
Price: Free
Clash Royale
Price: Free+

Clash Royale for PC using Nox App Player – Windows/Mac

  1. Download and install Nox App Player on your computer.
  2. Now download the Clash Royale APK.
  3. Double-click the downloaded Clash Royale APK to start its installation via Nox App Player.
  4. Wait a minute and let Nox install the APK file now.
  5. Once the APK has been installed, it will appear on the home-screen of Nox.
  6. You can now click on the Clash Royale icon in Nox to launch it.
  7. Download the game data and proceed with the on-screen instructions now.
  8. The game won’t take too long to run now. You’re all set to play it now. That’s all.

Download Clash Royale for PC using BlueStacks 3 – Windows only

  1. Download, install and setup BlueStacks 3 on your computer. Mac users can download and install BlueStacks instead.
  2. Download Clash Royale APK.
  3. Now open BlueStacks 3 and then open My Apps tab.
  4. Click on the “Install APK” button located inside BlueStacks 3.
  5. Locate and select the Clash Royale APK. Let BlueStacks 3 install it.
  6. Once the installation comes to an end, Clash Royale will appear in the My Apps section. It will also appear as a shortcut on your computer’s desktop.
  7. You can open Clash Royale now. Follow on-screen instructions to run it within BlueStacks 3.

The Andy OS tutorial explains how to play a game on your Mac OS X, but the same guide will also work for a Windows PC.

That’s all. In case you’re stuck with anything, reach us out through the comment box below.

Best Free Photo Editing Software 2016 [ PC ]

0
Best Free Photo Editing Software 2016 [ PC ]

Here is the guide to Best Free Photo Editing Software 2016. While finding the Best Free Photo Editing Software we get tons of options on the internet. However, that does not lead us to exactly what we are looking for. Most of us, who are not professional photographers or artists, have to deal with complicated photo editing software. Also, if we do not avail all of the tools of editors like Photoshop, why are we supposed to them? That is why I have decided to introduce you to the Best Free Photo Editing Software that do not push users to pay for any tool and come with free registration. Also, these Best Free Photo Editing Software are packed with useful editing features and are quite easy to use as well.

So, let’s have a look at the Best Free Photo Editing Software 2016 that you can use for editing your photos without any help from the professionals.

Best Free Photo Editing Software 2016

Best Free Photo Editing Software 2016 [ PC ]:

GIMP:

GIMP is free of cost and is packed with unbelievably vast options to edit photos. The interface is much similar to Photoshop and although the developers have tried to make it easy to use, if you do not have some knowledge, you might get stuck between the menu and some of the editing tools. You will have to take your time to explore what each tool is supposed to do as the names can be confusing. But, once you get hold of all the tools, it is going to make your life really simple. Above all, GIMP comes with full layer support.

Paint.net:

One editor that can side by side with GIMP is Paint.net. The software designed as a student project is now widely used as an alternative to Photoshop. Users get to use all the handy tools like Clone tool and magic wand as well as it comes with full layer support just like GIMP. You can also enjoy the following rich features;

  • Handle multiple images
  • Interface enhanced for Aero Glass (Windows 7)
  • Online Forum
  • Tutorials and Plugins
  • Special Effects including red eye removal, Photo Blur, Noise, Distortion tools and more.

PicMonkey:

PicMonkey is one of the easiest online photo editor you can find. Considering that it is totally free to use, it has a huge variety of editing tools and options. Basic editing tools include photo resizer that allows you to resize photos in different ratios and even for Facebook cover. Brightness, contrast and saturation can also be adjusted quite easily. Moving into the Filters and advanced editing features, you have a variety of impressive filters that are fully capable of turning your ordinary photo into a professional one. There are some effects that are premium and you need to purchase them. But, you are as good to go even without them.

Pixlr:

You might have heard about Pixlr before; this software has many features similar to Photoshop, Paint.net and GIMP including full layer support and you can merge different layers, move layers and add layer mask. Again, if you are not a pro for editing tools, you will need some time to figure out what each tool does. Simple filters are comparatively easier to work with. You can adjust contrast, brightness, saturation and posterize, solarize or desaturize image. There are a number of photo filters readily available as well and the program can be used in multiple languages.

Photoshop Express Editor:

You might mistake this one for the Adobe Photoshop. It is much less complicated than Photoshop and can be considered a demo version. However, it is not close to Photoshop. However, the simple user interface and menu allows users to quickly edit photos using basic editing tools like crop, rotate, adjust brightness, contrast, saturation, etc. You can also use adjustment tools as well as defining photo filters using Photoshop Express Editor.

Picasa:

Picasa is mostly used for organizing and managing photos. You can upload your photos and share them with your circle. However, one feature of Picasa makes different filters available for you to mask your photos with the right one to make it look better and lively. And once you are done editing, you can feel free to directly share the photo with your social circle.

Paint:

Lastly, we have Microsoft paint which does not include any layer support or advanced filters. But if you want to crop, rotate, resize your photo or even adjust the brightness or contrast, the software will do that for you conveniently and free of cost.

This was the list of Best Free Photo Editing Software 2016 for your computer or laptop. They have tons of features and tools to edit photos, some also include the option to share photos on social media and some of them have good filters and full layer support. You can choose from any of these Free Photo Editing Software according to your requirement.

How to get the new Facebook Reactions

0
How to get the new Facebook Reactions

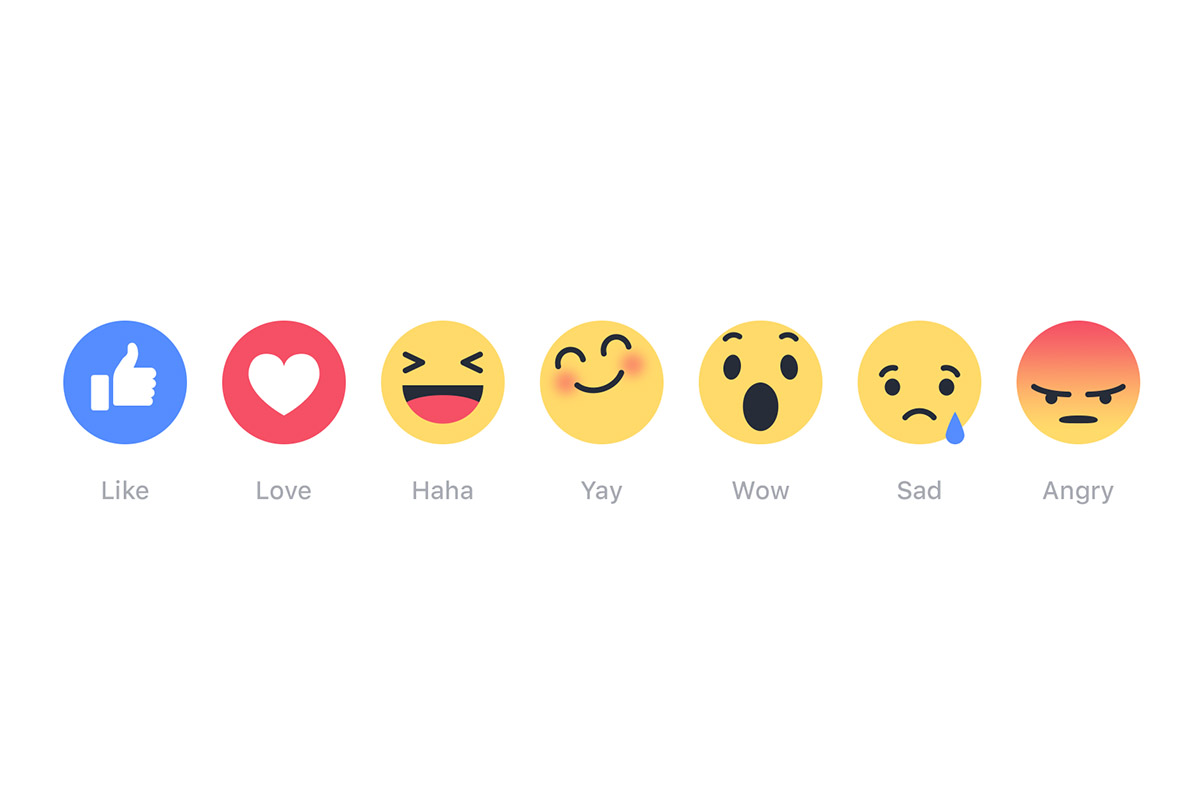
Here’s how to get new Facebook Reactions if you haven’t got it already, that means now you can respond to any one status with Love, Haha, Wow, Sad and Angry. Most of us still waiting to get these new reactions..

Facebook_Reactions15

How to get the new Facebook Reactions:

Desktop:

Open Facebook on your browser on your PC, now simply hover over the like button and new reactions will pop up in a bar above.

Once you have used the new reactions, you’ll see top three reactions. When you click on reaction you will see a breakdown of how many people have used each reaction.

Mobile:

  1. Open the Facebook app on your device.
  2. If it’s already opened closed it completely and the reopen it.
  3. Now when you hit like button, you’ll see a message showing how to use the new reactions.
  4. All Done.

Fix There was a Problem Sending the Command to the Program Error Message

1
Fix There was a Problem Sending the Command to the Program Error Message

Following are the instruction on how to fix there was a problem sending the command to the program error message on Windows, a few days back while I was using MS Excel on my Windows 10 and I start getting the message there was a problem sending the command to the program.

Overview:

Well, the first thing I got in my mind is that maybe my files are corrupted, but as I click on Ok and opened the file again it was working fine. At that time, it started working but after that whenever I tried to open the same file I got the same error message. In this article, I will explain, you how to fix there was a problem sending the command to the program error message on Windows.

Problem Sending the Command

Problem Details: 

There was a problem sending the command to the program.

OR

Windows cannot find the file, Make sure you typed the name correctly, and then try again.

OR

Cannot find the file (or one of its components). Make sure the path and filename are correct and that all required libraries are available.

Fix There was a Problem Sending the Command to the Program Error Message:

  • Open Microsoft Office->Options->Office ORB->Options.
  • Now select Advanced tab.
  • Find for option “Ignore other applications that use Dynamic Data Exchange (DDE)” and make sure it’s unchecked.
  • If it’s checked then uncheck it and restart your system.

Solution:

  • Right Click on the MS Office file and choose “Open with” option.
  • Now keep that in mind if you are using Windows 7-> Click on Browse button and if you are using Windows 8 or later, click on More options. After that click on “Look for another app on this PC” option.
  • You’ll be in “C:\Program Files\Microsoft Office\Office…” here you have to choose the correct EXE file for default program for your file.
  • All done, It should fix the problem.

References:

Keep visiting Techbeasts for more information and updates on Fix There was a Problem Sending the Command to the Program Error Message.

List of Samsung Galaxy S7 & S7 Edge Model Numbers

6
List of Samsung Galaxy S7 & S7 Edge Model Numbers

List of Samsung Galaxy S7 & S7 Edge Model Numbers:

Specs:

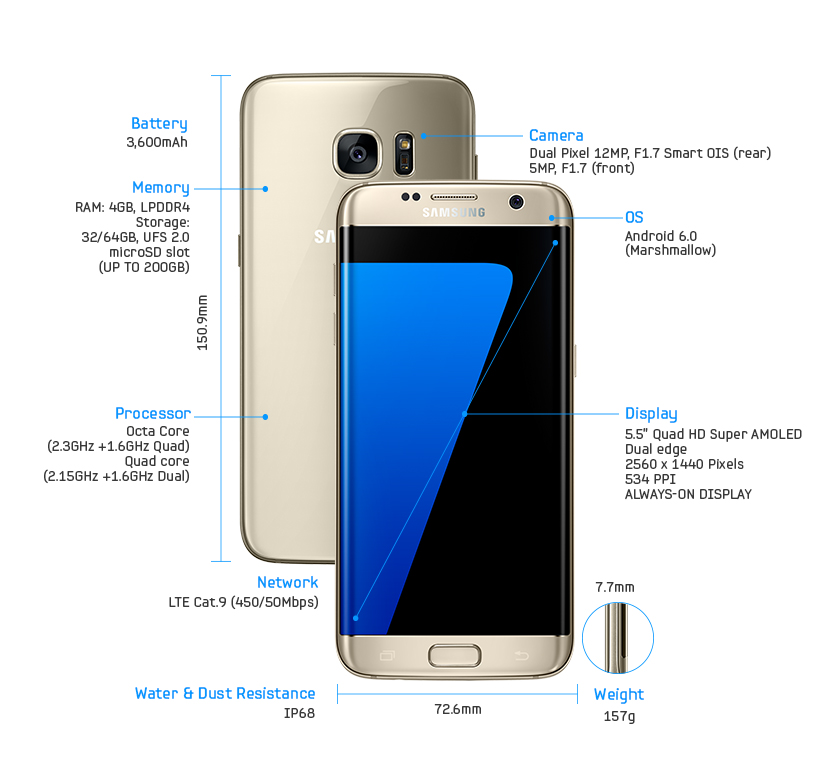
Samsung is all done with launching its latest flagships the Galaxy S7 and S7 Edge at MWC, 2016. The Galaxy S7 and S7 Edge are far better than their predecessors. Galaxy S7 Edge is bigger, and also brings a massive bump in the battery i.e. 3600 mAh as compared to the 2550 mAh battery on the S6 Edge.

Both these phones, in terms of specifications are equipped with either an Exynos 8890 CPU or a Snapdragon 820 CPU accompanied by a 4 GB RAM which has just become a standard for Android flagships of today.

Details:

The standard S7 touts a 5.1-inch QHD display with 576 PPI and the S7 Edge sports a 5.5-inch QHD display with 515 PPI. Both these phones have Samsung’s new 12 MP camera module at the back which is pretty much efficient in low-light conditions. A 5 MP shooter is on the front to entertain selfie freaks.

Samsung Galaxy S7 and S7 Edge run on Android 6.0.1 Marshmallow out of the box. Both these phones are following the design and build language introduced by the Galaxy S6 and S6 Edge. As usual, Samsung is going to launch a plethora of variants under the S7 and S7 Edge umbrella.

Now that Samsung has also turned back to its tradition of launching the same smartphone with 2 different SoCs, we will be seeing different regions getting different chipsets plugged inside the S7 and S7 Edge. In order to give you a better idea of what model number brings what specifications and what SoC onboard, here is the detailed list of the S7 and S7 Edge Model numbers with their regions listed beside.

Samsung Galaxy S7 Model Numbers / Variants List

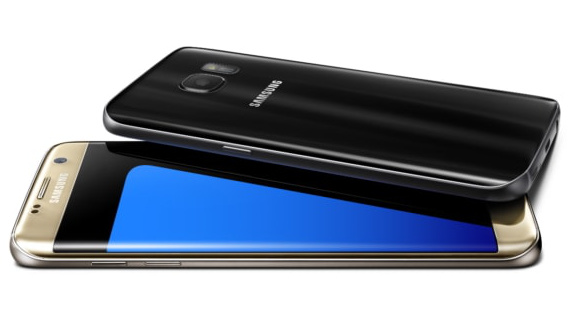
Galaxy-S7-and-S7-edge-official-press-shots (3)

Device NameModel NumberRegionConnectivity
Galaxy S7SM-G9300 (Snapdragon 820)China (Hong Kong)SIM1:TDD-LTE+FDD-LTE+WCDMA+TD-SCDMA+GSM;SIM2:GSM
Galaxy S7SM-G930FGlobalFDD-LTE+WCDMA+GSM
Galaxy S7SM-G930TT-MobileFDD-LTE+WCDMA+GSM
Galaxy S7SM-G930SKorea SKTFDD-LTE+WCDMA+CDMA+GSM
Galaxy S7SM-G930KKorea KT+FDD-LTE+WCDMA+GSM
Galaxy S7SM-G930LKoreaFDD-LTE+WCDMA+GSM
Galaxy S7SM-G930P (Snapdragon 820)Sprint - (United States)FDD-LTE+WCDMA+GSM
Galaxy S7SM-G930A
At&t - (United States)FDD-LTE+WCDMA+GSM
Galaxy S7SM-G9309ChinaSIM1:TDD-LTE+FDD-LTE+CDMA;SIM2:GSM;Roaming:WCDMA+GSM
Galaxy S7SM-G9308ChinaSIM1:TDD-LTE+TD-SCDMA+GSM;SIM2:GSM;Roaming:FDD-LTE+WCDMA
Galaxy S7SM-G930R4 (Snapdragon 820)US Cellular - (United States)FDD-LTE+WCDMA+GSM
Galaxy S7SM-G930V (Snapdragon 820)Verizon - (United States)FDD-LTE+WCDMA+CDMA+GSM
Galaxy S7SM-G930FDSoutheast AsiaSIM1:FDD-LTE+WCDMA+GSM;SIM2:GSM
Galaxy S7SM-G930W8Canada

Samsung Galaxy S7 Edge Model Numbers / Variants List

Galaxy-S7-and-S7-edge-official-press-shots (4)

Device NameModel NumberRegionConnectivity
Galaxy S7 EdgeSM-G9350 (Snapdragon 820)China (Hong Kong)SIM1:TDD-LTE+FDD-LTE+WCDMA+TD-SCDMA+GSM;SIM2:GSM
Galaxy S7 EdgeSM-G935FGlobalFDD-LTE+WCDMA+GSM
Galaxy S7 EdgeSM-G935TT-MobileFDD-LTE+WCDMA+GSM
Galaxy S7 EdgeSM-G935SKorea SKTFDD-LTE+WCDMA+CDMA+GSM
Galaxy S7 EdgeSM-G935KKorea KT+FDD-LTE+WCDMA+GSM
Galaxy S7 EdgeSM-G935LKoreaFDD-LTE+WCDMA+GSM
Galaxy S7 EdgeSM-G935P (Snapdragon 820)Sprint - (United States)FDD-LTE+WCDMA+GSM
Galaxy S7 EdgeSM-G935AAt&t - (United States)FDD-LTE+WCDMA+GSM
Galaxy S7 EdgeSM-G9359ChinaSIM1:TDD-LTE+FDD-LTE+CDMA;SIM2:GSM;Roaming:WCDMA+GSM
Galaxy S7 EdgeSM-G9358ChinaSIM1:TDD-LTE+TD-SCDMA+GSM;SIM2:GSM;Roaming:FDD-LTE+WCDMA
Galaxy S7 EdgeSM-G935R4 (Snapdragon 820)US Cellular - (United States)FDD-LTE+WCDMA+GSM
Galaxy S7 EdgeSM-G935V (Snapdragon 820)Verizon - (United States)FDD-LTE+WCDMA+CDMA+GSM
Galaxy S7 EdgeSM-G935FDSoutheast AsiaSIM1:FDD-LTE+WCDMA+GSM;SIM2:GSM
Galaxy S7 EdgeSM-G935W8Canada