Sony has replaced its Xperia Z series with an all new Xperia X series. The Xperia X series announcement came from Sony at MWC, 2016. Sony’s new smartphones include Sony Xperia X, X Performance and XA. While QHD display has just become a standard for flagship smartphones of today, Sony has decided to stay low and brought the phones with FHD display instead. All these phones, Xperia X, Xperia X Performance and Xperia XA flaunt a 5-inch full HD display. Under the hood we can find a Snapdragon 820 CPU with a RAM of 3 GB on the Xperia X, X Performance and a RAM of 2 GB on the Xperia XA.
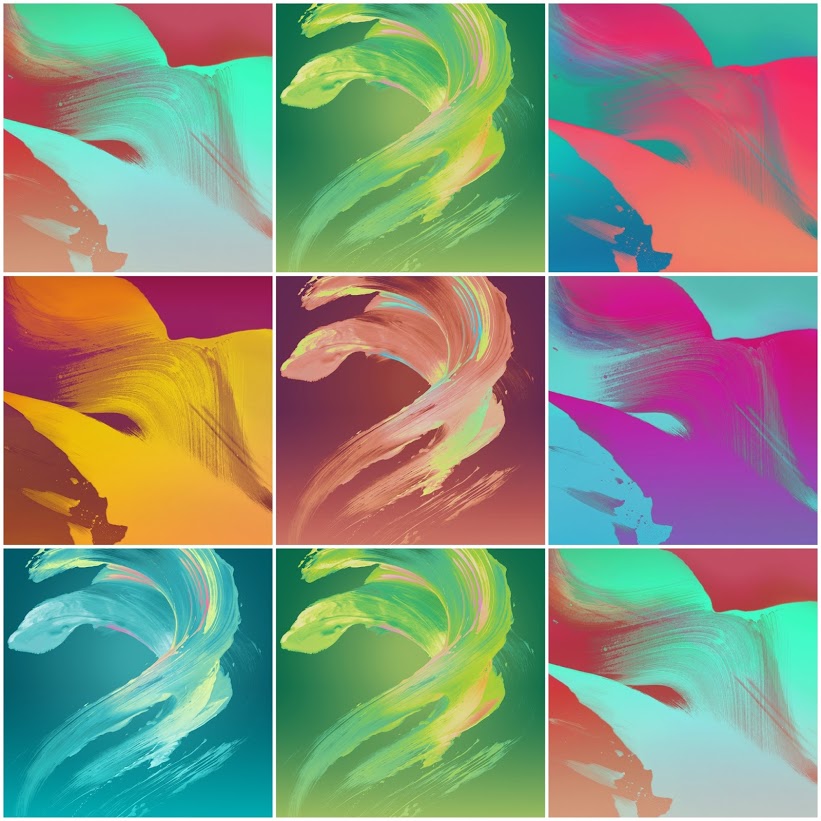
Sony is pretty good with the graphic work on its smartphones. Xperia users have been enjoying the cool wallpapers pushed into their devices by Sony. Continuing its tradition of cool wallpapers, Sony has packed up the new Xperia X series with a bunch of exciting and colour-full wallpapers as well. We’ve got our hands on the official / stock wallpapers of the Sony Xperia X, X Performance and XA. The wallpapers are attached below for all of our viewers. You can also download all the wallpapers from the all-in-one link attached at the bottom.
Samsung brought its latest guns, the Galaxy S7 and S7 Edge to the public at its Unpacked event making the use of MWC, 2016. Galaxy S7 and S7 Edge carry the same specifications except for the screen size and edges on the S7 Edge variant. Galaxy S7 and S7 Edge are equipped with Exynos 8890 or Qualcomm Snapdragon 820 SoC with a 4 GB RAM. S7 sports a 5.1-inch Super AMOLED QHD display and the S7 Edge sports a 5.5-inch Super AMOLED QHD display. Both these phones carry Samsung’s latest 12 MP shooter with upgraded lens at their back and a 5 MP shooter on the front for selfies.
To entertain the users a little bit more with the crispy and super-HD display on the latest Galaxy phones, Samsung has added a bunch of wallpapers on these devices. The wallpapers show the true nature of QHD screen on these phones. These wallpapers are in 2560 x 1440 pixels resolution. We’ve managed to get our hands on all the stock wallpapers of the Samsung Galaxy S7and Galaxy S7 Edge. You can use the official Galaxy S7and Galaxy S7 Edge wallpapers on any of your Android phone or tablet’s screen. An all-in-one package is also available below.
Following are the instruction on to download and installiOS 9.3 right now. !
If you are looking a way to download and install iOS 9.3 on your Apple devices, you have to come to right place. We have prepared a step by step guide on how to download iOS 9.3 on iPhone, iPad and iPod touch. Before going any further let me tell you few important things about iOS9.3, First it’s a beta version for testing purpose, you need a developer account to download iOS 9.3 on your devices, this is not a stable version you might face issues after downloading it.
Following are the new features added in iOS 9.3:
Night Shift.
Apple News. ( Improvements )
CarPlay.
So now anyone of you want to try the latest iOS 9.3 beta version, follow the instruction carefully in order to download and install iOS 9.3.
How to download/Install iOS 9.3:
First you have to create a backup, I would suggest that create complete backup using iTunes.
Once the backup is created, you have to archive the backup. Goto iTunes > Preferences>right click on backup> Archive.
Open browser on your Pc, navigate to https://beta.apple.com and Sign up. Follow the instruction given on the screen.
Now open beta.apple.com/profile on your browser, Tap on the option to download the profile. Once the profile is downloaded it will open setting app on your Apple device, Tap on confirm the installation.
Reboot your device, Tap on Settings > General > Software Update.
Once the beta version is downloaded on your device, first thing you must do is check everything is working fine? use your device normally as you do.
Also check out the new features such as CarPlay, night shift and 3D touch on stock apps.
If you find iOS 9.3 as a buggy update, you can head over to iTunes and put your device in recovery mode to install the latest iOS 9.2.1 version.
If you face any issue while downloading and installing iOS 9.3, please tell us in comments so you provide you the solution.
Following are the instruction on how to install GBA4iOS on iOS 9.2.1 without Jailbreak. !
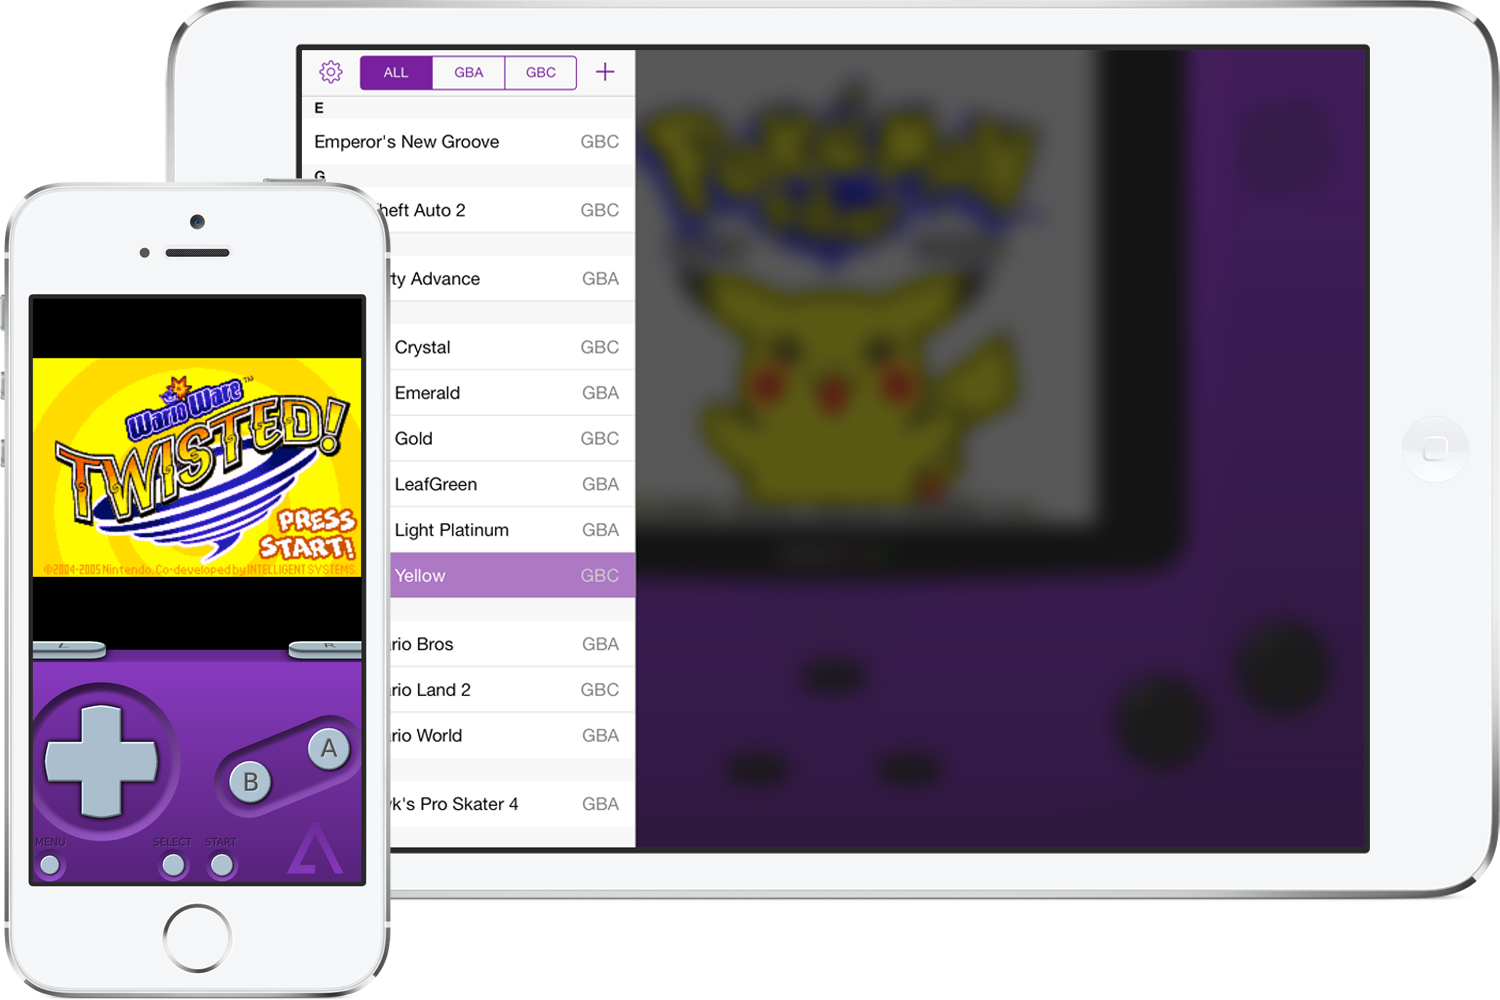
GBA4iOS is the best gaming emulators available for iPhone and iPad, now you can install GBA4iOS without Jailbreak. GBA4iOS is top downloaded tweak in Jailbreak category and the best emulator to sync your GBA ROMs. If you are looking for a way to install GBA4iOS on iOS 9.2.1 without Jailbreak, you’ve come to right place. In the following guide I’ll tell you how you can install GBA4iOS on iOS 9.2.1 without Jailbreak.
The procedure to install GBA4iOS on iOS 9.2.1 is the same as you have used to install GBA4iOS on iOS 9.0, for those who are new and don’t know ho to install GBA4iOS on iOS X try the following steps carefully.
Download and Install GBA4iOS on iOS 9.2.1 without Jailbreak:
Step#1: Open Safari on your iPhone or iPad.
Step#2: Open this link in your browser ( http://iemulators.com/gba4ios ).
Step#3: Tap on GBA4iOS application and click on install.
Step#4: Wait for few seconds to let installation process complete.
Step#5: Once the installation process is finished, You can find the GBA4iOS app icon on your home screen.
How to Fix GBA4IOS emulator Not opening on iOS 9.2.1:
After installing GBA4iOS application, if you’re facing GBA4iOS emulator not opening problem. Follow the methods stated below in order to fix GBA4iOS emulator not opening on iOS 9.2.1.
Step1: Open Settings.
Step2: Tap on General.
Step3: Tap on DeviceManagement->emulator profile ( Xiamen ).
Step4: Tap on ” Trust Button“.
All Done.
Video Guide on How to Install or Download GBA4iOS on iOS 9 without Jailbreak:
Following are the instruction on Apple ID password reset and iforgot iCloud Apple security.
Apple ID and iCloud ID are the necessary things for iPhone user’s and if somehow you forget your Apple Id password or forgot iCloud security questions etc, then it will cause a headache for you. Apple has never compromise, when it comes to security so you have to very careful with your Apple and iCloud ID details. In the following guide, I will tell you what to do when you forgot apple id password or forgot my Apple ID or iforgot iCloud.
Following are the instruction on how to download Bridge Constructor for PC running Windows and Mac OS X.
If you like to play Simulation games on your smartphones, then I would suggest you Bridge Constructor a simple and very addictive game. You have everything need to build a bridge and with over 40 levels addiction rate goes up. Today I’ll guide you to install Bridge Constructor for PC, but moving on let me tell you about the main features of Bridge Constructor.
• 40 Levels
• Free build mode and help system
• 5 Settings: city, canyon, beach, mountains, hills
• Improved grid system
• 4 different building materials: wood, steel, cables, concrete pillars
• Color coded load indicator for different building materials
• Three different load bearing levels: car, truck and tank truck
• High score per level
• Facebook connection (upload screenshots and bridge scores)
Following the is the collection of 20+ Psychedelic and Trippy Backgrounds for your desktop PC.
I have collected many Wallpapers and backgrounds for my desktop, but Trippy Backgrounds are the most colorful and they bring fresh and creative inspirations. Trippy Backgrounds are based on optical illusions and are very different from normal backgrounds cause of their color pattern. Enjoy the 20+ Psychedelic and Trippy Backgrounds for your desktop.
Learn how to Install Android 6.0.1 Marshmallow on Xperia Active, Xperia Live With Walkman via CM 13:
Own a Sony Ericsson Xperia Active or Sony Ericsson Xperia Live With Walkman? If so, it might be the time for you to cheer up. Xperia Active and Xperia Live are now blessed with an unofficial build of CyanogenMod 13 custom ROM which is based on Android 6.0.1 Marshmallow. That means you can now install the latest available version of Android, the Android Marshmallow on your legacy Sony Ericsson Xperia smartphone.
Overview:
The following guide illustrates how you can install the CyanogenMod 13 custom ROM on your Sony Ericsson Xperia Active or Xperia Live With Walkman. We will go through what’s working in this custom ROM and what’s not, and also have a flashback on the specifications of both the mentioned smartphones prior to flashing this ROM.
As far as the stability of the CyanogenMod 13 custom ROM for these devices is concerned, you may be happy to know that there aren’t any mainstream bugs in it. The list of not working features includes Radio, ANT+, 720P video recording and HDMI. Rest of the features are working pretty well. If you don’t really consider these features a big deal, you may be able to install this custom ROM right away. Let’s go through the early preparations and then go through the method to get CM 13 Android 6.0.1 Marshmallow running on our beloved Sony Ericsson Xperia Active and Xperia LWW.
Precautions / Early Preparations:
This guide is intended for Xperia Active and Xperia LWW only. Do not try this on any other device or else you will result in bricking it.
Your phone must be running the latest available Android 4.0 ICS firmware on it.
Your phone must be charged over at-least 50% to avoid any mishap during the flashing procedure.
Use the original data cable to establish a connection between your phone and your PC.
Install USB Drivers for Xperia Active and Xperia LWW using the driver’s installer from the Flashtool installation folder. Download Flashtool from here. After installing USB Drivers, connect a phone to PC using the USB cable so that USB drivers are installed properly and the connection is established properly.
Make a Nandroid Backup if any custom Recovery is installed already. If not, you will find a custom recovery later in this guide. –Guide
Copy all the media files and anything else stored in the internal memory to a PC before flashing to save this data.
Disclaimer:
THE METHODS INVOLVED IN FLASHING CUSTOM RECOVERIES, ROMS AND ROOTING YOUR PHONE ARE HIGHLY CUSTOM AND MAY RESULT IN BRICKING YOUR DEVICE, AND HAS NOTHING TO DO WITH GOOGLE OR THE DEVICE MANUFACTURER THAT IS SONY IN OUR CASE. ALSO ROOTING YOUR DEVICE WILL VOID ITS WARRANTY AND YOU WILL BE NO LONGER ELIGIBLE FOR ANY KIND OF FREE DEVICE SERVICES BY THE MANUFACTURERS/WARRANTY PROVIDERS. IN CASE OF ANY MISHAP WE MAY NOT BE HELD RESPONSIBLE. FOLLOW THESE INSTRUCTIONS TO THE LETTER TO AVOID ANY MISHAP OR BRICKING. MAKE SURE THAT WHATEVER YOU DO, YOU ARE DOING IT AT YOUR OWN RESPONSIBILITY.
Required Downloads:
Download the cm-13.0.zip ROM file carefully according to your device.
Connect your SD card using a card reader to your PC, if you’re using internal storage, then connect your device to your PC and mount it as mass storage (USB).
Now launch the MiniTool Partition Wizard on your PC.
In the MiniTool Partition Wizard, select your SDcard or your connected device and then click on Delete.
Now click on Create and from the displayed options, configure it as follows.
Create As: Primary.
File System: Unformatted.
Do not touch any other option and leave everything as it is and click on Ok.
Now hit Apply and click on Yes as soon as a popup comes up.
Hold on tighter while the process finishes.
That’s all with the partitioning process.
Next step:
Make sure that you’ve followed all the instructions listed above.
Extract the downloaded cm-13 ROM.zip file and copy boot.imgfrom it to your desktop.
Rename the dowloaded CM-13 ROM.zip file to only “update.zip” and the Gapps.zip file to only “gapps.zip”.
Copy downloaded CM-13.zip file and Gapps zip to Fastboot (platform-tools) folder or Minimal ADB and Fastboot folder.
Now turn off phone wait for 5 seconds.
Hold volume up button and connect the phone to PC.
The LED should remain blue, which means that the phone is in fastboot mode.
Now copy boot.img to Fastboot (platform-tools) folder or Minimal ADB and Fastboot installation folder.
Open that folder, hold shift button on the keyboard and right-click on the mouse.
Click on Open Command Window Here.
Type fastboot devices and press Enter.
It should only one fastboot connected device in return. If it showing more that one, then disconnect any other connected device or close any Android Emulator. Also, make sure that PC Companion is completely disabled if installed.
Now type fastboot flash boot boot.img and press Enter.
Type fastboot reboot and press Enter.
Disconnect your phone from your PC now.
While the phone is booting up, press Volume down button repeatedly to enter recovery mode.
Now in recovery, format system/format data and then format cache. You can find the format options in Advanced / Advanced Wipe options in CWM or TWRP recovery.
Now in the custom recovery, select Apply Update > Apply from ADB.
Connect your phone to your PC once again.
Now in the opened ADB Command line, issue this command: adb sideload update.zip and hit Enter key.
Once the process has been completed, issue this command: adb sideload gapps.zip.
Now that the ROM and GApps have been installed, wipe cache and dalvik cache from recovery once again.
Reboot your phone now. The first reboot may take up to 10-15 minutes.
That’s all! Best of luck 🙂
That’s all. Just in case you’re stuck with something, reach us out through the comment box below. We will try to help you out at our best.
Update Xperia Play, Xperia Ray to Android 6.0.1 Marshmallow CM 13 Custom ROM:
Custom ROMs are the reason behind giving a new life to the legacy Android devices. Whenever manufacturers forget their devices, custom ROM developers land in to keep the device alive by bringing a higher version of Android to it.
Just today, an unofficial build of CyanogenMod 13 custom ROM based on Android 6.0.1 Marshmallow has been made available for almost all the Sony Ericsson Xperia and Sony Xperia devices which came out either in 2011 or 2012. Sony Xperia Play and Sony Xperia Ray are the two devices which also came out under Sony’s Umbrella with Ericsson in February and June 2011.
Sony Ericsson Xperia Play and Xperia Ray are entirely different devices from each other. We will have a recap of both these smartphones before we move towards what we are here for.
A Glimpse Sony Ericsson Xperia Play and Sony Xperia Ray Specs
It definitely is the time for Sony Ericsson Xperia Play and Xperia Ray owners to prepare their devices for Android 6.0.1 Marshmallow. The available custom ROM is in early development stages, but it’s pretty good to give it a try. The ROM has got its mainstream features working which means you will likely be able to keep it as a daily driver.
You may find the camera for Xperia Play a little buggy, but it might work by means of a third party camera application. For Xperia Ray, the Radio, Ant+, HDMI and 720P video recording are not working for now.
Since we are getting Android 6.0.1 Marshmallow to work on this device, compromising for these features shouldn’t be big deal for most of the users. If you’re willing to flash this firmware on your Xperia Play and Xperia Ray, you may have already spotted the right place to do so.
The succeeding guide is going to take you through a step-by-step method to update your Sony Ericsson Xperia Play, Xperia Rayto Android 6.0.1 Marshmallow CM 13 Custom ROM
Precautions / Early Preparations:
This guide is intended for Xperia Play, Xperia Ray only. Do not try this on any other device or else you will result in bricking it.
Your phone must be running the latest available Android 4.0 ICS firmware on it.
Your phone must be charged over at-least 50% to avoid any mishap during the flashing procedure.
Use the original data cable to establish connection between your phone and your PC.
Install USB Drivers for Xperia Play, Xperia Ray using the drivers installer from the Flashtool installation folder. Download Flashtool from here. After installing USB Drivers, connect phone to PC using the USB cable so that USB drivers are installed properly and connection is established properly.
Make a Nandroid Backup if any custom Recovery is installed already. If not, you will find a custom recovery later in this guide. –Guide
Copy all the media files and anything else stored in the internal memory to a PC before flashing to save this data.
Disclaimer:
THE METHODS INVOLVED IN FLASHING CUSTOM RECOVERIES, ROMS AND ROOTING YOUR PHONE ARE HIGHLY CUSTOM AND MAY RESULT IN BRICKING YOUR DEVICE, AND HAS NOTHING TO DO WITH GOOGLE OR THE DEVICE MANUFACTURER THAT IS SONY IN OUR CASE. ALSO ROOTING YOUR DEVICE WILL VOID ITS WARRANTY AND YOU WILL BE NO LONGER ELIGIBLE FOR ANY KIND OF FREE DEVICE SERVICES BY THE MANUFACTURERS/WARRANTY PROVIDERS. IN CASE OF ANY MISHAP WE MAY NOT BE HELD RESPONSIBLE. FOLLOW THESE INSTRUCTIONS TO THE LETTER TO AVOID ANY MISHAP OR BRICKING. MAKE SURE THAT WHATEVER YOU DO, YOU ARE DOING IT AT YOUR OWN RESPONSIBILITY.
Required Downloads:
Download the cm-13.0.zip ROM file carefully according to your device.
Connect your SD card using a card reader to your PC, if you’re using internal storage, then connect your device to your PC and mount it as mass storage (USB).
Now launch the MiniTool Partition Wizard on your PC.
In the MiniTool Partition Wizard, select your SDcard or your connected device and then click on Delete.
Now click on Create and from the displayed options, configure it as follows.
Create As: Primary.
File System: Unformatted.
Do not touch any other option and leave everything as it is and click on Ok.
Now hit Apply and click on Yes as soon as a popup comes up.
Hold on tighter while the process finishes.
That’s all with the partitioning process.
Next Method:
Make sure that you’ve followed all the instructions listed above.
Extract the downloaded cm-13 ROM.zip file and copy boot.imgfrom it to your desktop.
Rename the dowloaded CM-13 ROM.zip file to only “update.zip” and the Gapps.zip file to only “gapps.zip”.
Copy downloaded CM-13.zip file and Gapps zip to phone’s internal memory.
Now turn off phone wait for 5 seconds.
Hold volume up button and connect the phone to PC.
The LED should remain blue, which means that the phone is in fastboot mode.
Now copy boot.img to Fastboot (platform-tools) folder or Minimal ADB and Fastboot installation folder.
Open that folder, hold shift button on the keyboard and right-click on the mouse.
Click on Open Command Window Here.
Type fastboot devices and press Enter.
It should only one fastboot connected device in return. If it showing more that one, then disconnect any other connected device or close any Android Emulator. Also, make sure that PC Companion is completely disabled if installed.
Now type fastboot flash boot boot.img and press Enter.
Type fastboot reboot and press Enter.
Disconnect your phone from your PC now.
While the phone is booting up, press Volume down button repeatedly to enter recovery mode.
Now in recovery, format system/format data and then format cache. You can find the format options in Advanced / Advanced Wipe options in CWM or TWRP recovery.
Now in the custom recovery, select Apply Update > Apply from ADB.
Connect your phone to your PC once again.
Now in the opened ADB Command line, issue this command: adb sideload update.zip and hit Enter key.
Once the process has been completed, issue this command: adb sideload gapps.zip.
Now that the ROM and GApps have been installed, wipe cache and dalvik cache from recovery once again.
Reboot your phone now. The first reboot may take up to 10-15 minutes.
That’s all! Best of luck :)That’s all. Just in case you’re stuck with something, reach us out through the comment box below. We will try to help you out at our best.
Install Android 6.0.1 Marshmallow on Xperia Pro, Mini, Mini Pro with CyanogenMod 13: Sony Ericsson Pro, Xperia Mini, and Xperia Mini Pro can now enjoy the highest version of Android i.e. Android 6.0.1 Marshmallow. Surprised? well, we are not kidding at all. As long as we’ve got some great developers working for this kind of legacy devices, there isn’t going to an end to the lives of these phones.
The greatest thing for Xperia Pro, Xperia Mini and Xperia Mini Pro has been done by XDA recognized developer mikeioannina who’s responsible for pulling out the unofficial builds of CyanogenMod 13 custom ROM based on Android 6.0.1 Marshmallow.
The unofficial CM 13 builds are available for all legacy Xperia devices which came out back in 2011 or 2012. Luckily, Xperia Pro, Xperia Mini, and Xperia Mini Pro are the 3 devices of that league as well.
Those who do not know about the devices mentioned above, we will shed some light on these devices before we head towards the instructions for updating your phone to Android 6.0.1 Marshmallow.
Android 6.0.1 Marshmallow on Xperia Pro
Sony Ericsson Xperia Pro
Xperia Pro first appeared in February, 2011. This device by Sony touts a 3.7-inch 480p display with 265 ppi. Sony used a scratch-resistant glass to protect its display. Xperia Pro originally ran on Android 2.3 Gingerbread and was later updated to Android 4.0 Ice Cream Sandwich. After ICS, Sony didn’t update the device to any further version of Android due to its hardware limitations. Xperia Pro is powered up with Qualcomm’s Snapdragon S2 CPU clocked at 1.0 GHz backed up by Adreno 205 GPU and a RAM of 512 MB. This device carried an 8 MP shooter at the back and a VGA shooter on the front for secondary video calls.
Sony Ericsson Xperia Mini and Mini Pro:
Xperia Mini and Xperia Mini Pro, Sony’s small and beautiful smartphones were popped up in August 2011. Both these phones have a 3.0-inch display with a resolution of 320 x 480 pixels and 192 ppi.
Xperia Mini and Mini Pro were powered up with Qualcomm’s Snapdragon S2 CPU clocked at 1.0 GHz and supported by Adreno 205 GPU. A RAM of 512 MB was placed inside.
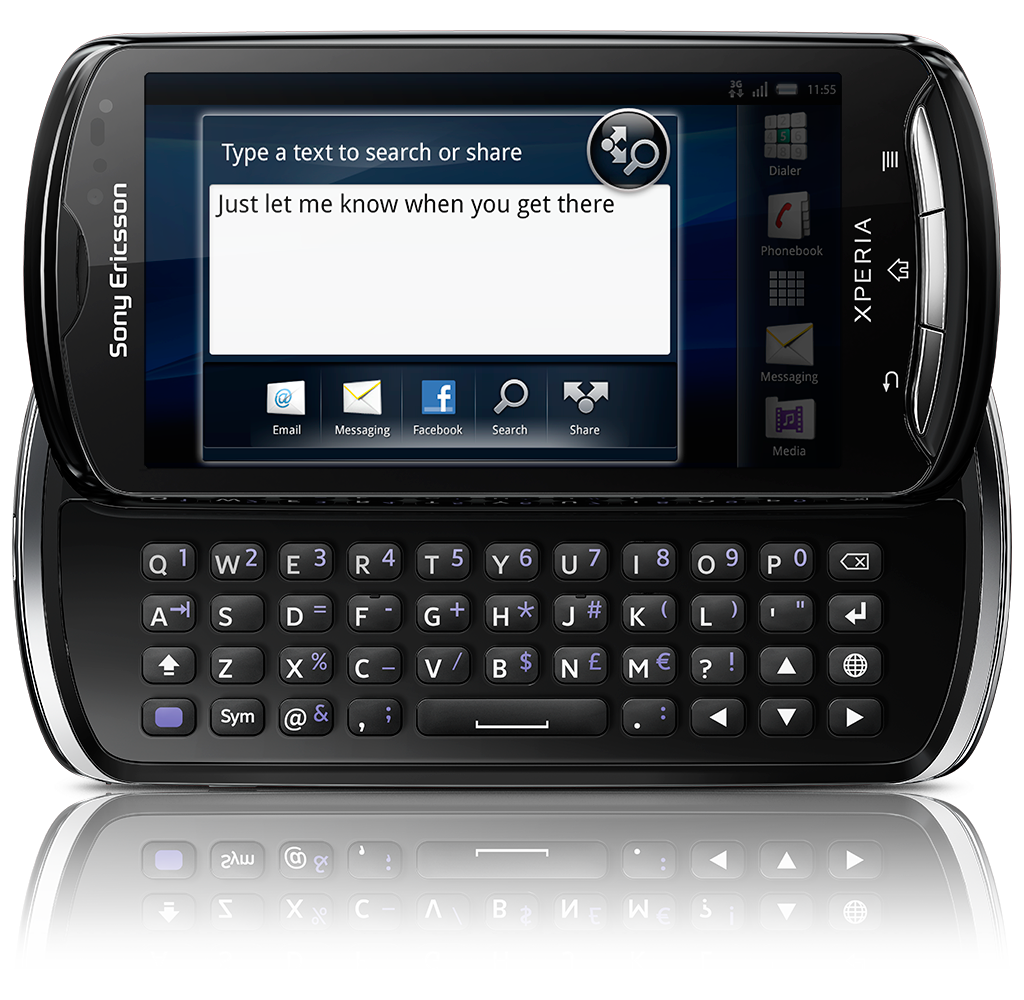
These phones have only 320 and 400 MB internal storage. Xperia Mini and Xperia Mini Pro’s official software support remained limited to Android 4.0 ICS as well. The only difference between Xperia Mini and Xperia Mini Pro is the addition of a horizontal-sliding keyboard on the Xperia Mini Pro. Rest of the devices are almost the same.
CyanogenMod 13 custom Android 6.0.1 Marshmallow:
That was all about these devices. We can now get back to our work. If you own this device, you may want to have the latest Android firmware installed on it. The available CyanogenMod 13 custom ROM has got the features like Camera, Bluetooth, RIL, WiFi, Video working. Radio, ANT+, HDMI and 720P video recording are crashing for now.
If this custom ROM is not stable, we can safely assume that it’s at least close to stable. Using the set of instructions listed here, you can safely install Android 6.0.1 Marshmallow on Sony Ericsson Pro, Mini, Mini Pro with CyanogenMod 13
Precautions / Early preparations:
This guide is intended for Xperia Pro, Mini, and Mini Pro only. Do not try this on any other device or else you will result in bricking it.
Your phone must be running the latest available Android 4.0 ICS firmware on it.
Your phone must be charged over at-least 50% to avoid any mishap during the flashing procedure.
Use the original data cable to establish a connection between your phone and your PC.
Install USB Drivers for Xperia Pro, Mini and Mini Pro using the drivers’ installer from the Flashtool installation folder. Download Flashtool from here. After installing USB Drivers, connect the phone to PC using the USB cable so that USB drivers are installed properly and the connection is established properly.
Make a Nandroid Backup if any custom Recovery is installed already. If not, you will find a custom recovery later in this guide. –Guide
Copy all the media files and anything else stored in the internal memory to a PC before flashing to save this data.
Disclaimer:
THE METHODS INVOLVED IN FLASHING CUSTOM RECOVERIES, ROMS AND ROOTING YOUR PHONE ARE HIGHLY CUSTOM AND MAY RESULT IN BRICKING YOUR DEVICE, AND HAS NOTHING TO DO WITH GOOGLE OR THE DEVICE MANUFACTURER THAT IS SONY IN OUR CASE. ALSO ROOTING YOUR DEVICE WILL VOID ITS WARRANTY AND YOU WILL BE NO LONGER ELIGIBLE FOR ANY KIND OF FREE DEVICE SERVICES BY THE MANUFACTURERS/WARRANTY PROVIDERS. IN CASE OF ANY MISHAP WE MAY NOT BE HELD RESPONSIBLE. FOLLOW THESE INSTRUCTIONS TO THE LETTER TO AVOID ANY MISHAP OR BRICKING. MAKE SURE THAT WHATEVER YOU DO, YOU ARE DOING IT AT YOUR OWN RESPONSIBILITY.
Required Downloads:
Download the cm-13.0.zip ROM file carefully according to your device.
Connect your SD card using a card reader to your PC, if you’re using internal storage, then connect your device to your PC and mount it as mass storage (USB).
Now launch the MiniTool Partition Wizard on your PC.
In the MiniTool Partition Wizard, select your SDcard or your connected device and then click on Delete.
Now click on Create and from the displayed options, configure it as follows.
Create As: Primary.
File System: Unformatted.
Do not touch any other option and leave everything as it is and click on Ok.
Now hit Apply and click on Yes as soon as a popup comes up.
Hold on tighter while the process finishes.
That’s all with the partitioning process.
Next Step:
Make sure that you’ve followed all the instructions listed above.
Extract the downloaded cm-13 ROM.zip file and copy boot.imgfrom it to your desktop.
Rename the downloaded CM-13 ROM.zip file to only “update.zip” and the Gapps.zip file to only “gapps.zip”.
Copy downloaded CM-13.zip file and Gapps zip to phone’s external memory.
Now turn off phone wait for 5 seconds.
Hold volume up button and connect the phone to PC.
The LED should remain blue, which means that the phone is in fastboot mode.
Now copy boot.img to Fastboot (platform-tools) folder or Minimal ADB and Fastboot installation folder.
Open that folder, hold shift button on the keyboard and right-click on the mouse.
Click on Open Command Window Here.
Type fastboot devices and press Enter.
It should only one fastboot connected device in return. If it showing more that one, then disconnect any other connected device or close any Android Emulator. Also, make sure that PC Companion is completely disabled if installed.
Now type fastboot flash boot boot.img and press Enter.
Type fastboot reboot and press Enter.
Disconnect your phone from your PC now.
While the phone is booting up, press Volume down button repeatedly to enter recovery mode.
Now in recovery, format system/format data and then format cache. You can find the format options in Advanced / Advanced Wipe options in CWM or TWRP recovery.
Now in the custom recovery, select Apply Update > Apply from ADB.
Connect your phone to your PC once again.
Now in the opened ADB Command line, issue this command: adb sideload update.zip and hit Enter key.
Once the process has been completed, issue this command: adb sideload gapps.zip.
Now that the ROM and GApps have been installed, wipe cache and dalvik cache from recovery once again.
Reboot your phone now. The first reboot may take up to 10-15 minutes.
That’s all! Best of luck 🙂
That’s all. Just in case you’re stuck with something, reach us out through the comment box below. We will try to help you out at our best.
Update Sony Xperia Neo, Neo V, Neo L to Android 6.0.1 Marshmallow via CyanogenMod 13:
Xperia Neo, Neo V, and Neo L can now enjoy the Android 6.0.1 Marshmallow via CyanogenMod 13 custom ROM. This has been made possible by XDA recognized developer mikeioannina.
The Android 6.0.1 Marshmallow for Xperia Neo trio comes in the form of unofficial CyanogenMod ROM build. Xperia Neo’s official Android firmware support was extended till Android 4.0 Sandwich only.
After this firmware, the device wasn’t able to enjoy any further version of Android officially, but thanks to custom ROM developers who have always been able to give a new life to this series of Sony Xperia.
Overview:
Sony Xperia Neo trio’s 2 smartphones, Xperia Neo and Xperia Neo V were introduced to the world back in March 2011 and October 2011 while the Xperia L made an appearance in June 2012.
All these smartphones carry almost same specifications except a few minor changes. Xperia Neo, Neo V are equipped with a 3.7-inch 480p display with 265 ppi and the Xperia Neo L sports a 4.0-inch 480p display with 245 ppi.
All these phones are powered up with Qualcomm’s Snapdragon S2 CPU clocked at 1.0 GHz accompanied by Adreno 205 GPU and a RAM of 512 MB.
Their internal storage is ranged at 1 GB supported by an external SD Card slot. Xperia Neo and Neo ran on Android 2.3.4 Gingerbread, and the Xperia Neo L ran on Android 4.0.4 Ice Cream Sandwich out of the box.
In case you own this device and you’ve put it aside, it’s the time for you to take it out for the sake of giving it a whole new life by means of Android 6.0.1 Marshmallow.
A Bit of Important:
If you’re concerned about what’s working and what’s not working in the mentioned custom ROM, you may be happy to know that there aren’t so many bugs for now. Mainstream features like Camera, WiFi, RIL, Bluetooht, Video are working pretty great. You may not find FM Radio, ANT+, 720P Video Recording and HDMI working for now.
When most of the other features are working, these features may not seem a big deal. If you’re okay with that, you should go ahead and checkout the unofficial CyanogenMod 13 Android 6.0.1 custom ROM.
As you scroll down, you will find a comprehensive step-by-steptutorial to updateyour Xperia Neo, Neo V, Neo L to Android 6.0.1 Marshmallow via CyanogenMod 13 custom ROM.
Precautions / Early preparations:
This guide is intended for Sony Ericsson Xperia Neo, Neo V and Neo L only. Do not try this on any other device or else you will result in bricking it.
Your phone must be running the latest available Android 4.0 ICS firmware on it.
Your phone must be charged over at-least 50% to avoid any mishap during the flashing procedure.
Use the original data cable to establish a connection between your phone and your PC.
Install USB Drivers for Xperia Neo / Neo V / Neo L using the driver’s installer from the Flashtool installation folder. Download Flashtool from here. After installing USB Drivers, connect the phone to PC using the USB cable so that USB drivers are installed properly and the connection is established properly.
Make a Nandroid Backup if any custom Recovery is installed already. If not, you will find a custom recovery later in this guide. –Guide
Copy all the media files and anything else stored in the internal memory to a PC before flashing to save this data.
Disclaimer:
THE METHODS INVOLVED IN FLASHING CUSTOM RECOVERIES, ROMS AND ROOTING YOUR PHONE ARE HIGHLY CUSTOM AND MAY RESULT IN BRICKING YOUR DEVICE, AND HAS NOTHING TO DO WITH GOOGLE OR THE DEVICE MANUFACTURER THAT IS SONY IN OUR CASE. ALSO ROOTING YOUR DEVICE WILL VOID ITS WARRANTY AND YOU WILL BE NO LONGER ELIGIBLE FOR ANY KIND OF FREE DEVICE SERVICES BY THE MANUFACTURERS/WARRANTY PROVIDERS. IN CASE OF ANY MISHAP WE MAY NOT BE HELD RESPONSIBLE. FOLLOW THESE INSTRUCTIONS TO THE LETTER TO AVOID ANY MISHAP OR BRICKING. MAKE SURE THAT WHATEVER YOU DO, YOU ARE DOING IT AT YOUR OWN RESPONSIBILITY.
Required Downloads:
Download the CM-13.0 custom ROM.zip file carefully according to your device
Connect your SD card using a card reader to your PC, if you’re using internal storage, then connect your device to your PC and mount it as mass storage (USB).
Now launch the MiniTool Partition Wizard on your PC.
In the MiniTool Partition Wizard, select your SDcard or your connected device and then click on Delete.
Now click on Create and from the displayed options, configure it as follows.
Create As: Primary.
File System: Unformatted.
Do not touch any other option and leave everything as it is and click on Ok.
Now hit Apply and click on Yes as soon as a popup comes up.
Hold on tighter while the process finishes.
That’s all with the partitioning process.
Next Step:
Make sure that you’ve followed all the instructions listed above.
Extract the downloaded cm-13 ROM.zip file and copy boot.imgfrom it to your desktop.
Rename the dowloaded CM-13 ROM.zip file to only “update.zip” and the Gapps.zip file to only “gapps.zip”.
Copy downloaded CM-13.zip file and Gapps zip to phone’s internal memory.
Now turn off phone wait for 5 seconds.
Hold volume up button and connect the phone to PC.
The LED should remain blue, which means that the phone is in fastboot mode.
Now copy boot.img to Fastboot (platform-tools) folder or Minimal ADB and Fastboot installation folder.
Open that folder, hold shift button on the keyboard and right-click on the mouse.
Click on Open Command Window Here.
Type fastboot devices and press Enter.
It should only one fastboot connected device in return. If it showing more that one, then disconnect any other connected device or close any Android Emulator. Also, make sure that PC Companion is completely disabled if installed.
Now type fastboot flash boot boot.img and press Enter.
Type fastboot reboot and press Enter.
Disconnect your phone from your PC now.
Let’s go On:
While the phone is booting up, press Volume down button repeatedly to enter recovery mode.
Now in recovery, format system/format data and then format cache. You can find the format options in Advanced / Advanced Wipe options in CWM or TWRP recovery.
Now in the custom recovery, select Apply Update > Apply from ADB.
Connect your phone to your PC once again.
Now in the opened ADB Command line, issue this command: adb sideload update.zip and hit Enter key.
Once the process has been completed, issue this command: adb sideload gapps.zip.
Now that the ROM and GApps have been installed, wipe cache and dalvik cache from recovery once again.
Reboot your phone now. The first reboot may take up to 10-15 minutes.
That’s all! Best of luck 🙂
That’s all. Just in case you’re stuck with something, reach us out through the comment box below. We will try to help you out at our best.
Install Unofficial Android 6.0.1 Marshmallow on Xperia Arc/Arc S via CM 13:
Great news for Sony Ericsson Xperia Arc and Arc S owners. You can now flash CyanogenMod 13 (CM 13) Android 6.0.1 Marshmallow on your device. The build happens to be an unofficial one and comes from XDA recognized developer mikeioannina.
Mikeioannina has managed to pull our this unofficial build of CyanogenMod 13 for almost all legacy Xperia devices which were the greatest devices back in the year 2011. These devices include Sony Ericsson Xperia Arc and Arc S as well. It’s just a surprise for Xperia Arc and Arc S owners to be able to update such an old device to the latest and greatest version of Android.
Overview:
Just in case you’ve put your phone in a drawer, this is the time to pull it out and clean the dust from it. Those of you who have forgotten these devices, Sony Xperia Arc and Arc S were Sony’s last devices in collaboration with Ericsson. Xperia Arc and Arc S both sport a 4.2-inch 480p display with 233 ppi.
Xperia Arc is equipped with a Qualcomm Snapdragon S2 1.0 GHz Scorpion CPU accompanied by 205 GPU and the Xperia Arc S is equipped with the same CPU clocked at 1.4 GHz while the GPU remains the same as well. A RAM of 512 MB can be found in both these brothers and the internal storage was 320 MB on the Xperia Arc and 1 GB on the Arc S with a microSD card slot support. Both these phones carried a 1500 mAh battery.
Arc and Arc S ran on Android 2.3 Gingerbread out of the box. The journey ended on Android 4.0 Ice Cream Sandwich. Since then, these devices have been enjoying higher versions of Android by means of custom ROMs.
As far as the mentioned custom ROM is concerned, it still is in early development stages but most of the features are working on it. You can find RIL, WiFi, Bluetooth, Camera and other such features working on it.
Let’s Start Now:
The only thing that you may not find working in current builds is the FM Radio, HDMI support, and 720p video recording. If these features aren’t a big deal to you, you must go ahead and give your Xperia Arc and Arc S a whole new life. We are all set to take you through a step-by-step guide to flash/install the Android 6.0.1 Marshmallow on your Sony Ericsson Xperia Arcand Arc S.
Precautions / Early preparations:
This guide is intended for Sony Ericsson Xperia Arc and Xperia Arc S only. Do not try this on any other device or else you will result in bricking it.
Your phone must be running the latest available Android 4.0 ICS firmware on it.
Your phone must be charged over at-least 50% to avoid any mishap during the flashing procedure.
Use the original data cable to establish a connection between your phone and your PC.
Install USB Drivers for Xperia Arc / Arc S using the driver’s installer from the Flashtool installation folder. Download Flashtool from here. After installing USB Drivers, connect the phone to PC using the USB cable so that USB drivers are installed properly and the connection is established properly.
Make a Nandroid Backup if any custom Recovery is installed already. If not, you will find a custom recovery later in this guide. –Guide
Copy all the media files and anything else stored in the internal memory to a PC before flashing to save this data.
Disclaimer:
THE METHODS INVOLVED IN FLASHING CUSTOM RECOVERIES, ROMS AND ROOTING YOUR PHONE ARE HIGHLY CUSTOM AND MAY RESULT IN BRICKING YOUR DEVICE, AND HAS NOTHING TO DO WITH GOOGLE OR THE DEVICE MANUFACTURER THAT IS SONY IN OUR CASE. ALSO ROOTING YOUR DEVICE WILL VOID ITS WARRANTY AND YOU WILL BE NO LONGER ELIGIBLE FOR ANY KIND OF FREE DEVICE SERVICES BY THE MANUFACTURERS/WARRANTY PROVIDERS. IN CASE OF ANY MISHAP WE MAY NOT BE HELD RESPONSIBLE. FOLLOW THESE INSTRUCTIONS TO THE LETTER TO AVOID ANY MISHAP OR BRICKING. MAKE SURE THAT WHATEVER YOU DO, YOU ARE DOING IT AT YOUR OWN RESPONSIBILITY.
Connect your SD card using a card reader to your PC, if you’re using internal storage, then connect your device to your PC and mount it as mass storage (USB).
Now launch the MiniTool Partition Wizard on your PC.
In the MiniTool Partition Wizard, select your SDcard or your connected device and then click on Delete.
Now click on Create and from the displayed options, configure it as follows.
Create As: Primary.
File System: Unformatted.
Do not touch any other option and leave everything as it is and click on Ok.
Now hit Apply and click on Yes as soon as a popup comes up.
Hold on tighter while the process finishes.
That’s all with the partitioning process.
Method:
Make sure that you’ve followed all the instructions listed above.
Extract the downloaded cm-13 ROM.zip file and copy boot.imgfrom it to your desktop.
Rename the downloaded CM-13 ROM.zip file to only “update.zip” and the Gapps.zip file to only “gapps.zip”.
Copy downloaded CM-13.zip file and Gapps zip to phone’s internal memory.
Now turn off phone wait for 5 seconds.
Hold volume up button and connect the phone to PC.
The LED should remain blue, which means that the phone is in fastboot mode.
Now copy boot.img to Fastboot (platform-tools) folder or Minimal ADB and Fastboot installation folder.
Open that folder, hold shift button on the keyboard and right-click on the mouse.
FastBoot Mode:
Click on Open Command Window Here.
Type fastboot devices and press Enter.
It should only one fastboot connected device in return. If it showing more that one, then disconnect any other connected device or close any Android Emulator. Also, make sure that PC Companion is completely disabled if installed.
Now type fastboot flash boot boot.img and press Enter.
Type fastboot reboot and press Enter.
Disconnect your phone from your PC now.
While the phone is booting up, press Volume down button repeatedly to enter recovery mode.
Now in recovery, format system/format data and then format cache. You can find the format options in Advanced / Advanced Wipe options in CWM or TWRP recovery.
Now in the custom recovery, select Apply Update > Apply from ADB.
Connect your phone to your PC once again.
Now in the opened ADB Command line, issue this command: adb sideload update.zip and hit Enter key.
Once the process has been completed, issue this command: adb sideload gapps.zip.
Now that the ROM and GApps have been installed, wipe cache and dalvik cache from recovery once again.
Reboot your phone now. The first reboot may take up to 10-15 minutes.
That’s all! Best of luck 🙂
That’s all. Just in case you’re stuck with something, reach us out through the comment box below. We will try to help you out at our best.
Thanks to leakite blogfor tipping us off with the adb sideload method in order to flash the custom ROM on the target devices.











![Apple ID Password Reset & Iforgot iCloud Apple Security [ How To ]](https://techbeasts.com/wp-content/uploads/2016/03/iforgot-130322.jpg "Apple ID Password Reset & Iforgot iCloud Apple Security [ How To ]")