Home Blog Page 328

Download Batman HD Desktop Wallpapers for Widescreen, High Definition, Mobile

0
Download Batman HD Desktop Wallpapers for Widescreen, High Definition, Mobile

Following are Batman HD Desktop Wallpapers for Widescreen, High Definition, Mobile. Just Click on Wallpaper to download it.

Now that new block-buster is on his way ” Batman Vs Superman “, so I thought why not give you people a treat. Today I’ve collected the latest and HD Batman Desktop Wallpapers and you can also use these Wallpapers on iPhone, iPad, Android smartphones and Mac.

To get free HD Wallpapers for your desktop and mobile devices visit our Wallpapers gallery.

batman_superman_face_off-wallpaper-1024x768

Get more Batman Free HD Wallpapers from next page —>>>

Add Quick Charging Mode To iPhone Or iPad [ How To ]

0
Add Quick Charging Mode To iPhone Or iPad [ How To ]

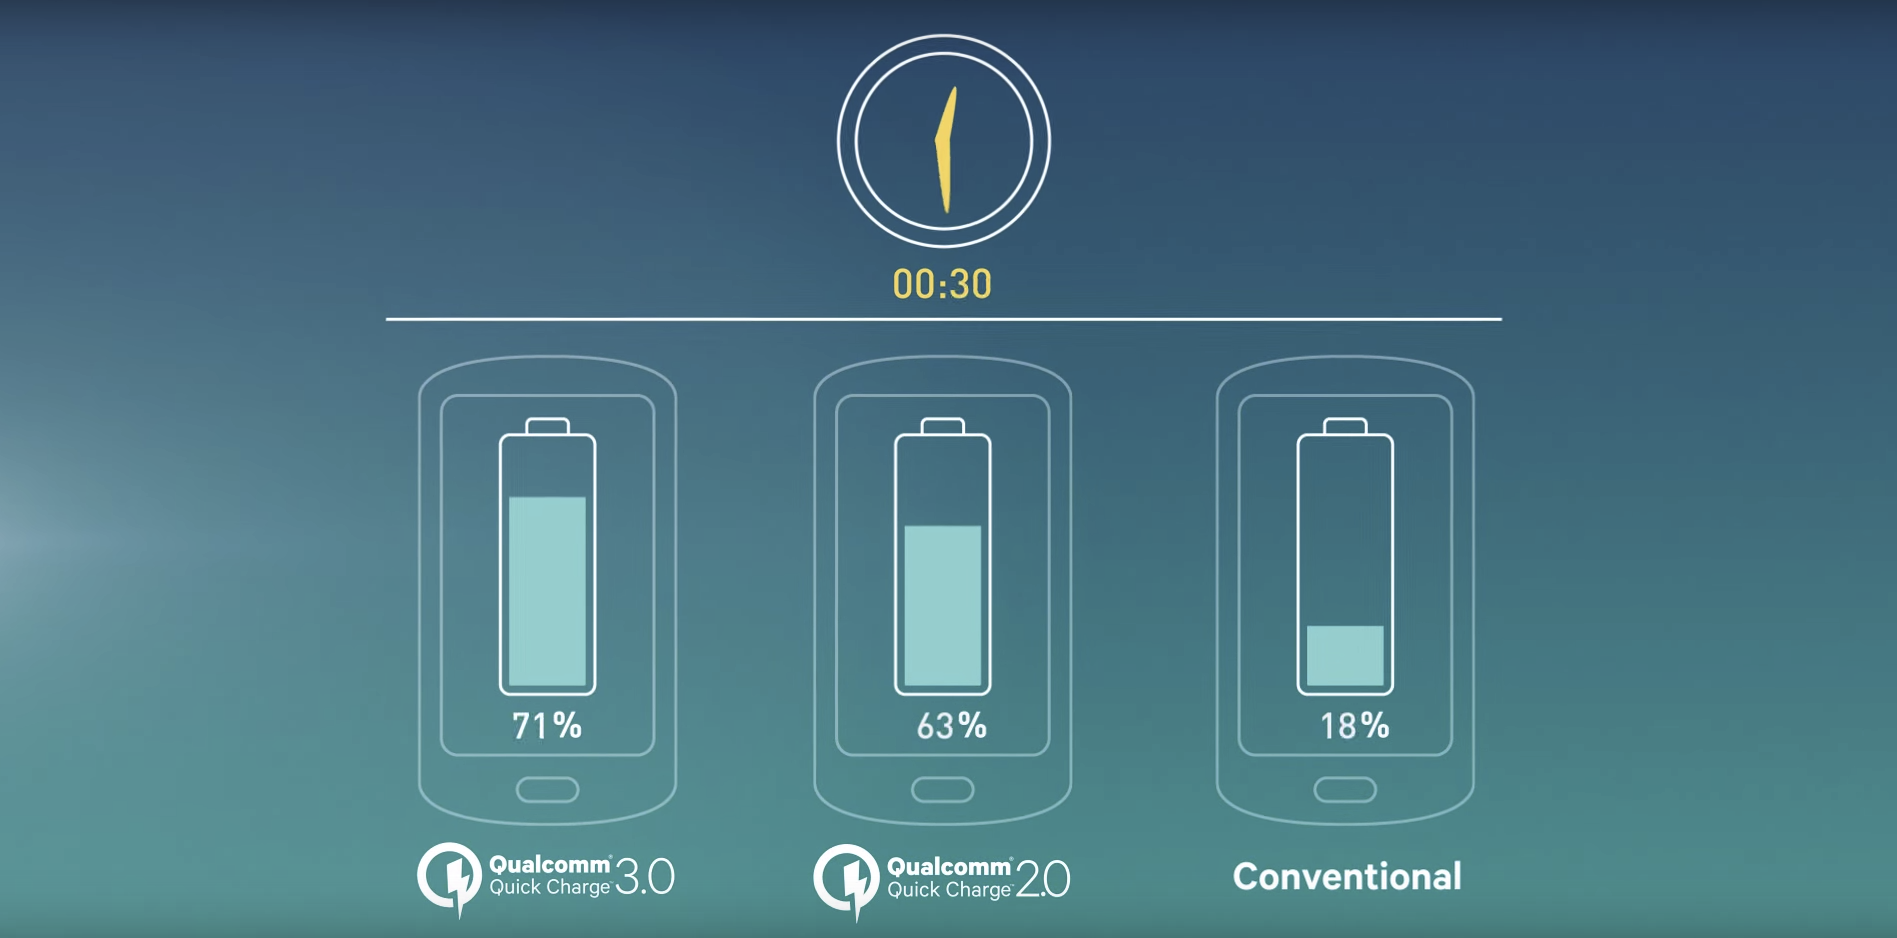
Do you want to charge your iPhone as quick as Android devices, in the following tutorial I’ll tell you how to add Quick Charging Mode To iPhone Or iPad.

Quick Charging is the Mode is the one feature that we want most in new iPhone and as rumored are growing we may get Quick Charging Mode on iPhone 7. But if you are using a Jailbreak device then you don’t need to wait for iPhone 7 to come in, all you have to do is follow the instruction below and in few minutes you’ll get Quick Charging Mode for iPhone Or iPad.
quick Charging Mode iphone or ipad

How to Add Quick Charging Mode To iPhone Or iPad:

Before moving on you need to Jailbreak your iPhone or iPad, if your device is not Jailbroken use our Jailbreak guide.

Step1: Open Cydia on iPhone or iPad.

Step2: Now search for Wolfram.

Step3: Once you find Wolfram, tap on install.

Step4: After Wolfram is installed, reboot your device. Once your device is turn on, plugin in lightning charging cable.

Now when charging cable is plugged in, you’ll see Low Power Mode will enable automatically. When low power mode is on its obvious that your iPhone will uses less power while charging. It means more power gets to the battery and your device will charge up quickly as compared to normal charging. That’s it for now.

Well you cannot say that this quick charging mode is like the Android devices mode, bit its effective. Hope so Apple will consider adding quick charging mode in iPhone 7, till now Wolfram will do to work for you.

Download Tesla Tubes for Windows PC and Mac

0
Download Tesla Tubes for Windows PC and Mac

Tesla Tubes is the latest game from Kiloo, the guys behind filthy-famous Subway Surfers. The new puzzle game is all set to check out your mapping skills. All you’ve got to do in this game is to connect the matching batteries with tubes. You’ve to make sure that you do not choose a wrong path for the tubes and block the way for other batteries. The formation of tubes should be done in such a way that all batteries can be connected to their other end. You will find pretty beautiful and colorful batteries in this game. Professor Droo and his grandson are your companions in this game. In the later stages, you will have to dodge bombs to avoid a disaster, pass obstacles and also cross bridges to reach the other end of the battery. With cool graphics, Tesla Tubes takes the concept of Flow-Free to a next level. You’re given a limited number of moves in this game to score good. Tesla Tubes packs over 500 levels. Tesla Tubes is an absolutely free-to-play game. It’s available for both Android and iOS platforms.Tesla Tubes for PC

Although you can easily play Tesla Tubes on a handheld device, but some of your might be willing to play this game on your computer. Tesla Tubes for PC can be played on a Windows XP/7/8/8.1/10 Desktop PC / Laptop and Mac OS X Macbook / iMac. All you will need to run Tesla Tubes for PC via BlueStacks, BlueStacks 2, Remix OS and Andy OS. Let’s move on to the method now.

Download Tesla Tubes For Windows PC & Mac

  1. Download Tesla Tubes APK
  2. Download and install Bluestacks: Bluestacks Offline Installer | Rooted Bluestacks | Bluestacks App Player | Rooted BlueStacks 2
  3. Once you’ve installed Bluestacks, double click the downloaded Tesla Tubes APK.
  4. The APK will be installed using Bluestacks, once installed open Bluestacks and locate the recently installed Tesla Tubes.
  5. Click the Tesla Tubes icon to open it, follow the on-screen instructions to play it.

You can also use Andy OS or Remix OS to install Tesla Tubes, here’s the tutorial:  How To Run Android Apps On Mac OS X With Andy | How to launch Remix OS for PC and install Apps for PC via Remix OS.

The Andy OS and Remix OS tutorial explains how to play a game on your Mac OS X, but the same guide will also work for a Windows PC.

That’s all. In case you’re stuck with anything, reach us out through the comment box below.

How to access native DPI settings hidden in Galaxy S7, S7 Edge, Note 5, S6 and S6 Edge

0
How to access native DPI settings hidden in Galaxy S7, S7 Edge, Note 5, S6 and S6 Edge

Samsung Galaxy S7, S7 Edge and other flagship Galaxy smartphones running Android Marshmallow have a hidden native DPI option. This means you can resize the content on your phone’s screen easily without any hard and fast rules i.e. rooting your device.

Google introduced the DPI option in Android N. Addition of this feature natively in the Android N was a great news for Android power users, since it gave them an option to tweak the DPI without messing up the core system files of their smartphones. Now that this option is found residing inside the Marshmallow build of flagship Galaxy smartphones, this has brought a little more cheer to the faces of Galaxy users.

For those who have no idea about DPI, it stands for Dots Per Inch. DPI determines what amount of content will appear on your phone’s screen. Changing the DPI results in the opposite direction, means higher the value lower the density and lower the value higher the density.galaxy-s7-and-galaxy-s7-edge-540x334

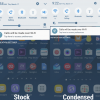
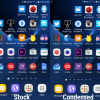
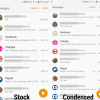
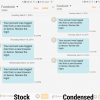
The DPI option in Samsung Galaxy S7, S7 Edge, Note 5, S6 and S6 Edge allows the users to choose between two modes: Standard Mode and Condensed Mode. You can easily preview the DPI changes in the condensed mode and then you can apply the changes if you wish, otherwise you can go back to the standard DPI state. Accessing the native DPI option in the mentioned smartphones isn’t a kind of a rocket-science. The following tutorial illustrates how you can access native DPI settings hidden in Galaxy S7, S7 Edge, Note 5, S6, S6 Edge and S6 Edge+.

How to access native DPI settings hidden in Galaxy S7/S7 Edge/Note5/S6/S6 Edge/S6 Edge+

  1. Install Nova Launcher on your Samsung phone.
  2. Launch Nova Launcher from the app drawer and use it as your default launcher.
  3. Now go to the home-screen on your Galaxy phone.
  4. Tap and hold an empty area of the screen and then select widgets.
  5. Now under widgets, find the “Activities” widget and place it on the home screen of your phone.
  6. Upon placing the widget on home screen, a menu will come up. Now find the “Settings” option in the list and tap it to open it.
  7. In settings, select the .DisplayScalingActivity option now. Doing this will place a small icon on your phone’s home screen.
  8. Now tap the new button appearing on the home screen. Tapping this button will bring up two DPI options: Standard and Condensed.
  9. Now you can apply the changes and see the changes in the Condensed mode. The changes will appear after pressing the Done button.
  10. After applying the new DPI settings, it will ask you to reboot your device. Reboot it and you’re all good to go with it.
  11. Once your device boots up, you will find your phone’s display a little bit more spacious and you will be able to place more icons / content on it.
  12. That is all.

Stuck with something? Reach us out through the comment box below.

How To Play Facebook Messenger’s Hidden Basketball Game

0
How To Play Facebook Messenger’s Hidden Basketball Game

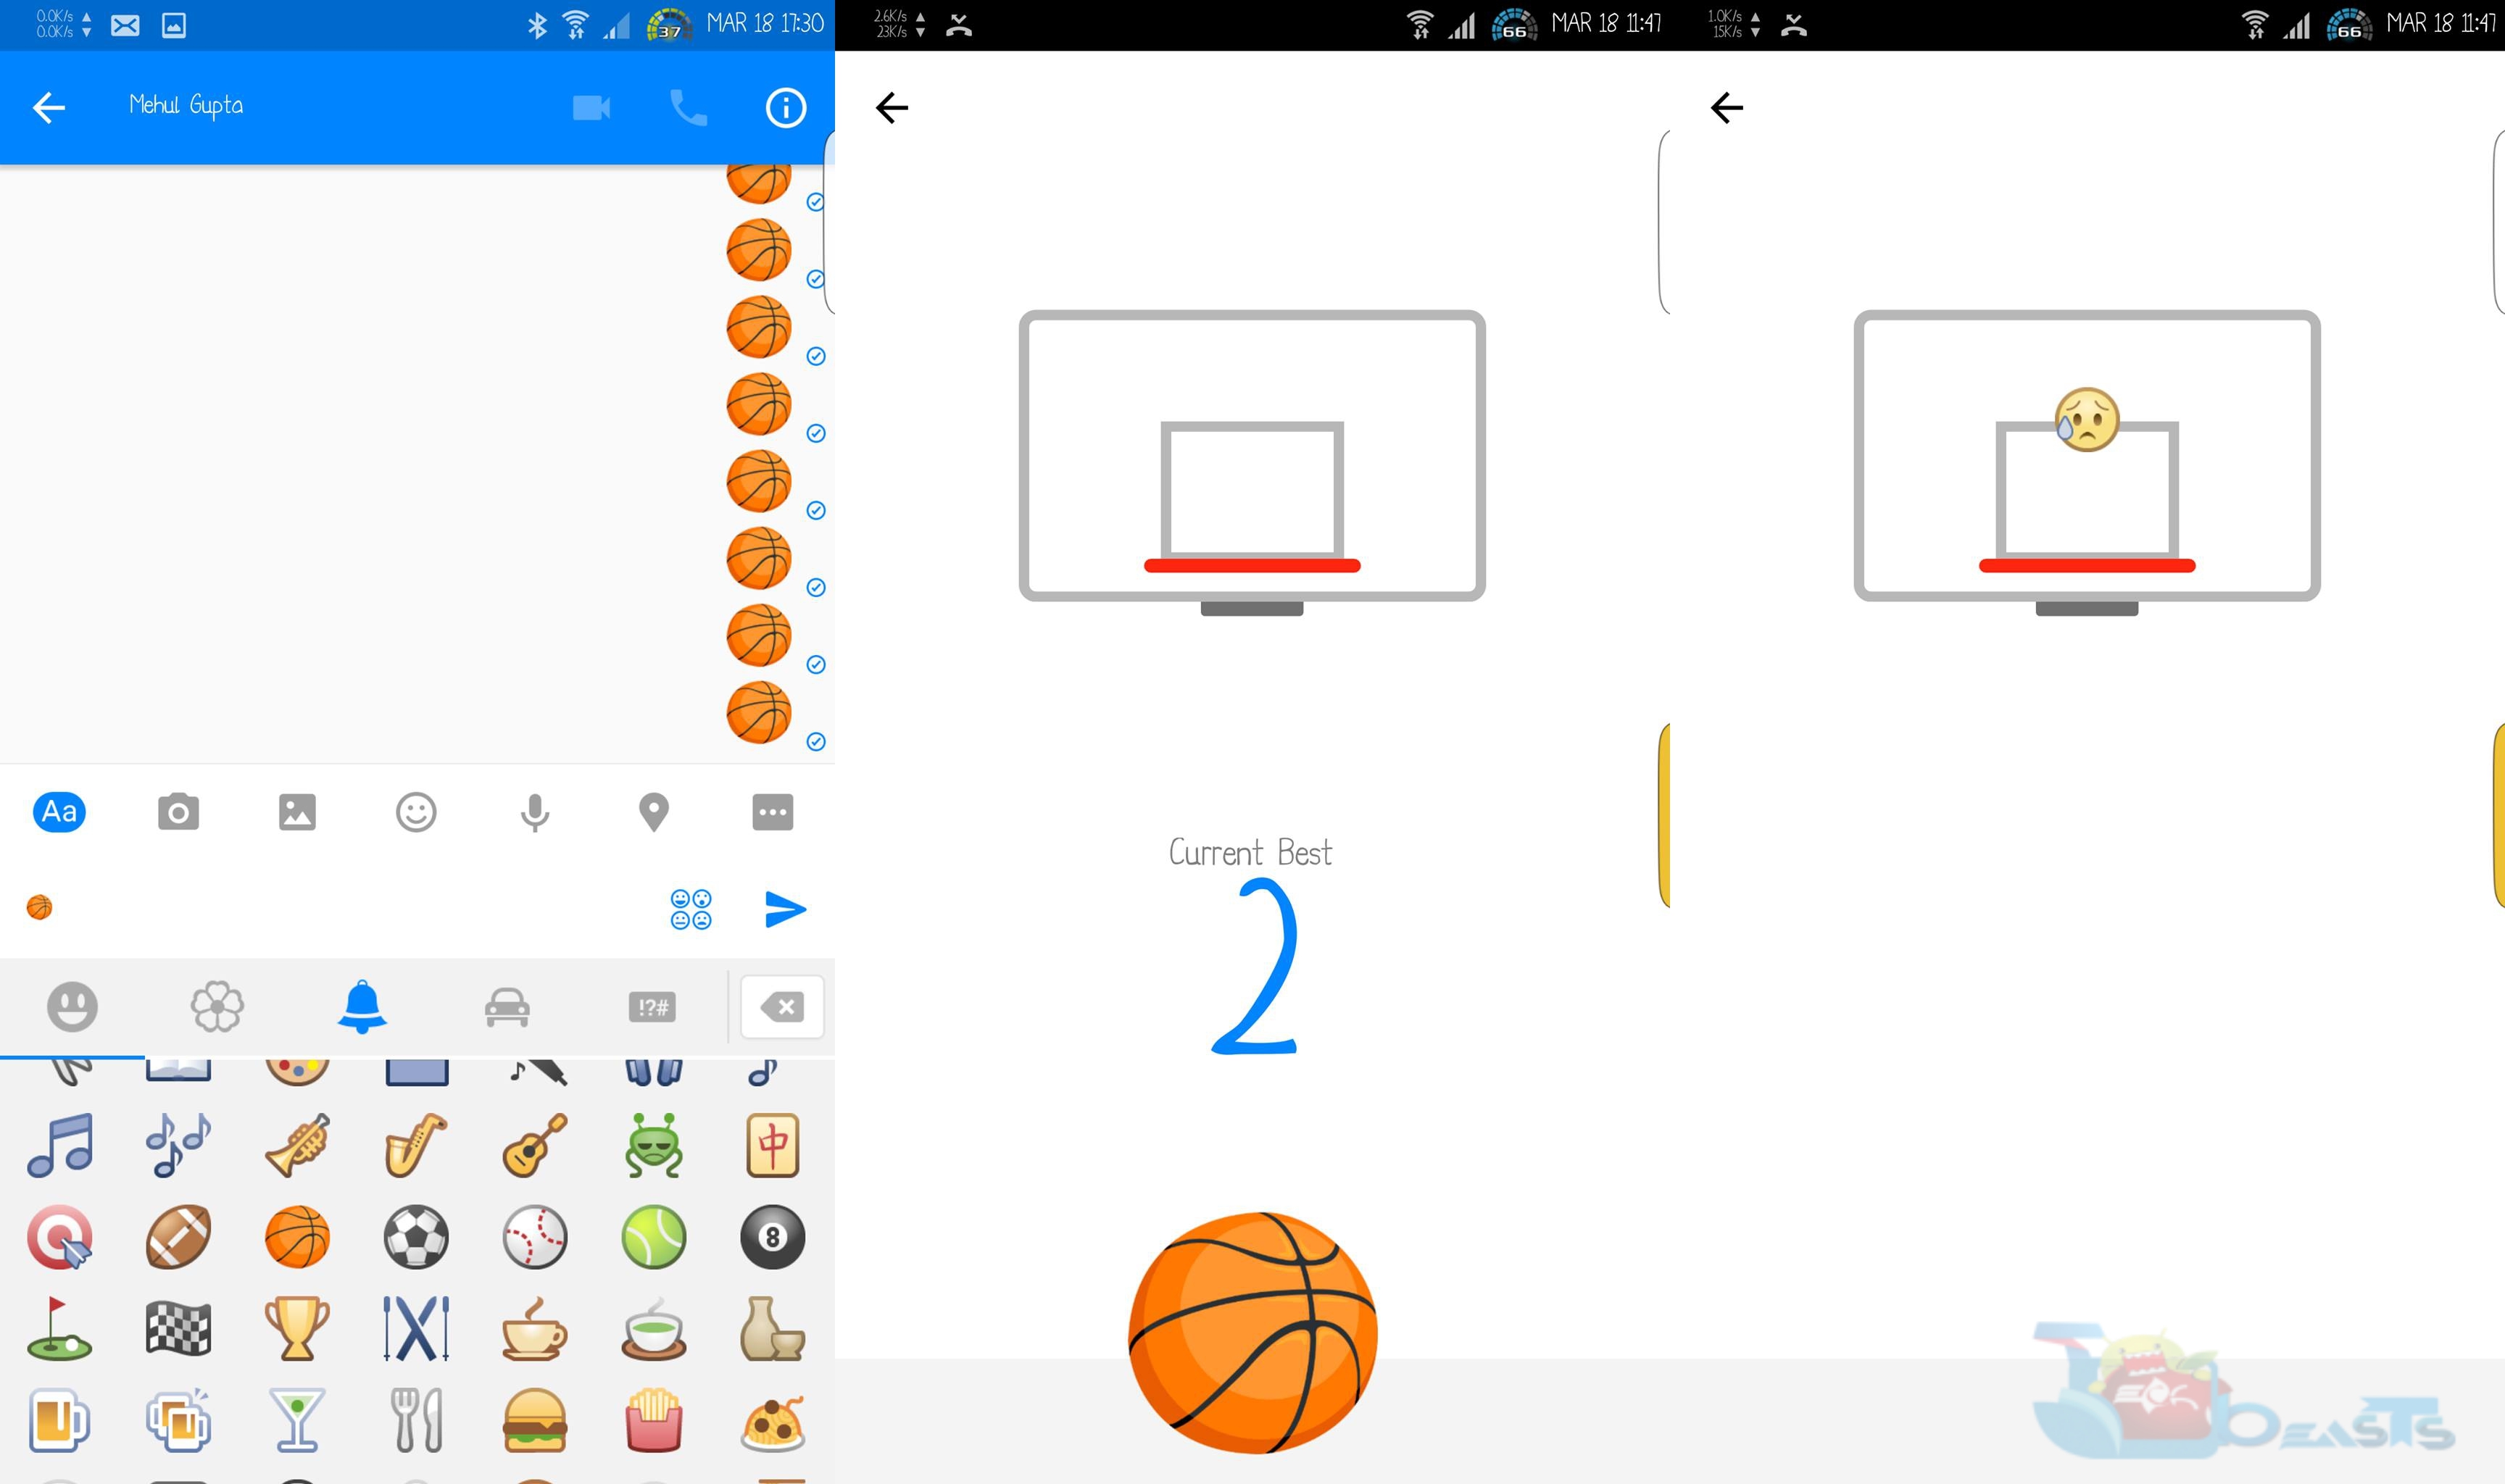
Facebook seems to be following the footsteps of Google since it has pushed a nice Basketball game into its Messenger application. The hidden Basketball game is just a tap away. All you’ve to do is to send someone a Basketball emoticon and then tap it to launch the game.

As soon as the game launches, you will see a screen with a Basket placed in the centre and a Basketball placed in the centre as well. You’ve to throw the Basketball into the basket by simply swiping upwards. Do not tap all along, or else you won’t be able to take your ball through the basket. One wrong throw and the game is over. Facebook has managed to make this game quite cool with the help of emoji’s. Every time you throw the ball, a new emoji comes up. A like or a thumb will come up if you manage to basket and a weeping emoji will come up if the ball falls away from the basket.

Set a high score and give your buddies a challenge. Your high score will appear in the chat screen of your friend to whom you sent the Basketball emoji to launch this game. Your friends can play it as well and set a challenge for you. The Basketball game hidden in Facebook’s Messenger is something that you must give a try to. It’s a nice time pass.

In case you’re having issues while trying to access this hidden Messenger game, we are all set to help you how to access it right away. Let’s go ahead and learn How To Play Facebook Messenger’s Hidden Basketball Game

How To Play Facebook Messenger’s Hidden Basketball Game

12499366_10208069662151991_2036041179_o-tile

  1. Make sure that you’re using the latest version of Facebook Messenger on your Android or iOS device. In case you’re not using the latest one, you can update it either using the App Store or Play Store.
  2. Now launch the latest Facebook Messenger on your phone.
  3. Open any random chat.
  4. Tap the emoji icon in Facebook Messenger located on the right side right before the send button.
  5. Now in the emoji’s, get to the bell icon to access the emoji list which has the basketball.
  6. Now look for the basketball emoji and press it, then send it in the opened chat. In case you are unable to find the basketball emoji, you can copy it from here and paste it there: ?
  7. After sending the basketball emoji, tap it in the chat screen to launch the Facebook Messenger Hidden Basketball game.
  8. Now play the game using the instructions we’ve already explained above.
  9. That’s all.

How To Root At&t and Verizon LG V10

5
How To Root At&t and Verizon LG V10

When it comes to making a unique smartphone, LG is the name that can’t be put under the hood. Just last year, we saw LG’s flagship device the LG V10 which definitely was one of its-own-kind smartphone. LG V10’s might specifications and cool design inside a premium build helped it to stand apart from the crowd. LG used a 5.7-inch QHD display with 515 ppi accompanied by a 5 MP duo camera setup on the front. At the back we saw a 16 MP shooter. LG made the use of Snapdragon 808 CPU to power this device up and backed this up by an Adreno 418 GPU. A RAM of 4 GB is plugged inside. LG V10 ran on Android Lollipop out of the box, the device is in the queue to get Android Marshmallow.

LG V10 is a pure beast in its original form, but you can further enhance its performance by breaking all the rules which means you can do this by gaining root access on your device. Usually, the rooting methods do not take long to come up for international variants of the device, but when it comes to carrier branded devices, rooting seems something close to impossible. LG V10 under the umbrella of At&t and Verizon have tons of users who have been looking forward to a method to fulfil their desire of root access. The good thing has finally happened.bg-tech-specs-right-desktop

Root for At&t and Verizon LG V10 has finally been achieved. The root for both these devices comes from XDA senior member tungkick and XDA member tekjester. We are about to take you through a comprehensive tutorial that will help you easily root your At&t and Verizon LG V10 with the model numbers H900(At&t V10) and VS990 (Verizon V10).

Early Preps:

  1. This root method is intended for At&t and Verizon LG V10 only. At&t V10 has the model number H900 and Verizon V10 has the model number VS990. Do not try this on any other device otherwise you may result in bricking it. Check your device’s model number in settings > about device.
  2. Charge your phone up to 50% to avoid power issues during the rooting process.
  3. Backup everything including Contacts, Call Logs, Text Messages. Also copy media content to your PC. This is important just for the sake of safety of your data.
  4. Enable OEM Unlocking on your LG V10. Also enable USB debugging mode on it.
  5. Follow this guide to the letter to avoid mishaps.

Disclaimer: In case of a mishap, TechBeasts or the Root developers may not be held responsible. Make sure that you’re doing everything at your own risk.

How to Root At&t LG V10 H900

  1. Download TOT file for At&t LG V10: rootedsystemh900.zip [Extract this file to get the .TOT files and other necessary files.]
  2. Download LGUP flashtool: lgupnew.zip [Extract this get required files.]
  3. Download and install LG USB drivers.
  4. Now from the lgupnew.zip extract files, run the following files one by one.
    • LGUP_Store_Frame_Ver_1_14_3.msi
    • LGUP_8994_DLL_Ver_0_0_1_18.msi
  5. Now from the extracted lgupnew.zip file copy the “common” folder to C:\Program Files (x86)\LG Electronics\LGUP\model.
  6. Now connect your phone to your PC in download mode. To do so, turn off your LG V10 completely. Now press and hold Volume Up key and plug the data cable into your phone.
  7. Now run the LGUP tool from the program files.
  8. In the LGUP tool, select your phone if you find the option to select the phone.
  9. Click the BIN file option and select the rootedsystemvs.tot file that you got after extracting the rootedsystemh900.zip file.
  10. Click start and sit back now. It will take around 3 minutes for the tool to flash the file and root your phone.
  11. Reboot your phone and verify root access using Root Checker now.
  12. That’s all.

How to Root Verizon LG V10 VS990

  1. Download TOT file, LGUP, LG Drivers for Verizon LG V10VS990 Root.zip [Extract this file to get the .TOT files and other necessary files.]
  2. Unzip the LGUP flashtool from this file: lgupnew.zip [Extract this get required files.]
  3. Install LG USB drivers that you got from the VS990 Root.zip file as well.
  4. Now from the lgupnew.zip extract files, run the following files one by one.
    • LGUP_Store_Frame_Ver_1_14_3.msi
    • LGUP_8994_DLL_Ver_0_0_1_18.msi
  5. Now from the extracted lgupnew.zip file copy the “common” folder to C:\Program Files (x86)\LG Electronics\LGUP\model.
  6. Now connect your phone to your PC in download mode. To do so, turn off your LG V10 completely. Now press and hold Volume Up key and plug the data cable into your phone.
  7. Now run the LGUP tool from the program files.
  8. In the LGUP tool, select your phone if you find the option to select the phone. Select the upgrade option as well, otherwise it will result in completely wiping your phone.
  9. Click the BIN file option and select the rootedsystemvs.tot file that you got after extracting the VS990 Root.zip  file.
  10. Click start and sit back now. It will take around 3 minutes for the tool to flash the file and root your phone.
  11. Reboot your phone and verify root access using Root Checker now.
  12. That’s all.

That’s all. Stuck with something? Reach us out through the comment box below.

Download Disney Magic Kingdoms APK for Android

0
Download Disney Magic Kingdoms APK for Android

Gameloft’s latest game in collaboration with Disney has been released today. The new title “Disney Magic Kingdoms” is a simulation game. The game brings your favourite characters from movies like Tangled, Monsters Inc and others. You’ve to build a Disney theme-park. Your mission in the game is to bring the magical powers of the Disney Park back from the evil Maleficent and its companions. You will enjoy a number of quests in this game to unlock new characters, earn rewards, unlock Disney-theme decorations and a lot more.Disney Magic Kingdoms for PC

Disney Magic Kingdoms is an absolutely free game. You can easily download it from the Google Play Store. However, if the game isn’t appearing at your end so far, you will need an alternative way to install it.

The other method to install Disney Magic Kingdoms right now is by means of its APK file. We’ve pulled out the Disney Magic Kingdoms APK alongside the instructions to install it. You can simply go ahead and download the Disney Magic Kingdoms APK and then use the instructions to install it on your Android smartphone or tablet.

Download and install Disney Magic Kingdoms APK

  1. Download Disney Magic Kingdoms APK.
  2. Download the file to your phone straight away, or copy it to your phone from your PC.
  3. Now on your phone, go to settings > security > allow unknown sources > check this.
  4. Now using a file manager, locate the APK file that your just copied or downloaded.
  5. Tap the APK file and finish installation using the on-screen instructions.
  6. Once installed, access the newly installed game through app drawer.
  7. That’s all. Enjoy Disney Magic Kingdoms!

You may also want to try Disney Magic Kingdoms for PC.

Download Disney Magic Kingdoms for PC – Windows and Mac

3
Download Disney Magic Kingdoms for PC – Windows and Mac

Disney Magic Kingdoms has been released and we are set to show you how to play this cool game on your computer. Disney Magic Kingdoms for PC works pretty good on a Windows XP/7/8/8.1/10 Desktop PC / Laptop and also Mac OS X Macbook, iMac. We will take you through a step-by-step guide to play Disney Magic Kingdoms for PC via BlueStacks, Remix OS and Andy OS.

Disney Magic Kingdoms which is Gameloft’s much hyped game in collaboration with Disney is finally out. Disney Magic Kingdoms is a simulation game in which you have to build a theme park. It’s time to finally build the Park of your dreams and attract as many people as you can. You’re all set to offer the public the most amazing, the most beautiful and the most enchanting Park. Your purpose in the game is to bring the magical powers of the Kingdom back, which have been taken away from the Maleficent. You will be able put all the Disney Park Attractions in your Park. You will be able to meet the characters from famous movies like Rapunzel(Tangled), Mickey Mouse, Buzz Lightyear, Tinker Bell and many others in this game. There are countless crazy and funny quests to test your simulation skills. You will have to collect Disney-themed items in order to unlock new characters from the store, which are apparently captured by Maleficent.

To back-up Maleficent, there are other evil forces like Pete, Zurg, Mother Gothel and others. It’s a battle of good vs bad. Now the future Magic Kingdoms lies in your hands.

The game-play of this game is stunning over-all. As far as the graphics are concerned, we have seen Gameloft putting its best efforts when it comes to this department. Continuing the trend of HD graphics, Gameloft and Disney have managed to make a beautiful, colorful and eye-soothing game. You can easily grab Disney Magic Kingdoms for iOS from the App Store and for Android from the Play Store. To play it on your computer, you will want to follow the procedure given on the next page.

Download LG G5 Stock Wallpapers

Download LG G5 Stock Wallpapers

LG G5 came out at MWC 2016 as a shining star. LG’s module phone is a perfect treat for those who want both a removable battery and a microSD card slot inside a beautiful smartphone. Just for the sake of unibody metallic smartphones, users had to compromise for a removable battery, the microSD card slot was easy to be found. LG has planted a sliding battery inside the G5, and made tons of modules to support the G5 to perform various operations.lg-g5-wallpaper_stock_techbeasts_016-tile

LG G5 on the front has a 5.3-inch QHD display with 554 ppi. LG has used Android 6.0.1 Marshmallow with its Optimus UX 5.0 UI to add graphics to this phone. When it come to the display department, LG has quite a good reputation. We’ve seen stunning displays on the LG G3 and LG G4 as well. To make the add some colours to the screen of G5, LG has used a number of brilliant wallpapers.

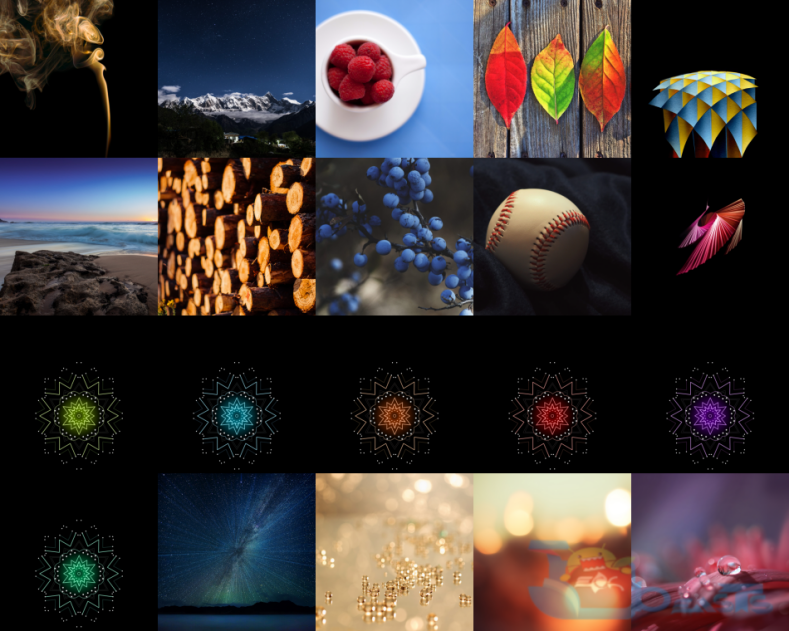
LG has used 21 wallpapers which look pretty cool. These wallpapers are in QHD resolution i.e. (2560 x 2560). If you own a device with a QHD screen, you might consider applying the wallpaper of the G5 on it. We’ve been keeping our eyes on the LG G5 wallpapers for a while, just now we’ve got a chance to get a hold of all the amazing LG G5 stock wallpapers. We’ve pulled out all the wallpapers and linked below. You can go ahead and download LG G5 stock wallpapers from the attached zip file and then extract it to grab the wallpaper of your choice.

Download LG G5 Stock Wallpapers.zip 

You may also want to checkout the Galaxy S7, S7 Edge and Sony Xperia X stock wallpapers.

4 Steps to take a screenshot on Raspberry Pi [ How to ]

0
4 Steps to take a screenshot on Raspberry Pi [ How to ]

Following are the instruction and different methods on how to take a screenshot on Raspberry Pi.

Raspberry Pi is getting famous and daily hundreds of new users join are using Raspberry Pi, suppose you are working on Raspberry Pi project and want to take a screenshot of your work or project, you have to follow instruction, below. Before moving on you have to do two things, first connect with WiFi and install “Scrot.”

4 Steps to take a screenshot on Raspberry Pi [ How to ]

How To to take a screenshot on Raspberry Pi:

Before moving on to the tutorial, first we have to install Scrot on your Mac. Scrot is tool which allows you to take screenshot using a simple command in terminal.

Step:1 Open Terminal on your Mac.

Step:2 When Terminal opens up, type the following command as it is.

sudo apt-get install scrot

Step:3 Press Enter.

All Done.

Let’s Start the Guide Move on to Next Page ——>>>

Download Cute HD Desktop Wallpapers for Widescreen, High Definition, Mobile

Download Cute HD Desktop Wallpapers for Widescreen, High Definition, Mobile

Download the latest Cute HD Desktop Wallpapers for Widescreen, High Definition, Mobile from the links below.

I love to collect beautiful and HD wallpapers for my tablets, smartphones, Mac and desktop. You can see my collection here at Techbeasts by going in Wallpapers galleries. Today I’ve collected the best Cute HD Desktop Wallpapers for Widescreen, in this collection you’ll find the cutest wallpapers of all time. I am sure you’ll like it and please share it with your friends and loved ones.

cute wallpapers

How To Root Android N Developer Preview

0
How To Root Android N Developer Preview

Google announced the Android N Developer preview just a few days back. Latest Nexus device owners once again have proved out to be lucky to join the Android N Developer Preview league. Android 7.0 N’s developer preview is currently available for devices like Nexus 5X, Nexus 6, Nexus 6P, Nexus 9 and Nexus 9G. Andoird N brings a number of new features like multi-window, picture-in-picture mode, new enhanced doze mode and many other feature that you need to know about.

This time around, Google has made it a lot easier for Nexus users to upgrade their device to Android N Developer Preview. Nexus users can still flash the factory images on their device, but if this procedure seems a little difficult then Google has introduced a new Android N Developer Preview Beta Program. You can easily enroll yourself in the Android N Beta program and get the developer preview update right over the air. That’s it! No flashing, no tweaking required at all.

Now, if you’ve already updated to Android N Developer Preview, you might be in need of a method to root it as well. The good thing here is, Android N Preview has already been rooted by root master Chainfire. Rooting Android N Developer Preview is just a matter of a click now. The guide here illustrates how you can easily root Android N Developer Preview on your Google Nexus 5X, Nexus 6, Nexus 6P, Nexus 9 and Nexus 9G.n-preview-hero_2x

Early Preparations

  1. The guide here is only for the devices mentioned above running the Android N Developer Preview. Do not run it on any other device or else you will result in bricking it.
  2. If your device isn’t already running on Android N Developer Preview, then update right now.
  3. Charge your phone up to 50% to avoid power issues during the flashing process.
  4. Backup everything on your phone since you will need to unlock the bootloader and unlocking will wipe your phone completely. The root will not work without unlocking the bootloader.
  5. Enable OEM unlocking on your phone as well.
  6. Use OEM data cable to establish connection between your PC and your phone.
  7. Follow this guide to  the letter to avoid any risks.

Disclaimer: The rooting and flashing methods are highly custom. These methods are not recommended by device manufacturers. In case something goes wrong during or after the process, TechBeasts or the device manufacturers may not be held responsible.

Head over to the 2nd page now for rooting your Android N Developer preview device.