Home Blog Page 323

4 Ways To Connect Android With Car Stereo

0
4 Ways To Connect Android With Car Stereo

Following are the different ways to connect your Android device with Car Stereo. While driving music is must thing and all of us listen music specially on long drives, we can use different methods to connect our device with Car stereo system. 

connect Android car stereo

 of the new cars are coming with the technology which allows us to easily connect our device with our car system, you can control central locking, use Wifi, make calls and read texts and much more. But not all the cars have the latest technology by default. If you are one of them try the following methods to connect your Android device with car stereo.

1 -Auxiliary Jack:

Auxiliary Jack is the oldest method in the books, you can use Aux Jack with all of the cars. Every manufacturer add’s Aux Jack port with the stereo systems. All you have to do is buy an Aux Cable insert one side in your device and other in stereo system, start enjoying the music. If you don’t see any Aux Jack port at the front side of your car stereo system no need to worry, you’ll one behind your car stereo system.

2 – USB Port:

Now a day every car has a USB port with its stereo system, all you to do is connect your device using data cable and you can easily access your device music.

3 – Bluetooth:

Bluetooth is the most effective way to connect your device with car Stereo if your car supports Bluetooth connection all you have to do is go to device “Settings” > “Network Connections“> Bluetooth>discoverable. Now set your car stereo to find a Bluetooth device, tap on the Android device. Here you go, enjoy music or making phone calls wirelessly.

4 – FM Transmitter:

This is your last option all you have to do is buy an FM Transmitter, it allows you to broadcast audio from your Android over FM frequencies. You can buy any FM Transmitter, no need to buy an expensive one.

How to Backup Your Entire Android Device to PC [ Tutorial ]

0
How to Backup Your Entire Android Device to PC [ Tutorial ]

Now a day we switch devices often because after every few months we got our self a new device. That is a good thing I also do that, but the one thing that is most irritating and I am sure you all feel the same when it comes to backup and transfer data to another device. Today I’ve got a perfect solution for this fuzz, learn how to Backup Your Entire Android Device to PC and move it to any other device.

how-to-backup-your-entire-android-device

Read more: Backup and Restore everything on your Android with Easy Backup & Restore

How to Backup Your Entire Android Device to PC [ Tutorial ]:

  • First, you need to download and install [ latest version of the Android SDK Tools ].
  • Once you are done with the installation, Open Android Studio->SDK Manager->Android SDK Platform-tools-> Install.
  • Now launch SDK Manager->Android SDK Platform-tools->Install x packages.
  • Go to your Android device settings, Tap on About phone/tablet.
  • Scroll down and tap on build number for 7 times, until you’ll see “You are now a developer“.
  • Go back to settings, scroll down and tap on developer options.
  • In developer options set “USB debugging” to “On“.
  • Connet your Android device with PC using data cable.
  • Now open a Command prompt, navigate to where ADB is located.
  • Type the following commands as per need.
  • adb backup -all
  • adb backup -all -f C:\filenameichoose.ab

You can choose from the followings:

  • -apk – Backs up your apps.
  • -noapk – Does not backup apps.
  • -shared – Backs up data on the SD card.
  • -noshared – Does not backup data on the SD card.

For more information visit the XDA guide.

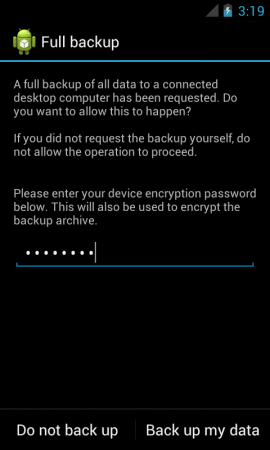
  • Now once you hit any of the following commands, you’ll see the following message on your device.

Backup Your Entire Android Device to PC

All Done !

How to download and install the Google Play Store on Android

3
How to download and install the Google Play Store on Android

Google Play Store is the Holy Grail of Android OS. Without Google Play Store, Android won’t be the same as it is now. Formerly known as Market, Google Play Store is the home to over 1.6 million applications and games, which definitely surpasses Apple’s app store by a great margin. There are some third party applications available which allow installing Android applications, but there are high chances that those applications will be bringing in a lot of spam in your Android smartphone. Since Google Play Store is Google’s very own app store, we can blindly trust it and use it as the primary source of applications on our Android smartphones. Google consistently keeps improving the Google Play Store everyday. A great number of improvements over the past few years have made the Google Play Store much cool today. To be more clear, we can say that an Android device is pretty incomplete without the presence of Play Store in it.play-store

Now that you’re pretty familiar with the significance of Play Store on your Android smartphone or tablet, we can get back to the purpose we were here for. In case you’ve accidentally lost the Google Play Store on your Android device, or deleted it mistakenly and now you want to get it back, or you just want to install a previous or update version of Play Store, then this guide is going to help you out. We will be showing you the step-by-step procedure to manually install or update Google Play Store (Google Play Store 6.0.00) on your Android device in the succeeding guide.

Google Play Store v6.0

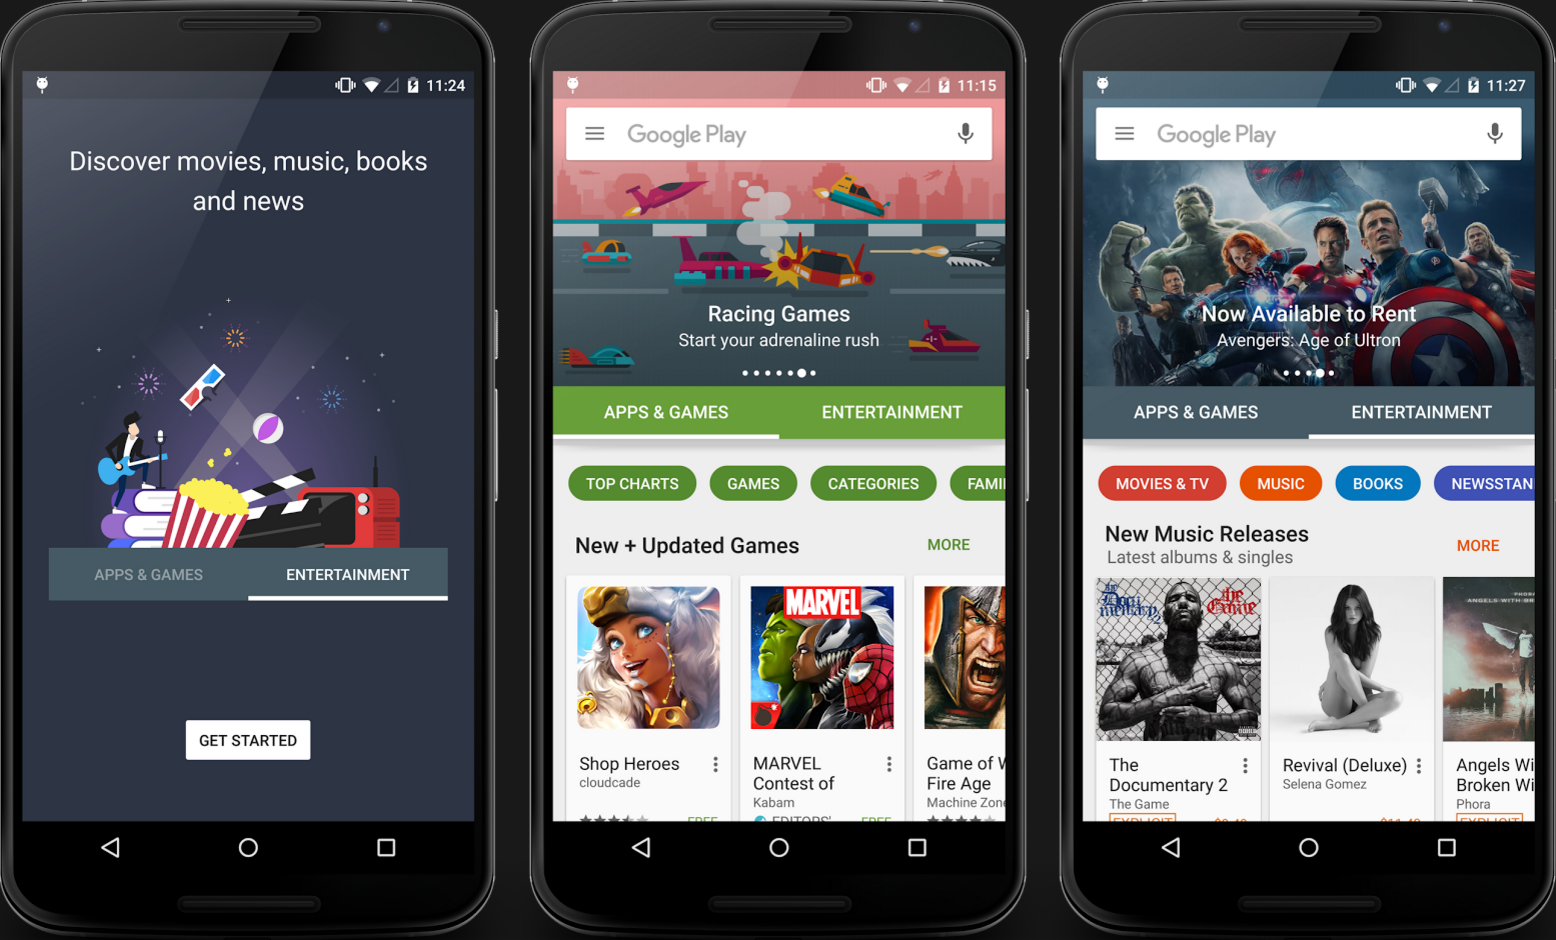
Latest version of Google Play Store is 6.0.0 that is Android Marshmallow 6.0 driven. Notable changes in the Google Play Store 6.0.00 include new fonts in the search bar. The content is now divided into two categories; apps and games and entertainment. These two categories have further sub-categories. New look of Google Play Store looks and feels pretty awesome.

How to download and install the Google Play Store on Android

  1. Download latest Google Play Store APK: Google Play Store Latest APK
  2. You can download the APK file linked above directly on your phone, or you can copy it to your phone after downloading it on your PC.
  3. Once you’ve got the APK file in your phone, go to settings > security > check the allow unknown sources option.
  4. Now using a file manager locate the latest Play Store APK file that you just copied or downloaded on your phone.
  5. Tap the APK file and install it following the on-screen instructions.
  6. Once done, Google Play Store will be installed/updated on your device.
  7. Find the latest version of Play Store in app drawer now.

Google Play Store 6.0.00

Troubleshooting Google Play Store

In case you’re facing issues with your new installed or updated Google Play Store, you can wipe its cache to fix it. To do so, go to settings > application manager > all applications or running applications > Google Play Store > clear cache. Once cleared, reboot your device. Your Google Play Store should be working fine now.

If you’re facing any other issues regarding the installation or usage of Play Store, reach us out through the comment box below. We sure would love to help you out. Thanks all!

Root Xperia Z2 on Android 6.0.1 Marshmallow 23.5.A.0.570 and Install TWRP

31
Root Xperia Z2 on Android 6.0.1 Marshmallow 23.5.A.0.570 and Install TWRP

Sony update the Xperia Z2 to Android 6.0.1 Marshmallow. This came out as a surprise because the Android Marshmallow’s official version carried the same build number as the last beta build. Sony continued to update the beta firmware even after rolling out the official Android Marshmallow for the Xperia Z2. Marshmallow brought quite many goodies to this device. This update came out pretty late, but it’s still worth installing it on your Xperia Z2.

If you have updated your device, or you’re planning to update it to the latest Marshmallow firmware while you happen to be an Android power user, you must keep in mind that flashing the stock firmware wipes off the root access, custom recover and other tweaks from your device. If your Xperia Z2 was rooted earlier and now you’ve lost root access, you may want to root it once again to modify the device running on Marshmallow firmware. Rooting Android 6.0.1 Marshmallow directly isn’t possible, but you sure can root it using a little different method that is discussed here.

We are set to go through the instructions to install a pre-rooted Android 6.0.1 Marshmallow 23.5.A.0.570 on our beloved Xperia Z2 D6503 and D6502. The guide illustrates how you can flash the pre-rooted firmware to gain root access and TWRP recovery. Before getting onto the method, we will learn some precautions to make sure that nothing goes wrong during all this process.

Note: If your device is already running on .264 firmware and is rooted with a recovery installed on it, you may skip the first two steps and jump straight to the method to flash the Marshmallow pre-rooted .zip file.

How To Install CWM/TWRP Recovery and Root Xperia Z2 10.7.A.0.228 Firmware

1. Downgrade to .167 Firmware and Root It

Note: If you already have a custom recovery installed on your phone, you may skip downgrading and flash the pre-rooted .264 firmware directly on your phone.

  1. If you have already updated your smartphone to Android 5.1.1 Lollipop, then you have to downgrade your device to KitKat OS and Root it.
  2. Use this guide to Install .167 firmware.
  3. Root using this guide.
  4. Now you have to Install XZ Dual Recovery (Steps below).
  5. Now phone is rooted, USB Debugging must be enabled.
  6. Download latest installer for Xperia Z2 from here. (Z2-lockeddualrecovery2.8.xx-RELEASE.installer.zip)
  7. Connect phone to PC using OEM date cable and run install.bat.
  8. It will install the custom recovery.
  9. Now work here is done. Lets move on to next step.

2. Flash most recent Lollipop 5.1.1 Pre-rooted Firmware now

  1. Download D6503_Customized ES_1281-4644_23.4.A.1.264_R8C. Copy this file to your phone’s SD card.
  2. For D6502, create your own FTF or wait for the links till we find and add them here.
  3. Now you have to turn off phone.
  4. Turn it on again and press volume up or down to enter either TWRP or CWM recovery.
  5. Now for TWRP recovery, tap Install > scroll all the way to bottom and select the copied pre-rooted firmware.zip file.
  6. After selecting the file, swipe finger from left to right on the bottom to flash.
  7. Once flashed, reboot your device and you will have pre-rooted 10.7.A.0.228 Lollipop firmware.
  8. For CWM, select Install Zip > Choose Zip from SD card > locate pre-rooted firmware.zip file > select yes to flash.
  9. Once flashed, reboot your phone and you will have 10.7.A.0.228 rooted Lollipop firmware.
  10. Now verify root access using an app like Root Checker.


Root Xperia Z2 on Android 6.0.1 Marshmallow 23.5.A.0.570 and Install TWRP

  1. Download the bootloop fix.zip file and copy it to your phone.
  2. Download Xperia Z2 23.5.A.0.570 pre-rooted zip with recovery for D6503 and copy it to your phone’s SD card. For D6502, you can create your own pre-rooted FTF using this guide.
  3. Phone was downgraded to KitKat and rooted, the custom recovery was also installed in the first step.
  4. The phone was updated to pre-rooted Android 5.1.1 Lollipop in the 2nd step.
  5. Now you’re all set to flash the latest Android 6.0.1 Marshmallow.
  6. Now you have to turn off phone.
  7. Turn it on again and press volume up or down to enter TWRP recovery.
    1. Now for TWRP recovery, tap Install > scroll all the way to bottom and select the copied pre-rooted firmware.zip file.
    2. After selecting the file, swipe finger from left to right on the bottom to flash.
    3. Once flashed the firmware, flash the bootloop file next.
    4. Now flash the bootloop fix.zip file in the same way on your phone.
    5. Reboot the device.
  8. Now verify root access using an app like Root Checker.
  9. That’s all.

Stuck with something? Reach us out through the comment box below. We would love to help you out.

Credits

How to install Android N on Xperia Z3 D6603/D6643/D6653 right now

0
How to install Android N on Xperia Z3 D6603/D6643/D6653 right now

Sony Xperia Z3 turns out to be the very first Non-Nexus device to join the Android N Developer Preview list. Sony just dropped the Android N Developer Preview for its Xperia Z3 yesterday. The preview is available for Xperia Z3 D6603, D6643 and D6653. The firmware carries the build number NPC91K. Surprisingly, the FTF files of the Android N Developer Preview for the Xperia Z3 are also available. This means you can now update your Sony Xperia Z3 to the Android N Developer Preview to get a glimpse of Google’s upcoming iteration of Android.

Android N Developer Preview will allow the Xperia Z3 owners to get their hands on some new features like double tap to wake, Sony’s new camera enhancements, better battery life and performance stability. A hefty list of new features is making its way in the Android N. Android N is set to come out of the curtains in Q3, 2016. While Google is cooking up the Android N and deciding its final name, the Xperia Z3 users can enjoy this Developer Preview to relax themselves.

The method illustrated here will help you to install Android N Developer Preview on your Xperia Z3 D6603, D6643 and also the D6653 variant. It can be flashed as the normal FTF file. The steps are discussed in the installation section below. Before jumping straight up to the procedure, it’s important to apply some precautions.

Early Preparations:

1. This is only for Sony Xperia Z3.

This ROM is only for the device mentioned above. Make sure that your model number matches the one listed above. To do so, go to Settings > About Device on your device and see your model number. Flashing this firmware on any other device will result in bricking it so make sure that you meet this requirement first of all.

2. Battery should be charged at least over 60%.

Make sure that your battery is charged enough to complete the flashing process. In case your battery is low and your device goes dead during the flashing process, you may end up soft bricking your device as it won’t complete the flashing process.

3. Backup everything!

Just to be on the safe side, you may consider backing up each and everything from your Android device. This is highly recommended so that in case anything goes wrong, you still have the access to all of your data and you can restore it immediately. You may backup everything as listed below.

4. Enable USB Debugging Mode on your device.

Enable USB debugging mode on your device. To do so, tap settings>developer options>USB debugging. If you can’t find developer options in settings, then tap settings > about device and tap “Build Number” for 7 times and you’ll get em’ activated under settings.

5. Install and setup Sony Flashtool.

You must have installed Sony Flashtool.  Find the full guide here. After installing Sony Flashtool, open the Flashtool folder from the drive where you installed it.Now open Flashtool>Drivers>Flashtool-drivers.exe and install the Flashtool, Fastboot & Xperia Z3 drivers from the list. [Important]

6. Use OEM data cable to establish connection.

Make sure that you use the phone’s original data cable to establish connection between your phone and the PC. Using a different data cable might result in interrupting the firmware installation.

How To Update Sony Xperia Z3 To Android N Developer Preview Firmware

Before moving forward, please make sure that you’ve read the pre requisites and ensure that you are set to go ahead.

  1. Download the latest firmware Android N Developer Preview NPC91K  FTF file.
    1. For Xperia Z3: Android N Developer Preview NPC91K FTF.
  2. Copy the file and paste in Flashtool>Firmwares folder.
  3. Open Flashtool.exe now.
  4. Hit the small lightening button on the top left corner and select Flashmode.
  5. Select the FTF firmware file that you placed in the Firmware folder.
  6. From the right side, select what do you want to wipe. Data, cache and apps log, all wipes are recommended, perhaps you may select if you don’t want.
  7. Click on OK, and it will start preparing the firmware for flashing. This may take a little while to load.
  8. As soon as the firmware is loaded, it will prompt you to attach the phone by turning it off and keeping the back key press.
  9. For Xperia Z3, Volume Down key will do the job of back key, just turn off your phone, keep the Volume Down key pressed and plug in the data cable.
  10. As soon as the phone is detected in Flashmode, the firmware will start flashing, Do not leave the Volume Down key until the process is complete.
  11. As soon as you see “Flashing ended or Finished Flashing” leave the Volume Down key, plug the cable out and reboot.
  12. That’s All! Congrats! You’ve installed the Android N Developer Preview on your Xperia Z3. Enjoy.
Xperia-Z3_NPC91K_Android-N_2-576x1024 Xperia-Z3_NPC91K_Android-N_3-576x1024 Xperia-Z3_NPC91K_Android-N_4-576x1024 Xperia-Z3_NPC91K_Android-N_1-576x1024

In case you got any queries or face any problems regarding this guide, please feel free to stop by the comment box below and let us know. We will get back to you as soon as possible. Thanks all!

FTF Credits

How To Disable Request Desktop View in Chrome [ iOS – Android ]

How To Disable Request Desktop View in Chrome [ iOS – Android ]

I was using Facebook full site on my Android and iOS devices, but when I tried to disable the Request Desktop View, it was grayed out. Then I start searching on Google and didn’t find any solution, but after working for few minutes I found the solution. Now let’s start the guide on how to Disable Request Desktop View in Chrome. This option is very effective but we don’t want to see all the sites in full view, Google developers have to look on this issue because we want select sites to open in full view.

disable request desktop view

How To Disable Request Desktop View in Chrome [ iOS – Android ]:

You can apply following steps on both iOS and Android devices, this guide is specially for Chome so don’t apply these steps on any other browsers.

Step1: Open Chrome on your iOS/ Android device.

Step2: Tap on 3 dots located on top right corner.

Step3: Tap on Settings.

Step4: Tap on Privacy.

Step5: First Clear Browsing History.

Step6: Now Tap on Clear Cache.

Step7: Clear Cookies, Site Data.

Step8: Head back to main page and then go to home screen.

Step9: Now open recent apps and close chrome from it.

Step10: Restart your device.

Step11: Open Chrome and you’ll see Request Desktop View will be live again.

10 Best Android Selfie Phones With LED Flash Front Cameras

0
10 Best Android Selfie Phones With LED Flash Front Cameras

Smile. Click. Selfie! Along with the extremely rapid increase in the Smartphone usage, selfies have also become a part of our lives. App stores contains many apps concerning only selfies. The selfie tradition has taken the world by storm. No matter in which part of the world you may be, you wont have any trouble finding the selfie addicts! Research states that an average youngster will take 25000 photos of themselves throughout a lifetime. Which comes to a total of over 1 million selfies taken per day worldwide! An alarming amount for sure.

Talking about taking selfies may sound fun, but what isn’t fun is being ambiguous and unsure about which phone to buy for the best selfies. Which is exactly why we are here! We have come up with a List of 10 Best Android Phones with LED front flash cameras. Sounds interesting? Even more interesting once you go through the list, learn all the features and finally choose the best phone for yourself.

Moto X Pure Edition

moto_xpure_edition_featexp_camera_2_dAccording to the company, Moto X Pure Edition has the industry-leading camera with 21 MP, oh and did we mention the color balancing flash? 5 MP front cam takes fabulous selfies with a wide-angle lens, which means no one is left out of the selfie! And the best feature it contains is the additional front flash that does not disappoint the selfie makers even when its dark. Along with its amazing photo taking abilities, Moto X Pure Edition contains a brilliant sound system with front facing stereo speakers that produce a crisp, clear, and powerful audio. Now watching videos and listening to music would be better than ever. And its waterproof!

Samsung Galaxy J7

SM-J700HZKDPAK-321483-0

Android experience just got better with the Samsung Galaxy J7. Containing Super AMOLED display, Samsung J series gives its users the best of screen. The color quality brings the images to life, the light and dark balance has been set to a rich hue, which gives a life-like touch to the photos. Samsung J7 users can get better and brighter selfies with the 5 MP front cam f/2.2 aperture, which comes with the perfect match of a front flash!  Now taking selfies in the dark is not a problem with the Samsung J7. In addition, it serves the facility of geo-tagging, touch focus, face detection and panorama. 13 MP rear camera  allows you to have the extraordinary photography experience. Having a f/1.9 aperture, it produces amazing picture quality.

Samsung Galaxy J5              
Galaxy J5 front flash selfieMuch like its descendant, Galaxy J5 also carries the same features. Galaxy J series has 5 MP front camera,  f/2.2 aperture with the best facility of front flash, for giving you the perfect selfie experience in any kind of lighting. Rear camera of 13 MP, f/1.9 aperture is featured to awaken the photographer in each of us.  The J series also features geo-tagging, touch focus and face detection.

Samsung has worked on giving its users the best of experiences in all contexts, as they have created a crisp display with the 5.5 inch screen.With the J series, Samsung has not let it customers down!

Huawei Honor 7

76201534525PM_635_huawei_honor_7_classic_greyLaunched in June 2015, Huawei Honor 7 comes with a 5.20-inch touchscreen display with a resolution of 1080 pixels by 1920 pixels at a PPI of 424 pixels per inch. Huawei Honor 7 holds amazing photo taking abilities featuring 20MP autofocus camera with phase auto-focus, dual-tone LED flash, F/2.0 aperture and 1080p video recording.

Coming to the front cam, it has 8MP front-facing camera with the LED flash, 1080p video recording and selfie panorama mode. Which leads it to our list. For all the selfie freaks out there it is one of the best among the list, is a highly recommended device.

Asus Zenfone Selfie

Asus-ZenFone-Selfie for best selfies

Asus has been among the leading tech brands and putting powerful steps in smart phone industry as well. With the Asus Zenfone Selfie, Asus lets you ‘See the Perfect You’.

Both front and back cameras offer a huge resolution of 13 MP! The exceptional front camera of Asus Zenfone Selfie features 13MP resolution and an f/2.2-aperture,88-degree wide-angle lens, ontrast detection autofocus, dual-LED dual-tone flash, 1080p@30fps video recording. Which is a more than usual offering. As for the rear camera, it gives a large f/2.0 aperture lens for superb low-light shots,  laser autofocus, dual-LED dual-tone flash, 1080p@30fps video recording. The amazing features make it one of the best among the wide range of smartphones available.

BLU Selfie 

BLU-Selfie

BLU Selfie comes with a unique design of a bottom and top ‘chin’ shape. As the name indicates, BLU’s creation specializes in its camera features. In short, BLU Selfie is an Android smartphone tailor-made for selfie fanatics.

Lets come down to the specs now. The phone carries a 4.7-inch 720p LCD screen, covered in Cornilla Glass 3 for scratch protection. As for the cameras, both the front and rear shooters are 13 MP with Sony IMX135 sensors. The rear cam has dual LED flash while the front cam has only one flash, which BLU states as ‘Glam Flash’. The company has its own Selfie Software known as the ‘Final Touch Software’ which offers eye modifications, face thinner, smooth skin, and skin brightener. The adjustments for all 4 features are given by a slider, thought which you can set the level according to your desire.

HTC Desire Eye

IMG_1733-2HTC Desire Eye has 5.2″ 1080p IPS display with 424ppi. It has wonderful photography offerings such as Dual 13 MP cameras with Dual LED flash for both front and rear cameras. Also featuring BSI sensors for great low light shots. It has its own editing software to give the photos a quick edit.

Coming to the specs of the cameras. For the rear cam it has 13 MP f/2.0, 1080p @30fps video recording and of course dual LED flash. 13MP f/2.2 front-facing camera with two-tone, dual-LED flash; 1080p @30fps video recording. The selfie enthusiasts would love this little device with amazing features.

Sony Xperia C3
Xperia C3 for best selfies with front flash In mood for a selfie? Then your best partner is Sony Xperia C3 for sure! Sony believes in good lighting so they have featured Superior Auto and the soft LED flash on your Xperia C3 to give your pictures the best natural lighting. The auto face-detection captures the genuine smiles so that you do not have to miss any good moments! Xperia C3 preserves them all for you. With its ultra wide-angle lens (25mm, 80 degrees), Sony has made sure that no one is left out of the pictures. No need to move from place to place to get that perfect selfie, just get your friends and take that perfect shot!

With a screen of 5.5″ Triluminos IPS LCD, 720 x 1280 pixels, 267ppi, Xperia C3 features an 8MP rear camera, single LED flash and 1080p video recording. And front cam containing 5MP wide-angle front-facing camera with LED flash and HD video recording.

Sony Xperia C4

Xperia C4 Mint. Selfie phoneC4 comes as the new and improved descendant to the Xperia C3. As Sony states ‘ Become a master of Selfie’. We can be clarified that this phone also serves the Selfie fanatics. The next generation smartphone from Sony gives you PROselfie photos and videos with its Dual 13 MP camera. Now you can take ‘PROselfies at any time without any worries with the help of Sony’s automatically optimized settings that help tp capture sharp, clear portraits, even in low light. It holds 5.5″ IPS LCD, 1080 x 1920 pixels, 401ppi. 13MP rear camera having single LED flash, 1080p video recording, hardware two-stage shutter release button. As for the front camera, 5MP wide-angle front-facing camera with LED flash and HD video recording. Like its previous release, it is one of the best launches, but only better than the previous.

Sony Xperia C5 Ultra
Sony-Xperia-C5-Selfiegsmarena_001 (1)

 With Sony Xperia C5 Ultra, bring all your best moments to life. With the extraordinary clarity and picture quality, Sony comes with one of its best makes. Using the Superior Auto, autofocus and PROselfie™, you can take the sharpest selfies imaginable.

With a screen of 6″ IPS LCD, 1080 x 1920 pixels, 367ppi, C5 Ultra carries equally powerful cameras, both front and back. 25mm, F/2.0 13MP rear camera, single LED flash, 1080p video recording and hardware shutter key. 22mm, F/2.2 13MP front camera, single LED flash and 1080p video recording. All these PRO features give this device a bit more benefit over its predecessors.

Selfie phones have proved to be the ‘cash cows’ for all the phone brands, as every buyer now a days firstly looks for the most used feature, the camera. This list will hopefully be of great help to all the selfie phone seekers. Keep smiling and clicking!

Android: Setup RoadRunner Email [ How To ]

0
Android: Setup RoadRunner Email [ How To ]

Following are the instruction on how to setup RoadRunner Email on your Android devices. Most people are using RoadRunner email through Gmail app because the method is bit complex when it comes to configure RoadRunner email on Android devices. I’ve tried many methods and most of them didn’t worked but after few hours of work, I finally found a working method. Let’s start the method to setup RoadRunner Email on Android. Before moving on let me tell you one thing we will be using Android stock email app to configure RoadRunner Email.

android-setup-roadrunner-email

Android: Setup RoadRunner Email [ How-To ]:

  1. First launch Email app.
  2. Now enter your RoadRunner email and tap next.
  3. Tap “Personal (POP3)->Next.
  4. Type the password-> Next.
  5. Use the following information for “Incoming server settings“:
  • Username: your email address with @maine.rr.com.
  • Password: Same
  • Server: pop-server.maine.rr.com
  • Port:110.
  • Security:None
  1. Once done, Tap on Next.
  2. Now use the following information for “Outgoing server settings“.
  • Server: smtp-server.maine.rr.com.
  • Port: 587.
  • Security type: None.
  • Require sign-in: Check
  • Username: username@maine.rr.com.
  • Password: Your RoadRunner email password.
  1. Tap on Next 2 times.
  2. Choose a name for your Account.
  3. Tap Next.

All Done!

Chat with Wikipedia through WhatsApp [Guide]

1
Chat with Wikipedia through WhatsApp [Guide]

Well guys, today we’ll guide you on how to chat with Wikipedia via Whatsapp on your Android phone or the iPhone. Of course you guys already know all about Whatsapp and Wikipedia, however incase you aren’t familiar, WhatsApp Messenger is a messaging app available for Android, Apple and other smartphones. WhatsApp uses your phone’s Internet connection (4G/3G/2G/EDGE or Wi-Fi) to message and call friends and family, so you don’t have to pay for every message or call. In addition to that, you can send photos, videos, Voice Messages, share your location, exchange contacts, set custom wallpapers and notification sounds, email chat history and broadcast messages to multiple contacts at once. The foremost advantage of using Whatsapp over cellular texting is that there are no charges for sending WhatsApp messages internationally/locally.

On the other hand, Wikipedia is a multilingual and web-based encyclopedia which provides openly editable content, free of cost. Wikipedia is a jointly written by a huge number of anonymous contributors who provide their services without any charge. Thus, anyone with an Internet connection can write and make changes to Wikipedia articles which are not restricted to prevent disruption or vandalism. Note that users can contribute anonymously or with their real identity.

Now you’d definitely want to chat with such organisation to ask them for information on different topics. Fret not, because you’ll learn to do that in no time.

Step one: Create a contact with the name “Duta” and number “+919043005490”.

First of all, you’ll need to open the ‘Contacts’ app on your iPhone and tap on the ‘+’ icon on the top right corner. There, in the ‘First Name’ tab, write “Duta”. After that, add the number “+919043005490” in the respective field followed by saving the contact.

IMG_2001

For those who haven’t heard, Duta is basically an automated bot, with the help of which you can get access to many features including Live Indian Currency Conversion, Funny Jokes,
Hindi News (Aaj Tak, DivyaBhaskar), Gujarati News (Akila), English News (Google News), Random Quotes, Wikipedia and Cricket Score. Note that this bot works via popular mobile messaging apps, including WhatsApp and Telegram. In addition to that, it must be mentioned that Duta is an Indian invention, thus is mainly focuses on interests and services particularly of users residing in India.

Step two: Create a new group in Whatsapp and add Duta in it.

Now you need to open Whatsapp messenger in you iPhone and add a new group with the name ‘Wikipedia’. Next what you need to do is add ‘Duta’ in the newly created group.

Step Three: Chat with Wikipedia

After you are done with the above mentioned two steps, you can now search anything by written the word/phrase/sentence in the chat box. Moreover, you can use different functions like searching for news or for a word’s meaning.

See also : Specifications of the upcoming Samsung Galaxy Note 6 revealed by CPU-Z screenshot

Pros and Cons of the automated bot, Duta

The Duta bot delivers many amazing features, but unfortunately it comes with some drawbacks too. Lets look into the Pros and Cons of Duta. This bot is actually the first automated WhatsApp bot which comes with some eye-catching features and services. The main advantage being its rapidness. Apparently the bot responds with an answer within a very short period of 2 seconds, after you send it a message.

However, the external links which are sent by the bot every now and then are modified by adfly network. Considering the fact that adfly is banned by different browsers, including Google Chrome, no external links can be accessed by most browsers, especially news updates. In other words, this facility comes with spams, no one would prefer opening an ad link to read a news article if he/she has to wait for several seconds in order to skip their way to the actual page.

10 Best Waterproof Android Smartphones

0
10 Best Waterproof Android Smartphones

wickedleak-wammy-passion-x-waterproof-smartphoneSmartphones have become a necessity in our lives, it gives us all kinds of facilities at any time right in our hand. But a Waterproof Smartphone? Now that’s more like it. Waterproof Smartphones have been releasing like a flood and are a great success.

These phones not only allow you to take photos underwater but also come with many great features. All are IP certified. An IP (Ingress Protection) rating indicates the extent to which a device is resistant to dust and water. The digits of the IP code represent the level of resistance to dust and water. The first indicates the level of resistance to solid particles like dust and the second to water. The bigger number the better.

We all have walked into nice and big stores to buy smart devices, but each of us halts on the same question. Which one to buy? Which is why we have come up with the list of 10 Best Waterproof Android Smartphones yet. Each one is IP certified and loved by the users. We hope we can help to clear the ambiguities in your mind as well, and help you find the best suitable Waterproof Smartphone for yourself!

Lets list down the phones we have chosen.

Samsung Galaxy S7
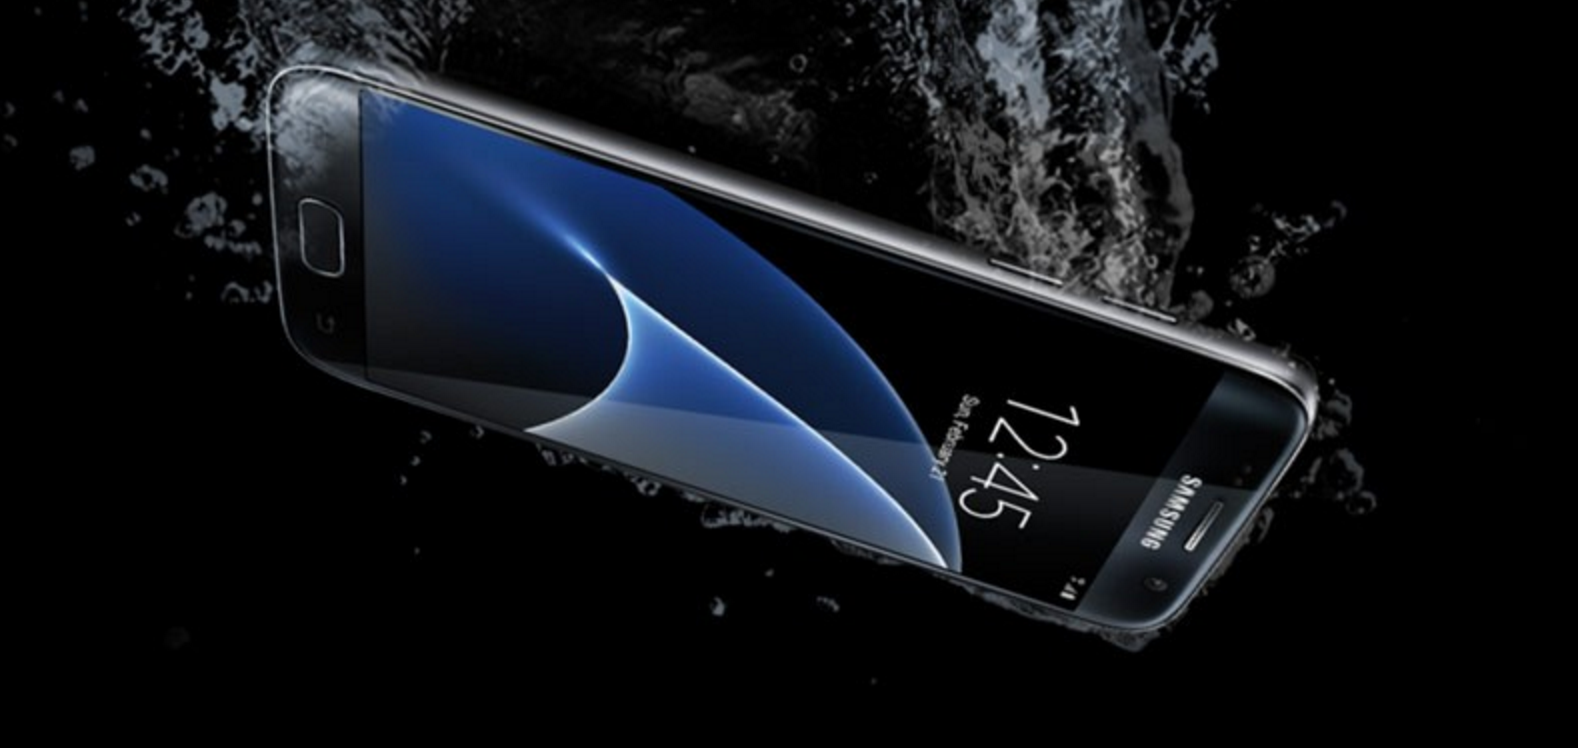
Galaxy S7 waterproofSamsung Galaxy S7, released in March 2016 features a 5.1 inch display. Like one of its predecessors Galaxy S5, Galaxy S7 is water resistant. It is capable of surviving a dip of up to 1.5 meters for 30 minutes or above. Unlike the S6 and S5, it can survive more than just an accidental dip. Hence it can guarantee more protection than the former ones. With a certification of IP 68, it has good capacity of resistance to dust and water. One of the best choices among the waterproof smartphone family. Samsung has definitely come up to the customer expectations with the new launch!


Sony Xperia X Performance

Sony launched its X series, along with the first three phones of the series, Xperia X, XA and X Performance. All have a 5″ display. All phones have Android 6.0 Marshmallow. Sony tells us that apart from internal changes Xperia X and X Performance are identical concerning the body of the phone. 

The Xperia X runs an octa-core Snapdragon 650 chip, and X Performance run the Snapdragon 820 processor which makes it the fastest among the three. And unlike the X and XA, what makes Xperia X Performance more special? Of course waterproofing! Now Sony users can easily use their smartphones in swimming pools, rain or any ‘watery’ conditions to the full of their content without any worries. X Performance is also IP 68 certified, i.e. it can stay in 1 meter depth for up to 30 minutes. (The rest 2 are not IP certified)


Samsung Galaxy S7 Edge

Samsung-galaxy-S7-edge-waterproof-840x507The S7 Edge carries the same gorgeous style with the large curved screen and better battery life. It has definitely turned out to be better than the Galaxy S7. It runs the latest OS that is the Android Marshmallow.

Just like the S7, S7 Edge also has the water and dust resistance feature. Samsung has put more effort on sealing all kinds of ports to make it more useful at all times. It can be used in showers, rains even with mischievous children around. It is also IP 68 certified.


Sony Xperia Z5 Series
Xperia-Z5-Compact-waterSony Xperia Z5 Series is the best make by Sony yet. It is best in all aspects. Xperia launched Z5, Z5 Premium and Z5 compact. Z5 Compact has all the features of Z5 in compact size. All the phones have incredible cameras with the best low-light technology, Z5 Premium being the best among all. The Z5 series has Sony’s new integrated fingerprint power button, so the phone makes sure its you! Longer battery life of up to 2 days. Like the waterproof smartphones it is IP 68 certified, which means now a rainy day can’t ruin your day!


Motorola Moto G 3rd Generation

Moto_G_3rd_gen_press5The Motorola Moto G (Gen 3) is powered by 1.4GHz quad-core Qualcomm Snapdragon 410 processor.  It runs Android 5.1.1 with a 5-inch display and a battery life of one day. Secured with Gorilla-Glass display for all kinds of usual and rough users. As for the camera, it has 13 MP rear and a 5 MP selfie camera. All companies have been working hard to produce a low-cost, high-quality device that serves to all requirements, and so far Motorola has succeeded in doing so. According to Motorola, it is ‘Water-resistant and Worry-proof’. An IPX7-rating that protects your phone from splashes and water drops. It can be survive the accidental drops in water. Just dry it off and keep going!


Xperia M5 Aqua

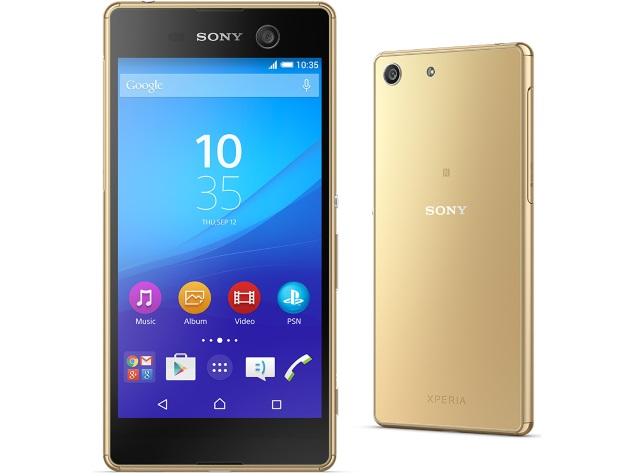
83201512213PM_635_sony_xperia_m5_dualThe Xperia M5 Aqua features a 5″ display with a 1080p high resolution screen. In comparison with the M4, it has a much crispier display. 16GB ROM and MediaTek Helio X10 octa-core chip. 20 MP for the rear camera and the front camera of 13 MP. Certified IP 68, water and dust resistance. It can sustain exposure to water or dust for up to 30 minutes, in the same depth mentioned earlier.


Hisense C20
kingkoin--620x349Hisense C20 features a 5-inch IPS display with 720 x 1280 pixels. It runs an Android 5.1 Lollipop OS, with 2 GB RAM & Octa Core processor. Coming to the camers specs, Hisense C20 serves a rear cam of 13 MP and a front cam of 5 MP. Also known as ‘King Kong 2’ Hisense C20 is powered by Snapdragon 410 64-bit quad-core. Certified IP67, it also keeps the ability of waterproofing!


MFOX A7 Pro
Cloud-Fox-A7-Pro-i-Golden-tri-vrlo-žestoka-i-skupa-smartfona-01A waterproof and dustproof rugged smartphone with a 5.5 inch display, a CPU of MTK6595 Octa Core and a 3 GB RAM.

This smartphone can be the best for the user, having a 4G connectivity along with the other features. It runs on Android 6.6 and a battery life of up to 6 hours. But MFOX A7 Pro has a quick recharging feature which will retain the users in trusting the device. Certified IP 68, it is protected from water and dust.


Cat S60
cat_s60_1Known as the ‘World’s Most Waterproof Phone’ and also ‘World’s First Smartphone With Integrated Thermal Camera’.With a 4.7″IPS 720p display covered with Gorilla glass, and runs on the Snapdragon 617 chip with 3GB of RAM.

The CAT S60 is MIL-STD-810G certified, which means it has the ability of protection from salt, dust, humidity, rain, vibration, solar radiation, transport and thermal shock, making it the ‘Most Waterproof Phone’. If the lids on the mouthpiece and earpieces are covered, it can survive a dive of up to 5 meters, and if uncovered, it can still survive under a depth of 2 meters. What more can we ask in the name of waterproofing?


Kyocera Hydro Life
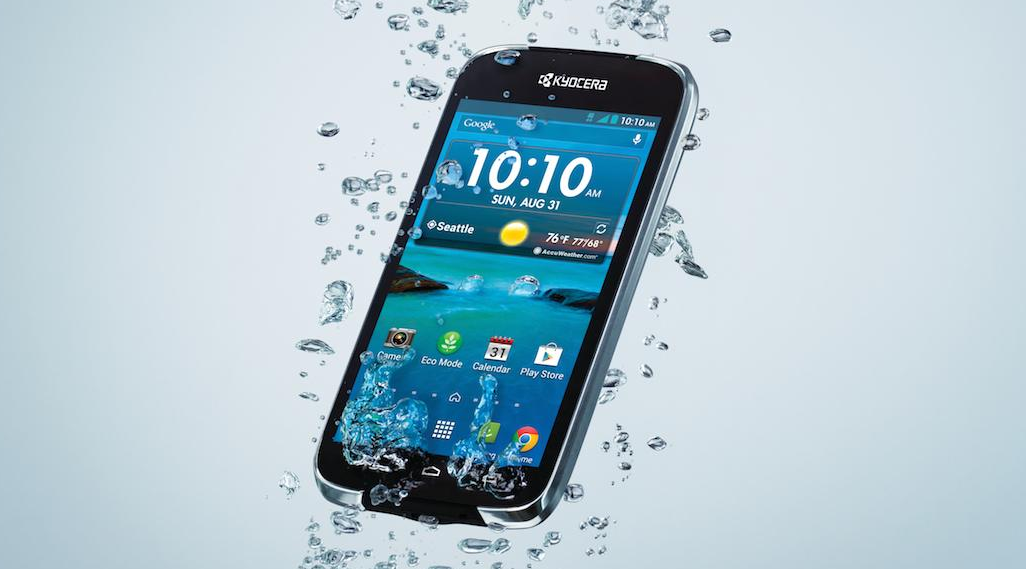
Kyocera-Hydro-Life-Android-T-Mobile-MetroPCSReleased in August 2014, Kyocera Hydro Life is an IP 57 certified device that is water and dust resistant. The water resistance rate of the device is up to 30 minutes in 3 feet water. Very impressive! With 4.5″ IPS 540 x 960 pixels display, it runs on Android v4.3 Jelly Bean OS. Contains a Qualcomm MSM8212 Snapdragon 200 chip set and Quad-core 1.2 GHz Cortex-A7 CPU. Concerning all of its specs it is much durable and inexpensive. Kyocera Hydro Life also has great sound quality and a very interesting custom lock of their own design. All the features made it worth to be featured in the best smartphone list.


Every Smartphone company is rushing to launch new phones with the best features, making it hard for the users to decide. Hopefully our list will help you in hunting down the best phone for you that suits your style and requirement. Happy buying!

How To View Full Version of Facebook on iPhone – iPad

0
How To View Full Version of Facebook on iPhone – iPad

Whenever we open Facebook on our iPhone and iPad, by default Facebook mobile version is opened. Not everyone wants the Facebook mobile view because it drop out many features. In the following guide, I’ll tell you how to view full version of Facebook on iPhone and iPad.

ios-view-full-version-of-facebook

How To View Full Version of Facebook on iPhone – iPad:

1 – From Facebook Menu:

2 – Safari Setting:

  • Open Facebook.com on your mobile browser.
  • In iOS 9, Tap “Share”button and select “Request Desktop Site“.
  • In iOS 8, Tap the address bar and the URL will become highlighted. Now you’ll see bookmark list, swipe down and select the “Request Desktop Site” option.

3 – Safari UA string Hack:

This is the last resort, before moving on let me tell you one thing. This method is little complex so, I hope you don’t have to go for it. Download and install iBackupBot and follow the instruction show on the screen.