Home Blog Page 314

Download Badland 2 for PC (Windows and Mac)

0
Download Badland 2 for PC (Windows and Mac)

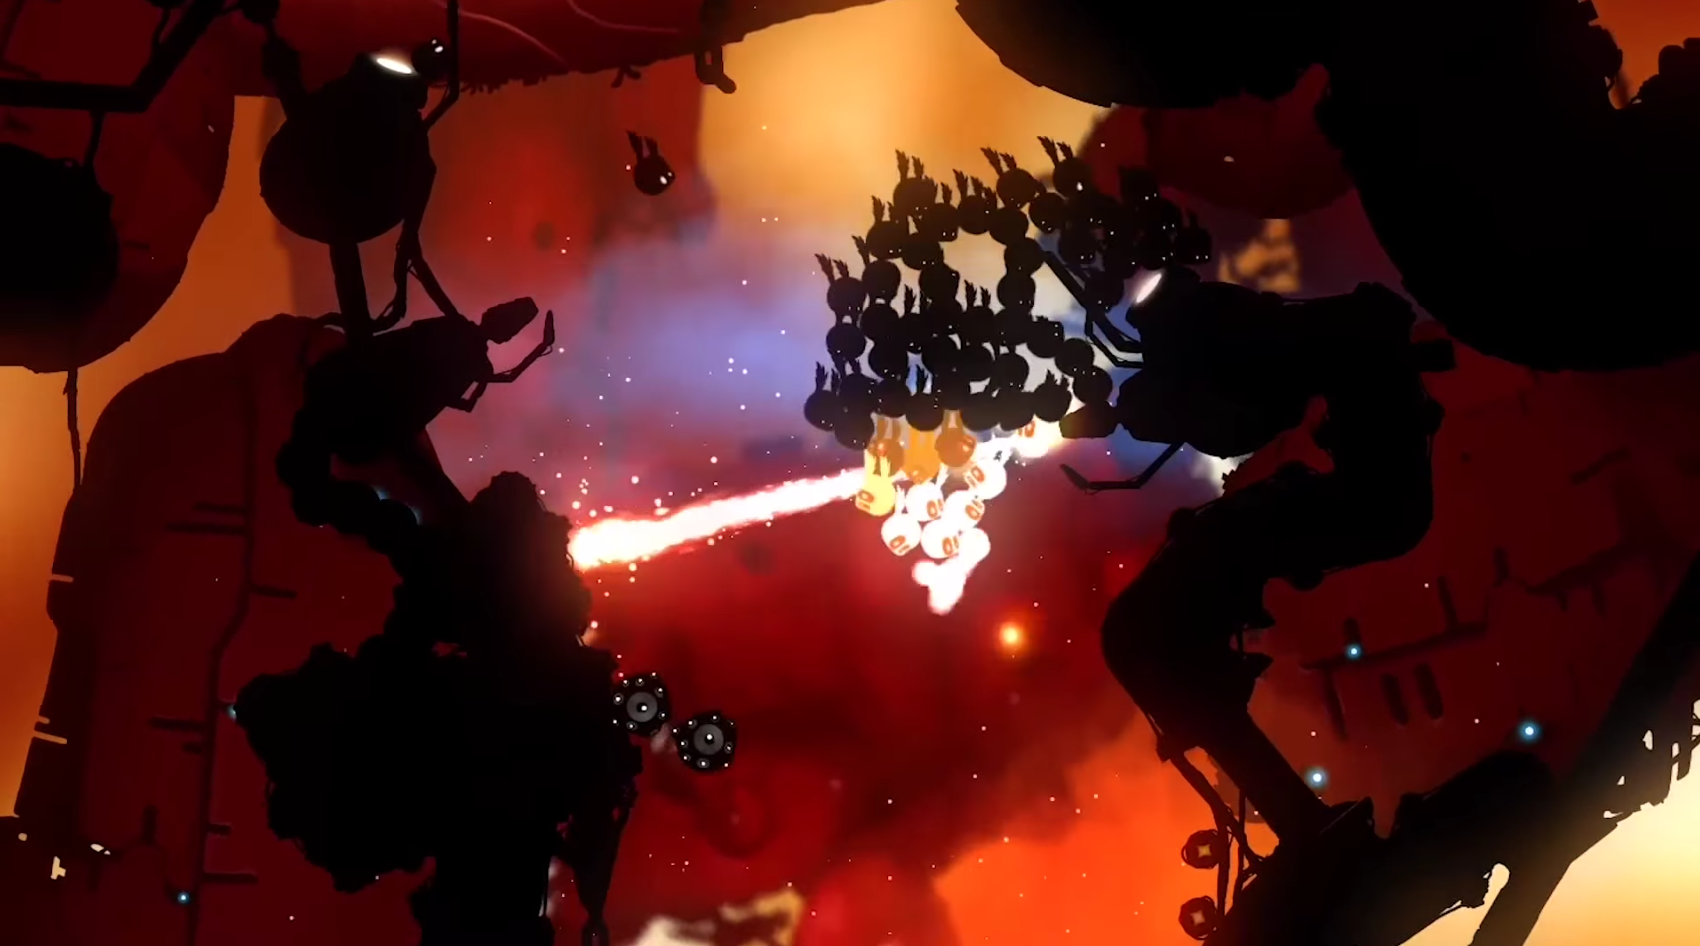
The sequel of popular adventure game Badland is out now as Badland 2. Badland 2 comes as a result of collaboration of Frogmind (the original developer of Badland) and Clean Master Games. Badland 2 brings stunning graphics, the game has been made an absolute beauty this time. It extends the levels of Badland and brings more thrill. New elements including liquids, frost, magma, water and framethrowers are all set to challenge your survival. Scroll to all the directions and seek life. Fly and skip the deadliest elements blocking your way. Badland 2 is available in the Google Play Store and is free. Grab it for your Android handheld and start playing it right now. The game isn’t free for iOS.Badland 2 for PC

The original Badland was a great success, Badland 2 is expected to do the same. Many of the gaming geeks would love to play this game on their computer. You can install and play Badland 2 for PC on your Windows Vista, Windows 7, Windows 8, Windows 8.1, Windows 10 Laptop/Desktop PC and also a Mac OS X powered Macbook Pro, Macbook Air or iMac. You will need an Android emulator like BlueStacks or Andy running on your computer for this purpose. The guide following your way down is all set to explain the method. Have a look on it now and start playing Badland 2 for PC.

Download Badland 2 For Windows PC & Mac

  1. Download Badland 2 APK
  2. Download and install Bluestacks: Bluestacks Offline Installer | Rooted Bluestacks |Bluestacks App Player
  3. Once you’ve installed Bluestacks, double click the downloaded Badland 2 APK.
  4. The APK will be installed using Bluestacks, once installed open Bluestacks and locate the recently installed Badland 2.
  5. Click the Badland 2 icon to open it, follow the on-screen instructions to play it.

You can also use Andy OS to install Badland 2, here’s the tutorialHow To Run Android Apps On Mac OS X With Andy

The Andy OS tutorial explains how to play a game on your Mac OSX, but the same guide will also work for a Windows PC.

That’s all. In case you’re stuck with anything, reach us out through the comment box below.

Download Pokèmon Go APK for Android

1
Download Pokèmon Go APK for Android

Pokèmon Go, the long awaited augmented reality game has finally started making its way to the Google Play Store in select regions. The game apparently has made its way to New Zealand and Australia. It is yet to make its way all across the world. Pokèmon Go tends the players to discover Pokèmon. A lot of Pokèmon like Venusaur, Charizard, Blastoise, Pikachi and others have landed on the planet Earth and now it is your job to discover them. Pokèmon Go makes the use of your smartphone’s cameras and sensors and shows you the Pokèmon lying around you, you have to move to that location and capture them. Pokèmon Go might make you go out as well and explore the world. As you capture more and more Pokèmon, you will certainly level up in this game and you will be able to capture more powerful Pokèmon to help yourself complete your Pokèdex. You can evolve your Pokèmon into something entirely new and different by collecting many Pokèmon of the same kind. Pokemon Go is a free to play game, you can download it easily from the Google Play Store only if its appearing at your end.Screenshot at Jul 07 04-28-21

As mentioned, Pokèmon Go is available in limited regions for now. If you want to install this game right now, you will have to get its APK file. We have managed to pull out the Pokèmon Go APK for Android and linked it right here alongside the installation instructions. You can go ahead now and download Pokèmon Go APK, install it and start playing this cool game right away.

Pokèmon Go APK and How to Install

  1. Download Pokèmon Go APK
  2. Download the file to your phone straight away, or copy it to your phone from your PC.
  3. Now on your phone, go to settings > security > allow unknown sources > check this.
  4. Now using a file manager, locate the APK file that your just copied or downloaded.
  5. Tap the APK file and finish installation using the on-screen instructions.
  6. Once installed, access the newly installed game through app drawer.
  7. That’s all. Enjoy Pokèmon Go !

Just in case you’re willing to play the new version of  Pokemon Go on your  PC then checkout Pokèmon Go for PC!

[OnePlus 3] Unlock Bootloader, Flash TWRP and Root

[OnePlus 3] Unlock Bootloader, Flash TWRP and Root

OnePlus introduced the all-new OnePlus 3 to the world just a few weeks back. The OnePlus 3 is the 4th addition to the OnePlus family and comes with some serious innovations on-board. OnePlus has ditched its previous plastic-sand build and turned the phone into metal giving it a whole new premium look and feel. OnePlus 3 carries a Snapdragon 820 CPU under the hood which is accompanied by a whopping RAM of 6 GB.

The internal storage starts from 64 GB which might become a standard for the flagship smartphones of the year 2016 following the footsteps of OnePlus. There is no external card slot on this smartphone, 64 GB of internal storage is quite enough for that matter. OnePlus 3 is powered up with Adreno 530 GPU, which might be a great choice for Android gaming geeks as well.phpnblzg9

OnePlus 3’s software is the latest Android 6.0.1 Marshmallow running the Oxygen OS atop of it. OnePlus’s very first smartphone ran on CyanogenMod, which is the aftermarket distribution of Android OS. OnePlus One successfully attracted Android power users in masses.

The software iteration of OnePlus, which now has reached the Oxygen OS is worth having a look at as well. The Oxygen OS is bond to provide near a very close experience to the stock Android, which also happens to be a reason for this smartphone to be an efficient performer. OnePlus 3 is available in the market for around 400 (USD) bucks.

OnePlus 3 has been caught up by developers and the device has already got the treatment that the users always want to see as soon as the device comes out. We are talking about the bootloader unlock, TWRP recovery and the root access. All these three things are the base for an Android device’s customization.

Having the bootloader unlocked, TWRP recovery flashed and rooted your OnePlus 3 means you can flash your desired .zip files, flash custom software, tweak the battery consumption and performance of your OnePlus 3. While you look out for the methods to perform the aforementioned tweaks on your OnePlus 3, we’ve looked into the details and managed to come up with the guide here.

 Unlock Bootloader, Flash TWRP and Root OnePlus 3

As we go ahead, we will have a look on how to unlock the bootloader of your OnePlus 3, flash the latest TWRP recovery and then root it right away. Have a look on the preparations and then follow the guide going down.

Precautions & Prep

  • This guide is intended for OnePlus 3 only. Do not try this method on any other device otherwise, you may result in bricking it.
  • Make sure that your phone’s battery is charged up to 80% in order to avoid any power issues during the flashing process.
  • Backup all of your important contacts, call logs, sms messages and media content to stay on a safe end.
  • Enable USB debugging mode on your OnePlux X in developer options. To do so, go to settings > about device > tap build number for 7 times. You will have developer options in settings now. Open developer options > Enable USB debugging. If you have the “OEM Unlocking” option, enable it as well.
  • Use your original data cable to establish a connection between your phone and your PC.
  • Follow this guide to the letter to avoid any mishap.

Disclaimer: The methods involved in flashing custom recoveries and rooting the device are highly custom. Rooting the device and flashing a custom recover is never recommended by a device manufacturer. In case something goes wrong, TechBeasts or the device manufacturers may not be held responsible. Make sure that you’re doing everything at your own risk.

Required downloads & installations

  1. Download and install OnePlus USB drivers.
  2. Also, download and install Minimal ADB & Fastboot drivers.
  3. Download SuperSu.zip file and copy it to your phone’s internal storage.

Unlock OnePlus 3 Bootloader

Unlocking bootloader will wipe your device. Make sure that you’ve backed up everything before going ahead.

  1. Make sure that you’ve downloaded and installed Minimal ADB & Fastboot drivers on your Windows PC or installed Mac ADB & Fastboot for Mac.
  2. Connect your phone to your PC now.
  3. Now open Minimal ADB & Fastboot.exe from your desktop. If you do not have this file on your desktop, then go to your Windows installation drive i.e. C drive > Program Files > Minimal ADB & Fastboot > Press and hold Shift Key + Right click on an empty area with the open folder > click “Open command window here”.
  4. Now in the command window enter the following commands one by one.
    • adb reboot-bootloader

      This will reboot your Nvidia Shield in bootloader. Once booted up, issue the following command.

      fastboot devices

      This command will verify the connection of your device with your PC in fastboot mode.

    • fastboot oem unlock

      This command will unlock the bootloader. As soon as you press the enter key after typing this command, you will get a message in your phone asking for the confirmation of bootloader unlocking. Use volume up & down keys to navigate through options and confirm unlocking.

    • fastboot reboot

      This command will reboot your phone. That’s all, disconnect your phone.

How To Install TWRP Recovery on OnePlus 3

  1. Download recovery.img file for OnePlus 3.
  2. Copy recovery.img file to Minimal ADB & Fastboot folder which is located in program files in your windows installation drive.
  3. Now boot your OnePlus 3 into fastboot mode as suggested in step 4 above.
  4. Connect your OnePlus 3 to your PC now.
  5. Open Minimal ADB & Fastboot.exe explained in step 3 above.
  6. Now in the command window enter following commands:
  • fastboot devices

    fastboot flash recovery recovery.img

  • fastboot boot recovery.img

    (this will boot your device in TWRP recovery mode)

    To boot manually into TWRP recovery mode, unplug USB cable from your OnePlus 3 and turn off your device completely by keeping the power key pressed for a while. Now press and hold Volume Down + Power Key to turn on your OnePlus 3. As soon as your phone’s screen turns on, leave the Power Key and keep the Volume Down Key pressed. Your device will now boot into TWRP recovery mode.

How To Root OnePlus 3

  1. Make sure that you’ve copied SuperSu.zip file to your phone. In case you haven’t, do it now.
  2.  Now boot your phone into TWRP recovery mode. To do so, turn it off completely first. Now turn it on by pressing and holding Volume Down + Power Key. If this doesn’t work for you then try Volume Up + Power or both, Volume Down + Up + Power to boot into recovery mode.
  3. As you see TWRP recovery, tap “Install > Locate the copied SuperSu.zip file (should be at the bottom) > tap this file > Swipe the bar at the bottom of the screen to confirm flash”.
  4. As soon as SuperSu.zip file is flashed, go back to the main menu in TWRP and tap reboot > system.
  5. Your device will boot up now. Find SuperSu in the app drawer. Install the Root Checker app to verify root access.

Don’t forget to create a Nandroid Backup for your OnePlus 3 now. Also, check out how to use Titanium Backup since you’ve got your phone rooted. That’s all. Stuck with something? Don’t worry! Reach us out through the comment box below.

How To Fix Fast Battery Drain Problem On Samsung Galaxy Note 3

How To Fix Fast Battery Drain Problem On Samsung Galaxy Note 3

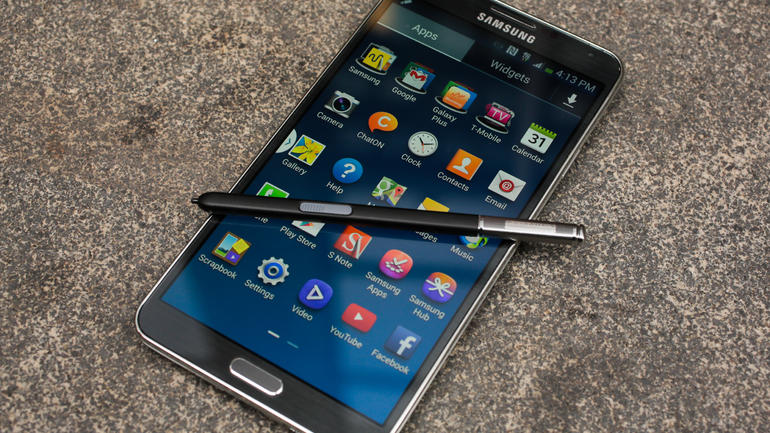
In this post, I’ll tell how to Fix Fast Battery Drain Problem On Samsung Galaxy Note 3, although Galaxy Note 3 is an old device now but still million of people still own this awesome device. Samsung Galaxy Note 3 was a game changer when it was released with his awesome features and specs. Now let’s moved to the tutorial on how to fix battery drain problem on Galaxy Note 3.

Also Read: How To Extend Samsung Galaxy Note 3 Battery Life [ Guide ]

note 3 battery drain

How To Fix Fast Battery Drain Problem On Samsung Galaxy Note 3:

The first thing you should do is change your battery because I have seen many users saying ” After changing the Samsung Galaxy Note 3 battery their battery draining issue has been resolved.” Sometimes we over charge the battery and that can cause the battery drain issues with our devices.

If you updated your device to the latest software, I think you should clear the cache partition using recovery mode. Follow the instructions below.

  • Turn off your device.
  • Now press and hold home+Power+Volume Up key.
  • Release the power button once you see logo, but keep holding home and Volume up keys.
  • Now when you see Android logo, let go both buttons.
  • Use the volume down button to navigate and highlight wipe cache partition.
  • Now use the power key to select the option.
  • You have to select ‘Yes‘ when you’ll be prompted to next menu.
  • Now wait for the process to be completed, once it’s done highlight ‘Reboot system now’ and press power button to select it.
  • All Done.

Boot your device into Safe mode and check the battery is draining or not. If the battery is draining fast that means you have a bad firmware and if it’s working fine, that means some app is causing this issue. All you have to do is locate the app and then delete it.

If you are facing a bad firmware update, you need to flash the stock firmware again. Next thing you can do is Factory reset, follow the instructions below.

  • Turn off your device.
  • Now press and hold home+Power+Volume Up key.
  • Release the power button once you see logo, but keep holding home and Volume up keys.
  • Now when you see Android logo, let go both buttons.
  • Use the volume down button to navigate and highlight wipe data / factory reset.
  • Now use the power key to select the option.
  • You have to select ‘Yes‘ when you’ll be prompted to next menu.
  • Now wait for the process to be completed, once it’s done highlight ‘Reboot system now’ and press power button to select it.
  • All Done.

Fix Samsung Galaxy S6 Keeps On Crashing Issue & Other problems

0
Fix Samsung Galaxy S6 Keeps On Crashing Issue & Other problems

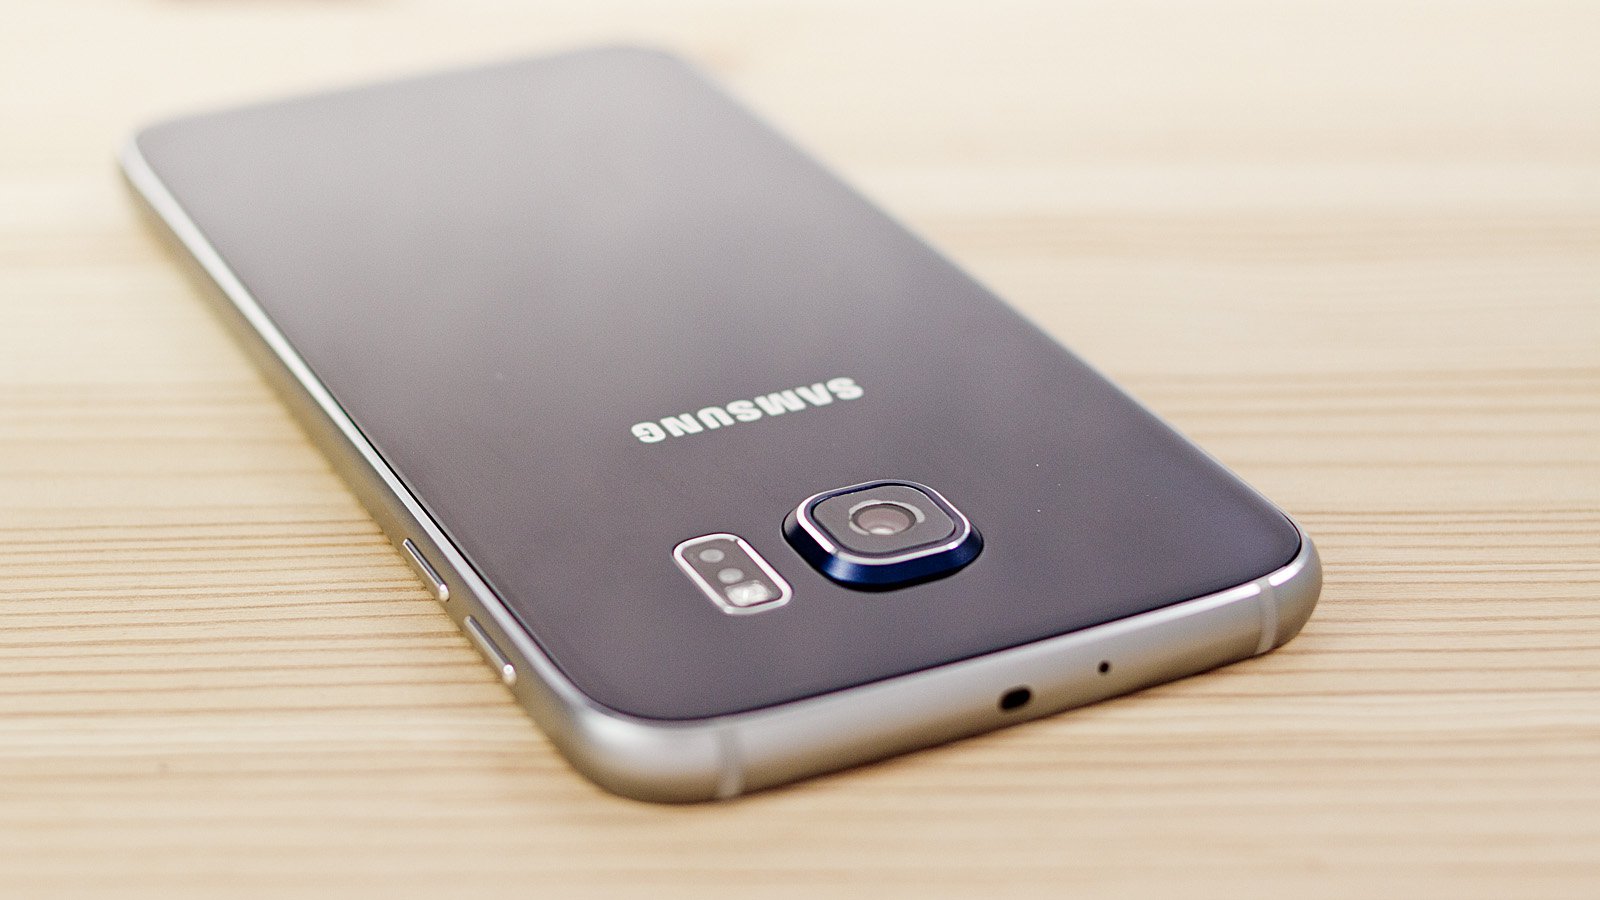
In this post, I’ll tell you how to Fix Samsung Galaxy S6 Keeps On Crashing Issue & Other problems. I’ve seen many people reporting about different issues, they are facing on their Samsung Galaxy S6. Following is the list of all the issues I’ll help you fix.

Fix Samsung Galaxy S6 Keeps On Crashing Issue

Also Read: How To Fix Samsung Galaxy S6 Apps Not Updating On Wi-Fi Issue

List of Errors:

  • Galaxy S6 Keeps On Crashing
  • Galaxy S6 Freezes Locks Up
  • Galaxy S6 Freezes Does Not Stay Charged
  • Galaxy S6 Stuck In Boot Screen During Update
  • Galaxy S6 Button Inactive Screen Black
  • Galaxy S6 Difficulty Swiping Screen

Fix Galaxy S6 Keeps On Crashing:

The best solution I found so far for this issue, you need to do a factory reset your device. The main reason what causing this issue might be a culprit app or a bad firmware update. The best solution is a factory reset.

  • Turn off your device.
  • Now press and hold home+Power+Volume Up key.
  • Release the power button once you see logo, but keep holding home and Volume up keys.
  • Now when you see Android logo, let go both buttons.
  • Use the volume down button to navigate and highlight wipe data / factory reset.
  • Now use the power key to select the option.
  • You have to select ‘Yes‘ when you’ll be prompted to next menu.
  • Now wait for the process to be completed, once it’s done highlight ‘Reboot system now’ and press power button to select it.
  • All Done.

Fix Samsung Galaxy S6 Freezes Locks Up:

Follow the steps below.

  • First. you need to Wipe the cache partition using recovery mode.
  • Boot your device in Safe Mode. Check if the phone freezes in this mode or not. If it does that means you have a culprit app.
  • Backup your device and uninstall the app.

Fix Galaxy S6 Freezes Does Not Stay Charged:

To Fix this issue, you can only boot into the recovery mode and perform a factory reset. Next option is that you should take your device to the Samsung service center and get it fixed.

Fix S6 Stuck In Boot Screen During Update:

Turn off your device, boot into the recovery mode. Perform a factory reset. Now after the factory reset, I hope that your problem is fixed, but if it’s not then you have to flash the phone with its updated stock firmware.

Fix Samsung Galaxy S6 Difficulty Swiping Screen:

Now to fix S6 Difficulty Swiping Screen. You need to boot into the recovery mode and clear the Cache Partition.

  • Turn off your device.
  • Now press and hold home+Power+Volume Up key.
  • Release the power button once you see logo, but keep holding home and Volume up keys.
  • Now when you see Android logo, let go both buttons.
  • Use the volume down button to navigate and highlight wipe cache partition.
  • Now use the power key to select the option.
  • You have to select ‘Yes‘ when you’ll be prompted to next menu.
  • Now wait for the process to be completed, once it’s done highlight ‘Reboot system now’ and press power button to select it.
  • All Done.

Download Clash Royale 1.4.1 APK

0
Download Clash Royale 1.4.1 APK

Clash Royale comes from the developers of all-time famous Clash of Clans. The game takes the trend set by Clash of Clans to a whole new level. Where you had fights between clans in Clash of Clans, you will have fights between kingdoms in Clash Royale. Clash Royale is a real-time multiplayer game, that means you can have even more fun in this game. The game carries some characters from Clash of Clans and also brings a bunch of its own new characters. The game also features Clash of Clans spells, defenses, troops and also Royales such as Princes, Knights, Baby Dragons etc. All you’ve to do is to demolish the enemy Kingdom and occupy the space of your enemy king. Clash Royale brings various upgrades, reward systems to keep your gameplay spicy. The game has become quite famous even before its world-release.Clash-Royale-for-PC

At the moment, Clash Royale is on a soft release. The game has hit only a few regions in the world and in most of the regions its available as “Pre-register”. If you’re one of gaming enthusiast who can’t wait for this game to officially rollout for your region, you may want to get your hands on it right away. The good news is, we’ve already acquired the APK file of Clash Royale. The current version v1.1.2 is now available for download. You safely go ahead and download Clash Royale v1.4.1APK and learn to install it on your Android smartphone or tablet.

Download and install Clash Royale 1.4.1 APK

  1. Download Clash Royale APK
  2. Download the file to your phone straight away, or copy it to your phone from your PC.
  3. Now on your phone, go to settings > security > allow unknown sources > check this.
  4. Now using a file manager, locate the APK file that your just copied or downloaded.
  5. Tap the APK file and finish installation using the on-screen instructions.
  6. Once installed, access the newly installed game through app drawer.
  7. That’s all. Enjoy Clash Royale!

Fix Samsung Galaxy S6 problems after Marshmallow update

Fix Samsung Galaxy S6 problems after Marshmallow update

Samsung Galaxy S6 users are getting Android Marshmallow update, the latest OS brings tons of new features and improvements. But after updating Galaxy S6 to Android 6.0 users have reported many issues they are facing. Today I’ll help you to fix Samsung Galaxy S6 problems after Marshmallow update. Following is the list of issues that we are gonna fix in this post. I’ll update this post with more solution as soon as I found them. Let’s start the method to fix the Galaxy S6 problems after Marshmallow update.

[note] learn how to install Fix Edge features still pops up after being disabled on Galaxy S6 Edge Plus[/note]

Update 1x: Fix Samsung Galaxy S6 Keeps On Crashing Issue & Other problems

fix galaxy s6 problems after marshmallow update

List of the issues:

  • Samsung Galaxy S6 Edge that just froze and became unresponsive; the screen won’t turn on even if the Power button is pressed.
  • Phone is stuck on Android 5.1 and won’t update; it says it’s up-to-date when it’s obviously isn’t. 
  • The error “The kernel is not seandroid enforcing” is shown after a successful root. 
  • Galaxy S6 Edge data won’t work after updating to Marshmallow and cellular connection keeps dropping.
  • Phone entered the boot loop and can’t get out after a successful Marshmallow update. 
  • Text to speech feature keeps crashing or won’t work with any apps.

Fix Samsung Galaxy S6 problems after Marshmallow update:

Samsung Galaxy S6 Edge that just froze and became unresponsive; the screen won’t turn on even if the Power button is pressed.

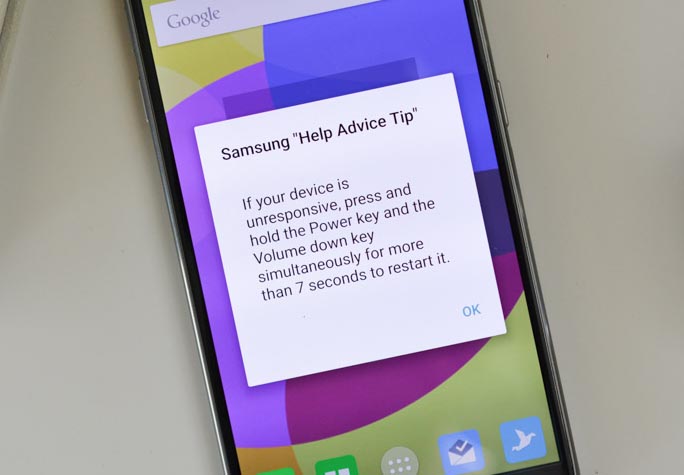
First thing you should do is, press and hold the Volume Down and Power keys for 10-15 seconds. Your device will now reboot once it’s on and working I prefer a factory reset, because it will fix the issue.

  • Turn off your device.
  • Now press and hold home+Power+Volume Up key.
  • Release the power button once you see logo, but keep holding home and Volume up keys.
  • Now when you see Android logo, let go both buttons.
  • Use the volume down button to navigate and highlight wipe data / factory reset.
  • Now use the power key to select the option.
  • You have to select ‘Yes‘ when you’ll be prompted to next menu.
  • Now wait for the process to be completed, once it’s done highlight ‘Reboot system now’ and press power button to select it.
  • All Done.

Phone is stuck on Android 5.1 and won’t update:

Now keep that in mind Firmware update are rolled out by region, it’s possible that right now the country you are in is not yet receiving the update. I may be wrong, in order to check that your carrier rolled out the update, you should contact the service center.

error “The kernel is not seandroid enforcing” is shown after a successful root.

The best solution for this issue is that you need to flash the stock firmware with the same version you installed. If this won’t work for you, try the old Android version and flash it through Odin and after that you can update your device to the latest.

mobile data won’t work after updating to Marshmallow and cellular connection keeps dropping.

To fix mobile data issue you need to check your APN settings because sometimes they got delete when you are updating your device. As for signals are dropping I suggest you should go to your nearest service center.

Phone entered the boot loop and can’t get out after a successful Marshmallow update.

There is only one solution for that you need to re-flash the firmware but if you cannot go into recovery mode or download mode that means you cannot flash the firmware. The best left is goto Samsung store and let them fix it.

Text to speech feature keeps crashing or won’t work with any apps.

The best and working solution for this issue is as below.

  • Turn off your device.
  • Now press and hold home+Power+Volume Up key.
  • Release the power button once you see logo, but keep holding home and Volume up keys.
  • Now when you see Android logo, let go both buttons.
  • Use the volume down button to navigate and highlight wipe cache partition.
  • Now use the power key to select the option.
  • You have to select ‘Yes‘ when you’ll be prompted to next menu.
  • Now wait for the process to be completed, once it’s done highlight ‘Reboot system now’ and press power button to select it.
  • All Done.

Download Vysor APK for Android

0
Download Vysor APK for Android

Vysor is the kind of application that I’ve been waiting for long and having this application out now, its no more less then a dream come true. Just as the title has already suggested, Vysor allows you to control your Android smartphone right from your computer. For years we have been mirroring the screen of our computer on our smartphone using various applications like Team Viewer, Chrome Remote Desktop and others. None of the applications in the past allowed the screening on your Android handheld on your computer, but Vysor has now made this possible.

Vysor comes from the ClockworkMod developers, the guys who were behind the all time famous CWM recovery. Once your phone’s screen is on your computer, you will be able to use applications installed on your phone, play the games, control your entire Android device using your computer’s mouse and keyboard. The coolest thing about Vysor is, you don’t need to use the traditional Android emulators anymore to have fun of Android on your desktop PC. Now you can use your real Android device on your PC and access all of its contents. Vysor is extremely easy to install and use, all you need is a Vysor application installed inside your phone and the same on your Google Chrome browser running on your computer. Connect your device to your PC after installing Vysor and boom!Vysor Android

Vysor is a free application. You can grab it from the Google Play Store. We have also managed to pull out the Vysor APK for Android and linked it down right here along side the installation instructions. Just go ahead and start using it now.

Download Vysor APK and How to Install

You need your device’s USB drivers or Android ADB and Fastboot drivers installed on your PC beforehand. You also need to have Vysor for Chrome installed on your PC for Vysor Android to work.

  1. Download Vysor APK
  2. Download the file to your phone straight away, or copy it to your phone from your PC.
  3. Now on your phone, go to settings > security > allow unknown sources > check this.
  4. Now using a file manager, locate the APK file that your just copied or downloaded.
  5. Tap the APK file and finish installation using the on-screen instructions.
  6. Now enable USB Debugging mode on your Android device.
  7. Once installed, access the newly installed Vysor through app drawer.
  8. Connect your phone to your PC now.
  9. That’s all. Enjoy Vysor!


Fix Samsung Galaxy Note 4 Lag In Sending Text Messages Issue and more problems.

Fix Samsung Galaxy Note 4 Lag In Sending Text Messages Issue and more problems.

In this post, I’ll tell you how to fix Samsung Galaxy Note 4 Lag In Sending Text Messages Issue and other related issues. Also, we have covered all the issue of Samsung Galaxy Note 4 after upgrading to Marshmallow 6.0. Now in this post, I’ll tell solution of messaging problem on Samsung Galaxy Note 4. Following is the list of text messaging issues that i will help you fix.

Best-Galaxy-Note-4-Apps-1

List of Problems:

  • Note 4 Lag In Sending Text Messages.
  • Note 4 Lag When Sending Text To One Person
  • Note 4 Not Receiving Text Messages
  • Note 4 Text Messaging Stops Working

Fix Galaxy Note 4 Lag In Sending Text Messages:

Fix Samsung Galaxy Note 4 Lag In Sending Text Messages Issue and more problems.

  1. First, Try this out. Settings->Applications->All Apps-> Messaging App-> Clear Cache.
  2. Now if the step one didn’t work for you, try to do a soft reset.
  3. If the both steps did no good, Follow the steps below.
  • Turn off your device.
  • Now press and hold home+Power+Volume Up key.
  • Release the power button once you see logo, but keep holding home and Volume up keys.
  • Now when you see Android logo, let go both buttons.
  • Use the volume down button to navigate and highlight wipe cache partition.
  • Now use the power key to select the option.
  • You have to select ‘Yes‘ when you’ll be prompted to next menu.
  • Now wait for the process to be completed, once it’s done highlight ‘Reboot system now’ and press power button to select it.
  • All Done.

Fix Galaxy Note 4 Lag When Sending Text To One Person:

You can fix this by clearing the app cache and data, also you can delete the thread and start a new one. You can use the third-party messaging app. But I think you should stick with the first option.

Fix Galaxy Note 4 Not Receiving Text Messages:

  • Start with the soft reset.
  • Check your signal reception.
  • Clear Cache and data of messaging app. ( Settings->Applications->All Apps-> Messaging App-> Clear Cache.)
  • Try clearing cache partition.
  • Perform a Factory Reset.

Fix Galaxy Note 4 Text Messaging Stops Working:

Step#1: Open Settings on your Android device.

Step#2: Now tap on More tab.

Step#3: Tap on Application Manager from the list.

Step#4: Now select All Application by a swipe to left.

Step#5: There you’ll see all your installed apps, Tap on Messages.

Step#6: Now all you have to do tap on Clear Cache and Clear data.

Step#7: Now go to home screen and restart your device.

All Done ….

How to fix HTC 10 that won’t connect to Wi-Fi & other internet issues

1
How to fix HTC 10 that won’t connect to Wi-Fi & other internet issues

In this post, I’ll help you fix HTC 10 that won’t connect to Wi-Fi & other internet issues. There no device which is perfect in every way, although HTC 10 is the best device so far from HTC, but as i said it’s not perfect. Following is the list of all the issue that we have received so far.

How to fix HTC 10 that won’t connect to Wi-Fi & other internet issues

List of Errors:

How to fix HTC 10 that won’t connect to Wi-Fi & other internet issues:

Now I’ve address all the issues separately, now these will help you fix these issues but if you are having a hardware problem. The best solution is that you should go to HTC service nearby.

HTC 10 CANNOT CONNECT TO WI-FI NETWORK IT USED TO CONNECT:

Now this seems to be problem with your WiFi connection because you were connecting your device before and now it’s not connecting that means you have issues with your WiFi connection. First i think you should try connect your device with another WiFi network, if it works fine that means you have to try following steps.

  • Go to your device Settings->WiFi->Tap on the connection->Forget.
  • Now connect your device with same connection.
  • Turn off/on your WiFi router.
  • Reset your Router Settings.
  • Call the connection provider and make sure your net connection is live.
  • Change your WiFi router and connect your device.
  • Make sure your password is same.

HTC 10 REBOOTS OR HANGS WHENEVER WI-FI IS TURNED ON:

I’ve received a e-mail from our one of reader that, When he turns on WiFi on HTC 10 his device reboots or hangs. When he is using mobile data, there is no such issue. Following are the all possible solution to fix this issue.

Boot your HTC 10 in safe mode:

We are booting in to Safe mode because it will help us to determine the problem.

  1. Unlock your device, Press and hold the Power key for few seconds. A Window will appear.
  2. You have to touch and hold power off option shown in the window until a prompt telling you to ‘Reboot in safe mode’ appears.
  3. Now tap on the ‘Reboot in safe mode’ and tap OK to confirm.
  4. When your device boots up, you’ll be in Safe Mode.

Once your are in Safe mode that means now you are running only stocks apps, no third-party will is allowed to run. Now turn on your Wifi to check that still it’s  triggering the problem or not. If it’s running fine then i would suggest that use your device in Safe mode for a day or two. If you face the same issue that means its a firmware problem or If you don’t face the same issue that means one of third-party app is causing the issue. Now for the firmware problem you can try the following steps.

Try deleting the system cache:

  • Turn off your device.
  • Press and hold volume down button.
  • Press+hold power key and release it when your device vibrates. But don’t let go off volume down button.
  • As you see a black screen with red and blue line of texts appears, let go the volume down key.
  • You’ll see a list of options, use the volume down button to highlight “reboot to bootloader” and press the Power key to confirm it.
  • Wait for few seconds, now as the white screen appears, use the volume down button and highlight the option “BOOT TO RECOVERY MODE” and press the Power key to select it.
  • Once you are in recovery menu, use the volume down key to highlight “wipe cache partition” and use power key to select it.
  • Wait for wiping process to completed and then choose “reboot system now”.

Perform master reset:

  • Turn off your device.
  • Press and hold volume down button.
  • Press+hold power key and release it when your device vibrates. But don’t let go off volume down button.
  • As you see a black screen with red and blue line of texts appears, let go the volume down key.
  • You’ll see a list of options, use the volume down button to highlight “reboot to bootloader” and press the Power key to confirm it.
  • Wait for few seconds, now as the white screen appears, use the volume down button and highlight the option “BOOT TO RECOVERY MODE” and press the Power key to select it.
  • Once you are in recovery menu, use the volume down key to highlight “wipe data/factory reset” and use power key to select it.
  • Wait for wiping process to completed and then choose “reboot system now”.

HTC 10 WI-FI CAN’T BE TURNED ON AS SWITCH IS DISABLED:

Now for this issue, i think you should try the above methods and I am sure you’ll get a good result. I am adding the method you can use.

  1. Boot your device in safe mode and see if the Wi-Fi switch is enabled
  2. If mobile data is enabled, disable it and check Wi-Fi.
  3. Wipe the cache partition
  4. Master reset to refresh everything in your phone.

This is all for now, I’ll keep updating this post as i get more solutions and issues people are facing with their HTC devices.

Update Galaxy Alpha to Android 6.0.1 Marshmallow Resurrection Remix Custom ROM

7
Update Galaxy Alpha to Android 6.0.1 Marshmallow Resurrection Remix Custom ROM

Samsung Galaxy Alpha made its way to the world back in August, 2014. The Galaxy Alpha was a little different from Samsung’s traditional devices since it boasted off a new design and a little different build quality. Samsung used a Super AMOLED 4.7-inch screen on the front with a resolution of 720 x 1280 pixels and 312 ppi. Galaxy Alpha had a 12 MP camera on its back and a 2.1 MP shooter on the front. Galaxy Alpha’s internal storage was 32 GB and there was no external card slot. A RAM of 2GB and Exynos 5430 Octa CPU powered up this device. Galaxy Alpha originally ran on Android 4.4 KitKat out of the box. Later on Samsung updated it to Android 5.0.2 Lollipop. After the Android Lollipop, Samsung probably forgot this device and there hasn’t been any further version of Android available for this device nor there is any sign of any update.

When manufacturers stop the software update for one of their old devices, it always restricts the users with the same software where the updates stopped for the rest of the life. The new versions of Android keep pouring in and it is quite frustrating having yourself stuck on one software and not being able to update. To kill this frustration, custom ROM developers always try to pull out custom firmwares for the devices with no further official software support. For the Galaxy Alpha, XDA Senior member sunsettrack4 has managed to compile the Resurrection Remix ROM based on Android 6.0.1 Marshmallow. You heard it right, it’s all new Android 6.0.1 now.

10837Samsung-Galaxy-Alpha-Design

Using the Resurrection Remix ROM on your Galaxy Alpha, you can enjoy all new features of the Android 6.0.1 Marshmallow which you wouldn’t have been able to do so otherwise. The ROM does not only bring the features of Android 6.0.1 only, but it brings its own exclusive features as well. Resurrection Remix’s build for Galaxy Alpha is light, stable, has a nice battery consumption and also has a nice performance. The ROM doesn’t contain any major bugs, we can safely call it a daily driver. Have a look at the Resurrection Remix Marshmallow features to checkout if it fits your needs or not.

[showhide type=”link” more_text=”Resurrection Remix Marshmallow for Galaxy Alpha Features” less_text=”Show less…”]

Features:- Based On Latest Google Android 6.0.1 Release Based On Cyanogenmod 13 Sources RR Customizations:- -Navigation Bar -Enable/Disable Navbar -Navbar Button Customization -Navbar Slim Dim
-Animate Dim -Dim Timeout Duration -Dim Alpha -Double Tap To sleep navbar -Navigation Bar left/Right handed mode Switch for landscape

-Statusbar -Brightness Slider -Enable/Disable Show Notification Count -SuperUser Indicator Switch -Double Tap To sleep Statusbar -Carrier Label
-Carrier Label Switch -Carrier label Colour -Carrier Label Size -Clock Customizations -Time & date -Clock Colour -Day & date Toogle -Center/Right/Left Clock Choice -Date Format -Clock Font Styles -Battery -Battery Bar customization -Battery Icon Customization(circle/landscape/Potrait and more) -Battery % Text -Network Traffic Indicator -Network Traffic Arrows Switch -Incoming/OutGoing Traffic -Network traffic Color -Statusbar RR Logo -RR logo Color -StatusBar Weather -Weather Color -Weather Position(left/right) -Weather Style -Weather Size

-Animations -Toast Animations -ListView Animations -System Animations

-Gestures -Gestures Anywhere Feature -3 Finger Swipe Screenshot Gesture

-App Circle Bar -Choose apps in AppSidebar -Trigger Width -Trigger Hieght -Trigger Position -App Sidebar -Choose apps in App circle -Trigger Width -Trigger Hieght -Trigger Position -Pie -Pie Trigger(left ,Right ,Bottom) -Pie Targets -Pie Colors -More Pie Features

-Recents Panel -Clear All button Switch -Clear All Tasks Switch -Clear All Button Location(Top right,Top Left,Top Center,Bottom Left,Bottom Right,Bottom Center) -Recents Search Bar -Full Screen Recents -Slim Recents -OmniSwitch

-Cclock Widget -CLock And Alarm Customizations -Weather Panel Customizations -Calender Events

-LockScreen -Lockscreen Bottom Shortcuts -Lockscreen General Shorcuts -100+ Icons for Shortcuts -Double Tap to Sleep Lockscreen -Lockscreen Media Art/Enable Disable -Quick PIN/Patter Unlock -LockScreen Blur -Lockscreen Blur Intensity -LockScreen Wallpaper -Lockscreen Weather Widget -Lockscreen Icons Color

-Quick Settings Draggable Tiles -Customizable Tiles -Show Two Main Tiles Per Row -Dyanamic Tiles Adjustment -Notification Drawer -Weather Display Switch -LongPress Toogles to Enter Settings -Disable Immersive Mode Messages -Force Expand Notification -Task Manager Switch -Time Contextual Header(HD,Modern,Poly) -Quick PullDown Switch

-Buttons -Backlight Timer -Backlight Strength

-Advanced Reboot Menu -Power Menu Customizations -Power Off -Reboot(Recovery, Bootloader, Hot Reboot) -ScreenShot -Power Menu End Calls Switch -Restart SystemUI -Airplane Mode -ScreenRecord -On the Go Mode -Sound Panel

-Home Button(For devices with HW keys Only) -Home Button answer call -Long Press Actions -Double Tap Actions

-Menu Button(For devices with HW keys Only) -Short Press Actions -Long Press Actions

-Search Button(If Device Supports) -Short Press Action -Long Press Action

-Volume Buttons -Wake Up Device -Playback Control -Ringtone Volume Control -Keyboard Cursor Control -Swap Buttons on Landscape mode -Volume Key Answer

-Miscellaneous -Selinux Switch (Switch Between Permissive and Enforcing Selinux if Device has Selinux Enabled) -cLock Shortcut -Disable Battery Saver Warning Color -Disable Fc Notifications -Wakelock Blocker -Media Scanner On Boot Behaviour -Cammera Shutter Sound Enable/Disable

-SystemUI Tuner -Enabled By default -Removed Demo mode and Tweaked SystemUI Tuner As compared To AOSP -StatusBar Icons Cuzomizations -Quick Settings Customizations

Other Features -Perfomance Profiles -LCD Density -Expanded Desktop Mode -Audio FX -Heads Up Switch -Live Display -Configurable 0,90,180,270 Degree Rotation -Lock Screen Autorotate Switch -Native Tap to Wake From Marshmallow -Double Tap Power Button To enable Camera gesture -Prevent Accidental Wakeup -Wake Phone on Charging Plug -Battery Light Customizations -Notification Light Customizations -Font Size -CM privacy guard -Performance Tweaks(Kernel Aduitor Inbuilt)

-SuperSU Inbuilt

-RR OTA -Optimized With UBER TC for smoother ,Snappier and Battery Friendly Performance -CM Theme Chooser -OverAll Smoothness Improvements -Optimizations to Improve Battery -Includes All Android Marhsmallow Features -Includes ALL CM13 Features -AND MUCH MUCH MORE
[/showhide]


Willing to install this ROM on your Galaxy Alpha now? It’s time for us to get a hang of how to install it. The comprehensive guide coming your way will help you to update your Galaxy Alpha G850F, G850FQ, G850M and G850Y to Android 6.0.1 Marshmallow Resurrection Remix ROM. Go through the installation preparations now and flash it right away.

Preparations

  1. This ROM will only work with the variants of the Galaxy Alpha which are listed above. Do not try this on any other variant. Otherwise you will result in bricking it.
  2. Your phone should be charged up to 50%. This is important to avoid any power issues during the flashing process.
  3. Root your Galaxy Alpha. Here’s how to root your Galaxy Alpha.
  4. Download TWRP Recovery.img file for your Galaxy Alpha.
  5. Flash the download Recovery.img file using Flashify. (If you already have a TWRP recovery flashed, skip this step.)
  6. Create a Nandroid backup of your existing ROM using backup option in TWRP.
  7. Backup your EFS partition. Also backup your important contacts, call logs and sms messages.
  8. Follow the instructions to the letter to avoid any mishap.

DISCLAIMER: FLASHING CUSTOM RECOVERY AND ROOTING THE DEVICE VOID ITS WARRANTY. IN CASE OF A MISHAP, TECHBEASTS OR SAMSUNG MAY NOT BE HELD RESPONSIBLE. MAKE SURE THAT YOU’RE DOING EVERYTHING AT YOUR OWN RISK AND WITH YOUR FULL UNDERSTANDING.

How to Update Galaxy Alpha to Android 6.0.1 Marshmallow Resurrection Remix Custom ROM

  1. Make sure that your phone has a TWRP recovery installed.
  2. Now download the latest build of Resurrection Remix ROMResurrectionRemix-M-vxxxxxxxxxxxx-slte.zip 
  3. Download the Google GApps.zip file according to your liking: GApps.zip
  4. Copy both the downloaded .zip files to your phone’s internal SD card.
  5. Now boot your phone into recovery mode. To do so, first turn it off completely. Now turn it on by pressing and holding Volume Up + Home + Power Key.
  6. In TWRP Recovery, tap install > locate the copied ROM.zip file > Select it > Swipe finger to flash it.
  7. Once the ROM.zip file has been flashed, go back to the main menu. Once again tap install > locate the GApps.zip file > Select it > Swipe finger to flash it.
  8. Now that both files have been flashed, go back to the main menu and tap Wipe > Advanced Wipe > Select Dalvik Cache and Cache > Swipe finger to wipe.
  9. Once done, reboot your phone.
  10. As your phone boots up, it will be running on Android 6.0.1 Marshmallow Resurrection Remix ROM.
  11. That’s all.

The first boot may take up to 10 minutes, so there is no need to panic in this while. In case something goes wrong after flashing the ROM, you can restore your Nandroid backup. You can also go back to your stock firmware. Here’s a guide on how to install stock firmware on your Samsung Galaxy Alpha.

In case you’ve got any issues, drop your query in the comments or reach us out through our contact us page.

Download CSR Racing 2 for PC (Windows and Mac)

0
Download CSR Racing 2 for PC (Windows and Mac)

The sequel of popular racing game CSR Racing has been leashed into the Google Play Store now. NaturalMotionGames has collaborated with  Zynga this time and pulled out the all new CSR Racing 2. CSR Racing has manage to remained the top drag racing game and the CSR Racing 2 is now set to take this legacy ahead.  CSR Racing 2 is a game with no limits at all. The 3d Next-Gen graphics make the gameplay look realistic. You’re all set to begin your racing career, challenge the opponents, win bets and cater in tons of money. Win and unlock cars, customise them and show of the modifications you’ve done. Your car is your status in this game, so make it as cool as possible. Upgrade the performance of your car and make sure you remain the no#1 racer through all the racing modes. CSR Racing 2 features some super cars such as Ferrari, Mclaren, bugatti, Lamborghini, Bugatti, Koenigsegg and Pagani. Have you got what it takes to lead from the front in the brutal world of racing? CSR Racing 2 is waiting for you to join it now. CSR Racing 2 is a free to play game and is available in the Play Store and as well as in the App Store. You can get it easily on your handheld device, but if you’re looking for a way to play CSR Racing 2 on your desktop PC, you will have to use a little different method.CSR Racing 2 for pc

CSR Racing 2 for PC can be installed and play on a computer running Windows XP/7/8/8.1/10 desktop PC/Laptop and also a Mac OS X powered computer. The only thing you need is an emulator like BlueStacks or Andy which will help you to emulate the Android OS on your computer. We have the method drilled down here, let’s have a look on that and start playing CSR Racing 2 for PC now.

Download CSR Racing 2 For Windows PC & Mac

  1. Download CSR Racing 2 APK
  2. Download and install Bluestacks: Bluestacks Offline Installer | Rooted Bluestacks |Bluestacks App Player
  3. Once you’ve installed Bluestacks, double click the downloaded CSR Racing 2 APK.
  4. The APK will be installed using Bluestacks, once installed open Bluestacks and locate the recently installed CSR Racing 2.
  5. Click the CSR Racing 2 icon to open it, follow the on-screen instructions to play it.

You can also use Andy OS to install CSR Racing 2, here’s the tutorialHow To Run Android Apps On Mac OS X With Andy

The Andy OS tutorial explains how to play a game on your Mac OSX, but the same guide will also work for a Windows PC.

That’s all. In case you’re stuck with anything, reach us out through the comment box below.