Home Blog Page 313

How to fix Samsung Galaxy S7 that’s not charging

0
How to fix Samsung Galaxy S7 that’s not charging

In this post, I’ll tell you how you can fix Samsung Galaxy S7 that’s not charging, it happens because of several reasons and in this post,I’ll tell you how to fix all the problem which cause charging issues on Samsung Galaxy S7. We’ve covered many issues of Samsung Galaxy S7 and S7 Edge visits the links below to check them.

Read more:

fix galaxy s7 not charging issue

How to fix Samsung Galaxy S7 that’s not charging:

Reboot your phone: This is oldest and most effective trick in books, Reboot your device and put it on charging and most of the time it works like a charm.

Plug in the charger and hold the phone at various angles: This would help you to know that what is causing the issue, is it cable or charging port. All you have to do is plug in the charging cable and move your phone upside down, right, left etc. If your phone start charging at the certain angle that means your cable is ok and the issue is with a port. The best solution for that is to go to the repair center and get it fixed.

Verify the USB cable isn’t broken: This is really important, check your USB cable, sometimes it’s broken but we can’t see it. Connect other devices with the same cable, start pressing the cable from various points to see is there any bump etc.

Verify that your phone charges wirelessly: This will come real handy, if your device is charging wirelessly that means your charging port is done. Go to Samsung service center and get it checked by officials.

Check Which app is causing not charging issue:

  • To check this you have to perform the following steps.
  • First, Press and hold power key.
  • Now when you see the  ‘Samsung Galaxy S7’ logo on the screen, release the power and hold Volume down key.
  • Don’t let go the volume down key until your device finishes rebooting.
  • When you see Safe mode in the bottom left corner of your screen, release the volume down button.

Now you’ll be in safe mode and all of your third-party apps will be temporarily disabled, now plug-in the charger. If your device start charging normally as it used to do, that means some third party app was causing this issue.

Turn off your phone and charge.

This might help us to know, what is the main issue. If for some reason first step was a total failure, this will help. Now if your device charge normally while no apps are running in background, that means either pre-installed apps are causing this, firmware glitch, battery or a hardware issue.

Try deleting the system cache and then charge:

  • Turn off your Samsung Galaxy S7.
  • Now press and hold home+Power+Volume Up key.
  • Release the power button once you see Samsung Galaxy S7 logo, but keep holding home and Volume up keys.
  • Now when you see Android logo, let go both buttons.
  • Use the volume down button to navigate and highlight wipe cache partition.
  • Now use the power key to select the option.
  • You have to select ‘Yes‘ when you’ll be prompted to next menu.
  • Now wait for the process to be completed, once it’s done highlight ‘Reboot system now’ and press power button to select it.
  • All Done.

factory default settings and try charging it again:

  • Turn off your Samsung Galaxy S7.
  • Now press and hold home+Power+Volume Up key.
  • Release the power button once you see Samsung Galaxy S7 logo, but keep holding home and Volume up keys.
  • Now when you see Android logo, let go both buttons.
  • Use the volume down button to navigate and highlight wipe data / factory reset.
  • Now use the power key to select the option.
  • You have to select ‘Yes‘ when you’ll be prompted to next menu.
  • Now wait for the process to be completed, once it’s done highlight ‘Reboot system now’ and press power button to select it.
  • All Done.


How to Fix Pokemon Go Force Close Error on Android

0
How to Fix Pokemon Go Force Close Error on Android

Pokemon Go is out since quite many days now. The Augmented Reality based game is already driving the internet crazy. Pokemon Go has already hit all the top charts, pushing every single Android application or game down. Pokemon Go’s fever isn’t going to calm down anytime soon, the game is not even released all across the world and its users are already growing in masses.

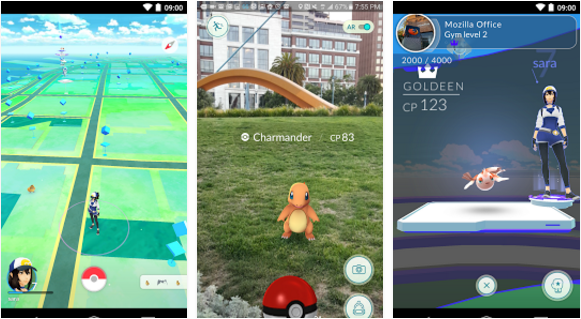
Pokemon Go’s concept is quite simple. All you have to do in this game is to capture different Pokemon characters showing up on your phone’s screen. They do not appear by simply opening up the game. You have to open the game first, it turns on your phone’s camera and then it tends the players to move around and spot Pokemon characters. Capturing many characters of the same kind will evolve them into a special kind of Pokemon character. You can also call on your friends and capture the tiny creatures getting their help. Pokemon Go is good enough to do some exercise if you have remained a friend of your bed in a long while. It’s time to move out and capture Pikachu and his friends.

Pokemon Go has received several updates and a lot of bugs that came up in the previous versions have already been fixed. The only issue that might eat you up at the moment are the force close errors that can come up with any application at any time. If you’re facing Pokemon Go force close errors, it is the time for you to fix them and play your game flawlessly. Here’s a little guide on How to Fix Pokemon Go Force Close Error on Android.

How to Fix Pokemon Go Force Close Error on Android

Method#1

Update Pokemon Go

The error may be  coming up because there’s a latest version of Pokemon Go available in the Google Play Store and the one installed on your Android device has outdated. To fix this issue, simply tap the Google Play Store and search for “Pokemon Go”. If an update is available, hit update and let it install the latest version of the game. Once it has updated, you will not get the Force Close error anymore.

Pokemon Go Google Play Store: Link

Method#2

Clear Pokemon Go Data and Cache.

  1. One your Android device, open Settings > Applications / Applications Manager > All Apps
  2. Scroll all the way down and locate Pokemon Go.
  3. Tap Pokemon Go to open it settings.
  4. If you’re using Android Marshmallow or higher, you will have to tap Pokemon Go > Storage to open cache and data options.
  5. Now tap Clear Data and Clear Cache.
  6. Now restart your Android device now.
  7. Once done, open Pokemon Go and the issue should have been resolved by now.13689563_10209085441585842_208205977_n

Method#3

Clear cache of your Android device

Just in case you’ve recently updated your Android device or made any potential changes in the system of your phone, it may have hampered the working of Pokemon Go. To resolve this issue, you simply need to wipe the cache of your device. In order to clear the cache, boot into the stock or custom recovery of your Android device and locate “Wipe Cache or Cache Partition” option. Wipe the cache and restart the phone. After restarting, try opening the Pokemon Go app and it should be working fine.c03754848

That’s all. We hope that your issue has been resolved. In case you have got any queries, reach us out through the comment box below.

How To Activate Text Message Forwarding on iOS 9.x

0
How To Activate Text Message Forwarding on iOS 9.x

In this post, I’ll tell you how to activate text message Forwarding on iOS 9.x. I am not a big fan of Apple devices but there are few features which I like in iOS devices. The one I like the most is Text Message Forwarding, It helps you receive text messages on other Apple devices. Now Let’s start the method to enable Text Message Forwarding on iOS 9.x.

Read more:

How To Activate Text Message Forwarding on iOS 9.x

How To Activate Text Message Forwarding on iOS 9.x:

Before going any further you have to take care of few things, you need an email address for iMessage and Apple ID for FaceTime. After that follow the steps mentioned below in the guide.

  • First go to iPhone Settings > Messages > Send & Receive->Add an Email.
  • Enter your Apple ID user name and password. Now you can select email to send and receive Messages.
  • Once the email id is configured, Go back to Message settings.
  • Tap on Text Message Forwarding-> and choose the Mac or iPad.
  • Now go on your Mac or iPad and you’ll see a popup of one-time verification code.
  • All you have to do is enter the code into your iPhone one time.

This is how you can enable Text Message Forwarding on iOS 9.x. Following is a video tutorial on how to activate text messaging forward on your iOS devices.

How To Download & Install Pokemon Go For iOS / Android In Any Region

How To Download & Install Pokemon Go For iOS / Android In Any Region

In this Post, I’ll tell you how to download and install Pokemon Go For iOS / Android In Any Region. Pokemon Go is rocking the charts and this game has gone viral. On every social media Pokemon Go is trending and strange thing is that it’s still not available worldwide. That’s why in this post, I’ll tell you how you can download and install Pokemon Go for iOS/ Android.

Read more:

Pokemon Go

How To Download & Install Pokemon Go For iOS / Android In Any Region:

Method#1:

  1. Download Pokèmon Go APK
  2. Download the file to your phone straight away, or copy it to your phone from your PC.
  3. Now on your phone, go to settings > security > allow unknown sources > check this.
  4. Now using a file manager, locate the APK file that your just copied or downloaded.
  5. Tap the APK file and finish installation using the on-screen instructions.
  6. Once installed, access the newly installed game through app drawer.
  7. That’s all. Enjoy Pokèmon Go !

Method#2:

  • Open Settings on your Android device.
  • Head over to accounts->Add New Google Account.
  • Now login with your new Google account credentials.
  • Open wallet.google.com/manage/w/0/# tap on Settings. Here, you will be prompted to select a country-> Select US.
  • Now on your device install an VPN app. You can choose any free VPN app.
  • Once the VPN is installed, Connect US VPN.
  • Open Google Play Store from your device now, Search for Pokemon Go and install it.
  • Once the game is installed, disconnect from VPN.
  • Enjoy the Pokemon madness by start playing the Pokemon Go on your Android device.

Install Pokemon Go For iOS:

To install Pokemon Go for iOS, all you need to do is create a US-based iTunes account and then connect to the US App Store. Now search for Pokemon Go and Tap on install. Follow the instruction in given link.

How To Enable Adoptable Storage for Galaxy S7 and S7 Edge

How To Enable Adoptable Storage for Galaxy S7 and S7 Edge

In this post, I’ll tell you how to Enable Adoptable Storage for Galaxy S7 and S7 Edge. Android Marshmallow came out with many exciting feature including format SD card. It allows you to format SD card and use it as internal storage. This is called Adoptable Storage, now those who own Samsung Galaxy S7 and S7 Edge, probably noticed that this feature was left out. In this Guide I’ll tell you how you can enable Adoptable Storage for Galaxy S7 and S7 Edge.

Read more:

enable adoptable storage Galaxy s7 s7 edge

How To Enable Adoptable Storage for Galaxy S7 and S7 Edge:

Requirements:

Method:

  • Open up a command prompt in ADB folder.
  • In ADB folder hold down the shift key > Right click > Click on Open Command Window
  • Connect your Galaxy device with PC using a USB cable.
  • Use the following commands in same order as written.

adb shell

sm list-disks

Take note of your device ID (disk: xxx,x)

To partition the entire SD card space as internal storage use these commands.

sm partition disk:xxx,x private

  • All Done, now let’s check the storage settings.
  • Go to Settings on your device->scroll down and tap on storage.
  • In here you’ll see your total device storage will be spiked up.

Now it’s time to migrate your data.

  • Settings.
  • Storage.
  • SD Card.
  • More.
  • Migrate data

How To Enable Adoptable Storage for Galaxy S7 and S7 Edge [ Video]

VIA: XDA Developers

Fix HTC 10 that won’t send text messages & other texting issues

0
Fix HTC 10 that won’t send text messages & other texting issues

In this post, I’ll tell you how to Fix HTC 10 that won’t send text messages & other texting issues. Previously I’ve covered fix HTC 10 that won’t connect to Wi-Fi & other internet issuesHTC 10 is said to be the best device of HTC after HTC M 8, I’ve been receiving tons of emails on HTC 10 texting issues, Let’s start the method to fix HTC 10 that won’t send text messages.

fix HTC 10 that won’t send text messages

Fix HTC 10 that won’t send text messages & other texting issues:

Following is the list of the issue that we’ll address.

  • Fix HTC 10 that won’t send text messages 
  • Fix “Unfortunately, Messages has stopped” that causes the phone to freeze or reboot.
  • HTC 10 that cannot receive SMS but can send text messages just fine
  • HTC 10 cannot send and receive picture messages, group conversations or MMS.

1#: Fix HTC 10 that won’t send text messages:

First you should check Message Center Number, if you are using a carrier device then go online and check the message center number on their website, compare it with yours. If your message center number is not right ” correct it ” and if it’s right one the follow the instruction below.

  • Turn off your device.
  • Press and hold volume down button.
  • Press+hold power key and release it when your device vibrates. But don’t let go off volume down button.
  • As you see a black screen with red and blue line of texts appears, let go the volume down key.
  • You’ll see a list of options, use the volume down button to highlight “reboot to bootloader” and press the Power key to confirm it.
  • Wait for few seconds, now as the white screen appears, use the volume down button and highlight the option “BOOT TO RECOVERY MODE” and press the Power key to select it.
  • Once you are in recovery menu, use the volume down key to highlight “wipe data/factory reset” and use power key to select it.
  • Wait for wiping process to completed and then choose “reboot system now”.

2#: Fix “Unfortunately, Messages has stopped” that causes the phone to freeze or reboot.

  • Go to your HTC 10 home screen, Tap on Apps icon.
  • Now Tap on Settings.
  • You’ll see a list of different options, Scroll down to ‘Phone’ section and then tap Apps.
  • Search for Messages, Tap on Storage.
  • Tap Clear Cache and then Clear Data.
  • Now Tap OK.

Method#2:

Wipe the cache partition to force the system to create new caches:

  • Turn off your device.
  • Press and hold volume down button.
  • Press+hold power key and release it when your device vibrates. But don’t let go off volume down button.
  • As you see a black screen with red and blue line of texts appears, let go the volume down key.
  • You’ll see a list of options, use the volume down button to highlight “reboot to bootloader” and press the Power key to confirm it.
  • Wait for few seconds, now as the white screen appears, use the volume down button and highlight the option “BOOT TO RECOVERY MODE” and press the Power key to select it.
  • Once you are in recovery menu, use the volume down key to highlight “wipe cache partition” and use power key to select it.
  • Wait for wiping process to completed and then choose “reboot system now”.

3#: HTC 10 that cannot receive SMS but can send text messages just fine:

  • Go to your HTC 10 home screen, Tap on Apps icon.
  • Now Tap on Settings.
  • You’ll see a list of different options, Scroll down to ‘Phone’ section and then tap Apps.
  • Search for Messages, Tap on Storage.
  • Tap Clear Cache and then Clear Data.
  • Now Tap OK.

4#: HTC 10 cannot send and receive picture messages, group conversations or MMS.:

Now this be mobile data issue or you have wrong APN settings, First check your mobile data is working fine, if not check your data bucket. Second thing you need to do is check your APN settings, if you have doubt that these are not the right ones, call your service provider and get the correct APN settings for your HTC 10.

This is all for now, I’ll keep updating this post as soon as i get new problems and their solutions.

Update OnePlus 3 to Android 6.0.1 Marshmallow CyanogenMod 13

0
Update OnePlus 3 to Android 6.0.1 Marshmallow CyanogenMod 13

It’s been a month since the OnePlus 3 is out. The OnePlus 3 has already been rooted, got a custom recovery (TWRP) and the tweaks have already started pouring in. OnePlus 3’s OS is pretty close to stock Android, but if you still wish to unleash the true power of your phone equipped with a whopping 6 GB RAM, you may checkout the CyanogenMod 13. You heard it right, the CM 13 custom ROM based on Android 6.0.1 Marshmallow is already out for the all new OnePlus 3. phpnblzg9

CyanogenMod 13 for the OnePlus 3 is already in its beta stage. It may contain a number of bugs, but if you’re an Android power user then it shouldn’t really matter to you. We are not certain if you will be able to keep this ROM as your daily driver or not, but keeping in view the top of the line specifications of this latest flagship by the Chinese manufacturer, it’s definitely a good idea to checkout what potential it has got. We’ve put together the method to update OnePlus 3 to Android 6.0.1 Marshmallow CyanogenMod 13 custom ROM in the post going down. Let’s have a look on some early preparations and start flashing this ROM.

Early preparations

  1. This guide is intended for OnePlus 3 [all variants]. Do not try this on any other phone or else you may result in bricking it.
  2. Charge your phone up to 50% to avoid power issues during ROM installation process.
  3. Backup your important contacts, call logs and sms messages. Also copy your media content to your computer.
  4. Unlock the bootloader of your OnePlus 3, install TWRP custom recovery and root it as well. Here’s the guide to do so.
  5. Create a Nandroid backup of your phone using a custom recovery.
  6. Follow this guide to the letter to avoid any mishap.

Disclaimer: Proceed at your own risk. These procedures of flashing custom ROMs are not recommended by OEMs. In case of a mishap, TechBeasts or the device manufacturer may not be held responsible.

How to Update OnePlus 3 to Android 6.0.1 Marshmallow CyanogenMod 13

  1. Make sure that your phone has a TWRP recovery with bootloader unlocked at this point.
  2. Download latest cm-13.0-20160703-UNOFFICIAL-oneplus3.zip file and copy it to your phone’s internal storage.
  3. Download ARM 64 Gapps.zip file according to your choice. Copy this file to your phone’s internal storage as well.
  4. Now boot your phone into TWRP recovery. To boot into TWRP recovery, first turn off your phone completely. Now press and hold Volume Down + Power Key to turn on your OnePlus 3. As soon as your phone’s screen turns on, leave the Power Key and keep the Volume Down Key pressed. Your device will now boot into TWRP recovery mode.
  5. Once you’re in TWRP recovery, tap “Install > Locate the ROM.zip file > flash it”.
  6. After flashing the ROM, get back to the main menu in TWRP recovery and once again tap “Install > Locate and select the Gapps.zip file > flash it”.
  7. Now from the main menu in TWRP recovery, tap “Reboot > System”.
  8. Your phone will now reboot into CyanogenMod 13 custom ROM.

That’s all. I hope that this method worked right for you. In case you’ve got any issues while flashing the ROM, reach us out through the comment box below.

Credits: Garak

Fix Samsung Galaxy S7 Edge error message “Unfortunately, Gallery has stopped”

0
Fix Samsung Galaxy S7 Edge error message “Unfortunately, Gallery has stopped”

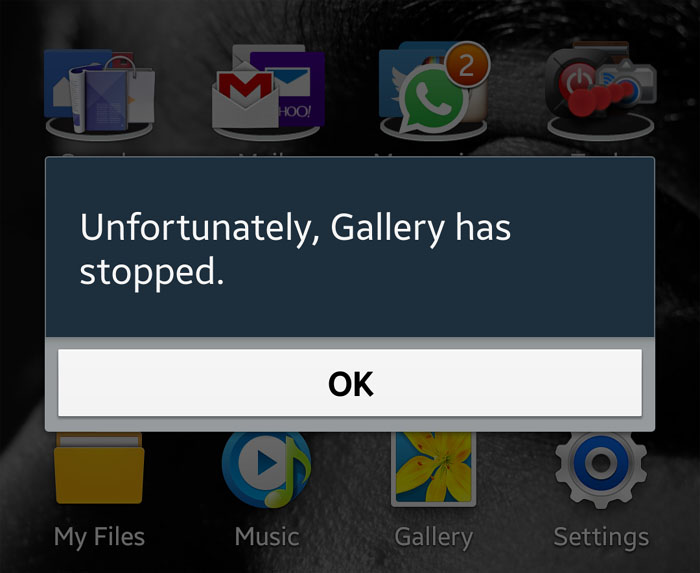
In this post, I’ll tell you how to fix Samsung Galaxy S7 Edge error message “Unfortunately, Gallery has stopped”, although I’ve already posted about how to fix Unfortunately Gallery has stopped error on Android but still i am getting emails about this issue on Samsung Galaxy S7. Let’s start guide to fix Galaxy S7 Edge error message “Unfortunately, Gallery has stopped”.

Galaxy-S7-Edge-Gallery-has-stopped

How To Fix Unfortunately Gallery has Stopped error on Android:

Before going any further you must see our ultimate guide on how to Fix ‘Unfortunately app has stopped’ errors.

Step#1: Open Settings on your Android device.

Step#2: Now tap on More tab.

Step#3: Tap on Application Manager from the list.

Step#4: Now select All Application by swipe to left.

Step#5: There you’ll see all your installed apps, Tap on Gallery.

Step#6: Now all you have to do tap on Clear Cache and Clear data.

Step#7: Now goto home screen and restart your device.

All Done ….

Method#2:

  • Turn off your device.
  • Now press and hold home+Power+Volume Up key.
  • Release the power button once you see logo, but keep holding home and Volume up keys.
  • Now when you see Android logo, let go both buttons.
  • Use the volume down button to navigate and highlight wipe cache partition.
  • Now use the power key to select the option.
  • You have to select ‘Yes‘ when you’ll be prompted to next menu.
  • Now wait for the process to be completed, once it’s done highlight ‘Reboot system now’ and press power button to select it.
  • All Done.

Method#3:

  • Turn off your device.
  • Now press and hold the power button.
  • When you see  ‘Samsung Galaxy S7 EDGE’ on your screen, let go the power button and hold volume down button.
  • You have to hold the volume down button until your device boots up and when you can see ‘Safe mode’ in the bottom left corner of the screen.

Now you’ll be in Safe Mode, open gallery app and use it for a while. If you still are getting the error “Unfortunately, Gallery has stopped”, it means you have to perform the 2nd method and if it’s working fine that means a third party app is causing the issue. You have to find that app and uninstall it.

Fix Samsung Galaxy Note 4 random reboot issue, other issues

Fix Samsung Galaxy Note 4 random reboot issue, other issues

In this post, I’ll tell you how to fix Samsung Galaxy Note 4 random reboot issue, other issues. I’ve been getting messages on my social media accounts about people are facing random reboot issues on Samsung Galaxy Note 4. Previously I’ve covered many issues on Galaxy Note 4 for e.g Fix Samsung Galaxy Note 4 problems after Marshmallow update , Fix Samsung Galaxy Note 4 Lag In Sending Text Messages Issue and more problems and more. Now Let’s us start the guide to fix Galaxy Note 4 random reboot issue.

Fix Samsung Galaxy Note 4 random reboot issue

Following is the list of all the issues that we’ll be fixing in this post.

  1. Galaxy Note 4 random reboot issue
  2. Galaxy Note 4 stuck in Samsung logo screen
  3. Galaxy Note 4 Messaging app becomes very slow after Marshmallow update
  4. Galaxy Note 4 battery percentage drops suddenly | Galaxy Note 4 freezes and shuts down on its own
  5. Galaxy Note 4 not receiving SMS

Fix Samsung Galaxy Note 4 random reboot issue, other issues:

  1. Galaxy Note 4 random reboot issue:

Now this issue can be trigger by many reasons, the following are all the reason that can cause this issue.

Incompatible update or app. Yes, it can happen, sometimes you install an app which is not compatible with your current software and it causes reboot because the environment is not suitable for that app. The second thing is that you have installed an incompatible firmware on your device which was not released for your device. To fix the problem you have to flash the supported firmware version and delete the app which is incompatible.

Malware or virus. Nowadays there are hundreds of malware and virus which are causing a lot of problems for smartphones. In order to remove the malware or virus, you have to a little bit of hard work.

  • Go to Settings.
  • Proceed to Applications.
  • Select Manage Applications.
  • Tap the Running tab.

Now in the running tab search for the app or service, you don’t recognize. Google it and check what this app or service is for, if you find out it’s irrelevant, uninstall the app.

Rare firmware glitch. It happens when you are using a carrier device. when the carrier rolled out a new update sometimes create conflicts with other apps and as a result, you start facing rebooting and freezing issues. The best solution for this kind of situation is to perform a factory reset.

Overheating. This is an issue that can cause rebooting problems on your Galaxy Note 4, overheating is a common problem for all the devices doesn’t matter its iOS, Android or any other. The best solution I can suggest you is that you should go to Samsung service center and get it fixed.

The best solution to fix Galaxy Note 4 random rebooting issue is a cache partition Wipe and Factory Reset using Recovery.

  • Turn off your device.
  • Now press and hold home+Power+Volume Up key.
  • Release the power button once you see logo, but keep holding home and Volume up keys.
  • Now when you see Android logo, let go both buttons.
  • Use the volume down button to navigate and highlight wipe cache partition.
  • Now use the power key to select the option.
  • You have to select ‘Yes‘ when you’ll be prompted to next menu.
  • Now wait for the process to be completed, once it’s done highlight ‘Reboot system now’ and press power button to select it.
  • All Done.

Factory Reset:

  • Turn off your device.
  • Now press and hold home+Power+Volume Up key.
  • Release the power button once you see logo, but keep holding home and Volume up keys.
  • Now when you see Android logo, let go both buttons.
  • Use the volume down button to navigate and highlight wipe data / factory reset.
  • Now use the power key to select the option.
  • You have to select ‘Yes‘ when you’ll be prompted to next menu.
  • Now wait for the process to be completed, once it’s done highlight ‘Reboot system now’ and press power button to select it.
  • All Done.
  1. Galaxy Note 4 stuck in Samsung logo screen
  • Turn off your device.
  • Now press and hold home+Power+Volume Up key.
  • Release the power button once you see logo, but keep holding home and Volume up keys.
  • Now when you see Android logo, let go both buttons.
  • Use the volume down button to navigate and highlight wipe cache partition.
  • Now use the power key to select the option.
  • You have to select ‘Yes‘ when you’ll be prompted to next menu.
  • Now wait for the process to be completed, once it’s done highlight ‘Reboot system now’ and press power button to select it.
  • All Done.
  1. Galaxy Note 4 Messaging app becomes very slow after Marshmallow update

Follow the instruction given in the following link.

  1. Galaxy Note 4 battery percentage drops suddenly | Galaxy Note 4 freezes and shuts down on its own
  • Turn off your device.
  • Now press and hold home+Power+Volume Up key.
  • Release the power button once you see logo, but keep holding home and Volume up keys.
  • Now when you see Android logo, let go both buttons.
  • Use the volume down button to navigate and highlight wipe cache partition.
  • Now use the power key to select the option.
  • You have to select ‘Yes‘ when you’ll be prompted to next menu.
  • Now wait for the process to be completed, once it’s done highlight ‘Reboot system now’ and press power button to select it.
  • All Done.

Factory Reset:

  • Turn off your device.
  • Now press and hold home+Power+Volume Up key.
  • Release the power button once you see logo, but keep holding home and Volume up keys.
  • Now when you see Android logo, let go both buttons.
  • Use the volume down button to navigate and highlight wipe data / factory reset.
  • Now use the power key to select the option.
  • You have to select ‘Yes‘ when you’ll be prompted to next menu.
  • Now wait for the process to be completed, once it’s done highlight ‘Reboot system now’ and press power button to select it.
  • All Done.
  1. Galaxy Note 4 not receiving SMS:

Follow the instruction in the given link.

Install Custom Recovery and Root Exynos Galaxy S7 & S7 Edge

Install Custom Recovery and Root Exynos Galaxy S7 & S7 Edge

Galaxy S7 and S7 Edge are two of the most stunning smartphones till date. These pure beasts equip might specifications packed inside a cool build and design. Both the Galaxy S7 and S7 Edge come with a QHD Super AMOLED display. The Galaxy S7 Edge variant has a curve going at both sides of the screen and the display is slightly larger than the Galaxy S7. Both these smartphones are equipped by either Qualcomm Snapdragon 820 or the Exynos 8890 CPU accompanied by Adreno 530 and Mali-T880 MP12 GPU respectively. Both these smartphones have a RAM of 4 GB and the internal storage starts from 32 GB. There is a microSD card slot as well. Galaxy S7 and S7 Edge carry a 12 MP stunning shooter at the back and a 5 MP on the front for selfies. Both these phones can be found running on Android 6.0.1 Marshmallow out of the box.samsung-galaxy-s7-edge-and-s7-feature

Owning a beast like Galaxy S7 or S7 Edge and having it not rooted means you’re missing out something. The true potential of an Android smartphone lies within the root access. If you’re an Android power user, it would be more easy for you to understand. However, if you’re not an Android power user, you may want to educate yourself that root access allows you to modify the behavior of your Android phone. It allows you to customize the performance, battery consumption and the GUI of your phone.

You can also add some new features by means of some root specific applications. Another term that’s much similar to the root access is the custom recovery, which gives you extra control of your phone. With a custom recovery installed at hand, you can back up the whole Android system, flash zip files, wipe your selected partitions and a lot more. Both the root access and custom recovery for the Galaxy S7 and S7 Edge are available now. In the following guide, we will learn how to flash the latest custom recovery (TWRP) and root the Exynos variants of the Galaxy S7 and S7 Edge.

Install Custom Recovery and Root Exynos Galaxy S7 & S7 Edge

This guide is bound to work with the following variants of the Galaxy S7 and Galaxy S7 Edge.

Galaxy S7 Galaxy S7 Edge
SM-G930F SM-G935F
SM-G930FD SM-G935FD
SM-G930X SM-G930X
SM-G930W8 SM-G930W8
SM-G930K (Korean) SM-G935K (Korean)
SM-G930L (Korean)  SM-G930L (Korean)
SM-G930S (Korean)  SM-G930S (Korean)


Early preparations

  1. Charge your Galaxy S7 or S7 Edge up to 50% to avoid power issues during the flashing process. Check your device’s model number carefully under settings > more / general > about device.
  2. Enable OEM Unlocking and also enable USB debugging mode on your phone.
  3. Get a microSD card as you will need to copy SuperSU.zip file to that, otherwise you will have to use the MTP mode while you boot up into TWRP recovery to flash copy it.
  4. Backup your important contacts, call logs, sms messages and also copy your media content to your computer as you will have to wipe your phone on the way.
  5. Uninstall/disable Samsung Kies while using Odin. Samsung Kies can hinder the connection between your phone and Odin.
  6. Use OEM data cable to establish connection between your PC and your phone.
  7. Follow these instructions to the letter to avoid any mishap during flashing process.

Downloads and installations

  • Download and install Samsung USB drivers on your PC: Download Link with Guide
  • Download and extract Odin 3.10.7 on your PC: Download Link with Guide
  • Now, download the TWRP Recovery.tar file carefully according to your device.
    • TWRP Recovery for Galaxy S7 SM-G930F/FD/X/W8: Download
    • TWRP Recovery for Galaxy S7 SM-G930S/K/L: Download
    • The TWRP Recovery for Galaxy S7 SM-G935F/FD/X/W8: Download
    • TWRP Recovery for Galaxy S7 SM-G935S/K/L: Download
  • Download SuperSU.zip file and copy it to your phone’s external SD card. If you haven’t got an external SD card, you will need to copy it to internal storage after installing TWRP recovery.
  • Download dm-verity.zip file and copy it to the extern SD card as well. Alternatively, you can also copy both these.zip files to a USB OTG if you have got one.

How to Install TWRP Custom Recovery and Root Galaxy S7 or S7 Edge now

  1. Open Odin3.exe file from the extracted Odin files that you downloaded above.
  2. Put your Galaxy S7 or S7 Edge in download mode now. To do so, turn off your phone first. Now turn it on by pressing and holding Volume Down + Power + Home button. As soon as your device boots up showing a Downloading screen, leave the keys.
  3. Connect your phone to your PC now. Odin should show an “Added” message in the logs and also show the blue light in the ID:COM box. This will verify a successful connection between your phone and your PC.
  4. Now click on the “AP” tab in Odin and select the TWRP Recovery.img.tar file according to your device carefully.
  5. The options ticked in Odin should be only “F.Reset Time“. Make sure that the Auto-Reboot option is not checked, we do not want to reboot the phone after flashing TWRP recovery.
  6. After selecting the file and checking/unchecking the options carefully, hit the start button. Odin will now flash the TWRP and show you a PASS message in a few minutes.
  7. Once done, disconnect your device from your PC now.
  8. Now you need to boot directly into TWRP Recovery. Turn off your phone completely and turn it on by pressing and holding Volume Up + Home + Power key now. Your phone should successfully boot into newly installed custom recovery.
  9. TWRP will ask you whether you want to allow modifications or not, you will need to swipe the finger to the right to enable modifications. Swiping the finger to right will trigger dm-verity, if you will need to disable it immediately. Leaving it enabled will let you boot the phone neither root it. This is important stuff since we want to be able to modify the system.
  10. Now tap “Wipe > Format Data > type “yes” to format data. This is important to disable encryption. This step will factory reset your phone, so make sure that you’ve backed up the entire data at hand.
  11. Go back to the main menu in TWRP Recovery and tap “Reboot > Recovery”. This will once again reboot your phone in TWRP.
  12. Now make sure that you’ve copied the SuperSU.zip and dm-verity.zip files in external SD Card or USB OTG, if not then transfer both these files to your external SD Card by using MTP mode in TWRP now. Once you have the files, tap “Install > locate the SuperSU.zip according to the location where you copied > flash it”.
  13. Now once again tap “Install > locate the dm-verity.zip file > flash it”.
  14. Once done flashing, reboot your phone to the system.
  15. That’s all. You’re rooted and have TWRP recovery installed. Best of luck.

That was it guys. Don’t forget to backup your EFS partition now and also create a Nandroid backup. Its’ time to unleash the true power of your Galaxy S7 and Galaxy S7 Edge. I hope that this guide proved to be fruitful for all of you. Let us know if you are stuck with something or something isn’t working right for you.

Credits: jcaduono

Maiden Legacy of the Beast for PC (Windows and Mac)

1
Maiden Legacy of the Beast for PC (Windows and Mac)

Maiden Legacy of the Beast, the all new Role Playing game from Roadhouse Games is on a full roll at the moment. This Iron Maiden music inspired game puts you in the battlefield as Eddie. Eddie’s mission is to save the universe from the evil powers. Train Eddie, sharpen his skills and unleash his powers to face off the unrelenting enemies who are behind the mission to devastate the beautiful world.  Eddie will fight with the enemies such as the Axis General, Horus and the Wickerman. If you successfully defeat any of these enemies, their souls can transform into weapons and also into allies that can be of much help on your next mission. Devise the best possible strategy to take out all the foes. Unleashing the power of your characters is the key to your success in all the battles. You will travel through time and space in this while. The sound tracks in this game are from the famous heavy metal band Iron Maiden.Maiden Legacy of the Beast for PC

Maiden Legacy of the Beast is a free to play game. You can grab it for your Android phone from the Google Play Store. If you want to play Legacy of the Beast on your computer, that is possible as well. You can play Maiden Legacy of the Beast for PC on your desktop PC/Laptop powered up with Windows Vista, 7, 8, 8.1, 10 and MacOS/OS X. For this purpose, you will need an emulator like BlueStacks, Andy OS or BlueStacks 2. Scroll down to the method now to start playing Maiden Legacy of the Beast for PC.

Download Maiden Legacy of the Beast For Windows PC & Mac

  1. Download Maiden Legacy of the Beast APK
  2. Download and install Bluestacks: Bluestacks Offline Installer | Rooted Bluestacks |Bluestacks App Player
  3. Once you’ve installed Bluestacks, double click the downloaded Maiden Legacy of the Beast APK.
  4. The APK will be installed using Bluestacks, once installed open Bluestacks and locate the recently installed Maiden Legacy of the Beast.
  5. Click the Maiden Legacy of the Beast icon to open it, follow the on-screen instructions to play it.

You can also use Andy OS to install Maiden Legacy of the Beast, here’s the tutorialHow To Run Android Apps On Mac OS X With Andy.

The Andy OS tutorial explains how to play a game on your Mac OSX, but the same guide will also work for a Windows PC.

That’s all. In case you’re stuck with anything, reach us out through the comment box below.

Pokemon Go for PC Download – Windows/Mac

7
Pokemon Go for PC Download – Windows/Mac

In this post, I’ll tell you how to download and install Pokemon Go for PC running Windows and Mac.

The pro-long wait is over guys! The highly anticipated and the most awaited game of the year, Pokemon Go is finally out. You’re all set to capture the Pokemon now. The game puts you in the field with a task of discovering and capturing Pokemons who have just made their way to the planet earth. The game makes the use of your device’s camera and sensors. The target Pokemon is lying somewhere around you and it will eventually show up on your screen, you’ve to move to that location and capture it. Collecting many Pokemons of the same kind will let you evolve them into a more powerful Pokemon. Let’s start the method on how to install Pokemon Go for PC.

Pokemon Go for PC

You can install and play Pokemon Go for PC on your Windows Vista, Windows 7, Windows 8, Windows 8.1, Windows 10 Laptop/Desktop PC and also a Mac OS X powered Macbook Pro, Macbook Air or iMac. You will need an Android emulator like BlueStacks or Andy running on your computer for this purpose. The guide following your way down is all set to explain the method. Have a look on it now and start playing Pokemon Go for PC.

Download Pokemon Go For Windows PC & Mac

  1. Download Pokèmon Go APK.
  2. Download and install Bluestacks: Bluestacks Offline Installer | Rooted Bluestacks |Bluestacks App Player
  3. Once you’ve installed Bluestacks, double click the downloaded Pokemon Go APK.
  4. The APK will be installed using Bluestacks, once installed open Bluestacks and locate the recently installed Badland 2.
  5. Click the Pokemon Go icon to open it, follow the on-screen instructions to play it.

You can also use Andy OS to install Pokemon Go, here’s the tutorialHow To Run Android Apps On Mac OS X With Andy

The Andy OS tutorial explains how to play a game on your Mac OSX, but the same guide will also work for a Windows PC.

That’s all. In case you’re stuck with anything, reach us out through the comment box below.