Home Blog Page 310

Fix iPhone Rebooting Randomly Overnight Problem After Jailbreak

0
Fix iPhone Rebooting Randomly Overnight Problem After Jailbreak

Till now there are many peoples who have Jailbroken their Apple devices using Pangu Tool. Jailbreaking is fun because we can bypass Apple security and easily install third-party apps, tweaks and much more. But as we all know freedom has its price, I have seen many people are reporting about “ iPhone Rebooting Randomly Overnight Problem After Jailbreak “. So there is no need to worry, follow the steps below to fix iPhone Rebooting Problem After Jailbreak. 

Fix iPhone Rebooting Randomly Overnight Problem After Jailbreak

Fix iPhone Rebooting Randomly Overnight Problem After Jailbreak:

This method is only for Jailbreak devices, If you facing this issue on non-Jailbreak devices then you have to check our Tips and Tricks section in order to fix rebooting issue.

  • Before going any further, make sure your device is in Jailbreak State.
  • On your iPhone launch Cydia app.
  • When Cydia app is launched, wait for few seconds and let it refresh.
  • Tap on Sources tab.
  • Now you have to add the following repository source. https://codyqx4.github.io/cydia.
  • Once the repo has been added, reload Cydia.
  • Now located the recently added repository, Tap on it to view the packages it contains. Find “iOS 9 Reboot Fix“.
  • Once you locate iOS 9 Reboot Fix“. Tap on it to install.
  • Wait for the installation process to be completed.
  • When the package is installed, respring the device if requested.

This is all, But keep that in mind this is not a proper solution. Pangu team is looking into this issue and soon they’ll give us an update to fix this issue. Meanwhile, our team is looking for more suitable solution so bookmark this post and keep check for the update.


How To Fix “Invalid Recipient” Message on Android Devices

In this Post, I’ll tell you how to Fix “Invalid Recipient” Message on Android devices, Many of us have faced this issue while we are texting on our Android devices. When we are trying to add a contact in our message app “Invalid recipient — Unable to add this recipient. The recipient’s number is not valid.” this error message pops-up.

How To Fix “Invalid Recipient” Message on Android Devices:

Now to fix this issue you have to follow the steps below, there is no rocket science in it. There is no need to change anything or install a third-party app to Fix “Invalid Recipient” Message on Android Devices.

  • Open Contact app, locate the number and Tap on it.
  • Here you’ll see many options, Tap on Edit located on the right side of the screen.
  • Now, number looks correct, but sometimes the problem is often caused by spaces or invalid characters.
  • Remove all the hyphens, spaces or brackets from the phone number. Tap on Save.
  • All Done.

Before doing anything please follow the steps in order to ensure that you won’t face Invalid Recipient message error again.

How to fix “Invalid Recipient” Message on Android Devices:

Step#1: Open Settings on your Android device.

Step#2: Now tap on More tab.

Step#3: Tap on Application Manager from the list.

Step#4: Now select All Application by the swipe to left.

Step#5: There you’ll see all your installed apps, Tap on Contacts.

Step#6: Now all you have to do tap on Clear Cache.

Step#7: Now goto home screen and restart your device.

All Done ….

How to Backup/Restore EFS and IMEI on Galaxy S7, Galaxy S7 Edge

0
How to Backup/Restore EFS and IMEI on Galaxy S7, Galaxy S7 Edge

Galaxy S7 and S7 Edge are around for more then 6 months now. Both these devices have been rooted, received a custom recovery and there is a number of custom stuff floating in. That means you can start tweaking your handset and get the most out of it. When it comes to flashing custom files on your smartphone and smartphone like Galaxy S7 or S7 Edge which costs you a portion of your salary, you have to make sure that you play safe. Taking precautionary measures can lead to a successful experiment on your device. Having backed up your data, radio partitions, contacts, call logs and everything puts you on a much safer end. In case something messes up, you can restore the lost data right away.s7angle-930x621.0.0

There’s another catch with the Galaxy smartphones. Samsung’s Galaxy smartphones use EFS partition for maintaining the IMEI, NVRAM, Radio data and WiFi / Bluetooth Mac Addresses. This partition is quite sensitive and can be tampered upon flashing a wrong file or even while trying to downgrade a device. Tampered EFS partition means it easily gets corrupt. The EFS partition gone corrupt means your cellphone is no longer capable of its GSM connectivity. It won’t make any calls, won’t send any text messages, it will not detect the SIM card and it might end up changing your phone’s IMEI to null. For this reason, the very first thing should do right after rooting your Samsung Galaxy handset is to backup the EFS and all other sensitive partitions and then you’re free to do anything of your choice.

As we mentioned, both the Galaxy S7 and S7 Edge have been rooted, now you should backup the EFS partition before you begin to flash any custom ROM. After giving a try to EFS backup application, we’ve come up with the method here. Let’s go ahead now and learn How to Backup/Restore EFS and IMEI on Galaxy S7, Galaxy S7 Edge

Here are some pre-requisites and precautions.

How to Backup EFS/IMEI partition on Samsung Galaxy S7 or S7 Edge

  1. Make sure that you’ve rooted your device.
  2. Now download and install Wanam’s Partitions Backup application on your device.
  3. Open the application now and grant SuperSu rights.
  4. Now click the small tool settings button at the top besides the information button and select the format in which you want to backup the EFS partition. (select .tar and .img formats)
  5. Now from the partitions list select EFS and RADIO  partition.
  6. Now tap the small arrow in the circle at the lower right corner.
  7. It will prompt a confirmation message, tap BACKUP here.
  8. That’s all. You will have your EFS files in the “Partitions Backup” folder located in your internet storage.

How to Restore EFS/IMEI partition on Samsung Galaxy S7 or S7 Edge

  1. If you have accidentally corrupted your EFS partition, you can simply restore it using the same application.
  2. Make sure that you have already backed up the EFS partition in .img format.
  3. Now open the partitions backup application and tap the small options button at the top right corner.
  4. Select restore a partition, and then select your radio and efs.img files from the partitions backup folder inside your internal storage.
  5. Once you’ve selected the files, follow on-screen instructions to restore your lost IMEI.
  6. That’s all.

Screenshot_2015-05-05-00-24-22 Screenshot_2015-05-05-00-26-56Screenshot_2015-05-05-00-26-48

Download Artisto for PC (Windows and Mac)

0
Download Artisto for PC (Windows and Mac)

Artisto is the Art Video Editor which just made its way to the Apple and iOS app stores 3 days ago. Artisto does to videos what Prisma does to photos. It adds prismatic effects to your videos and makes them look fabulous. Artisto comes from My.com B.V group, the guys who are behind some famous titles like Jaggernaut Wars and Jungle Clash. It looks like Artisto has taken the opportunity which Prisma missed and introduced something completely different into app world of Android and iOS. If you’re a video editing freak and like to take your videos to a whole new level then Artisto might be of some help.Artisto for PC

Artisto brings various filters to help you turn your videos into blockbusters. Artisto promises to provide you the artwork which was only available to companies like Pixar, Disney and others. Like Prisma, Artisto allows you to change your world into artwork similar to the artwork of Dali, Picasso, Van Gogh and other such famous artists. Artisto carries almost all filters for your vidoes that Prisma carries for pictures. Artisto is quite a new application, the application is not well-known at the moment but keeping in view its functionality we hope to see it rising soon. Artisto is available for Android and iOS platforms at the moment, but you can also get this on your computer by playing a nifty trick.

Artisto for PC can be installed and used on a computer powered up with Windows XP/7/8/8.1/10 and Mac OS X powered Macbook/iMac. You will have to install an Android emulator like BlueStacks or Andy to run Artisto for PC and that’s all. Let’s have a look on how to get Artisto for PC now.

Download Artisto For Windows PC & Mac

  1. Download Artisto APK
  2. Download and install Bluestacks: Bluestacks Offline Installer | Rooted Bluestacks |Bluestacks App Player
  3. Once you’ve installed Bluestacks, double click the downloaded Artisto APK.
  4. The APK will be installed using Bluestacks, once installed open Bluestacks and locate the recently installed Artisto.
  5. Click the Artisto icon to open it, follow the on-screen instructions to play it.

You can also use Andy OS to install Artisto, here’s the tutorialHow To Run Android Apps On Mac OS X With Andy

The Andy OS tutorial explains how to play a game on your Mac OSX, but the same guide will also work for a Windows PC.

That’s all. In case you’re stuck with anything, reach us out through the comment box below.


How to remove Prisma watermark from photos

0
How to remove Prisma watermark from photos

Prisma and Pokemon Go are the two Android and iOS applications that everyone is probably using and playing now a days. The former brings a unique artwork to your pictures and the later brings a new concept into the gaming world. Prisma’s fever is on the rise at the moment. Prisma changes your pictures into fantastic artwork. The application is inspired by nature, artwork of famous artists etc. Prisma brings numerous filters that completely change the way your pictures look.

The photo application Prisma differs from ordinary photo editing applications in a way that it doesn’t bring those usual photo-filters back to your pictures, but it has something entirely different to offer. Prisma doesn’t edit your pictures on the go in the application, it uses its servers instead. Whenever you capture a picture and start applying filters, it is uploaded to Prisma’s server and that’s where the game is actually played.

Prisma adds its watermark to all the pictures that you edit using this application. Prisma doesn’t require you to pay for removing this watermark. We would like to shed the credits on Prisma’s generosity that it allows you to disable the watermark from its settings located a tap away in the application. In case you don’t want to show off that you have edited your pictures using Prisma, you can simply disable this watermark and upload your pictures on your social media channels without Prisma’s logo. Let’s have a look on How to remove Prisma watermark from photos.

How to remove Prisma watermark from photos

13918915_10209308911812458_499904753_o-horz

  1. Open Prisma application on your Android or iOS device.
  2. Tap the small settings gear icon located on the right in the middle of the screen.
  3. In the settings, the third option is to disable or enable Prisma watermark which goes by “Add watermark”. By default it should be enabled.
  4. Now tap this button to disable it.
  5. Edit your pictures now and you should not find the logo on the pictures anymore. That’s all.

How to Fix Pokemon Go Pokestop not Spinning or not Working

0
How to Fix Pokemon Go Pokestop not Spinning or not Working

Are you caught in a frustrating situation where you’re not being able to spin your Pokestop? In simple words, are you one of the players who has been caught up by Niantic for trying a dirty trick to move ahead in Pokemon Go? Well, Niantic is more then active on capturing players cheating around and teaching them a listen right away. Pokemon not spinning means you’re soft banned from the game and now it depends on Niantic when they lift up your ban and let you play the game once again. If you’re going through such an issue, then at first, you should be thankful to God that you’re only soft banned and its something which you can get rid off. And then you should be glad to know that you’ve already spotted the right place to get rid of this issue.Pokémon-Go-logo-620x389

After giving a try to a nifty-trick, we’ve managed to get rid of the Pokestop not spinning issue. You can give it a try and start playing your game once again right now. Let’s have a look on how to fix Pokemon Go Pokestop not spinning or not working issue.

How to Fix Pokemon Go Pokestop not Spinning or not Working

Alliance-Church-Pokestop-DAGeeks-e1468202170110

  1. Make sure that you’re connected to the internet and you can open Pokemon Go.
  2. Now open the Pokemon Go game in your phone.
  3. Find a local Pokestop around.
  4. Tap the Pokestop and it will open the Pokestop screen with its name and its picture in the circle.
  5. Try spinning the circle, if the circle doesn’t spin that means you’re banned.
  6. Now get back to the game by pressing the back key and tap the Pokestop again, it won’t spin again.
  7. Repeat this same process for 40 times, in the 41st spin, the Pokestop will start spinning and your ban will be lifted up.
  8. That’s all. Let us know if this works for you or not. Best of luck.

Some more guides for Pokemon Go:

Root Galaxy S5 Android 6.0.1 Marshmallow and Install TWRP Recovery

38
Root Galaxy S5 Android 6.0.1 Marshmallow and Install TWRP Recovery

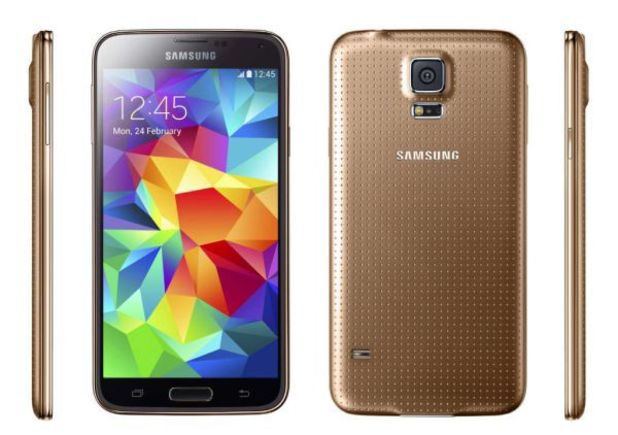
Samsung Galaxy S5 was updated to Android 6.0.1 Marshmallow few months back. Almost all variants of the Galaxy S5 are now enjoying the Marshmallow firmware. Galaxy S5’s Marshmallow update has given this device a new life. The new UI seems quite cool, new features have freshened up this device. Android power users, who had their devices rooted prior to the Marshmallow update, they’ve probably lost the root access, custom recovery and all the custom changes after updating to official Android 6.0.1 Marshmallow firmware. If you’re one of such power users and now you want the root access and custom recovery back on your Galaxy S5 then you have already spotted the right place.galaxy-s5-gold

The guide going down illustrates how you can re-gain the root access on your Galaxy S5 running Marshmallow. You will also learn how you can flash latest TWRP custom recovery so that you can flash all things custom on your device once again. The guide works for all variants of the Galaxy S5. You need to follow the guide carefully and you are all good to go with it.

Some things to keep in mind

  1. This guide is intended for the Galaxy S5s listed below only. Do not try this on any other device or else you may result in bricking it.
  2. Charge your phone up to 50% to avoid power issues during flashing process.
  3. Enable USB Debugging and OEM Unlocking on your device if you have developer options accessible. If your device is stuck in a particular mode, then skip this step.
  4. Backup your important Contacts, Call Logs and SMS messages just to be on a safe side.
  5. Turn off Samsung Kies in your computer if you have opened it.
  6. Disable any Anti-virus and also your Firewall if enabled.
  7. Use OEM data cable to establish connection between your PC and your phone.
  8. Follow this guide to the letter to avoid mishap.

Disclaimer: The methods mentioned in the succeeding guide are highly custom. Such installations are not recommended by device manufacturers. In case a mishap occurs, we or the device manufacturers may not be held responsible. Make sure that you’re doing everything at your own risk.

Required Downloads

  • Samsung USB Drivers – Download and Install
  • Odin3 Flashtool – Download and Extract
  • CF-Autoroot according to your device:- Download and Extract to get .tar file.
  • Download latest TWRP Recovery.img.tar according to your device:
    • International, Americas, and Oceanic (SM-G900F, SM-G900W8, SM-G900T, SM-G900M, SM-G900P, SM-G900V, SM-G900I):  Download
    • International Duos (SM-G900FD): Download 
    • China & China Duos (SM-G9006V, SM-G9008V, SM-G9006W, SM-G9008W, SM-G9009W): Download
    • Japan (SCL23, SC-04F): Download
    • Korea (SM-G900K, SM-G900L, SM-G900S): Download

How to Root Samsung Galaxy S5 Android 6.0.1 Marshmallow

  1. Open Odin3 V3.10.7.exe that you extracted on your PC.
  2. Put your phone in download mode now. To do so, turn it off completely. Now turn it on by pressing and holding Volume Down + Home + Power Key. Once your phone boots up, press the Volume Up key to continue.
  3. Connect your phone to your PC now. The ID:COM box in the top-left corner of Odin3 should  turn blue. This indicates that your phone is connected properly.
  4. Now click the “AP” tab in Odin and select the CF-Autoroot.tar file. It will take a second or two for Odin3 to load this file.
  5. If the Auto-reboot option is ticked, untick it. Leave all other options in Odin3 as they are.Odin 3.10.6 Explained_Techbeasts
  6. Now you’re all set to flash the root file. Just click the start button in Odin3 and sit back.
  7. Once the process box above ID:COM box shows green light and flashing process is finished, disconnect your device.
  8. Reboot your phone manually now. You can do by pulling out the battery, put it back again and turn on your device.
  9. Checkout the SuperSu in application drawer. Also install BusyBox from Play Store.
  10. Verify root access using Root Checker.
  11. That’s all. You’re now set to unleash the open source nature of Android.

How to install TWRP Recovery on Samsung Galaxy S5 Android 6.0.1 Marshmallow

  1. Open Odin3 V3.10.7.exe that you extracted on your PC.
  2. Put your phone in download mode now. To do so, turn it off completely. Now turn it on by pressing and holding Volume Down + Home + Power Key. Once your phone boots up, press the Volume Up key to continue.
  3. Connect your phone to your PC now. The ID:COM box in the top-left corner of Odin3 should  turn blue. This indicates that your phone is connected properly.
  4. Now click the “AP” tab in Odin and select the twrp-xxxxxx.img.tar file. It will take a second or two for Odin3 to load this file.
  5. If the Auto-reboot option is ticked, untick it. Leave all other options in Odin3 as they are.Odin 3.10.6 Explained_Techbeasts
  6. Now you’re all set to flash the recovery. Just click the start button in Odin3 and sit back.
  7. Once the process box above ID:COM box shows green light and flashing process is finished, disconnect your device.
  8. Now pull out the battery of your phone to turn it off.
  9. Put the battery back and turn on your device into recovery mode. To do so, press and hold Volume Up + Power + Home Keys altogether. Your device will boot up into the recovery mode.
  10. You can do whatever you wish to do using the custom recovery now. Best of luck.

Just in case you’re facing any difficulties following this procedure or you’re stuck with something, feel free to reach me out in the comment box below. Thank you.

Install TWRP Recovery on Sprint Galaxy S5 G900P and Root it

0
Install TWRP Recovery on Sprint Galaxy S5 G900P and Root it

Samsung Galaxy S5 is one of those lucky devices which have tasted the Marshmallow firmware. We all know that Samsung really sucks when it comes to updating its devices to further version of Android. Keeping that in mind, we can say that the Galaxy S5 Marshmallow update is not less than a blessing.

This device got the update pretty late but at least it was updated. Galaxy S5’s almost all variants have been updated to the Marshmallow firmware. Carrier branded Galaxy S5 have also got the firmware. Sprint’s Galaxy S5 is also enjoying it at the moment.maxresdefault
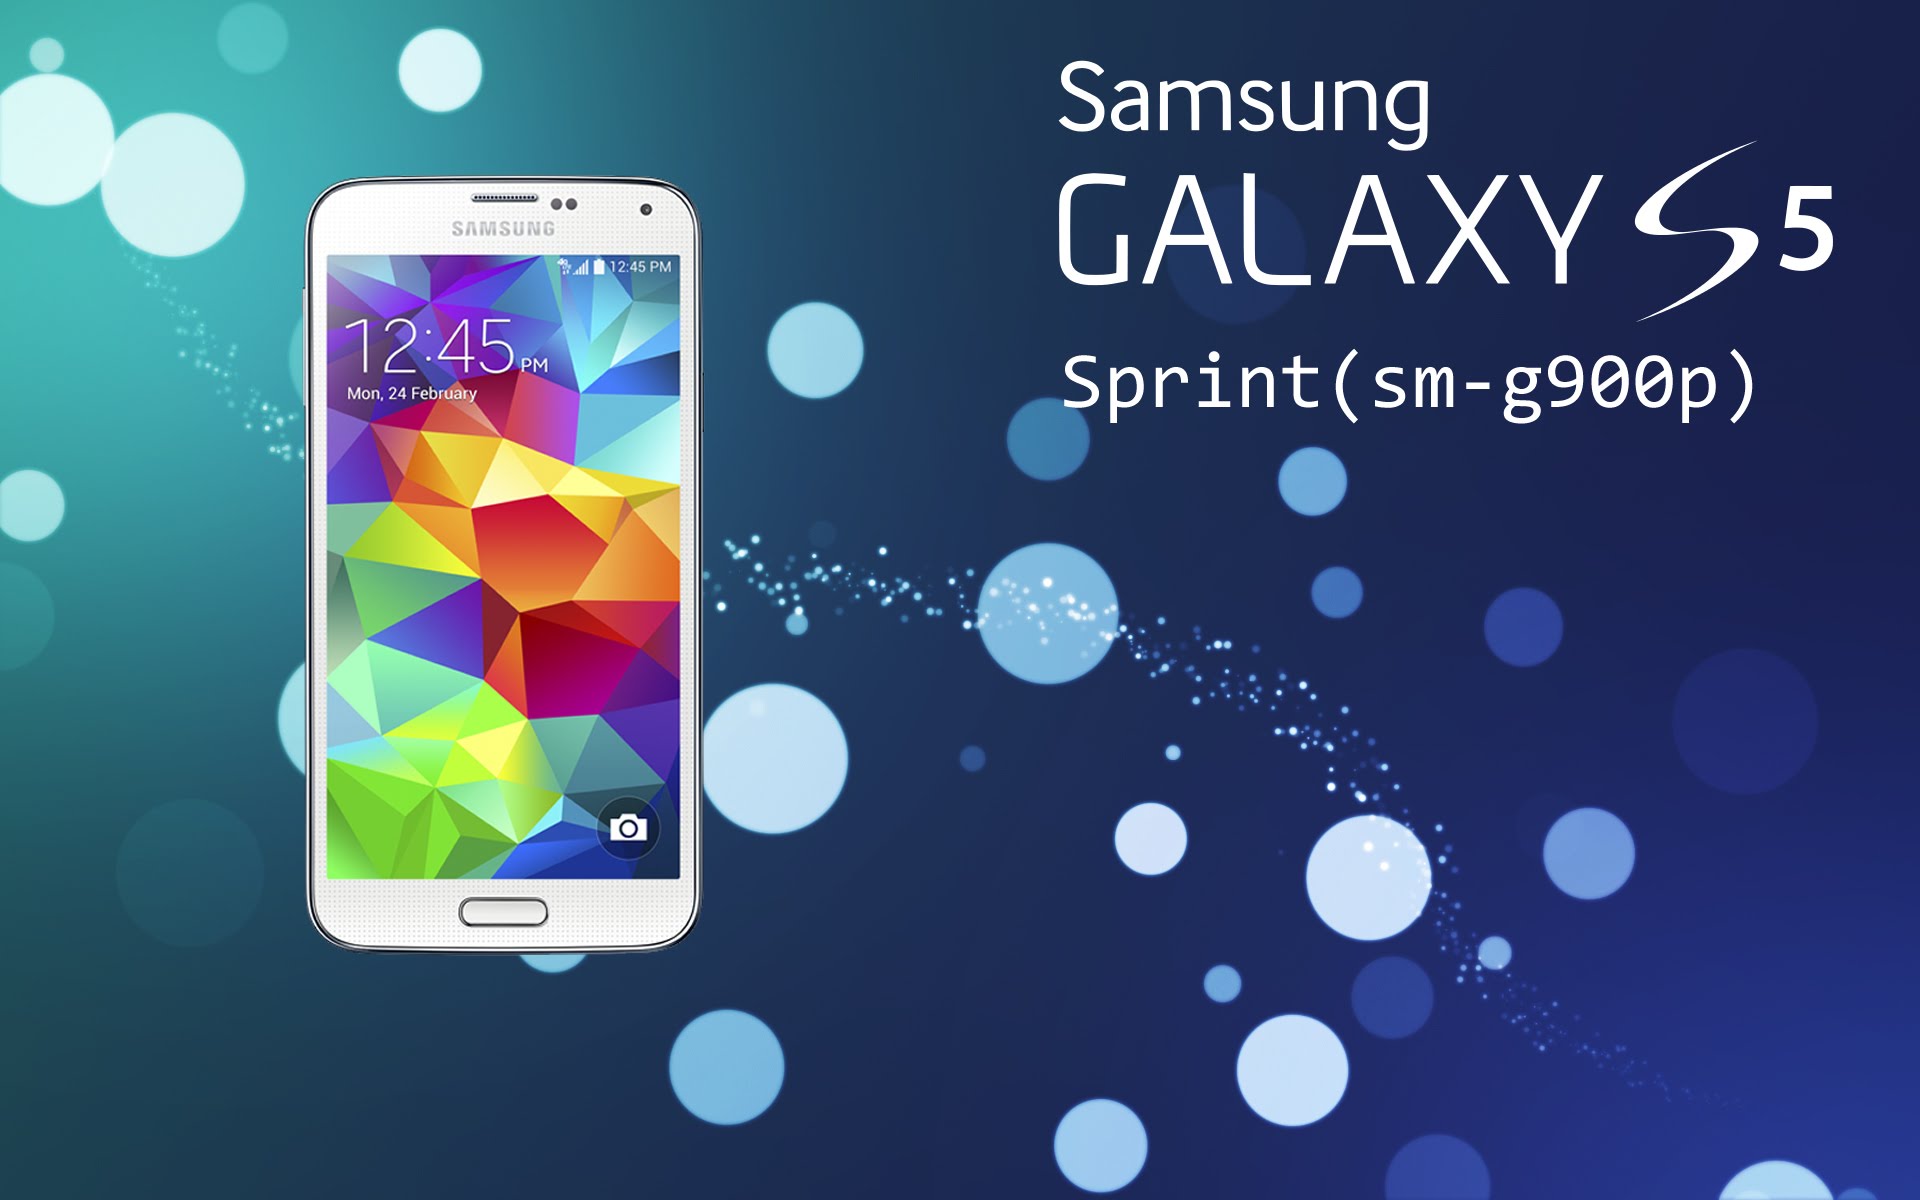
If you own a Sprint-branded Galaxy S5 which goes by the model number SM-G900P, and you have recently updated it to Marshmallow, chances are; you have lost the root access. Now if you’re wishing to gain the root access once again, you will have to follow the root procedure from scratch.

Alongside the root access, you may want to flash a custom recovery i.e. TWRP recovery on your GS5 for flashing zip files, backing up data, wiping Dalvik cache and a lot more. To help our beloved users owning a Sprint GS5 G900P, we have compiled this guide to root your phone and then flash a TWRP. In the first step, we will root the device and in the next half, we will flash TWRP custom recovery. Let’s go through the guide now.

Install TWRP Recovery on Sprint Galaxy S5 G900P and Root it

Some things to keep in mind

  1. This guide is intended for the Sprint Galaxy S5 only. Do not try this on any other device or else you may result in bricking it.
  2. Charge your phone up to 50% to avoid power issues during flashing process.
  3. Enable USB Debugging and OEM Unlocking on your device if you have developer options accessible. If your device is stuck in a particular mode, then skip this step.
  4. Backup your important Contacts, Call Logs and SMS messages just to be on a safe side.
  5. Turn off Samsung Kies in your computer if you have opened it.
  6. Disable any Anti-virus and also your Firewall if enabled.
  7. Use OEM data cable to establish a connection between your PC and your phone.
  8. Follow this guide to the letter to avoid a mishap.

Disclaimer: The methods mentioned in the succeeding guide are highly custom. Such installations are not recommended by device manufacturers. In case a mishap occurs, we or the device manufacturers may not be held responsible. Make sure that you’re doing everything at your own risk.

Required Downloads

  • Samsung USB Drivers – Download and Install
  • Odin3 Flashtool – Download and Extract
  • CF-Autoroot for G900P – Download and Extract to get a .tar file.
  • TWRP Recovery.img.tar – Download

How to Root Samsung Galaxy S5 G900P Android 6.0.1 Marshmallow

  1. Open Odin3 V3.10.7.exe that you extracted on your PC.
  2. Put your phone in download mode now. To do so, turn it off completely. Now turn it on by pressing and holding Volume Down + Home + Power Key. Once your phone boots up, press the Volume Up key to continue.
  3. Connect your phone to your PC now. The ID:COM box in the top-left corner of Odin3 should turn blue. This indicates that your phone is connected properly.
  4. Now click the “AP” tab in Odin and select the CF-Autoroot.tar file. It will take a second or two for Odin3 to load this file.
  5. If the Auto-reboot option is ticked, untick it. Leave all other options in Odin3 as they are.Odin 3.10.6 Explained_Techbeasts
  6. Now you’re all set to flash the root file. Just click the start button in Odin3 and sit back.
  7. Once the process box above ID:COM box shows a green light and flashing process is finished, disconnect your device.
  8. Reboot your phone manually now. You can do by pulling out the battery, put it back again and turn on your device.
  9. Check out the SuperSu in the application drawer. Also, install BusyBox from Play Store.
  10. Verify root access using Root Checker.
  11. That’s all. You’re now set to unleash the open source nature of Android.

How to install TWRP Recovery on Samsung Galaxy S5 G900P Android 6.0.1 Marshmallow

  1. Open Odin3 V3.10.7.exe that you extracted on your PC.
  2. Put your phone in download mode now. To do so, turn it off completely. Now turn it on by pressing and holding Volume Down + Home + Power Key. Once your phone boots up, press the Volume Up key to continue.
  3. Connect your phone to your PC now. The ID:COM box in the top-left corner of Odin3 should turn blue. This indicates that your phone is connected properly.
  4. Now click the “AP” tab in Odin and select the twrp-xxxxxx.img.tar file. It will take a second or two for Odin3 to load this file.
  5. If the Auto-reboot option is ticked, untick it. Leave all other options in Odin3 as they are.Odin 3.10.6 Explained_Techbeasts
  6. Now you’re all set to flash the recovery. Just click the start button in Odin3 and sit back.
  7. Once the process box above ID:COM box shows a green light and flashing process is finished, disconnect your device.
  8. Now pull out the battery of your phone to turn it off.
  9. Put the battery back and turn on your device into recovery mode. To do so, press and hold Volume Up + Power + Home Keys altogether. Your device will boot up into the recovery mode.
  10. You can do whatever you wish to do using the custom recovery now. Best of luck.

Just in case you’re facing any difficulties following this procedure or you’re stuck with something, feel free to reach me out in the comment box below. Thank you.

How to Unban a Banned Pokemon Go Account

0
How to Unban a Banned Pokemon Go Account

Pokemon Go is sitting atop of all the charts of Android and iOS applications at the moment. The game is yet to make its way to some countries. It’s release is taking time to hit different regions because of the server load on Niantic’s servers. Pokemon Go’s craze is getting onto the new peaks every single minute. Players are enjoying this game and competing with one another and trying hard to beat each other’s level. There came a number of applications in the Google Play Store that acted more like a Pokemon Go assistant. Pokemon Go maps, Pokestop tracking applications and many other such apps helped players to boost up their game play. Niantic took an actin against these applications and removed them all with the help of Google from the Google Play Store, but this didn’t stop the Pokemasters from trying dirty tricks to beat one in another on the rank-charts of Pokemon Go.niantic-taking-requests-for-new-gyms-and-pokestop-for-pokemo_xwnj.640

While trying to prove others that they are better at playing Pokemon Go, people have got their Pokemon Go accounts banned. Let’s not talk about the cheats or the tricks that have actually tricked you getting banned, but talk about the solution now. We are talking about a soft-ban here, we in no way mean to help you un-ban yourself from a hard-ban. A soft ban simply means the Pokestop doesn’t spin when you reach it and try spinning it, it won’t work and won’t show you any Pokemon or anything at all. To get rid of this, you’ve to play a little trick that we have just come across. Let’s have a look on how to lift up the soft-ban from your banned Pokemon Go account.

How to Unban a Banned Pokemon Go Account

Alliance-Church-Pokestop-DAGeeks-e1468202170110

  1. Make sure that you’re connected to the internet and you can open Pokemon Go.
  2. Now open the Pokemon Go game in your phone.
  3. Find a local Pokestop around.
  4. Tap the Pokestop and it will open the Pokestop screen with its name and its picture in the circle.
  5. Try spinning the circle, if the circle doesn’t spin that means you’re banned.
  6. Now get back to the game by pressing the back key and tap the Pokestop again, it won’t spin again.
  7. Repeat this same process for 40 times, in the 41st spin, the Pokestop will start spinning and your ban will be lifted up.
  8. That’s all. Let us know if this works for you or not. Best of luck.

Some more guides for Pokemon Go:

PokeWhere Live Radar for PC Download

0
PokeWhere Live Radar for PC Download

More news apps are coming to help you while playing Pokemon Go, Today I’ve another app which will show you the location of Pokemon around you in real-time on a map. Consider PokeWhere Live Radar a real-time radar which tells where you have to go to catch the Pokemon and whether you believe it or not these apps do help. Now as we all know everyone wants to go out and catch them all, that’s why we have told you how you can install Pokemon Go for PC and in this post, I’ll tell you how to download and install PokeWhere Live Radar for PC running Windows and Mac. Follow the instruction below in order to install PokeWhere Live Radar for PC.

PokeWhere Live Radar for PC

PokeWhere Live Radar for PC can be installed and used on a computer powered up with Windows (XP/7/8/8.1/10) Desktop PC/Laptop and MacOS/OS X powered MacBook Air, MacBook Pro, and iMac. In order to be able to get PokeWhere Live Radar for PC, you need an Android emulator like BlueStacks or Andy OS. We have this guide going down explaining the method to grab PokeWhere Live Radar for PC right away.

Download PokeDetector For Windows PC & Mac

  1. PokeWhere Live Radar APK.
  2. Download and install Bluestacks: Bluestacks Offline Installer | Rooted Bluestacks |Bluestacks App Player
  3. Once you’ve installed Bluestacks, double-click the downloaded PokeWhere Live Radar APK.
  4. The APK will be installed using Bluestacks, once installed open Bluestacks and locate the recently installed PokeWhere Live Radar.
  5. Click the PokeWhere Live Radar icon to open it, follow the on-screen instructions to use it.

You can also use Andy OS to install PokeWhere Live Radar, here’s the tutorialHow To Run Android Apps On Mac OS X With Andy

The Andy OS tutorial explains how to play a game on your Mac OSX, but the same guide will also work for a Windows PC.

That’s all. In case you’re stuck with anything, reach us out through the comment box below.

Fix GPS Signal Not Found Error in Pokemon GO

0
Fix GPS Signal Not Found Error in Pokemon GO

A few days back when Pokemon Go madness has begun, our team posted about few issue that users were facing. Today we’ve got another issue that is taking a lot of heat, so as always we are here to help. In this post, I’ll tell you how you can fix GPS Signal Not Found Error in Pokemon GO. Well if you are facing this issue while playing Pokemon Go then my friend you are not having a really good time. Now let’s start the guide on how to fix GPS Signal Not Found Error in Pokemon GO. Following are few informative links you might want to see.

Read more:

Fix GPS Signal Not Found Error in Pokemon GO

Fix GPS Signal Not Found Error in Pokemon GO:

Now when you start searching for solutions in order to fix Fix GPS Signal Not Found Error in Pokemon GO, you’ll get a lot of fixes but trust me you don’t need to do anything just follow the steps below and you’ll get the best results.

  • Firstly, Go to settings on your Android device.
  • Now scroll down to look for privacy and safety, Tap on it. ( If you are running old Android version try tabs in settings to locate privacy and safety).
  • There you have to enable location option, Tap on location to turn it on.
  • Now that you have enabled your location, I hope you won’t be seeing GPS signal not found error.

IF after trying this method you are still facing GPS signal not found error. Follow the steps below.

Clear Pokemon Go Data and Cache.

  1. One your Android device, open Settings > Applications / Applications Manager > All Apps
  2. Scroll all the way down and locate Pokemon Go.
  3. Tap Pokemon Go to open it settings.
  4. If you’re using Android Marshmallow or higher, you will have to tap Pokemon Go > Storage to open cache and data options.
  5. Now tap Clear Data and Clear Cache.
  6. Now restart your Android device now.
  7. Once done, open Pokemon Go and the issue should have been resolved by now.

Try Deleting System Cache:

  • Turn off your Android device.
  • Now press and hold home+Power+Volume Up key.
  • Release the power button once you see your device logo, but keep holding home and Volume up keys.
  • Now when you see Android logo, let go both buttons.
  • Use the volume down button to navigate and highlight wipe cache partition.
  • Now use the power key to select the option.
  • You have to select ‘Yes‘ when you’ll be prompted to next menu.
  • Now wait for the process to be completed, once it’s done highlight ‘Reboot system now’ and press power button to select it.
  • All Done.

Download iOS 9.3.4 IPSW Firmware [Direct Links]

0
Download iOS 9.3.4 IPSW Firmware [Direct Links]

Apple released the iOS 9.3.4 yesterday, Now this update is only to stop the Jailbreak that was released by the Pangu team. There is nothing new in this update, As Apple said “an important security update”. Well there are many who will update their devices to the latest iOS 9.3.4, there are two methods to do so. First, you can update your device through OTA the other one is download the iOS 9.3.4 IPSW Firmware from the following links and use iTunes to install the latest iOS 9.3.4 on your Apple devices. You can download the iOS 9.3.4 IPSW Firmware from the following links.

According to Apple’s security document: “IOMobileFrameBuffer: Available for: iPhone 4s and later, iPad 2 and later, iPod touch (5th generation) and later. Impact: An application may be able to execute arbitrary code with kernel privileges. Description: A memory corruption issue was addressed through improved memory handling. CVE-2016-4654: Team Pangu.”

There you have it, If you love Jailbreak don’t go for this update and the good news is that Pangu has released their new Jailbreak tool with English language support.

iOS 9.3.4 IPSW Firmware

Download iOS 9.3.4 IPSW Firmware: