Home Blog Page 309

Update Nexus 6 to Android 6.0.1 Marshmallow Pure Nexus ROM

0
Update Nexus 6 to Android 6.0.1 Marshmallow Pure Nexus ROM

Whenever it comes to finding a perfect and a stable custom ROM meeting all the needs of an Android power user, the best choice to go with is the ROM which gives you the complete control over its features and also the freedom to expand inside the boundaries. The Pure Nexus Project is bound to bring such stable and feature-rich ROMs for our beloved Google Nexus smartphones. Pure Nexus ROMs have been around for quite a while and these ROMs probably need no introduction since these have been in-run by the masses. Pure Nexus ROM is available for a handful Google Nexus devices and the Nexus 6 by Motorola is among those lucky devices as well. A version of Pure Nexus based on AOSP Android 6.0.1 Marshmallow is available for the Nexus 6 which brings tons of goodies to unleash the real power of your Nexus 6.10152014111218PM_635_motorola_google_nexus_6Pure Nexus ROM brings almost all the features that you would want on a rooted Android device or the features for which you would like to root the device and then start bringing all the goodies from here and there. The ROM has quite a few handy features pre-installed in it. It brings the WiFi Calling and the Project Fi Support as an in-built feature. You will find the VoLTE fully working on this ROM. There’s an option to tweak almost each and every single feature of your device once you’ve this ROM installed on it. The list of Pure Nexus features doesn’t stop here but continues up to a hundred lines at the least. To learn more about the features, you can have a look on the entire list attached below. Pure Nexus undoubtedly is the most popular ROM among Nexus users. We are going to help Motorola Nexus 6 users to install this Android 6.0.1 Marshmallow Pure Nexus ROM on their phone and do more on their handset.

[showhide type=”link” more_text=”Pure Nexus ROM Features” less_text=”Hide…..”]
-General
*Based on AOSP Android 6.0.1_r62
*SELinux Enforcing
*Busybox
*Init.d support
*Addon.d support
*T-Mobile US WiFi Calling + Project Fi Support 
*Fully Working VoLTE
*Native Sprint PRL/Profile update
*Native ntfs and exfat support
*Full Substratum Theme Engine support
*Google sounds from factory image not the horrible AOSP ones
*Googles marshmallow wallpapers added to wallpaper picker 
*Advanced Reboot menu enabled by default
*Advanced rotation settings
*Enabled Developer settings by default
*Enabled option to use multi-window mode
*Enabled click/longclick on notification panel header items
*Disabled forced encryption
*Disabled Device modification warning
*Disabled Tethering checks
*Show apps being optimized during initial boot
*Bug fix's and stability improvements
*UI Improvements (fixed a bunch google forgot to materialize)
*Download Speed in download notifications
*Scrolling cache improvements
*Seek-bar style animation speed and font size control
*Full 3-Minit battery support no mods needed
*Added headset icon attached icon in statusbar
*Added back volume adjust sounds and toggle
*Added PureAmbient display options
*Added Full CAF based AppOps
*Added Special keys to all keyboard keys
*Added Ability to disable fullscreen keyboard
*Added ability to see app version when sideloading app
*Added app package name to app info screen
*Added play store link to actionbar of app info screen
*Added option to show hide substratum overlays in application screen
*Added ability to disable battery saver color in nav/statusbars
*Added ability to launch purenexus settings from notification drawer (longpress settings icon)
*Added ability to customize Settings dashboard columns, dashboard text lines, dashboard dividers
*Added ability to launch app when touching app icon in app info screen
*Added ability to pause and resume downloads
*Added ability to unlock and set default for usb action with insecure lockscreen
*Added advanced charging sound mod
*Added bluetooth device battery status to statusbar
*Added phone info shortcut to about phone/status*Native Dialer lookup in the aosp dialer
*Increasing ringtone option
*Incall vibration options
*Proximity speakerphone option
*National Data roaming option
*Call/Message blocking
*Option to flip phone to mute/reject incoming call
*Link/Unlink Notification ringtone option
*ADB enhancements (ADB over wifi, Hide ADB icon, colored logcat "abd logcat -C")
*Added ability to change the device hostname
*Added Kexec and Kexec hardboot support
*Added kcal display calibration support
*Added double tap to wake, swipe to wake, swipe to sleep, camera wakeup gestures
*Added High brigtness mode support
*Removed googles bug report option
*Removed googles SystemUpdate option
*Removed googles legal information

-PureNexus Settings
Lock Screen
*Option to customize lockscreen shortcuts
*Long press power for torch
*double tap anywhere to sleep
*Option to disable lockscreen media art
*Scramble pin layout
*Quick pin unlock
*option to hide lockscreen clock
*option to set custom lockscreen clock fonts
*option to hide lockscreen date
*option to hide lockscreen alarm text
*option to set the alpha of lockscreen and lockscreen security bouncer 
*Lockscreeen Wallpaper (add/crop/delete)
Notification Drawer
*Weather
*Force Expanded Notifications
*quick settings pulldown (left,right,always)
*smart pulldown (no ongoing, no dismissable, no notifications)
*brightness slider on/off toggle
*fully customizable quick settings with now up to 30 custom tiles
*option to enable or disable the top two main quicksettings tiles
*option to enable 3/4/5 quick settings tiles per row
*option for advanced cellular tile action
*option for advanced location in location quick setting tile
*option to enable haptic feedback on quick settings tiles
*option to disable quick tiles on secure lockscreen
Recent Apps
*Immersive recents (stock, full screen, statusbar only, navbar only)
*Clear all recents toggle
*Clear all recents location option
*Clear all recents but last app toggle
*Recent searchbar on/off toggle
*slim recents and slim recent options
Statusbar
*Battery customization (stock, landscape, circle, dotted circle, text, none)
*Battery percent options (hidden, inside the icon, next to the icon)
*Battery Bar options (location, color, style, thickness, anitmation)
*Carrier Text customization (text placement, custom text)
*Clock customization (position, am/pm, date, date position, date style, date format)
*Network traffic meter options (disabled/incoming/outgoing/both,  units displayed, update interval, hide arrows, autohide, autohidethreshold)
*Status-bar options (notification counter, double-tap to sleep, statusbar brightness control)
*Option to disable headset icon, vibrate icon, vpn icon in statusbar
Navigation Bar
*Enable/disable
*IME toggle
*Option for arrow cursor keys
*Option for double tap navbar to sleep
*Long-press back to kill toggle
*option to configure back kill delay
*Long-press recents for last app toggle
*Navigation bar size customization (width, height, length)
*Navigation bar customization (placement, buttons)
PowerMenu
*Option to disable on secure lock
*Add/remove (reboot, screenshot, screen-record, torch, airplane mode, user switcher,settings shortcut, search, voice search, lock now, sound panel)
Volume Rocker
*Volume key wake
*Volume key music control
*Volume key keyboard cursor control
*Volume button swap toggle
*Control media volume anytime toggle
*Live volume steps
Display
*Expanded desktop options
*option to enable/disable wake on plug
*option to enable 3 finger swipe to screenshot
*LED controls
Media & Notifications
*option to disable camera shutter sound (does not work with hdr+ mode)
*option to disable double tap camera vibration
*custom heads up options (global on/off, timeout, heads up snooze, force heads up, heads up whitelist, heads up do not disturb, heads up blacklist)
*option to disable low battery notification
*Option to disable battery saver notification
[/showhide]

Pre-requisites

  1. This ROM is intended for the Motorola Nexus 6 only. Do no try this on any other device at all.
  2. Charge your phone up to 75% to avoid power issues during flashing process.
  3. Unlock Bootloader, Flash TWRP Recovery on your Nexus 6. Here’s a complete guide.
  4. Backup your important contacts, call logs, sms messages and also copy your media content to your PC. Here’s a complete guide to backup everything.
  5. Follow this guide to the letter to avoid any mishap.

Disclaimer: Unlocking bootloader, rooting and flashing custom recoveries, custom ROMS are highly custom processes. Doing any of these will result in voiding the warranty of your device. Ensure that you’re doing everything at your own risk. In case of a mishap, TechBeasts or the device manufacturer may not be held liable. 

How To Install Android 6.0.1 Marshmallow Pure Nexus Custom ROM on Nexus 6

  1. Download the latest build of pure_nexus_shamu-6.0.1-20160803-OFFICIAL.zip for your Nexus 6.
  2. Download the GApps for Pure Nexus ROM: PureNexus_Dynamic_GApps-6.x.x-20160803.zip
  3. Download SuperSU.zip beta version: Download
  4. Copy the Pure Nexus ROM.zip, GApps.zip and the SuperSU.zip  files to your Nexus 6’s external or internal SD card.
  5. Make sure that you’ve unlocked the bootloader, flashed TWRP on your Nexus 6.
  6. Now boot your Nexus 6 into TWRP recovery mode. To do so, turn off your Nexus 6 completely and then turn it on by pressing and holding Volume Up + Down + Power Key. Once your phone is in bootloader mode, select recovery mode here and it will boot your phone into TWRP recovery.
  7. Create a Nandroid backup of your device’s system and boot.img under the Backup options in TWRP recovery.
  8. Now in the homescreen of TWRP, tap Reboot > Recovery and then swipe to allow modifications.
  9. Perform a factory reset using the Wipe options in TWRP and then get back to the main screen in recovery.
  10. Now tap Install > Locate the Pure Nexus Custom ROM.zip file > swipe to confirm ROM installation.
  11. Similarly, flash the GApps.zip file and after this, flash the SuperSU.zip file as well.
  12. Once done, reboot your device to system and it should launch the newly installed Pure Nexus Custom ROM.

That’s all. If you are stuck with something, reach us out through the comment box or our contact us page.

Credits: BeansTown106

Install TWRP and Root Virgin/Boost Galaxy J7 J700P

4
Install TWRP and Root Virgin/Boost Galaxy J7 J700P

A method to root and install TWRP recovery on the Virgin/Boost Samsung Galaxy J7 SM-J700P is now available. Android power users keeping their eyes on the methods to unleash the true power of their J7 are now free to do it. We have the entire method compiled up right here for our beloved Galaxy J7 users. Just to have a recap, this mid-range comes with powering up an Exynos 7580 CPU alongside a RAM of 1.5 GB. The internal storage is 16 GB. A 13 MP shooter is fixed at the back and a 5 MP shooter on the front for selfies. On the front, there is a huge 5.5-inch display to entertain graphics lovers. Galaxy J700P runs on Android 5.1.1 Lollipop.1

Rooting the device and flashing TWRP is the phenomenon that only Android power user follows. If you happen to be a newbie and you’re still interested in knowing what a custom recovery and root access will do on your device then let’s learn about it before flashing the phone. Root access is the way to explore your device beyond the boundaries set by device manufacturers.

Rooting your phone will allow you to install applications like Titanium Backup, Greenify and many others like these to enhance the performance, battery life and also backup each and every single software component of your phone. On a rooted device, you can also bring some new features by means of third-party root specific applications.

As far as a custom recovery is concerned, it gives you the access to backup Nandroid, wipes cache and Dalvik cache, flashes zip files and a lot more. The combined power of root and custom recovery can definitely do wonders. Assuming that you’ve got an idea about both these terms, we can safely proceed and start rooting the Galaxy J7 and then flash TWRP recovery afterward.

Some things to keep in mind

  1. This guide is intended for the Galaxy J7 J700P only. Do not try this on any other device or else you may result in bricking it.
  2. Charge your phone up to 50% to avoid power issues during flashing process.
  3. Enable USB Debugging and OEM Unlocking on your device if you have developer options accessible. If your device is stuck in a particular mode, then skip this step.
  4. Backup your important Contacts, Call Logs and SMS messages just to be on a safe side.
  5. Turn off Samsung Kies in your computer if you have opened it.
  6. Disable any Anti-virus and also your Firewall if enabled.
  7. Use OEM data cable to establish a connection between your PC and your phone.
  8. Follow this guide to the letter to avoid a mishap.

Disclaimer: The methods mentioned in the succeeding guide are highly custom. Such installations are not recommended by device manufacturers. In case a mishap occurs, we or the device manufacturers may not be held responsible. Make sure that you’re doing everything at your own risk.

Required Downloads

  • Samsung USB Drivers – Download and Install
  • Odin3 Flashtool – Download and Extract
  • CF-Autoroot – Download and Extract to get .tar file.
  • Latest TWRP Recovery.img.tar: Download

How to Root Samsung Galaxy J7 J700P

  1. Open Odin3 V3.10.7.exe that you extracted on your PC.
  2. Put your phone in download mode now. To do so, turn it off completely. Now turn it on by pressing and holding Volume Down + Home + Power Key. Once your phone boots up, press the Volume Up key to continue.
  3. Connect your phone to your PC now. The ID:COM box in the top-left corner of Odin3 should turn blue. This indicates that your phone is connected properly.
  4. Now click the “AP” tab in Odin and select the CF-Autoroot.tar file. It will take a second or two for Odin3 to load this file.
  5. If the Auto-reboot option is ticked, untick it. Leave all other options in Odin3 as they are.Odin 3.10.6 Explained_Techbeasts
  6. Now you’re all set to flash the root file. Just click the start button in Odin3 and sit back.
  7. Once the process box above ID:COM box shows a green light and flashing process is finished, disconnect your device.
  8. Reboot your phone manually now. You can do by pulling out the battery, put it back again and turn on your device.
  9. Check out the SuperSu in the application drawer. Also, install BusyBox from Play Store.
  10. Verify root access using Root Checker.
  11. That’s all. You’re now set to unleash the open source nature of Android.

How to install TWRP Recovery on Samsung Galaxy J7 J700P

  1. Open Odin3 V3.10.7.exe that you extracted on your PC.
  2. Put your phone in download mode now. To do so, turn it off completely. Now turn it on by pressing and holding Volume Down + Home + Power Key. Once your phone boots up, press the Volume Up key to continue.
  3. Connect your phone to your PC now. The ID:COM box in the top-left corner of Odin3 should turn blue. This indicates that your phone is connected properly.
  4. Now click the “AP” tab in Odin and select the twrp-xxxxxx.img.tar file. It will take a second or two for Odin3 to load this file.
  5. If the Auto-reboot option is ticked, untick it. Leave all other options in Odin3 as they are.Odin 3.10.6 Explained_Techbeasts
  6. Now you’re all set to flash the recovery. Just click the start button in Odin3 and sit back.
  7. Once the process box above ID:COM box shows a green light and flashing process is finished, disconnect your device.
  8. Now pull out the battery of your phone to turn it off.
  9. Put the battery back and turn on your device into recovery mode. To do so, press and hold Volume Up + Power + Home Keys altogether. Your device will boot up into the recovery mode.
  10. You can do whatever you wish to do using the custom recovery now. Best of luck.

Just in case you’re facing any difficulties following this procedure or you’re stuck with something, feel free to reach me out in the comment box below. Thank you.

Download Poke Radar for GO 1.1 APK

0
Download Poke Radar for GO 1.1 APK

Developers are working hard to provide us assistant apps for Pokemon Go and every time a new which allows us to use some tricks while playing Pokemon Go is deleted from Google Play. No need to worry today we have another app { Poke Radar for GO } for your which will help you discover the location of any Pokemon GO monsters that have been found by other players. This  Well this is good means you’ll know which Pokemon’s are found and on which location it was caught. Now the bad news is that Poke Radar for GO is not available on Google Play but you can download the latest Poke Radar for GO 1.1 APK from the following links.

Poke Radar for GO for PC

DISCLAIMER:
Poke Radar for GO is in no way affiliate with or endorsed by the Pokemon brand, Niantic or Nintendo. This app has been built by fans, for fans who love the game and wanted to create this separate assistant app to support it’s community.

Download Poke Radar for GO 1.1 APK for Android and How to Install it

  1. Download Poke Radar for GO 1.1 APK.
  2. Download the file to your phone straight away, or copy it to your phone from your PC.
  3. Now on your phone, go to settings > security > allow unknown sources > check this.
  4. Now using a file manager, locate the APK file that your just copied or downloaded.
  5. Tap the APK file and finish installation using the on-screen instructions.
  6. Once installed, access the newly installed game through app drawer.
  7. That’s all. Enjoy Poke Radar for GO !

Just in case you’re willing to play the new version of  Pokemon Go on your  PC then checkout Poke Radar for GO for PC.

Poke Radar for GO for PC Download – Windows / Mac

0
Poke Radar for GO for PC Download – Windows / Mac

Poke Radar for GO for PC: In this Post, I’ll tell you how you can download and install Poke Radar for GO for PC running Windows and Mac. Poke Radar for GO is an app which helps you discover the location of any GO monsters that have been found by other players using crowdsourcing. Once you install Poke Radar for GO, you’ll see all the Pokemon’s caught by you and other masters. Now if you are using Pokemon Go on PC then Poke Radar for GO will come handy. Let’s start the method to install Poke Radar for GO for PC.

Poke Radar for GO for PC

Read more:

Poke Radar for GO works pretty great on a computer as well. You can easily install Poke Radar for GO for PC on your computer powered up with Windows XP/Vista/7/8/8.1/10 and Mac OS X powered Macbook Air/Pro/ and iMac. The only thing you need is to install an Android emulator. We will be helping you to install and use Poke Radar for GO for PC via BlueStacks, BlueStacks 2, Andy OS or Remix OS. It’s time for us to head towards the method and get Poke Radar for GO working on our computer devices.

Download Poke Radar for GO For Windows PC & Mac

  1. Download Poke Radar for GO APK:
  2. Download and install Bluestacks: Bluestacks Offline Installer | Rooted Bluestacks |Bluestacks App Player
  3. Once you’ve installed Bluestacks, double click the downloaded Poke Radar for GO APK.
  4. The APK will be installed using Bluestacks, once installed open Bluestacks and locate the recently installed Poke Radar for GO.
  5. Click the Poke Radar for GO icon to open it, follow the on-screen instructions to use it.

You can also use Andy OS to install Poke Radar for GO, here’s the tutorialHow To Run Android Apps On Mac OS X With Andy

The Andy OS tutorial explains how to play a game on your Mac OSX, but the same guide will also work for a Windows PC.

That’s all. In case you’re stuck with anything, reach us out through the comment box below.

Download Steppy Pants for PC (Windows and Mac)

0
Download Steppy Pants for PC (Windows and Mac)

Steppy Pants just made its way to the smartphone gaming world. This arcade game is quite interesting and brings a whole new concept into the mobile gaming scene. It’s a walking simulator that tends you to walk on a footpath. Just tap the screen and your avatar will step ahead. Tap and hold the screen for a bigger step, but don’t tap the screen for too long otherwise the character will stretch its legs too much and result in ending the game. Do not put your step on the cracks. Stepping up on cracks will also result in ending the game. Go as fast as you can and cover as much distance as you can. As you move ahead, you will come across many other hurdles. You will face some evil drivers and many other odds. The game will take you through a swing of emotions, it will freak you out and make you laugh at the same time. Steppy Pants is an absolutely free to play game and its available in the Play Store. Just in case you’re wishing to play Steppy Pants on your computer, that is possible as well.Screenshot_4

You can install and play Steppy Pants for PC on a computer running Windows XP, Windows 7, Windows 8, Windows 8.1, Windows 10 and also a Mac OS X powered Macbook/iMac. The only thing that you have to do is to install an Android emulator like BlueStacks, Remix OS or Andy OS. Here’s a short guide on how to play Steppy Pants for PC right now.

Download Steppy Pants For Windows PC & Mac

  1. Download Steppy Pants APK
  2. Download and install Bluestacks: Bluestacks Offline Installer | Rooted Bluestacks |Bluestacks App Player
  3. Once you’ve installed Bluestacks, double click the downloaded Steppy Pants APK.
  4. The APK will be installed using Bluestacks, once installed open Bluestacks and locate the recently installed Steppy Pants.
  5. Click the Steppy Pants icon to open it, follow the on-screen instructions to play it.

You can also use Andy OS to install Steppy Pants, here’s the tutorialHow To Run Android Apps On Mac OS X With Andy

The Andy OS tutorial explains how to play a game on your Mac OSX, but the same guide will also work for a Windows PC.

Modern Strike Online for PC on Windows and Mac

3
Modern Strike Online for PC on Windows and Mac

If you have ever had a wish to find out the terrorists bringing bad fate to the humanity and crush them down then Modern Strike Online is the game for you. Modern Strike Online is all set to take you through the battlefield where evil terrorists are keeping their eyes on the armed forces. You’ve been given the task of chasing them down and killing them right on the spot. There’s no other way but to confront the enemies and shoot them at site. Modern Strike Online brings 3 different combat modes. The game allows players to design their own game with their own rules and strategy with the help of their friends. You will be hunting down the enemies in 7 different locations. Modern Strike Online will provide you a variety of weapons to choose from. You can perform upgrades on your weapons for a better performance in the battlefield. Modern Strike Online’s plus point is the amount of graphics inserted into this game. The game comes with HD graphics, which look quite stunning and crispy even on a low-end smartphone. Furthermore, Modern Strike Online is an absolutely free to play Action game. It’s available in the Play Store for Android freaks.Modern strike online for pcs

Whenever a game like Modern Strike Online makes its way to the smartphone gaming world, players always look for a way to replicate that game on their computers. Android emulators have been helping the players to do so. The same can be done with Modern Strike Online as well. Players wishing to play Modern Strike Online on a computer can do so by means of an Android emulator like BlueStacks, Andy or Remix OS. Here’s the guide to play Modern Strike Online for PC on a computer running Windows XP/7/8/8.1/10 or Mac OS X/MacOS.

Download Modern Strike Online For Windows PC & Mac

  1. Download Modern Strike Online APK
  2. Download and install Bluestacks: Bluestacks Offline Installer | Rooted Bluestacks |Bluestacks App Player
  3. Once you’ve installed Bluestacks, double click the downloaded Modern Strike Online APK.
  4. The APK will be installed using Bluestacks, once installed open Bluestacks and locate the recently installed Modern Strike Online.
  5. Click the Modern Strike Online icon to open it, follow the on-screen instructions to play it.

You can also use Andy OS to install Modern Strike Online, here’s the tutorialHow To Run Android Apps On Mac OS X With Andy

The Andy OS tutorial explains how to play a game on your Mac OSX, but the same guide will also work for a Windows PC.


Download Messi Runner for PC (Windows and Mac)

0
Download Messi Runner for PC (Windows and Mac)

Lio Messi, the football sensation has returned to his national team and cheered up all his fans in Aregentina. To help Messi fans interact with their ideal virtually, QB9 games coded a runner game named as Messi Runner. Just like the name suggests, its an endless runner game. Kick the football, play super shots, sprint and tackle it while running through the streets. Lio Messi will come across a lot many fans who will act mysteriously. Handle them, dodge them, catch them all and put a high score on the leader-board. Messi Runner comes with numerous levels. Let’s see how fast you can run and checkout your soccer skills in this all new Messi Runner. It’s an absolutely free to play game, and is available in the Google Play Store. In case you want to play Messi Runner for PC, that is possible as well. For that you will need to follow the method going down in this post.Messi Runner for PC

Messi Runner for PC can be played on a computer powered up with Windows (XP/7/8/8./10) and also Mac OS X powered computers. You will need an Android emulator like BlueStacks, BlueStacks 2, Andy OS or Remix OS. Go through the guide and follow the instructions to the letter now to start playing Messi Runner for PC.

Download Messi Runner For Windows PC & Mac

  1. Download Messi Runner APK
  2. Download and install Bluestacks: Bluestacks Offline Installer | Rooted Bluestacks |Bluestacks App Player
  3. Once you’ve installed Bluestacks, double click the downloaded Messi Runner APK.
  4. The APK will be installed using Bluestacks, once installed open Bluestacks and locate the recently installed Messi Runner.
  5. Click the Messi Runner icon to open it, follow the on-screen instructions to play it.

You can also use Andy OS to install Messi Runner, here’s the tutorialHow To Run Android Apps On Mac OS X With Andy

The Andy OS tutorial explains how to play a game on your Mac OSX, but the same guide will also work for a Windows PC.


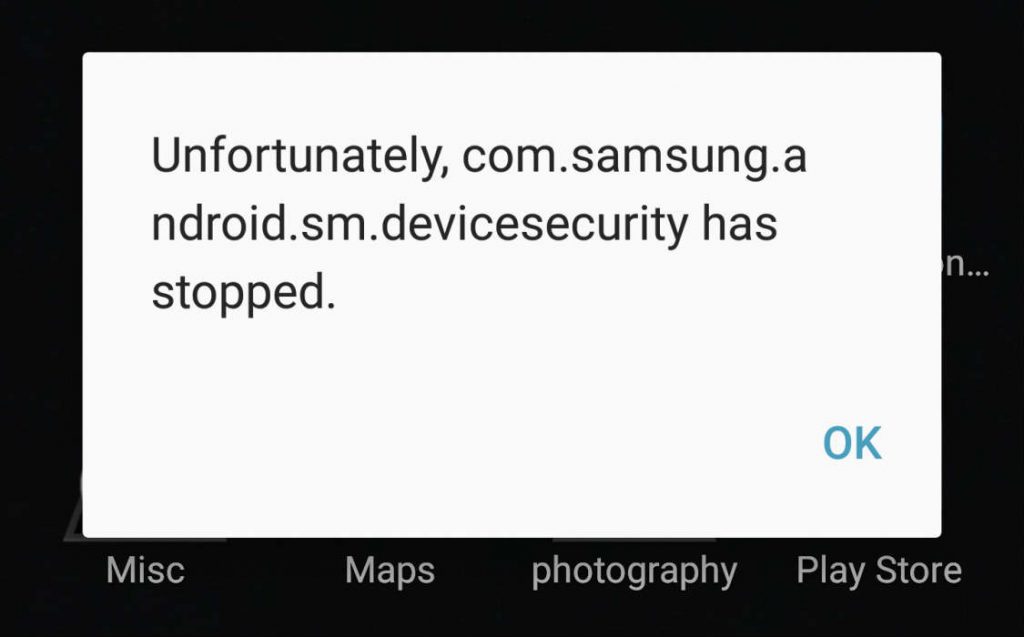
fix Samsung Galaxy S7 Edge “Unfortunately, com.samsung.android.sm.devicesecurity has stopped” error

0
fix Samsung Galaxy S7 Edge “Unfortunately, com.samsung.android.sm.devicesecurity has stopped” error

 Today I’ve got an email from our readers complaining about an issue that he was facing on Samsung Galaxy S7 Edge. This issue was “Unfortunately, com.samsung.android.sm.devicesecurity has stopped“, it’s the same as we have posted before. Follow the instruction below in the post.

Galaxy-S7-Edge-SM-Device-Security-stopped-1024x637

How to fix Unfortunately, com.samsung.android.sm.devicesecurity has stopped” error:

Before going any further you must see our ultimate guide on how to Fix ‘Unfortunately app has stopped’ errors.

Step#1: Open Settings on your Android device.

Step#2: Now tap on More tab.

Step#3: Tap on Application Manager from the list.

Step#4: Now select All Application by swipe to left.

Step#5: There you’ll see all your installed apps, Tap on touch com.samsung.android.sm.devicesecurity.

Step#6: Now all you have to do tap on Clear Cache and Clear data.

Step#7: Now goto home screen and restart your device.

All Done ….

Method#2:

  • Turn off your device.
  • Now press and hold home+Power+Volume Up key.
  • Release the power button once you see logo, but keep holding home and Volume up keys.
  • Now when you see Android logo, let go both buttons.
  • Use the volume down button to navigate and highlight wipe cache partition.
  • Now use the power key to select the option.
  • You have to select ‘Yes‘ when you’ll be prompted to next menu.
  • Now wait for the process to be completed, once it’s done highlight ‘Reboot system now’ and press power button to select it.
  • All Done.

Method#3:

  • Turn off your Samsung Galaxy S7 Edge.
  • Now press and hold home+Power+Volume Up key.
  • Release the power button once you see Samsung Galaxy S7 logo, but keep holding home and Volume up keys.
  • Now when you see Android logo, let go both buttons.
  • Use the volume down button to navigate and highlight wipe data / factory reset.
  • Now use the power key to select the option.
  • You have to select ‘Yes‘ when you’ll be prompted to next menu.
  • Now wait for the process to be completed, once it’s done highlight ‘Reboot system now’ and press power button to select it.
  • All Done.

Download Google Duo 1.0.130018012.RC1_RC29 APK

0
Download Google Duo 1.0.130018012.RC1_RC29 APK

FaceTime is not the heat anymore and Google Duo is here an app work same like FaceTime but it’s not only for Android devices you can also install it on iOS devices. Google Duo is released today and yet it not available for all countries, no need to worry you can download the latest Google Duo 1.0.130018012.RC1_RC29 APK from the following links.

Google Duo APK

Google Duo:

  • Pick a loved one and jump right in, with a simple interface that brings video to the forefront.
  • See the caller before you pick up with Duo’s live preview feature.
  • Experience faster and more reliable video calls whether you’re on Wi-Fi or on-the-go.
  • Video call all your friends across Android and iOS with just one simple app.

Download Google Duo 1.0.130018012.RC1_RC29 APK APK for Android and How to Install it

  1. Download Google Duo 1.0.130018012.RC1_RC29 APK
  2. Download the file to your phone straight away, or copy it to your phone from your PC.
  3. Now on your phone, go to settings > security > allow unknown sources > check this.
  4. Now using a file manager, locate the APK file that your just copied or downloaded.
  5. Tap the APK file and finish installation using the on-screen instructions.
  6. Once installed, access the newly installed game through app drawer.
  7. That’s all. Enjoy Mobius Final Fantasy!

Just in case you’re willing to play the new version of  Pokemon Go on your  PC then checkout Google Duo for PC.

Here’s a peek into the success of Pokemon Go if you don’t already know about this game

0
Here’s a peek into the success of Pokemon Go if you don’t already know about this game

Pokemon Go undoubtedly has become the top Android and iOS game, played by almost everyone now a days. Pokemon Go is slowly hitting different regions, the game is yet to reach out quite many countries. Pokemon Go players are going crazy over this game. Reaching streets, parks, markets, malls and every single public place just to capture the tiny Poke-characters. Gaming geeks are even discovering crazy stuff and weird things are happening all around the globe since the day this game came out of the curtains. It didn’t take more then a just-a-few days for Pokemon Go to make its way to the top charts of Android and iOS applications, the game earned over $10M in its first month only. Pokemon Go’s active number of users crossed applications like Twitter, Tinder, Candy Crush Saga and many other popular applications.

Pokemon Go is popular enough that you’ve probably played this game or at least heard of this game. If, unfortunately, you haven’t done either of the aforementioned things, you may want to have a look at the so far success story of Pokemon Go. Just today, folks over UnboxingDeals sent us an infographic, which is good enough to know each and everything about Pokemon Go. Let’s have a look at this infographic and increase our knowledge about the talk-of-the-town game Pokemon Go.


Source: UnboxingDeals


PokeMesh Real Time Map for PC (Windows and Mac)

0
PokeMesh Real Time Map for PC (Windows and Mac)

Pokemon Go craze has started reaching its peak now. To help Pokemon Go players play the game better, some developers came up with a bunch of applications which would allow the users to track Pokemons, Pokestops, Gyms and reach out the best possible locations to catch their favorite characters without any hard work. The Poketrackers were taken down by Google upon an intimation by Niantic. Almost all the Pokemon Go’s third party tracker applications were kicked out and stopped working. At the time of writing this post, we have merely got an application working and PokeMesh Real Time Map is one of those applications which, somehow, have managed to survive through all the hardships that Niantic has put for third party app developers. PokeMesh can look out for a specific Pokecharacter for you, it can get you the directions and it can easily get you to the location of your desired character in no time. PokeMesh informs you up to the minute through push notifications. If you’re looking for  a working Pokemon Go map application then PokeMesh Real Time Map is your choice to go with.pokemesh-encontrar-pokemon-1024x500

PokeMesh Real Time Map works pretty great on a computer as well. You can easily install PokeMesh Real Time Map for PC on your computer powered up with Windows XP/Vista/7/8/8.1/10 and Mac OS X powered Macbook Air/Pro/ and iMac. The only thing you need is to install an Android emulator. We will be helping you to install and use PokeMesh Real Time Map for PC via BlueStacks, BlueStacks 2, Andy OS or Remix OS. It’s time for us to head towards the method and get PokeMesh Real Time Map working on our computer devices.

Download PokeMesh Real Time Map For Windows PC & Mac

  1. Download PokeMesh Real Time Map APK
  2. Download and install Bluestacks: Bluestacks Offline Installer | Rooted Bluestacks |Bluestacks App Player
  3. Once you’ve installed Bluestacks, double click the downloaded PokeMesh Real Time Map APK.
  4. The APK will be installed using Bluestacks, once installed open Bluestacks and locate the recently installed PokeMesh Real Time Map.
  5. Click the PokeMesh Real Time Map icon to open it, follow the on-screen instructions to play it.

You can also use Andy OS to install PokeMesh Real Time Map, here’s the tutorialHow To Run Android Apps On Mac OS X With Andy

The Andy OS tutorial explains how to play a game on your Mac OSX, but the same guide will also work for a Windows PC.

That’s all. In case you’re stuck with anything, reach us out through the comment box below.

Download and Install Custom PS3 Themes

0
Download and Install Custom PS3 Themes

I have a really good news for all PS3 Owners if you are bored of your default theme and want to install a custom theme this is the right place for you then. In this post,I’ll tell you how you can download and install Custom PS3 Themes. This method is lengthy and a bit complex but end result are awesome. Let’s start method to download and install custom PS3 themes.

Custom-PS3-Theme

Download and Install Custom PS3 Themes To your Mac or Windows PC:

  • First, We have to download the themes for PS3. Open your browser on your Mac or Windows.
  • Type the following address: http://www.ps3-themes.com/.
  • Here you’ll find hundreds for free themes for PS3, choose the theme you like and download it on your PC.
  • Now plug-in a USB drive, Create a folder in it named as PS3, now create another folder in PS3 folder named as THEME.
  • Once done with the folders, copy the theme files you downloaded before and paste it in the THEME folder.
  • Turn on your PS3 and plug the USB in PS3. Now head over to Settings->Theme Settings. In theme settings menu select theme, head over to the top and select Install.
  • You have to select your USB from the available sources.
  • Now you’ll see all the downloaded themes list, Choose the one you want and install it.
  • Once you have selected the theme and installed it, head back to theme settings and select Apply.

This is all, You have successfully installed a custom theme on your PS3. Please if you face any issue regarding this method, tell us in comments so we can help you.