Home Blog Page 296

Install Android 7.1 Nougat on LG G5 H850, H830 via CyanogenMod 14.1

0
Install Android 7.1 Nougat on LG G5 H850, H830 via CyanogenMod 14.1

LG G5 is LG’s latest flagship device. The G5 was unveiled running Android Marshmallow out of the box. LG does have the plans to update this phone to the new Android 7.0 and 7.1 Nougat. The new firmware has even started rolling out for some users in the hometown of LG, but it will take quite a while for this update to expand to the users all acorss the globe. LG G5 is a powerhouse to might specifications and the device is a great toy if you want to tweak it beyond the boundaries.install-android-7-1-nougat-on-lg-g5-h850-h830-via-cyanogenmod-14-1

An unofficial build of CyanogenMod 14.1 based on Android 7.1 Nougat is available for the LG G5 H850 and H830. If you are not happy with the current official firmware of your device or if you are one of the users who just loves playing around with the firmware of your device, then CyanogenMod 14.1 should be your call for now. CyanogenMod 14.1’s current build’s mainstream features are found working. You might find only a few features crashing. Being an Android power users, the buggy features shouldn’t be a big deal for you. Let’s have a look on the method and learn how to install Android 7.1 Nougat on LG G5 H850, H830 via CyanogenMod 14.1 custom ROM.

Precautions

  • This guide is supposed to work for LG G5 H850 and H830 only. Do not try it on another phone. It might result in bricking your phone if the model number is not as same as listed here.
  • Charge your phone up to 50% prior to the flashing process. This should be done in order to keep your device alive throughout the flashing process.
  • Make sure that your phone is running the latest Lollipop firmware before flashing this ROM.
  • Flash a TWRP Recovery on your LG G5.
  • Backup Nandroid and save it to your computer. Nandroid Backup is important since it will help you to revert back everything in case the new ROM crashes.
  • Backup your important text messages, call logs and contacts as well.
  • Follow the instructions to the letter to avoid any mishap. Flash the ROM at your own risk. In case of a mishap, TechBeasts or the ROM developers may not be held responsible.

Install Android 7.1 Nougat on LG G5 H850, H830 via CyanogenMod 14.1

  1. Download Android 7.1 Nougat CyanogenMod 14.1 Custom ROM.zip file. CM 14.1 for H850 | CM 14.1 for H830
  2. Download Gapps.zip file for Android 7.1 Nougat (ARM64) according to your liking.
  3. Copy both the downloaded files to your phone’s internal or external storage.
  4. Now power off your phone and boot it into TWRP recovery mode by using the volume button combination.
  5. As soon as you boot into TWRP, select the wipe option and perform a factory data reset.
  6. Now get back to the main menu in TWRP recovery and tap Install > locate the ROM.zip file > Swipe to confirm flash > finish the flashing.
  7. Now once again get back to the main menu in TWRP recovery and this time flash the Gapps.zip file.
  8. After flashing Gapps.zip file, wipe the cache and dalvik cache from the wipe > advanced wipe options.
  9. Now reboot your phone into system.
  10. As it boots up, you should find the CyanogenMod 14.1 Android 7.1 Nougat booting up on your LG G5. That’s all.

Source

Update LG G2 D802/D805 to Android 7.1 Nougat via CyanogenMod 14.1

0
Update LG G2 D802/D805 to Android 7.1 Nougat via CyanogenMod 14.1

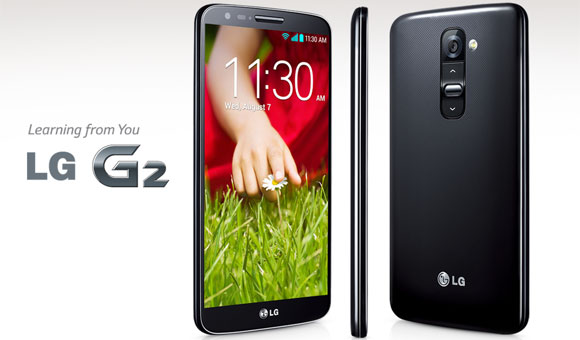
LG G2 is still one of the greatest and alive devices available around. G2 has a great user base. The device was originally unveiled by LG back in September 2013. LG G2 carried a 5.2 inch dsplay with 1080 x 1920 pixels resolution and 424 ppi. LG used Qualcomm Snapdragon 800 CPU to power up this phone and planted the Adreno 300 alongside the processor. A RAM of 2 GB is plugged inside as well. G2 has a 13 MP at its back and a 2.1 MP shooter on the front. LG G2 was found running on Android 4.4.2 KitKat out of the box, it was updated to Android 5.0.2 Lollipop later on. Unfortunately, after the Lollipop update, this device didn’t get any further update.update-lg-g2-d802-d805-to-android-7-1-nougat-via-cyanogenmod-14-1

G2 has been surviving only because of the custom ROMs hitting the device since LG discontinued the official software support. G2 was blessed with custom ROMs based on Android 5.1.1 Lollipop and also the Marshmallow 6.0.1. Now that Google is done releasing the Android 7.1 Nougat, it is the time for LG G2 owners to taste the all new Nougat firmware as well. Luckily, an unofficial build of CyanogenMod 14.1 based on Android 7.1 Nougat has made its way to the LG G2 D802 and D805 variants. That means you can now finally give your device another new life.

In the following post, we have tried to put up an easy method to help you update LG G2 D802/D805 to Android 7.1 Nougat via CyanogenMod 14.1 custom ROM. The ROM has most of its features like RIL, Wifi, Bluetooth and Camera got working. It might contain a few bugs here and there, but if you are Android power user, it should not be a big deal for you. Let’s head towards the method to get done with it now.

Precautions

  • This guide is supposed to work for LG G2 D802 and D805 only. Do not try it on another phone. It might result in bricking your phone if the model number is not as same as listed here.
  • Charge your phone up to 50% prior to the flashing process. This should be done in order to keep your device alive throughout the flashing process.
  • Make sure that your phone is running the latest Lollipop firmware before flashing this ROM.
  • Flash a TWRP Recovery on your LG G2.
  • Backup Nandroid and save it to your computer. Nandroid Backup is important since it will help you to revert back everything in case the new ROM crashes.
  • Backup your important text messages, call logs and contacts as well.
  • Follow the instructions to the letter to avoid any mishap. Flash the ROM at your own risk. In case of a mishap, TechBeasts or the ROM developers may not be held responsible.

Update LG G2 D802/D805 to Android 7.1 Nougat via CyanogenMod 14.1

  1. Download Android 7.1 Nougat CyanogenMod 14.1 Custom ROM.zip file.
  2. Download Gapps.zip file for Android 7.1 Nougat according to your liking.
  3. Copy both the downloaded files to your phone’s internal or external storage.
  4. Now power off your phone and boot it into TWRP recovery mode by using the volume button combination.
  5. As soon as you boot into TWRP, select the wipe option and perform a factory data reset.
  6. Now get back to the main menu in TWRP recovery and tap Install > locate the ROM.zip file > Swipe to confirm flash > finish the flashing.
  7. Now once again get back to the main menu in TWRP recovery and this time flash the Gapps.zip file.
  8. After flashing Gapps.zip file, wipe the cache and dalvik cache from the wipe > advanced wipe options.
  9. Now reboot your phone into system.
  10. As it boots up, you should find the CyanogenMod 14.1 Android 7.1 Nougat booting up on your LG G2. That’s all.

Source

How to install official Android 6.0.1 Marshmallow on Galaxy S5 Mini

0
How to install official Android 6.0.1 Marshmallow on Galaxy S5 Mini

Good news for all the Galaxy S5 Mini users out there. The official Android 6.0.1 Marshmallow firmware for your device is finally out. Samsung has fulfilled the promise of updating this device to the 2nd last latest version of Android. However, we do not hope that the device will be updated to any further version of Android. Android Marshmallow should be the last official update for the Galaxy S5 Mini. If you have been running your phone on Android Lollipop so far, it is the time to update it enjoy all new UI changes and system changes of Marshmallow. The new Marshmallow firmware will give your device a performance boost. You will also find the firmware even more stable and you will find out the battery of your phone lasting a little longer. As far as the UI is concerned, there are some minor touchups on the applications’ icon parts and there are some new icons introduced in the status bar. You will also find some new colours.how-to-install-official-android-6-0-1-marshmallow-on-galaxy-s5-mini

The official firmware is rolling out slowly in select regions. It is not available for all the variants of the Galaxy S5 Mini, but seeing the rollout, it won’t be wrong to say that the firmware will soon be expanded to all other variants as well. You can check the OTA updates by going in to settings > about device > software updates. If you do not happen to be lucky enough to find the Android 6.0.1 Marshmallow OTA update, then you will have to go for a manual method of updating your S5 Mini. In that case, this guide is going to be fruitful. While you move ahead, you will come across a comprehensive method which will teach you on how to install official Android 6.0.1 Marshmallow on Galaxy S5 Mini. Have a look on the early preparations and then upgrade your Galaxy S5 Mini right away.

Early Preparations

  • Make sure that your device is exactly as mentioned above. To check out what device you have, go to Settings > More/General > About Device or Settings > About Device and match the model number. Be careful about the device model number, flashing a file on a device not listed here might result in bricking it up. In that case, we may not be held responsible.
  • Your device’s battery should not be weak. In case your device goes dead during the flashing process, your device may get soft bricked and you might be in need of flashing stock firmware and that will ultimately result in wiping up your data as well.
  • Always use the original data cable to establish connection between your Android device and your computer / laptop. Using ordinary data cables might interrupt the flashing process, so to avoid any mishap, you need to meet this requirement as well.
  • Backup everything!

    Backup SMS Messages
    Backup Call Logs
    Backup Contacts
    Backup Media – Copy your files manually to your PC or Laptop.
    Backup EFS – If rooted, otherwise skip this step.

  • Make sure that you turn off Samsung Kies while using Odin3 flashtool. Samsung Kies will interrupt Odin3 and will result in causing errors and may not let you flash your desired firwmrae. Also, make sure that you turn off any antivirus software you’ve installed and also disable firewall to avoid any connection and flashing issues.

Required Downloads & Installations

  1. Download and install Samsung USB Drivers on your PC.
  2. Download and extract Odin3 v3.10.6.
  3. Download the firmware according to your device: SM-G800H
  4. Extract the downloaded firmware file to get the .tar.md5 file.

How to install official Android 6.0.1 Marshmallow on Galaxy S5 Mini

  1. Make sure that you read the instructions listed above carefully and you’re all set to go ahead now.
  2. Wipe your device complete in order to attain a neat installation. You may boot into the recovery mode and perform a factory data reset.
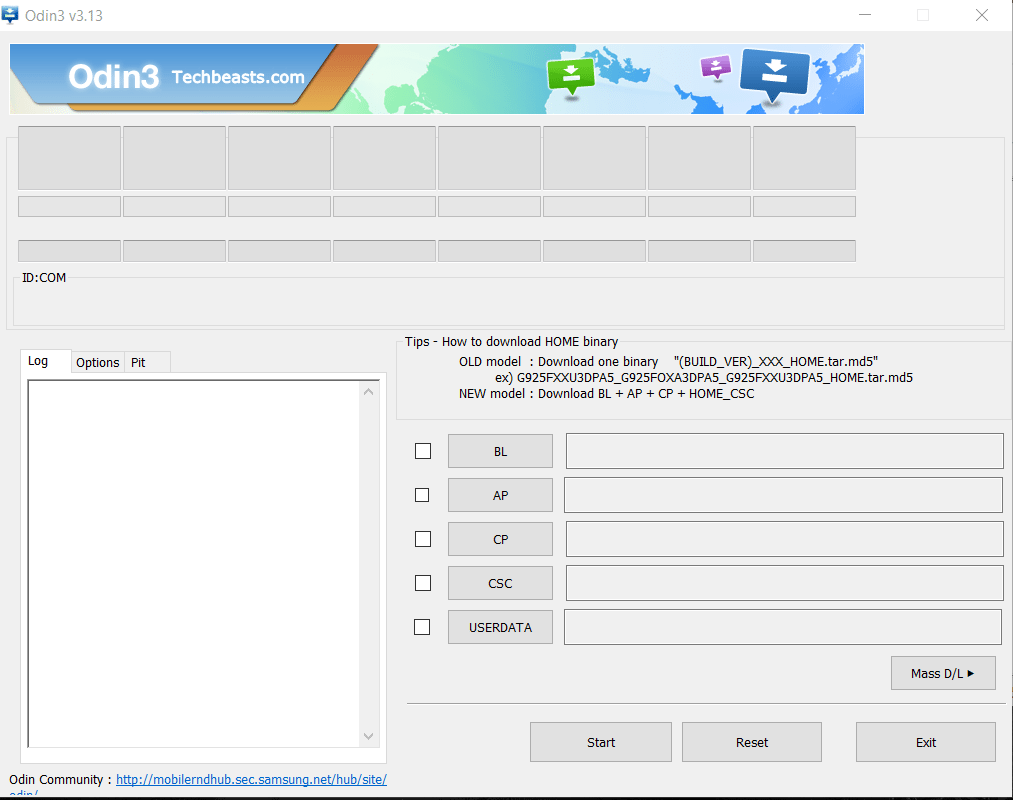
  3. Open Odin3.exe.
  4. Put your Galaxy S5 Mini in download mode. To do so, turn it off and wait for 10 seconds. Turn it on by pressing and holding Volume Down + Home Button + Power Key simultaneously, You should see a warning, press Volume Up to continue. In case this method doesn’t work for you, try one from this guide.
  5. Connect your device to your PC.
  6. As soon as Odin detects your phone, the ID:COM box should turn blue.  Make sure that you’ve installed Samsung USB drivers before connecting.
  7. For Odin 3.09 or 3.10.6 hit the AP tab. Select the firmware.tar.md5 or firmware.tar, that you downloaded and extracted above.
  8. If you’re using Odin 3.07, you will select “PDA” tab instead of the AP tab, rest of the options remain untouched.
  9. Make sure that the options selected in your Odin are exactly as shown in the pic.Odin 3.10.6 Explained_Techbeasts
  10. Hit start and wait till the firmware  flashing is complete, The flashing process box will turn green upon successful flashing.
  11. Once the flashing process has been completed successfully, disconnect your device and reboot it manually.
  12. Once the device boots up, checkout the new firmware now.
  13. Your device will be running on official Android 6.0.1 Marshmallow firmware.
  14. Once updated to stock, do not try to downgrade, or else you will result in messing up EFS partition of your device.
  15. That’s all!

Got any queries? Make sure that you drop em’ in the comment box below. Good Luck!

Install Android 7.0 Nougat on Galaxy Tab 4 10.1 via CyanogenMod 14

5
Install Android 7.0 Nougat on Galaxy Tab 4 10.1 via CyanogenMod 14

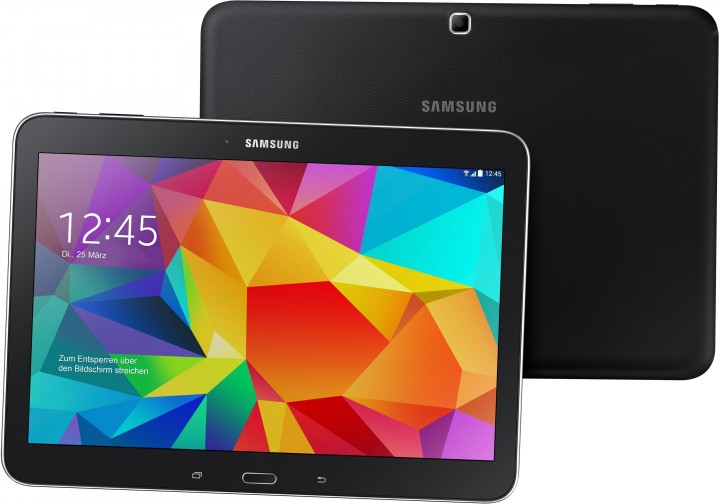
Ladies and Gentlemen! It’s time to update your Galaxy Tab 4 10.1 to all new Android 7.0 Nougat. This is not possible officially but unofficially. You can now install the CyanogenMod 14 custom ROM on your Galaxy Tab 4 in order to update it to Android Nougat. Galaxy Tab 4’s official current firmware is Android 5.0.2 Lollipop. Samsung hasn’t announced any plans of taking Galaxy Tab 4 to a higher version of Android. The device will stay on Android 5.0.2 Lollipop for the time being. However, with the help of the available CyanogenMod 14 custom ROM, you can upgrade it right away and taste the all new Nougats by Google.install-android-7-0-nougat-on-galaxy-tab-4-10-1-via-cyanogenmod-14

The ROM is in its beta stage. It may carry some bugs here and there. If you are an Android power user, you should be fine with those few bugs in this ROM. The following post will take you through a comprehensive guide to install Android 7.0 Nougat on Galaxy Tab 4 10.1 via CyanogenMod 14.

Precautions

  1. This ROM is intended for Galaxy Tab 4 SM-T530, T531 and T535. Do not try flashing this ROM on any other device otherwise you will result in bricking it. Check your device’s model number under settings > about device.
  2. Charge your phone up to 50% to avoid any power issues during the flashing process.
  3. Flash a custom recovery on your Galaxy Tab 4 SM-T530, T531 and T535
  4. Backup everything including your important contacts, call logs and text messages.
  5. Don’t forget to create a Nandroid backup. This is highly recommended so that you can revert back to your previous system in case of a mishap.
  6. Backup EFS partition to avoid EFS corruption later on.
  7. Follow the instructions to the letter.

DISCLAIMER: FLASHING CUSTOM ROMS VOIDS THE WARRANTY OF A DEVICE AND ITS NOT RECOMMENDED OFFICIALLY. WHILE YOU’RE GOING TO DO THIS, MAKE SURE THAT YOU’RE DOING THIS AT YOUR OWN RISK. IN CASE OF A MISHAP TECHBEASTS, SAMSUNG OR THE ROM DEVELOPERS MAY NOT BE HELD RESPONSIBLE.

Install Android 7.0 Nougat on Galaxy Tab 4 10.1 via CyanogenMod 14

  1. Download latest CM 14.zip file according to your device
    1. cm-14.0-20160923-0014-UNOFFICIAL-matisselte.zip
    2. Download Gapps.zip [arm, 6.0.zip] file for Android Nougat.
  2. Connect your phone to your PC now.
  3. Copy all .zip files to the storage of your phone.
  4. Now disconnect your phone and turn it off complete.
  5. Boot into TWRP recovery now, in order to do so, turn it on by pressing and holding Volume Up + Home Button + Power Key. You should see the recovery mode in a while.
  6. Now in TWRP  recovery, wipe cache, factory data reset and advanced options > dalvik cache.
  7. After wiping all these three, select “Install” option.
  8. Now select “Install Zip >  Select cm-14.0…….zip file > Yes”.
  9. This will flash the ROM in your phone, once done get back to the main menu in recovery.
  10. Now once again select “Install > Select Gapps.zip file > Yes”
  11. This will flash the Gapps in your phone.
  12. Reboot your device.
  13. You should see the Android 7.0 Nougat CM 14.0 running on your device in a while.
  14. That’s all!

In order to enable root access on this ROM, go to settings > about device > tap the build number for 7 times. This will enable developer options on in settings. Now open developer options and enable root.

First boot may take up to 10 minutes, you may not worry if it’s taking that much long. In case it’s taking too long, you may boot into TWRP recovery and wipe cache and dalvik cache and reboot your device as it may fix the issue. In case your device is having issues, you may return to your old system using the Nandroid backup or follow our guide here to install stock firmware.

Got any queries? Reach us out through the comment box below.

Source

How to install TWRP recovery and Root Galaxy Tab 4 10.1

4
How to install TWRP recovery and Root Galaxy Tab 4 10.1

Galaxy Tab 4 10.1 is a pretty old device by Samsung. Galaxy Tab 4 runs on Android 5.0.2 Lollipop. Samsung doesn’t have any plans in pipeline to update this device to a further version of Android. If you are willing to play with the Galaxy Tab 4, it may be the time for you to pull it out if you have one. You can install a handful of custom MODs, pick up a working custom ROM or pick up any tweak to add some new features to your pretty old device. Galaxy Tab 4 10.1’s CyanogenMod 14 custom ROM is already out, you can also give a try to Xposed framework to unleash the real power of your device.how-to-install-twrp-recovery-and-root-galaxy-tab-4-10-1

The question comes up when you think how are you going to do all the aforementioned things? Well, that is what custom recoveries and root access are meant to be for. You can flash a custom recovery like TWRP or CWM and then you are all set to flash any files of your liking on the device. The good thing for now is, TWRP recovery is available for our beloved Galaxy Tab 4. The available TWRP recovery will work with your Galaxy Tab 4 SM-T530, SM-T531, SM-T533, SM-T535 and the US Cellular Galaxy Tab 4 as well. In a while, a guide coming your way will educate you on how to install TWRP recovery and Root Galaxy Tab 4 10.1. Let’s go through the precautions and then flash the recovery in order to kickstart tweaking the Tab 4.

Preparations

  • This guide is only for Galaxy Tab 4 10.1 SM-T530/T531/T533/T535. Do not try this on any other device.
  • Charge your device up to 50%.
  • Use original data cable to establish connection between your PC and your phone.
  • Backup your important data as a safety measure. Use the backup guides linked below.
  • Follow this guide to the letter to avoid any mishap.

DISCLAIMER: FLASHING CUSTOM RECOVERY AND ROOTING THE DEVICE VOID ITS WARRANTY. IN CASE OF A MISHAP, TECHBEASTS OR SAMSUNG MAY NOT BE HELD RESPONSIBLE. MAKE SURE THAT YOU’RE DOING EVERYTHING AT YOUR OWN RISK AND WITH YOUR FULL UNDERSTANDING.

Required Downloads:

How to install TWRP recovery and Root Galaxy Tab 4 10.1

  1. Open Odin3 V3.10.6.exe that you extracted on your PC.
  2. Enable OEM Unlock on your Tab 4 10.1. To do so on your phone, go to settings > about device > tap the build number for 7 times to enable developer options. Get back to the settings and open developer options. Under developer options turn on “OEM unlock.
  3. Put your Tab 4 10.1 in download mode now. To do so, turn it off completely. Now turn it on by pressing and holding Volume Down + Home + Power Key. Once your phone boots up, press the Volume Up key to continue.
  4. Connect your phone to your PC now. The ID:COM box in the top-left corner of Odin3 should  turn blue. This indicates that your phone is connected properly.
  5. Now click the “AP” tab in Odin and select the TWRP recovery.tar file that you downloaded. It will take a second or two for Odin3 to load this file.
  6. Make sure that your Odin3 looks like this. The only option ticked should be F. Reset Time.

  7. Odin 3.10.6 Explained_Techbeasts
  8. Now you’re all set to flash the recovery. Just click the start button in Odin3 and sit back.
  9. Once the process box above ID:COM box shows green light and flashing process is finished, disconnect your device.
  10. Without rebooting the device, we have to boot into TWRP recovery now. To do this, press and hold Volume Down + Home + Power key on your device, as soon as the screen goes black, immediately switch the key from Volume Down to Volume Up while having the Power + Home Key pressed. This will take you to the TWRP recovery.
  11. In TWRP Recovery, Swipe to allow modifications and then tap “Install > Locate the SuperSU.zip file > Select this file > Swipe to confirm flash > flash it”.
  12. Once SuperSU.zip file flashing ends, reboot your device into system.
  13. As it boots up, checkout the SuperSu in application drawer. Also install BusyBox from Play Store.
  14. Verify root access using Root Checker.
  15. That’s all. You’re now set to unleash the open source nature of Android.

Don’t forget to backup Nandroid now. And also learn How to install Android 7.0 Nougat CyanogenMod 14 on your Galaxy Tab 4 10.1.

Stuck with anything? Reach us out through the comment box below!

Source

Fix iPhone/iPad Won’t Download Or Update Apps

0
Fix iPhone/iPad Won’t Download Or Update Apps

In this Post, I’ll tell you how to Fix iPhone/iPad Won’t Download Or Update Apps. I’ve collected all possible solution that can Fix iPhone/iPad Won’t Download Or Update Apps.

Read more:

Fix iPhone/iPad Won’t Download Or Update Apps

Fix iPhone/iPad Won’t Download Or Update Apps:

Internet connection:

This is the first thing you should do, because if your internet connection is not working then you cannot download or update your Apps.

  • Settings > Wi-Fi and make sure it is turned on.
  • Settings > Cellular and make sure Cellular data is turned on.

Airplane mode:

  • Open your iPhone Home Screen.
  • Tap on Settings.
  • At the top of the screen, you’ll see AirPlane Mode.
  • Turn on the Airplane mode, wait for 15-20 seconds.
  • Now Turn off the Airplane mode.

Restart App Store app:

You have to close App Store from the recent apps, you can call it as a force to close. Double tap the home button and you’ll see all the apps which are running in the background close all of them and them reopen App Store, sometimes apps running in the background make such that your iPhone/iPad Won’t Download Or Update Apps.

Date & Time – Set automatically:

  • Navigate to Settings
  • Next, tap General
  • Tap Date & Time
  • Toggle the switch next to “Set automatically” to turn it on.

Restart your iPhone:

This one is the universal solution for every technology device, all you have to do is Try a soft reboot will fix things for you, Press and Hold power button for 4-5 seconds. When you see a pop-up saying “slide to power off” just go with the flow and turn off your device. Once your device is completely off wait for 1 minute and then turn it on.

Sign out/ Sign in from the App Store:

  • Navigate to Settings
  • Tap iTunes & App Store
  • Next, tap on your Apple ID
  • Tap Sign Out
  • Sign in again.

Renew Lease:

  • Go to Settings
  • Tap Wi-Fi
  • Find your Wi-Fi network and tap on the info button (i) right next to it
  • Tap Renew Lease.

Free up some storage:

This can help you, delete some of your apps which are not getting used. If your Space is full then you cannot Download Or Update Apps.

Update the software:

  • Go to Settings > General > Software Update
  • Tap Download and Install or Install Now.

To update the software using iTunes:

  1. plug-in your Apple device.
  2. Now open iTunes and wait for it to detect your device.
  3. As soon as your device is detected, click on “Check for updates”.
  4. If the update is available through iTunes, it will begin downloading and install it once done.
  5. That’s all.

Reset all settings:

  • Settings.
  • General.
  • Reset.
  • Reset All Settings.
  • Type your Passcode.
  • Tap Ok.

This is all for now, Bookmark this post and I’ll keep updating more solutions regarding ” iPhone/iPad Won’t Download Or Update Apps “.

Install AryaMod Note 7 ROM on Galaxy Note 3 to get all Galaxy Note 7 features

0
Install AryaMod Note 7 ROM on Galaxy Note 3 to get all Galaxy Note 7 features

Galaxy Note 7 was turning out to be Samsung’s best device ever unless the exploding debacle started. The phone boasted off some massive features. Samsung equipped it with top of the line hardware and software features. Now that the Galaxy Note 7 is completely over, all the users can do is to grab its cool features and keep the memories of the phone alive. Galaxy Note 7’s ROMs have started landing in for other Galaxy smartphones. A Note 7 ROM based on AryaMod has already made its way for the Galaxy Note 3 which literally reflects the Note 7 in Note 3 now.note-7-rom-on-galaxy-note-3

The ROM is based on Galaxy Note 7’s N930FXXU1APG7 firmware. The operating system version is Android 6.0.x Marshmallow. It packs up almost all the new features that you may have seen in the new Galaxy Note 7. These new features include the new UI of the Galaxy Note 7 and the new enhanced Air Command as well. There are sound MODs like Viper4Android and others builtin in this ROM. Apart from that, you can choose the camera application of the Galaxy Note 5, Galaxy S7 Edge or the Galaxy Note 7. Your Note 3’s UI will be completely revamped as you flash this Note 7 ROM on your Galaxy Note 3. You can have a look on all the features of this ROM on its official thread here.

Furthermore, this ROM is supposed to work with the LTE variants of the Galaxy Note 3 only. It will not work with the standard Galaxy Note 3 N900. You can download and install AryaMod Note 7 ROM on Galaxy Note 3 N9005 and other Galaxy Note 3 LTE variants to get all Galaxy Note 7 features.

Precautions

  1. This ROM is intended for  Galaxy Note 3 N9005. Do not try flashing this ROM on any other device otherwise you will result in bricking it. Check your device’s model number under settings > about device.
  2. Your Galaxy Note 3 must be running on the latest firmware prior to flashing this ROM. It must have latest bootloader and modem installed on it.
  3. Charge your phone up to 50% to avoid any power issues during the flashing process.
  4. Flash a custom recovery on your Galaxy Note 3.
  5. Backup everything including your important contacts, call logs and text messages.
  6. Don’t forget to create a Nandroid backup. This is highly recommended so that you can revert back to your previous system in case of a mishap.
  7. Backup EFS partition to avoid EFS corruption later on.
  8. Follow the instructions to the letter.

DISCLAIMER: FLASHING CUSTOM ROMS VOIDS THE WARRANTY OF A DEVICE AND ITS NOT RECOMMENDED OFFICIALLY. WHILE YOU’RE GOING TO DO THIS, MAKE SURE THAT YOU’RE DOING THIS AT YOUR OWN RISK. IN CASE OF A MISHAP TECHBEASTS, SAMSUNG OR THE DEVICE MANUFACTURERS MAY NOT BE HELD RESPONSIBLE.

Install AryaMod Note 7 ROM on Galaxy Note 3 to get all Galaxy Note 7 features

  1. Download latest AryaMod ROM.zip file according to your device
    1. AryaMod_Note7_PortV2.0.zip 
  2. Connect your phone to your PC now.
  3. Copy the .zip file to the storage of your phone.
  4. Now disconnect your phone and turn it off complete.
  5. Boot into TWRP recovery now, in order to do so, turn it on by pressing and holding Volume Up + Home Button + Power Key. You should see the recovery mode in a while.
  6. Now in TWRP  recovery, wipe cache, factory data reset and advanced options > dalvik cache, cache and system.
  7. After wiping all these three, select “Install” option.
  8. Now select “Install Zip >  Select AryaMod_Note7_PortV2.0.zip  file > Yes”.
  9. This will flash the ROM in your phone, once done get back to the main menu in recovery.
  10. Reboot your device.
  11. You should see the Android 6.0 Marshmallow Note 7 Port AryaMod running on your device in a while.
  12. That’s all!

First boot may take up to 10 minutes, you may not worry if it’s taking that much long. In case it’s taking too long, you may boot into TWRP recovery and wipe cache and dalvik cache and reboot your device as it may fix the issue. In case your device is having issues, you may return to your old system using the Nandroid backup or follow our guide here to install stock firmware.

Got any queries? Reach us out through the comment box below.

Install Android 7.1 Nougat on Galaxy Note 3 N9005 via CM 14

1
Install Android 7.1 Nougat on Galaxy Note 3 N9005 via CM 14

Android 7.1 Nougat is now available for the Galaxy Note 3. No, we are not talking about the official Android Nougat. The firmware is available unofficially by means of CyanogenMod 14 custom ROM. Samsung left the Note 3 all alone after updating it to Android Lollipop. Since then, the device hasn’t got any further version of Android and it has been relying on custom ROM developers only. CyanogenMod 14, which is the aftermarket distribution of Android Nougat is available for quite many Android smartphones and now the Note 3 has also joined the league.install-android-7-1-nougat-on-galaxy-note-3-n9005-via-cm-14

The available ROM is in alpha development stage. If you are one of the custom ROM freaks and you are willing to flash it right now, then bear in mind that this ROM is going to have a handful of bugs. Custom ROMs are always expected to carry a few bugs here and there. Android power users should be perfectly fine since they know how to handle custom ROMs. We are going to have a look on a comprehensive guide which will teach you how you can Install Android 7.1 Nougat on Galaxy Note 3 via CM 14.

Precautions

  1. This ROM is intended for  Galaxy Note 3 N9005. Do not try flashing this ROM on any other device otherwise you will result in bricking it. Check your device’s model number under settings > about device.
  2. Charge your phone up to 50% to avoid any power issues during the flashing process.
  3. Flash a custom recovery on your Galaxy Note 3.
  4. Backup everything including your important contacts, call logs and text messages.
  5. Don’t forget to create a Nandroid backup. This is highly recommended so that you can revert back to your previous system in case of a mishap.
  6. Backup EFS partition to avoid EFS corruption later on.
  7. Follow the instructions to the letter.

DISCLAIMER: FLASHING CUSTOM ROMS VOIDS THE WARRANTY OF A DEVICE AND ITS NOT RECOMMENDED OFFICIALLY. WHILE YOU’RE GOING TO DO THIS, MAKE SURE THAT YOU’RE DOING THIS AT YOUR OWN RISK. IN CASE OF A MISHAP TECHBEASTS, SAMSUNG OR THE DEVICE MANUFACTURERS MAY NOT BE HELD RESPONSIBLE.

Install Android 7.0 Nougat on Galaxy Note 3 N9005 via CM 14

  1. Download latest CM 14.zip file according to your device
    1. cm-14.1-20161108-UNOFFICIAL-trader418-hlte-v0.8B.zip
    2. Download Gapps.zip [arm, 7.0.zip] file for Android Nougat.
  2. Connect your phone to your PC now.
  3. Copy all .zip files to the storage of your phone.
  4. Now disconnect your phone and turn it off complete.
  5. Boot into TWRP recovery now, in order to do so, turn it on by pressing and holding Volume Up + Home Button + Power Key. You should see the recovery mode in a while.
  6. Now in TWRP  recovery, wipe cache, factory data reset and advanced options > dalvik cache.
  7. After wiping all these three, select “Install” option.
  8. Now select “Install Zip >  Select cm-14.0…….zip file > Yes”.
  9. This will flash the ROM in your phone, once done get back to the main menu in recovery.
  10. Now once again select “Install > Select Gapps.zip file > Yes”
  11. This will flash the Gapps in your phone.
  12. Reboot your device.
  13. You should see the Android 7.0 Nougat CM 14.0 running on your device in a while.
  14. That’s all!

In order to enable root access on this ROM, go to settings > about device > tap the build number for 7 times. This will enable developer options on in settings. Now open developer options and enable root.

First boot may take up to 10 minutes, you may not worry if it’s taking that much long. In case it’s taking too long, you may boot into TWRP recovery and wipe cache and dalvik cache and reboot your device as it may fix the issue. In case your device is having issues, you may return to your old system using the Nandroid backup or follow our guide here to install stock firmware.

Got any queries? Reach us out through the comment box below.


Adobe Photoshop Fix for PC (Windows XP/7/8/8.1/10 and Mac)

0
Adobe Photoshop Fix for PC (Windows XP/7/8/8.1/10 and Mac)

Adobe has released the all-new Adobe Photoshop Fix onto Android OS now. The new application promises some amazing features. It can retouch your photos and add a completely new life in just a few taps. Adobe Photoshop Fix comes with features like pain, color, retouching your photos, adjusting its dimensions and a lot more. In addition to editing photos on your Android phone, you can also sync Adobe Photoshop Fix with the Adobe CC and Adobe Lightroom. This way you can take editing from your phone to your PC and retouch them further. Adobe Photoshop Fix comes as a free to use application. This coolest part is that you don’t have to be a master to edit your photos on this new app. Adobe Photoshop Fix can retouch your photos for you easily by simply letting you touch those options.adobe-photoshop-fix-for-pc

Adobe Photoshop Fix is already making its way to the top charts of photography apps. You can download this application on your computer as well. Wondering how? Well, here’s the method. You can download and install Adobe Photoshop Fix for PC on a Desktop PC/Laptop running Windows XP/7/8/8.1/10 and MacOS/OS X operating systems. You will need an Android emulator to be able to use Adobe Photoshop Fix for PC. Make the use of BlueStacks emulator to run Adobe Photoshop Fix for PC flawlessly. Let’s go through the features of this new application and then have a look at the installation method of Adobe Photoshop Fix for PC.

Download Adobe Photoshop Fix for PC

  1. First of all, download Adobe Photoshop Fix APK for PC.
  2. Download and install Bluestacks or Remix OS Player: Bluestacks Offline Installer | Rooted Bluestacks |Bluestacks App Player | Remix OS Player for PC
  3. Double click the APK file that you just downloaded.
  4. Let BlueStacks or Remix OS Player install the APK file.
  5. Finish the installation of this game and open the app drawer or all apps in the emulator.
  6. Click the Adobe Photoshop Fix icon to open it, follow the on-screen instructions to play or use it.

Fix iPhone Says No SIM Card, Invalid SIM, Or SIM Card Failure

0
Fix iPhone Says No SIM Card, Invalid SIM, Or SIM Card Failure

Today I’ll tell how to fix iPhone Says No SIM Card, Invalid SIM, Or SIM Card Failure. These are the most common error which every iOS users have faced while using Apple devices. In this Post, I’ll tell you all the possible solution to fix iPhone Says No SIM Card, Invalid SIM, Or SIM Card Failure and more. Let’s the process.!

fix iPhone Says No SIM Card, Invalid SIM, Or SIM Card Failure

Fix iPhone says NO Sim card?:

This the one error which is the most common and irritating one, let’s start the methods to fix iPhone Says No Sim Card.

Toggle Airplane Mode:

  • Open your iPhone Home Screen.
  • Tap on Settings.
  • At the top of the screen, you’ll see AirPlane Mode.
  • Turn on the Airplane mode, wait for 15-20 seconds.
  • Now Turn off the Airplane mode.

This help to fix cellular data, GPS or Bluetooth issue, so this also help you fix iPhone says no Sim card.

Reboot your iPhone:

A simple will get the things working for you most of the time, sometimes because of some glitch, you are experiencing no sim card issue on your iOS devices. Trying a soft reboot will fix things for you, Press and Hold power button for 4-5 seconds. When you see a pop-up saying “slide to power off” just go with the flow and turn off your device. Once your device is completely off wait for 1 minute and then turn it on.

See if your SIM card is properly placed:

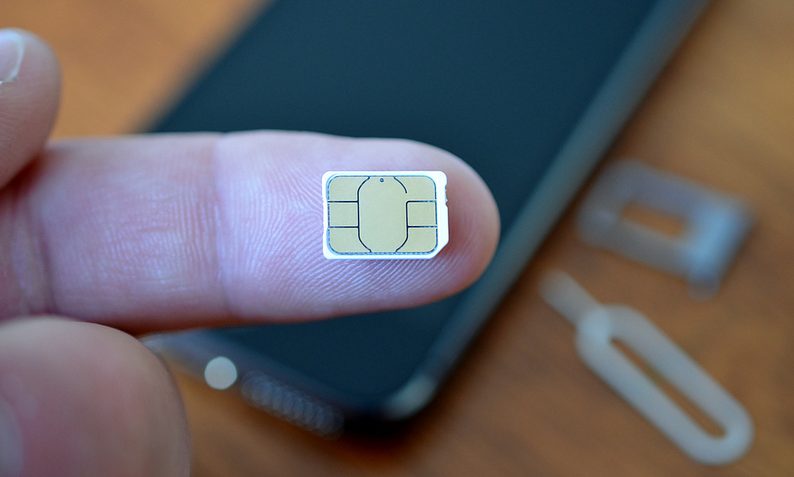
This a must thing to do, use the Pin and take the sim tray. Now carefully check if your SIM card is properly placed or not. If not then place your SIM card properly and insert the SIM card tray back.

Try another SIM card:

May you are seeing no SIM card on your device because of your network, in that case, the best scenario is to try another SIM card of a different network to determine that no SIM card is because of network problem or any other.

Carrier settings update:

  • Go to Settings
  • Tap on General
  • Tap on About

Now if there is a update of your carrier setting you’ll see a message as shown in the photo below. All you have to do is update them in order to fix iPhone says no SIM card error.

iPhone says no SIM card

Reset network settings:

This is the most useful solution till now, follow the steps below to reset network settings to default settings.

  • Go to Settings > General > Reset > Reset all settings.
  • Enter your passcode.
  • Tap Reset all settings to confirm your action.

Upgrade your iPhone to the latest version of iOS:

When ever a new iOS is released Apple Stop siging old iOS versions and people start getting connectivity issues and more. To update your iOS device to the latest version might help you fix iPhone says no SIM card issue.

  • Go to Settings > General > Software Update
  • Tap Download and Install or Install Now..

Fix iPhone says Invalid SIM card or SIM card failure:

If you are experiencing iPhone says Invalid SIM card or SIM card failure, you can try the following steps to fix this issue.

Step1. Restart your device.

Step2. Take out the SIM card tray and check your SIM card is properly placed.

Step3. Try using other carrier SIM to make sure it’s not a carrier issue.

Step4. Reset your netwrok settings to default.

Step5. Update your device to the latest iOS device.

Step6. Factory reset your device using iTunes.

iPhone says No Sim, Invalid SIM card or SIM card failure after iOS update:

  • Restart your device.
  • Take out the SIM card tray and check your SIM card is properly placed.
  • Try using other carrier SIM to make sure it’s not a carrier issue.
  • Reset your netwrok settings to default.
  • Update your device to the latest iOS device.
  • Factory reset your device using iTunes.

iPhone No Sim card installed, Invalid SIM card or SIM card failure after water damage:

If you are facing such issue, I would suggest you to go to the Apple store and let it look by the professionals. Don’t try to be a hero !

DC Legends for PC Download – Win/Mac

1
DC Legends for PC Download – Win/Mac

You can Play DC Legends for PC on your Windows XP/7/8/8.1/10 Desktop PC/Laptop and also Mac OS X Macbook/iMac. Playing DC Legends for PC has been made possible by using Android emulators like BlueStacks, Andy, and Remix OS. Before going through the installation instructions, let’s learn a little bit about this game.

We all want to be Superman, Batman and more heroes of famous Justice league, we now you can because there is a new game called ” DC legends ” which give you chance to lead the team of world superheroes to save the world. DC legends game is created by Warner Bros. International Enterprises that means you can have all your favorite superheroes on your team. You have to save the DC from the shadow of the Blackest Night prophecy, you can learn more about DC legends from Google Play. Let’s start the method to download DC Legends for PC.

DC Legends for PC

DC Legends for PC Download – Windows/Mac:

  1. Download DC Legends APK.
  2. Download and install Bluestacks: Bluestacks Offline Installer | Rooted Bluestacks |Bluestacks App Player
  3. Once you’ve installed Bluestacks, double click the APK that you just downloaded above.
  4. The APK will be installed using Bluestacks, once installed open Bluestacks and locate the recently installed DC Legends.
  5. Click the DC Legends icon to open it, follow the on-screen instructions to play it.

You can also use Andy OS  to install DC Legends for PC, here’s the tutorialHow To Run Android Apps On Mac OS X With Andy.

How to Root and install TWRP recovery on LG V20 Android Nougat

0
How to Root and install TWRP recovery on LG V20 Android Nougat

LG’s 2nd flagship device for the year 2016, the all new LG V20 has been rooted and blessed by a TWRP recovery. The development just happened very recently. With the recovery and root solution out now, you can take your Android Nougat experience on the V20 to an entire new level. LG V20 is already a pure beast, but with the perks of root access, you can install all root specific apps like Greenify, Titanium Backup, Ad Blockers etc. With the TWRP recovery, you can now install Xposed Framework and flash custom ROMs to unleash the real power of your V20.How to Root and install TWRP recovery on LG V20 Android Nougat

The root and recovery solution currently work with the H918 variant of the V20 only. Since Google is making things quite difficult on its Android OS now, rooting and flashing TWRP are not just the same as before. You need to go an extra mile to be able to get across the boundaries on your Android phone. Same is the case here. No traditional flashing methods work with the LG V20 for this moment. You will have to follow the steps very carefully and to the letter to get TWRP and Root on your V20 H918. In the guide coming your way, we have covered the entire method step-by-step. Have a look on it now and learn how to root and install TWRP recovery on LG V20 Android Nougat.

A few things to prepare:

  1. The entire process involves multiple data wipes, so backup each and every single thing from your phone to stay on a safe side.
  2. The process is highly custom and involves a risk of bricking your device. Do not proceed if you are a newbie. This method is only recommended for Android power users.
  3. First of all, download and install LG USB drivers on your computer. Download drivers for Windows | Mac.
  4. Download and install Minimal ADB and Fastboot drivers on your PC. Mac users can use this guide for Mac OS X.
  5. Download all files from this page and copy them to C:\Program Files (x86)\Minimal ADB and Fastboot or where ever you have installed it. Mac users will copy the file to their respective ADB and Fastboot directory.
  6. No, first of all, we need to unlock the bootloader of the LG V20. Let’s have a look on the method now.

Unlock LG V20 Bootloader

  1. Enable USB debugging mode on your LG V20. To do so, go to settings > about device > software info > tap the build number for 7 times to enable Developer Options in settings. Now go to developer options > enable USB debugging mode.
  2. Similarly, enable OEM unlocking from the developer options under settings.
  3. Now connect your LG V20 to your PC and give it the permissions that it is asking on your phone for the ADB and Fastboot mode. You will need to connect your phone in PTP mode at this point.
  4. Now you need to open the command window on your computer. To do so, either go to C:\Program Files (x86)\Minimal ADB and Fastboot > press and hold shift key + right click on an empty area within the folder > click on open command window here or you can open the Minimal ADB and Fastboot.exe file if you have created a desktop shortcut.
  5. Issue the following commands in command window one by one now.
    1. adb reboot bootloader
      1. wait for your phone to reboot in bootloader mode, once it boots up, issue the next command
    2. fastboot oem unlock
      1. this will unlock the bootloader and wipe your phone completely.
    3. fastboot getvar all
      1. this command should return bootloader unlocked: yes.
    4. fastboot reboot
      1. this command should reboot your phone normally now.
  6. That’s all. You are ready for the next step now.

Install a running recovery before flashing the actual TWRP recovery

  1. Download all the recovery binaries from this page.
  2. Now copy all the downloaded files to the Minimal ADB and Fastboot folder mentioned above.
  3. After copy all the files, open command window from the ADB and Fastboot folder once again.
  4. Reboot into adb and fastboot mode once again and this time, issue all these commands.
adb push dirtycow /data/local/tmp
adb push recowvery-applypatch /data/local/tmp
adb push recowvery-app_process64 /data/local/tmp
adb push recowvery-run-as /data/local/tmp

adb shell

$ cd /data/local/tmp
$ chmod 0777 *
$ ./dirtycow /system/bin/applypatch recowvery-applypatch
"<wait for completion>"
$ ./dirtycow /system/bin/app_process64 recowvery-app_process64
"<wait for completion, your phone will look like it's crashing>"
$ exit

adb logcat -s recowvery
"<wait for it to tell you it was successful>"
"[CTRL+C]"

adb shell reboot recovery
"<wait for phone to boot up again, your recovery will be reflashed to stock>"

adb shell

$ getenforce
"<it should say Permissive, adjust source and build for your device!>"

$ cd /data/local/tmp
$ ./dirtycow /system/bin/run-as recowvery-run-as
$ run-as exec ./recowvery-applypatch boot
"<wait for it to flash your boot image this time>"

$ run-as su
#
"<play around in your somewhat limited root shell full of possibilities>"
Do not restart your device at this point.

How to Flash TWRP recovery and finally Root the LG V20 now

  • Download TWRP recovery.img file. Copy this file to the Minimal ADB and Fastboot folder now.
  • Download SuperSU.zip file. If you don’t want to go through the hassle of copying this file by mounting USB storage after booting up into TWRP recovery, then grab a USB OTG and copy these files to the OTG.
  • Make sure that you have followed all steps of the running recovery.
  • Now enter the following commands in command window once again.
adb push twrp-3.0.2-0-beta4-h918.img /sdcard/twrp.img
adb shell
$ run-as exec dd if=/sdcard/twrp.img of=/dev/block/bootdevice/by-name/recovery
"<wait for it to complete>"
$ reboot recovery
  • As TWRP recovery now boots up, it will ask you whether you want to allow system modifications or not. Swipe yes to allow modifications.
  • Now connect USB OTG and mount the USB OTG. Tap Install > Locate the SuperSU.zip filea and flash it.
  • After flashing SuperSU.zip file, get back to the main menu in TWRP recovery > tap the Wipe option > Format Data to disable encryption.
  • Reboot your device now and it should be rooted with SuperSU installed in it. That’s all.

Source