Home Blog Page 294

Update Galaxy A5 A500F/A500H to Official Android 6.0.1 Marshmallow [How To]

0
Update Galaxy A5 A500F/A500H to Official Android 6.0.1 Marshmallow [How To]

Galaxy A5 A500F and A500H are the mid-range Galaxy smartphones from the year 2015. Galaxy A5 originally came out back in 2014. Samsung loaded the phone with a 5.0-inch display having 720 x 1280 pixels resolution and 294 ppi. On the board we had a Snapdragon 410 CPU accompanied by Adreno 306 GPU and a RAM of 2 GB. A 13 MP shooter was fixed at the back and a 5 MP selfie shooter was there. Galaxy A5 ran on Android 4.4.4 KitKat out of the box. The phone was updated to Android Lollipop afterwards. It’s quite surprising to see that Samsung has started rolling out Android 6.0.1 Marshmallow for the phone in select regions. We are not kidding, the Marshamllow update for the first-gen A5 is happening for real.update-galaxy-a5-a500fa500h-to-official-android-6-0-1-marshmallow-how-to

The Android Marshmallow for Galaxy A5 brings all those new changes you saw in Android Marshmallow by Google. A few UI touchups are there, performance, battery life and stability of the phone have improved significantly. The update currently is rolling out through OTA. In case you haven’t got it yet, you might be in need of a method to update your phone manully. Update your Galaxy A5 to Marshmallow manually is possible through Samsung’s own flashtool Odin. You just have to get your hands on the firmware files and then follow the guide to update the phone right now.

The firmware installed through Odin is completely safe, secure and untouched. It is in its official form and the flashing process involves no risk at all. Follow the steps to the letter to avoid any mishap. Go ahead to see how to update Galaxy A5 A500F/A500H to Official Android 6.0.1 Marshmallow right now.

Pre-requisites

  • Make sure that your device is exactly as mentioned above. To check out what device you have, go to Settings > More/General > About Device or Settings > About Device and match the model number. Be careful about the device model number, flashing a file on a device not listed here might result in bricking it up. In that case, we may not be held responsible.
  • Your device’s battery should not be weak. In case your device goes dead during the flashing process, your device may get soft bricked and you might be in need of flashing stock firmware and that will ultimately result in wiping up your data as well.
  • Always use the original data cable to establish connection between your Android device and your computer / laptop. Using ordinary data cables might interrupt the flashing process, so to avoid any mishap, you need to meet this requirement as well.
  • Backup everything!

    Backup SMS Messages
    Backup Call Logs
    Backup Contacts
    Backup Media – Copy your files manually to your PC or Laptop.
    Backup EFS – If rooted, otherwise skip this step.

  • Make sure that you turn off Samsung Kies while using Odin3 flashtool. Samsung Kies will interrupt Odin3 and will result in causing errors and may not let you flash your desired firwmrae. Also, make sure that you turn off any antivirus software you’ve installed and also disable firewall to avoid any connection and flashing issues.

Required Downloads & Installations

  1. Download and install Samsung USB Drivers on your PC.
  2. Download and extract Odin3 v3.10.6.
  3. Download the Official Android 6.0.1 Marshmallow firmware according to your device: SM-A500H | SM-A500F
  4. Extract the downloaded firmware file to get the .tar.md5 file.

Update Galaxy A5 A500F/A500H to Official Android 6.0.1 Marshmallow [How To]

  1. Make sure that you read the instructions listed above carefully and you’re all set to go ahead now.
  2. Wipe your device complete in order to attain a neat installation. You may boot into the recovery mode and perform a factory data reset.
  3. Open Odin3.exe.
  4. Put your Galaxy A5 in download mode. To do so, turn it off and wait for 10 seconds. Turn it on by pressing and holding Volume Down + Home Button + Power Key simultaneously, You should see a warning, press Volume Up to continue. In case this method doesn’t work for you, try one from this guide.
  5. Connect your device to your PC.
  6. As soon as Odin detects your phone, the ID:COM box should turn blue.  Make sure that you’ve installed Samsung USB drivers before connecting.
  7. For Odin 3.09 or 3.10.6 hit the AP tab. Select the Android Marshmallow firmware.tar.md5 or firmware.tar, that you downloaded and extracted above.
  8. If you’re using Odin 3.07, you will select “PDA” tab instead of the AP tab, rest of the options remain untouched.
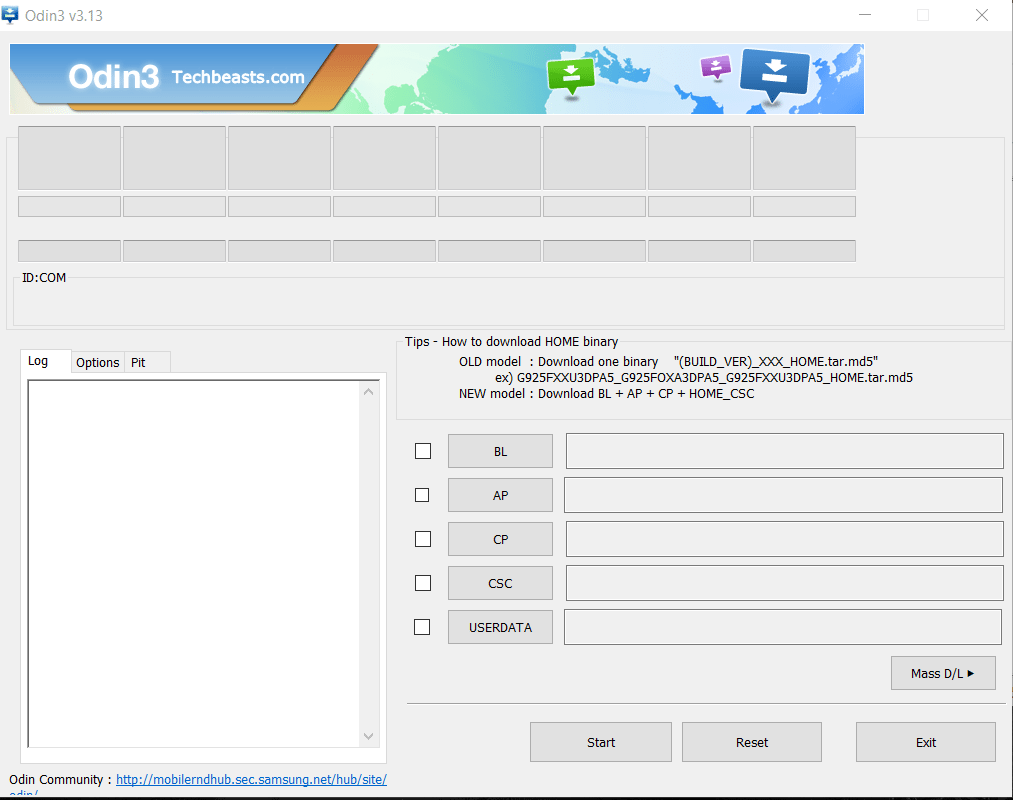
  9. Make sure that the options selected in your Odin are exactly as shown in the pic.Odin 3.10.6 Explained_Techbeasts
  10. Hit start and wait till the firmware  flashing is complete, The flashing process box will turn green upon successful flashing.
  11. Once the flashing process has been completed successfully, disconnect your device and reboot it manually.
  12. Once the device boots up, checkout the new firmware now.
  13. Your device will be running on official Android 6.0.1 Marshmallow firmware.
  14. Once updated to stock, do not try to downgrade, or else you will result in messing up EFS partition of your device.
  15. That’s all!

Got any queries? Make sure that you drop em’ in the comment box below. Good Luck!

Install Official Android 6.0.1 Marshmallow on Galaxy J7 J700F/J700H [How To]

0
Install Official Android 6.0.1 Marshmallow on Galaxy J7 J700F/J700H [How To]

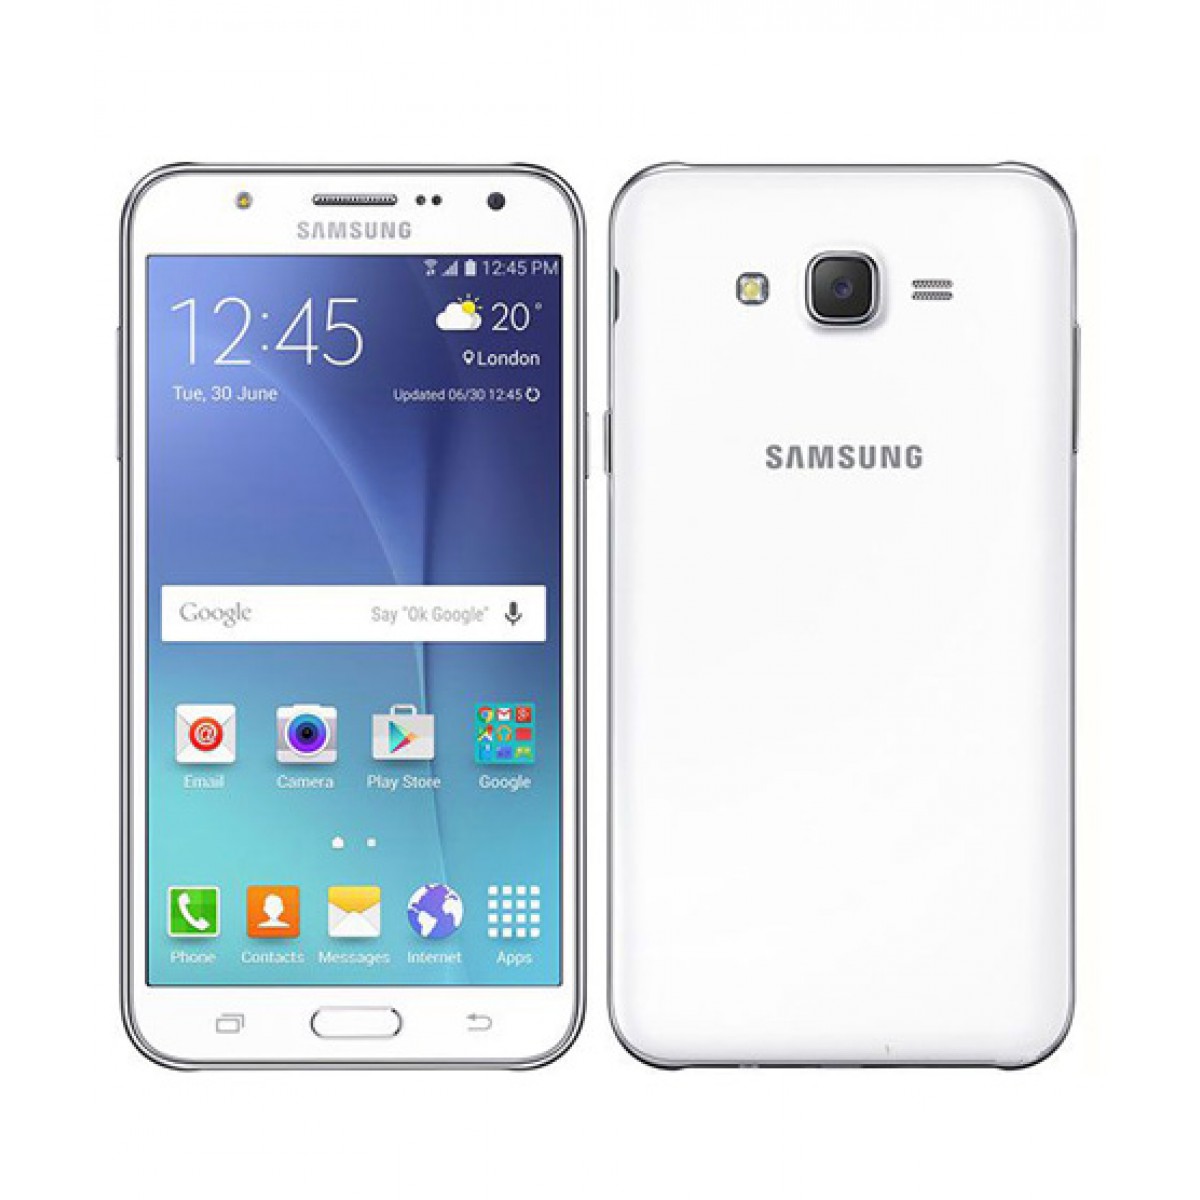
Galaxy J7’s J700F and J700H variants have been updated to Android 6.0.1 Marshmallow. J7 owners can enjoy all those new features packed inside the Android Marshmallow by Google. Marshmallow for the Galaxy J7 brings a handful of changes. You may find some graphical changes in the settings application and in the notification panel of your phone. The overall performance of the phone got a boost and battery life has improved as well. Android 6.0.1 Marshmallow brings more stability and more power to the phone.install-official-android-6-0-1-marshmallow-on-galaxy-j7-j700fj700h-how-to

Samsung pushed the update through OTA in select regions. If you haven’t already got the OTA update or if you’re not in a region where this update reached, you may need a manual solution. Don’t worry, you are not totally out of luck. You can flash the Android 6.0.1 Marshmallow on your Galaxy J7 using Odin. It’s a tool for Samsung Galaxy smartphones which enables the users to flash stock firmware manually on the phone. You just need to download the appropriate firmware and then you are good to flash it. In this guide you will learn how to install official Android 6.0.1 Marshmallow on Galaxy J7 J700F/J700H. Let’s go through the pre-requisites and then flash the firmware right now to upgrade your Galaxy J7 to all new Android Marshmallow.

Pre-requisites

  • Make sure that your device is exactly as mentioned above. To check out what device you have, go to Settings > More/General > About Device or Settings > About Device and match the model number. Be careful about the device model number, flashing a file on a device not listed here might result in bricking it up. In that case, we may not be held responsible.
  • Your device’s battery should not be weak. In case your device goes dead during the flashing process, your device may get soft bricked and you might be in need of flashing stock firmware and that will ultimately result in wiping up your data as well.
  • Always use the original data cable to establish connection between your Android device and your computer / laptop. Using ordinary data cables might interrupt the flashing process, so to avoid any mishap, you need to meet this requirement as well.
  • Backup everything!

    Backup SMS Messages
    Backup Call Logs
    Backup Contacts
    Backup Media – Copy your files manually to your PC or Laptop.
    Backup EFS – If rooted, otherwise skip this step.

  • Make sure that you turn off Samsung Kies while using Odin3 flashtool. Samsung Kies will interrupt Odin3 and will result in causing errors and may not let you flash your desired firwmrae. Also, make sure that you turn off any antivirus software you’ve installed and also disable firewall to avoid any connection and flashing issues.

Required Downloads & Installations

  1. Download and install Samsung USB Drivers on your PC.
  2. Download and extract Odin3 v3.10.6.
  3. Download the Official Android 6.0.1 Marshmallow firmware according to your device: SM-G700H | SM-J700F
  4. Extract the downloaded firmware file to get the .tar.md5 file.

 Install Official Android 6.0.1 Marshmallow on Galaxy J7 J700F/J700H [How To]

  1. Make sure that you read the instructions listed above carefully and you’re all set to go ahead now.
  2. Wipe your device complete in order to attain a neat installation. You may boot into the recovery mode and perform a factory data reset.
  3. Open Odin3.exe.
  4. Put your Galaxy J7 in download mode. To do so, turn it off and wait for 10 seconds. Turn it on by pressing and holding Volume Down + Home Button + Power Key simultaneously, You should see a warning, press Volume Up to continue. In case this method doesn’t work for you, try one from this guide.
  5. Connect your device to your PC.
  6. As soon as Odin detects your phone, the ID:COM box should turn blue.  Make sure that you’ve installed Samsung USB drivers before connecting.
  7. For Odin 3.09 or 3.10.6 hit the AP tab. Select the Android Marshmallow firmware.tar.md5 or firmware.tar, that you downloaded and extracted above.
  8. If you’re using Odin 3.07, you will select “PDA” tab instead of the AP tab, rest of the options remain untouched.
  9. Make sure that the options selected in your Odin are exactly as shown in the pic.Odin 3.10.6 Explained_Techbeasts
  10. Hit start and wait till the firmware  flashing is complete, The flashing process box will turn green upon successful flashing.
  11. Once the flashing process has been completed successfully, disconnect your device and reboot it manually.
  12. Once the device boots up, checkout the new firmware now.
  13. Your device will be running on official Android 6.0.1 Marshmallow firmware.
  14. Once updated to stock, do not try to downgrade, or else you will result in messing up EFS partition of your device.
  15. That’s all!

Got any queries? Make sure that you drop em’ in the comment box below. Good Luck!


How to Unlock Bootloader of Verizon Google Pixel and Pixel XL

0
How to Unlock Bootloader of Verizon Google Pixel and Pixel XL

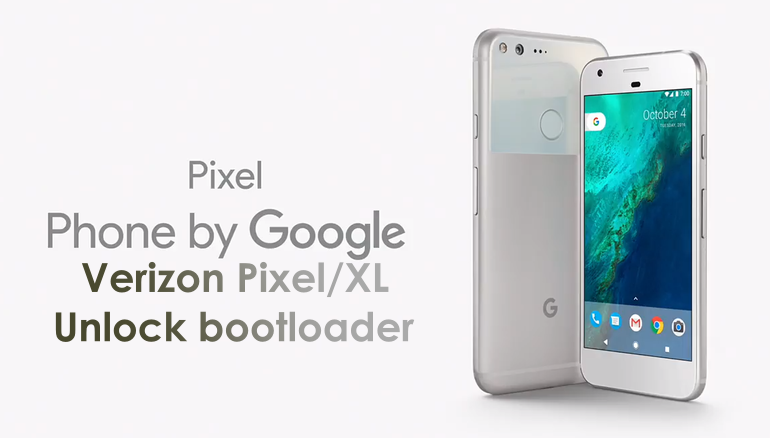
At this time of the year, the best Android smartphones that you can safely put your bet on are the Google Pixel and Pixel XL. It’s very obvious that the Galaxy Note 7 fiasco gave Google a chance to shine its very own stars. Taking the opportunity up, Google is putting in every single effort to make sure that the maximum possible users get their hands on the new Pixel smartphones. Google has equipped both these smartphones with a 4 GB RAM, Snapdragon 821 CPU, Adreno 530 GPU and many other top-of-the line hardware features. Both the Pixel phones run on Android Nougat out of the box.Unlock Bootloader of Verizon Google Pixel and Pixel XL

Keeping in view the potential these devices have got, there is no point in staying stock and keeping the phones as they are. Having a Google Pixel phone and not unleashing its true potential is kind of unacceptable. To begin with all things custom, you need to unlock the bootloader and then you need to flash a custom recovery and root your phone as well. The international variants of Pixel and Pixel XL can be unlocked in a few commands in the ADB and Fastboot mode, but the hiccups start happening when it comes to carrier branded Pixels.

Verizon Google Pixel and Pixel XL come with a bootloader which isn’t very easy to unlock. The ordinary fastboot oem unlock or any other commands simply won’t work if you wish to unlock the bootloader of your VZW Pixel or Pixel XL. Thanks to famous Android developer Beaups, who developed a tool named dePixel8 to unlock the bootloader of the Pixel smartphones by Verizon in a single blow. You just need to push the files of this tool into your smartphone through ADB commands and it will do the magic. To help you further, we have this guide here which explains how to unlock bootloader of Verizon Google Pixel and Pixel XL.

Pre-requisites

  1. The battery of your phone should be charged up to 50% to avoid power issues during rooting process.
  2. Allow USB debugging and enable OEM unlock from the developer options in your phone.
  3. Download and install Google USB drivers.
  4. Download and setup Minimal ADB & Fastboot drivers.  Mac users can use this guide to install ADB & Fastboot drivers.
  5. Backup everything before unlocking the bootloader. Unlocking the bootloader wipes off your phone, so this is a necessary step.
  6. We will not be responsible if something goes wrong. Make sure that you are doing everything at your own risk.

How to Unlock Bootloader of Verizon Google Pixel and Pixel XL

  1. Download DePixel8 tool and copy it to C drive > Program Files > Minimal ADB & Fastboot folder or wherever you have installed the Minimal ADB tool.
  2. Now within the Minimal ADB and Fastboot folder,  press and hold shift key and right click on an empty area within the folder >  open command window here. Mac users can see in the Mac guide for the file they will be opening.
  3. Connect your VZW Pixel or Pixel XL to your PC now using a USB cable.
  4. Now in the command window, enter the following commands one by one.
    • adb push dePixel8 /data/local/tmp

    • adb shell chmod 755 /data/local/tmp/dePixel8

    • adb shell /data/local/tmp/dePixel8

  5. After entering these commands one by one, your Pixel phone should automatically boot into the bootloader mode.
  6. Once your phone is in the bootloader mode, enter the following commands one by one.
    • fastboot oem unlock

  7. This will start unlocking the bootloader now. On the screen of your phone, accept the unlocking process by select yes and let it do the job.
  8. Now enter this command to reboot your phone: fastboot reboot

That’s all. If something fails to work for you, start over and it should work right. Let us know if you face any difficulties.

How to install TWRP Recovery on Google Pixel and Pixel XL

0
How to install TWRP Recovery on Google Pixel and Pixel XL

Google Pixel and Pixel XL are out in the markets in all their glory. Galaxy Note 7’s death makes these 2 smartphones the best choices to go with right now. Since these are Google branded phones, things like Custom ROMs, Rooting and Flashing sound good. Google has always made its devices development friendly, but this time Google did the opposite. The Pixel and Pixel XL smartphones were not so easy to root, but they were somehow rooted. Now these two smartphones are also blessed by a TWRP recovery, but as we said, because of Google’s changes in the system, the recoveries are not flashable as they were supposed to. To root your phone or to install a recovery, you need to follow a little different approach as compared to that of the traditional methods.install-twrp-recovery-google-pixel-pixelxl

The TWRP recovery for Pixel and Pixel XL is still in its alpha stage, but it works well. In order to flash it on your phone, you first need to boot up a TWRP recovery on your phone temporarily and then flash another build of TWRP to make sure that it sticks on the phone. Flashing TWRP wipes off the root for now, but you can immediately regain the root access by flashing a latest version of SuperSU. We will have a look on the steps explaining how to install TWRP Recovery on Google Pixel and Pixel XL. Go ahead with us now and get it done.

Before rooting, follow these instructions

  1. Make sure that your phone is either international Google Pixel/XL. It can be Verizon Google Pixel/XL as well since you can easily unlock the bootloader of the aforementioned smartphones.
  2. The battery of your phone should be charged up to 50% to avoid power issues during rooting process.
  3. Allow USB debugging and enable OEM unlock from the developer options in your phone.
  4. Download and install Google USB drivers.
  5. Download and setup Minimal ADB & Fastboot drivers.  Mac users can use this guide to install ADB & Fastboot drivers.
  6. Backup everything before unlocking the bootloader. Unlocking the bootloader wipes off your phone, so this is a necessary step.
  7. Now unlock the bootloader of your Google Pixel phone.
  8. We will not be responsible if something goes wrong. Make sure that you are doing everything at your own risk.

How to install TWRP Recovery on Google Pixel and Pixel XL

  1. Download the recovery and root files.
  2. Copy the recovery.img file to C drive > Program Files > Minimal ADB & Fastboot folder.
  3. Copy the recovery-alpha1.zip and the SuperSU.zip file to the internal or external storage or your Google Pixel/Pixel XL.
  4. Now within the Minimal ADB and Fastboot folder,  press and hold shift key and right click on an empty area within the folder >  open command window here. Mac users can see in the Mac guide for the file they will be opening.
  5. Turn off your phone completely. Turn it on by pressing and holding Volume Down + Power Key. This will boot your phone into bootloader mode.
  6. Connect your phone to your PC now.
  7. In the command window, issue the following command:
    • for Pixel: fastboot boot twrp-3.0.2-alpha1-fastboot-sailfish.img
    • for Pixel XLfastboot boot twrp-3.0.2-alpha1-fastboot-marlin.img
  8. Now as your Pixel or Pixel XL boots up into TWRP recovery, tap Install > Locate the copied twrp-pixel-installer-marlin/sailfish-3.0.2.0-alpha1.zip file and flash it.
  9. After flashing the TWRP recovery, get back to the main menu in TWRP again and tap Reboot > Recovery.
  10. This will reboot your phone in the newly flashed TWRP recovery. Now in this recovery, tap Install > Locate the SuperSU.zip file and flash it.
  11. Once done, reboot your phone into system. That’s all.

Stuck with something? Reach us out through the comment box below.

How to Root Google Pixel and Pixel XL

0
How to Root Google Pixel and Pixel XL

Google’s all new HTC built Pixel and Pixel XL smartphones are out there rocking on the shelves. The smaller variant, Google Pixel comes with a 5-inch AMOLED screen. The phone is powered up with Qualcomm Snapdragon 821 CPU accompanied by Adreno 530 GPU. A RAM of 4GB and internal storage of 32GB/128GB is there on this phone. The Pixel XL sports almost same specifications, the only difference is in the display department. Pixel XL 5.5-inch QHD display. Another difference between these two phones is of the battery. The Pixel XL equips a 3450 mAh battery and the Pixel equips a 2770 mAh battery.root-google-pixel-and-pixel-xl

When the Google Pixel and Pixel XL came out a month ago, things seemed pretty hard with the root access and custom recoveries. It didn’t take long for the root God Chainfire to get across the boundaries and break the jails on Google’s all new Pixel smartphones. Chainfire successfully rooted both new Pixel smartphones and updated his SuperSu application for all of the users across the globe. What’s cool about the new SuperSu is that, this is a systemless root. It doesn’t modify or change the system of your phone and rather modifies the boot file.

So, if you have got your hands on a Pixel phone and now you are looking around for some MODs or to install Xposed framework in order to tweak your phone, you will need the root access and it is already available. A few steps to follow and you will be done. In the upcoming guide, we will learn how to Root Google Pixel and Pixel XL running Android 7.1 Nougat.

Before rooting, follow these instructions

  1. Make sure that your phone is either international Google Pixel/XL. It can be Verizon Google Pixel/XL as well since you can easily unlock the bootloader of the aforementioned smartphones.
  2. The battery of your phone should be charged up to 50% to avoid power issues during rooting process.
  3. Backup everything before unlocking the bootloader. Unlocking the bootloader wipes off your phone, so this is a necessary step.
  4. Now unlock the bootloader of your Google Pixel phone.
  5. Allow USB debugging and enable OEM unlock from the developer options in your phone.
  6. Download and install Google USB drivers.
  7. Download and setup Minimal ADB & Fastboot drivers.  Mac users can use this guide to install ADB & Fastboot drivers.

How to Root Google Pixel and Pixel XL

  1. Download the root file according to your device.
  2. Unzip the downloaded root file. You will get the boot-to-root.img file now.
  3. Copy the boot-to-root.img file to C drive > Program Files > Minimal ADB & Fastboot folder.
  4. Now within the Minimal ADB and Fastboot folder,  press and hold shift key and right click on an empty area within the folder >  open command window here. Mac users can see in the Mac guide for the file they will be opening.
  5. Turn off your phone completely. Turn it on by pressing and holding Volume Down + Power Key. This will boot your phone into bootloader mode.
  6. Connect your phone to your PC now.
  7. In the command window, issue the following command:
    • fastboot boot boot-to-root.img

  8. This will install the boot-to-root.img file on your Google Pixel or the Pixel XL. Hold on and wait patiently. As your phone boots up, check out the SuperSu application in the app drawer and verify root access using Root Checker. That’s all.

Also learn: How to install TWRP Recovery on Google Pixel and Pixel XL

Stuck with something? Reach us out through the comment box below.


Best Bing Backgrounds Free Download

0
Best Bing Backgrounds Free Download

Following are the best Bing Backgrounds Free Download, I’ve collected the best of the best Bing Backgrounds Wallpapers for your desktop. You can also set Bing Backgrounds as your Wallpapers automatically by using our guide below.

How to Set Bing Images as your Desktop Wallpaper.

Best Bing Backgrounds Free Download

Bing Backgrounds Free Download

Bing background free wallpaper.

Bing Backgrounds Free Download

Bing background HD.

Bing Backgrounds Free Download

Bing background HD Download.

Bing Backgrounds Free Download

Bing background Images

Bing Backgrounds Free Download

Bing background Images.

Bing Backgrounds Free Download

Bing backgrounds 1920×1200.

Bing Backgrounds Free Download

Bing Backgrounds Nature.

Bing Backgrounds Free Download

Bing Backgrounds Free Download.

Bing Backgrounds Free Download

Bing Backgrounds Photo Download.

Bing Backgrounds Free Download

Bing windows 7 widescreen wallpapers.

Bing Backgrounds Free Download

Desktop Free Bing Wallpaper.

Bing Backgrounds Free Download

Free Download Bing background.

Bing Backgrounds Free Download

Images Bing Backgrounds.

Bing Backgrounds Free Download

Photo Images Bing background.

Bing Backgrounds Free Download

Windows 7 widescreen wallpapers HD Bing.

Enable Two Step Verification on your WhatsApp Number

0
Enable Two Step Verification on your WhatsApp Number

WhatsApp is coming up with a lot of new features, a few days back Video Calling feature made available and now another security feature that is used by many companies. You can secure your WhatsApp number with Two-Step Verification, In this post, I’ll tell you how you can Enable Two-Step Verification on your WhatsApp Number.

Two Step Verification on your WhatsApp

Note: To enable WhatsApp two-step verification you need to have the WhatsApp Latest version. You can Download it from the following link.

Download WhatsApp APK.

Once you’ve enabled two-step verification on your WhatsApp, nobody can register against your number. If someone is trying you’ll get notified because you’ll get verification password on your number.

This will make WhatsApp more secure than before so follow the steps below in order to enable Two-Step Verification on your WhatsApp number.

How To Enable Two-Step Verification on your WhatsApp Number:

  • Open WhatsApp on your device.
  • Tap on the 3 dots icon ( Android ) Tap on Settings ( iOS ).
  • Now Select Account » Two-step verification and tap on the ENABLE button.
  • Choose a Six digit password and type it in and Tap on Next.
  • You have confirmed your six digit password again and then tap on next.
  • Now you have to enter your email address, it will be used for password reset-purpose in-case you forget it.
  • You’ll get a Two-step verification is enabled screen. That’s it, hit the DONE button.

Google PhotoScan for PC Download – Win/Mac

0
Google PhotoScan for PC Download – Win/Mac

You can use Google PhotoScan for PC on your Windows XP/7/8/8.1/10 Desktop PC/Laptop and also Mac OS X Macbook/iMac. Using Google PhotoScan for PC has been made possible by using Android emulators like BlueStacks, Andy, and Remix OS. Before going through the installation instructions, let’s learn a little bit about this app.

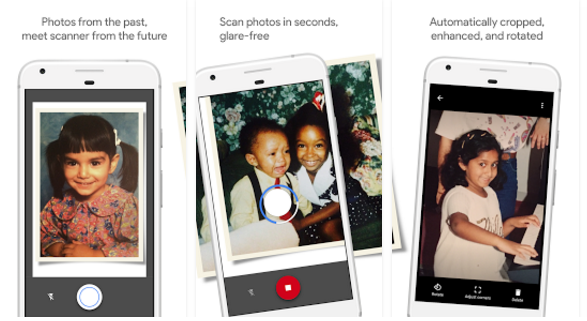
Finally after such a long time we have an app which let us scan and save our favorite printed photos using your phone’s camera. Google has given us a good tool to use it as a scanner to scan printed photos. This is not it, automatic cropping is added, perspective correction and smart rotation. Now let’s start the method to install Google PhotoScan for PC.

Photoscan for pc

PhotoScan for PC Download – Windows/Mac:

  1. Download PhotoScan APK.
  2. Download and install Bluestacks: Bluestacks Offline Installer | Rooted Bluestacks |Bluestacks App Player
  3. Once you’ve installed Bluestacks, double click the APK that you just downloaded above.
  4. The APK will be installed using Bluestacks, once installed open Bluestacks and locate the recently installed PhotoScan.
  5. Click the PhotoScan icon to open it, follow the on-screen instructions to play it.

You can also use Andy OS  to install PhotoScan for PC, here’s the tutorialHow To Run Android Apps On Mac OS X With Andy.

Download Angry Birds Evolution for PC

0
Download Angry Birds Evolution for PC

Rovio is kind of a company that will never get tired of releasing a new game one after another. The new Angry Birds Evolution just came out of the curtains as another new variant of the viral Angry Birds series. This time, Angry Birds have made their way into the RPG genre. The battle is between bad piggies and cute birds once again. It’s the time to take a strong initiative against the black sheep. In order to prove your feet, you need to build a team and to build a strong team, you need the birds with unique skills. Now there is a collection of 100+ birds from which you can pick up the ones fitting best in your squad.angry-birds-evolution-for-pc

Apart from fighting against the bad-pigs in ordinary levels, you will get a chance to jump in the weekly events and other challenges enabling yourself to put a high score on the leaderboards. You can fight head to head with other players in the PigBall mode in the all new Angry Birds Evolution. The game once again brings hundreds of levels. And of-course, the graphics are stunning as always.

Angry Birds Evolution is available for both iOS and Android. You can play this game on your computers powered either with the Windows or the MacOS operating systems as well. Follow this guide to be able to play Angry Birds Evolution for PC on your Desktop PC/Laptop running Windows XP/7/8/8.1/10 and MacOS/OS X. Just get an Android emulator like the BlueStacks or Remix OS Player and then follow the steps coming your way to start playing Angry Birds Evolution for PC right away.

Download Angry Birds Evolution for PC – Tested and Working Method

  1. Download and install Nox App Player on your computer.
  2. Now download the Angry Birds Evolution APK.
  3. Double-click the downloaded Angry Birds Evolution APK to start its installation via Nox App Player.
  4. Wait a minute and let Nox install the APK file now.
  5. Once the APK has been installed, it will appear on the home-screen of Nox.
  6. You can now click on the Angry Birds Evolution icon in Nox to launch it.
  7. Download the game data and proceed with the on-screen instructions now.
  8. The game won’t take too long to run now. You’re all set to play it now. That’s all.

Download Angry Birds Evolution for PC (Windows and Mac)

  1. Download Angry Birds Evolution APK for PC.
  2. Download and install Bluestacks or Remix OS Player: Bluestacks Offline Installer | Rooted Bluestacks |Bluestacks App Player | Remix OS Player for PC
  3. Double click the APK file that you just downloaded.
  4. Let BlueStacks or Remix OS Player install the APK file.
  5. Finish the installation of this game and open the app drawer or all apps in the emulator.
  6. Click the Angry Birds Evolution icon to open it, follow the on-screen instructions to play it.

Download Grow Castle for PC – Windows and Mac

0
Download Grow Castle for PC – Windows and Mac

Grow Castle is an arcade game from RAON games. You get to build and raise your own castle from scratch in this game. Once you are set after building a castle, your task ultimately changes into protecting the castle. Enemies will be finding a chance to demolish your castle every now and then. Deploy your soldiers and use intelligent strategies to defend your castles. You can place heroes on the ground to protect the castle.grow-castle-for-pc

The game brings over 80 heroes and all of them have got their unique skills. There are cool upgrades available for your castle and the heroes as well. Build colonies and bring as many people as you can to build a healthy and wealthy society. Grow Castle has a real-time ranking system in which you can track your rank among all other players across the globe. Grow Castle is slightly different from those ordinary and typical simulation/arcade games. You sure will have fun after playing this game. It’s available without any cost in the Play Store for Android.

It is a defense game to protect the castle from enemy attack.
If growth can be placed in the castle tower and the hero on each floor.
Archer of the town is becoming a lot more more powerful the more upgrades.

More than 80 heroes can use their own skills.
Some heroes are made to give a strong archers of the town, another hero is cursed enemy.
This strategy is important because only a hero can be mounted up to nine.

When you build colonies and hire workers, you can earn more gold.

Clear up to a higher level and check out my rankings in the midst of the world.

※ Features
Real-time rankings
Hero promotion system
Addictive without reason
Build your own castle

Grow Castle is playable on a computer as well. You can install and play Grow Castle for PC on your Windows XP/7/8/8.1/10 and MacOS/OS X computers. Just get an Android emulator like the BlueStacks or BlueStacks 2. Follow the steps given below to download and install Grow Castle for PC right now.

Download Grow Castle for PC (Windows and Mac)

  1. Download Grow Castle APK for PC.
  2. Download and install Bluestacks or Remix OS Player: Bluestacks Offline Installer | Rooted Bluestacks |Bluestacks App Player | Remix OS Player for PC
  3. Double click the APK file that you just downloaded.
  4. Let BlueStacks or Remix OS Player install the APK file.
  5. Finish the installation of this game and open the app drawer or all apps in the emulator.
  6. Click the Grow Castle icon to open it, follow the on-screen instructions to play it.


[ List ] – Best Android Widgets 2016

0
[ List ] – Best Android Widgets 2016
Best Android Widgets 2016

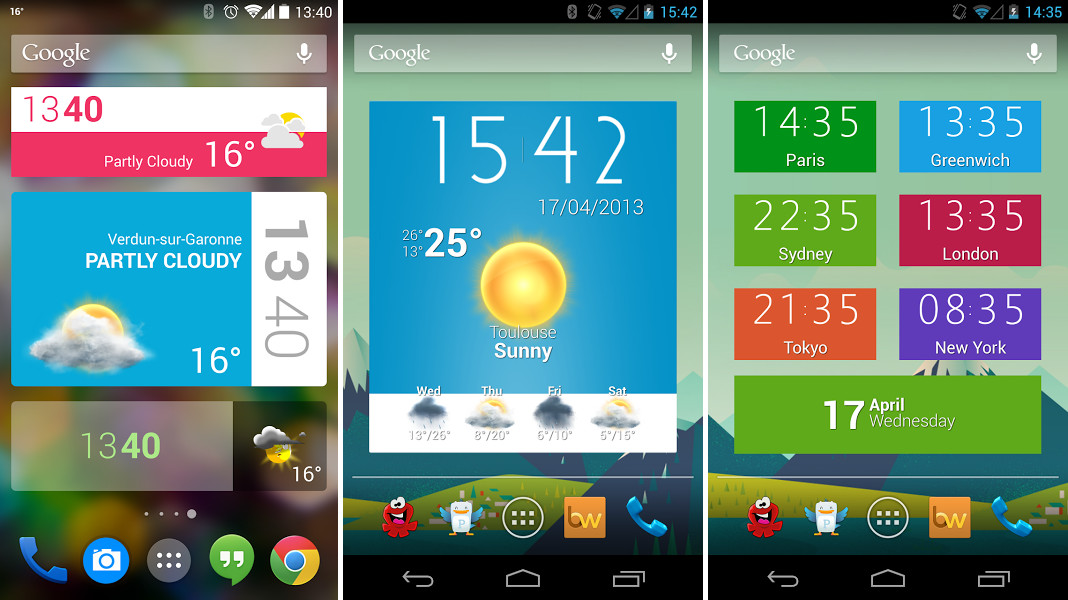
Best Android Widgets. Widgets Play vital role to make your Android screen look cool, it gives you quick access to basic settings and apps. Today I’ve collected Best Android Widgets for all of you, you can download all these widgets from the following links. These Widgets are of many types of e.g weather forecast, alarm, clock, and Wallpapers. Now keep that in mind when you are using Widgets your device seems a bit slower than usual, but if you choose the right widget for your device you won’t any difference.

Best Android Widgets 2016:

Best Android Widgets 2016

DashClock Widget:

Best Android Widgets

DashClock is a home screen clock widget for Android 4.2+ phones and tablets, with lock screen support for Android 4.2-4.4. It also exposes additional status items called extensions. The widget comes bundled with extensions that give you instant access to.

DashClock Widget
Price: Free

Power Toggles:

Best Android Widgets

An advanced power control widget. FREE and No ads. Note: Many toggle (GPRS, NFC, AirplaneMode…) are not working on Lollipop even with root. This is a known issue. I am still looking for a fix.

Power Toggles
Price: Free

 Google Keep:

Best Android Widgets
Best Android Widgets 2016

Quickly capture what’s on your mind and get a reminder later at the right place or time. Speak a voice memo on the go and have it automatically transcribed. Grab a photo of a poster, receipt or document and easily organize or find it later in search. Google Keep makes it easy to capture a thought or list for yourself, and share it with friends and family.

Zooper Widget:

Best Android Widgets

Minimal, classy, extremely customizable, and battery friendly “Do It Yourself” widget with almost limitless possibilities. If you like the software and want to support the development please rate it! If you have issues or requests send me an email or use the forum at http://zooper.uservoice.com/.

Zooper Widget
Price: Free

DIGI Clock Widget:

Best Android Widgets
Best Android Widgets 2016

Select widget click actions: tap on widget to load alarm application, widget settings or any installed application. Widget background with selectable color and opacity from 0% (transparent) to 100% (completely opaque).


DIGI Clock Widget
Price: Free

More Best Android Widgets:

Battery HD
Price: Free
HD Widgets
Price: $0.99

These are the Best Android Widgets of 2016, Enjoy and do tell us your experience in comments. I’ll Keep updating this post when ever a new widget app is out .

Download Aptoide for PC – Windows/Mac

0
Download Aptoide for PC – Windows/Mac

You can use Aptoide for PC on your Windows XP/7/8/8.1/10 Desktop PC/Laptop and also Mac OS X Macbook/iMac. Using Aptoide for PC has been made possible by using Android emulators like BlueStacks, Andy, and Remix OS. Before going through the installation instructions, let’s learn a little bit about this app.

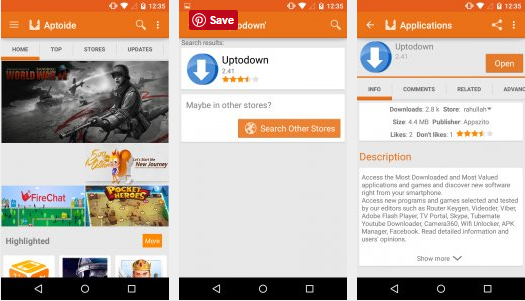
Aptoide is an alternate for Google Play, a complete store for those who want to download apps with freedom no registration or anything just install the Aptoide and start download apps for your Android devices. It’s a sort of free app store where users can also upload files and you can download any app by just searching the app by name. Now let’s start the method to download and install Aptoide for PC.

Aptoide for PC

Aptoide for PC Download – Windows/Mac:

  1. Download Aptoide APK.
  2. Download and install Bluestacks: Bluestacks Offline Installer | Rooted Bluestacks |Bluestacks App Player
  3. Once you’ve installed Bluestacks, double click the APK that you just downloaded above.
  4. The APK will be installed using Bluestacks, once installed open Bluestacks and locate the recently installed Aptoide.
  5. Click the Aptoide icon to open it, follow the on-screen instructions to play it.

You can also use Andy OS  to install Aptoide for PC, here’s the tutorialHow To Run Android Apps On Mac OS X With Andy.