Contents
How To Root Motorola Moto G.
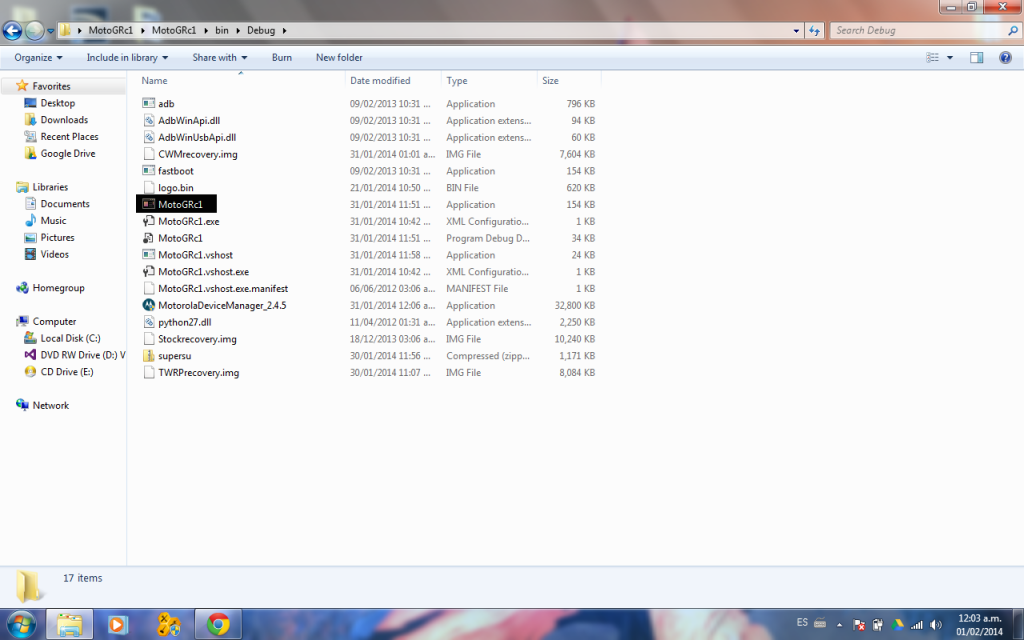
- Extract the MotoGRc1.zip and launch the MotoGRc1 inside the bin/debug folder.
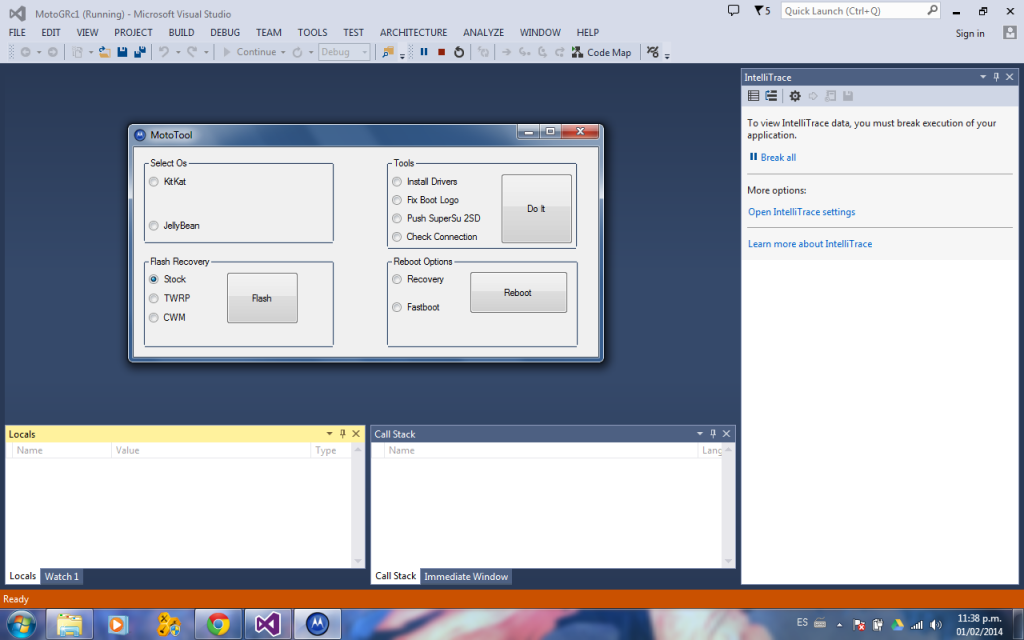
- This is basically the Whole app.
Here is the List of Commands:
Push SuperSu 2SD:This will push supersu to your SD.
Flash Stock Recovery:This will flash the stock recovery (Android 4.4.2).
Flash CWM Recovery:This will flash CWM recovery in your device.
Flash TWRP Recovery:This will flash TWRP recovery in your device.
Reboot Recovery:This will reboot your device into recovery.
Reboot Fastboot: Will reboot the device to fastboot.
Install drivers:This will install the drivers of the moto g(when finish the installation remember close the CMD window).
Fix Boot Logo: This will remove the warning when you unlock the bootloader, and put the normal logo(Blue M).
Check Connection: This will check if your device is detected by the tool(you can do this manually, go where is adb and pres shift+right click, then select open command prompt here and put “adb devices” if, is detected will return a number.
Restore:This will revert to fully stock your device, will wipe everything, flash the image XT1032 US RETAIL.
- Now if you want To root your device, Select Kit-Kat, if your device is running Kit-Kat Or Jelly Bean if your device is running Jelly Bean.
- Then Select Push Super SU and Click Do it.
- Then Select the Desired Recovery, and Click Flash.
- When the Recovery is installed, Select Fastboot and then Reboot.
- Now you will find your device is fastboot mode, Select Recovery from it. Now navigate to install zip from sdcard and select Super SU.
- Confirm the Installation on Next Screen and wait till the Process is over.
- Then Reboot your device from Recovery.
- That’s It, now install any Root Checker device to Check whether your device is Rooted or not.


