

Samsung Galaxy A8 2018 is the mid-range phone from Samsung, launched in January this year. The A series phones are the best choice when it comes to buying a mid-range phone. It came with an edge-to-edge design similar to the Galaxy S8. Also, the fingerprint is located on the back below the camera module. You can now boost your Galaxy A8 2018 with new Official TWRP. A senior XDA member BlackMesa123 ported the Official TWRP on Galaxy A8 2018. Here’s a simple guide on how to Install Official TWRP on Galaxy A8 2018.
The Samsung Galaxy A8 2018 is powered by Exynos 7885 Octa processor coupled with 4GB RAM for the 32GB/64GB ROM models. Features a 5.6 inch, 18.5:9 ratio Super AMOLED capacitive touchscreen display with 1080 x 2220 pixels resolution. AMOLED displays have better color saturation, amazing contrast and above all when there are black pixels on the display, it actually turns off that individual pixel to increase the contrast and save some battery as well. The device leads with a good Class-leading performance, Premium build quality and design, Super fast to charge, and has a featured display.
Contents
TWRP
The recovery, simply put, is a runtime environment separate from Android that can perform various system-related tasks. The stock recovery on most Android devices can apply OTA updates, delete user and cache content, and allow external tools from a microSD card to run functions on the device. TWRP is one of the most popular custom recoveries for Android smartphones. It is a touch-based custom recovery with an intuitive interface and a lot of useful functions.
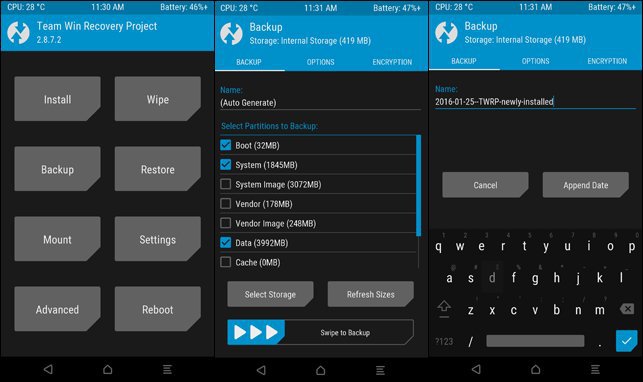
It has an intuitive touch interface with a lot of useful options. You can take Nandroid backups, restore the backups in case your device stuck at bootloop, flash custom ROMs, mods and any flashable ZIP file. Apart from that, you can wipe individual partitions on your device, run custom scripts and much more.
TWRP is more dynamic as it displays large buttons that you can easily tap on to execute, and it also guesses what you’ll want to do next & the buttons aren’t set in stone. Like after flashing a new ROM, it’ll replace one of the buttons with an option to wipe the cache and other related functions. It also stays in the folder you browsed to last, which is great if you have multiple related files you need to flash that are all located in the same folder. It boasts a long list of supported devices, so you should be able to find a recovery made for your device.
So, if you’re ready to go, let’s see how to unlock the bootloader and Install Official TWRP on Galaxy A8 2018.
Prerequisites
- This guide is only for the Galaxy A8 2018. Do not try this on any other phone.
- Charge your phone good enough so that it doesn’t go dead during the installation process.
- Backup your call logs, contacts and SMS messages. Also backup your media content. This is important since unlocking the bootloader will completely wipe your phone.
- Enable OEM Unlocking and USB Debugging mode on your device.
- Use the OEM data cable to connect your phone to your PC.
- Your device must not be RMM locked. Given below are the ways to identify the RMM lock.
- Reboot to download mode. If you see the text RMM state = Prenormal, then it means your device is RMM locked.
- The OEM unlock option is not available under the Developer options after you have enabled it. If it’s not available, then that is because your device is RMM locked. It should be available normally.
- When you boot to recovery mode again, you get the message “Only official released binaries are allowed to be flashed”. This also means that your Galaxy A8 2018 is RMM locked.
Download TWRP Recovery for Galaxy A8 2018
- Samsung USB drivers
- Download Odin3 v3.13.1 on your PC and extract it to get Odin3.exe.
- TWRP
- latest no-verity-opt-encrypt zip
- RMM Bypass zip
How to Install Official TWRP on Galaxy A8 2018
- Boot Galaxy A6 into download mode. To do this follow the below steps.
- Switch off your device. Now press and hold the Volume Down + Power + Volume Up together till you see a warning screen.
- Once Press Volume Up button to confirm to enter into Download Mode.
- Download and open Odin3 v3.13.1.exe on your PC and then connect your Galaxy A6 to the PC with a USB cable.
- When Odin recognizes your device you’ll be shown as Added!! message in log box. If it was not showing, reinstall the drivers.
- The ID:COM port in Odin will turn yellow if you have installed correct drivers.
- Download the TWRP file in your PC and load it into Odin. To do this, click on the AP button on Odin and select the TWRP file.
- Go to the options tab to check whether Re-partition and Auto Reboot checkboxes are selected or not. If they were selected deselect them.
- Click on the Start button and the TWRP file will be installed on your Galaxy A8 2018. It’ll be ended up with the message PASS! on successful installation of TWRP recovery.
- Repeat the process if you got any error.
- Force reboot and access the recovery mode again to get to TWRP recovery. To do this
- Press and hold Volume down + Power button together until the screen goes off, but once the screen goes off, do this quickly: while still holding the Power button, press Volume Up in place of Volume down button to reboot into recovery mode.
- You’ll be now welcomed with TWRP home screen and it will be asking you for “allow for System modification”. Tap on the “Keep Read Only” button to not allow system modification and access TWRP safely.
- Click on Reboot>>System.
That’s all. You have successfully installed TWRP on your Galaxy A8 2018 smartphone. You can reboot into recovery mode by pressing “Volume up + Power” buttons until your device boots into recovery mode.
 Google Camera for Redmi Note 8 Pro")

")


