Home Blog Page 501

Install Android 4.4 KitKat on Samsung Galaxy Note using Asylum Omni Custom ROM

4
Install Android 4.4 KitKat on Samsung Galaxy Note using Asylum Omni Custom ROM

Samsung’s very first Galaxy Note ran on Android 2.3 Ginger Bread out of the box, Samsung updated the device to Ice Cream Sandwich and later updated to Android 4.1.2 Jelly Bean, Since the Android Jelly Bean update is there, there hasn’t been any word by Samsung on further updates for the device to Android 4.3 or Android 4.4 KitKat. Since the device was a trendsetter by Samsung, it is vastly used all over the world and is much popular with the users and the developers as well, so nothing to worry about if the updates stopped because the great developers over XDA community are always there to bring the best staff for us.

Well, let’s get back to the topic. Team Asylum has developed the unofficial Omni ROM based on Android 4.4 KitKat for our beloved Galaxy Note GT-N7000. If you are a Custom ROM freak, you must be familiar with the Omni ROM as it is one of the very best custom ROMs available around. Before we begin flashing, please keep in mind that this ROM is only for those who always like to get their hands on the latest and greatest version of Android before it comes out or if its not available officially, these ROMs are nightly builds and may contain bugs, also may not be kept for every day use, so go ahead only if you are familiar with what you’re doing.

Samsung-Galaxy-Note-1

Disclaimer: The methods involved in flashing custom roms and rooting your phone is highly custom and may result in bricking your device, and has nothing to do with Google or the device manufacturer that is Samsung in our case. Also rooting your device will void its warranty and you will be no longer eligible for any kind of free device services by the manufacturers/warranty providers. In case of any mishap we may not be held responsible. Follow these instructions to the letter to avoid any mishap or bricking. Make sure that whatever you do, you are doing it at your own responsibility.

Here are some pre-requisites and pre-cautions:

      • This ROM is only for Galaxy Note GT N7000. Do not try this on any others phone.
      • Your phone must be rooted and have a CWM recovery installed. Follow our full guide here to do so[Use only this method].
      • Using CWM recovery backup your current ROM. This is highly recommended in case something goes wrong, or the new custom ROM doesn’t work well for you, you can immediately go back to your older system.
      • Make sure that your phone’s battery is charged at least over 60%. This is highly recommended in order to prevent any mishap during the flashing process.
      • Make sure that you backup your important media content, contacts, call logs and text messages. This is highly recommended as you may have to wipe your phone in case something doesn’t work.
      • Alright, follow this guide to letter in order to get the flashing process done successfully.

Files you need to download:

Download Asylum_Omni_4.4_20131202_n7000.zip file.

Download gapps for Android 4.4.

Download the latest Raw Kernel form Here.

Download SuperSu.zip v1.80 from Here.

How to Install Android 4.4 KitKat Asylum Omni Custom ROM on Galaxy Note:

      1. Make sure that you’ve rooted your phone and flashed a custom recovery using the link attached above.
      2. Place all the downloaded .zip files on your phone’s sd card.
      3. Now boot into recovery on your phone. To do so, turn off your device completely, now turn it by pressing and holding Volume Up + Home button + Power Key simultaneously. You should see the custom recovery interface now.
      4. In custom recovery select “Install Zip>Choose Zip from sd/ext sd>Select Raw Kernel.zip file”.
      5. Proceed the installation and wait for the Raw Kernel flashing to be finished.
      6. Now reboot into recovery once again, do not reboot into the system [Important].
      7. Wipe cache and dalvik cache using the wipe options in the recovery.
      8. In recovery, now select “Install Zip>Choose Zip from sd/ext sd>Select Asylum Omni.zip ROM file” and select “Yes”.
      9. After flashing the ROM, now flash gapps.zip in the same way.
      10. After flashing gapps, now flash SuperSu.zip in the same way.
      11. Reboot.
      12. Congrats! You’ve installed the Asylum Omni Custom Android 4.4 KitKat ROM on your Galaxy Note GT N7000. Enjoy KitKat unofficially!

4a8or8tdmo3x18l

We hope that you will surely love this ROM. All the credit goes to the developer for his awesome work, consider a donation.

That’s all. In case you got any queries or face any difficulties, feel free to stop by the comment box below. We will try our best to help you out. Thanks and Happy Flashing!

Install Android 4.4 KitKat CM 11 Custom ROM on Sony Xperia SP

Install Android 4.4 KitKat CM 11 Custom ROM on Sony Xperia SP

Sony’s Xperia SP is Sony’s mid range device, and is also one of my favorite Xperia phones. The phone fits perfect in your hands, has a 1.7 GHz dual core processor, 1 GB RAM, 8 MP camera at the back and a VGA camera on front, while the display is 4.6 inch scratch resistant TFT, what else could you expect from a mid range phone, and I guess Xperia SP is the perfect choice. Well, the device runs on Android 4.1.2 Jelly Bean out of the box and Sony has planned the upgrade to Android 4.4 KitKat. As off now Sony has announced that the phone will receive Android 4.3 in the next month (December, 2013). What we have for you here today, is the unofficial CyanogenMod 11 based Android 4.4 KitKat custom ROM for Sony Xperia SP.

If you are familiar with custom ROMs and if you are one of those Android freaks who always like to taste the latest and greatest version of Android using custom ROMs before it actually comes out officially, then this post is surely for you. The guys at XDA have always been good with their work, and they have cooked up an unofficial CyanogenMod 11 based KitKat ROM, I’ve explained the method to install this ROM on Xperia SP in simple and easy steps below, scroll down and follow this guide to letter, but before we begin please keep in mind, as I mentioned that this is unofficial CM 11 ROM and is a nightly build, it may contain bugs, and may not be kept for every day use, flash it only if you have much knowledge about the custom ROMs and if you can handle these…

Xperia SP

Disclaimer: The methods involved in flashing custom roms and rooting your phone is highly custom and may result in bricking your device, and has nothing to do with Google or the device manufacturer that is Samsung in our case. Also rooting your device will void its warranty and you will be no longer eligible for any kind of free device services by the manufacturers/warranty providers. In case of any mishap we may not be held responsible. Follow these instructions to the letter to avoid any mishap or bricking. Make sure that whatever you do, you are doing it at your own responsibility.

Here are some important points to keep in mind and some pre requisites:

      1. Make sure that your phone is Xperia SP C5303/2. Do not try this on any other phone.
      2. Make sure that your phone’s bootloader is unlocked, if not then unlock it here.
      3. Your phone must be rooted and have a CWM recovery installed. Follow this post to root and install CWM recovery.
      4. Your phone’s battery must be charged over at least 60%. This is highly recommended in order to prevent any mishap during the flashing process.
      5. Make sure that you backup your important media content, contacts, call logs and messages.
      6. Make sure that you make nandroid backup using the backup option in CWM recovery. This is highly recommended so that if the custom ROM doesn’t work, or if you do not like it after flashing, you can immediately restore the previous system on your phone.
      7. Once again I insist, use this guide to letter to prevent any mishap.

How to flash Android 4.4 KitKat CM 11 Custom ROM on Sony Xperia SP:

      1. Download the ROM’s zip file from Here .
      2. Open the downlaoded .zip folder and extract the boot.img kernel file only.
      3. Download Android ADB and Fastboot drivers, follow our full guide here to make it easy.
      4. Now place the kernal file that is boot.img file that you extracted from the zip folder in the fastboot folder that you downloaded form the guide linked above.
      5. After placing the kernel file in the fastboot folder, open the fastboot folder. Press shift and then Right click on any empty area inside the folder, now select “Open command prompt here“. flash it using the command “Fastboot Flash Boot Boot.img”. In case you are confused, follow the Android ADB & Fastboot drivers guide carefully.
      6. .
      7. Place the ROM.zip file and Gapps.zip file on your phone’s internal or external sd card.
      8. Boot into CWM recovery. To do so, turn off your device, now turn it on and quickly press volume up and down keys, you will get the CWM interface.
      9. In CWM wipe the cache and dalvik cache.
      10. Now select “Install Zip>Choose Zip from Sd card / external Sd card”.
      11. Select the ROM.zip file that your placed on your phone’s Sd card.
      12. It should take a few mins to flash the ROM, now once again select “Install Zip>Choose Zip from Sd card / external Sd card”.
      13. Choose the Gapps.zip file this time and flash it.
      14. As soon as done flashing, clear cache and dalvik cache again.
      15. Reboot system now, you should see the CM logo on the boot screen now, it may take upto 10 minutes in order to boot into home screen.
      16. Congrats! Enjoy unofficial Android 4.4 KitKat custom ROM on your Sony Xperia SP now.

That’s all for now. Do tell us about your experience about this ROM. In case you got any queries or you face any difficulties, feel free to stop by the comment box below. We will try our best to help you out. Thanks All!

FIFA Apk For Android – Download Here

0
FIFA Apk For Android – Download Here

Good News for Football lover’s now you cannot miss a MOMENT from Foot ball events because FIFA has released official App for Smartphones. You can download it from Android Play Store. And for those who are on old version no need to worry because Techbeasts team is first to give FIFA Apk for Android. Following are the features and download files.

FIFA Apk

Download the most comprehensive football app on the planet and unlock the world of football. Hundreds of competitions, thousands of goals and over a million minutes of football every single week!

From the Bundesliga to the Barclays Premier League, MLS to La Liga, the World Match Centre provides unrivalled coverage of 197 leagues across the globe. Personalise your World Match Centre with national teams, competitions, and clubs ensuring you never miss kick-off, the final whistle or any action in-between ever again.

Get ready for the 2014 FIFA World Cup Brazil™! Be the first to discover the fate of your national team by following the Final Draw LIVE on December 6th! After the Final Draw is finished plot the path to glory with our World Cup match schedule, exclusive destination guide and team profiles.

Need to know where your national team is placed in the FIFA Coca-Cola World Ranking? Now you can check men’s and women’s national team rankings wherever you are, 24-7.

FIFA News brings you closer to the world of football than ever before with breaking stories, galleries from Getty Images, videos from the FIFA TV Studio and FIFA archives.

Explore FIFA brings to life FIFA’s passion for developing the game and building a better future. Travel through each journey to discover our worldwide projects, the people they reach and share incredible stories of the lives they change.

Download the official FIFA app and never miss a moment in football again!

How to Download and Install FIFA Apk For Android:

1. Download FIFA Apk and place it on your Root of  SD card.

2. Now open it with Package installer and run.

3. After few seconds your FIFA app will be installed.

Install Android 4.3 Omega V16 ROM on Samsung Galaxy S4 I9505

0
Install Android 4.3 Omega V16 ROM on Samsung Galaxy S4 I9505

Samsung’s latest flagship Galaxy S4 has already topped all the charts because of the hefty features it has to offer. The developer community has always been pretty active with Sammy’s devices as the Galaxy S series is much popular with both the users and developers, and Samsung’s less restrictions allow the developers to develop the best stuff for the devices.

Samsung-Galaxy-S4-44358_2628

Although Galaxy S4 has a might list of features, but ever wondered that you can still add much charm to the functionality of your phone, enhance the performance of your phone and do a lot of other things that are not possible on the stock firmware that Samsung installed in the device, well, if you’re looking for such firmware, that has a number mods, features and is bug free and smooth then you have spotted the right place.

Recently I installed Omega V16 ROM on my Snapdragon Galaxy S4 and found it really awesome. The Omega ROM has a number of features that will make you love your device even more after installing it. What’s more good is, Samsung recently implemented Knox through the Android 4.3 update in its main stream devices, but Omega ROM is knox free and does not trip your Knox counter at all, so you can still claim warranty simply after flashing a stock ROM. The mods include Call recording, Battery icon,  Modded youtube (Can download videos from Youtube as well), long press menu button to kill all the apps, Camera shutter sound off, No sms to mms conversion and the list goes on…

I9505-01 I9505-02

Well getting back to the topic, as I told you guys that i found this ROM quite impressive, I couldn’t stop myself from appreciating the developer’s work and share this ROM with you along with the installation guide. This ROM is fully working, is bug free as well, so you may keep it for every day use until the next version of this ROM is out. Follow this guide to letter in order to prevent any mishap during the flashing process.

Here is what you need to do before flashing this ROM:

      1. This guide is only for Samsung Galaxy S4 GT I9505 (Snapdragon). Do not try this on any other device.
      2. Your phone must be rooted and have CWM or TWRP recovery installed. Follow the guide here to Root your phone. Although it is mentioned that the method is for Android 4.3, but should work on device having lower Android version as well.
      3. Backup your current ROM using the Backup Option in the recovery. This is highly recommended so that if something goes wrong or the Custom ROM doesn’t satisfy you or you face issues after installing it, you can immediately go back to the previous system.
      4. After you’ve rooted your phone, install Titanium Backup and backup all your important apps/system data.
      5. Also make sure that you backup EFS.
      6. Backup all your important Media Content, Contacts, Call logs and Messages. This is highly recommended in case you wipe your phone completely after the flashing process to achieve the best results from the ROM.
      7. Make sure that your phone is charged at least over 60%. This is highly recommended in order to prevent any mishap during the flashing process.

Installing Android 4.3 Omega v16 ROM on Galaxy S4 I9505:

    • Download and Extract Odin3 v3.09 – Get it Here.
    • Download and Install Samsung USB drivers – Get Here.

First of all you need to deal with your phone’s Modem. Please do not skip the modem installation process as the Modem problem may cause the no service issue on your phone. If you already have a latest modem i.e XXUE then skip the modem installation process.

Check your phone’s baseband version, if it is XXUB you need to flash this Modem first GSM_Modem_XXUEMJ5_and_LTE_Modem_XXUBMH1.tar

If your baseband version is XXUD you need to flash this Modem first GSM_Modem_XXUEMJ5_and_LTE_Modem_XXUEMJ5.tar 

How to Flash the Modem Properly:

    • Open Odin
    • Put your phone in download mode, to do so turn it off completely wait for a few seconds and then turn it on by pressing and holding Volume down + Home Button + Power Key then Volume Up to continue.
    • Connect your phone to your PC using the original data cable, as soon as the PC detects your phone the ID:COM box in Odin should turn blue.
    • Select the “Phone” tab now, and select the Model file that you downloaded above according to your phone’s current baseband version.
    • Hit start, and the installation should complete quickly.
    • Check the baseband version now under Settings>More>About Device, it should be changed to the new one that you flashed.
    • Alright now, head towards the ROM flashing process.

Installing the ROM:

Download the Omega v16 Android 4.3 ROM .zip file.

    • Place the downloaded file on your phone’s sd cared, either internal or external.
    • Boot into CWM or TWRP recovery that you’ve installed on your phone. To do so, turn off your device completely, then turn it on by pressing and holding Volume Up + Home Button + Power Key. You should now see the custom recovery interface.

For CWM Recovery:

Now in recovery Select “Install Zip From Sdcard>Choose Zip from Internal or External SD Card>Select the downloaded ROM’s .zip file>Select Yes”

For TWRP Recovery:

Boot into recovery and select “Install Zip>Select the file from the location where you placed it>proceed the installation”.

    • Complete the ROM installation process and reboot. You’ve successfully installed the Omega v16 Android 4.3 ROM on your phone. Enjoy!
    • Although it is not required to wipe data-cache-dalvik cache after flashing this ROM, but you may wipe it in order to attain the best results from this ROM. Make sure that you’ve backed up everything before wiping.

That’s all, We hope that you will love this ROM, and the developer surely deserves a donation. Checkout the official thread. In case you face any issues or have any queries, feel free to stop by the comment box below. We will try our best to help you out. Thanks

Install Android 4.4 KitKat CM 11 based custom ROM on Sony Xperia Z

4
Install Android 4.4 KitKat CM 11 based custom ROM on Sony Xperia Z

Sony has planned the Android 4.4 KitKat upgrade for its previous flagship device Xperia Z that may be available anytime soon, mean while Sony is busy making the update the developers over XDA have already cooked a custom Android 4.4 KitKat ROM based on unofficial CynogenMod 11. Those who can’t wait for the official KitKat update and want to taste the latest and greatest version of Android before it comes it, the Android 4.4 KitKat CM 11 based custom ROM is there now, install it and check out what the KitKat has to offer.

Sony-Xperia-Z5

So, if you are looking out how you can get this custom ROM running on your device, then here is the tutorial for you, before we actually proceed, please keep in mind that custom roms/nightlies are meant to be for those only who like to play with their device and always keep tinkering their phone with new operating systems. These ROMs may not be kept for every day use as these contain a lot of bugs until there is a stable build out there, so it is highly recommended not to mess with these if you are a noob or if you don’t know much about the custom ROMs. Follow this guide to the letter in order to prevent any mishap.

Disclaimer: The methods involved in flashing custom roms and rooting your phone is highly custom and may result in bricking your device, and has nothing to do with Google or the device manufacturer that is Sony in our case. Also rooting your device will void its warranty and you will be no longer eligible for any kind of free device services by the manufacturers/warranty providers. In case of any mishap we may not be held responsible. Follow these instructions to the letter to avoid any mishap or bricking. Make sure that whatever you do, you are doing it at your own responsibility.

What you need to do before flashing this ROM:

This ROM is only for Sony Xperia Z. Do not try this on any other smartphone.

      1. Your phone’s bootloader must be unlocked. Unlock it here.
      2. Your phone must be rooted and have the latest TWRP recovery installed. Follow the complete guide here to root and install TWRP.  Root Sony Xperia Z | Install TWRP Recover on Sony Xperia Z.
      3. Make sure that your phone’s battery is charged at least over 60%. This is highly recommended in order to prevent any power issues during the flashing process.
      4. Do not forget to backup your current ROM/System using the TWRP recovery. This is highly recommended in case the new custom ROM does not satisfy you and contains a lot of bugs, you can immediately go back to your previous system using the Restore option in the TWRP recovery.
      5. Make sure that you backup your important media content, contacts, call logs and text messages. This is highly recommended as you will have to wipe your phone before flashing this rom for clean installation.
      6. After backing up all the important stuff, boot intoTWRP recovery use the wipe options and wipe data-cache-dalvik cache. This is highly recommended to achieve the best installation results and best ROM functionality.
      7. Alright! Once again I insist that follow this guide to letter!

Install Android 4.4 KitKat CM 11 Custom ROM on Xperia Z:

      • Download unofficial CM 11 Android 4.4 KitKat ROM.
      • Download pa_gapps-full .zip file.
      • Place both the downloaded files on your phone’s sd card.
      • Boot into TWRP Recovery, to do so, turn off your phone and then turn it on, while it boots quickly press the volume up and down keys simultaneously, your phone should boot into TWRP Recovery.
      • Select “Install>select the unofficial CM 11 ROM.zip file” and proceed the installation process.
      • After the ROM installation completes, once again select “Install>choose the placed gapps.zip file” and proceed.
      • After installed both the files, Reboot.
      • You should see the CM 11 logo on the boot screen now.
      • Congrats! You’ve successfully installed the Android 4.4 KitKat based on unofficial CyanogenMod 11 custom ROM.

Troubleshooting:

In case your device is stucked on the boot logo, boot into the TWRP recovery and wipe cache and dalvik cache using the wipe option, after that reboot your device and it should successfully boot you into the home screen. Please keep in mind that the phone may take up to 10 minutes to boot into the home screen.

That’s all for now, in case you face any difficulties or have any queries, feel free to stop by the comment box. We will try our best to help you out. Thanks!

Adobe Flash Player APK for Android – Download Here

0
Adobe Flash Player APK for Android – Download Here

To pave a way for HTML5, Adobe pulled off Flash Player from Google Play Store, a bad news for those who always like to surf the sites with flash content, Unfortunately, HTML5 does not work with all the sites and you need to have Flash player instead of that. As of now, there is no Flash Player available in the Play Store and you can’t have it on your smartphone with Android 4.1 Jelly Bean from the Play Store, but the good thing is that you can still have Flash Player on your Jelly Bean supported smartphone by installing using an application package file.

android_flash

To overcome the need of Flash Player, we have the APK file right here for you, follow the instructions to get it installed.

How to Install Adobe Flash Player on Android

      1. Download Adobe Flash Player APK from HERE.
      2. Download it directly to your phone, or download on your PC and place on your phone’s sd card.
      3. Open the apk file on your phone using any file manager.
      4. If it prompts for the installer, choose package installer, also if it asks you for permissions then tick unknown sources and proceed.
      5. Complete the installation process.
      6. Pheww..! You’ve successfully installed Adobe Flash Player on your phone, you may browse the Flash supported websites smoothly now.

Please keep in mind that Google Chrome browser on Android does not support Flash Player. You may use Stock Browser of your device or download any flash support ed browser from the Google Play Store to browse the websites with flash content.

Install Android 4.3 JB on Galaxy S4 Mini LTE using CyanogenMod 10.2 Custom ROM

0
Install Android 4.3 JB on Galaxy S4 Mini LTE using CyanogenMod 10.2 Custom ROM

Galaxy S4 Mini, following the footsteps of Samsung’s recent flagship Galaxy S4, came out to continue Samsung’s mini line up that Samsung started after the Galaxy S3. The mini version resembles the flagship, but differs in size as the name suggests and has slightly lower specifications. In case you don’t know about the Galaxy S4 Mini, let’s have a recap.

The phone sports a 4.3 inch Super AMOLED display with 256 ppi. Qualcomm’s Snapdragon 400 Dual Core processor is chipped inside the phone clocked at 1.7 GHz, a RAM of 1.5 GB is there while the internel storage is 8 GB and the phone also supports microSD card upto 64 GB. At the back, the phone has an 8 MP camera while a 1.9 MP camera on the front. Under the hood it has a 1900 mAh battery.

Out of the box, Samsung Galaxy S4 Mini runs on Android 4.2.2, the phone hasn’t received the Android 4.3 Jelly Bean update yet neither there is any news the update’s roll out, but the developers over CyanogenMod have always done the good work when it comes to the unofficial Android upgrades. A custom rom based on Android 4.3 Jelly Bean CyanogenMod 10.2 is available for the Galaxy S4 Mini LTE. If you’re an Android enthusiast and always want to taste the higher version of Android before it officially comes out, you may go with the CyanogenMod 10.2 custom ROM for the Galaxy S4 Mini LTE.

Let’s get back to the topic. In the following post we’ll be having a look on a method to install the CyanogenMod 10.2 Custom ROM Android 4.3 Jelly Bean on the Samsung Galaxy S4 Mini LTE, Follow this guide to the letter.

GalaxyS4mini-Press-07-580-90


Disclaimer: The methods involved in flashing custom roms and rooting your phone is highly custom and may result in bricking your device, and has nothing to do with Google or the device manufacturer that isSamsung in our case. Also rooting your device will void its warranty and you will be no longer eligible for any kind of free device services by the manufacturers/warranty providers. In case of any mishap we may not be held responsible. Follow these instructions to the letter to avoid any mishap or bricking. Make sure that whatever you do, you are doing it at your own responsibility.

Before we head towards the ROM installation process, here is what you need to have:

This guide is only for Galaxy S4 Mini LTE I9195. Check your phone’s model in Settings>More>About Device. Do not try this on any other device.

      1. Make sure that your Galaxy S4 Mini LTE is rooted, and has the CWM recovery installed. Follow this guide to root and install CWM.
      2. Using CWM recovery, backup your current system/ROM.
      3. Make sure that you also backup all your important media content, contacts, call logs and messages. This is highly recommended as after flashing new ROM the phone may be wiped, or you might have to wipe it for the ROM to work properly.
      4. Your phone’s battery must be charged over at least 60%. This is highly recommend in order to prevent any mishap during the flashing process.
      5. Before flashing this ROM, boot into CWM recovery and wipe all your data – cache and dalvik cache. This is highly recommended in order to achieve the best results from the custom ROM.
      6. Alright. You’re good to go with it now, once again I insist, follow this guide to the letter.

How to Install Android 4.3 Jelly Bean CyanogenMod 10.2 Custom ROM on Galaxy S4 Mini:

      1. Download the CyanogenMod 10.2 Android 4.3 Jelly Bean Custom ROM.
      2. Download the Gapps 20130813 from HERE.
      3. Place the downloaded ROM’s .zip and gapps.zip file on your phone’s sd card.
      4. Boot into CWM recovery. To do so, turn off your device, turn it on now by pressing and holding Volume Up + Home Button + Power Key simultaneously, you should now see the CWM recovery interface.
      5. Select “Install Zip>Choose zip from sd card”.
      6. Select the .zip ROM file that you placed on your phone’s sd card.
      7. Select “Yes” in order to start the process, it should take a very short time to flash the ROM.
      8. Once again in the recovery mode, select “Install zip>choose zip from sd card>select gapps.zip file” and select “yes” to complete the flashing process.
      9. As soon as the flashing process ends, reboot your device and you should now see the CyanogenMod logo on the boot screen.
      10. It might take upto 10 minutes to boot into the home menu, hold your nerves while it turns on.
      11. Congrats! You’ve successfully installed Android 4.3 Jelly Bean on your Galaxy S4 Mini LTE using CyanogenMod 10.2 Custom ROM.

Troubleshooting:

In case your device is stucked on the CyanogenMod logo, boot into the recovery mode and wipe cache and dalvik cache, reboot and your device should boot into the home screen successfully now. It may take a few minutes to turn on completely.

That’s all, we hope that his guide helps you. In case you got any queries or face any difficulties, feel free to stop by the comment box below. We will try our best to help you out. Thanks!

Install Android 4.4 on Samsung Galaxy S2 using unofficial CM 11 Pound ROM

Install Android 4.4 on Samsung Galaxy S2 using unofficial CM 11 Pound ROM

Samsung’s Galaxy S2 stopped receiving updates after Android 4.1.2 Jelly Bean, not bad because Samsung brought this device from Android 2.3 Ginger Bread to Jelly Bean, thanks to Samsung for not forgetting the device too early. Galaxy S2, no doubt is all time popular and one of the best Android devices, and the device which Samsung a huge break through. The likings of users increase for Galaxy S2 specially when it comes to the development for the device.

Galaxy S2

Galaxy S2 is not expected to get Android 4.4 KitKat update, but the development community for Galaxy S II is quite big and always active, things never stop popping out on the XDA-developers. While exploring a custom ROM for the phone, i found Android 4.4 KitKat custom ROM based on unofficial CM 11. As off now, CM has not announced the Android 4.4 KitKat officially, but the developers have been producing ROMS based on CM 11’s kernel, we hope that it will soon get official as well.

Well, for now we have a working Android 4.4 KitKat Custom ROM, named as “Pound ROM” and is based on CyanogenMod 11,  in the following tutorial we’ll be having a look on how we can flash this ROM in the Galaxy S2 GT-I9100.

Disclaimer: The methods involved in flashing custom roms and rooting your phone is highly custom and may result in bricking your device, and has nothing to do with Google or the device manufacturer that is Samsung in our case. Also rooting your device will void its warranty and you will be no longer eligible for any kind of free device services by the manufacturers/warranty providers. In case of any mishap we may not be held responsible. Follow these instructions to the letter to avoid any mishap or bricking. Make sure that whatever you do, you are doing it at your own responsibility.

Before flashing the ROM, here is what you need to do.

Do this only on Galaxy S2 GT-I9100. Do not try this on any other phone.

      1. Your phone must be rooted and have a custom recovery installed in it. Follow our guide here to root and install CWM recovery.
      2. Before you flash this ROM, make sure that you backup your current ROM/System using CWM recovery.
      3. Backup all your important media content, contacts, call logs and important text messages before flashing.
      4. Make sure that your phone’s battery is charged at least over 60%. This is highly recommended in order to prevent any mishap during the flashing process.
      5. Wipe your data-cache-dalvik cache using CWM recovery.
      6. Alright, make sure that you did everything mentioned above and now  follow this guide to the letter.

How to Install Android 4.4 KitKat POUND ROM on Galaxy S2:

      1. Download Android 4.4 KitKat unofficial CM 11 POUND ROM.
      2. Place the downloaded .zip file on your phone’s sd card.
      3. Boot into CWM Recovery. To do so, turn off your device and turn it on by pressing and holding Volume Up + Home Button + Power Key.
      4. Now in CWM, select “Install zip>choose zip from sd card”.
      5. Select the downloaded ROM’s .zip file that you placed on your phone sd card and then select “Yes” and let the installation proceed.
      6. It will take a very short time to complete the installation, as soon the installation gets complete, reboot your device.
      7. You will see the new ROM’s logo on the boot now and it will take a few minutes to turn on completely, Congrats! You’ve successfully installed the Android 4.4 KitKat Custom ROM.

Troubleshooting:

In case you face the bootloop / stucked on the boot screen issue, boot into CWM recovery and wipe cache and dalvik cache.  The bootloop issue should be resolved. If you do not like the ROM, or if the ROM has bugs, you can quickly go back to your phone’s last working state that you backed up previously using CWM. You can find the restore option in CWM.

That’s all. We hope that you find this guide helpful, in case you got any queries or face any difficulties, feel free to stop by the comment box below. We’ll try our best to help you out. Thanks.

How To Root Android 4.3 Jelly Bean ZCUFMK3 / ZNUFMK2 On Galaxy S4 I9500.

How To Root Android 4.3 Jelly Bean ZCUFMK3 / ZNUFMK2 On Galaxy S4 I9500.

The Only thing about Official updates are that no matter how small the effect will be, they will cause your device to loose its Root access. So not that you have updates your Galaxy S4 I9500 to Android 4.3 Jelly Bean ZCUFMK3 / ZNUFMK2, your device must have loose its root access, the only way now is to Root your device again and those who once used a Rooted device can never live a day with a Non-Rooted one. You can Root your Samsung Galaxy S4 again by following our Tutorial Below, make sure to read the whole tutorial before applying it  to your device.

SAMSUNG DIGITAL CAMERA

If you are familiar with Odin and it’s working, then this tutorial might not be difficult for you. Otherwise read the whole tutorial first before trying it on your device. In this Article, we will show you How To Root Android 4.3 Jelly Bean ZCUFMK3 / ZNUFMK2 On Galaxy S4 I9500.. But before we begin, Make sure that you have battery charged over 60 % and have backed up all your important ContactsCall Logs & Messages.It is highly recommended in case of any mishap or data loss to back up all your important data.

Disclaimer: The methods involved in flashing custom roms and rooting your phone is highly custom and may result in bricking your device,and has nothing to do with Google or the device manufacturers which is Samsung in our case. In case of any mishap we may not be held responsible. Follow these instructions to the letter to avoid any mishap or bricking. Make sure that whatever you do, you are doing it at your own responsibility.

Important things:.

  • Make Sure that USB Cable is not Connected With PC While The Installation in Process.
  • Enable USB debugging mode.
  • Make sure that battery level is at 85% or more.
  • This Tutorial is Only For Galaxy S4 I9500.
  • Your Device must be running ZCUFMK3 / ZNUFMK2 versions of Android 4.3, if not Follow: Install Android 4.3 Jelly Bean ZCUFMK3 / ZNUFMK2 On Galaxy S4 I9500.

How To Root Android 4.3 Jelly Bean ZCUFMK3 / ZNUFMK2 On Galaxy S4 I9500.

odin_explained


  • Download CF-Auto-Root Android 4.3 Package for Galaxy S4 to your computer and extract the zip file.
  • Download Odin.
  • Turn off your Phone and Turn it On While Pressing, Power + Volume Down + Home button until you see some text on-screen, Press Volume Up to continue.
  • Make Sure that the USB drivers are installed.
  • Open Odin in Computer and connect your device to PC, while it is in the Download mode.
  • If your Phone is successfully connected to PC, the Odin port will turn Yellow with COM port number.
  • Now Click on PDA and select the File ‘CF-Auto-Root-ja3g-ja3gxx-gti9500.zip the one who has the biggest size.
  • In Odin, Check Auto reboot and F.Reset Options.
  • Now Click the start button and wait for the process to complete.
  • After the installation is complete you device will restart and once you see the Home Screen, unplug the cable.

That;s it your Samsung Galaxy S4 I9500 has been Rooted on ZCUFMK3 / ZNUFMK2 Android 4.3 Jelly Bean. Go to Settings > About To verify.

Galaxy Note 3 Ultimate Guide: Features, Custom Recovery, Root, Unroot, Backup, Stock Firmware Installation & More

Galaxy Note 3 Ultimate Guide: Features, Custom Recovery, Root, Unroot, Backup, Stock Firmware Installation & More

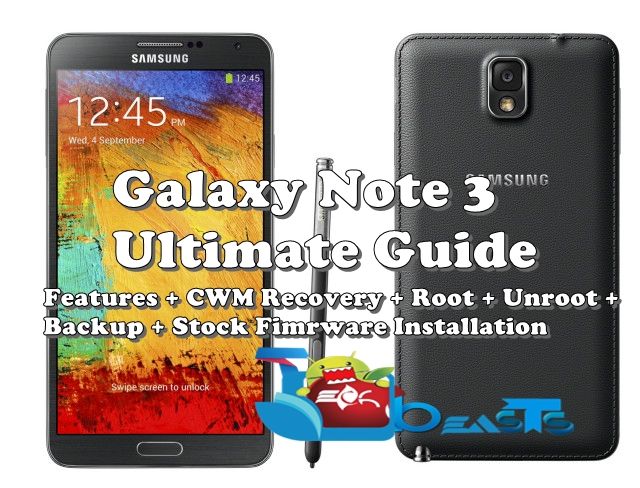
Samsung Galaxy Note 3, continuing the Note series, has certainly become the best smartphone of the world. Samsung introduced the might Galaxy Note 3 at the IFA event held in Berlin on 4th of September 2013. The Galaxy Note series is no doubt a trendsetter by Samsung, the series went through 5.3 to 5.5 and 5.7″ Galaxy Note. Each Galaxy Note packed up features of its own kind and got warmly welcomed by the users. Specially the S pen along with the phablet, that actually helps it to become a Note.
Samsung-Galaxy-Note-3-front-back.jpg-640x488

Starting from 2011, Samsung introduced Galaxy Note 1 sporting a 5.3 inches display, 1.4 GHz Dual Core processor, 1 GB RAM, 8 MP camera at the back and 1.9 MP on the front, the device has a massive 2500 mAh battery under the hood. As this was Samsung’s mainstream series after Galaxy S series, Samsung introduced the next generation, the Galaxy Note 2 in 2012. Galaxy Note 2 sports a 5.5″ display, an improved 8 MP camera sensor at the back, while a  1.9 MP camera sensor on the front. Having `1.6 GHz Exynos 4412 Quad Core CPU inside along with a RAM of 2 GB, battery just got improved from 2500 mAh to 3100 mAh, also Samsung added a lot new features the S Pen like Air View etc. The change in the Galaxy Note 1 and Galaxy Note 2 is pretty obvious, and the big change and improvements in the Galaxy Note 3 was surely expected.

With a 5.7 inches full HD display having 386 ppi, the Galaxy Note 3 packed up a massive 1.9 GHz Exynos 5 Octa Core CPU or Snapdragon 800 Quad Core CPU clocked at 2.3 GHz. A RAM of 3 GB introduced by Samsung inside the Note 3, Battery just got increased by 100 mAh more, its 3200 mAh now. Galaxy Note 3 features the same camera at the back as that of the Galaxy S4, its 13 MP, while a 2.1 MP is installed on the front. Samsung also skipped the 16 GB internal storage and instead started the device from 32 GB and a 64 GB variant as well. Huge improvements in the build and design department as well, as Samsung was criticized because of the low quality plastic material used to build its devices, Samsung still used plastic but smartly changed the device’s design and build quality, the back gives a stitched leather look and feel.

Variation in the operating system, Galaxy Note 1 ran on Android 2.3 Gingerbread out of the box, the device received Android 4.0 Ice Cream Sandwich update and then stopped at Android 4.1.2 Jelly Bean update. Galaxy Note 2 ran on Android 4.1.1 out of the box and received Android 4.1.2 Jelly Bean update, and now the device runs on Android 4.3 Jelly Bean. Where as, Samsung Galaxy Note 3 runs on Android 4.3 Jelly Bean out of the box and the device is set to receive Android 4.4 KitKat update in Q1, 2014. To know more about the Galaxy Note 3, check out the full review here.

So getting back to the topic, while hunting the different guides / methods for my Galaxy Note 3 over the web, i had some difficulties, faced issues while trying different methods, it took several attempts to verify different methods, having a recap of all the time i spent on the things to work on my Galaxy Note 3 I decided to make the Galaxy Note 3 owners’s life easy. In the following post I’ll be explaining the features that you may find and enjoy on your Galaxy Note 3, guide to root your Galaxy Note 3, installing a custom recovery to flash custom roms, mods, backup your current rom and restore, guide to unroot your Galaxy Note 3 and the guide to Install Stock / Official firmware on your Galaxy Note 3.

Let’s start from the Galaxy Note 3 Features:

Galaxy Note 3 specs are explained above, these are the newly introduced features of the hefty Note 3.

Air Command: Just take out your S Pen and the our command will pop up. In the air command you can find the following features:Techbeasts (4)

      • Pen Window – simply draw a rectangle on your phone’s screen and select the application to use it in small poped up screen.
      • S Finder – Find anything in your Galaxy Note 3 easily, doesn’t matter wherever the file is located.
      • Screen Write – Captures the screen and let’s you write on it immediately.
      • Scrap Booker – Saving memories with pictures and art work is not hard now, use Scrap Booker quickly through Air Command.
      • Action Memo – Create memos quickly by using Action Memo through Air Command.

 Screenshot_2013-11-27-01-33-52 Screenshot_2013-11-27-01-34-00 Screenshot_2013-11-27-01-34-05 Screenshot_2013-11-27-01-34-19 Screenshot_2013-11-27-01-34-32

To enable Air Command head to Settings > Controls > Air Command.

Additionally, Samsung Galaxy Note 3 also features all the new controls introduced in Samsung Galaxy S IV, these include:

Air Gesture: Control your phone with Gestures.   

      • Quick Glance.
      • Air Jump.
      • Air Browse.
      • Air Call-Accept.

Air View: Let’s you view information by using either your fingers or S-Pen.

      • Information Preview.
      • Progress Preview.
      • Speed Dial Preview.
      • Icon Labels
      • List Scrolling

Motions, Palm Motion are also there in the Galaxy Note 3.

Smart Alert helps you to catch up all the missed calls, text messages by giving you a lighter vibration. Check out the motions under Settings > Control > Motions.

Smart Screen:  Control your phone’s screen smartly.

        • Smart Stay.
        • Smart Rotation.
        • Smart Pause.
        • Smart Scroll.

Once Handed Mode:

Samsung previously introduced one handed mode for Keyboard in the Galaxy Note 2 and Samsung Galaxy S4, this time Samsung has introduced a new kind of One Handed Operation that allows the users to control the whole screen one handedly.

The one handed mode may be either used for full screen or for different features, find it in Settings > Control > One Handed Operation.

Hands-free Mode:

The new hands free mode allows you to control your device while you’re are driving. It reads our caller’s information when someone is calling, let’s you accept calls with the help of Air call-accept, reads out the message sender’s information as soon as a new message arrives, reads out alarm information when the alarm begins to sound and also reads out the schedule information for what you’ve settled the alarms.

Enable it from Settings > Control > Hands-free mode.

Use your Galaxy Note 3 while wearing Gloves:

Increase touch sensitivity under Settings > Control tab increase the sensitivity of your phone and lets you use your phone while you are wearing gloves.

Voice Control

Samsung’s Voice features helps the users to control their device by just speaking to it. The Voice control includes answering the incoming calls or cancelling them, as soon as you accept the call using Voice command the speaker will turn on. You can stop or snooze alarms, You can take pictures using voice commands and you can also control the music player’s behavior using voice commands. Find it under Settings > Control > Voice Control.

S-Voice now works with the Screen – Off:

Samsung’s popular app S-Voice that let’s the users interact with their device by speaking to it, now works while the phone’s screen is off. Previous Galaxy Series smartphones need to be touched in order to activate the S-Voice once the screen is off, but the new Galaxy Note 3 just needs to be reminded by saying “Hi Galaxy” and the S-Voice will turn on even if the phone’s screen is off.  Using S-Voice you can make calls, text messages, open apps, or search something.

Find the S-Voice’s options by opening S-Voice app, tap the menu key and scroll down and find “Screen Wake Up” option and check it, then say “Hi Galaxy” and the feature will start working.

All Settings Toggle with 2 Fingers Pull in the Notification Bar:Techbeasts (5)

You can turn on or off most of the used features of your device like WiFi, Bluetooth, GPS etc by pulling down the notification bar and going through the settings toggles. The front end horizontal scroller only features a few settings toggles, while you can access all of them by pressing the small button on the top right corner.

In the new Galaxy Note 3, pulling down the notification bar using 2 fingers will do the job for you and display all the settings toggle. Also by pressing and holding that specific toggle will take you to the settings page of that option.


Using Flash as Call Alert:

The popular feature in the iPhone, Samsung has also pulled it out on their Galaxy Note 3. You can select this option and turn on your device’s Flash as a call alert, as soon as someone calls you the Flash starts blinking.

To enable this feature head to Settings > Device> Accessibility > Check Flash Notification.

Search option in Settings:

The Galaxy Note 3’s settings have a search option. The hefty and advanced Note 3 packs up tons of features that can be enabled / disabled through settings, while going through each and every single feature may become quiet hard. To save the time Samsung has introduced the search in settings. Find the search option on top of any screen under settings, write whatever you want to find and access it.

Reading Mode:

It looks like that Samsung wants to take care of the user’s eyes and has introduced the Reading Mode, which helps you to treat your eyes in a better way. The reading mode enhances the quality of the readable text. You can add your favorite apps to work with the Reading Mode.

In order to enable reading mode, pull down the notification bar and long press the Reading Mode to access its settings. In Reading Mode, tap the small pencil on the top right corner and select the apps that you want to make work with the Reading Mode.

Galaxy Note 3 Camera:

Galaxy Note 3 features a same camera sensor as that of the Samsung Galaxy S4, but Samsung has just improved the quality a little more. There is a number of features in camera to try out, that can help you to become a better photographer – jk. Let’s have a look at the feature offered by Samsung Galaxy Note 3’s Camera.

      • Dual Shot – Use front and back cam at the same time.
      • Burst Mode  – Capture 20 photos at the same time by pressing and holding the capture button.
      • Best Photo and Best Face feature in Camera.
      • HDR mode.
      • Slow and Fast Motion.
      • Drama Shot and more.

Screenshot_2013-11-27-01-33-05Screenshot_2013-11-27-01-33-11 Screenshot_2013-11-27-01-33-18 Screenshot_2013-11-27-01-33-38 Screenshot_2013-11-27-01-35-46 Screenshot_2013-11-27-01-35-41Screenshot_2013-11-27-01-33-32 Screenshot_2013-11-27-01-33-28 Screenshot_2013-11-27-01-34-52 Screenshot_2013-11-27-01-34-39 Screenshot_2013-11-27-01-35-11 Screenshot_2013-11-27-01-35-27 Screenshot_2013-11-27-01-35-50 Screenshot_2013-11-27-01-36-35 Screenshot_2013-11-27-01-36-26 Screenshot_2013-11-27-01-36-31 Screenshot_2013-11-27-01-36-09 Screenshot_2013-11-27-01-35-55


The list of features doesn’t stop here, I may have not mentioned a number of features, you can explore the features by messing up with your device, or check out the our full review here.


So, It’s time to move forward and learn how to flash a Custom Recovery, and Root your phone. But before we begin, you need to know something important about the Galaxy Note 3:


The Galaxy Note 3 has a Knox implementation, Knox is a new security system introduced by Samsung that focuses on security of the device.  Users can create a new profile in their phone, that has everything different from the main user, you can install apps that are compatible with the Knox mode, Samsung has added Knox store in order to allow the users to find Knox compatible apps easily. The Knox profile requires a password to be accessed.


Dealing with the Samsung Knox.


Samsung has also implemented Knox Warranty Void on the bootloader of Samsung Galaxy Note 3 that cannot be erased using Triangle away or any other method. So, as off now, if once you flash a custom recovery or root your device, you will raise the Knox Warranty Void to 1 and you will never be able to avail the free repair services offered in device warranty. Also upon rooting your device, Knox will cause problems and may not let some apps to work properly, In order to over come this drawback you’ll need to disable Knox completely. You can do so by using the freeze option in the titanium backup.

Before moving forward, you may be interested in to know what is root access, and what are the advantages of having custom recovery, here’s the answer for you:

Rooting your phone gives you complete access over all the data which is apparently locked by the manufacturers. This includes removal of the factory restrictions and making changes to the internal system and the operating system. Gaining the root access gives you the privileges to install various applications to enhance the performance of your device, allows you to remove the built-in applications/programs, helps you to upgrade the battery life of your device & install the apps which require the root access for the proper functionality and modify your device in so many other ways e.g using mods and custom roms. By installing custom recovery, you can flash custom roms in the phone easily. Custom recovery also let’s you backup your current rom and restore it in case of any mishap. There is a laundry list of things you can do after having your device rooted and installed the custom recovery, now once you’re rooted and have installed custom recovery, go ahead and enjoy it on your phone. Here’s our collection of 10 Best Root Apps.

Disclaimer: The methods involved in flashing custom roms and rooting your phone is highly custom and may result in bricking your device, and has nothing to do with Google or the device manufacturer that is Samsung in our case. Also rooting your device will void its warranty and you will be no longer eligible for any kind of free device services by the manufacturers/warranty providers. In case of any mishap we may not be held responsible. Follow these instructions to the letter to avoid any mishap or bricking. Make sure that whatever you do, you are doing it at your own responsibility.


Here are some pre-requisites that you need to have before moving towards the recovery, root and other processes.


      1. Make sure that your Galaxy Note 3 is charged at least over 60%. It is highly recommended in order to prevent any mishap during the flashing process.
      2. Make sure that you use the original data cable in order to connect your device to your PC.
      3. Make sure that you’ve backed up all your important media content, contacts, call logs and text messages. It is highly recommend as you may have to wipe your device during any process.
      4. Make sure that your device is Galaxy Note 3, do not try this on any other device. Also use this method only on the model numbers that are listed below.
      5. Make sure that you read everything about the Knox Warranty void, follow the guides to the letter in order to get all the processes done properly.

Must have installed these:

      1. Download and extract Odin 3.09 Get it Here.
      2. Download and Install Samsung USB drivers.Get Here.
      3. Download CWM Recovery .tar.md5 file according to your device’s Model:
          • Download CWM Recovery for Samsung Galaxy Note 3 SM-N900.
          • Download CWM Recovery for Samsung Galaxy Note 3 SM-N900S.
          • Download CWM Recovery for Samsung Galaxy Note 3 SM-N900T.
          • Download CWM Recovery for Samsung Galaxy Note 3 SM-N900W8.
          • Download CWM Recovery for Samsung Galaxy Note 3 SM-N9002
          • Download CWM Recovery for Samsung Galaxy Note 3 SM-N9005.

How to Install Custom Recovery (CWM) on Galaxy Note 3:

      1. First off all, turn of the reactivation lock on your Galaxy Note 3, find it under Settings > General > Security > Uncheck Reactivation Lock.
      2. Put your phone in download mode. In order to do so turn it off by pressing power key for a few seconds or by pulling out the battery, wait for 30 seconds. Turn it on by pressing and holding Volume Down + Home Button + Power Key, as soon as it shows you the warning press Volume Up to  continue. You are in the download mode now.
      3. Techbeasts (1)
      4. Open Odin, you installed in the step 1 above.
      5. Connect your Galaxy Note 3 to your PC using the original data cable. The ID:COM box should now turn blue, and Odin shows ”Added” in the log box below.
      6. Hit the PDA tab and select the downloaded CWM Recovery file, it should be a .tar file.
      7. Make sure that the options selected in your Odin screen are exactly as shown below.
      8. Alright! hit start and let the process begin, as soon as your device restarts, you can check the recovery by booting into it. In order to do so, turn off your device and then turn it on by pressing and holding Volume Up + Home Button + Power Key simultaneously, your phone should now boot into the ClockworkMod recovery.
  1. odin_explained

Backing up your current ROM:

The most useful feature, Backup in the custom recovery. Backing up your current system/ROM is much useful in case something goes wrong while you are playing with your device. Most of the times flashing custom ROMS /MODS messes up the phone, and irritates with several issues, in such state restoring your device to the previous working state is the best choice.

      1. In order to backup your ROM boot into recovery mode. To do so, turn off your phone and then turn it on by pressing and holding Volume Up + Home Button + Power Key, you should now boot into the recover mode.
      2. Select Backup.
      3. Select Backup to External or Internal sd card, depending upon your storage space.
      4. Confirm the backup process.
      5. The backup process should start now, you will see the backup logs in the CWM screen, it will take some time to backup your current system completely.

Restoring the Operating System.

      1. If something goes wrong with your device and you’ve taken the backup previously, then restoring may be of much use.
      2. Simply boot into recovery mode, select Backup & Restore.
      3. Select Restore from External or Internal SD card and select the backup file.
      4. It will take some time to restore your system.
      5. Techbeasts (2) Techbeasts (3)

That’s all with the Backup & Restore process.

How to Root your Samsung Galaxy Note 3:

      1. Place the downloaded SuperSu.zip file on your phone’s external SDcard. 
      2. Boot into the recovery mode. In order to do so, turn off your device and then turn it on by pressing and holding Volume Up + Home Button + Power Key simultaneously, your phone should now boot into the ClockworkMod recovery.
      3. You can move between the options by using volume up and down keys, to make a selection press home button or power key.
      4. Select install zip > choose zip and then select the SuperSu.zip file you placed on the external SdCard.
      5. Let it flash the SuperSu.zip, as soon as it ends, restart your device.
      6. Congrats! Now you have rooted your phone, and already installed CWM recovery. Find the SuperSu.zip application in your applications.

In case you device’s CWM recovery is not listed above, you may root it by finding the method from HERE.

Unrooting your Galaxy Note 3:

The simplest and easiest way to unroot your Galaxy Note 3 is to flash a stock firmware and wipe data. Follow the method explained below for flashing the Stock/Official firmware in your Galaxy Note 3 and get your device unrooted. Flashing an official firmware will also remove the custom recovery from your device and restore it to the stock recovery. But keep in mind that flashing stock firmware will not erase the knox warranty void, it will just restore your device to the factory state.

How to Install a Stock/Official Firmware on your Samsung Galaxy Note 3:

Download the latest firmware for your Samsung Galaxy Note 3 depending on your model number:

Please keep in mind that always download the latest firmware for your device. Do not flash an older firmware, and do not ever try to downgrade your device. It may result in bricking it or malfunctioning it.

Flashing the Stock Firmware:

      • Extract the downloaded zip file on your desktop, it should be in .tar.md5* format. If you get the other files like PIT, CSC and Phone you may use them otherwise you just need to put the MD5 file which has the firmware in the PDA tab in Odin.
      • Open Odin, select PDA tab and select the extracted .tar.md5 file that has the firmware.
      • Put your device in download mode. In order to do so press and hold Volume Down + Home Button + Power Key simultaneously until you see the warning to continue. Press Volume Up to continue.
      • In case your device doesn’t go into the download mode using this method, search for the method for your device on Google.
      • Connect your phone to your PC using the original data cable. As soon as your phone is detected by Odin, the ID:COM box on the top left corner should turn blue or yellow depending upon your Odin version.
      • Hit the PDA tab in odin, and select the extracted file that is in [MD5.tar.md5 format.
      •  Most probably you have the .tar.md5 only for the PDA tab so make sure that only Auto Reboot and F. Reset Time are selected in Odin, In case you got the other files like CSC and Phone, put them in their respective tabs.In case you’ve got the PIT file you need to select the re-partition tab as well (remember PIT is only needed in some special cases, ignore this file for normal upgrading / flashing of the stock firmware).
      • odin_explained
      • Hit start – It should take a few seconds while the firmware flashing gets completed.
      • As soon as it gets finished, your device will restart. As soon as it restarts, get  it into the recovery mode by pressing and holding Volume Up + Home Button + Power Key simultaneously. You should get the recovery mode now. Reset Factory Data and Cache here – Restart your phone.
      • That’s all! You’ve successfully installed stock / factory firmware on your device and have it in the factory state now. Your device is just like a new device out of the box now.

That’s All! I hope that this guide helped you. We would love to listen from you about this, also if you face any difficulties or have any queries regarding your Samsung Galaxy Note 3, feel free to leave us a comment below. We will try our best to help you out. Thanks All.


Install CWM Recovery and Root Samsung Galaxy S3 GT-I9300 running Android 4.3 Jelly Bean

Install CWM Recovery and Root Samsung Galaxy S3 GT-I9300 running Android 4.3 Jelly Bean

Samsung recently started rolling out Android 4.3 update for its past flagship device, the Galaxy S3. The update packs up several bug fixes, performance enhancements, core UI changes, Galaxy Gear support and some more features.

While the device has been updated to the latest and greatest firmware, some of you may be looking out there for a method to root in on Android 4.3 Jelly Bean. We have it right here for you, simple, easy and explained in detail. You just got to follow the guide to the letter to get it done. In case you don’t know what root access and custom recovery is, then here’s a brief answer for you.

galaxy-s3-android-4.3

Rooting your phone gives you complete access over all the data which is apparently locked by the manufacturers. This includes removal of the factory restrictions and making changes to the internal system and the operating system. Gaining the root access gives you the privileges to install various applications to enhance the performance of your device, allows you to remove the built-in applications/programs, helps you to upgrade the battery life of your device & install the apps which require the root access for the proper functionality and modify your device in so many other ways e.g using mods and custom roms. By installing custom recovery, you can flash custom roms in the phone easily. Custom recovery also let’s you backup your current rom and restore it in case of any mishap. There is a laundry list of things you can do after having your device rooted and installed the custom recovery, now once you’re rooted and have installed custom recovery, go ahead and enjoy it on your phone. Here’s our collection of 10 Best Root Apps.

Let’s move forward to the root process…

Disclaimer: The methods involved in flashing custom roms and rooting your phone is highly custom and may result in bricking your device, and has nothing to do with Google or the device manufacturer that is Samsung in our case. Also rooting your device will void its warranty and you will be no longer eligible for any kind of free device services by the manufacturers/warranty providers. In case of any mishap we may not be held responsible. Follow these instructions to the letter to avoid any mishap or bricking. Make sure that whatever you do, you are doing it at your own responsibility.

Before we go ahead, here are some pre-requisites that you need to follow:

      1. Make sure that your phone’s battery is charged over at least 60%. This is highly recommended in order to prevent any power issues on the device during the flashing process.
      2. Make sure that you have backed up all your important ContactsCall Logs & Messages. It is highly recommended in case of any mishap or data loss to backup all your important data.
      3. Make sure that you use the original data cable to connect your device to your PC.
      4. Make sure that your device is  Galaxy Note S III GT-I9300, check the model under Settings>General>About Device>Model.
      5. In case of USB connection problems, enable USB debugging mode on your device. To do so, open Settings>General>Developer Options. If you can’t find the developer options, simply open About device and tap “Build Number” for 7 times and you should have the developer options enabled under the ”General Tab”.
      6. Install the listed files carefully, follow this guide to letter in order to prevent any mishap.

Although this guide is for rooting Galaxy S3 on Android 4.3, but should work on lower Android versions too.

Files you need to download:

      1. Download and extract Odin PC – Get it here
      2. Download and Samsung USB Drivers – Get here
      3. Download the Philz Advanced CWM recovery.tar.md5 file – Get here.
      4. Download SuperSu v1.69 file – Get here.

Install CWM Recovery on Samsung Galaxy S3 running Android 4.3 Jelly Bean:

    • Put your Galaxy S3 GT-I9300  in download mode by pressing and holding Volume Down + Home + Power key at the same time, you should get a screen showing a warning and asking to continue, press Volume Up to continue.
    • Now your phone should be in downloading mode. Connect your phone to your PC.
    • As soon as Odin detects your phone the ID:COM box will turn light blue.
    • Click on the PDA tab and select the downloaded Philz Advanced CWM recovery.tar.md5 file.
    • Your Odin screen should look like exactly as shown below.
  • odin_explained
    • Click Start and the root process should start showing you a process bar in the first box above ID:COM.
    • The process is quite fast and will finish in a few seconds, as soon as it ends, your phone will restart and you’ve installed the CWM recovery.
    • Boot into recovery by pressing and holding Volume Up + Home Button + Power Key simultaneously

How to Root your Samsung Galaxy S3 on Android 4.3:

    • Carefully download the SuperSu.zip file from the link attached above.
    • Place the downloaded SuperSu.zip file on your phone’s SD Card.
    • Boot into Philz Advanced CWM Recovery. To do so, first turn off your device by pulling out the battery or by keeping the power key pressed for a while until it gives you the turn off vibration. Now turn on your device by pressing and holding Volume Up + Home Button + Power Key simultaneously.
    • Now in Philz Advanced recovery tap “install zip>chose zip from sd card>select SuperSu.zip”and proceed with the installation process.
    • The flashing process should take a few seconds to end, reboot your device after and find SuperSu installed in App Drawer.

Congrats! You’ve successfully installed a custom recovery and rooted your Galaxy S III running on Android 4.3 Jelly Bean.In case you got any queries or face any issues, feel free to stop by the comment box below and leave your query. Thanks!

Root Verizon/AT&T Moto X on Android 4.4 Kit-Kat – How To Guide.

0
Root Verizon/AT&T Moto X on Android 4.4 Kit-Kat – How To Guide.

It’s a miracle to see a non-Nexus device to get the Android 4.4 Kit-Kat update just after 20 days of its release, we it happened to Verizon Moto X, who got the update of Android 4.4 Ki-Kat 2 weeks ago and it is not a good news for all the Nexus 4 users, who actually considered to get the Android 4.4 update as their first right when it comes to giving it to someone else. The Kit-Kat update for Moto X shortly follow by the AT&T and T-Mobile Variants. Well the Kit-Kat update was a surprise, nobody expect to see it that soon on any Non-Nexus device, but it seems legit when you look that Motorola is now a Google Owned device, so receiving such update is not a very big thing.

motorola-moto-x-1

Anyway, we all love the changes made by Google in Android 4.4, but loosing the root of device is still fearsome, yet those who once used a Rooted device can never lice a day with a Non-Rooted one. Now if you happen to own a Verizon or AT&T Moto X, just after receiving the Android 4.4 Kit-Kat update, your device will loose it’s root and the only way left is to root it again.

So here we are showing you the way to root your Moto X running Android 4.4 Kit-Kat,he new root method also comes from the same well-known developer Jcase who has released SlapMyMoto. The same developer has released the rooting tutorial for Moto X, just after the release of New Camera update.

Warning:

Please note that the new root method is still in its beta stage and and rather than easy it would be a little hard to follow, if you are a basic users and you know that more the tutorial will be difficult containing more risk. Therefore, if you are well aware of what you are doing, proceed further other wise Wait for the Stable and Easy method to come out.

So, if you are ready to follow Jcase’s instructions, visit the XDA thread by clicking this link.