Home Blog Page 496

Root Galaxy S4 I9500 on Android 4.3 XXUEMK8 Jelly Bean – How To.

0
Root Galaxy S4 I9500 on Android 4.3 XXUEMK8 Jelly Bean – How To.

Android 4.3 XXUEMK8 Jelly Bean rooting method is available and you can Root your device. Rooting allows you to install Custom Mods, Tweaks and other Stuff on your Rooted Device but on other hand Rooting also Voids your device Warranty. There are a lot of Custom ROMs and lots of Mods to look after you Root your device. We will use CF-Auto Root via Odin. All you need to do is to follow the Tutorial and own a Galaxy S4 Running Android 4.3 XXUEMK8 Jelly Bean 😉

SAMSUNG DIGITAL CAMERA

If you are familiar with Odin and it’s working, then this tutorial might not be difficult for you. Otherwise read the whole tutorial first before trying it on your device. In this Article, we will show you How To Root Android 4.3 Jelly Bean ZCUFMK3 / ZNUFMK2 On Galaxy S4 I9500.. But before we begin, Make sure that you have battery charged over 60 % and have backed up all your important ContactsCall Logs & Messages.It is highly recommended in case of any mishap or data loss to back up all your important data.

Disclaimer: The methods involved in flashing custom roms and rooting your phone is highly custom and may result in bricking your device,and has nothing to do with Google or the device manufacturers which is Samsung in our case. In case of any mishap we may not be held responsible. Follow these instructions to the letter to avoid any mishap or bricking. Make sure that whatever you do, you are doing it at your own responsibility.

Important things:.

  • Make Sure that USB Cable is not Connected With PC While The Installation in Process.
  • Enable USB debugging mode.
  • Make sure that battery level is at 85% or more.
  • This Tutorial is Only For Galaxy S4 I9500.
  • Your Device must be running XXUEMK8 versions of Android 4.3.

How To Root Galaxy S4 I9500 on Android 4.3 XXUEMK8 Jelly Bean.

odin_explained

  • Download CF-Auto-Root Android 4.3 Package for Galaxy S4 to your computer and extract the zip file.
  • Download Odin.
  • Turn off your Phone and Turn it On While Pressing, Power + Volume Down + Home button until you see some text on-screen, Press Volume Up to continue.
  • Make Sure that the USB drivers are installed.
  • Open Odin in Computer and connect your device to PC, while it is in the Download mode.
  • If your Phone is successfully connected to PC, the Odin port will turn Yellow with COM port number.
  • Now Click on PDA and select the File CF-Auto-Root-ja3g-ja3gxx-gti9500.zip the one who has the biggest size.
  • In Odin, Check Auto reboot and F.Reset Options.
  • Now Click the start button and wait for the process to complete.
  • After the installation is complete you device will restart and once you see the Home Screen, unplug the cable.

That;s it your Samsung Galaxy S4 I9500 has been Rooted on Android 4.3 XXUEMK8 Jelly Bean, check Super SU App in Drawer to verify.

SQL Server: Browser Services Start and Then Stopped.

SQL Server: Browser Services Start and Then Stopped.

If this Error keep occurring The SQL Server Browser service on your local computer started and then stopped. Some services stop automatically if they are not in use by other services or programs.” and you still getting teased by it. We will show you how to get over it by Solving it.

If SQL services are not started properly while contacting SQL server, you will encounter this Error.provider: SQL Network Interfaces, error: 26 – Error Locating Server/ Instance Specified (Microsoft SQL Server)

The-SQL-Server-Browser-service-on-Local-Computer-started-and-then-stopped_6


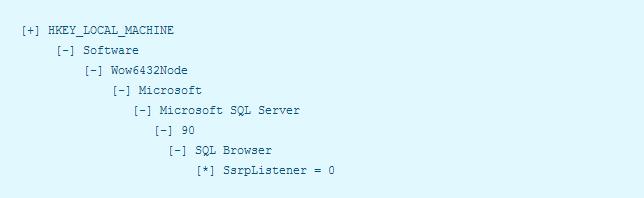
To solve the SQL server Browser Service on Local Computer Stop and Started, you need to Edit the Registry value to disable the SsrpListener service.

64-Bit Operating Systems (x64) :

Screenshot_20

32-Bit Operating Systems (x86):

Screenshot_21


How T0 Solve this issue:

  • Press Win + R to open Run and type regeidt in the Box.

Screenshot_22


  • For x64 Systems, Type the Following:

KEY_LOCAL_MACHINE\SOFTWARE\Wow6432Node\Microsoft\Microsoft SQL Server\90\SQL Browser

  • For x86 Systems, Type the Following:

HKEY_LOCAL_MACHINE\SOFTWARE\Microsoft\Microsoft SQL Server\90\SQL Browser

  • Right Click the SsrpListener, and modify and set the Value to 0.
  • Now Open the Dialog Box again and Type services.msc, Click Ok, then Navigate to SQL Browser services.
  • Right Click and Click Start, also, set the Start-up type as Automatic from Properties. After you Modify the Registry Value SsrpListener, the SQL Services will start properly form now on.

How To Download Exclusive and Country Stickers On Line.

0
How To Download Exclusive and Country Stickers On Line.

One of the Popular Social Chatting App, Line gives a good amount of beautiful stickers, but many of them are restricted to Countries only. Users outside this Specific area cannot download and use these stickers, even if they have the link of those Stickers. We will show you how to use Stickers of those countries you are not living in. But first, if you have registered Link using your Mobile number, Remove it.

Screenshot_2013-12-02-11-03-29

We will use OpenVPN to change the Country, so you can use Country Exclusive Stickers, but remember you can only download Free Stickers.

Delete Your Line Account’s Number First:

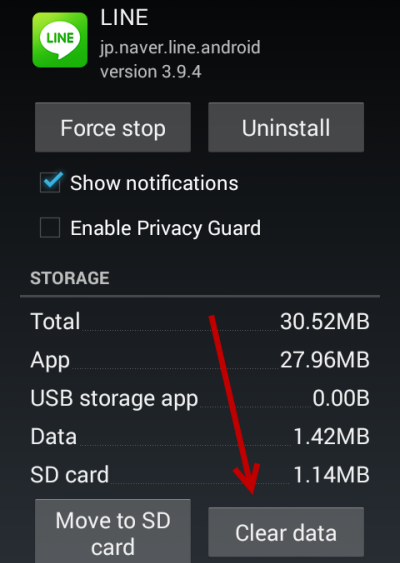
Go to Settings > Apps > Line and Tap Clear Data.

Screenshot_2013-12-02-10-46-52

 
Screenshot_2013-12-02-10-47-03

Once the Wipe is complete, Open Line again and Registered using your Facebook Account or any-other E-Mail. Do not use your Phone Number.

Now Get Stickers.

  • Launch Play Store and Search for OpenVPN and Install it.
  • Visit the Line StickerPage to check which country Stickers you want to download. The Website is in Thai but most Stuff Written is in English.

12-2-2013-7-06-03-PM

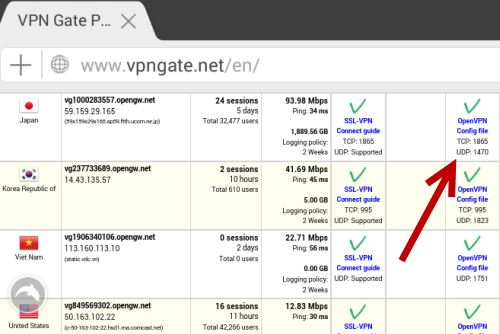
  • Visit VPNGate on your Browser and Switch to most Suitable VPN, Open VPN Config File > Download the File and tap on it to download and it will automatically imported to OpenVPN, you will get the Green Message if the Connection is successful.

Screenshot_2013-12-02-19-03-55

Screenshot_2013-12-02-10-45-39

Screenshot_2013-12-02-10-46-01

Screenshot_2013-12-02-10-46-42

  • Force Close Line if it is Running.
  • Open Line again and this time Visit Sticker store to download the Brand new Stickers.
  • Once the Stickers are downloaded, you can close OpenVPN, close line and launch it again if you have trouble sending message.
  • Repeat the VPN Config Steps to download Stickers from Other Countries.

Update Sony Xperia ZL C6503 to Latest Android 4.3 10.4.B.0.569 Firmware

11
Update Sony Xperia ZL C6503 to Latest Android 4.3 10.4.B.0.569 Firmware

With the release of Sony’s latest flagship series starting with Sony Xperia Z, Sony also introduced Sony Xperia ZL, the sibling smartphone of Xperia Z. Xperia ZL is not so much different from the Z1, the hardware specs, software features are almost same. One of the differences in both devices is the front camera. Xperia ZL’s front camera is at the bottom while Z has it on besides the call speaker, while there are other minor differences in the body of both the devices. Other specs of ZL are almost same as that of Z  e.g a 5 inches Full HD display with 441 ppi, 1.5 GHz Qualcomm MDM9215M / APQ8064 Quad Core CPU with Adreno 320 GPU, 2 GB RAM, 13 MP camera at the back and 2 MP on the front.

Out of the box, Xperia ZL ran on Android 4.1.2, Sony previously updated the device to Android 4.2.2 and also announced the plans for Android 4.3 and Android 4.4 KitKat and luckily, Xperia ZL was announced for both the updates. Few days back Sony rolled out Android 4.3 update for the announced devices and you can update your Xperia ZL to Android 4.3 Jelly Bean now.Xperia ZL

The new firmware comes up with a lot of performance enhancements, bug fixes, some new features. Camera app has been enhanced as well and has got new features. While there are new ringtones, new themes as well.At the moment, this  update is reaching the users through OTA, perhaps the OTA reach the users depending upon the regions, the process takes quite long for some regions. While it may be hard for some of the ZL owners to wait for the OTA update and taste the Android 4.3 Jelly Bean on the ZL, we have the solution right here. In the following post we’ve explained the method to update your device to the latest firmware 10.4.B.0.569 manually using the Sony Flashtool.

Before we head towards the flashing process, here are some pre-requisites:

      1. This guide is only for Sony Xperia Z C6503, even though this firmware works fine on C6502, perhaps it would not be wiser to flash it on C6602 to prevent any mishap. Please check your device model first in Settings > About Device > Model.
      2. You must have installed Sony Flashtool – Get the full guide here. Also Install drivers using Flashtool > Drivers > Flashtool-drivers > Flashtool, Xperia ZL, Fastboot, select all these and install.
      3. Your phone’s battery must be charged at least over 60%. This is highly recommended in order to prevent any power issues during the process.
      4. Make sure that you backup your media content,contactscall logs and text messages.  This is important and recommended so that in case you decide to wipe your phone during the flashing process, you can get all of your data back using the backup.
      5. Enable USB debugging mode on your device. To do so, tap settings>developer options>USB debugging. If you can’t find developer options in settings, then tap settings > about device and tap “Build Number” for 7 times and you’ll get em’ activated under settings.
      6. To flash this firmware, you do not need to root your device, you do not need to unlock the bootloader. All you need is, your device must be the one mentioned and must be running on Android 4.2.2 Jelly Bean or Android 4.1.2 Jelly Bean.
      7. Download the firmware file properly.
      8. Use the OEM data cable to connect your phone to your PC. Using any other data cable might cause connection problems.
      9. Alright! Follow this guide to the letter in order to prevent any mishap.

How to Install Android 4.3 Jelly Bean 10.4.B.0.569 on Xperia ZL C6503:

    1. Before moving forward, please make sure that you’ve read the pre requisites and ensure that you are set to go ahead.
      1. Download the latest firmware Android 4.3 Jelly Bean 10.4.B.0.569 FTF file. [Use a torrent client to download.]
      2. Copy the file and paste in Flashtool>Firmwares folder.
      3. Open Flashtool.exe now.
      4. Hit the small lightening button on the top left corner and select Flashmode.
      5. Select the FTF firmware file that you placed in the Firmware folder. 
      6. From the right side, select what do you want to wipe. Data, cache and apps log, all wipes are recommended, perhaps you may select if you don’t want.
      7. Click on OK, and it will start preparing the firmware for flashing. This may take a little while to load.
      8. As soon as the firmware is loaded, it will prompt you to attach the phone by turning it off and keeping the back key press.
      9. For Xperia ZLVolume Down key will do the job of back key, just turn off your phone, keep the Volume Down key pressed and plug in the data cable.
      10. As soon as the phone is detected in Flashmode, the firmware will start flashing, Do not leave the Volume Down key until the process is complete.
      11. As soon as you see “Flashing ended or Finished Flashing” leave the Volume Down key, plug the cable out and reboot.
      12. That’s All! Congrats! You’ve installed latest Android 4.3 Jelly Bean on your Xperia ZL C6503. Enjoy

That’s All! In case you got any queries/suggestions or face any difficulties regarding this post, please feel free to stop by the comment box below and drop us your message. We will respond as quick as we can.

Install Android 4.4.2 on Galaxy Note 2 GT-N7100 using Omni ROM

3
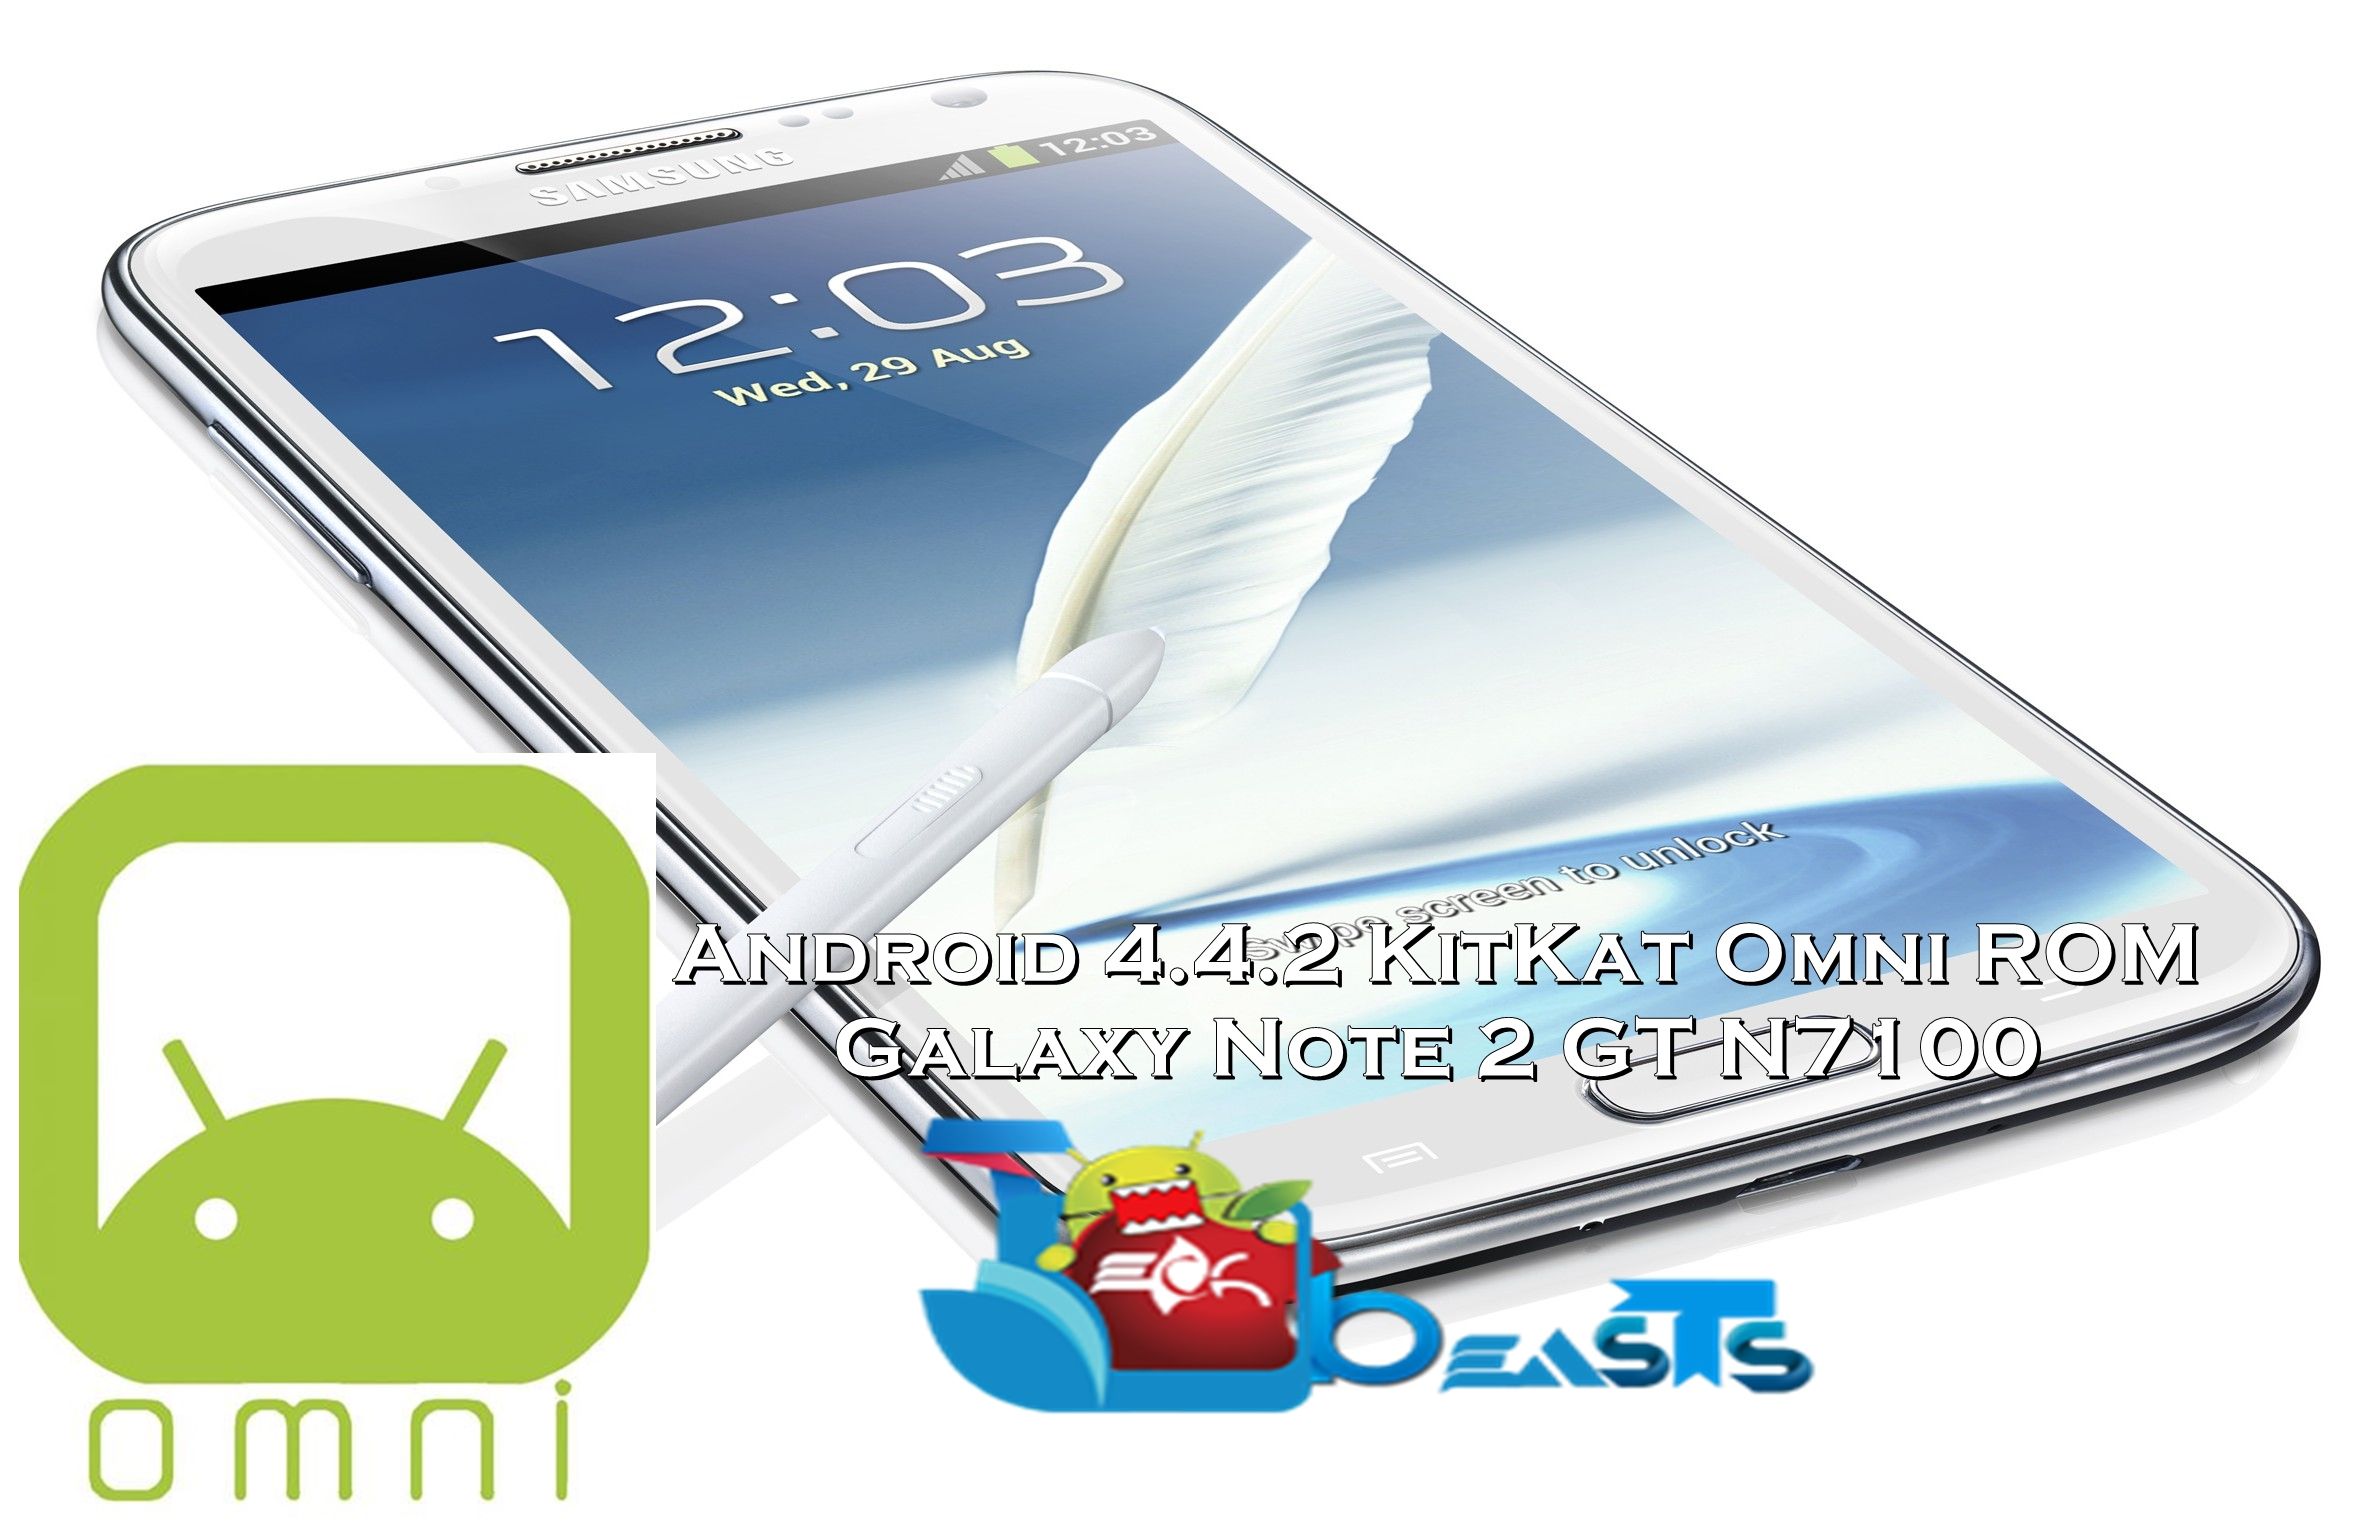
Install Android 4.4.2 on Galaxy Note 2 GT-N7100 using Omni ROM

Samsung’s 2nd phablet Galaxy Note 2 is by far one of the very good, popular and great devices around there, specially packing up might features in a superb body. Galaxy Note 2 flaunts a huge 5.5 inches display with 267 ppi, a 1.6 GHz quad core processor with a 2 GB RAM, the phone was the first one to have such a massive RAM. Under the hood it has a 3100 mAh battery. An 8 MP camera sensor is fixed at the back while a 2 MP camera is there on the front.

Galaxy Note 2 ran on Android 4.1.1 Jelly Bean out of the box, Samsung updated the device to Android 4.1.2 and then took a very long time to update the device to Android 4.3, the delay disappointed the users for sure, perhaps Samsung didn’t bring Android 4.2.2 and made a direct move to 4.3. As off now, Samsung has also announced its plans for the devices that will be receiving Android 4.4 KitKat and the good news is here for the Galaxy Note 2 owners as the device will be one of those. It is expected that in April 2014, Samsung will update Galaxy Note 2 to KitKat. Perhaps, that’s a long time isn’t it? and it’s quite hard to wait, specially when you’re an Android enthusiast.Galaxy_Note_2

Well, If you ever tried installing custom ROMs are went after searching any custom ROM for your Galaxy Note 2, you must have heard of the Omni ROM. A great and very well known ROM among the Galaxy Note 2 users, and is also one of the much used custom ROMs out there. Omni ROM’s latest build is based on Android 4.4.2 KitKat, that means you can taste the latest and greatest version of Android on your Galaxy Note 2 before it actually comes out, but you can taste this unofficially using this custom ROM. In the following guide, I’ve explained the method to install this ROM on the Galaxy Note 2 GT-N7100 in simple and easy words.

Before we head towards the ROM installation, here are some pre-requisites that you must have:

    1. This ROM is only for Galaxy Note II GT N7100. Do not try this on any other device, please check your device’s model in Settings > About Device.
    2. Flash this ROM only if you are familiar with custom ROMs and if you know what exactly you are doing. If you don’t know much about flashing custom ROMs we highly recommend you not to install this ROM.
    3. This ROM is a nightly build, do not expect it to work properly as it may contain a lot of bugs, you may not install it if you want to use it for everyday use. This may be used only if you want to taste the KitKat on your device.
    4. Your device must have a TWRP recovery installed. Follow our full guide to install TWRP recovery here.
    5. Before you install this ROM, boot into TWRP recovery and backup your current ROM/System/EFS and save it on your PC. This is highly recommended in case something goes wrong and you need to restore your device’s recent working state.
    6. Please make sure that you’ve battery charged enough to complete this process, it must be charged over at least 60%. This is important to prevent any power issues during the flashing process.
    7. Please make sure that you backup your important media content, ContactsCall Logs & MessagesThis is much important as you will have to wipe your phone before flashing this ROM.
    8. Alright! Follow this guide to the letter now.

Disclaimer: The methods involved in flashing custom roms and rooting your phone is highly custom and may result in bricking your device, and has nothing to do with Google or the device manufacturer that is Samsung in our case. Also rooting your device will void its warranty and you will be no longer eligible for any kind of free device services by the manufacturers/warranty providers. In case of any mishap we may not be held responsible. Follow these instructions to the letter to avoid any mishap or bricking. Make sure that whatever you do, you are doing it at your own responsibility.

How to Install Omni ROM Android 4.4.2 KitKat on Galaxy Note 2:

      1. Download the latest version of Omni ROM Android 4.4.2 KitKat Nightly.zip file for your device.
      2. Download Gapps for Omni ROM Android 4.4.2.
      3. Download SuperSu.zip file. 
      4. Place all the downloaded .zip files on your phone’s sd card.
      5. Boot into TWRP Recovery. To do so, turn off your device completely, now turn it on by pressing and holding Volume Up + Home Button + Power Key. You should see the TWRP Recovery interface now.
      6. In recovery select Wipe > Factory Reset, Also wipe your System.
      7. Go the main menu in recovery now and select Install > ROM.zip file and flash it.
      8. Wait for it to flash the ROM, as soon as ROM flashing is done, once again tap Install > this time tap Gapps.zip file.
      9. After flashing once again tap Install > and select SuperSu.zip file.
      10. After flashing all the files, Wipe > Cache and Dalvik Cache.
      11. Reboot.
      12. You should see the Omni ROM interface on your device now.
      13. Congrats! You’re done. Enjoy Android 4.4.2 KitKat on your Galaxy Note 2 now.
That’s All. In case you have any queries, or face any difficulties regarding this post, please feel free to stop by the comment box below and leave us your message. We will respond as quickly as we can. Thanks All.

How To View and Delete Google Location History.

0
How To View and Delete Google Location History.

If you love to travel to different places and sometimes even found yourself somewhere you don’t know. Google Maps is the only application that will help you in this matter. It is even available for Android and iOS devices, it will always come in handy when you are lost somewhere. If you are frequently using Google Maps, then you will know, that your Mobile data will continuously being consumed while using Google Maps, especially Location History. But you can disable it,  How? follow the rest of the guide to know.

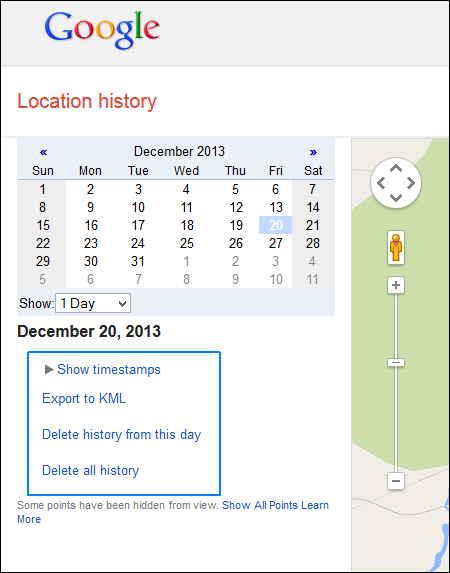
Google Location history is a web-based Dashboard, that allows you to view places you have been frequently visiting as well as the Routes your Opted for them. Google usually gather their data form Google Maps and Google Now Services. Each location is plotted on Google Maps, letting you know where you were each day. You can click on the date on Calender to know what places you went at that particular day.

How-To-View-And-Delete-Google-Location-History_Step1

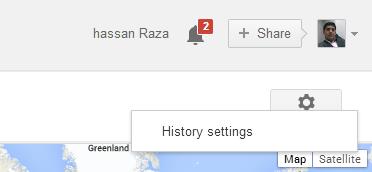
To see if you have enabled the Google Location History, head over to Google Maps Location History Page. If you see the Red lines, then it means Google is gathering your data. If you want to Disable them, Click the Small Gear button, followed by History settings.

Screenshot_19

Here you can choose, whether you want to enable or disable this settings, this page also explains what type of data it gathers. And you might want to Enable the Privacy too, if you want to leave it enabled. Disable, Location History won’t remove the History Which has been saved. If you want to remove that too, look below the Calender Widget, there you will see the Clear History option. You can even Export your Location Data to a KML file.

How-To-View-And-Delete-Google-Location-History_Step3

While allowing Google Location Services at useful times will help you in difficult matters. But if you are more into Privacy then Disable Google Location Services.

How-To-View-And-Delete-Google-Location-History_Step4

Christmas Charm: Download More HD Chrimstas Wallpapers

1
Christmas Charm: Download More HD Chrimstas Wallpapers

Just 4 more days to go and the celebrations will actually begin. Everyone is busy preparing to enjoy the 25th of December, the Xmass, perhaps these days are not even normal and preparing for the celebrations is the real celebration sometimes. Some of you might be busy bringing in the Holiday Tree to your house, some of you busy preparing the Christmas gifts, some of you preparing for Christmas treats. I thought your mobile or computer devices should not miss the event and need some makeup, to do so, here is our collection of best available HD wallpapers for Christmas.

So, here they are, you can set these wallpapers on your desktop PC, on your Android smartphone or on your Apple iPhone. In order to save these wallpapers, go ahead and click on the image it will open up, then right click and save image in your computer 🙂

16502

2280321789 21600 21589282 2044 8200 10527 13713 14783 14749 14525 14394 14311 15323 16520

17374 18296 21274 21112 20890 19420 19242 24836 31110 30979 27769 24996 31010 31248 33353 34964 31547 32787 41667 41691 33153 33183 42232 42301 42315 42276 42278 42325 42336 42294 42296 42341 42372 42370 42366 42355 42347 42379 42384 41709   41981

How To Transfer Data From iPhone to Android Phone.

0
How To Transfer Data From iPhone to Android Phone.

Android and iOS, Simply Means Android device and iPhone, are no doubt the most demanded OS of this time. If you happen to own anyone of them and then think of switching to the Second one, i.e form iPhone to Android or from Android to iPhone, most likely you want to transfer all the data from your device to the other one. But transferring Data to another Platform is not quite an easy task. When it comes to Media, like Photos, Videos, it is easy to transfer data. But transferring Contacts, Messages and Call History is not that simple. In this article, we will show you how to do it, You will need to Download an app called MobiTans (Free) MobiTrans (Paid).

iphone-data-android

Transferring Process:

  • Once the Application is Downloaded, Install it and Run it.
  • Once you see this Windows, you are ready to continue.

launch-mobiletrans

  • You will need to connect both of your device at the Same time with PC.

select-data

  • Select what you want to transfer, tick on the desired ones. Then Click Copy.
  • Make sure that iTunes is  installed and both of the devices are connected to PC at all the time.

copy-iphone-data-to-android

You can use this Program to Transfer the following things:

Contacts
Messages
Call Logs
Apps
Photos
Music
Videos

Here are the few advanced key features of this program:

Lets you transfer data between Android, iPhone and Symbian phones.
Apart from transferring photos, music and videos, you can also transfer SMS, contacts, and call logs.
Copy contacts while preserving all the important fields such as email address, job title, company name, etc.

No data loss. Everything you copy to another device will be 100% same as the orignal.

Works perfectly with over 2,000 phones including Android, Symbian and all models of iPhone (3GS, 4, 4S, 5, 5S, 5C).
It is compatible with Windows XP/Vista/7/8 (32 and 64bits)


Install CWM Recovery & Root Xperia Z Running Latest 10.4.B.0.569 Firmware

91
Install CWM Recovery & Root Xperia Z Running Latest 10.4.B.0.569 Firmware

Have you updated your Xperia Z to latest Android 4.3 10.4.B.0.569 firmware and now looking out there to root it? Well, we’ve the full guide right here for you that will let you root your device easily. In case you haven’t updated your Z to Android 4.3 yet, follow our full guide here to install the latest firmware on it.

In case you don’t know what is root access and why you should root your phone, we’ll be having a look on a brief intro to the root access first, also, the process involves installing a custom recovery first so we’ll be learning a little about custom recovery as well. So, here we go.

Xperia-Z-front-40-wet-v2-1024x1024

Rooting your phone gives you complete access over all the data which is apparently locked by the manufacturers. This includes removal of the factory restrictions and making changes to the internal system and the operating system. Gaining the root access gives you the privileges to install various applications to enhance the performance of your device, allows you to remove the built-in applications/programs, helps you to upgrade the battery life of your device & install the apps which require the root access for the proper functionality and modify your device in so many other ways e.g using mods and custom roms. By installing custom recovery, you can flash custom roms in the phone easily. Custom recovery also let’s you backup your current rom and restore it in case of any mishap. There is a laundry list of things you can do after having your device rooted and installed the custom recovery, now once you’re rooted and haveinstalled custom recovery, go ahead and enjoy it on your phone. Here’s our collection of 10 Best Root Apps.

 Let’s head towards the process. Here are some pre-requisites:

      1. This method is for Sony Xperia Z C6603 / C6602. Do not try this on any device, please check your device first in Settings > About device.
      2. You must have unlocked your device’s bootloader. Follow the full guide here.
      3. You must have installed Android ADB & Fastboot drivers. Follow the quick guide here.
      4. Use only on OEM data cable to establish connection between your PC and Phone.
      5. Make sure that you back up all your important media content, contacts, call logs and important text messages. This is highly recommended so that in case something goes wrong, you still have your data saved.
      6. Make sure that your battery is at least charged over 60%. This is highly recommended in order to prevent any power issues during the process.
      7. Your device must be running on latest Android 4.3 Jelly Bean 10.4.B.0.569 firmware. Check your firmware in Settings > About device.
      8. Enable USB debugging mode on your phone. Find it in Settings > Developer options > USB debugging mode. IF you can’t see it in settings, then you will have to enable it first. To do so, open settings and tap build number for 7 times.
      9. Alright! Follow this guide to the letter now.

Disclaimer: The methods involved in flashing custom roms and rooting your phone is highly custom and may result in bricking your device, and has nothing to do with Google or the device manufacturer that is SONY in our case. Also rooting your device will void its warranty and you will be no longer eligible for any kind of free device services by the manufacturers/warranty providers. In case of any mishap we may not be held responsible. Follow these instructions to the letter to avoid any mishap or bricking. Make sure that whatever you do, you are doing it at your own responsibility.

How to Install CWM Recovery:

Download the Kernal Package file with CWM recovery and extract it.

Copy the Boot.img file from the Kernel Package.zip folder.

      1. Paste the copied boot.img file and paste it in the Minimal ADB and Fastboot folder that you got after using our Quick ADB and Fastboot Drivers Guide. In case you used the full ADB and Fastboot drivers setup, place the downloaded file in Fastboot folder.
      2. Open the folder where you placed the downloaded recovery.img file. E.G Minimal ADB and Fastboot or Fastboot.
      3. Press and hold the shift key and right click on any empty area within the folder and click on “Open Command Window Here”.
      4. Turn off your Xperia Z completely.
      5. Now Press and hold the Volume Up Key and plug in the USB data cable.
      6. You should see the LED turning blue on your phone now, that means it is connected properly in Fastboot mode.
      7. Now in the command prompt type: Fastboot Flash Boot Recoveryname.img [Replace the Recovery name with the file name you downloaded],
      8. It will take a few seconds and flash recovery in your phone, check out the logs on the command prompt.
      9. Plug out the USB data cable, Turn on your device, as soon as you see the Sony logo press the Volume Up key rapidly, you should boot into the CWM recovery now.
      10. Congrats! You’re done with the recovery installation.
      11. Now for the stability and compatibility of the system, you need to fllash the kernel as well.
      12. To do so, copy the downloaded Kernel.zip folder to your phone’s sd card.
      13. Boot into CWM recovery, to do so, turn off your device completely, now turn it on and as soon as you see the Sony logo, press Volume Up key rapidly, you should see the CWM recovery now.
      14. Select “Install Zip > Choose Zip from sd card > Kernel Package.zip > Yes”.
      15. Wait for it to flash the kernel.
      16. That’s All!

How to Root your Xperia Z on Android 4.3 Jelly Bean 10.4.B.0.568 Firmware:

      1. Download the SuperSu.zip file.
      2. Place the downloaded file on your  phone’s sd card.
      3. Boot into the CWM recovery that you just installed.
      4. Select “Install Zip > Choose Zip from Sd Card > SuperSu.zip > Yes”.
      5. It will quickly flash SuperSu in your phone.
      6. That’s it, find it in app drawer after flashing.
      7. Install Busy Box now from the Google Play store if you need.
      8. Congrats! You’re rooted now as well.1390718_10201913366768454_351691808_n
  • Thanks to Doomlord for creating this awesome recovery.
  • Thanks to Chainfire for his fabulous SuperSu.

That’s all with the recovery installation on the Xperia Z. We hope that you find the guide easy to understand. In case you got any queries/suggestions or face any difficulties regarding this post, please feel free to stop by the comment below. We will respond you as quick as we can.

Update Sony Xperia Z C6603 to Latest Android 4.3 10.4.B.0.569 Firmware

41
Update Sony Xperia Z C6603 to Latest Android 4.3 10.4.B.0.569 Firmware

Sony’s Xperia Z was launched at CES 2013, giving a start to Sony’s high end flagship series. The phone sported a beautiful 5 inch full HD display, 13.1 MP camera at the back that was the best smartphone camera at the time of its release, while a 2.2 MP camera at the front was fixed. Under the hood it has a 1.5 GHz Qualcomm’s Snapdragon 600 Quad Core CPU along with Adreno 320 GPU and 2 GB RAM while a 2330 mAh battery was placed inside as well. Xperia Z was world’s first waterproof and dust proof phone as well.

Out of the box Xperia Z ran on Android 4.1.2 Jelly Bean, Sony recently took the phone to Android 4.2.2 Jelly Bean and the plans for further upgrades on the Xperia Z to Android 4.3 and Android 4.4 KitKat were revealed as well. The good news is Sony has already released the Android 4.3 Jelly Bean for Xperia Z, Z1, ZR, ZL and Tablet Z. The update is on a slow roll out to different regions at the moment.Xperia-Z-front-40-wet-v2-1024x1024

As Over-The-Air updates take quite some time to hit all the regions, some you couldn’t wait enough to taste the Android 4.3 Jelly Bean on your devices, to overcome the need of latest firmware on your Xperia Z C6603, we’ve made a detail guide below that will drive you to the 10.4.B.0.569 firmware on your device. The new firmware comes with a lot of bug fixes, performance enhancements, new themes, camera app is improved and has new camera affects, and there is a lot more that you may test upon upgrading. Let’s move forward to the upgrade method.

Here are some pre-requisites:

      1. This guide is only for Sony Xperia Z C6603, even though this firmware works fine on C6602, perhaps it would not be wiser to flash it on C6602 to prevent any mishap. Please check your device model first in Settings > About Device > Model.
      2. You must have installed Sony FlashtoolGet the full guide here. Also Install drivers using Flashtool > Drivers > Flashtool-drivers > Flashtool, Xperia Z, Fastboot, select all these and install.
      3. Your phone’s battery must be charged at least over 60%. This is highly recommended in order to prevent any power issues during the process.
      4. Make sure that you backup your media content,contacts, call logs and text messages.  This is important and recommended so that in case you decide to wipe your phone during the flashing process, you can get all of your data back using the backup.
      5. Enable USB debugging mode on your device. To do so, tap settings>developer options>USB debugging. If you can’t find developer options in settings, then tap settings > about device and tap “Build Number” for 7 times and you’ll get em’ activated under settings.
      6. To flash this firmware, you do not need to root your device, you do not need to unlock the bootloader. All you need is, your device must be the one mentioned and must be running on Android 4.2.2 Jelly Bean or Android 4.1.2 Jelly Bean.
      7. Download the firmware file properly.
      8. Use the OEM data cable to connect your phone to your PC. Using any other data cable might cause connection problems.
      9. Alright! Follow this guide to the letter in order to prevent any mishap.

How to Install Android 4.3 Jelly Bean 10.4.B.0.569 on Xperia Z C6603:

    1. Before moving forward, please make sure that you’ve read the pre requisites and ensure that you are set to go ahead.
      1. Download the latest firmware Android 4.3 Jelly Bean 10.4.B.0.569 FTF file. | Torrent
      2. Copy the file and paste in Flashtool>Firmwares folder.
      3. Open Flashtool.exe now.
      4. Hit the small lightening button on the top left corner and select Flashmode.
      5. Select the FTF firmware file that you placed in the Firmware folder. 
      6. From the right side, select what do you want to wipe. Data, cache and apps log, all wipes are recommended, perhaps you may select if you don’t want.
      7. Click on OK, and it will start preparing the firmware for flashing. This may take a little while to load.
      8. As soon as the firmware is loaded, it will prompt you to attach the phone by turning it off and keeping the back key press.
      9. For Xperia ZVolume Down key will do the job of back key, just turn off your phone, keep the Volume Down key pressedand plug in the data cable.
      10. As soon as the phone is detected in Flashmode, the firmware will start flashing, Do not leave the Volume Down key until the process is complete.
      11. As soon as you see “Flashing ended or Finished Flashing” leave the Volume Down key, plug the cable out and reboot.
      12. That’s All! Congrats! You’ve installed latest Android 4.3 Jelly Bean on your Xperia Z C6603. Enjoy
      13. Xperia Z 4 (7)Xperia Z 4 (6)Xperia Z 4 (5)Xperia Z 4 (4) Xperia Z 4 (3) Xperia Z 4 (1)Xperia Z 4 (2)

That’s All! In case you got any queries/suggestions or face any difficulties regarding this post, please feel free to stop by the comment box below and drop us your message. We will respond as quick as we can.

Install CWM/TWRP Recovery & Root Sony Xperia Z1 C6903/C6902 Running Latest 14.2.0.A.290 Firmware [How to – Guide]

106
Install CWM/TWRP Recovery & Root Sony Xperia Z1 C6903/C6902 Running Latest 14.2.0.A.290 Firmware [How to – Guide]

Sony has updated its flagship device Xperia Z1 to latest Android 4.3 Jelly Bean with the build number 14.2.A.0.290, the new update has fixed the camera bug upon unlocking the bootloader, there is a number of performance enhancements, some new ringtones, themes are added as well.

In case you don’t know about Sony Xperia Z1 yet, then let’s have a look at the device’s specs and features first. Xperia Z1 flaunts a beautiful 5 inches full HD display with 441 ppi. A 20.7 MP camera sensor is placed at the back, by far the best camera in a smartphone I’ve ever seen. On the front there is a 2 MP camera. Sony has used Qualcomm’s Snapdragon 800 Quad Core CPU clocked at 2.2 GHz to power up the device, while a RAM of 2 GB is also there and Adreno 33o GPU is set inside. Under the hood a massive 3000 mAh battery is fixed.xperia-Z1-hero-white-1240x840-f9b9916d16a90faba4e6e2fc3de5e289

While some of you might have updated your device to the latest Android 4.3 Jelly Bean firmware and now looking out for a way to root your device, you’ll probably end up finding no method, or finding a method that is not easy at all. Rooting Xperia Z1 on latest 14.2.A.0.290 firmware is possible if you have a CWM or TWRP recovery installed in your phone, you just got to flash SuperSu using the recovery. To make it even more easier for you, I’ve explained the method in detail below. But before we head towards the method, let’s have a look on what is a custom recovery [CWM / TWRP] and what are the advantages of having it installed.

A custom recovery allows you to install custom roms, mods etc. Along with these, you can make a Nandroid backup, this helps you a lot as you can move back to the previous working state of your phone at any time you want if you have backed up your current system. In some cases, to root the phone you need to flash SuperSu.zip file in the custom recovery, having installed the recovery may help you while in some casesto install the recovery easily, you need to have the phone rooted. You can also wipe cache and dalvik cache of your phone using a custom recovery.

Pre Requisites:

      1. This guide is only for Sony Xperia Z1 C6903/2. Do not try this on any other model, please check your device’s mode in Settings > About Device.
      2. The CWM / TWRP recovery is only for Xperia Z1 C6903/C6902 running latest Android 4.3 Jelly Bean 14.2.A.0.290 firmware. Check your firmware version in Settings > About Device and make sure that it matches the one mentioned here.
      3. You must have installed Android ADB & Fastboot drivers. Follow the quick guide here.
      4. Your device must have an unlocked bootloader. Follow our full guide here in order to unlock.
      5. Please make sure that your phone’s battery is charged at least over 60%. This is highly recommended in order to prevent any power issues during the recovery flashing process.
      6. Please make sure that you backup all of your important media content, contacts, call logs and important text messages. This is highly recommended so that in case something goes wrong, you can still restore your data.
      7. Use only OEM data cable to establish connection between your PC and Phone.
      8. Alright! Follow this guide to the letter now.

 Update: The method works fine for Xperia Z1 C6902 as well. 

Disclaimer: The methods involved in flashing custom roms and rooting your phone is highly custom and may result in bricking your device, and has nothing to do with Google or the device manufacturer that is SONY in our case. Also rooting your device will void its warranty and you will be no longer eligible for any kind of free device services by the manufacturers/warranty providers. In case of any mishap we may not be held responsible. Follow these instructions to the letter to avoid any mishap or bricking. Make sure that whatever you do, you are doing it at your own responsibility.


How to Install TWRP / CWM Recovery on Xperia Z1 C6903 and C6902:

Download your desired recovery.img file:

  • Place the downloaded Recovery.img file in the Minimal ADB & Fastboot folder that you created using our ADB & Fastboot Quick Setup Guide.
  • If you are using Android ADB & Fastboot full package, you can place the downloaded Recovery.img file in the Fastboot folder or in the Platform-tools folder.
  • Open the folder where you placed the Recovery.img file. E.g Minimal ADB & Fastboot or Fastboot or Platform Tools.
  • Press and hold the shift key and right click on an empty area within the folder, and click on “Open Command Window Here”.
  • Turn off your Xperia Z1 completely.
  • Now press the Volume Up Key and while keeping it pressed plug in the USB cable.
  • You should see a blue light in the notification light of your phone, that means your device is now connected in Fastboot mode.
  • Now type the following command: Fastboot Flash boot Recoveryname.img
  • You may rename the recovery.img file for your ease of access and replace it with Recoveryname in the command to flash it.
  • Hit Enter and it will quickly flash CWM / TWRP recovery in your Xperia Z1.Screenshot_1
  • Remove the USB cable now.
  • Reboot your device now, as soon as you see the Sony logo,  press Volume Up & Down Keys one after another in order to boot into the custom recovery you installed.
  • Congrats! You should now see the custom recovery.

How to Root Sony Xperia Z1 C6903 and C6902:

    1. Download the latest SuperSu.zip file.
    2. Place the downloaded SuperSu.zip file on your phone’s sd card.
    3. Boot into CWM / TWRP recovery on your phone.
    4. Select Install Zip / Install > Choose Zip from SD / Ext Sd card > SuperSu.zip 
    5. Select Yes and let it flash SuperSu.
    6. As soon as flashing is done, reboot your device.
    7. Find SuperSu in App drawer.
    8. Congrats! You’re rooted now.
    9. 20131219_02553020131219_02565220131219_025556

That’s all. In case you got any queries, face any difficulties regarding this post, please feel free to stop by the comment box below. We will try our best to sort it our for you.

Credits: MohammadAG

How To Unroot Nexus 5 By Installing Factory Images.

0
How To Unroot Nexus 5 By Installing Factory Images.

One of the Best thing about Android, is that it lets you have all sort of adventures, even if you are an average user, you can do a lot of things with your Android device. But if you are a little immense about your device and Rooted it, from that point on the things are pretty much different. You can try Custom ROMs, Mods, Tweaks and other things on your Android device. Rooting allows you to install custom Mods, Kernels, Modems, which allows you to increase performance and battery life.

But sometimes, you need to unroot your device and want to install the Stock Images on your device. In case of Nexus 5, it is not easy to find. Once, if you tried to install a Custom ROM on your Nexus 5, and by any chance the results are not like what you expected. The Only option left is to Flash the Factory image to your device. While not all the Android OEMs provides Official Firmwares for the Public, but there are some Like Motorola and Google, who gives their Users a good chance to install the Stock Image to the device again.

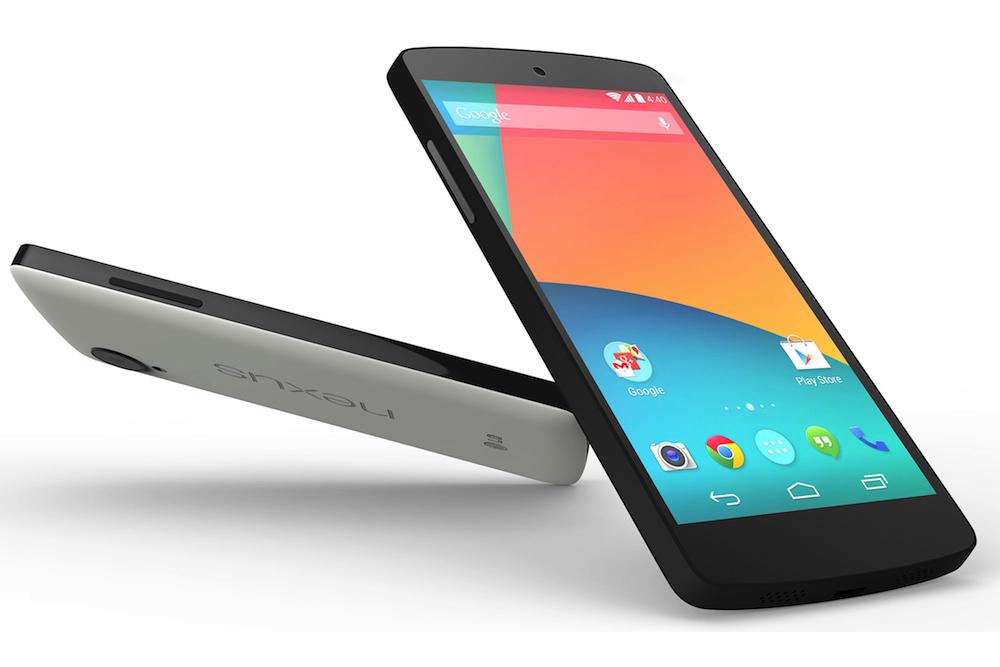
Nexus-5-Black

In this Article, we will show you How To Unroot Nexus 5 By Installing Factory Images. But before we begin, Make sure that you have battery charged over 60 % and have backed up all your important ContactsCall Logs & Messages.It is highly recommended in case of any mishap or data loss to back up all your important data.

Disclaimer: The methods involved in flashing custom roms and rooting your phone is highly custom and may result in bricking your device,and has nothing to do with Google or the device manufacturers which is Google/LG in our case. In case of any mishap we may not be held responsible. Follow these instructions to the letter to avoid any mishap or bricking. Make sure that whatever you do, you are doing it at your own responsibility.

Important things:.

  • Enable USB debugging mode.
  • This Tutorial is Only For LG Nexus 5.
  • Battery Level is not necessary, because your Device needs to be connected with PC all the time.

How To Unroot Nexus 5 By Installing Factory Images.

First make sure that Android SDK is installed on PC. Also installed Latest Google USB Drivers.

Screenshot_12

Download the Latest, Nexus 5 Factory Image: Link

Now Unzip the Downloaded Factory Image file with .tgz extension. If you can’t see the files with .tgz extension, change the File extension from .tar to .tgz.

Open the Extracted Folder, there is another Zip file in it, extract it too.

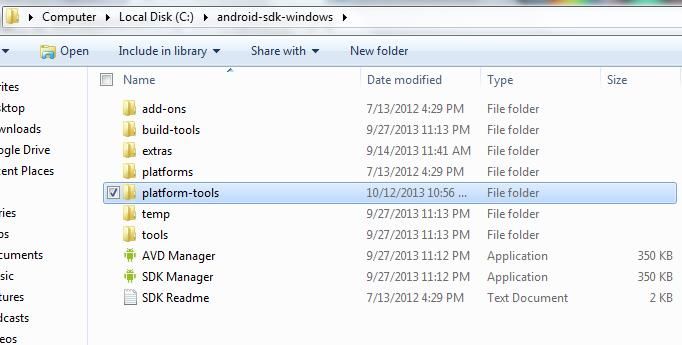
Now Copy all the Contents to C:/Program Files/Android/sdk.

Screenshot_11

Turn Off your device and Press and Hold Power + Volume Down buttons until it Opens up in Bootloader mode.

Connect your device with PC.

Now Open Platform-Tools folder, where you have copied the Factory Images and Open Command Prompt there.How? Hold Shift Key and Right Click anywhere in the Folder.

It is time to Perform the Flashing Process, Type in the Following Commands one-by-one, each to finish before putting the next one. On Mac, you should add ./ at the start of every command i.e ./fastboot flash boot boot.img

fastboot flash bootloader bootloader-hammerhead-hhz11k.img

fastboot reboot-bootloader

fastboot flash radio radio-hammerhead-m8974a-1.0.25.0.23.img

fastboot reboot-bootloader

fastboot flash system system.img

fastboot reboot-bootloader

fastboot flash userdata userdata.img

fastboot flash recovery recovery.img

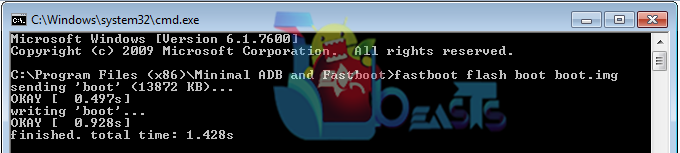
fastboot flash boot boot.img

fastboot erase cache

fastboot flash cache cache.img

When all is done, your Nexus 5 will be running, 100% Stock Android 4.4, like the way you bought it. If you want to unlock the Bootloader, Type the Following command:

fastboot oem unlock

But if you wish to remain on with a Locked Bootloader, skip the above step and Start using the Device.