Home Blog Page 492

Get The Dark Keyboard In iOS 7 Using Bloard – How To.

0
Get The Dark Keyboard In iOS 7 Using Bloard – How To.

Last time we only told you that in iOS 7 you can Turn your Keyboard color black from white using Bloard. Today we will show you how it s done. At first only developers who installed iOS 7.1 Beta had the opportunity to turn Keyboard dark, unfortunately, it is not available anymore. For those who don’t have an extra $100 to drop on a developer account, there is still a way to get a dark keyboard. All you need is a Jailbroken iOS 7 device. If already Jailbroken, it will be quick.

How To Get Dark Keyboard in iOS 7.

First Open Cydia and Search and install for Board.

get-new-dark-keyboard-your-ios-7-iphone-ipad-without-ios-7-1-beta.w654

Next go to Settings and Enable Bloard.

Screenshot_18

That is it, Your Keyboard will be black now in any app, if you want the White one back, Disable Board in Settings.

Screenshot_19

How To Root HTC Evo 4G LTE and Install Custom Recovery.

1
How To Root HTC Evo 4G LTE and Install Custom Recovery.

HTC Evo 4G has an issue when it comes to connectivity, it keeps showing that you are connected to a 4G  Network, even if you are connected to 3G or 2G network. This issue is one of the many things you can solve just by Rooting your device. Rooting allows you to get full control over the Software of your device. There is no limit what you can do, once you root your device. You can install Network mods to cover this issue. But how to Root it, First you need to Unlock the Bootloader, then install a Custom Recovery then push the Super SU binaries in your device, hence rooting it.

HTC-EVO

In this Article, we will show you How To Root HTC Evo 4G LTE and Install Custom Recovery. But before we begin, Make sure that you have battery charged over 60 % and have backed up all your important ContactsCall Logs & Messages.It is highly recommended in case of any mishap or data loss to back up all your important data.

Disclaimer:

The methods involved in flashing custom roms and rooting your phone is highly custom and may result in bricking your device, and has nothing to do with Google or the device manufacturers which is HTC in our case. In case of any mishap we may not be held responsible. Follow these instructions to the letter to avoid any mishap or bricking. Make sure that whatever you do, you are doing it at your own responsibility.

Important things:

  • Bootloader Must Be Unlocked. HOW? Follow the link
  • Enable USB debugging mode.
  • Make sure that battery level is at 85% or more.
  • This Tutorial is Only For HTC Evo 4G.

How To Root HTC Evo 4G LTE and Install Custom Recovery.

root-your-htc-evo-4g-lte-using-twrp-supersu.w654 (1)

  • Download Super SU
  • Copy the Recovery to the root of your Sd card.
  • Turn off your phone and open Bootloader/Fastboot mode. How? Press and hold Volume Down + Power button until the Soft Keys blinks for 6 times then Loose the Power Button but keep pressing Volume Down button.
  • Bootloader will refresh and it will detect the Recovery, Press the Volume Up to start the Installation.

root-your-htc-evo-4g-lte-using-twrp-supersu.w654

  • After the Process is done, on Phone Select Reboot Bootloader.
  • Now select Recovery from Bootloader.
  • Once the Recovery is Open, select the following.
  • Now select ‘Install zip from sd card’, then select ‘choose zip from sd card’.
  • Select the Super SU.zip file and confirm the installation on next screen.
  • After that, +++++Go back. and Reboot System now.

Stop Your Battery From Draining in iOS 7 – How To Guide.

0
Stop Your Battery From Draining in iOS 7 – How To Guide.

iOS 7 is the biggest turn Apple took after the release of iOS devices, till iOS 6.1.3 only those changes, we can’t notice mush,were brought to Mobile. And then arrived the iOS 7, change in looks, speed, performance and Battery life. But all those devices who arrived with iOS 7, like iPhone 5s, have no problem in Battery timing. All those who receive the iOS 7 update have serious problems, in terms of Battery Life.
ku-xlarge

While iPhone 5s can live upto 18-hours with all features On, iPhone 5 can only survive 12-hours. The Problem is not with iPhone 5 Only, iPod Touch, iPad Mini and other devices have the same problem. Today we will give you a couple Suggestions to Increase the Battery life of your iOS device running iOS 7. But Turn-Off those features that you don’t use much, if you really need some of them On, then let them remain Working.

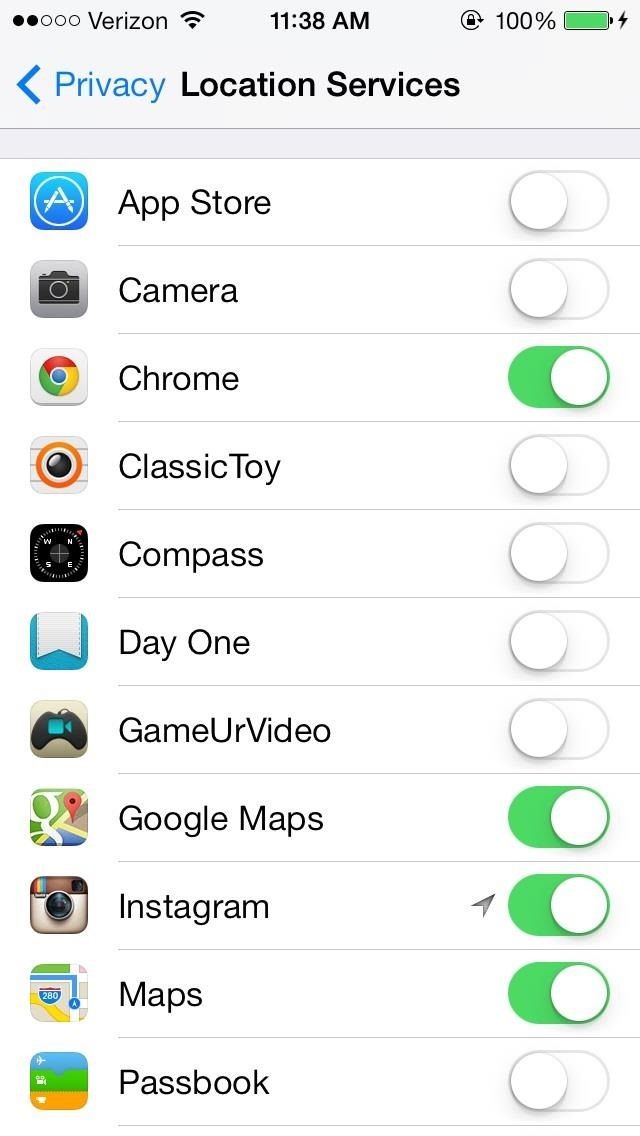
1. Turn Off location Services.

For some apps, location services turned on is necessary, but unfortunately, Location Service are the Biggest Reason why Battery Drain is that fast. Though you wouldn’t turn if Off for Maps or Yelp, but for all the apps Turning if Off is a Great idea. The lesser Application you will have in Location Service, the better Battery Life you will have.

stop-your-battery-from-draining-after-updating-ios-7-ipad-iphone-ipod-touch.w654 (1)

2. Disable Other System Service That Uses GPS.

While you are in Location Services, all those apps will change except those who can track your Location. Go to System Services ad Turn Off all those you don’t need.

stop-your-battery-from-draining-after-updating-ios-7-ipad-iphone-ipod-touch.w654 (2)


3. Disable the Parallex Effect.

Parallex Effect Brings Multi-Layer Illusion to your iOS Device, it is pretty cool, But do you really need it?  If you want Battery life, then you don’t. Navigate to Settings > General > Accessibility > Reduce Motion and Turn it On.

stop-your-battery-from-draining-after-updating-ios-7-ipad-iphone-ipod-touch.w654 (3)


4. Don’t Leave Air-Drop for Too Long

Air-Drop is an Amazing feature that allows you to Share different Media, Like Photos, Videos, Music etc. but letting it remain On for too long can Kill your Battery Life, Since it uses Wi-Fi and Bluetooth to Exchange Files.

stop-your-battery-from-draining-after-updating-ios-7-ipad-iphone-ipod-touch.w654 (4)


5. Turn-Off Bluetooth and Wi-Fi When you don’t need them.

After disabling the Air-Drop, make sure to Kill both Wi-Fi and Bluetooth, when you don’t need them. Due to New Control Center, now you can super fast to toggle on and off.

stop-your-battery-from-draining-after-updating-ios-7-ipad-iphone-ipod-touch.w654 (5)


6. Close all Running Applications.

Apple Claims that apps running in Background takes a little process, hence a little Battery Life. But Believe me, it shows a reasonable Improvement over Battery life, if you force close all the Running Applications. Just press the Home-Button Twice and Swipe up all the Unnecessary Running Applications.


stop-your-battery-from-draining-after-updating-ios-7-ipad-iphone-ipod-touch.w654 (6)


7. Don’t Use Dynamic Wallpapers

iOS 7 introduce Dynamic wallpapers, These Wallpapers are animate, with bubbles that appear and disappear, change size over time. Sure they drain a lot of battery life, Don’t use them.

stop-your-battery-from-draining-after-updating-ios-7-ipad-iphone-ipod-touch.w654 (7)


8. Disable Unnecessary Notifications.

The Notifications that keeps poping up can take a lot of battery. All you doing is wasting precious battery life. Go to Settings > Notifications Center and Disable it along with anything else you don’t want.

stop-your-battery-from-draining-after-updating-ios-7-ipad-iphone-ipod-touch.w654 (8)


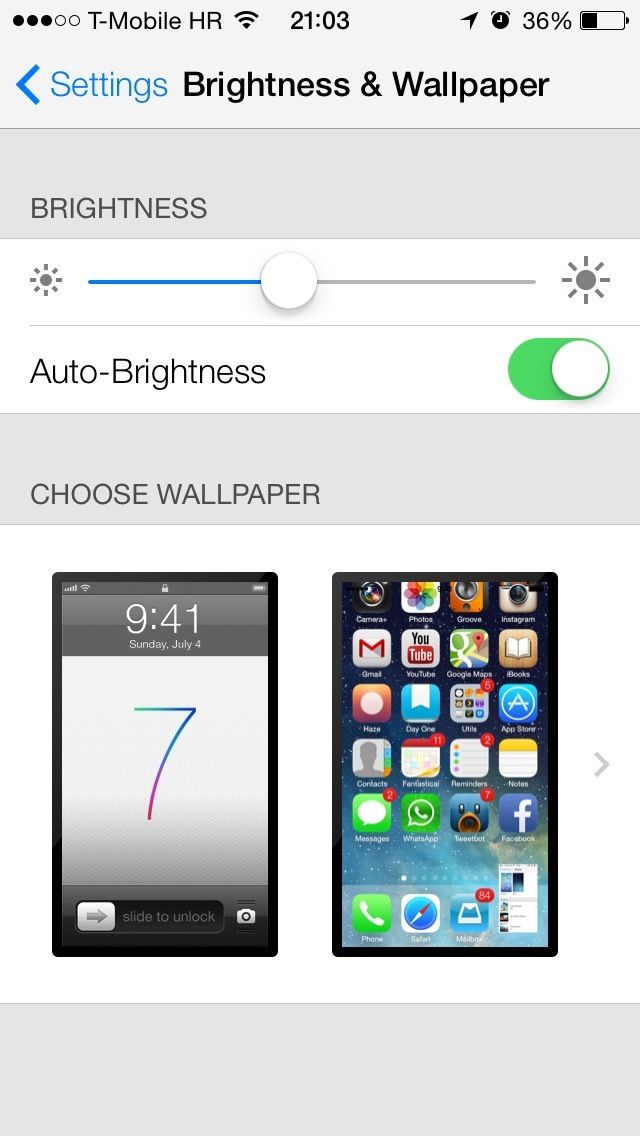
9. Lower The Brightness

Automatic Brightness is something that drain battery very fast, it increases the brightness when you are in front of light, doesn’t matter which one, and decrease it when there is darkness. Go to Settings > Wallpaper and Brightness and set the brightness according to your need.

iOS-7-Settings-Brightness-and-Wallpaper


Got any other Battery Saving Tips, Share with us in Comment Section Below.

VideoMix For Android – Watch Full Movies For Free.

0
VideoMix For Android – Watch Full Movies For Free.

VideoMix is an application for Android, Not Available at Google Play Store, Offers free movies to watch from Different Sites Like filmix.net, ekranka.tv, www.solarmovie.so, vodly.to, www.movs.ch, etc. It will give you a simple Discription of Movie along with Links to Third Party Source to watch the Movie. Those third Part Includes:  videorockerz.com, filenuke.com, putlocker.com, sockshare.com, movpod.in, nowvideo.eu, novamov.com, movshare.net, zalaa.com, online.ua, vk . com, youtube.com, movshare.net, video.mail.ru, myvi.ru, smotri.com, openfile.ru.

nu9uvara

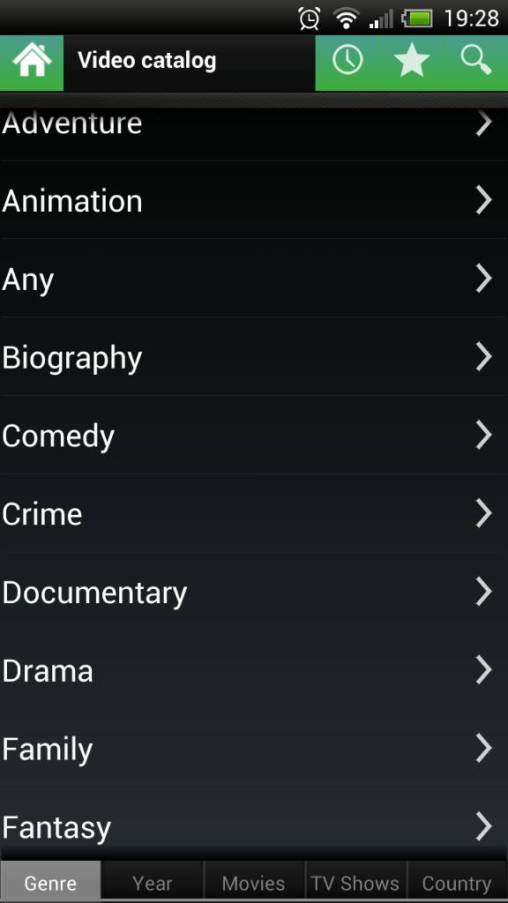
VideoMix has all type of Movies and the collection is so huge that you will find any move you want in it. After opening the app you will find different categories Included New, History , Catalog. In the New Tab, those movies which are recently added to the sources will be shown, in History you will find the Movies you have seen in Past. In catalog, you will find Genre, Year, TV Shows, Country, Movies etc.

eha4e8u9

In Genre, you will find movies according to your Interest, Like Animation, Adventure, Comedy, Drama etc. Since this app is not available at Google Play Store, we will give you the Apk download Link. All Thanks to XDA Member Intel007. Make Sure to use MX Player to watch videos in High Quality with full controls on Screen

Download VideoMix Apk

Convert All Videos And Audios With Format Factory Portable.

0
Convert All Videos And Audios With Format Factory Portable.

There are many Audio/Video converters available on WEB, but all of them have two problems, Free ones are not giving enough feature and trail versions of Paid Converters only converts for a Few seconds or minutes, but not all of the video. The only option left for Uses to Become a Pirate, use the original content in the wrong way. An there is another thing, that almost all of the Video or Audio Converters are not portable. Means on another PC you first need to install them again to use them, you can’t just copy them and start using them.

Format-Factory-Logo

So, here we are with another Portable Software to share with you, and it is called Format Factory Portable. Don’t worry it is an Audio/Video converter that will work without installation, just Run the .exe file and start using it. This Software can convert a video to any format and same with the Audio.It will even Fix the Broken Video or audio. Format Factory Portable Provides the Following Functions:

  • Convert Video: All to Mobile Device, All to MP4, All to AVI, All to 3GP, All to RMVB, All to GIF, All to WMV, All to MKV, All to MPG, All to VOB, All to MOV, All to FLV, All to SWF.
  • Convert Audio: All to MP3, All to WMA, All to FLAC, All to AAC, All to MMF, All to AMR, All to M4A, All to M4R, All to OGG, All to MP2, All to WAV, All to WavPack.
  • Convert Picture: All to JPG, All to PNG, All to ICO, All to BMP, All to GIF, All to TIF, All to PCX, All to TAG.
  • Convert ROM Device\DVD\CD\ISO: DVD to Video File, Music CD to Audio File, DVD/CD to ISO/CSO, ISO to CSO, CSO to ISO.

Format Factory Portable Has the following features:

  • Support converting all popular video,audio,picture formats to others.
  • Repair damaged video and audio file.
  • Reducing Multimedia file size.
  • Support iphone,ipod multimedia file formats.
  • Picture converting supports Zoom,Rotate/Flip,tags.
  • DVD Ripper.
  • Supports 60 languages

How To Use Format Factory Portable.

FormatFactory

  1. Download Format Factory Portable.
  2. Run the .exe file to Open it.
  3. Now Click Task and Select a Video or Audio.
  4. Once the File is Loaded, Choose what you wanted to do, Whether you want to convert all of them to Mp4 , Avi, Mp3, Acc or whatever.
  5. Once the Conversion is done, open the Destination folder to Use the File.

Burn ISO Images To USB Flash Drive With ISO To USB Portable.

0
Burn ISO Images To USB Flash Drive With ISO To USB Portable.

Nowadays, ISO images are one of the most important files, Same Like.Zip or .Rar but easily mountable and can be used in a virtual CD/DVD ROM. ISO images are used to create Boot-able Disk Drives like CD/DVD or USB or even an External Hard Drive. The best way to preserve ISO images is to either copy them on USB drive or Burn Them on USB Drive. But not all the Burning tools support USB, they support CD/DVD, but not USB.

So, Today we are giving you a Tutorial based on How to Burn ISO images on a Portable USB Using ISO to USB. ISO to USB also allows you to create Windows bootable USB disc with BOOTMGR and NTLDR boot mode including WinXP, Win7 PE, and WinXP PE bootable ISO image files. Just load your ISO OS images and click on the Burn button.

How To Burn ISO Images Using ISO To USB

screenshot_small

  1. Download ISO To USB and Run isotousb.exe to Launch the program.
  2. Insert USB drive and Wait for it to be detected.
  3. Now Click Browse and locate the ISO Image you want to burn. If it is a Windows ISO image then Tick Bootable.
  4. Now Click Burn to Start the Process , once the Process is finish, Try USB to see if it is working or not.

How To Root Verizon Galaxy S3 On Android 4.3 VRUCML1 Official Firmware.

8
How To Root Verizon Galaxy S3 On Android 4.3 VRUCML1 Official Firmware.

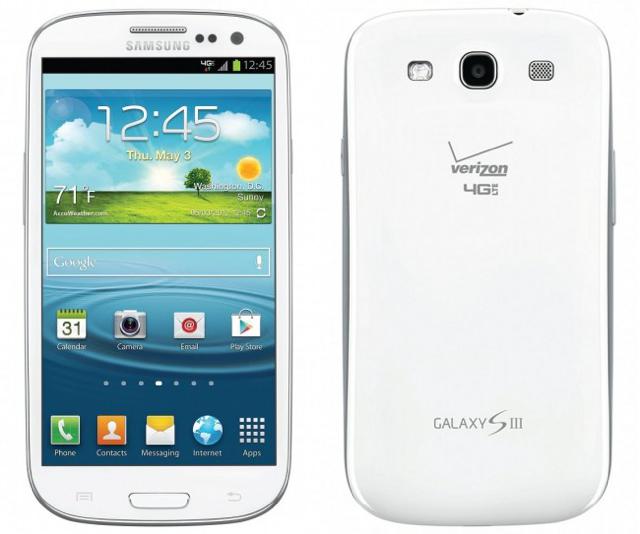
It has been a Month, since Verizon rolled out the Android 4.3 Jelly Bean update for Galaxy S3. It feels a bit weird to hear, because most of the devices are now receiving the update of Android 4.4 Kit-Kat and Verizon Galaxy S3 will receive the update of Android 4.3 Jelly Bean. As,  we all know that Rooting a Samsung Device is far easier than any other OEM, but when it comes to Rooting a Samsung Device from a US carrier, then things become a little complicated. But thanks to developers, we have the solution of every question users are asking. The Verizon Galaxy S3 has received the Android 4.3 VRUCML1 and if you have updated your Galaxy S3 to Android 4.3 VRUCML1 and looking for a solution to Root it, We will show you how it is done.

verizon-galaxy-s3

In this Article, we will show you How To Root Verizon Galaxy S3 On Android 4.3 VRUCML1 Official Firmware.But before we begin, Make sure that you have battery charged over 60 % and have backed up all your important ContactsCall Logs & Messages.It is highly recommended in case of any mishap or data loss to back up all your important data.

Disclaimer: 

The methods involved in flashing custom roms and rooting your phone is highly custom and may result in bricking your device,and has nothing to do with Google or the device manufacturers which is Samsung in our case. In case of any mishap we may not be held responsible. Follow these instructions to the letter to avoid any mishap or bricking. Make sure that whatever you do, you are doing it at your own responsibility.

Important things:.

How To Root Verizon Galaxy S3 On Android 4.3 VRUCML1 Official Firmware.

  1. Download Latest Saferoot Exploit and Extract it.
  2. Now Connect your Galaxy S3 to PC, using original data cable.
  3. Once the Device is Recognized, double click the Installer.bat, if you are using Windows Or Install.sh, if you are using Mac.
  4. Doing this will trigger the Root Script, which will install Super SU on your device.

That’s it your Samsung Galaxy S3 SCH-I535 has been Rooted On VRUCML1Android 4.3 Jelly Bean. Download any Root Checker app or See Super SU in app Drawer to Verify root access.

How To Root Samsung Galaxy S3 On Android 4.3 XXUGMK7 Official Firmware.

2
How To Root Samsung Galaxy S3 On Android 4.3 XXUGMK7 Official Firmware.

First Follow the Link to install Android 4.3 XXUGMK7 Official Firmware On Samsung Galaxy S3.

Update Galaxy S3 I9300 To XXUGMK7 Android 4.3 Jelly Bean Official Firmware.

Now that you have installed Android 4.3 XXUGMK7 Official Firmware on your Galaxy S3 I9300, then next thing you know is to root it. Why? you have already rooted your device on previous Firmware? Well because installing an Official Firmware will erase the root access of your device and you have to root it again. Rooting allows you to get full control over your device, Stock apps and mods are good, but installing Custom Mods gives you better support and great battery life, you might need to delete some Stock apps from the device, a non-rooted device can’t do that, but a rooted one has the power to remove stock apps too.

samsung-galaxy-s3-root-android-ics-firmware-image-screenshot

If you are familiar with Odin and it’s working, then this tutorial might not be difficult for you. Otherwise read the whole tutorial first before trying it on your device. In this Article, we will show you How To Root Samsung Galaxy S3 On Android 4.3 XXUGMK7 Official Firmware.But before we begin, Make sure that you have battery charged over 60 % and have backed up all your important ContactsCall Logs & Messages.It is highly recommended in case of any mishap or data loss to back up all your important data.

Disclaimer: 

The methods involved in flashing custom roms and rooting your phone is highly custom and may result in bricking your device,and has nothing to do with Google or the device manufacturers which is Samsung in our case. In case of any mishap we may not be held responsible. Follow these instructions to the letter to avoid any mishap or bricking. Make sure that whatever you do, you are doing it at your own responsibility.

Important things:.

How To Root Samsung Galaxy S3 On Android 4.3 XXUGMK7 Official Firmware.

odin_explained

  •  Download CF-Root-SGS3-v6.4.zip  for Galaxy S3 to your computer and extract the zip file.
  • Download Odin.
  • Turn off your Phone and Turn it On While Pressing, Power + Volume Down + Home button until you see some text on-screen, Press Volume Up to continue.
  • Make Sure that the USB drivers are installed.
  • Open Odin in Computer and connect your device to PC, while it is in the Download mode.
  • If your Phone is successfully connected to PC, the Odin port will turn Yellow with COM port number.
  • Now Click on PDA and select the File CF-Root-SGS3-v6.4.tar.‘, or the one who has the biggest size.
  • In Odin, Check Auto reboot and F.Reset Options.
  • Now Click the start button and wait for the process to complete.
  • After the installation is complete you device will restart and once you see the Home Screen, unplug the cable.

That’s it your Samsung Galaxy S3 I9300 has been Rooted On XXUGMK7Android 4.3 Jelly Bean. Download any Root Checker app or See Super SU in app Drawer to Verify root access.

Download Danger Dash for PC – Windows XP/7/8/8.1 & MAC

0
Download Danger Dash for PC – Windows XP/7/8/8.1 & MAC

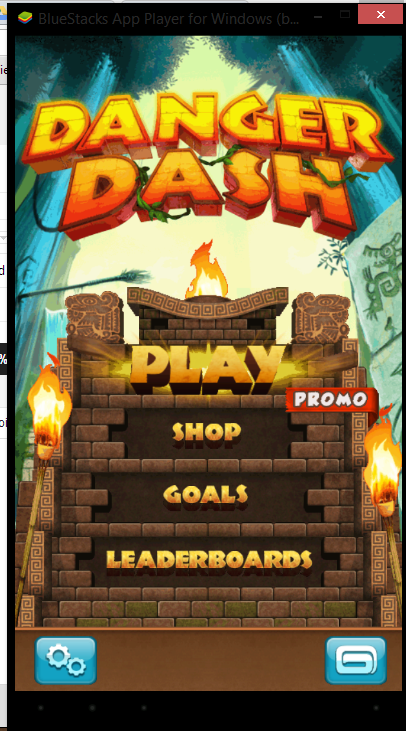
Another running game, but this time by the well known Gameloft. Danger Dash prompts the players to run and escape from the evil tigers that are running after you. The game consists of different power packs, bonuses, tasks, adventures. Quite similar to the popular game Subway Surfers, in Danger Dash you have to save your Avatar from the incoming obstacles, jump and slide through the traps, and collect coins while running. Danger Dash on PC

Danger Dash certainly became one of the most widely Android games and gain rank on the charts of popularity. You can experience the endless running and lots of fun while playing this game, but you’ll probably need and Android device to do so. Well, there is nothing to worry now as you’re on the spot where you’ll learn an alternative way to play this game, yes you heard it right. We’re going to have a look on a method to play this awesome game on a PC with Windows XP/7/8/8.1 or MAC. Before we head towards the method, let’s have a look on the game’s official description.

*** Are you a real adventurer? ***
Run and escape from evil tigers!

UNLOCK COOL CHARACTERS
Collect Artifacts and run for your life as the hero Chuck Ace, the adventurer girl Miranda Rose, or the powerful Blowing Wind. Accomplish missions, escape danger and become a Real Adventurer if you got what it takes…

PUSH YOUR SPEED TO THE LIMIT IN EXOTIC SETTINGS
Run through the jungle, survive a rush of obstacles in a lost city and hold on for dear life in the mysterious temple! A real runner could do it!

JUMP & SLIDE PAST DEADLY TRAPS
Rush past wild obstacles in a super-fast dash, jump over columns or broken trees, and slide fast under dangerous traps!.

GRAB POWER-UPS FOR A SUPER CHARGE!
Use powerful upgrades like the Revival Ankh, The Tiger, or Jungle Fever to become more powerful, increase your speed, unlock new levels and grow your capacity!

LEAVE ALL YOUR FRIENDS IN THE DUST!
Track your ranking on the online leaderboards and mark your friends to follow their scores. Make sure you leave them all in the dust!

Danger Dash on Pc 2Danger Dash on PC3 

How to Download and Install Danger Dash on PC:

      1. You need an Android emulator to run this game on your Windows PC or MAC. We recommend using Bluestacks. Use our guide to install it on your PC.
      2. After downloading and installing Bluestacks, download Danger Dash APK from here.
      3. Open the downloaded APK file now, and let Bluestacks install it.
      4. Open BlueStacks now > All Apps > Danger Dash.
      5. The game will start now, follow the on screen instructions.
      6. Follow the initial screen,  you’ll be able to play it.
      7. Enjoy endless running fun.

How to play-Danger Dash on PC

Don’t forget to check out more Android Apps for PC in our Android Apps For PC Garage 😀

That’s All!

Download Nutty Fluffies Rollercoaster for PC – Windows XP/7/8/8.1 & MAC

0
Download Nutty Fluffies Rollercoaster for PC – Windows XP/7/8/8.1 & MAC

nf1

Bored of something? Well If so, consider playing Nutty Fluffies Rollercoaster as this real fun game will just make you addictive in no time. Nutty Fluffies Rollercoaster by UBI Soft let’s the players become conductors of a rollercoaster and ride the mini creatures which include Cat, Dog, Pig, Elephant & Mouse to their destination while collecting hearts. These hearts can be used to buy new carts and expand the Rollercoaster, aslo you can unlock new tracks, and a lot more is there to have fun with.

You may or may have not played the game on Android, but just in case you are looking an alternative way to play this game, you’re definitely on the right place. In the following post we’ll be having a look on a method to install and play Nutty Fluffies Rollercoaster on Windows XP/7/8/8.1 running PC or MAC. You just need to follow the steps explained below to the letter, but before we move further let’s have a look on the game description and what more it has to offer.nf1 (1)

How to Download and Install Nutty Fluffies Rollercoaster On Windows PC or MAC: 

  1. You need an Android emulator to run this game on your Windows PC or MAC. We recommend using Bluestacks. Use our guide to install it on your PC.
  2. After downloading and installing Bluestacks, download Nutty Fluffies Rollercoaster APK from here.
  3. Open the downloaded APK file now, and let Bluestacks install it.
  4. Open BlueStacks now > All Apps > Nutty Fluffies Rollercoaster.
  5. The game will start, follow the onscreen instructions to set it up.
  6. Play the game.
  7. Enjoy endless Rollercoaster experience!

Don’t forget to check out more Android Apps for PC in our Android Apps For PC Garage 😀

That’s All!

Fix Your Nexus 5 Storage, From 16GB to 32GB.

18
Fix Your Nexus 5 Storage, From 16GB to 32GB.

Installing the Stock/Factory Image on your Android device is one of the best facilities of owning an Android device. If you are one of those who can’t just stay on the same thing, but keep trying new and new things on their Android devices to Explore the Android world to its limits, then there might be a time when you actually have to install the Factory Image on your device, because some Custom Mod has ruined the Fun and your device is not working fine.

Nexus-5-Black

In case of Nexus 5, there are users who claimed that after Flashing the Stock Image again on their device, because the start having problems in Custom Mods they have installed on their device. But after Flashing the Factory Image, they soon realised that their 32GB Nexus 5 is only Showing 14GB of Storage as users free. That problem occurs a lot of time when you tired to Flash the Factory Image but forget some extra parts.

Today we will tell you how to Fix this Storage Error. So, your Nexus 5 can again start showing you 32GB Storage instead of 14/16GB Storage. If you have encountered the Same problem after Flashing the Stock Image, below you will find how to Fix It.

Disclaimer: 

The methods involved in flashing custom roms and rooting your phone is highly custom and may result in bricking your device,and has nothing to do with Google or the device manufacturers which is LG in our case. In case of any mishap we may not be held responsible. Follow these instructions to the letter to avoid any mishap or bricking. Make sure that whatever you do, you are doing it at your own responsibility.

Downloads and Requirements:

Download the Factory Image of Nexus 5

Set-Up Android SDK

Enable USB Debugging Mode.

Install Google USB Drivers

Method 1: Via Stock Recovery.

Boot Into Recovery Mode of Nexus 5. Turn Off the Device, Then Press the Power + Volume Down Button, Now you are in Bootloader mode. Select Recovery Using Volume Keys, When you see the Android Robot, Press and Hold Volume Up + Power Button To get into Stock Recovery Mode. You might need to try 3-4 time to get into Recovery Mode.

DSC02156

  • In Recovery, Select Wipe Cache Partition.
  • The Scroll to Wipe Data/Factory Reset and Select it.
  • Then Finally Select Reboot System Now.
  • Now After a Successful Reboot, Go to Settings > Storage to see how much Storage it is Showing.


Method 2: Re-flash The Factory Image.

  • First make sure that Android SDK is installed on PC. Also installed Latest Google USB Drivers.

Screenshot_12

  • Now Unzip the Downloaded Factory Image file with .tgz extension. If you can’t see the files with .tgz extension, change the File extension from .tar to .tgz.
  • Open the Extracted Folder, there is another Zip file in it, extract it too.
  • Now Copy all the Contents to C:/Program Files/Android/sdk.

Screenshot_11

  • Turn Off your device and Press and Hold Power + Volume Down buttons until it Opens up in Bootloader mode.
  • Connect your device with PC.
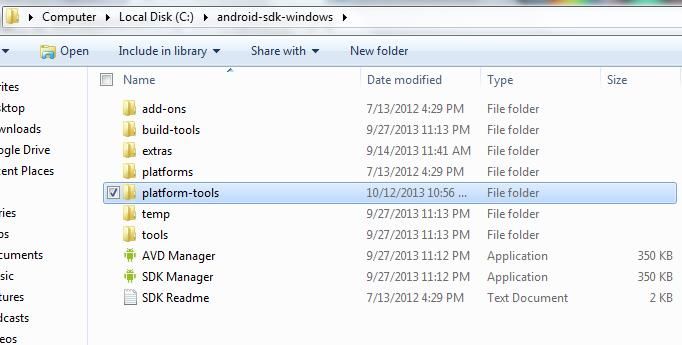
  • Now Open Platform-Tools folder, where you have copied the Factory Images and Open Command Prompt there.How? Hold Shift Key and Right Click anywhere in the Folder.
  • It is time to Perform the Flashing Process, Type in the Following Commands one-by-one, each to finish before putting the next one. On Mac, you should add ./ at the start of every command i.e ./fastboot flash boot boot.img

fastboot erase boot

fastboot erase cache

fastboot erase recovery

fastboot erase system

fastboot erase userdata

fastboot flash bootloader bootloader-hammerhead-hhz11k.img

fastboot reboot-bootloader

fastboot flash radio radio-hammerhead-m8974a-1.0.25.0.23.img f

astboot reboot-bootloader

fastboot flash system system.img

fastboot flash userdata userdata.img

When all is done Reboot Your Nexus 5, After a Successful Reboot, Go to Settings > Storage to see how much Storage it is Showing.

Download Frontline Commando For PC – Windows XP/7/8/8.1 & Mac

0
Download Frontline Commando For PC – Windows XP/7/8/8.1 & Mac

Do you like killing lots of enemies being a one man army? Well if so, then this game is surely for you. Frontline Command by Glu Mobile is perfect for the action game freaks.  Many of you must have played this game on Android smartphones, but how about playing the game on a Windows PC or MAC? Well, in today’s post we’ll be having a look on a method to run this game on PC. You just need to go through the method we explained below.

B30T1QvIpB1qCD2rKxAQ8yrIzDFG_tNitGEWp6OWZXfLovOmyYnukNruULZGzTbu-Qezh230


Before we head towards the method to install and run this game on your windows PC, let’s have a look on the game description by the devleoper:

  • ONE MAN. ONE WAR. YOU ARE THE FRONTLINE COMMANDO.
  • As the sole surviving Commando of a renegade attack against a ruthless dictator, you are stranded on the frontline and hell-bent on payback. You must use all of your specialized skills to survive the onslaught of the enemy forces and avenge your fallen soldiers.
  • SEE AND FEEL THE ACTION
  • The ultimate 3rd person shooter with stunning console quality visuals, precise controls, advanced physics and destructibles. Jump in the heat of battle and push your Android device to the limit!
  • COMPLETE DEADLY MISSIONS
  • Emerge from destructible cover points to take down helicopters, jeeps and heavily defended enemy bases. Fight off increasingly difficult waves of enemies over a variety of combat mission types.
  • COMMAND AN ARSENAL OF DEADLY WEAPONS
  • Take to the frontline with an artillery of assault rifles, sniper rifles, shotguns, rocket launchers, med kits, armor and more!
  • FRONTLINE COMMANDO is free to play.

How to Download and Install Frontline Command On Windows PC or MAC: 

  1. You need an Android emulator to run this game on your Windows PC or MAC. We recommend using Bluestacks. Use our guide to install it on your PC.
  2. After downloading and installing Bluestacks, download Frontline APK  from here.
  3. Open the downloaded APK file now, and let Bluestacks install it.
  4. Open BlueStacks now > All Apps > Frontline Commando.
  5. The game will start and begin download it’s data that is of 150 MB.
  6. As soon as data download is done, you’ll be able to play it.
  7. Enjoy endless war experience!

That’s All!