Home Blog Page 486

Install Android Revolution HD 4.2.2 Jelly Bean ROM on HTC One X

0
Install Android Revolution HD 4.2.2 Jelly Bean ROM on HTC One X

Android Revolution HD is one of the very best custom ROMs available around for HTC One X. The ROM is based on stock Android 4.2.2 Jelly Bean packing up useful mods and features. Android Revolution HD is popular among the users for being very stable and responsive operating system. In case you own an HTC One X and looking for a suitable and stable custom ROM, you may go for Android Revolution HD.

In the following post we are going to get through a detail method that explains how you can get this ROM running on your HTC One X. Before we head towards the ROM installation guide, I highly recommend you to make sure that you have the know how of the custom ROMs and you actually know what you’re doing with your phone. Although it is a highly stable and fast ROM, but still it is a custom ROM and you got to flash it only if you have much idea about custom operating systems.htc_one_x_photos_3

Let’s have a look on the ROM’s details and features:

System details:

      • Android 4.2.2 (Jelly Bean) – latest official HTC One X 4.18.401.3 (WWE) firmware
      • This is improved version of stock ROM – no visual changes!
      • Very fast, clean & stable!
      • Full HTC Sense 5.0 Interface
      • Multi-language (WWE)
      • For HTC One X

ROM Features:

Removed software (CPU) rendering – full nVidia Tegra 3 (GPU) rendering
Fully optimized and tweaked
Root access
Unsecured boot.img
Newest BusyBox
RAM optimizations
System signatures check enabled for system security and safety
Improved virtual memory management
Speed optimizations
Enabled GPU UI rendering
Data, cache and system partitions mounting tweaks
Bloatware applications removed
All /system applications updated to latest available
All /data applications updated to latest available
Improved CPU governors performance
Most optimal system scheduler
Disabled kernel debugging for better performance
Zipaligned (Improved RAM management)
Zipalign on boot (for user applications on data partition)
Fully de-odexed
init.d scripts (BusyBox run-parts) support
Auto init.d permissions set on boot
sysro/sysrw commands support
Excellent battery life!
Improved EXT4 performance
OpenVPN support
Most up-to-date system files permissions
Adobe Flash Player support
Support almost 24h a day

Here are some important pre-requisites and instructions that you must keep in mind before installing Android Revolution HD:

        1. This ROM is only for HTC One X International. Do not try this on any other variants of HTC One X. Make sure to check your device’s model number under Settings > About Device > Hardware Info / Model Number.
        2. Make sure that your phone’s battery is charged over at least 80%. We highly recommend this in order to prevent any power issues during the flashing process.
        3. Your device must be running on latest Android 4.2.2. Jelly Bean. If it’s running on a lower version of Android, you may not install this ROM. This may result in bricking your device. You may update your device to Android 4.2.2 via, check out this thread first and then flash this custom Android Revolution HD ROM.
        4. Download and Install Android ADB & Fastboot Drivers on your PC. Follow the full guide here.
        5. Download and Install HTC Drivers on your phone. Get here.
        6. Your device’s bootloader must be unlocked. Unlock it here.
        7. Backup each and everything on your Android phone as follows:
        8. Backup all your important contacts, find the full guide here.
        9. Backup all your important sms messages, find the full guide here.
        10. Backup all your important call logs, find the full guide here.
        11. Backup all your important media content manually. (Copy to your PC.)
        12. Backup all your apps / data. If you’ve rooted your device, use Titanium Backup to do so. Follow the full guide here.
        13. Make sure that you read all the important instructions carefully. Once done, you may go ahead.

Disclaimer: The methods involved in flashing custom roms and rooting your phone is highly custom and may result in bricking your device, and has nothing to do with Google or the device manufacturer that is HTC in our case. Also rooting your device will void its warranty and you will be no longer eligible for any kind of free device services by the manufacturers/warranty providers. In case of any mishap we may not be held responsible. Follow these instructions to the letter to avoid any mishap or bricking. Make sure that whatever you do, you are doing it at your own responsibility.

Once read all the instructions, head towards the 2nd page for ROM installation.

Pages: Page 1 > Page 2

How to Install TWRP Recovery on HTC One X

0
How to Install TWRP Recovery on HTC One X

HTC One X is HTC’s past flagship device and the device that added some value to HTC’s respect as the company was lacking in producing nice products. HTC’s debutante device to sport a Quad Core chipset based on Nvidia Tegra 3, HTC One X ran on Android 4.0.4 Ice Cream Sandwich out of the box at the time of it’s release. Recently HTC has updated the device to Android 4.2.2 Jelly Bean. Many of you may have updated your device and now looking out there for a compatible custom recovery with your device? Well there ain’t a need to worry about it anymore.

TWRP Recovery 2.6.3.0 is fully compatible with HTC One X, and the recovery has plenty of options you may use and modify your device the way you want. In case you don’t know what is a custom recovery (TWRP Recovery) in our case and why you should install a custom recovery on your device, then let’s go through a brief description of a custom recovery.htc_one_x_black

A custom recovery allows you to install custom roms, mods etc. Along with these, you can make a Nandroid backup, this helps you a lot as you can move back to the previous working state of your phone at any time you want if you have backed up your current system. In some cases, to root the phone you need to flash SuperSu.zip file in the custom recovery, having installed the recovery may help you while in some cases to install the recovery easily, you need to have the phone rooted. You can also wipe cache and dalvik cache of your phone using a custom recovery.

      1. This recovery is only for HTC One X International/Tegra 3/EndeavorU. Do not try this on any other variants of HTC One X. Make sure to check yourdevice’s model number under Settings > About Device > Hardware Info / Model Number.
      2. Make sure that your phone’s battery is charged over at least 80%. We highly recommend this in order to prevent any power issues during the flashing process.
      3. Download and Install Android ADB & Fastboot Drivers on your PC. Follow the full guide here.
      4. Download and Install HTC Drivers on your phone. Get here.
      5. Your device’s bootloader must be unlocked. Unlock it here.
      6. Backup each and everything on your Android phone. This is highly recommended in case something goes wrong and you need to go back to the previous working state of your phone.
      7. Backup all your important contacts, find the full guide here.
      8. Backup all your important sms messages, find the full guide here.
      9. Backup all your important call logs, find the full guide here.
      10. Backup all your important media content manually. (Copy to your PC.)
      11. Make sure that you read all the important instructions carefully. Once done, you may go ahead.

Disclaimer: The methods involved in flashing custom roms and rooting your phone is highly custom and may result in bricking your device, and has nothing to do with Google or the device manufacturer that is HTC in our case. Also rooting your device will void its warranty and you will be no longer eligible for any kind of free device services by the manufacturers/warranty providers. In case of any mishap we may not be held responsible. Follow these instructions to the letter to avoid any mishap or bricking. Make sure that whatever you do, you are doing it at your own responsibility.

Pages: Page 1 > Page 2

Install MaximusHD Android 4.2.2 Jelly Bean on HTC One X

1
Install MaximusHD Android 4.2.2 Jelly Bean on HTC One X

HTC’s competitor to Samsung Galaxy S3 was an amazing phone and is still one of very good to choose from a few Android smartphones available around. HTC sent the phone having a Super IPS LCD display ranged at 4.7 inches with a resolution of 720 x 1280 pixels and 312 ppi. HTC One X was HTC’s first device to debut with a Quad Core CPU clocked at 1.5 GHz Nvidia Tegra 3 CPU accompanied by ULP Geforce GPU and a RAM of 1 GB. Out of the box the device ran on Android ICS and as off now it’s running on Android Jelly Bean.

What’s good is, more a device gets old, more the experimentation and new things come out from the hands of developers. There’s a plenty of custom ROMs available for HTC One X now that are way too smooth, stable and responsive. We have found something similar today for the HTC One X owners. A very smooth, stable and fast custom ROM title ad MaximusHD based on Android 4.2.2 Jelly Bean. In the following post we will guide you to download and install this awesome ROM on your HTC One X, you got to move a little ahead with us and go through all the explanations and steps one by one.HTC One X Maximus

Let’s have a look on the features of MaximuHD ROM:

Based on 4.18.401.3
Android 4.2.2 (Jelly Bean)
Sense 5.0
Amazing battery life
Fast and Stable
Tweaked for Best Performance
OTA Updates
Native HTC EQS
Deodexed
Zippaligned
Rooted
Option to remove unneeded apps
Option to install additional mods
Support of init.d
Always newest ROM bases

Here are some pre-requisites and important instructions that you must follow before you flash this ROM:

      1. This ROM is only for HTC One X International. Do not try this on any other variants of HTC One X. Make sure to check your device’s model number under Settings > About Device > Hardware Info / Model Number.
      2. Make sure that your phone’s battery is charged over at least 80%. We highly recommend this in order to prevent any power issues during the flashing process.
      3. Your device must be running on Android 4.2.2. Jelly Bean. If it’s running on a lower version of Android, you may not install this ROM. This may result in bricking your device. You may update your device to Android 4.2.2 via OTA first and then flash this custom MaximusHD ROM.
      4. Download and Install Android ADB & Fastboot Drivers on your PC. Follow the full guide here.
      5. Download and Install HTC Drivers on your phone. Get here.
      6. Your device’s bootloader must be unlocked. Unlock it here.
      7. Backup each and everything on your Android phone as follows:
      8. Backup all your important contacts, find the full guide here.
      9. Backup all your important sms messages, find the full guide here.
      10. Backup all your important call logs, find the full guide here.
      11. Backup all your important media content manually. (Copy to your PC.)
      12. Backup all your apps / data. If you’ve rooted your device, use Titanium Backup to do so. Follow the full guide here.
      13. Make sure that you read all the important instructions carefully. Once done, you may go ahead.

Disclaimer: The methods involved in flashing custom roms and rooting your phone is highly custom and may result in bricking your device, and has nothing to do with Google or the device manufacturer that is HTC in our case. Also rooting your device will void its warranty and you will be no longer eligible for any kind of free device services by the manufacturers/warranty providers. In case of any mishap we may not be held responsible. Follow these instructions to the letter to avoid any mishap or bricking. Make sure that whatever you do, you are doing it at your own responsibility.

Once read all the instructions, head towards the 2nd page for ROM installation.

Pages: Page 1 > Page 2

How to Update or Install Stock Android on HTC Devices with RUU Guide

10
How to Update or Install Stock Android on HTC Devices with RUU Guide

If you’re familiar with installing stock Android on Android devices, you may have come across or heard of Odin for Samsung, Sony Flashtool for Xperia Devices and similar tools for other manufacturers. To do such stuff on HTC devices, RUU (Rom Update Utility) is used. HTC devices can be updated via OTA (Over The Air) updates that hit the regions by their time and then enter your phones and the 2nd available option is to use Rom Update Utility (RUU).

RUU is specific for different devices, so whenever you want to update your device or install stock Android on it from scratch, you got to downloaded the RUU tool for your device model and also the RUU should be the latest one or the version of Android that you want to update or install on your HTC Android device. All you got to do is to follow a few instructions and get your device updated to your desired version of Android. In the following post we’ll go through the advantages of RUU and then how we can use it. Move a little ahead with us.

Advantages of RUU:

If your phone has gone into a bootloop or is stucked somewhere:

This happens if your phone is interrupted while getting an OTA update or something else has gone wrong on your phone, it starts a bootloop and gets restarted again and again. Thus you’re unable to boot into the homescreen or recover your phone through factory reset. In that case only two things can help you, one is flashing back the nandroid backup if you’ve already made one and the second is the use of RUU to flash the stock Android firmware and give your phone a new life.

If you can’t update your phone via OTA:

In case you can’t update your phone via OTA due to some reason or you haven’t received the OTA, you can download the RUU for the latest available version of Android and update your phone manually using your PC.

Pre-requisites / Important Instructions before you use RUU:

      1. RUU is only for HTC devices. Do not try this on any other device, you may experience something worst if you did so.
      2. Download RUU for your device carefully, also make sure that your download RUU for the region that your device belongs to. Do not try RUU of any other device on your device, this may result in hard bricking it. You will have to find the RUU for your device over the web.
      3. RUU requires your phone’s battery to be at least 30%. We recommend that your charge your phone to 100% first and then connect your phone to your PC for RUU.
      4. Backup each and everything on your Android phone as follows:
      5. Backup all your important contacts, find the full guide here.
      6. Backup all your important sms messages, find the full guide here.
      7. Backup all your important call logs, find the full guide here.
      8. Backup all your important media content manually. (Copy to your PC.)
      9. Backup all your apps / data. If you’ve rooted your device, use Titanium Backup to do so. Follow the full guide here.
      10. Backup your current system using a custom recovery (CWM or TWRP) if you’ve flashed one. This is recommended in case something goes wrong with RUU, you can use the custom recovery and return to the old working state of your system.
      11. Enable USB debugging mode on your phone. To do so, goto settings > developer options > USB debugging mode > check.
      12. Use OEM data cable to connect your phone to your PC.
      13. Disable your antivirus, firewall if enabled any.
      14. If you get a security warning during flashing the stock Android with RUU, you may need to re-lock your phone’s bootloader in case you have unlocked it.
      15. If your phone is gone in the bootloop and you need to recover it using RUU, then you need to reboot your device in bootloader and then proceed with the procedure explained below. To boot into bootloader, turn off your phone completely, now turn it on by pressing and holding Volume Down + Power Key. You should be in the bootloader now.
      16. Make sure that your PC won’t go off during the ROM installation process. If you’re using Laptop, make sure that it has enough battery or if you’re using a desktop PC make sure that it has appropriate power connection.
      17. Make sure that you read all the important instructions carefully. Once done, you may go ahead.

Let’s begin with using RUU:

      1. Once downloaded RUU.exe file for your device, double click to open it on your PC.
      2. Pass the initial instructions, install it and get to the RUU panel.
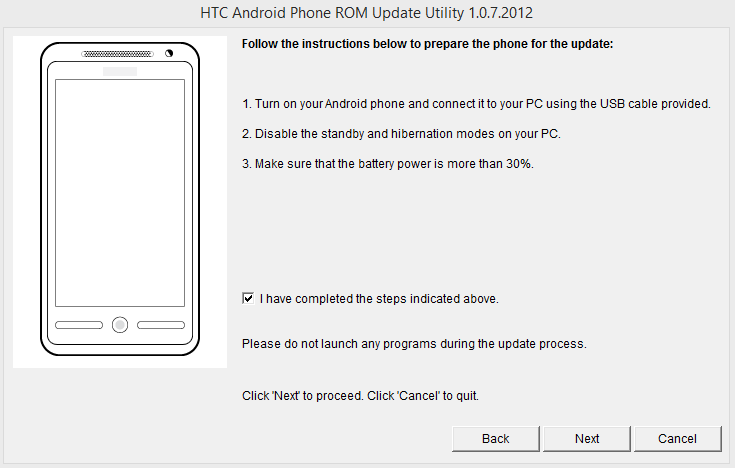
      3. Connect your phone to your PC now. Verify the install instructions on the RUU screen and click next.
      4. As soon as you click next, RUU get to the next step and start verifying the information for your phone now.
      5. Once RUU verifies each and everything, it will tell you about the current Android version of your Android device and tell you the version that you’re going to update to.
      6. Click next and keep following the on screen instructions.
      7. It will take around 10 minutes to get it done completely.
      8. Once installed, disconnect your phone and restart it.
      9. You’ve the newest Android running on your device and it’s completely stock.
      10. You can restore your data now using the same guides we linked above.
      11. That’s All! Good Luck.

Screenshot_9 RUU

That’s All. In case you got any queries or face any difficulties regarding this guide, please feel free to drop your words in the comment box below. We will get back to you as soon as possible. Thanks All.

How to Root Alcatel One Touch M’Pop 5020D/E/W

0
How to Root Alcatel One Touch M’Pop 5020D/E/W

Earlier today, we posted a method to install CWM recovery on Alcatel One Touch M’Pop. Some users also requested us to post the rooting guide for Alcatel One Touch M’Pop on our site, so as we’ve found the method we are going to explain it right here for all M’Pop 5020 owners.

While some of you may be new to rooting and flashing custom recoveries, you may want to know a little about both these. Let’s go through a quick intro to root access and custom recovery before we head towards the method to root your device.alcatel_one_touch_m_pop_dual_5020

Rooting your phone gives you complete access over all the data which is apparently locked by the manufacturers. This includes removal of the factory restrictions and making changes to the internal system and the operating system. Gaining the root access gives you the privileges to install various applications to enhance the performance of your device, allows you to remove the built-in applications/programs, helps you to upgrade the battery life of your device & install the apps which require the root access for the proper functionality and modify your device in so many other ways e.g using mods and custom roms. By installing custom recovery, you can flash custom roms in the phone easily. Custom recovery also let’s you backup your current rom and restore it in case of any mishap. There is a laundry list of things you can do after having your device rooted and installed the custom recovery, now once you’re rooted and have installed custom recovery, go ahead and enjoy it on your phone. Here’s our collection of 10 Best Root Apps.

Pre-requisites and important instructions:

      1. his guide is only for Samsung Alcatel One Touch M’Pop 5020D/E/W. Check your device’s model number in Settings > More > About Device.
      2. Download the file carefully for your device.
      3. Make sure that your device’s battery is charged over at least 60%. Highly recommended in order to prevent any mishap during the recovery installation process.
      4. Make sure that you backup your important media content, ContactsCall Logs & Messages. This is highly recommended just in case something goes wrong and you need to reset your phone.

Disclaimer: The methods involved in flashing custom roms and rooting your phone is highly custom and may result in bricking your device, and has nothing to do with Google or the device manufacturer that is ALCATEL in our case. Also rooting your device will void its warranty and you will be no longer eligible for any kind of free device services by the manufacturers/warranty providers. In case of any mishap we may not be held responsible. Follow these instructions to the letter to avoid any mishap or bricking. Make sure that whatever you do, you are doing it at your own responsibility.

Download files for rooting your device:

How to Root Alcatel One Touch M’Pop 5020X:

      1. Your device must have a CWM Recovery installed. Install it from here.
      2. Connect your phone to your PC after installing CWM Recovery and copy the downloaded SU-BusyBox-Installer.zip file to your phone’s internal storage.
      3. Disconnect your phone and boot into CWM on your phone now. To do so, turn it off completely, now turn it on by pressing and holding Volume Up + Power Key. You should see  the CWM Recovery interface now. You can use Volume Up, Down and Power Button to move through and make selections in CWM.
      4. Select “Install Zip > Choose Zip from SD Card > Select the downloaded SU-BusyBox-Installer.zip > Yes” and flash the file.
      5. Once flashed, reboot your device.
      6. Find SuperSu in app drawer.
      7. Phewwww! You’re rooted now.
      8. If you wish to unroot your phone, flash SU-BusyBox-Unisntaller.zip file in the same way you flashed the SU-BusyBox-Installer.zip file to root your phone.

That’s All. In case you got any queries or you face any difficulties regarding this post, feel free to contact us through the comment box below. We will get back to you as soon as possible. Thanks All.

Install CWM Recovery on Alcatel One Touch M’Pop 5020X

16
Install CWM Recovery on Alcatel One Touch M’Pop 5020X

Alcatel One Touch M’Pop 5020 is a low end Android device and is a good choice for those who can’t afford a high end device from the tech giants like Samsung, HTC, Sony or others. One Touch M’Pop also known as Acatel OT 5020D, 5020E or 5020W sports a nice 4.0 inches touch screen with a pixel resolution of 480 x 800 and 233 ppi. Internal memory is 4 GB but there is a microSD card slot as well while the two variants of the device have a RAM of 512 MB and 5020W has a 1GB RAM. Alcatel has used Mediatek MT6575 Cortex A-9 1GHz CPU to power up the device. Primary cam is ranged at 5 MP and there is a VGA cam on the front as well for video calling. What ads icing to the cake is, Alcatel has embed Android 4.1 Jelly Bean atop of these nice features. Overall it becomes a great package with these specs in such a small price.

Let’s get back to the topic now. As this is an Android device, so it may be easy for the users to go beyond the boundaries and tweak the device according to their likings. But, to do so, you will need a custom recovery that will allow you to root your device, flash mods, flash ROMs, create nandroid backups and a lot more. So, to make it more easy for you we are going to have a look on a method to install ClockworkMod Recovery on Alcatel One Touch M’Pop 5020D/E/W. Move a little forward with us and get it installed on your device.AC OT 5020 CWM

Here are some important instructions and pre-requisites before you head towards the recovery installation procedure:

      1. This guide is only for Samsung Alcatel One Touch M’Pop 5020D/E/W. Check your device’s model number in Settings > More > About Device.
      2. Download the file carefully for your device.
      3. Make sure that your device’s battery is charged over at least 60%. Highly recommended in order to prevent any mishap during the recovery installation process.
      4. Make sure that you backup your important media content, ContactsCall Logs & Messages. This is highly recommended just in case something goes wrong and you need to reset your phone.

Disclaimer: The methods involved in flashing custom roms and rooting your phone is highly custom and may result in bricking your device, and has nothing to do with Google or the device manufacturer that is ALCATEL in our case. Also rooting your device will void its warranty and you will be no longer eligible for any kind of free device services by the manufacturers/warranty providers. In case of any mishap we may not be held responsible. Follow these instructions to the letter to avoid any mishap or bricking. Make sure that whatever you do, you are doing it at your own responsibility.

Download the Recovery for your device:

How to Install CWM Recovery on your device:

      1. Once downloaded the recovery.img file, connect your Alcatel One Touch M’Pop to your PC and copy the downloaded recovery.img file to your phone.
      2. Disconnect your phone and turn it off now in order to boot into recovery mode.
      3. Turn on your phone while pressing and holding Power + Volume Up keys, you should see the recovery menu now. You can use Volume Up and Down and Power Keys to navigate and make selections through the recovery menu.
      4. In recovery mode select “Install Zip > Navigate to the recovery.img file” that you copied to your phone’s SD card.
      5. Select “Start / Yes” to flash the recovery.
      6. Once flashing is finished, reboot your device.
      7. Reboot your device in recovery mode using step 3, you should see the CWM Recovery now.
      8. Phewww! That’s All. You’ve installed CWM Recovery on your device now, move a little forward and know more about the custom recovery.
      9. If you wish to flash your stock recovery back, you can flash factory_NON_modified_recovery_Alcatel_5020X.img file using the same steps explained above to flash the custom reocvery.

Advantages of a Custom Recovery:

A custom recovery allows you to install custom roms, mods etc. Along with these, you can make a Nandroid backup, this helps you a lot as you can move back to the previous working state of your phone at any time you want if you have backed up your current system. In some cases, to root the phone you need to flash SuperSu.zip file in the custom recovery, having installed the recovery may help you while in some cases to install the recovery easily, you need to have the phone rooted. You can also wipe cache and dalvik cache of your phone using a custom recovery.

You may wish to root your phone now, checkout  How to Root Alcatel One Touch M’Pop 5020D/E/W

That’s All. In case you got any queries or face any difficulties regarding this post, please feel free to leave us your words through the comment box below. We will get back to you as soon as possible. Thanks All.

How To Un-Jailbreak Your iPhone.

0
How To Un-Jailbreak Your iPhone.

So, you have finally changed your Mind or you might have received the worst attack of your life, well I am not talking about your real life, I am talking about your Jailbroken iPhone, if you have changed your mind to un-jailbreak your iPhone, we can help you in this matter. But that is a really poor decision and if you are thinking how it will be done, then don’t worry all Jailbreaks are reversible. You can easily un-jailbreak your iOS device using iTunes, it is only a Two steps process and you won’t loose anything except Cydia and any other app that was installed using Cydia.

0

How To Un-Jailbreak Your iPhone

  • Download iTunes, if you haven’t already.
  • Connect your Jailbroken iOS Device to iTunes, make sure to use original data cable.
  • In the left column, select your iOS device.
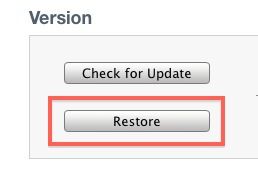
  • Under Summery Tab, you will see the Restore button. Click it.

reverse-jailbreak

  • You will see a message asking you to make a Back-up of all your data,click Yes and let the process start.
  • After the process is over, your iPhone will automatically restart.
  • You will be asked to restore back-up of your data, Click Yes and let the Restore process begin.
  • When the Process is complete, you iPhone will be Un-Jailbreak and all the application will be restored.

This Process will work on any iOS device running any iOS version., if you have any problem in this tutorial, feel free to comment.

WinScan2PDF 2.24 Save Scans As PDF – Download Here.

0
WinScan2PDF 2.24 Save Scans As PDF – Download Here.

If you are one of those people who are engaged in signing paper constantly, then you will need to covert your Simple documents to PDF file format. It must have been a tired thing to constantly converting your documents to PDF format and the worst part is the waste of time. What if you have a program which directly converts your Documents into PDF format as soon as you Scan the Document. Searching the web will gives you such thing but the softwares will either be paid or the file size is such big that you can download or install them into your Office Computer, what you need is something small and obviously portable. It this is your need, we have the the solution.

WinScan2PDF1

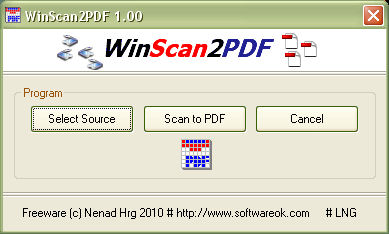
WinScan2PDF is an application that will get the Job done, the size of this application is so small that it will be downloaded in less than a second. It is a very small application that allows you to scan the files directly to a PDF Format using any installed Scanner. It is compatible with almost every Windows version:Windows 7, Windows 8 and 8.1, Windows Server 2008, Windows Vista, Windows 2003, Windows XP, Windows 2000, Windows Me, Windows NT, Windows 98 .

The Features of WinScan2PDF are listed Below:

  • Very Small
  • Low CPU usage
  • Direct scan the documents and save them as a pdf
  • PDF multiple pages support
  • Change the quality of your scanned PDF file!
  • Optional translation feature
  • Portable
  • Multilingual

If you are interested in Such type of Application, Follow the Link Below to Download WinScan2PDF.

Download WinScan2PDF

Monsters U: Catch Archie for PC – Free Download

0
Monsters U: Catch Archie for PC – Free Download

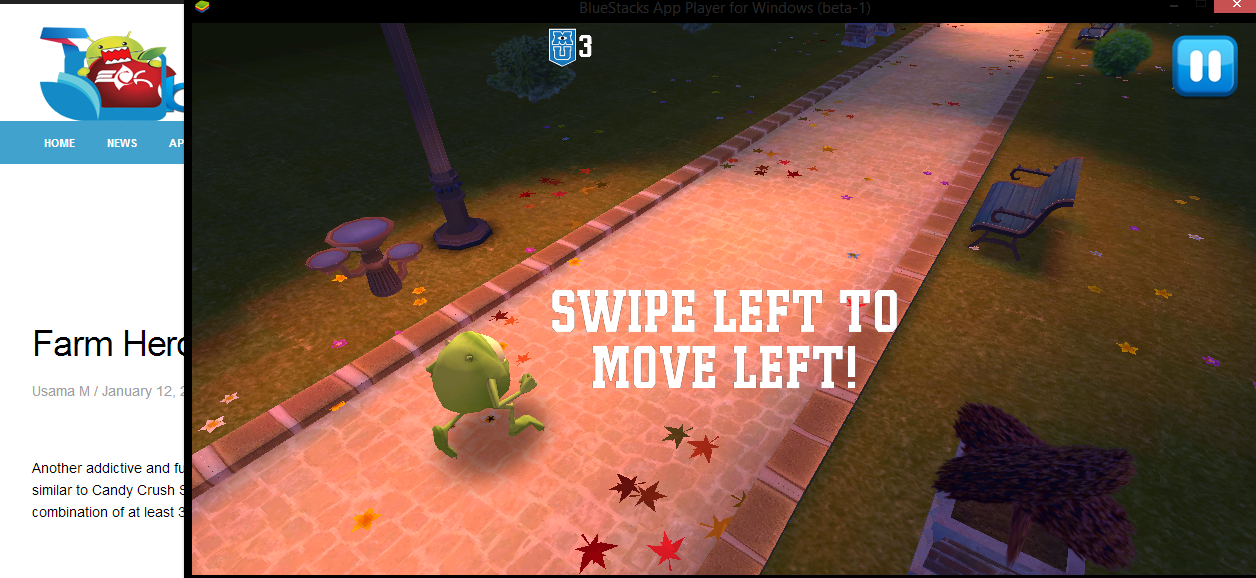
One of the very best and free games to play around with stunning HD graphics. Catch Archie and scare the pig as he is running away and you’re going to catch him, once caught, get him under and complete the run to finish the level. Monster’s U: Catch Archie is another masterpiece by the world famous Disney, another movie dubbed into a game. The game comes with a number of levels that you may unlock and go through.

So, are you willing to play this game and you don’t have an Android smartphone? Well, you may not need a phone anymore to play this game as we are going to have a look a method that will let you play Monster’s U: Catch Archie on your Windows PC or MAC. The process involves using an Android emulator and is pretty much easy. You got to move a little ahead with us and get installed on your Desktop PC having Windows XP/7/8/8.1 or an Apple MAC.Catch Archie Game

Before we head towards the installation method, let’s have a look on the game description:

Also Check: Farm Heroes Saga for PC

Description

WELCOME TO MONSTERS UNIVERSITY!

Celebrate the launch of Disney•Pixar’s film “Monsters University” with this monstrous app! Join Monsters University freshman Mike Wazowski on his first day of college, and catch Archie the Scare Pig! Get a hold of the squealing mascot of Monsters University’s rival school, Fear Tech, in this FREE, thrilling mini game based on the film.

· Run as Mike, and find a way to grab Archie the Scare Pig and tire him out!
· Chase after Archie in 10 exciting stages!
· Swipe to jump, slide, and dodge obstacles; the campus is full of surprises!

How to Install Monsters U: Catch Archie on your PC:
      1. You need an Android emulator to run this game on your Windows PC or MAC. We recommend using Bluestacks. Use our guide to install it on your PC.
      2. After downloading and installing Bluestacks, Download Monster U: Catch Archie APK from here.
      3. Open the downloaded APK file now, and let Bluestacks install it.
      4. Open BlueStacks now > All Apps > Monsters U: Catch Archie.
      5. The game will start now, follow the on screen instructions.
      6. Follow the initial screen,  you’ll be able to play it.
      7. Move/Swap your monster  by dragging with your mouse’s right click.
      8. Enjoy endless fun.

Screenshot_9 Screenshot_10 Screenshot_11

Install Custom Fonts on your Android Device

2
Install Custom Fonts on your Android Device

Few years ago the arrival of Android changed the world of mobile phones ultimately and created a new smartphone era. The open source operating system allows the users to customize it the way they want, according to their likings. The flexible nature of Android has allowed a number of smartphone manufacturers to power up their devices with Android and customize it under their brand, that’s the only reason everyone’s owning an Android smartphone today as they can find one in their range for sure. Not only this, the open nature of Android has also allowed the developers to put the icing on the cake, and they have even made it more loveable and eased the lives of users.

Samsung, Sony, HTC, LG, Google Nexus, Motorola and all other manufacturers have themefied their UI to make it significant, and all have limited customization options one can select from. These changes may include themes, wallpapers, using different launchers,  changing fonts, applying different effects on screen, changing the icons on your smartphone and etc. But this can be done to a limited extent. The goodness, no one can stop you from doing anything out of bounds on your Android smartphone. It is quite simple, once you get your phone rooted you’re on the way to play with your Android powered device beyond the boundaries. Although Android’s malleable nature let’s the users make much bends here and there but rooting the device just adds charm to it. Rooting your device is risky in some cases, but who cares when there’s heaven beyond the barbed walls. Let’s move forward now.frame_fonts21

One of the advantages of having root access or installing a custom recovery on your phone is to flash mods in the form of zip files or flash ROMs to enhance the performance of your phone or to modify the UI or to change the system of your phone. What we are after today is, using a custom recovery and install different fonts on your device. By default, there are only 3 or 4 fonts in smartphones [Samsung] and some don’t have an option to change the fonts, our aim today is to change those fonts into the one of your desire. So just in case you don’t like the default fonts on your Android smartphone or you’re having visibility problem or you just hate the style, You got to move a little ahead and follow the instructions and get it changed on your smartphone. We’ll be having a look on two methods, pick up the one you like.

Pre-requisites:

Make sure that you backup each and everything on your Android device before you proceed. Playing with the system / modding it beyond the boundaries is highly custom and may result in bricking your device. It is highly recommended to make a nandroid backup so that in case of any mishap you may go back to your previously working system immediately. In case you don’t have a backup or you don’t want to make a backup, make sure that you know how to flash a stock firmware on your device in case of any mishap. Also, these fonts will replace the original fonts on your device. So whatever you’re doing, you’re doing it at your own risk.


Changing fonts with Font Installer App:

      1. This app is compatible with Android 1.6 and up.
      2. You must have your device rooted for running this App.
      3. Download and Install Font Installer on your rooted Android device.
      4. Run the app.
      5. Follow the on screen instructions, pick up your favorite font style and apply it.
      6. That’s All.

Changing fonts using a Custom Recovery and flashing a zip file:

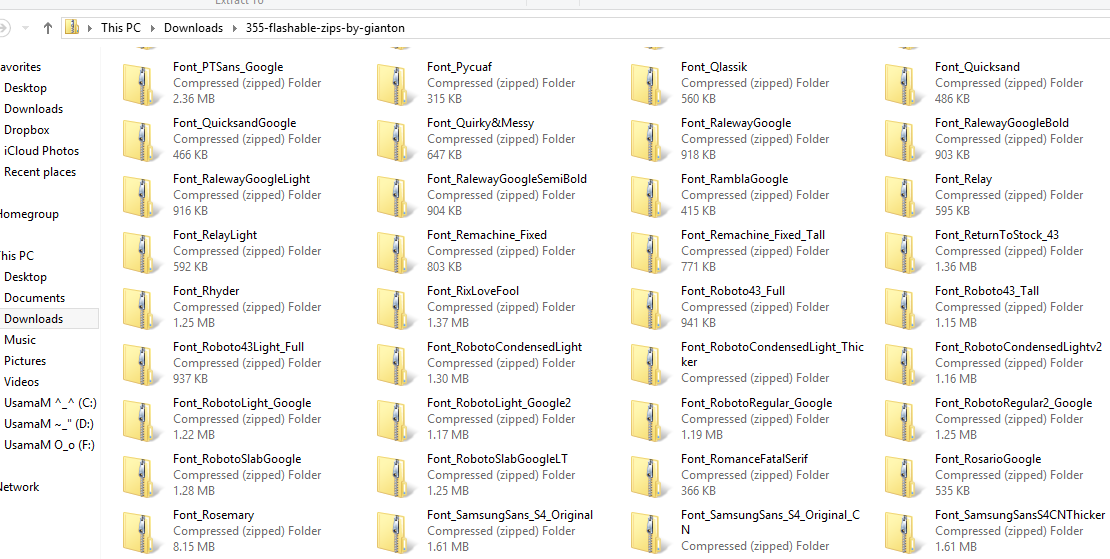
XDA Recognized Contributor gianton brought a hefty list of font styles in the form of zip flashable files. You can select the zip file of the font style that you like and flash it on your Android smartphone, but you will need a custom recovery to flash the font style .zip file. You can either use a CWM recovery or a TWRP recovery, both will work for this purpose.Fonts For Android

Compatibility: Android 4.x.x +

How to install:

      1. Download 355-flashable-zips-by-gianton.zip
      2. Extract the zipped file, you will find 355 more zipped files under it.
      3. Pick up the zip file of the font you like, and copy it to the SD card of your phone. Have a look here.
      4. Now boot into custom recovery on your phone. Methods vary for different phones to boot into custom recovery, but the best way to boot into CWM or TWRP recovery is using ADB and issuing command: adb reboot recovery.
      5. Once in custom recovery, select “Install zip/Install > Choose zip from sd card > Select the zip file that you copied to your phone’s sd card”.
      6. Flash the zip file.
      7. Reboot device.
      8. Fonts are changed! Phewww! You’re done.

That’s All. In case you got any queries or face any difficulties regarding this post, feel free to stop by the comment box below and leave us your words. We will get back to you as soon as possible. Thanks All!

How to import contacts from Android to iPhone

2
How to import contacts from Android to iPhone

android-apple-hybrid-logoHave you just shifted from an Android smartphone to Apple’s iPhone and now looking for a way to import all of your contacts from Android to your IOS running iPhone? Well, you may end up finding no method except “Import sim card contacts” under settings > contacts on your iPhone, but there is no need to worry about it anymore as you’re on the right spot now.

Moving your contacts from Android device to iPhone requires a small and easy trick and helps you to shit all of your contacts in a few steps. This may save your time from adding each and every single contact one by one. Move a little forward with us and get this done.


How to import contacts from Android smartphone to Apple iPhone:

      1. You will need 2 email addresses for this purpose.
      2. Create a contact backup vcf  [vcard file] on your Android smartphone. Follow the full guide here.
      3. Compose a new email and attach the contacts backup vcf file to this mail and send it to your 2nd email address.
      4. Once the email is sent, log into your other email address on your iPhone.
      5. Open the mail that you just sent having attached the contacts backup vcf file.
      6. Tap the attached vcf file.
      7. You will get the option to import all contacts to your iPhone.
      8. Import – Phewwww! You’re done importing all of your contacts from your Android smartphone to your Apple iPhone.

That’s All!

Root Galaxy S3 I9300 On Android 4.3 XXUGML2 Jelly Bean Official Firmware[Guide].

0
Root Galaxy S3 I9300 On Android 4.3 XXUGML2 Jelly Bean Official Firmware[Guide].

Before going any further, Follow the link to update your Galaxy S3 I9300 to XXUEML2 Android 4.3 Jelly Bean:

Update Galaxy S3 I9300 To Android 4.3 XXUGML2 Jelly Bean Official Firmware

Now that you have Updated your device to Android 4.3 Jelly Bean and as per rule of installing Official Firmware, your device will loose its root access. The only way to get it back, is by rooting it again. Rooting allows you to get full control over your device, Stock apps and mods are good, but installing Custom Mods gives you better support and great battery life, you might need to delete some Stock apps from the device, a non-rooted device can’t do that, but a rooted one has the power to remove stock apps too.

samsung-i9300-galaxy-s-iii-glossy-white

If you are familiar with Odin and it’s working, then this tutorial might not be difficult for you. Otherwise read the whole tutorial first before trying it on your device. In this Article, we will show you How To Root Galaxy S3 I9300 On Android 4.3 XXUGML2 Jelly Bean Official Firmware.But before we begin, Make sure that:

  1. That you have a Well Charged Battery, 60%-80% is better.
  2. Back-Up all your important ContactsCall Logs & Messages.It is highly recommended in case of any mishap or data loss to back up all your important data.
  3. Back-Up your Mobiles EFS DataHow To Restore and Back-Up EFS Data On Samsung Galaxy Devices.
  4. Check your device model, Go To Setting > About and Make sure that it is GT-I9300.
  5. Do-not try it on Carrier Bound Galaxy S3.

Disclaimer: 

The methods involved in flashing custom roms and rooting your phone is highly custom and may result in bricking your device,and has nothing to do with Google or the device manufacturers which is Samsung in our case. In case of any mishap we may not be held responsible. Follow these instructions to the letter to avoid any mishap or bricking. Make sure that whatever you do, you are doing it at your own responsibility.

Warning:

Rooting an Android device Voids Manufacturers Warranty, this Rooting method for Galaxy S3 I9300 is tested and Found Working. If you don’t follow the Procedure as we instructed, You only are responsible for your device. We won’t be liable if any damage occurs to your device and/or its components.

All done and good, let’s head towards the Next page to See, How you can Root Samsung Galaxy S3 I9300.

Pages: Page 1 | Page 2