Home Blog Page 483

How to Root Samsung SGH-i997 Infuse 4G

0
How to Root Samsung SGH-i997 Infuse 4G

Samsung Infuse 4G is quite similar to Galaxy S II and is At&t’s phone. Infuse was release in the same year (2011) as well, that actually gave Samsung a boost with its flagship Galaxy S II. Infuse sports a 4.55 inches Super AMOLED display with 207 ppi, Samsung has used 1.2 GHz Cortex – A8 CPU to power up this device. It came up with an 8 MP camera at the back and a 1.3 MP on the front. Infuse 4G SGH I997 ran on Android Froyo out of the box and received updates till Android 2.3 Gingerbread only.

Well, if you’re an Infuse 4G owner and you’re looking out to unleash the true power of your device, you will probably need to root your device and go beyond it’s boundaries. While Infuse 4G is way too old now and is also not a main stream device of Samsung, many of you may not be able to find a working method to root this device. To overcome this need, we have found a working root method and in the following post we will be going through it. As some of you might be the first timers, before we begin, we will have a brief look over what is root access and why you should root your phone.

Rooting your phone gives you complete access over all the data which is apparently locked by the manufacturers. This includes removal of the factory restrictions and making changes to the internal system and the operating system. Gaining the root access gives you the privileges to install various applications to enhance the performance of your device, allows you to remove the built-in applications/programs, helps you to upgrade the battery life of your device & install the apps which require the root access for the proper functionality and modify your device in so many other ways e.g using mods and custom roms. By installing custom recovery, you can flash custom roms in the phone easily. Custom recovery also let’s you backup your current rom and restore it in case of any mishap. There is a laundry list of things you can do after having your device rooted and installed the custom recovery, now once you’re rooted and have installed custom recovery, go ahead and enjoy it on your phone. Here’s our collection of 10 Best Root Apps.

Here are some important instructions to follow before you root your device:

    1. This guide is only for Infuse 4G SGH-I997. Do not try this on any other device. Check your device model underSettings > About device first and only then proceed.
    2. Your phone’s battery must be charged over at least 60%. This is highly recommended in order to prevent any power issues during the rooting process.
    3. Make sure that you backup your important media content, ContactsCall Logs & Messages. This is highly recommended just in case something goes wrong and you need to reset your phone.
    4. Proceed at your own risk. Read each and everything carefully.

Disclaimer: The methods involved in flashing custom roms and rooting your phone is highly custom and may result in bricking your device, and has nothing to do with Google or the device manufacturer that is Samsung in our case. Also rooting your device will void its warranty and you will be no longer eligible for any kind of free device services by the manufacturers/warranty providers. In case of any mishap we may not be held responsible. Follow these instructions to the letter to avoid any mishap or bricking. Make sure that whatever you do, you are doing it at your own responsibility.


How to Root Samsung SGH-i997 Infuse 4G:

Rooting this phone is quiet simple and requires a few taps only. Thanks to XDA-Senior member Alephzain for developing Framaroot that has made it easy to root Samsung Infuse 4G.

    1. Download: Framaroot APK v1.9.1
    2. Download the APK file and place it on your phone.
    3. Run the APK file, allow unknown sources if asked.
    4. Open Framaroot from App Drawer.
    5. Select Install SuperSu.
    6. Select any of these exploits: Sam, Frodo, Legolas and Aragorn.
    7. Follow the onscreen instructions!
    8. Complete the process.
    9. Phewww! You’re rooted now! Enjoy :D
    10. You can also unroot your device using the same application.

This surely is developer’s hardwork and if you’re really happy with such easy rooting method, please consider donating by purchasing his app here.

That’s All!

Update Xperia V LT25i to Stock Android 4.3 Jelly Bean 9.2.A.0.295 Firmware

28
Update Xperia V LT25i to Stock Android 4.3 Jelly Bean 9.2.A.0.295 Firmware

Sony has definitely won the hearts of fans this time by updating it’s old devices to Android 4.3 Jelly Bean. While other manufacturers are just bringing their flagship / mainstream devices to the newest firmware, this is where Sony took the lead. Earlier, Sony updated it’s Xperia Z family to Android 4.3 Jelly Bean and yesterday Sony has rolled out the update for it’s mid-range devices including Sony Xpera T, TX & V.

The new update comes with a lot of performance enhancements, new UI on the home screen, smooth graphical performance as well. On the core Sony has fixed some bugs, camera UI and media apps UI has changed. Battery performance has been enhanced as well in the new update. Android 4.3 Jelly Bean comes with the build number 9.2.A.0.295 for Xperia T, V & TX.

As some of you are familiar with how updates work, these take time to hit different regions through OTA or through Sony PC Companion. Many of the users may not be able to update their device right at the moment and may be worried or get jealous from those running their Xperia V on Android 4.3 Jelly Bean. Well, there’s no need to worry about it as we have remedy for your worry. In the following post we will guide Xperia V LT25i owners to update their device to latest firmware manually using Sony Flashtool. Let’s move forward and go through the procedure step by step.

Here are some important installation instructions:

    1. This guide is only for Sony Xperia V LT25i. Please check your device model first in Settings > About Device > Model.
    2. You must have installed Sony Flashtool – Get the full guide here. Also Install drivers using Flashtool > Drivers > Flashtool-drivers > Flashmode, Xperia V, Fastboot, select all these and install.
    3. Your phone’s battery must be charged at least over 60%. This is highly recommended in order to prevent any power issues during the process.
    4. Flashing this firmware will wipe all your apps, apps data, system data, contacts, call logs & messages. It will not wipe the internal storage (media) data. Proceed after you’ve backed up, in the next step the guides are linked in.
    5. Make sure that you backup your media content,contactscall logs and text messages.  This is important and recommended so that in case you decide to wipe your phone during the flashing process, you can get all of your data back using the backup.
    6. Enable USB debugging mode on your device. To do so, tap settings>developer options>USB debugging. If you can’t find developer options in settings, then tap settings > about device and tap “Build Number” for 7 times and you’ll get em’ activated under settings.
    7. To flash this firmware, you do not need to root your device, you do not need to unlock the bootloader. All you need is, your device must be the one mentioned and must be running on Android 4.2.2 Jelly Bean.
    8. Download the firmware file properly.
    9. Use the OEM data cable to connect your phone to your PC. Using any other data cable might cause connection problems.
    10. You need enough confidence to perform this custom method.
    11. Alright! Follow this guide to the letter in order to prevent any mishap.

How to Install Android 4.3 9.2.A.0.295 Official Firmware on Xperia V LT25i:

    1. Download Stock Android 4.3 Jelly Bean 9.2.A.0.295 Firmware for Xperia V LT25i [Unbranded / Generic ]
    2. Copy the file and paste in Flashtool>Firmwares folder.
    3. Open Flashtool.exe now.
    4. Hit the small lightening button on the top left corner and select Flashmode.
    5. Select the FTF firmware file that you placed in the Firmware folder. 
    6. From the right side, select what do you want to wipe. Data, cache and apps log, all wipes are recommended, perhaps you may select if you don’t want.
    7. Click on OK, and it will start preparing the firmware for flashing. This may take a little while to load.
    8. As soon as the firmware is loaded, it will prompt you to attach the phone by turning it off and keeping the back key press.
    9. For Xperia V LT25iVolume Down key will do the job of back key, just turn off your phone, keep the Volume Down key pressed and plug in the data cable.
    10. As soon as the phone is detected in Flashmode, the firmware will start flashing, Do not leave the Volume Down key until the process is complete.
    11. As soon as you see “Flashing ended or Finished Flashing” leave the Volume Down key, plug the cable out and reboot.
    12. That’s All! Congrats! You’ve installed latest Android 4.3 Jelly Bean on your Xperia V Enjoy.

Here are some screenshots:

Xperia-T-Android-4.3-screen_2-315x559Xperia-T-Android-4.3-screen_5-315x559 Xperia-T-Android-4.3-screen_6-315x560Xperia-T-Android-4.3-screen_7-315x559Xperia-T-Android-4.3-screen_8-315x559 Xperia-T-Android-4.3-screen_9-315x559Xperia-T-Android-4.3-screen_11-315x559Xperia-T-Android-4.3-screen_12-315x559

That’s All! In case you got any queries/suggestions or face any difficulties regarding this post, please feel free to stop by the comment box below and drop us your message. We will respond as quick as we can.

Also check:  Root Sony Xperia V LT25i Running 9.2.A.0.295 Firmware [How to – Guide]

Update Xperia TX LT29i to Official Android 4.3 Jelly Bean 9.2.A.0.295 Firmware

8
Update Xperia TX LT29i to Official Android 4.3 Jelly Bean 9.2.A.0.295 Firmware

Xperia TX is sony’s mid range device packing up some really nice hardware and software features. The device sports a beautiful 4.55 inches touch screen display with 323 ppi covered with shatter proof and scratch resistant glass. Xperia TX is powered up with Dual Core 1.5 GHz Krait CPU by Qualcomm and accompanied by Adreno 225 GPU alongside a RAM of 1 GB. Sony has always took lead when it comes to smartphone camera. In TX Sony has used a 13 MP camera sensor at the back while a 1.3 MP on the front. Out of the box it runs on Android 4.0.4 Sandwich.

Well, that’s enough talking about the phone, let’s get back to the topic. Sony recently started rolling out Android 4.3 Jelly Bean update and took it’s mainstream devices to the greater version of Android first. Xperia TX was also in the que and just yesterday Sony has started pulling out Android 4.3 Jelly Bean update based on build number 9.2.A.0.295 for Xperia T, V & VX. The new update comes with new UI with the home screen, performance enhancements, bug fixes, better battery life, new media apps UI etc.

While all of you know that these software updates take a long time to reach different through OTA or through Sony PC companion and many of you may end up finding no update for your device right at the moment. If you’re one of those Android lovers who can’t stop themselves and it’s hard for you to wait to get your hands on the new firmware, then you’re on the spot where you will learn how you can get it on your device now. In the following post we are going to install this latest official firmware Android 4.3 Jelly Bean 9.2.A.0.295 on Xperia TX LT29i. Let’s move forward and install it.

Here are some important installation instructions:

      1. This guide is only for Sony Xperia TX LT29i. Please check your device model first in Settings > About Device > Model.
      2. You must have installed Sony Flashtool – Get the full guide here. Also Install drivers using Flashtool > Drivers > Flashtool-drivers > Flashtool, Xperia TX, Fastboot, select all these and install.
      3. Your phone’s battery must be charged at least over 60%. This is highly recommended in order to prevent any power issues during the process.
      4. Flashing this firmware will wipe all your apps, apps data, system data, contacts, call logs & messages. It will not wipe the internal storage (media) data. Proceed after you’ve backed up, in the next step the guides are linked in.
      5. Make sure that you backup your media content,contactscall logs and text messages.  This is important and recommended so that in case you decide to wipe your phone during the flashing process, you can get all of your data back using the backup.
      6. Enable USB debugging mode on your device. To do so, tap settings>developer options>USB debugging. If you can’t find developer options in settings, then tap settings > about device and tap “Build Number” for 7 times and you’ll get em’ activated under settings.
      7. To flash this firmware, you do not need to root your device, you do not need to unlock the bootloader. All you need is, your device must be the one mentioned and must be running on Android 4.2.2 Jelly Bean.
      8. Download the firmware file properly.
      9. Use the OEM data cable to connect your phone to your PC. Using any other data cable might cause connection problems.
      10. You need enough confidence to perform this custom method.
      11. Alright! Follow this guide to the letter in order to prevent any mishap.

How to Install Android 4.3 9.2.A.0.295 Official Firmware on Xperia TX LT29i:

      1. Download Stock Android 4.3 Jelly Bean 9.2.A.0.295 Firmware for Xperia TX LT29i [Unbranded / Generic ]
      2. Copy the file and paste in Flashtool>Firmwares folder.
      3. Open Flashtool.exe now.
      4. Hit the small lightening button on the top left corner and select Flashmode.
      5. Select the FTF firmware file that you placed in the Firmware folder. 
      6. From the right side, select what do you want to wipe. Data, cache and apps log, all wipes are recommended, perhaps you may select if you don’t want.
      7. Click on OK, and it will start preparing the firmware for flashing. This may take a little while to load.
      8. As soon as the firmware is loaded, it will prompt you to attach the phone by turning it off and keeping the back key press.
      9. For Xperia TX LT29iVolume Down key will do the job of back key, just turn off your phone, keep the Volume Down key pressed and plug in the data cable.
      10. As soon as the phone is detected in Flashmode, the firmware will start flashing, Do not leave the Volume Down key until the process is complete.
      11. As soon as you see “Flashing ended or Finished Flashing” leave the Volume Down key, plug the cable out and reboot.
      12. That’s All! Congrats! You’ve installed latest Android 4.3 Jelly Bean on your Xperia TX Enjoy.

Here are some screenshots:

Xperia-T-Android-4.3-screen_2-315x559Xperia-T-Android-4.3-screen_5-315x559 Xperia-T-Android-4.3-screen_6-315x560Xperia-T-Android-4.3-screen_7-315x559Xperia-T-Android-4.3-screen_8-315x559 Xperia-T-Android-4.3-screen_9-315x559Xperia-T-Android-4.3-screen_11-315x559Xperia-T-Android-4.3-screen_12-315x559

That’s All! In case you got any queries/suggestions or face any difficulties regarding this post, please feel free to stop by the comment box below and drop us your message. We will respond as quick as we can.

Update Xperia T LT30P to 9.2.A.0.295 Android 4.3 Jelly Bean Stock Firmware

18
Update Xperia T LT30P to 9.2.A.0.295 Android 4.3 Jelly Bean Stock Firmware

Sony has remained very nice to it’s users specially in terms of software updates this time. All the smartphone manufacturers are currently updating their flagship devices to the higher Android versions while Sony took clear lead and started updating its devices to Android 4.3 in mass. Earlier we saw the 4.3 Jelly Bean update hitting Xperia Z, ZR, ZL and Ultra Z while now the low end devices Xperia T, TX & V have started receiving Android 4.3 Jelly Bean.

The new update packs up a lot of bug fixes and performance enhancements for sure but on the streamline Sony has updated the Sony Media Apps, User Interface has been updated for faster and smoother performance and graphical experience. User interface has been changed with new home screen look and feel. Battery performance has been improved and the Android 4.3 update has became a little more secure software for these devices.

Well, as you all know, these software updates hit different regions with time. Many of the Android enthusiasts might be looking for a way to update their device to the latest firmware and may not find any OTA update or through Sony PC companion. In that case this post will definitely help you. In the following post we are going to install the latest stock Android 4.3 Jelly Bean 9.2.A.0.295 firmware on Xperia T LT30P. Let’s move forward step by step.

Here are some important installation instructions:

      1. This guide is only for Sony Xperia T LT30P. Please check your device model first in Settings > About Device > Model.
      2. You must have installed Sony Flashtool – Get the full guide here. Also Install drivers using Flashtool > Drivers > Flashtool-drivers > Flashtool, Xperia T, Fastboot, select all these and install.
      3. Your phone’s battery must be charged at least over 60%. This is highly recommended in order to prevent any power issues during the process.
      4. Flashing this firmware will wipe all your apps, apps data, system data, contacts, call logs & messages. It will not wipe the internal storage (media) data. Proceed after you’ve backed up, in the next step the guides are linked in.
      5. Make sure that you backup your media content,contactscall logs and text messages.  This is important and recommended so that in case you decide to wipe your phone during the flashing process, you can get all of your data back using the backup.
      6. Enable USB debugging mode on your device. To do so, tap settings>developer options>USB debugging. If you can’t find developer options in settings, then tap settings > about device and tap “Build Number” for 7 times and you’ll get em’ activated under settings.
      7. To flash this firmware, you do not need to root your device, you do not need to unlock the bootloader. All you need is, your device must be the one mentioned and must be running on Android 4.2.2 Jelly Bean.
      8. Download the firmware file properly.
      9. Use the OEM data cable to connect your phone to your PC. Using any other data cable might cause connection problems.
      10. You need enough confidence to perform this custom method.
      11. Alright! Follow this guide to the letter in order to prevent any mishap.

How to Install Android 4.3 9.2.A.0.295 Official Firmware on Xperia T LT30P

      1. Download Stock Android 4.3 Jelly Bean 9.2.A.0.295 Firmware for Xperia T LT30P [Unbranded / Generic]
      2. Copy the file and paste in Flashtool>Firmwares folder.
      3. Open Flashtool.exe now.
      4. Hit the small lightening button on the top left corner and select Flashmode.
      5. Select the FTF firmware file that you placed in the Firmware folder. 
      6. From the right side, select what do you want to wipe. Data, cache and apps log, all wipes are recommended, perhaps you may select if you don’t want.
      7. Click on OK, and it will start preparing the firmware for flashing. This may take a little while to load.
      8. As soon as the firmware is loaded, it will prompt you to attach the phone by turning it off and keeping the back key press.
      9. For Xperia TVolume Down key will do the job of back key, just turn off your phone, keep the Volume Down key pressed and plug in the data cable.
      10. As soon as the phone is detected in Flashmode, the firmware will start flashing, Do not leave the Volume Down key until the process is complete.
      11. As soon as you see “Flashing ended or Finished Flashing” leave the Volume Down key, plug the cable out and reboot.
      12. That’s All! Congrats! You’ve installed latest Android 4.3 Jelly Bean on your Xperia T Enjoy.

Here are some screenshots:

Xperia-T-Android-4.3-screen_1-315x559Xperia-T-Android-4.3-screen_2-315x559Xperia-T-Android-4.3-screen_5-315x559 Xperia-T-Android-4.3-screen_6-315x560Xperia-T-Android-4.3-screen_7-315x559Xperia-T-Android-4.3-screen_8-315x559 Xperia-T-Android-4.3-screen_9-315x559Xperia-T-Android-4.3-screen_11-315x559Xperia-T-Android-4.3-screen_12-315x559

That’s All! In case you got any queries/suggestions or face any difficulties regarding this post, please feel free to stop by the comment box below and drop us your message. We will respond as quick as we can.

How to Root Xiaomi Mi-2S

0
How to Root Xiaomi Mi-2S

Chinese smartphone manufacturers have taken the competition seriously and are giving a real hard time to other tech giants inside and outside the Chinese markets. Where one has a high budget for a smartphone in mind, Chinese manufacturers take that thought out and provide a smartphone packed up with high end specs in a too cheap price. Similarly, Xiaomi is one of those manufactures based in China struggling to go up. With it’s line of Android smartphones, Xiaomi is gaining popularity and user reliability as well.

Xiaomi’s Mi-2S is an Android device sporting a nice 4.3 inches display with 342 ppi. Inside the device there is a 1.7 GHz Quad Core Qualcomm Snapdragon 600 CPU accompanied by Adreno 320 GPU and a RAM of 2 GB. Xiaomi has used an 8MP camera sensor at the back while a 2 MP camera sensor is there on the front while the device runs on Android 4.1 Jelly Bean out of the box. Quite nice features, isn’t it? well, that really makes one consider this phone a choice when the price is not high as other manufacturers.

So, let’s get  back to the topic now. These smartphones are not too much popular at the moment and it may become a pain in vein finding a method to root any such device. Xiaomi Mi-2S owners may end up finding no method over the web, so in order to overcome this worry, we’ve found a working root method for this device. In the following post we’ll go through the method but before we move further we’ll have a look at brief introduction to what is root access and why you should root your phone as some of you might the first timers.

Rooting your phone gives you complete access over all the data which is apparently locked by the manufacturers. This includes removal of the factory restrictions and making changes to the internal system and the operating system. Gaining the root access gives you the privileges to install various applications to enhance the performance of your device, allows you to remove the built-in applications/programs, helps you to upgrade the battery life of your device & install the apps which require the root access for the proper functionality and modify your device in so many other ways e.g using mods and custom roms. By installing custom recovery, you can flash custom roms in the phone easily. Custom recovery also let’s you backup your current rom and restore it in case of any mishap. There is a laundry list of things you can do after having your device rooted and installed the custom recovery, now once you’re rooted and have installed custom recovery, go ahead and enjoy it on your phone. Here’s our collection of 10 Best Root Apps.

Here are some important instructions to follow before you root your device:

      1. This guide is only for Xiaomi Mi-2S. Do not try this on any other device. Check your device model under Settings > About device first and only then proceed.
      2. Your phone’s battery must be charged over at least 60%. This is highly recommended in order to prevent any power issues during the rooting process.
      3. Make sure that you backup your important media content, ContactsCall Logs & Messages. This is highly recommended just in case something goes wrong and you need to reset your phone.
      4. Proceed at your own risk. Read each and everything carefully.

Disclaimer: The methods involved in flashing custom roms and rooting your phone is highly custom and may result in bricking your device, and has nothing to do with Google or the device manufacturer that is Xiaomi in our case. Also rooting your device will void its warranty and you will be no longer eligible for any kind of free device services by the manufacturers/warranty providers. In case of any mishap we may not be held responsible. Follow these instructions to the letter to avoid any mishap or bricking. Make sure that whatever you do, you are doing it at your own responsibility.

How to Root Xiaomi Mi-2S now:

Rooting this phone is quiet simple and requires a few taps only. Thanks to XDA-Senior member Alephzain for developing Framaroot that has made it easy to root Xiaomi Mi-2S.

      1. Download: Framaroot APK v1.9.1
      2. Download the APK file and place it on your phone.
      3. Run the APK file, allow unknown sources if asked.
      4. Open Framaroot from App Drawer.
      5. Select Install SuperSu.
      6. Select Gandalf Exploit.
      7. Follow the onscreen instructions!
      8. Complete the process.
      9. Phewww! You’re rooted now! Enjoy 😀
      10. You can also unroot your device using the same application.

This surely is developer’s hardwork and if you’re really happy with such easy rooting method, please consider donating by purchasing his app here.

That’s All!

Windows 8 Style Taskbar For Android

Windows 8 Style Taskbar For Android

Microsoft’s Windows 8 and Windows Phone 8 might not be much appreciated the users but both these products have a great UI. It is efficient, user friendly and looks awesome. But there is a number of things that pulls Windows 8  or Windows Phone 8 down when it comes to a comparison between such operating systems and Android. It is only the open source nature of Android that has broadened the sphere of development and the users can always do anything according to their liking on their device. This may be modification of hardware or software. Although Windows 8 is totally a separate thing but how about grabbing some of it’s alike features to an Android device?

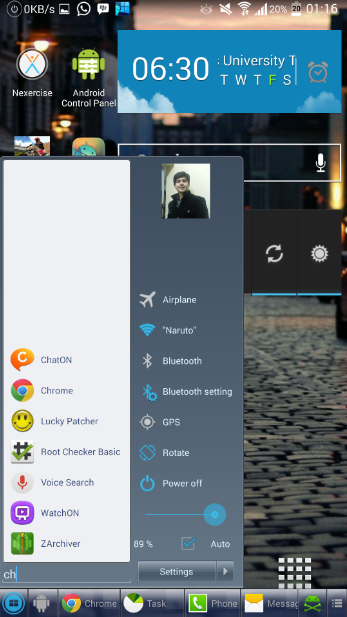
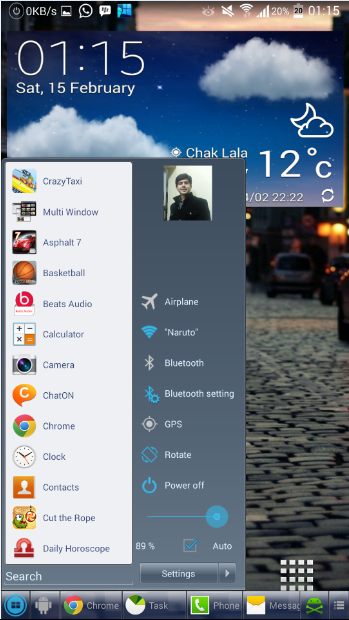
Well, a while ago I posted about the Windows 8 Launcher, using which you can change the UI of your Android device to that of a Windows Phone, but how about making it a completely Windows thing while keeping Android on the core? What we’ve here for you is the Windows 8 Style Taskbar. A Taskbar that works exactly as on a Windows PC. You can press the start button, it will pop up with the list of all the applications installed on your phone and on side it will show you the basic options with the user picture on the top.

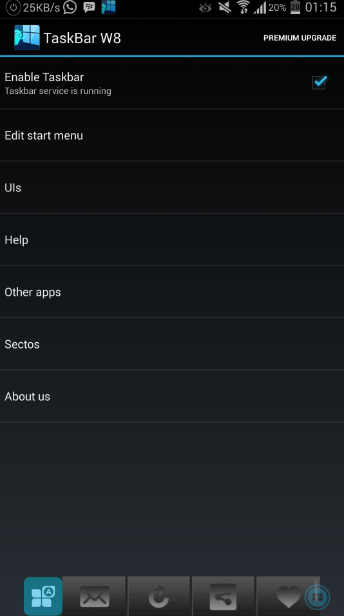
Taskbar – Windows 8 Style is a free application available in the Google Play Store. As mentioned above the app comes up with multiple features that make your phone’s look even more good and will definitely leave others in thought what’s actually running on your phone. One of the advantages of this app is, you can launch any apps quickly on the go. You don’t have to go to the app drawer and search for it. Simply press the start button and navigate through. Besides all these features, Taskbar 8 has a folder options as well where you can create your custom folders. The app is completely customizable, contains themes and all the modification options are there to give you the complete control over this app. A must have app if you’re looking to make your phone unique. Here are some screenshots from my phone:

Taskbar8 (1)  Taskbar8 (5)

Taskbar8 (3)Taskbar8 (4) 

You can get Windows 8 Style Task Bar here. Let us know how it works for you 🙂 Enjoy!
Experience Windows Phone 8 UI On Your Android With Launcher 8

Experience Windows Phone 8 UI On Your Android With Launcher 8

Android’s flexible nature is the best thing any operating system ever has. The only operating system that can be modified the way you went, whether these are system tweaks, hardware tweaks, software tweaks, themes and other enhancements. It totally depends on the user how does he wants to make his phone look, there are different choices available to decorate the display of an Android smartphone. One of the popular ways is to use custom ROMs, another is to flash different mods but not everyone is good with rooting a phone or flashing custom ROMs, also it results in voiding the warranty of phone.

So, something much easier is needed here and it can be done using a launcher. The wide variety of apps in the Google Play Store contains a number of launchers that can simply give your phone a whole new look. There popular launchers like Go Launcher, Nova Launcher, Next Launcher 3D, all these have their own user interface. But how about changing your phone’s costume to that of the Windows Phone 8? Well, Windows Phones might not be a good choice among the users and are lacking behind, but these phones definitely have a cool layout / UI.

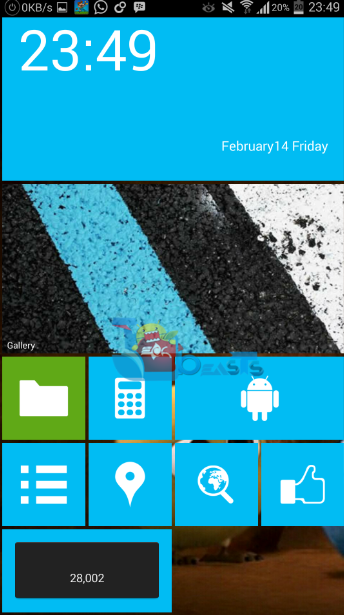
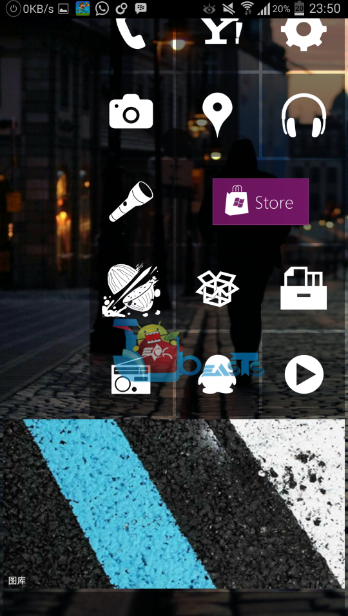
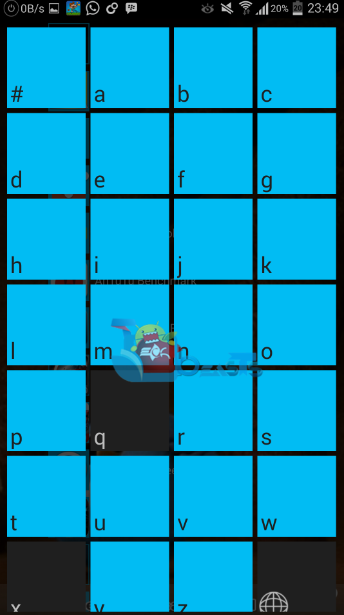
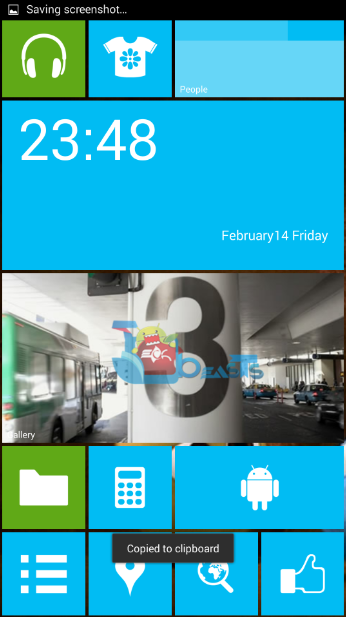
We’ve found something similar today. While going through the applications in the Google Play Store I came across Launcher 8 (Fake WP8). This launcher gives your phone the interface of Windows 8 Phone. To be honest, after using it, I was just stunned with the quality and effects of this launcher, the lock screen, the app drawer, tiles  just gave my phone a new style. After getting impressed, I couldn’t stop myself to share it here.

Launcher 8 is available for free in the Google Play Store. Like other launchers, this launcher is also highly user customizable and offers it’s very own exclusive features. You can change themes to whatever you like in the theme store, you can change the size of the tiles in the app drawer, you can change the colors of tiles, changing the lockscreen and homescreen background is allowed as well. Launcher 8 also allows the users to add Android widgets in the tiles, besides these it has the capability some special features like Live Gallery, LED light etc. There is a pro version of Launcher 8 available around as well just in case you want some more cool features you may go for the pro one.

Here are some screenshots from this launcher:

Launcher 8_Techbeats (6)Launcher 8_Techbeats (5)Launcher 8_Techbeats (4)Launcher 8_Techbeats (9)Launcher 8_Techbeats (7)Launcher 8_Techbeats (8)Launcher 8_Techbeats (1)Launcher 8_Techbeats (2)Launcher 8_Techbeats (3) Launcher 8_Techbeats (11)Launcher 8_Techbeats (12)Launcher 8_Techbeats (13)

Get Launcher 8 for your Android smartphone and let us know how it works for you. Download Freeware | Download Pro Version [Paid]

Restore LG G2 To Stock Firmware All Models(AT&T/ Sprint/ Verizon/ Canadian & Others)

44
Restore LG G2 To Stock Firmware All Models(AT&T/ Sprint/ Verizon/ Canadian & Others)

Stock Firmwares are not as good as they should suppose to be, but sometimes there are some circumstances that leads to installing the stock firmware again on your device. In case of Samsung, it is quite easy as you can install Odin and flash the firmware through it.But when it comes to any other device the method of installing Stock Firmware is far different, specific softwares are created to install stock firmwares on specific devices, in our case, LGs latest Flagship device LG G2. IF you are here to know how to restore your LG G2 to the Stock Firmware, you won’t be disappointed.

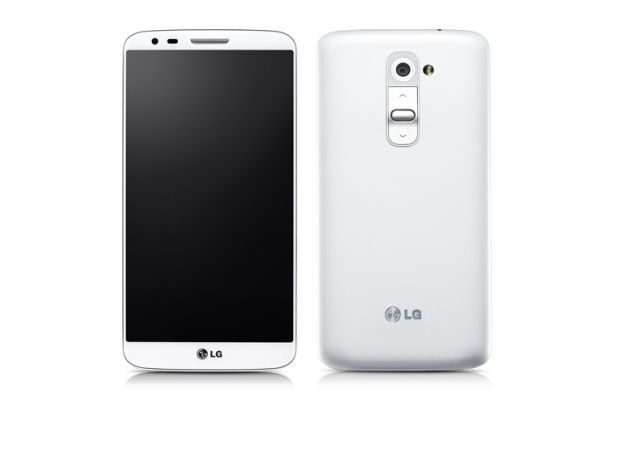
lg-g2-white-big

Disclaimer: 

The methods involved in flashing custom roms and rooting your phone is highly custom and may result in bricking your device,and has nothing to do with Google or the device manufacturers which is Samsung in our case. In case of any mishap we may not be held responsible. Follow these instructions to the letter to avoid any mishap or bricking. Make sure that whatever you do, you are doing it at your own responsibility.

Root Warning:

Since this is an official Release from LG and it doesn’t require Root or Custom Recovery. But if your Device is rooted, Installing this Firmware will most likely to erase the Root of your device. You need to root your device again to gain root access and start installing Custom Tweaks on it

How to Root LG G2.

How To Install CWM Recovery On LG G2

Before You proceed. let’s look at the Models supported with such Application:

  • Open LG G2 D802
  • LG G2 D805 (Brazil, Mexico, Panama)
  • AT&T G2 D800
  • T-Mobile G2 D801
  • Sprint G2 LS980
  • Verizon G2 VS980
  • Korean LG G2 F320K
  • Korean LG G2 F320L
  • Korean G2 (SKT) F320S

Downloads Required:

All thanks to XDA member hyelton, who extract the LG G2 stock firmwares for us. Following are the links to the Stock firmware.

LG G2 D802 Firmwares: Click to Download  [Mirror Link]

AT&T LG G2 D800 Firmwares: Click to Download  [Mirror Link]

LG G2 D805 (Brazil, Mexico, Panama): Click to Download   [Mirror Link]

Sprint LG G2 S980 Firmwares: Click to Download  [Mirror Link]

T-Mobile G2 D801 FirmwareClick to Download  [Mirror Link]

Verizon G2 VS980 Firmware: Click to Download  [Mirror Link]

Korean LG G2 Firmwares: Click to Download  [Mirror Link]

LG G2 D802 Firmwares: Click to Download  [Mirror Link]

LG G2 D802T (Australia) Firmwares:

LG G2 D802T (India) Firmwares:

AT&T LG G2 D800 Firmwares: Click to Download  [Mirror Link]

Canadian LG G2 Firmwares:

LG G2 D805 (Brazil, Mexico, Panama): Click to Download   [Mirror Link]

Sprint LG G2 LS980 Firmwares: Click to Download

T-Mobile G2 D801 Firmware: Click to Download

Verizon G2 VS980 Firmware: Click to Download  [Mirror Link]

Korean LG G2 Firmwares: Click to Download  [Mirror Link]

Installation Process:

  • Download The Appropriate Firmware file and Extract the zip, if required.
  • Download and install LG support Tool: LINK
  • Download and install LG Flash Tool: LINK
  • Download LG G2 USB Drivers: LINK
  • Turn off your LG G2 and Boot into Download Mode, HOW? Press and Hold Volume Up Key and Plug in the USB Cable.
  • Extract the LG Flash Tool and Double click the UpTestEX.exe
  • Once the Flash Tool is Open, Change the Select Type to 3GQCT and change the Phone mode to DIAG.
  • Click the Select kdz Option file and select the .KDz extention file from the downloaded Firmware folder.

Screenshot_6

  • Click Normal Web Upgrade Test.
  • Now you will see a pop-up window, showing you the Phone Information.
  • Click Upgrade Start Button.
  • After a Few Seconds, there will be another pop-up asking you the Language and Country.
  • As Country, Select Republic Of Korea and Language English
  • Finally Click OK to proceed the installation.
  • When the Flashing is done, your LG G2 will reboot, don’t forget to do a Factory Reset. To do it, press and Hold Volume Down + Power Buttons until you see the Phone screen.

That is it, Enjoy the Stock Firmware on LG G2.

  • Note : We will soon Add Method of AT&T/ Sprint/ Verizon and .TOT 

Add Charm To Your Android’s Screen With Transparent Clock & Weather

Add Charm To Your Android’s Screen With Transparent Clock & Weather

Whenever there is a talk about Android, we can expect great things. Billions of apps have taken birth and are constantly expanding the functionality of Android. Although Android is pre-loaded with some splendiferous features, but the open nature of this OS is the real deal that has allowed the developers to get their hands on awesome ideas and bring em’ up for the users. You can add themes using differently launchers to your Android screen, you can use different widgets to make it look cool, you can also use different color effects, modify icons of your Android phone and a lot more is there.

The pre-installed weather and clock widgets come with a theme / background in your phone. This background sometimes makes your phone’s screen ugly. HTC’s weather and clock widgets are quite nice, but Samsung’s and other manufacturer’s weather widgets are not really so cool. There were mods that made these clocks and weather widgets transparent in early times, but not everyone is an expert enough to flash a mod and do the things beyond the boundaries.

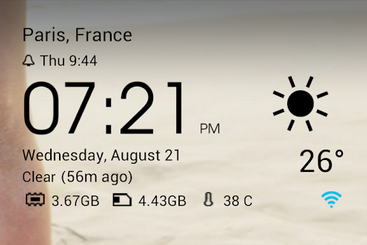
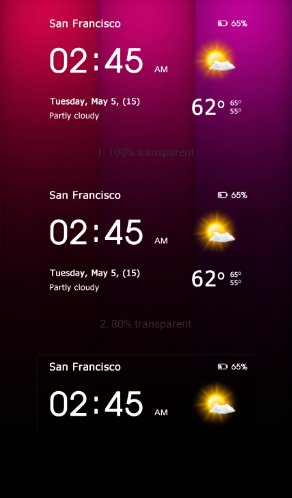
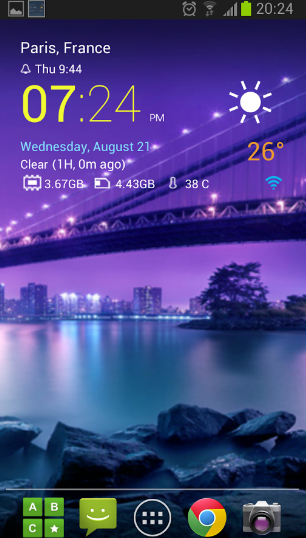
So, to add this great feature to your phone, Droid27 has a Transparent Clock & Weather widget app in the Google Play Store. Transparent Clock & Weather is not only an app with a transparent background, but it is a completely customizable app. It packs up a number of weather icon skins, fonts for time, world weather feature is there, you can choose which elements you want to display on the widget. Besides all this, you can select the moon phase, there is an option to show a different time from the one on your device, you can also add weather from multiple custom locations on your Android. Transparent Clock & Weather has the ability to detect your current location and display it’s details. There are multiple widget sizes to select from and each widget has the capability of showing various elements on your device’s display having a transparent background.

transparent Weather2transparent Weather3transparent Weather4

Well, I guess that’s enough about this cool app. So, what are you waiting for? Go ahead and get this free app from the Google Play Store and make your friends jealous with your phone’s on screen look.

Control Your Android Easily With Android Control Panel

0
Control Your Android Easily With Android Control Panel

Unleashing the true power of Android is what you should do if you own such device. Android’s open nature has provided everything a user actually wants on that small screen. With a mighty list of features, Android’s control should also be easy. Although the default Android settings do the job, but how about making it a bit more easy to understand and also a nice look? Well,  going to settings and then finding your desired option can be a real pain sometimes, specially if you own a high end Android device and you’re failed to find something very basic. In that case, an easy to understand and a quick control panel that allows you to do anything on the go can be a life savior.

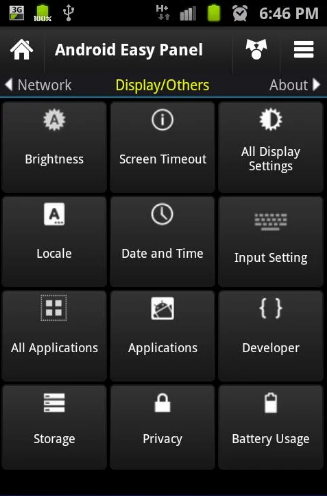
We have found something similar today. While going through apps on the Google Play Store, I came across Android Control Panel and installed it on my phone. What impressed me first was the App’s cool interface, very understandable, user friendly and good looking as well. It provides all the basic settings of an Android device just in one screen, you can swipe through the screen to switch between the available options.

The 4 different tabs on Android Control Panel include Sound, Network, Display/Others & About. In the Sound tab, you can adjust / change all the sounds of your Android. The Network tab includes each and everything under connectivity on your phone, while the Display/Others tab can do rest of the job as it includes almost all the options like Brightness, Applications, Date & Time, Input Settings, Developer Options etc. Just one tap on any of the available options and it will do the job. Android Control Panel stays in the notification panel for quick access, the app is very lite. Go ahead and get it on the Google Play Store and take complete control over your Android with just one app.

Here are some screenshots from Android Control Panel.

Android Control PanelAndroid Control Panel1Android Control Panel2

Root Galaxy S3 I9300 On Android 4.3 XXUGNA7 Jelly Bean[Guide]

0
Root Galaxy S3 I9300 On Android 4.3 XXUGNA7 Jelly Bean[Guide]

Before going any further, Follow the link to update your Galaxy S3 I9300 to XXUGNA7 Android 4.3 Jelly Bean:

Update Galaxy S3 I9300 To Android 4.3 XXUGNA7 Jelly Bean Official Firmware

Now that you have Updated your device to Android 4.3 Jelly Bean and as per rule of installing Official Firmware, your device will loose its root access. The only way to get it back, is by rooting it again. Rooting allows you to get full control over your device, Stock apps and mods are good, but installing Custom Mods gives you better support and great battery life, you might need to delete some Stock apps from the device, a non-rooted device can’t do that, but a rooted one has the power to remove stock apps too.

AndroidPIT-Galaxy-S3-Side


If you are familiar with Odin and it’s working, then this tutorial might not be difficult for you. Otherwise read the whole tutorial first before trying it on your device. In this Article, we will show you How To Root Galaxy S3 I9300 OnAndroid 4.3 XXUGNA7 Jelly Bean Official Firmware.But before we begin, Make sure that:

  1. That you have a Well Charged Battery, 60%-80% is better.
  2. Back-Up all your important ContactsCall Logs & Messages.It is highly recommended in case of any mishap or data loss to back up all your important data.
  3. Back-Up your Mobiles EFS DataHow To Restore and Back-Up EFS Data On Samsung Galaxy Devices.
  4. Check your device model, Go To Setting > About and Make sure that it is GT-I9300.
  5. Do-not try it on Carrier Bound Galaxy S3.

Disclaimer: 

The methods involved in flashing custom roms and rooting your phone is highly custom and may result in bricking your device,and has nothing to do with Google or the device manufacturers which is Samsung in our case. In case of any mishap we may not be held responsible. Follow these instructions to the letter to avoid any mishap or bricking. Make sure that whatever you do, you are doing it at your own responsibility.

Warning:

Rooting an Android device Voids Manufacturers Warranty, this Rooting method for Galaxy S3 I9300 is tested and Found Working. If you don’t follow the Procedure as we instructed, You only are responsible for your device. We won’t be liable if any damage occurs to your device and/or its components.

All done and good, let’s head towards the Next page to See, How you can Root Samsung Galaxy S3 I9300.

Pages: Page 1 | Page 2

Backup & Restore EFS In One Click on Samsung Galaxy Note 2 & Note 3 With EFS Tool

0
Backup & Restore EFS In One Click on Samsung Galaxy Note 2 & Note 3 With EFS Tool

EFS plays an essential role, specially when you’re playing with your device beyond the boundaries. You must have read this important point while flashing custom ROMs / custom recoveries or rooting your Android device “Make sure that you backup your EFS”, ever wondered what does it mean and why is it important? Well, if you are not familiar with EFS, let’s first have a brief introduction of EFS.

EFS stands for Encrypted File System.  In Android devices the baseband information (IMEI) is stored in the form of EFS data, whenever you flash different firmwares there are chances that your phone’s baseband will get effected… So it is always safer to have backed up your EFS before you flash any file in your Android device.  This is way too much important, specially when you buy a new phone, the very first thing you should do is to backup your EFS. In case of messing up your EFS will result in bad IMEI, it will either give you a generic IMEI or null. You can understand now what it will do, that means no signals on your device and no network at all. The only way to bring your phone back to the life of signals is flashing the backed up EFS.

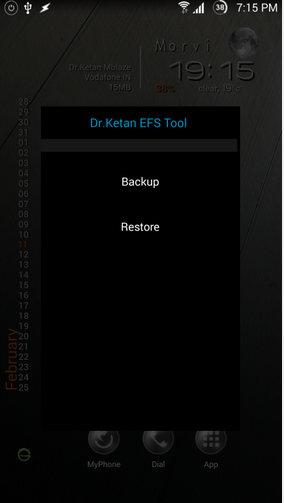
Let’s get back to the topic. Our friend Dr. Ketan Hindocha, XDA-Recognized Contributor has developed an awesome app that allows you to backup your EFS in just one click on Samsung Galaxy Note 2 GT-N7100 & Samsung Galaxy Note 3 SM-N900. Galaxy Note 2’s development is not going to come to an end any time soon and there is number of tweaks you can make to your phone, so Dr. Ketan has actually eased it more than a lot for the newbies to backup EFS in just one tap. Also, this EFS issue is common with these devices so this EFS Tool will just play the role of a life savior for you here.

BackupRestore

At the moment, the tool is named as for “EFS Tool Samsung Galaxy Note 2 GT-N7100” but as said by Dr. Ketan, the tool also works perfect with Galaxy Note 3 SM-N900 regardless of the name. Let’s have a look at how this app works.

Download: EFS Tool Samsung

Description

Works with: Galaxy Note 2 GT N7100 | Galaxy Note 3 SM-N900. [Do not try it on any other device.]

Installation and Activation
-Needs Rooted device | Root Galaxy Note 2 Root Galaxy Note 3
-Enable USB debugging
-Click on App Icon – This will prompt for backup and Restore menu, select your choice.
-When you select backup – It will backup and make efs.img file on Int SD card, also it will create text file just to stamp time,date and device model while you created backup. Now move both file to safer place.
-When you needs to restore, put efs.img file (your backup) on root directory of Int SD card, run application and select to Restore. Once restore done, Reboot device.

In case you got any queries or face any difficulties, please feel free to stop by the comment box below and leave us your words. We will get back to you as soon as possible.