Home Blog Page 473

Download and Install Orbot: Proxy with Tor APK

0
Download and Install Orbot: Proxy with Tor APK

Internet has innovated the world and has given it a whole new dimension. Whenever we come across surfing a website or accessing internet for some work purpose or anything else, it’s all about openness while keeping your privacy at top. Some of the countries have blocked access to a number of websites, these websites include Youtube and Facebook as well. While this block is quite insane and one may not be able to keep patience as these are the two most popular and useful websites, it may cause a little trouble. However, there is always a solution to the existing problem.

You can always access blocked / inaccessible websites by using different proxies. Well, it’s quite easy but still has a lot of risk. Finding a secure and a useful proxy app or changing your IP address to a working IP might cause some trouble and waste a lot of time as well, but today we’ve found something that is going to help you to get rid of such situation if you’re going through one and that is Orbot Proxy with Tor.

Orbot 3Orbot 5Orbot 6Orbot

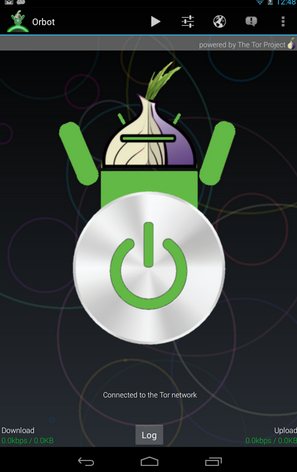
Orbot by The Tor Project is a free proxy application available for Android smartphones in the Google Play Store. It works with Tor, that assures personal freedom and privacy while you’re surfing the web. Tor keeps a user anonymous to the best extent it can, the software is completely free and is open network. Orbot packs up a number of features that can add charm to the web-surfing on your Android device. In the following post, we’re going to download and install this application on your Android device and run it, let’s go ahead and go through the steps.

How to Download & Install Orbot: Proxy with Tor:

      1. Download Orbot APK.
      2. Copy the downloaded APK to your Android device or download it straight to your phone.
      3. Now locate the APK and install it.
      4. Allow Unknown Sources if asked.
      5. Select Package Installer if prompted.
      6. Proceed and complete the installation.
      7. Once installation is done, access the app rom app drawer and run it.
      8. Select the language you want, select “Root Request” if you want to use advanced features.
      9. You may not select Root permissions if you haven’t rooted your device.
      10. Once in main screen, long tap the Orbot button to turn it on.
      11. Enjoy Anonymous Web Surfing on your Android device.
      12. That’s All!

Enjoy Galaxy S5 on any Smartphone with Samsung’s Galaxy S5 Experience App

0
Enjoy Galaxy S5 on any Smartphone with Samsung’s Galaxy S5 Experience App

Samsung recently brought it’s new device into the spot light at the Unpacked Event it holded on while MWC was going on. The next Galaxy, Galaxy S5 came along with 3 new wearable devices Samsung Galaxy Gear 2, Samsung Galaxy Gear Neo & Galaxy Gear Fit. Now that the new devices are already out and are about to hit the markets soon, some of you might be most probably wondering about buying these devices and empty your smartphone budget once again and get these wearables on your hands as well or not, well in case you can’t help yourself to decide it yet by watching the hands on videos, reviews, devices’s specifications and all the stuff available around, you may stop thinking about it as Samsung has made it way too easy for all of it’s valuable customers.

Let’s talk about the app now a bit first. With Galaxy S5 Experience App, you can get into the Galaxy S5 Experience Mode, this mode offers quite a few things which will let you explain the phone-like environment on your Android device. Galaxy S5’s hands on videos and key features videos are also linked in from Samsung’s Youtube channel, along with these features, the App also offers the Design mode of Galaxy S5. Galaxy Gear 2 and Galaxy Gear Fit’s key features are bundled inside this app while Samsung has also implemented a brief introduction to the new accessories that it introduced with it’s new flagship device.S5 Experience 2

Here are the requirements to run this application on Android device:

Android smartphones with Android 4.0 or + – No support for Tablets.

CPU: 1.0 GHz

RAM: 1 GB.

Here are the download links: Download from Play Store | Download APK by Techbeasts

How To Root T-Mobile ZTE Concord

0
How To Root T-Mobile ZTE Concord

Android is hovering over more than 82 companies and taking this amount in fact that every devices rooting method is online. Many root their device using Framaroot, because this is the easiest way available out there and those who can’t find it have to use the other way, Manual rooting. That does not mean that you have to write codes yourself just have to do a little work yourself, otherwise in Framaroot all work is done by your device.Rooting your Android device allows you to get full control over it, allows you to install Custom Recoveries and ROMs on it along with many more tweaks and other stuff. It allows you to change settings of your hardware too, like you can over clock you CPU. GPU and RAM, but all of it will heat up your device and not suggested from many officials. If you have an ZTE Concord and want to root it follow the tutorial ahead and get what you want.

concord-01

This method will only work for T-Mobile ZTE Concord, do not try this tutorial on any other variant. If you are not familiar with Rooting your device, you can leave the post, but we will not held responsible for any damage done to your device. All you need is to make sure that  ZTE Concord is running latest version of Android OS and not rooted.

Disclaimer:

The methods involved in flashing custom roms and rooting your phone is highly custom and may result in bricking your device,and has nothing to do with Google or the device manufacturers which is ZTE in our case. In case of any mishap we may not be held responsible. Follow these instructions to the letter to avoid any mishap or bricking. Make sure that whatever you do, you are doing it at your own responsibility.

Warning:

Rooting an Android device Voids Manufacturers Warranty, this Rooting method for ZTE Concord is tested and Found Working. If you don’t follow the Procedure as we instructed, You only are responsible for your device. We won’t be liable if any damage occurs to your device and/or its components

Necessary Preparations:

  1. Enable USB Debugging mode.
  2. Download Update.zip.
  3. Install ZTE USB Drivers

How To Root T-Mobile ZTE Concord

  1. Connect your device with PC.
  2. Copy and Paste the Above zip files to the root of your sdcard.
  3. Disconnect the cable.
  4. Turn Off your Device
  5. Now go to Recovery mode, Press and hold Power + Volume Down Buttons till you see some text on-screen.
  6. Press Home Button on your Device
  7. Navigate to ‘Apply update from sd card’ another windows will open in front of you.
  8. Select the Update.zip file and confirm the installation on next screen.
  9. Once the Installation is Over, Select +++++Go Back+++++.
  10. Select Reboot Now to Reboot the System.
  11. Now Head over to Google Play Store and Look for Super SU and Busy Box.
  12. That is it your Device is now rooted.

Root T-Mobile Samsung Galaxy Light – How To

0
Root T-Mobile Samsung Galaxy Light – How To

Samsung Galaxy Light is Low budget but high end device, with 1GB of RAM and 1.4GHz Quad-Core processor running Android 4.2.2 Jelly Bean, this device can give its users a real good time. If your device is still un-rooted and you are looking for a tutorial to root it we are here to provide you but only for T-Mobile Variant of Galaxy Light.Rooting your Android device allows you to get full control over it, allows you to install Custom Recoveries and ROMs on it along with many more tweaks and other stuff. It allows you to change settings of your hardware too, like you can over clock you CPU. GPU and RAM, but all of it will heat up your device and not suggested from many officials. If you have an Samsung Galaxy Light and want to root it follow the tutorial ahead and get what you want.

Samsung-Galaxy-Light-Goes-Official-at-T-Mobile

If you are familiar with Odin and it’s working, then this tutorial might not be difficult for you. Otherwise read the whole tutorial first before trying it on your device. In this Article, we will show you How To T-Mobile Samsung Galaxy Light On Android 4.2.2 Jelly Bean.But before we begin, Make sure that:

  1. That you have a Well Charged Battery, 60%-80% is better.
  2. Back-Up all your important ContactsCall Logs & Messages.It is highly recommended in case of any mishap or data loss to back up all your important data.
  3. Back-Up your Mobiles EFS DataHow To Restore and Back-Up EFS Data On Samsung Galaxy Devices.
  4. Check your device model, Go To Setting > About and Make sure that it is SGH-T399.
  5. Do-not try it on any other device.

Disclaimer: 

The methods involved in flashing custom roms and rooting your phone is highly custom and may result in bricking your device,and has nothing to do with Google or the device manufacturers which is Samsung in our case. In case of any mishap we may not be held responsible. Follow these instructions to the letter to avoid any mishap or bricking. Make sure that whatever you do, you are doing it at your own responsibility.

Warning:

Rooting an Android device Voids Manufacturers Warranty, this Rooting method for Samsung Galaxy Light is tested and Found Working. If you don’t follow the Procedure as we instructed, You only are responsible for your device. We won’t be liable if any damage occurs to your device and/or its components.

Necessary Preparations:

 How To Root T-Mobile Samsung Galaxy Light

  1. Download Super SU From Google Play Store and Install it on your device
  2. Turn off your Phone and Turn it On While Pressing, Power + Volume Down + Home button until you seesome text on-screen, Press Volume Up to continue.
  3. Make Sure that the USB drivers are installed.
  4. Open Odin one click in Computer and connect your device to PC, while it is in the Download mode.
  5. If your Phone is successfully connected to PC, the Odin port will turn Yellow with COM port number.
  6. In Odin, Check Auto reboot  Option.
  7. Now Click the Start button and wait for the process to complete.
  8. After the installation is complete you device will restart and once you see the Home Screen and get the “Pass” Message on Odin, unplug the cable.

That’s it your T-Mobile Samsung Galaxy Light has been Rooted On Android 4.2.2 Jelly Bean . Download any Root Checker app or See Super SU in app Drawer to Verify root access.

How To Root LG Optimus F3(MetroPCS)

0
How To Root LG Optimus F3(MetroPCS)

Previously we posted the rooting tutorial of T-Mobile Variant of LG Optimus F3. Today we are about to post rooting tutorial of LG Optimus F3 (MetroPCS).Rooting your Android device allows you to get full control over it, allows you to install Custom Recoveries and ROMs on it along with many more tweaks and other stuff. It allows you to change settings of your hardware too, like you can over clock you CPU. GPU and RAM, but all of it will heat up your device and not suggested from many officials. If you have an LG Optimus F3 and want to root it follow the tutorial ahead and get what you want.

copy-medium04

This method will only work for LG Optimus F3 MetroPCS, do not try this tutorial on any other variant. If you are not familiar with Rooting your device, you can leave the post, but we will not held responsible for any damage done to your device. All you need is to make sure that LG Optimus F3 is running latest version of Android OS and not rooted.

Disclaimer:

The methods involved in flashing custom roms and rooting your phone is highly custom and may result in bricking your device,and has nothing to do with Google or the device manufacturers which is LG in our case. In case of any mishap we may not be held responsible. Follow these instructions to the letter to avoid any mishap or bricking. Make sure that whatever you do, you are doing it at your own responsibility.

Warning:

Rooting an Android device Voids Manufacturers Warranty, this Rooting method for LG Optimus F3 is tested and Found Working. If you don’t follow the Procedure as we instructed, You only are responsible for your device. We won’t be liable if any damage occurs to your device and/or its components

Necessary Preparations:

  1. Enable USB Debugging mode.
  2. Download SafeRoot.
  3. Install LG USB Drivers

How To Root LG Optimus F3

  • Connect your LG Optimus F3 with PC.
  • Unzip Saferoot file and open the extracted folder.
  • Right click the Run.bat file and choose run as admin, For Mac choose root-mac.sh and for Linux chooseroot-linux.sh
  • A cmd window will appear and all you have to do is to press any Key

Screenshot_2

  • In only a matter of Seconds, your LG Optimus F3 will be rooted.
  • That’s all

How To Root LG Optimus F3(T-Mobile)

2
How To Root LG Optimus F3(T-Mobile)

We have been successfully covering the Rooting methods of all the Latest LG Devices, previously we posted the Rooting tutorial of LG G Flex and LG G Pro 2, today we will show you how to Root T-Mobile variant of LG Optimus F3.Rooting your Android device allows you to get full control over it, allows you to install Custom Recoveries and ROMs on it along with many more tweaks and other stuff. It allows you to change settings of your hardware too, like you can over clock you CPU. GPU and RAM, but all of it will heat up your device and not suggested from many officials. If you have an LG Optimus F3 and want to root it follow the tutorial ahead and get what you want.

copy-medium04

This method will only work for T-Mobile Variant of LG Optimus F3, do not try this tutorial on any other variant. If you are not familiar with Rooting your device, you can leave the post, but we will not held responsible for any damage done to your device. All you need is to make sure that LG Optimus F3 is running latest version of Android OS and not rooted.

Disclaimer:

The methods involved in flashing custom roms and rooting your phone is highly custom and may result in bricking your device,and has nothing to do with Google or the device manufacturers which is LG in our case. In case of any mishap we may not be held responsible. Follow these instructions to the letter to avoid any mishap or bricking. Make sure that whatever you do, you are doing it at your own responsibility.

Warning:

Rooting an Android device Voids Manufacturers Warranty, this Rooting method for LG Optimus F3 is tested and Found Working. If you don’t follow the Procedure as we instructed, You only are responsible for your device. We won’t be liable if any damage occurs to your device and/or its components

Necessary Preparations:

  1. Enable USB Debugging mode.
  2. Download SafeRoot.
  3. Install LG USB Drivers

How To Root LG Optimus F3

  • Connect your LG Optimus F3 with PC.
  • Unzip Saferoot file and open the extracted folder.
  • Right click the Run.bat file and choose run as admin, For Mac choose root-mac.sh and for Linux chooseroot-linux.sh
  • A cmd window will appear and all you have to do is to press any Key

Screenshot_2

  • In only a matter of Seconds, your LG Optimus F3 will be rooted.
  • That’s all

Update Sony Xperia Z1 C6902 to Latest Android 4.4.2 KitKat 14.3.A.0.681 Firmware [How to – Guide]

11
Update Sony Xperia Z1 C6902 to Latest Android 4.4.2 KitKat 14.3.A.0.681 Firmware [How to – Guide]

Sony has been pretty much fair with it’s users for the last few months, specially regarding the Android updates. As it promised the customers about the Android 4.3 Jelly Bean updates and then unveiled the plans for Android 4.4.2 KitKat, it looks like Sony has decided to over come the promises it made and to avoid any disappointments at the user’s end. Recently, Sony has rolled out Android 4.4.2 KitKat update for it’s former flagship device accompanied by a few of it’s family members as well. Xperia Z1 C6902 owners can now have a KitKat firmware based on build number 14.3.A.0.681 for their device and can give their device a whole new life as the new app comes up with performance enhancements, bug fixes, camera has been imporved, there is a WiFi data transfer option and a lot more that you may checkout once you install this update.

So, to get this latest and greatest version of Android, you’ll probably need to wait for the update to hit your region either via Sony PC Companion or through OTA updates but we all know that both these can take time and become a pain for those who can’t wait. If that’s the case with you, you may not worry about it anymore and get this update immediately on your device as we’ve a detailed guide right here for you that will help you to get your device a break with Android 4.4.2 KitKat. All you need to do is to go through this step by step guide carefully.

Pre Requisites:

    1. As mentioned, this firmware is only for Xperia Z1 C6902. Do not try this on any other phone, that may result in bricking your device. Check your device’s model number in Settings > About device.
    2. You must have installed Sony Flashtool. Find the full guide here.
    3. After installing Sony Flashtool, open the Flashtool folder from the drive where you installed it.
    4. Now open Flashtool>Drivers>Flashtool-drivers.exe and install the Flashtool, Fastboot & Xperia Z1 drivers from the list. [Important]
    5. Your phone must be charged at least over 60%. This is highly recommended in order to prevent any power issues during the flashing process.
    6. Enable USB debugging mode on your device. To do so, tap settings>developer options>USB debugging. If you can’t find developer options in settings, then tap settings > about device and tap “Build Number” for 7 times and you’ll get em’ activated under settings.
    7. Make sure that you back up all your important media content,  contactscall logs and text messages. This is highly recommended and important in case something goes wrong during the flashing process or in case you select the data wipe option before flashing. You can easily restore whenever you need.
    8. To flash this firmware, you do not need to root your device, you do not need to unlock the bootloader. All you need is, your device must be the one mentioned and must be running on Android 4.2.2 or 4.3 Jelly Bean.
    9. Download the firmware file properly.
    10. Use the OEM data cable to connect your phone to your PC. Using any other data cable might cause connection problems.
    11. This firmware can be flashed on Xperia Z1 in any region/any country.
    12. Alright! Follow this guide to the letter in order to prevent any mishap.

How to Install Android 4.4.2 KitKat 14.3.A.0.681 on Xperia Z1 C6902:

  1. Before moving forward, please make sure that you’ve read the pre requisites and ensure that you are set to go ahead.
  2. Download the latest firmware Android 4.4.2 KitKat 14.3.A.0.681 FTF file. Link 1 | Link 2 [Generic]
  3. Copy the file and paste in Flashtool>Firmwares folder.
  4. Open Flashtool.exe now.
  5. Hit the small lightening button on the top left corner and select Flashmode.
  6. Select the FTF firmware file that you placed in the Firmware folder. 
  7. From the right side, select what do you want to wipe. Data, cache and apps log, all wipes are recommended, perhaps you may select if you don’t want.
  8. Click on OK, and it will start preparing the firmware for flashing. This may take a little while to load.
  9. As soon as the firmware is loaded, it will prompt you to attach the phone by turning it off and keeping the back key press.
  10. For Xperia Z1Volume Down key will do the job of back key, just turn off your phone, keep the Volume Down key pressed and plug in the data cable.
  11. As soon as the phone is detected in Flashmode, the firmware will start flashing, Do not leave the Volume Down key until the process is complete.
  12. As soon as you see “Flashing ended or Finished Flashing” leave the Volume Down key, plug the cable out and reboot.
  13. That’s All! Congrats! You’ve installed latest Android 4.4.2 kitkat on your Xperia Z1 C6902. Enjoy

In case you got any queries or face any problems regarding this guide, please feel free to stop by the comment box below and let us know. We will get back to you as soon as possible. Thanks all!

How To Change Fonts In iOS 7

0
How To Change Fonts In iOS 7

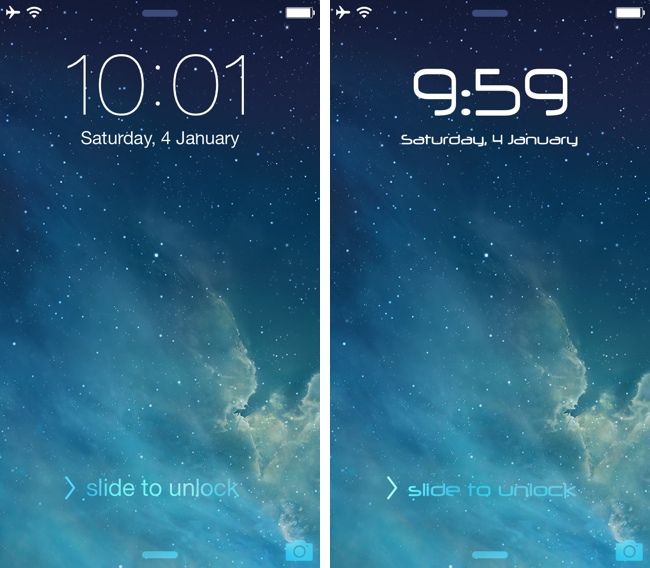
Fonts are the style of Text, that how the Text will appear on the Screen, bold, Italic, Crossed, Underlined etc. Stock Fonts are no doubt good and the same style can be applied to any Language. In previous versions of iOS, there was no option of changing the Fonts, but since the release of iOS 7 and iPhone 5S, now finally users can change the Fonts of their device. This app has a feature that allows you to set different Fonts for Different apps like Keyboard, Camera, iBooks and System Separately and it is totally free.

bytafont2-lockscreen

Bytafont 2 is the name of the Application and it is available only for Jailbroken devices, available on Cydia Store totally free. Here is how you can Change the Fonts of your iDevice Using Bytafont 2.

Jailbreak your iOS Device.

Since the following tutorial needs an iOS device which is Jailbroken, you need to Jailbreak your device. If yourdevice is still in its normal condition. Follow our Jailbreak Section to find out how to Jailbreak your device

Install Bytafont 2

  1. Open App Store.
  2. Search for Bytafont 2.
  3. Tap Bytafont 2 once the search is over.
  4. Tap Install in the top right corner.
  5. Tap Confirm.
  6. Let it install.
  7. Tap Restart.

How To Use Bytafont 2

  1. Open Bytafont 2
  2. Tap on Browse on Bottom
  3. Find a font that you like, use Categories for help.
  4. Once chosen, tap install on Bytafont 2
  5. Tap Restart.

How To Set A Custom Font

  1. Open Bytafont 2
  2. Tap on Basic to change the Fonts of Entire System or Advance to Change as you like.
  3. Tap the New Font that you installed, to change.
  4. Tap Yes.
  5. After a Reboot you will see the New Font everywhere, Enjoy!

How To See If Someone is Typing To You in iOS 7

0
How To See If Someone is Typing To You in iOS 7

In Facebook Messenger when someone is typing to you after a conversation is started you can see a typing notification before you receive the message, which can be tiresome if someone forget to write after he started and after a long wait all you get is “OK” or “Hmmm”. The same thing can be happen in iOS 7 but not in Facebook messenger only or iMessages only, it has been expanded to any page in iOS. A small banner will appear on Status Bar if someone is Typing to you or if someone has read a Message of yours. Once you enable this Feature it is hard to get back on the Previous way.

TypeStatus

TypeStatus is a Jailbreak Tweak that helps you in getting the Type On Notification on the Status bar. The app is Totally free and Available only for Jailbroken devices, if your device is Jailbroken you can download and install it easily, but to do so, First you must Add the Repository for TypeStatus. Without further ado, let’s find out how.

Jailbreak your iOS Device.

Since the following tutorial needs an iOS device which is Jailbroken, you need to Jailbreak your device. If yourdevice is still in its normal condition. Follow our Jailbreak Section to find out how to Jailbreak your device

Add TypeStatus Repo To Cydia

  1. Open Cydia.
  2. Tap Manage at the Bottom.
  3. Open Sources.
  4. Navigate to Edit at bottom.
  5. Tap on Add on the Left.
  6. Enter the Following in the Text Field,http://cydia.hbang.ws, and hit Add Source.
  7. Return to Cydia

Install TypeStatus

  1. Open App Store.
  2. Search for TypeStatus.
  3. Tap TypeStatus once the search is over.
  4. Tap Install in the top right corner.
  5. Tap Confirm.
  6. Let it install.
  7. Tap Restart.

How To Set-Up TypeStatus

  1. Go to Settings.
  2. Open TypeStatus.
  3. Choose the Option you want or like the most.
  4. Tap Test Typing and Test Read to ensure they are working or not.
  5. Enjoy!

How To Put Your Name On MenuBar Of Mac OS X

0
How To Put Your Name On MenuBar Of Mac OS X

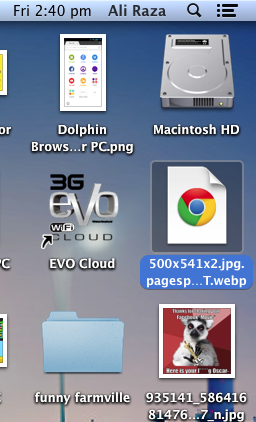
Well, I am not going to discuss too much on this post, after a little intro and reason I will show you how it is done. Now, many of you have given name to your Mac and the only place it is showing on is the Lock-Screen, there you will see your name and after you log-in there is no other place where you can see it. So, here is a little presentation to show you how to see the nickname you have given t your mac. It will only appear on your Menubar but it will be noticeable. Here is how you can display it.

 Screen Shot 2014-03-21 at 14.40.17

How To Display Your Name On Menubar

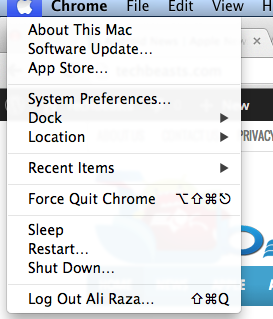
  • Click on Apple Logo and Open System Preferences.

Screen Shot 2014-03-21 at 14.35.34

  • Click Users&Groups.

Screen Shot 2014-03-21 at 14.33.40

  •  Click the Lock Icon on the Bottom Left corner to change the settings

Screen Shot 2014-03-21 at 14.33.58

  • Click Log-in Options, Check Enable Fast User Switching and View as: Name

Screen Shot 2014-03-21 at 14.33.17

  • That is it, your name will be shown on the MenuBar of your Mac OS X

Jailbreak iOS 7.1 Tethered on iPhone 4 with Geeksn0w

0
Jailbreak iOS 7.1 Tethered on iPhone 4 with Geeksn0w

Apple’s recent firmware update iOS 7.1 has patched evasi0n that has left the developers in thoughts to find a new way to Jailbreak this new strict firmware. This may cause a little worry for the Jailbreak users until and unless there is a way to get beyond the boundaries on your iOS device. While the research work is going on, a method to Jailbreak iPhone 4 running iOS 7 has already landed. The new method is includes the use of Geeksn0w that is based on wincom’s opensn0w project that is works on Geohot’s exploit limera1n bootrom that came out in 2010. Geeksn0w only works with iPhone 4, that means you won’t be able to use this tootl on any other device in case you want to break the jail. It is important to know about Geeksn0w first and only then we recommend you to head towards further instructions.iphone-4-jailbreak-iOS 7.1

Before we head towards the Jailbreak Tethered instructions, it may be kept in mind that iOS 7.1’s Jailbreak Tethered temper will prompt the users to boot their device Tethered when ever the power will be cycled.

Compatibility:

iPhone 4 – CDMA Verizon | At&t and Global Editions | GSM Revision A

Pre-requisites / Important Instructions:

  • Your device must be an iPhone 4 and must be running iOS 7.1. Please check it in General section of your device.
  • It always good to backup all your important data before you proceed.
  • An original data cable to avoid any connection issues is required.
  • Geeksn0w for Windows – Get it here.
  • Latest version of iTunes installed on your PC. – Get it here.
  • You may need the following tools to run Geeksn0w: Java DK | .Net Frameworks


How to Jailbreak Tethered iPhone 4 running iOS 7.1:

  1. Download Geeksn0w, iTunes, Java Development Kit, .Net Frameworks and install all these.
  2. Once installed open Geeksn0w.
  3. Connect your iPhone 4 to your PC.
  4. Enter DFU mode while your iPhone 4 is connected to your PC. In order to do so, press and hold Power + Home Button on your iPhone 4 for about 10 seconds, after 10 seconds leave the Power button only and keep holding the Home Button for 10 seconds more.
  5. Now, inside Geeksn0w click on “Jailbreak” and chose your iPhone 4 depending on it’s model.
  6. Now leave your iPhone 4 connected to your PC, as soon as Geeksn0w prompts, you should put your device in DFU mode using the same method in step 4.
  7. As soon as your iPhone 4 reboots, Geeksn0w will automatically reboot it in 2 minutes in order to show the installation progress finished and once again you will have to reboot your device in DFU mode using the same method in step 4.
  8. As soon as the installation is completely ended and your device has rebooted for the last time, it will now have Cydia installed on it, but it won’t be usable until your device reboots.
  9. As mentioned, you will have to boot your iphone 4 everytime Tethered with Geeksn0w after you reboot it.

That’s all. You should now have successfully jailbroken your iOS 7.1 powered iPhone 4. In case you got any queries or difficulties regarding this post, please feel free to stop by the comment box below and drop us your words. We will get back to you as soon as possible. Thanks all.

Source1 | Source 2