Home Blog Page 463

Don’t Tap The White Tile for PC ( Windows 7,8,XP-Mac )

0
Don’t Tap The White Tile for PC ( Windows 7,8,XP-Mac )

After a long time a very simple and highly addictive game is in, it is available on both play store iOS and Android. Don’t Tap The White Tile is an Arcade game, in which, you feel like you’re playing a piano. Interestingly, you have to tap on black tiles instead of white tiles to achieve the high score. The developers have not added any high definition graphics, it is totally simple and a fun game. The game consists of three modes. In Classic mode, just reach the given target as soon as possible. While in the Arcade mode, try your best to tap the black tiles as much as you can with no time limit. And in the Zen mode, try your best to tap the black tiles as much as you can in the given time of 30 seconds. It can be more fun for kids or adults if you will play Don’t Tap The White Tile on PC or Mac. No need to get confuse, just follow my step by step guide on how to install Don’t Tap The White Tile for PC.

Also See: 2048 for pc 

Don't Tap The White Tile for PC

Don’t Tap The White Tile for PC ( Windows 7,8,XP-Mac ) Features:

  • Charming Piano Sound Effects!!!
  • No weird shoes or sharks
  • Full English & Chinese language Support (more languages are coming soon)
  • Simple Controls
  • Google Play Services Support
  • Social Share Support

How to Download and Install Don’t Tap The White Tile – Windows 7/8/XP/Mac:

  1. Running Android apps on PC is possible through an App Player / Android Emulator only. To do this, we recommend BlueStacks. Follow the full guide here and install it on your PC.
  2. Download Don’t Tap The White Tile file to your PC.
  3. Once downloaded, go to the downloaded file location.
  4. Double click the downloaded APK file now.
  5. Wait for the installation to get complete with BlueStacks.
  6. Once it complete, open BlueStacks now.
  7. Click on “All Apps” in the BlueStacks now and click on the app that you just installed.
  8. Use the app by following the on-screen instructions.
  9. That’s All! Enjoy!

Wide Desktop Wallpaper for Free – Download here

0
Wide Desktop Wallpaper for Free – Download here

Being a busy bee and working on other things, I was quite out of touch from my little hobby of collecting Wallpapers. As per now I am free and have started again the collection of beautiful, cool, wide and best Wallpapers for Desktops, iMac, mobiles and tablets. Today I have collected a range of Wide Desktop Wallpapers for free. If you want more Free HD Wallpapers please check my collection on Techbeasts. Here is a part of my collection as well, enjoy these HD themed wallpapers.

3d_fantasy_graphic_wide_desktop_wallpaper_ghost_ship-1280x800

1680x1050_WideScreen_wallpaper_15

blue_abstract_widescreen-wide

hd-wallpapers-wide-pack-40-26

hd-wallpapers-wide-pack-41-16

Vista_Trends_for_Wide_Screen

wallpaper_804

wallpapers-wide

background-desktop-computer-sun-widescreen

How to Root Vodafone Samsung Galaxy S5 SM-G900M

How to Root Vodafone Samsung Galaxy S5 SM-G900M

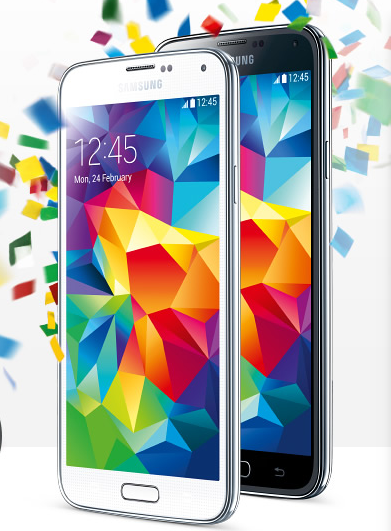
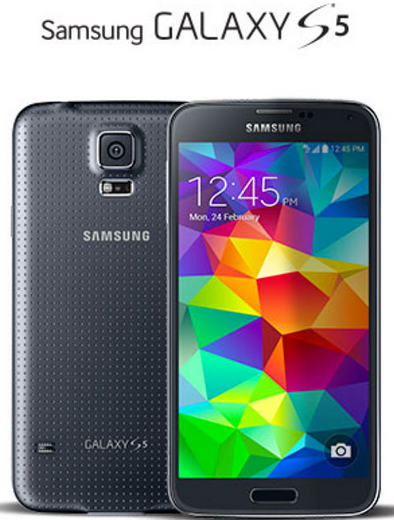
Samsung has rolled out its latest flagship device, the Galaxy S5 to over 125 countries and almost all of the U.S carriers have got their variants with their offers listed on the sites. Vodafone is also offering the Galaxy S5 modeled as SM-G900M with its exclusive bonus packages. It actually doesn’t matter which variant of the Galaxy S5 you get, you’ll be able to enjoy thVodaFone Galaxy S5e device’s features beyond it’s boundaries, but the carrier restrictions make the devices a little hard to tweak and to pull these restrictions out of the device, carrier specific methods are required. Just in case you’re going to buy Vodafone Galaxy S5 and you’re planning to play with your device by applying different mods or by using some cool apps, root access might become an obstacle. In order to overcome this obstacle, you’ll need to root your Vodafone Galaxy S5 SM-G900M.


In the following post we are going to gain the root access on Vodafone Samsung Galaxy S5 SM-G900T. We will be using Chainfire’s Autoroot to root the device, before we head towards the root instructions, I’m assuming that not all of you are familiar with rooting an Android device. To make it clear and remove any confusions, we will first have a look on a brief introduction of the root access.

Rooting your phone gives you complete access over all the data which is apparently locked by the manufacturers. This includes removal of the factory restrictions and making changes to the internal system and the operating system. Gaining the root access gives you the privileges to install various applications to enhance the performance of your device, allows you to remove the built-in applications/programs, helps you to upgrade the battery life of your device & install the apps which require the root access for the proper functionality and modify your device in so many other ways e.g using mods and flashing custom recoveries and custom ROMs. There is a laundry list of things you can do after having your device rooted and installed the custom recovery, now once you’re rooted and have installed custom recovery, go ahead and enjoy it on your phone. Here’s our collection of 10 Best Root Apps.

Here are the pre-installation instructions:

  1. This guide is only for Vodafone Samsung Galaxy S5 SM-G900M. Do not try this on any other device, please check your device’s model number in Settings > General > About Device.
  2. Your phone’s battery must be charged at least over 60%. This is highly recommended in order to prevent any power issues during the flashing process.
  3. Make sure that you backup your important media content, ContactsCall Logs Messages. This is highly recommended just in case something goes wrong and you need to reset your phone.
  4. Use only OEM data cable to establish connection between your phone and PC. Turn off your Anti Virus and Firewall to prevent any connection issues. Also enable USB debugging mode on your phone if you face connection issues.
  5. Your device must be running Android 4.4.2 KitKat.
  6. Alright! Go ahead, follow this guide to the letter.
Disclaimer: The methods involved in flashing custom ROMs and rooting your phone are highly custom and may result in bricking your device, and has nothing to do with Google or the device manufacturer that is SAMSUNG in our case. Also rooting your device will void its warranty and you will be no longer eligible for any kind of free device services by the manufacturers/warranty providers. In case of any mishap we may not be held responsible. Also, if your device comes with Knox Security, you will result in voiding it after you root your device and the Knox counter cannot be reset. Follow these instructions to the letter to avoid any mishap or bricking. Make sure that whatever you do, you are doing it at your own responsibility. 


Files you need to download: 

  1. Download and extract Odin PC – Get it here
  2. Download and Samsung USB Drivers – Get here
  3. Download & Unzip Cf Auto Root Package file once on your desktop, you will get a .tar.md5 file.

 How to Root Vodafone Samsung Galaxy S5 SM-G900M:

  1. Open Odin3.exe from the extracted folder.
  2. Put your Vodafone SGS 5 in download mode by pressing and holding Volume Down + Home + Power key at the same time, you should get a screen showing a warning and asking to continue, press Volume Up to continue.
  3. Now your phone should be in downloading mode. Connect your phone to your PC.
  4. As soon as Odin detects your phone the ID:COM box will turn light blue.
  5. Click on the PDA tab and select the CF-autoroot file that you extracted above.
  6. In case you’re using Odin v3.09, you will put the .tar.md5 file in the “AP” tab, rest of the settings should remain untouched in Odin v3.09 as well.
  7. Your Odin screen should look like exactly as shown below.
  8. odin_explained
  9. Click Start and the root process should start showing you a process bar in the first box above ID:COM.
  10. The process is quite fast and will finish in a few seconds, as soon as it ends, your phone will restart and you’ll see the CF Auto root installing SuperSu on your phone.
  11. Congratulations you have your Samsung Galaxy S5 SM-G900M rooted now!

How to check if the device is properly rooted or not?

  1. To do so, go to Google Play Store on your Galaxy S5.
  2. Find “Root Checker” and install it.
  3. Open Root Checker.
  4. Tap “Verify Root”.
  5. It will ask you for SuperSu rights, tap “Grant”.
  6. It should show you Root Access Verified Now!
  7. That’s All!

1560688_10202529514651766_2061540064_n

Once you’re rooted, make sure that you Backup EFS Data on your Galaxy S5.

That’s all. In case you have some queries or you’re facing some issues regarding this post, feel free to stop by the comment box below and drop us your words. We surely will get back to you as soon as possible. Thanks all.

How To Root MetroPCS Samsung Galaxy S5 SM-G900T1

How To Root MetroPCS Samsung Galaxy S5 SM-G900T1

Samsung Galaxy S5 is up for sale through MetroPCS modeled as SM-G900T1. The carrier is offering the Galaxy S5 for $649 for Off-Contract while the On-Contract price is $40 to $60 for 2 years. If you’re planning to buy MetroPCS GMetrPCS Galaxy S5alaxy S5, and you’re also an Android enthusiast, you would definitely like to root your device. Before you start wondering here and there, XDA Elite Recognized Developer Chainfire has already rooted the MetroPCS Galaxy S5 and rolled out his CF-Autoroot file to help the users to get their devices rooted.


Before we head towards the root instructions, I’m assuming that some of you are familiar with the root access and some are not. To remove any confusions and make it clear, we will first go through a brief introduction of root access and also know that why you should root your MetroPCS Samsung Galaxy S5.

Rooting your phone gives you complete access over all the data which is apparently locked by the manufacturers. This includes removal of the factory restrictions and making changes to the internal system and the operating system. Gaining the root access gives you the privileges to install various applications to enhance the performance of your device, allows you to remove the built-in applications/programs, helps you to upgrade the battery life of your device & install the apps which require the root access for the proper functionality and modify your device in so many other ways e.g using mods and flashing custom recoveries and custom ROMs. There is a laundry list of things you can do after having your device rooted and installed the custom recovery, now once you’re rooted and have installed custom recovery, go ahead and enjoy it on your phone. Here’s our collection of 10 Best Root Apps.

Here are the pre-installation instructions:

  1. This guide is only for MetroPCS Samsung Galaxy S5 SM-G900T1. Do not try this on any other device, please check your device’s model number in Settings > General > About Device.
  2. Your phone’s battery must be charged at least over 60%. This is highly recommended in order to prevent any power issues during the flashing process.
  3. Make sure that you backup your important media content, ContactsCall Logs & Messages. This is highly recommended just in case something goes wrong and you need to reset your phone.
  4. Use only OEM data cable to establish connection between your phone and PC. Turn off your Anti Virus and Firewall to prevent any connection issues. Also enable USB debugging mode on your phone if you face connection issues.
  5. Your device must be running Android 4.4.2 KitKat.
  6. Alright! Go ahead, follow this guide to the letter.
Disclaimer: The methods involved in flashing custom ROMs and rooting your phone are highly custom and may result in bricking your device, and has nothing to do with Google or the device manufacturer that is SAMSUNG in our case. Also rooting your device will void its warranty and you will be no longer eligible for any kind of free device services by the manufacturers/warranty providers. In case of any mishap we may not be held responsible. Also, if your device comes with Knox Security, you will result in voiding it after you root your device and the Knox counter cannot be reset. Follow these instructions to the letter to avoid any mishap or bricking. Make sure that whatever you do, you are doing it at your own responsibility. 


Files you need to download: 

  1. Download and extract Odin PC – Get it here
  2. Download and Samsung USB Drivers – Get here
  3. Download & Unzip Cf Auto Root Package file once on your desktop, you will get a .tar.md5 file.

 How to Root MetroPCS Samsung Galaxy S5 SM-G900T1:

  1. Open Odin3.exe from the extracted folder.
  2. Put your MetroPCS SGS 5 in download mode by pressing and holding Volume Down + Home + Power key at the same time, you should get a screen showing a warning and asking to continue, press Volume Up to continue.
  3. Now your phone should be in downloading mode. Connect your phone to your PC.
  4. As soon as Odin detects your phone the ID:COM box will turn light blue.
  5. Click on the PDA tab and select the CF-autoroot file that you extracted above.
  6. In case you’re using Odin v3.09, you will put the .tar.md5 file in the “AP” tab, rest of the settings should remain untouched in Odin v3.09 as well.
  7. Your Odin screen should look like exactly as shown below.
  8. odin_explained
  9. Click Start and the root process should start showing you a process bar in the first box above ID:COM.
  10. The process is quite fast and will finish in a few seconds, as soon as it ends, your phone will restart and you’ll see the CF Auto root installing SuperSu on your phone.
  11. Congratulations you have your Samsung Galaxy S5 SM-G900T1 rooted now!

How to check if the device is properly rooted or not?

  1. To do so, go to Google Play Store on your Galaxy S5.
  2. Find “Root Checker” and install it.
  3. Open Root Checker.
  4. Tap “Verify Root”.
  5. It will ask you for SuperSu rights, tap “Grant”.
  6. It should show you Root Access Verified Now!
  7. That’s All!

1560688_10202529514651766_2061540064_n

Once you’re rooted, make sure that you Backup EFS Data on your Galaxy S5.

That’s all. In case you have some queries or you’re facing some issues regarding this post, feel free to stop by the comment box below and drop us your words. We surely will get back to you as soon as possible. Thanks all.

How To Root US Cellular Samsung Galaxy S5 SM-G900R4

0
How To Root US Cellular Samsung Galaxy S5 SM-G900R4

US Cellular Galaxy S5 has been unveiled modeled as SM-G900R4. Like other variants, US Cellular has also implemented it’s standard securities on the device in order to keep the security as maximum as possible. Galaxy S5 users won’t take long to realize that the device isn’t a normal one and might plane to go beyond the boundaries and what makes it possible is the root access. XDA Elite Recognized Developer Chainfire has rooted all the variants of the Galaxy S5 with his CF-Autoroot, and it’s out now making the root access much easy.

In the following post we are going to root the US Cellular Samsung Galaxy S5 SM-G900R4 using CF-Autoroot. If you’ve been looking to root your device, you got to follow this guide carefully. Before we move towards the installation instructions, I’m assuming that not all of you are familiar with the root access. To remove any confusions, we will first go through a brief introduction of the root access and it’s advantages.US Cellular Galaxy S5 Root

Rooting your phone gives you complete access over all the data which is apparently locked by the manufacturers. This includes removal of the factory restrictions and making changes to the internal system and the operating system. Gaining the root access gives you the privileges to install various applications to enhance the performance of your device, allows you to remove the built-in applications/programs, helps you to upgrade the battery life of your device & install the apps which require the root access for the proper functionality and modify your device in so many other ways e.g using mods and flashing custom recoveries and custom ROMs. There is a laundry list of things you can do after having your device rooted and installed the custom recovery, now once you’re rooted and have installed custom recovery, go ahead and enjoy it on your phone. Here’s our collection of 10 Best Root Apps.

Here are the pre-installation instructions:

  1. This guide is only for US Cellular Samsung Galaxy S5 SM-G900R4. Do not try this on any other device, please check your device’s model number in Settings > General > About Device.
  2. Your phone’s battery must be charged at least over 60%. This is highly recommended in order to prevent any power issues during the flashing process.
  3. Make sure that you backup your important media content, ContactsCall Logs & Messages. This is highly recommended just in case something goes wrong and you need to reset your phone.
  4. Use only OEM data cable to establish connection between your phone and PC. Turn off your Anti Virus and Firewall to prevent any connection issues. Also enable USB debugging mode on your phone if you face connection issues.
  5. Alright! Go ahead, follow this guide to the letter.
Disclaimer: The methods involved in flashing custom ROMs and rooting your phone are highly custom and may result in bricking your device, and has nothing to do with Google or the device manufacturer that is SAMSUNG in our case. Also rooting your device will void its warranty and you will be no longer eligible for any kind of free device services by the manufacturers/warranty providers. If your device comes with Knox Security Solution, you will also result in voiding this warranty and there is no way to reset it once void. In case of any mishap we may not be held responsible. Follow these instructions to the letter to avoid any mishap or bricking. Make sure that whatever you do, you are doing it at your own responsibility.


Files you need to download: 

  1. Download and extract Odin PC – Get it here
  2. Download and Samsung USB Drivers – Get here
  3. Download & Unzip Cf Auto Root Package file once on your desktop, you will get a .tar.md5 file.

 How to Root US Cellular Galaxy S5 SM-G900R4:

  1. Open Odin3.exe from the extracted folder.
  2. Put your US Cellular SGS 5 in download mode by pressing and holding Volume Down + Home + Power key at the same time, you should get a screen showing a warning and asking to continue, press Volume Up to continue.
  3. Now your phone should be in downloading mode. Connect your phone to your PC.
  4. As soon as Odin detects your phone the ID:COM box will turn light blue.
  5. Click on the PDA tab and select the CF-autoroot file that you extracted above.
  6. In case you’re using Odin v3.09, you will put the .tar.md5 file in the “AP” tab, rest of the settings should remain untouched in Odin v3.09 as well.
  7. Your Odin screen should look like exactly as shown below.
  8. odin_explained
  9. Click Start and the root process should start showing you a process bar in the first box above ID:COM.
  10. The process is quite fast and will finish in a few seconds, as soon as it ends, your phone will restart and you’ll see the CF Auto root installing SuperSu on your phone.
  11. Congratulations you have your Samsung Galaxy S5 SM-G900R4 rooted now!

How to check if the device is properly rooted or not?

  1. To do so, go to Google Play Store on your Galaxy S5.
  2. Find “Root Checker” and install it.
  3. Open Root Checker.
  4. Tap “Verify Root”.
  5. It will ask you for SuperSu rights, tap “Grant”.
  6. It should show you Root Access Verified Now!
  7. That’s All!

1560688_10202529514651766_2061540064_n

Once you’re rooted, make sure that you Backup EFS Data on your Galaxy S5.

That’s all. In case you have some queries or you’re facing some issues regarding this post, feel free to stop by the comment box below and drop us your words. We surely will get back to you as soon as possible. Thanks all.

How To Root Canadian Samsung Galaxy S5 SM-G900W8

0
How To Root Canadian Samsung Galaxy S5 SM-G900W8

Canadian variant of the Galaxy S5 has already been unveiled, if you’re planning to buy one, you surely would like to break the jails of this new beast and test how much tolerance your Galaxy S5 has and how many mods it can actually bear. XDA community is already active on the development of Samsung’s new flagship, there’s a lot of stuff available around that you would like to check out, but the only thing that you need to enjoy mods on your Galaxy S5 is the root access. XDA Elite Recognized Developer Chainfire has already rooted the hefty list of the Galaxy S5 variants, his popular CF-autoroot is available for the Canadian Galaxy S5 SM-G900W8 as well. In the following post we are going to use this method to gain the root access on the phone.

Before we head towards the instructions, I’m assuming that not all of you are familiar with the root access and not aware of the answer to the question “why you should root your device?”. To make it clear, we will first have look on a brief introduction of the root access.

Canadian Galaxy S5 Root

Rooting your phone gives you complete access over all the data which is apparently locked by the manufacturers. This includes removal of the factory restrictions and making changes to the internal system and the operating system. Gaining the root access gives you the privileges to install various applications to enhance the performance of your device, allows you to remove the built-in applications/programs, helps you to upgrade the battery life of your device & install the apps which require the root access for the proper functionality and modify your device in so many other ways e.g using mods and flashing custom recoveries and custom ROMs. There is a laundry list of things you can do after having your device rooted and installed the custom recovery, now once you’re rooted and have installed custom recovery, go ahead and enjoy it on your phone. Here’s our collection of 10 Best Root Apps.

Here are the pre-installation instructions:

  1. This guide is only for Canadian Samsung Galaxy S5 SM-G900W8. Do not try this on any other device, please check your device’s model number in Settings > General > About Device.
  2. Your phone’s battery must be charged at least over 60%. This is highly recommended in order to prevent any power issues during the flashing process.
  3. Make sure that you backup your important media content, ContactsCall Logs & Messages. This is highly recommended just in case something goes wrong and you need to reset your phone.
  4. Use only OEM data cable to establish connection between your phone and PC. Turn off your Anti Virus and Firewall to prevent any connection issues. Also enable USB debugging mode on your phone if you face connection issues.
  5. Alright! Go ahead, follow this guide to the letter.
Disclaimer: The methods involved in flashing custom ROMs and rooting your phone are highly custom and may result in bricking your device, and has nothing to do with Google or the device manufacturer that is SAMSUNG in our case. Also rooting your device will void its warranty and you will be no longer eligible for any kind of free device services by the manufacturers/warranty providers. In case of any mishap we may not be held responsible. Also, if your device comes with Knox Security, you will result in voiding it after you root your device and the Knox counter cannot be reset. Follow these instructions to the letter to avoid any mishap or bricking. Make sure that whatever you do, you are doing it at your own responsibility. 


Files you need to download: 

  1. Download and extract Odin PC – Get it here
  2. Download and Samsung USB Drivers – Get here
  3. Download & Unzip Cf Auto Root Package file once on your desktop, you will get a .tar.md5 file.

 How to Root Canadian Samsung Galaxy S5 SM-G900W8:

  1. Open Odin3.exe from the extracted folder.
  2. Put your Canadian SGS 5 in download mode by pressing and holding Volume Down + Home + Power key at the same time, you should get a screen showing a warning and asking to continue, press Volume Up to continue.
  3. Now your phone should be in downloading mode. Connect your phone to your PC.
  4. As soon as Odin detects your phone the ID:COM box will turn light blue.
  5. Click on the PDA tab and select the CF-autoroot file that you extracted above.
  6. In case you’re using Odin v3.09, you will put the .tar.md5 file in the “AP” tab, rest of the settings should remain untouched in Odin v3.09 as well.
  7. Your Odin screen should look like exactly as shown below.
  8. odin_explained
  9. Click Start and the root process should start showing you a process bar in the first box above ID:COM.
  10. The process is quite fast and will finish in a few seconds, as soon as it ends, your phone will restart and you’ll see the CF Auto root installing SuperSu on your phone.
  11. Congratulations you have your Samsung Galaxy S5 SM-G900W8 rooted now!

How to check if the device is properly rooted or not?

  1. To do so, go to Google Play Store on your Galaxy S5.
  2. Find Root Checker and install it.
  3. Open Root Checker.
  4. Tap “Verify Root”.
  5. It will ask you for SuperSu rights, tap “Grant”.
  6. It should show you Root Access Verified Now!
  7. That’s All!

1560688_10202529514651766_2061540064_n

Once you’re rooted, make sure that you Backup EFS Data on your Galaxy S5.

That’s all. In case you have some queries or you’re facing some issues regarding this post, feel free to stop by the comment box below and drop us your words. We surely will get back to you as soon as possible. Thanks all.

Recover Data From Galaxy S2, S3, S4 With A Broken Screen – How To Guide

0
Recover Data From Galaxy S2, S3, S4 With A Broken Screen – How To Guide

Modern Smartphones are no doubt, provide a lot of convenience when it comes to connecting with the world, with just a swipe and a single touch you can learn what is happening in this world. Smartphone also provides a safe way to preserve your data and because of huge storage, users mostly keep their data within the device, after all you can then access it from anywhere, share it with anyone you like, update it on the spot and the best, it remains with you all the time. However, modern smartphones are not as good as they should be, when it comes to the build quality, they broke even if they fall from a little height, if not externally then there will be an internal damage for sure.

That was the reason phone with a physical keyboard were far more reliable than what we are using right now, modern smartphones do gives us a lot of reliability, but we have to make sure that they remain free from any Jerk. Now if you have a Galaxy Flagship, and by any accident you have broken its screen, the next thing you can do is take it to a Reparing shop, but before that you need to secure your data, so in any mishap with your device memory, you have your data saved. The process is not as simple as you think, but if you have no security then it can be easier.

Samsung-Galaxy-S3-S-3-Repair-Fix-Cracked-Screen-Glass-Miami-Aventura-Fort-Lauderdale-Phone-Techs

Usually we lock our Mobile phones with security and once we connect it with PC, we need to bypass the lock screen to access the Data. But if your screen is locked, your device will connect to PC, but only for charging, you can’t access any data. The same case is with Samsung Kies, so there is a Suggestion to all of you people, put locks on the Folders and apps in the Mobile, but never use any Lock Screen. Now if you have unable to recover data with any way possible, then we have Two Mehtods to collect your data, including Messages, Videos, Contacts etc.

How To Recover Data From a Broken Galaxy Device

Method 1:

This Method will only work if you have a Samsung account made in your broken Samsung device, if you have a working device, I’ll suggest making a Samsung account right now.

  1. Open Samsung Website.
  2. Click on Find My Mobile.
  3. Login using your Samsung  account,
  4. All the options related with your Samsung Smartphone are available on the screen.
  5. There will be an option to unlock your device remotely.
  6. Unlock your device and then Connect it with PC afterwards, then you can access your data in your Smartphone

Method 2:

This method is a little technical and it requires Hardware tweaking, for this you need the same device, in complete working condition, for example, if you have a Broken Galaxy S3 then you need another Galaxy S3 in working condition.

4h31wwW-1024x682

  1. Just make sure to follow the Steps carefully, so you won’t damage your device.
  2. Take out the Tiny Screws from the Back of your device.
  3. Remove the plastic cover that is covering the Motherboard.
  4. Unclip the Display Cable from both the Phones.
  5. Connect the Cable of working device with the Broken one, now you can see the broken device data on the working screen.
  6. Boot it up and connect it with PC, unlock the Screen and Save all the Data


FarmVille 2: Country Escape for PC ( Windows 8/7/XP/Mac )

2
FarmVille 2: Country Escape for PC ( Windows 8/7/XP/Mac )

When it comes to Farming games FarmVille is on top, Zynga owns all the rights and now as the smartphones getting in our daily life Zynga added FarmVille 2 country escape in both Android and Apple play store to catch more audience. No doubt FarmVille 2 is going good as its going on Facebook. Today i am telling you how you can download and install farmville 2 country escape for PC. It will be easy while playing FarmVille 2 country escape on PC.

Also See: Doodle Basketball 2 for pc

FarmVille 2 country escape on PC.

Also See: Cut the rope 2 for pc

FarmVille 2: Country Escape for PC ( Windows 8/7/XP/Mac ) Features:

• CRAFT a variety of baked gourmet goods like classic country apple pies
• HARVEST unique coastal crops along with your favorite fruits and vegetables
• DECORATE to your heart’s content as you customize your farm with your very own house
• COLLECT hidden and rare treasures as you discover a new coastal farm
• NURTURE and raise a wide variety of adorable farm animals
• GARDEN by the beautiful blue ocean as you decorate your farm with flowers
• EXPLORE a new FarmVille story filled with special farm adventures
• BUILD a new lush, family farm by the coast so all your friends can visit
• FISH with your fellow farmers and sell your catch at Pike’s Landing
• TRADE and chat with friends or play anonymously with people from all over the world
• ESCAPE to the coast and then connect to your Facebook farm to send free water
• COMPETE with others as your Co-Op climbs the global rankings

Fore Info: Check Google Play

How To Install FarmVille 2: Country Escape for PC ( Windows 8/7/XP/Mac ):

  1. You need an Android emulator to run this game on your Windows PC or MAC. We recommend using Bluestacks. Use our guide to install it on your PC.
  2. After downloading and installing Bluestacks,Open it
  3. Download Apk Of  FarmVille 2 country escape , Double click the Apk File and Bluestacks will install it automatically
  4. Open BlueStacks now > All Apps > FarmVille 2 country escape
  5. The game will start now, follow the on screen instructions.
  6. Follow the initial screen,  you’ll be able to play it.
  7. Tap the screen by clicking inside the game frame.
  8. Enjoy rebuilding the Quahog.
  9. Don’t forget to let us know about your high score.
  10. That’s All!

Install TWRP Recovery 2.7 On Samsung Galaxy Note 3 Neo LTE N7505.

6
Install TWRP Recovery 2.7 On Samsung Galaxy Note 3 Neo LTE N7505.

When it comes to installing Custom ROMs and flashing different zip files via recovery, TWRP recovery is considered the best among all the recoveries available. TWRP is far easy to use and you don’t need to go back and again to flash different files in one time, TWRP allows you to select all the files in one shot and install them one-by-one, reducing your effort to go back again and again. It can also make the Back-up of your current ROM which can be restored using TWRP afterwards, if something happens to the ROM you have just installed. Other Features are the same as any other Recovery, except the interface which is far better than CWM Recovery. Only one thing that CWM recovery hits the market first for a specific device than TWRP.

Screenshot_12

TWRP recovery for Galaxy Note 3 Neo LTE is available and you can install it by following our tutorial below.If you are familiar with Odin and it’s working, then this tutorial might not be difficult for you. Otherwise read the whole tutorial first before trying it on your device. In this Article, we will show you How To Install TWRP 2.7 Recovery On Samsung Galaxy Note 3 Neo LTE. But before we begin, Make sure that:

  1. Back-Up all your important ContactsCall Logs & Messages.It is highly recommended in case of any mishap or data loss to back up all your important data.
  2. Back-Up your Mobiles EFS Data. How To Restore and Back-Up EFS Data On Samsung Galaxy Devices.
  3. Check your device model, Go To Setting > About and Make sure that it is SM-N7505
  4. Do-not try it on SM-N750.
  5. Enable USB Debugging Mode
  6. Download USB Driver For Samsung Devices: Link

Disclaimer:

The methods involved in flashing custom roms and rooting your phone is highly custom and may result in bricking your device,and has nothing to do with Google or the device manufacturers which is Samsung in our case. In case of any mishap we may not be held responsible. Follow these instructions to the letter to avoid any mishap or bricking. Make sure that whatever you do, you are doing it at your own responsibility.

Here you will find the Step-by-Step Guide On How To Install TWRP Recovery Galaxy Note 3 Neo. Before proceeding further, Let me Warn you that if you Get stuck in bootloop, after the installation(Possibilities are almost Zero), Here is the Process to get out of it.

If you stuck Into bootloop After the Installation Process.

  • Go to Recovery, Turn off your Phone and Turn it On While Pressing, Power + Volume Up + Home button until you see some text on-screen.

S78U

  • Navigate to Wipe and Select Wipe Devlik Cache.
  • Then Select Wipe Cache.
  • Go back and Select Reboot.

How To Install TWRP Recovery 2.7

odin_explained6

  1. Download TWRP Recovery 2.7 For your Galaxy Note 3 Neo to your computer and extract the zip file.
  2. Download Odin.
  3. Turn off your Phone and Turn it On While Pressing, Power + Volume Down + Home button until you see some text on-screen, Press Volume Up to continue.
  4. Make Sure that the USB drivers are installed.
  5. Open Odin in Computer and connect your device to PC, while it is in the Download mode.
  6. If your Phone is successfully connected to PC, the Odin port will turn Yellow with COM port number.
  7. Now Click on PDA and select the file openrecovery-twrp-2.7.0.0-hlltexx.img.tar”.
  8. In Odin, Check Auto reboot  Option.
  9. Now Click the start button and wait for the process to complete.
  10. After the installation is complete you device will restart and once you see the Home Screen and get the “Pass” Message on Odin, unplug the cable.

Now all that is left is to see whether Custom Recovery is installed or not,Go to Recovery How? Turn off your Phone and Turn it On While Pressing, Power + Volume Up + Home button until you see some text on-screen. If you see the TWRP Recovery, then everything went better than expected.


How To Fix FaceTime Issues on iOS 6 – iOS 7

0
How To Fix FaceTime Issues on iOS 6 – iOS 7

I am getting messages and mail’s about FaceTime is getting issues on iOS 6 from my reader’s. I have been working on it ” How to Fix FaceTime issues “. Well one and the best way is to update your device to iOS 7, because there is no such report about FaceTime issues on iOS7. But most of iPhone user don’t want to update their devices cause iOS 7 sucks. Lets get to the point following are the main Troubleshooting steps that may work for you.

simple

Many have contacted Apple support and they told them the best option is update your device to latest iOS 7 version. Ahh this is the best they can tell because they are not supporting the old versions. 😛

Troubleshooting steps:

  • Let me clear one thing if you are using iPhone 4 then FaceTime will not work on Cellular Data. To get things more clear Apple didn’t added iPhone 4 in the list of FaceTime working on Cellular Data. You can run FaceTime only on iPhone 4S, iPhone 5, 5s/5c, and iPad 3 and newer (including iPad mini 1 and 2). Even you are running on iOS 7 on iPhone 4.
  • If you are using FaceTime on Wifi, it can cause you issue because of  unstable Wi-fi network, incorrect router settings. So make sure your Wifi connection is working perfectly in order to use FaceTime on Wifi.
  • Try reactivating your FaceTime account. Sign out from FaceTime then restart your device wait for few second. Power on your iPhone login again in FaceTime. That will some time account authentication gives issues.
  • Last but not the least try updating your devices to iOS 7.

What tool can I use to jailbreak? [ List ]

0
What tool can I use to jailbreak? [ List ]

When using iPhone some times it gets boring because there is nothing to customise for e.g when we are using Android devices rooting, custom Roms, themes, launchers, Apk and many more. But for people like us who can’t stuck with the stock things there is always something, Jailbreak is for us. It is same like rooting we can do everything not all of it, we can add third party apps, themes, tweaks for developers. So when you buy iPhone first thing you want is how to Jailbreak your device, there are many methods and tools on web. Question is that What tool can i use to Jailbreak. We have gathered information and a list of all working tools for jailbreak. 

10268126_10203670301581410_1590609264_n

Chart of jailbreaking tools:

These are not all the tools available for Jailbreak but these are most popular tools for Jailbreak.

Do Check our Guides on How To Jailbreak.

Name Firmware Supported Devices Supported OS Uses Restore Notes
evasi0n7 7.0-7.0.6 All except ATV3 Mac/Windows No Untethered
p0sixspwn 6.1.3-6.1.5 All except ATV3 Mac/Windows No Untethered
evasi0n 6.0, 6.0.1, 6.0.2, 6.1, 6.1.1(4s only) & 6.1.2 All except ATV3 Mac/Windows/Linux No Untethered
redsn0w 0.9.15b3 4.1-4.3.5, 5.0-5.1.1, 6.0-6.1.3/6.1.5/6.1.6 *Do extras > select 6.0 ipsw for 6.0-6.1.3/6.1.5/6.1.6 except iPhone 2G Mac and Windows No Untethered, except 4.3, 4.3.4, 4.3.5, 4.2.9, 4.2.10, 5.0, 5.1, 6.0-6.1.3/6.1.5/6.1.6 are tethered (unless it’s old bootrom 3GS). Tethered iOS 6 jailbreaks can be untethered by installing ‘evasi0n’ or ‘p0sixspwn’ from the Telesphoreo repository, which is a default Cydia repo. (Tethered jailbreaks are available for iPhone 4, iPod touch 4th generation, iPhone 3GS and some prior devices.)
Absinthe 2.0.4 5.1.1 iPad 3rd generation, iPad 2, iPad 1, iPhone 4S, iPhone 4, iPhone 3GS, and iPod touch 3rd and 4th generation Mac/Windows/Linux No Untethered.
sn0wbreeze 2.9.14 3.1.3, 3.2.x, 4.0.x, 4.1, 4.2.1 to 4.2.8, 4.3 to 4.3.3, 4.4.3, 4.4.4, 5.0.1, 5.0.2, 5.1.1, 5.2, 6.0.x, 6.1, 6.1.2, 6.1.3 except iPad 2, 3rd & 4th generation, iPod 5th gen and iPhone 4S & 5 Windows Yes Untethered, except 6.1.3 is tethered (unless it’s old bootrom 3GS).
PwnageTool 5.1.1 5.1.1 except iPad 2, iPad 3rd generation, and iPhone 4S Mac Yes Untethered on 5.1.1
seas0npass 4.3 (4.2.1), 4.3 (4.2.2), 4.3, 4.4 (5.0), 4.4.1 (5.0), 4.4.2 (5.0), 4.4.3 (5.0.1), 4.4.4 (5.0.1), 5.0 (5.1), 5.0.1 (5.1.1), 5.0.2 (5.1.1), 6.1 (5.2), 6.1.4 (5.3) Apple TV Mac and Windows Yes Untethered on 5.0.2, 5.2, 5.3; otherwise tethered except 4.0, 4.1, 5.0.1, 5.1.1, 6.0, 6.0.1, 6.0.2

Table Credit: jailbreakqa

Samsung Galaxy S5, Top Ten Hidden Features

0
Samsung Galaxy S5, Top Ten Hidden Features

Samsung Latest flagship, Galaxy S5 has been released over a week ago and the Korean Company is gaining much attention by the ads of Galaxy S5, which are going in full flow. To help the owners of Galaxy S5 and to give them an easy way to learn about their device, as well as telling the whole world about what Samsung Galaxy S5 is capable of, Samsung has detailed a list of “Top Ten Hidden” features of Samsung Galaxy S5. Now for all the users of Galaxy S4, you might not find them very secret or hidden, but for a new user they are not something he can find easily.

However, no matter how much experience you had with TouchWiz or how much you have explored the previous Galaxy devices, there is always something new in a Particular device, and even though you are confident on all that you know about Galaxy S5, who know you might get a surprise once you run through the list. The list is more like a Slideshow of Device’s features while it helps out those who bought the Galaxy S5, also it represent a show of that company has release a device worth playing with.

Screenshot_9

The round start with something that we saw in Galaxy Note 3, you can write on it using a pencil, going below reveals something about Music player, whose tilt can bring up the Customized Playlist. Then it is about apps, which can be bookmarked with toolbox given in the device OS, furthermore, your privacy is safe with Privacy mode. Then there is something that can make you a huge fan of Kids, he Kids Mode ported in it can help you in this matter. Then there is something we have seen many times, you can use the camera directly from the Lock Screen.

Then there are some camera features, Virtual Tour in camera is there to guide you about the next photo you take, your steps will count, you can either go straight, take a left or make a right, and according to your movement, it will take a photo. Shot and more mode allows you to edit photos immediately after taking the photo. Set priority in Messaging app, you can also check the caller info while you are on a call. The best one is that you can take a call while using any other app using Call Notification Pop-Ups. You can find the full list in the link below, but we have also provided a huge strip for your ease.


10 Hidden Features of the Galaxy S5   Samsung Electronics Official Blog  Samsung Tomorrow (1)

Source: SamsungTomorrow