Home Blog Page 380

Root and Install CWM/TWRP on Xperia Z3 Compact D5803 23.1.A.0.726 Lollipop 5.0.2 Firmware
5
Root and Install CWM/TWRP on Xperia Z3 Compact D5803 23.1.A.0.726 Lollipop 5.0.2 Firmware

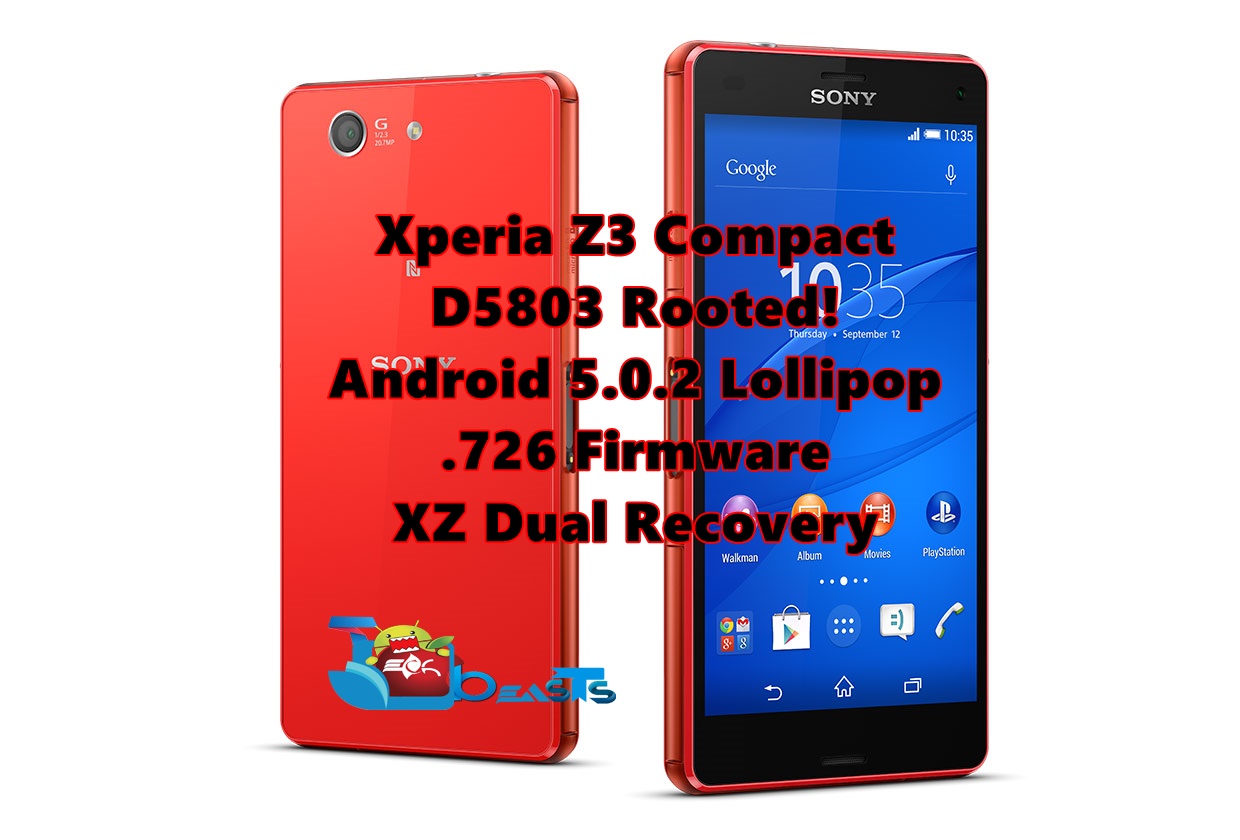
Sony released Android 5.0.2 Lollipop update for Xperia Z3 Compact few days ago with the build number 23.1.A.0.726. In this post, we are discussing the D5803 variant of Xperia Z3 Compact only. If you have any other variant, then you should not be reading this guide because this build number is available for D5803 only at the time of writing. So the rooting method and recovery installation method is for this model number only.

In this guide, you will go through the steps to root Xperia Z3 Compact D5803 variant on 23.1.A.0.726 Andorid 5.0.2 Lollipop Firmware. It is repeated many times in this post so that users do not make any mistakes while using this guide. If users try to flash file of one variant on another variant, then it can damage the device. The recovery that will be installed in this guide will be Dual Recovery by NUT who is a recognized XDA Developer and a leading developer for large number of Xperia devices. SuperSU will be flashed as the SuperUser application. The rest of the required tasks and the installation steps are explained below.

1. This is only for Sony Xperia Z3 Compact D5803

This rooting method is only for the device mentioned above. Make sure that your model number matches the one listed above. To do so, go to Settings > About Device on your device and see your model number. Flashing this firmware on any other device will result in bricking it so make sure that you meet this requirement first of all.

2. Battery should be charged at least over 60%.

Make sure that your battery is charged enough to complete the flashing process. In case your battery is low and your device goes dead during the flashing process, you may end up soft bricking your device as it won’t complete the flashing process.

3. Backup everything!

Just to be on the safe side, you may consider backing up each and everything from your Android device. This is highly recommended so that in case anything goes wrong, you still have the access to all of your data and you can restore it immediately. You may backup everything as listed below.

  • Backup SMS Messages
  • Backup Call Logs
  • Backup Contacts
  • Backup Media – Copy your files manually to your PC or Laptop.
  • Titanium Backup – If already rooted, use Titanium Backup to backup all of your apps, system data and other important content. If you haven’t rooted your device previously, skip this step.
  • Backup Nandroid – If CWM  or TWRP installed previously, otherwise skip this step and perform this at the end of flashing.

4. Enable USB Debugging Mode on your device.

Enable USB debugging mode on your device. To do so, tap settings>developer options>USB debugging. If you can’t find developer options in settings, then tap settings > about device and tap “Build Number” for 7 times and you’ll get em’ activated under settings.

5. Install and setup Sony Flashtool.

You must have installed Sony Flashtool. Find the full guide here.

After installing Sony Flashtool, open the Flashtool folder from the drive where you installed it. Now open Flashtool>Drivers>Flashtool-drivers.exe and install the Flashtool, Fastboot & Xperia Z3 Compact drivers from the list. If you do not find the Flashtool drivers in Flashmode, skip this step and install Sony PC Companion instead, for drivers support. [Important]

6. Use OEM data cable to establish connection.

Make sure that you use the phone’s original data cable to establish connection between your phone and the PC. Using a different data cable might result in interrupting the firmware installation.

7. Unlock Bootloader

Use the following guide to unlock the bootloader of your Xperia device before proceeding.

Steps For Rooting Xperia Z3 Compact D5803 .726 Firmware

1. Downgrade to .77/.93 Firmware and Root It

  1. If you have already updated your smartphone to Android 5.0.2 Lollipop, then you have to downgrade your device to KitKat OS and Root it.
  2. Use this Flashtool Guide to Install 23.0.A.2.93 firmware.
  3. Root using this guide.
  4. Now Install XZ Dual Recovery.
  5. Now phone is rooted, USB Debugging must be enabled.
  6. Download latest installer for Xperia Z3 Compact from here. (Z3-lockeddualrecovery2.8.10-RELEASE.installer.zip)
  7. Connect phone to PC using OEM date cable and run install.bat.
  8. It will install the custom recovery.
  9. Now work here is done. Lets move on to next step.

2. Make A Pre-Rooted Flashable Firmware For .726 FTF

  1. Download PRF Creator and install on your system.
  2. Download SuperSU zip and place anywhere on PC.
  3. Download .726 FTF and place it anywhere on PC.
  4. Download Z3-lockeddualrecovery2.8.10-RELEASE.flashable.zip
  5. Now run PRFC and add all three required files in it.
  6. Then click on Create.
  7. Once the Flashable ROM is created, it will show the successful message.
  8. Do not touch any other option while creating the pre-rooted firmware.
  9. Now copy the pre-rooted firmware to the phone’s internal storage.
  10. Our work in this step is now done. Move on to next step.

Note: If you do not want to create your own pre-rooted firmware and skip all these steps then you can download the pre-rooted flashable zip from the link given below.

D5803 23.1.A.0.726 Pre-Rooted Flashable Zip

3. Root and Install Recovery on Z3 Compact D5803 .726 5.0.2 Lollipop Firmware

  1. Custom recovery was installed in the first step.
  2. The pre-rooted firmware was created and copied to phone in next step.
  3. Now you have to turn off phone.
  4. Turn it on again and press volume up or down repeatedly to enter custom recovery.
  5. Click on install and locate the folder where you placed the flashable zip earlier.
  6. Tap on it and install it.
  7. Now reboot the phone.
  8. If phone is still connected to PC via USB cable, disconnect it.
  9. Now go back to the .726 ftf you downloaded in second step and copy it to /flashtool/fimrwares
  10. Open flashtool and click on lightning icon in the top left.
  11. Click on it and click on flashmode.
  12. Select the .726 firmware.
  13. In the right bar, in the exclude options, exclude System only. It means that tick System only there. Leave every other options as it is.
  14. While flashtool prepares the software for flashing, turn off your phone.
  15. Keep the volume down button pressed and connect it to PC via USB cable.
  16. The button must be pressed during it.
  17. The phone will enter flashmode.
  18. Flashtool will automatically detect it and start flashing.
  19. After flashing phone will reboot and you will be done 🙂
  20. That’s all 🙂 Enjoy
  21. Now your phone has a dual custom recovery, root access and of course latest Android 5.0.2 Lollipop Firmware.

Got any questions? Ask me in the comments below

Update Sony Xperia Z1 Compact D5503 To Android 5.0.2 Lollipop 14.5.A.0.242 Firmware

0
Update Sony Xperia Z1 Compact D5503 To Android 5.0.2 Lollipop 14.5.A.0.242 Firmware

Sony Xperia Z1 Computer debuted with Android Jelly Bean, but the device happens to be pretty much lucky to join the Z-league of Lollipop. Sony has started pushing the Android 5.0.2 Lollipop towards the Xperia Z1 & Z1 Compact. A number of regions has already received this update. In case you haven’t received yet, you may need to hold on a little tighter and wait for Sony to cook this update up for you and just in case you can’t wait, you may want to find a way to update your device manually. The later is what we are going to do in the following post. We will be installing latest official Android 5.0.2 Lollipop firmware with the build number 14.5.A.0.242 on our beloved Sony Xperia Z1 Compact D5503. Let’s go through the new features of this firmware and then flash it using Sony Flashtool.

Xperia Z Ultra Lollipop


Early Preparations:

1. This is only for Sony Xperia Z1 Compact D5503

This ROM is only for the device mentioned above. Make sure that your model number matches the one listed above. To do so, go to Settings > About Device on your device and see your model number. Flashing this firmware on any other device will result in bricking it so make sure that you meet this requirement first of all.

2. Battery should be charged at least over 60%.

Make sure that your battery is charged enough to complete the flashing process. In case your battery is low and your device goes dead during the flashing process, you may end up soft bricking your device as it won’t complete the flashing process.

3. Backup everything!

Just to be on the safe side, you may consider backing up each and everything from your Android device. This is highly recommended so that in case anything goes wrong, you still have the access to all of your data and you can restore it immediately. You may backup everything as listed below.

  • Backup SMS Messages
  • Backup Call Logs
  • Backup Contacts
  • Backup Media – Copy your files manually to your PC or Laptop.
  • Titanium Backup – If already rooted, use Titanium Backup to backup all of your apps, system data and other important content. If you haven’t rooted your device previously, skip this step.
  • Backup Nandroid – If CWM  or TWRP installed previously, otherwise skip this step and perform this at the end of flashing.

4. Enable USB Debugging Mode on your device.

Enable USB debugging mode on your device. To do so, tap settings>developer options>USB debugging. If you can’t find developer options in settings, then tap settings > about device and tap “Build Number” for 7 times and you’ll get em’ activated under settings.

5. Install and setup Sony Flashtool.

You must have installed Sony Flashtool. Find the full guide here.

After installing Sony Flashtool, open the Flashtool folder from the drive where you installed it. Now open Flashtool>Drivers>Flashtool-drivers.exe and install the Flashtool, Fastboot & Xperia Z1 Compact drivers from the list. [Important]

6. Use OEM data cable to establish connection.

Make sure that you use the phone’s original data cable to establish connection between your phone and the PC. Using a different data cable might result in interrupting the firmware installation.

How To Update Sony Xperia Z1C To Official Android 5.0.2 14.5.A.0.242 Lollipop  Firmware

Before moving forward, please make sure that you’ve read the pre requisites and ensure that you are set to go ahead.

  1. Download the latest firmware Android 5.0.2 Lollipop 14.5.A.0.242 FTF file.
    1. For Xperia Z1 Compact D5503 [Generic/Unbranded. Link 1 | Link2 | Create your own FTF using this guide.
  2. Copy the file and paste in Flashtool>Firmwares folder.
  3. Open Flashtool.exe now.
  4. Hit the small lightening button on the top left corner and select Flashmode.
  5. Select the FTF firmware file that you placed in the Firmware folder.
  6. From the right side, select what do you want to wipe. Data, cache and apps log, all wipes are recommended, perhaps you may select if you don’t want.
  7. Click on OK, and it will start preparing the firmware for flashing. This may take a little while to load.
  8. As soon as the firmware is loaded, it will prompt you to attach the phone by turning it off and keeping the back key press.
  9. For Xperia Z1 Compact Volume Down key will do the job of back key, just turn off your phone, keep the Volume Down key pressed and plug in the data cable.
  10. As soon as the phone is detected in Flashmode, the firmware will start flashing, Do not leave the Volume Down key until the process is complete.
  11. As soon as you see “Flashing ended or Finished Flashing” leave the Volume Down key, plug the cable out and reboot.
  12. That’s All! Congrats! You’ve installed latest Android 5.0.2 Lollipop on your Xperia Z1C. Enjoy!

In case you got any queries or face any problems regarding this guide, please feel free to stop by the comment box below and let us know. We will get back to you as soon as possible. Thanks all!

Next: Root Xperia Z1 Compact D5503 14.5.A.0.242 5.0.2 Firmware Plus Recovery

Download WhatsApp Messenger 2.12.38 – [Material Design + Voice Call]

0
Download WhatsApp Messenger 2.12.38 – [Material Design + Voice Call]

Time for WhatsApp to go all Material. The most popular and most widely used social chat messenger has received a new update. The update brings all new Google Material Design UI to the application for Android platform. This is another great addition from WhatsApp after the Voice Call feature, that is already running pretty great. The new UI is flat and smooth, chat heads have got a new look. The prominent changes we can note in this update are in the header part. WhatsApp has changed the old dull-green color of the messenger, its much more dark and better now. The UI has an eye-soothing effect now. This update carries the version number 2.12.38 and is available on WhatsApp’s official site for now.

While we are not sure when WhatsApp will push this update into the Google Play Store, some users may want to get early access and install it right away on their devices. We’ve acquired a copy of Whatsapp Messenger 2.12.38 APK and embedded the download link right here. If you’re looking for the latest version of WhatsApp for your device, you may go ahead and download it, and install it following the installation instructions explained below.Screenshot at Apr 14 22-28-07

Download & Install Material Design WhatsApp v 2.12.38

  1. Download latest WhatsApp 2.12.38 APK.
  2. Copy the downloaded APK file to your device.
  3. Open your old WhatsApp, go to chat settings > backup all conversations.
  4. Now uninstall your WhatsApp.
  5. Now locate the copied APK file of WhatsApp 2.12.38 using a file manager on your device.
  6. Tap the APK file to begin installation.
  7. Proceed with the instructions and finish it.
  8. Once done, access new WhatsApp from app drawer and enjoy the new Material Design UI.
  9. That’s all!

11147979_10205762976526292_1347595222_o11086836_10205762976206284_1501421329_o 11100974_10205762976046280_505602125_o 11144681_10205762976886301_1274613387_o


Update Sony Xperia Z Ultra To Official Android 5.0.2 Lollipop 14.5.A.0.242 Firmware

2
Update Sony Xperia Z Ultra To Official Android 5.0.2 Lollipop 14.5.A.0.242 Firmware

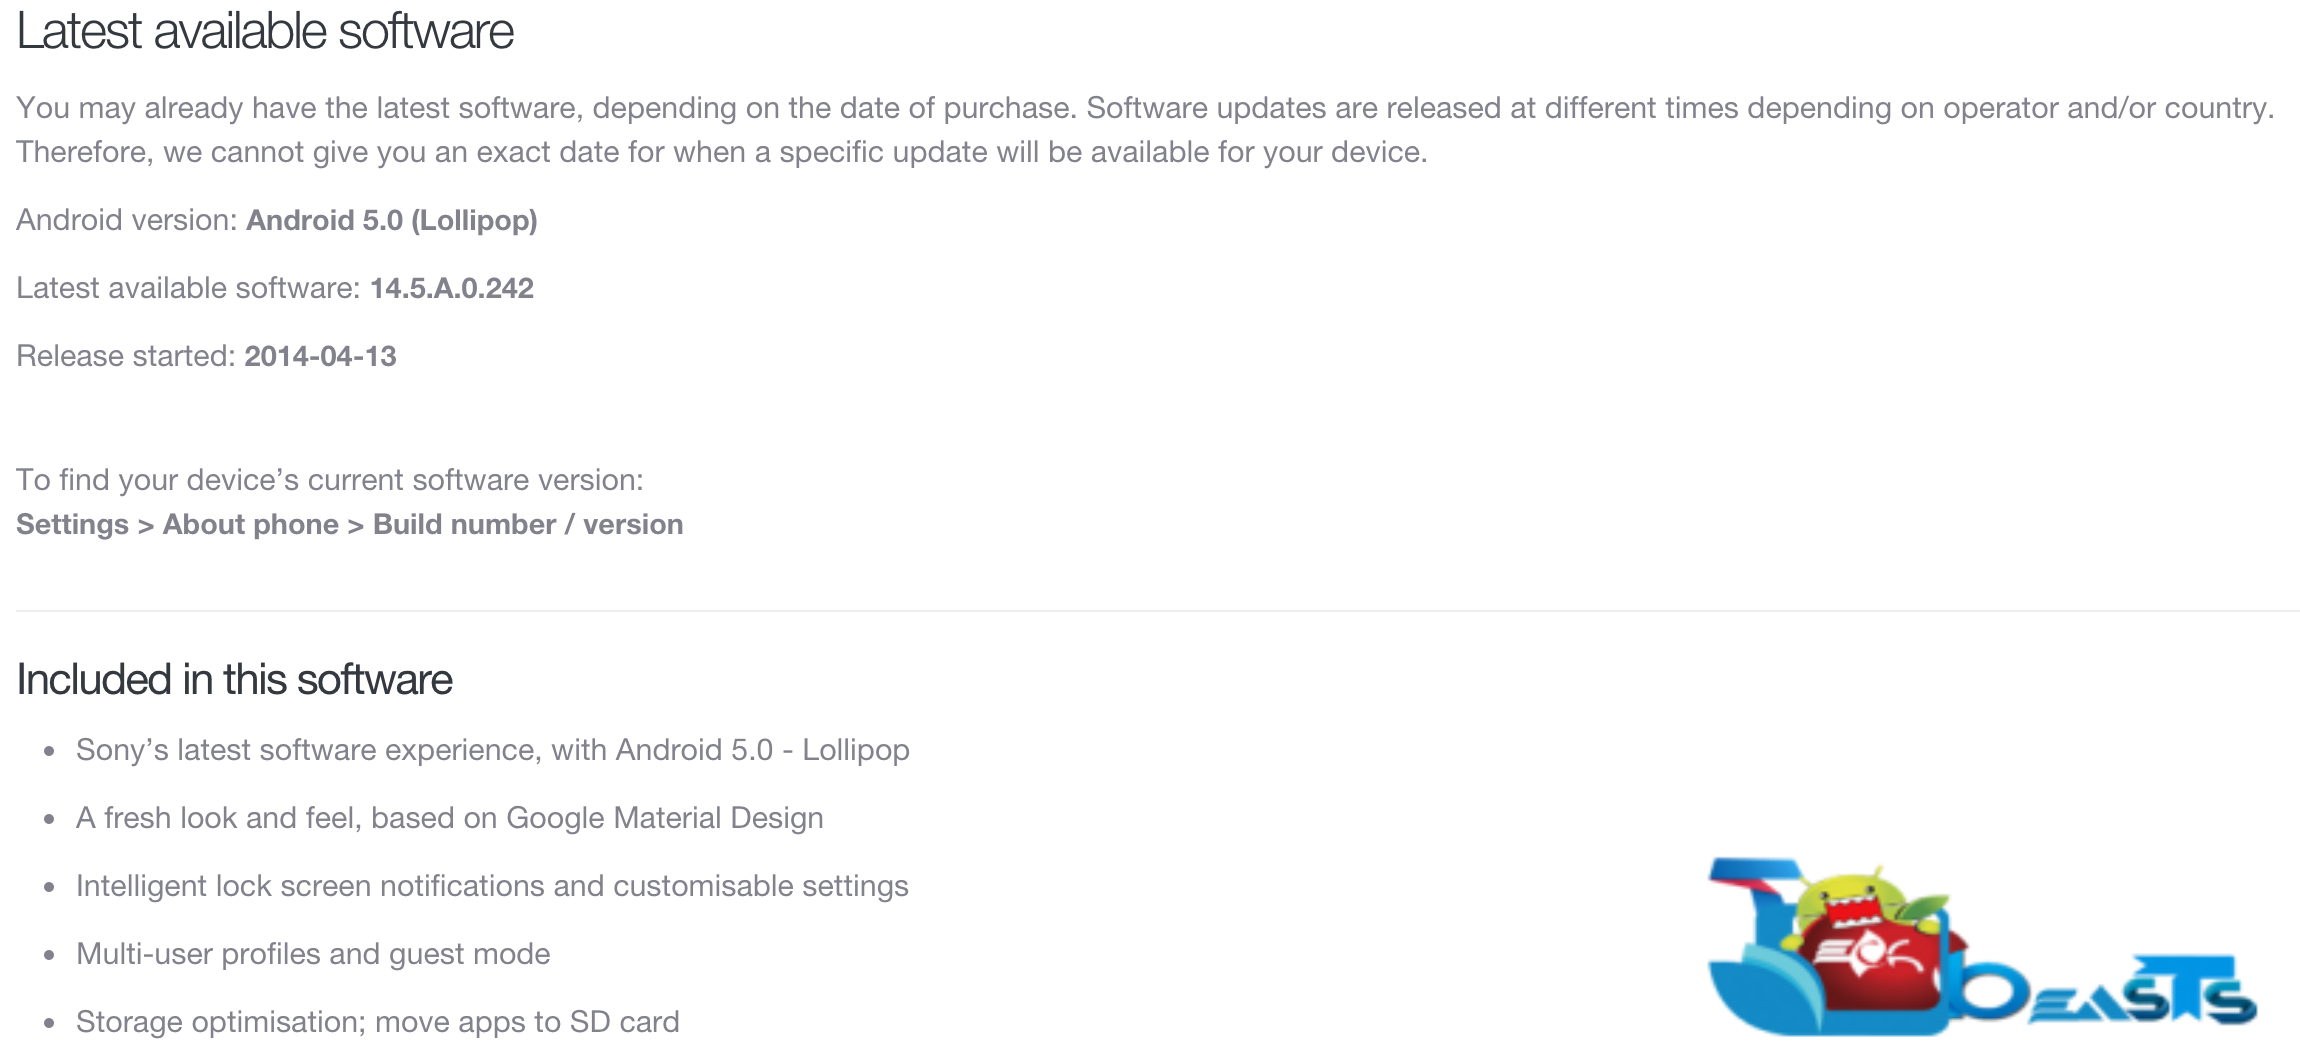
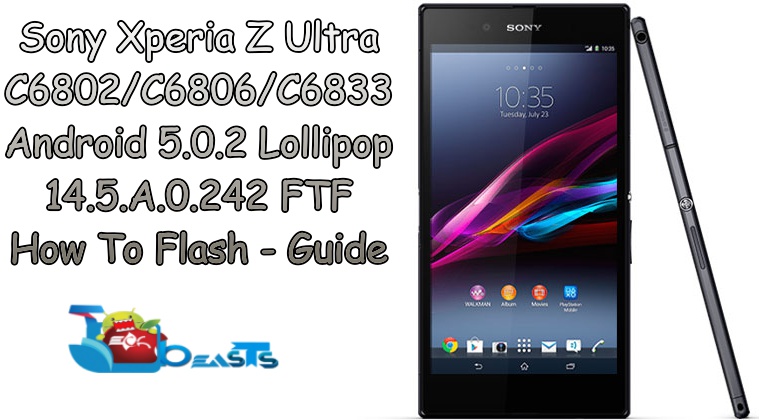
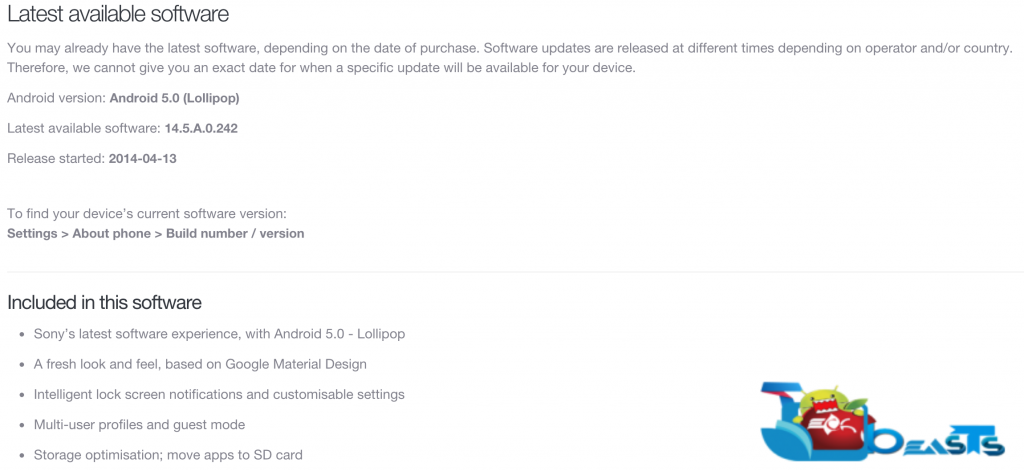
Sony Xperia Z Ultra happens to be another lucky device from the Xperia Z family to receive Android 5.0.2 Lollipop. The update started rolling out just yesterday alongside the Xperia Z1 and Xperia Z1 Compact. The changes include new UI with a new look and feel according to Google’s Material Design UI. New intelligent notifications on the lock screen have made their way to this device as well. There are multi-user and guest modes in this update. Users can now move apps to SD card as well. Performance and battery life of the device have been enhanced as well. The update for Xperia Z Ultra carries the build number 14.5.A.0.242 and has as mentioned, this is based on Android 5.0.2 Lollipop.

The update is on the way to several regions through OTA and through Sony PC Companion. If you haven’t received this update yet, it might take a little while for Sony to push it towards you. Some Android enthusiasts may want to get hands on this latest and greatest version of Android before Sony cooks it up for their region, in this case the only way to get this update keeping everything official is to use Sony Flashtool and flash the latest Android 5.0.2 FTF. Don’t know how? Well, that’s what we are here for. As you go ahead in the proceeding guide, you will find a comprehensive method to update your Xperia Z Ultra C6802, C6806 & C6833 to official Android 5.0.2 Lollipop 14.5.A.0.242 firmware.


Here are some quick early preparations to make sure that everything goes safe and sound.

Early Preparations:

1. This is only for Sony Xperia Z Ultra C6802, C6806 & C6833

This ROM is only for the device mentioned above. Make sure that your model number matches the one listed above. To do so, go to Settings > About Device on your device and see your model number. Flashing this firmware on any other device will result in bricking it so make sure that you meet this requirement first of all.

2. Battery should be charged at least over 60%.

Make sure that your battery is charged enough to complete the flashing process. In case your battery is low and your device goes dead during the flashing process, you may end up soft bricking your device as it won’t complete the flashing process.

3. Backup everything!

Just to be on the safe side, you may consider backing up each and everything from your Android device. This is highly recommended so that in case anything goes wrong, you still have the access to all of your data and you can restore it immediately. You may backup everything as listed below.

  • Backup SMS Messages
  • Backup Call Logs
  • Backup Contacts
  • Backup Media – Copy your files manually to your PC or Laptop.
  • Titanium Backup – If already rooted, use Titanium Backup to backup all of your apps, system data and other important content. If you haven’t rooted your device previously, skip this step.
  • Backup Nandroid – If CWM  or TWRP installed previously, otherwise skip this step and perform this at the end of flashing.

4. Enable USB Debugging Mode on your device.

Enable USB debugging mode on your device. To do so, tap settings>developer options>USB debugging. If you can’t find developer options in settings, then tap settings > about device and tap “Build Number” for 7 times and you’ll get em’ activated under settings.

5. Install and setup Sony Flashtool.

You must have installed Sony Flashtool. Find the full guide here.

After installing Sony Flashtool, open the Flashtool folder from the drive where you installed it. Now open Flashtool>Drivers>Flashtool-drivers.exe and install the Flashtool, Fastboot & Xperia Z Ultra drivers from the list. [Important]

6. Use OEM data cable to establish connection.

Make sure that you use the phone’s original data cable to establish connection between your phone and the PC. Using a different data cable might result in interrupting the firmware installation.

Xperia Z Ultra LollipopHow To Update Sony Xperia Z Ultra C6802, C6806, C6833 To Official Android 5.0.2 14.5.A.0.242 Lollipop  Firmware

Before moving forward, please make sure that you’ve read the pre requisites and ensure that you are set to go ahead.

  1. Download the latest firmware Android 5.0.2 Lollipop 14.5.A.0.242 FTF file.
    1. For Xperia Z Ultra C6802 [Generic/Unbranded. Link 1 | Create your own FTF using this guide.
    2. For Xperia Z Ultra C6806[Generic/Unbranded] Link 1  | You can also create your own FTF using this guide.
    3. For Xperia Z Ultra C6833 [Generic/Unbranded] Link 1  | You can also create your own FTF using this guide.
  2. Copy the file and paste in Flashtool>Firmwares folder.
  3. Open Flashtool.exe now.
  4. Hit the small lightening button on the top left corner and select Flashmode.
  5. Select the FTF firmware file that you placed in the Firmware folder.
  6. From the right side, select what do you want to wipe. Data, cache and apps log, all wipes are recommended, perhaps you may select if you don’t want.
  7. Click on OK, and it will start preparing the firmware for flashing. This may take a little while to load.
  8. As soon as the firmware is loaded, it will prompt you to attach the phone by turning it off and keeping the back key press.
  9. For Xperia Z Ultra Volume Down key will do the job of back key, just turn off your phone, keep the Volume Down key pressed and plug in the data cable.
  10. As soon as the phone is detected in Flashmode, the firmware will start flashing, Do not leave the Volume Down key until the process is complete.
  11. As soon as you see “Flashing ended or Finished Flashing” leave the Volume Down key, plug the cable out and reboot.
  12. That’s All! Congrats! You’ve installed latest Android 5.0.2 Lollipop on your Xperia Z Ultra. Enjoy

In case you got any queries or face any problems regarding this guide, please feel free to stop by the comment box below and let us know. We will get back to you as soon as possible. Thanks all!

Next: Root Xperia Z Ultra C6802,C6833,C6806 14.5.A.0.242 5.0.2 Lollipop Firmware

Update Sony Xperia Z1 C6902/C6903 To Official Android Lollipop 14.5.A.0.242 Firmware

41
Update Sony Xperia Z1 C6902/C6903 To Official Android Lollipop 14.5.A.0.242 Firmware

Good day for Xperia Z1 owners. The long awaited and the best Android update for Xperia Z1 has finally landed today. Sony started rolling out Android 5.0.2 Lollipop for Xperia Z1, Z1 Compact & Z Ultra today. Apart from the Android 5.0.2 Lollipop base, this update sports changes in the UI. Sony has kept the changes minimal and complied with the Material Design UI. Other new features include Multi-user profile and guest mode. New notifications cards on the lock screen are there and users can move apps to SD card now. Android 5.0.2 Lollipop for Xperia Z1 carries the build number 14.5.A.0.242. The update is available for C6902 and C6903 variants of this device.

As expected, this update is rolling out slowly in different regions. If it hasn’t already reached your region, it may take a while for Sony to push it towards you. If you’re an Android power user and its getting hard for you to wait for this update to arrive through Sony PC companion or through OTA, you may want to use a method that can help you to taste the Lollipop straight away. We’ve found such a method and in the following post we will be explaining it to help you update your beloved Xperia Z2 C6902 and C6903 to Android 5.0.2 Lollipop 14.5.A.0.242 firmware using Sony Flashtool. Let’s go through some pre-installation instructions and get your device a Lollipop now.

Early Preparations:

1. This is only for Sony Xperia Z1 C6902, C6903.

This ROM is only for the device mentioned above. Make sure that your model number matches the one listed above. To do so, go to Settings > About Device on your device and see your model number. Flashing this firmware on any other device will result in bricking it so make sure that you meet this requirement first of all.

2. Battery should be charged at least over 60%.

Make sure that your battery is charged enough to complete the flashing process. In case your battery is low and your device goes dead during the flashing process, you may end up soft bricking your device as it won’t complete the flashing process.

3. Backup everything!

Just to be on the safe side, you may consider backing up each and everything from your Android device. This is highly recommended so that in case anything goes wrong, you still have the access to all of your data and you can restore it immediately. You may backup everything as listed below.

  • Backup SMS Messages
  • Backup Call Logs
  • Backup Contacts
  • Backup Media – Copy your files manually to your PC or Laptop.
  • Titanium Backup – If already rooted, use Titanium Backup to backup all of your apps, system data and other important content. If you haven’t rooted your device previously, skip this step.
  • Backup Nandroid – If CWM  or TWRP installed previously, otherwise skip this step and perform this at the end of flashing.

4. Enable USB Debugging Mode on your device.

Enable USB debugging mode on your device. To do so, tap settings>developer options>USB debugging. If you can’t find developer options in settings, then tap settings > about device and tap “Build Number” for 7 times and you’ll get em’ activated under settings.

5. Install and setup Sony Flashtool.

You must have installed Sony Flashtool. Find the full guide here.

After installing Sony Flashtool, open the Flashtool folder from the drive where you installed it. Now open Flashtool>Drivers>Flashtool-drivers.exe and install the Flashtool, Fastboot & Xperia Z1 drivers from the list. [Important]

6. Use OEM data cable to establish connection.

Make sure that you use the phone’s original data cable to establish connection between your phone and the PC. Using a different data cable might result in interrupting the firmware installation.


xperia-Z1-hero-white-1240x840-f9b9916d16a90faba4e6e2fc3de5e289


How To Update Sony Xperia Z1 To Official Android 5.0.2 14.5.A.0.242 Lollipop  Firmware
Before moving forward, please make sure that you’ve read the pre requisites and ensure that you are set to go ahead.

  1. Download the latest firmware Android 5.0.2 Lollipop 14.5.A.0.242 FTF file.
    1. For Xperia Z1 C6902 [Generic/Unbranded. Link 1 | Link 2 | Link 3 Create your own FTF using this guide.
    2. For Xperia Z1 C6903[Generic/Unbranded] Link 1  |  Link 2 | You can also create your own FTF using this guide.
  2. Copy the file and paste in Flashtool>Firmwares folder.
  3. Open Flashtool.exe now.
  4. Hit the small lightening button on the top left corner and select Flashmode.
  5. Select the FTF firmware file that you placed in the Firmware folder.
  6. From the right side, select what do you want to wipe. Data, cache and apps log, all wipes are recommended, perhaps you may select if you don’t want.
  7. Click on OK, and it will start preparing the firmware for flashing. This may take a little while to load.
  8. As soon as the firmware is loaded, it will prompt you to attach the phone by turning it off and keeping the back key press.
  9. For Xperia Z1 Volume Down key will do the job of back key, just turn off your phone, keep the Volume Down key pressed and plug in the data cable.
  10. As soon as the phone is detected in Flashmode, the firmware will start flashing, Do not leave the Volume Down key until the process is complete.
  11. As soon as you see “Flashing ended or Finished Flashing” leave the Volume Down key, plug the cable out and reboot.
  12. That’s All! Congrats! You’ve installed latest Android 5.0.2 Lollipop on your Xperia Z1. Enjoy

In case you got any queries or face any problems regarding this guide, please feel free to stop by the comment box below and let us know. We will get back to you as soon as possible. Thanks all!

Next: Root Xperia Z1 C6902/C6903 14.5.A.0.242 5.0.2 Lollipop With Dual Recovery

Install TWRP Recovery on Samsung Galaxy S6 (zeroflte)

Install TWRP Recovery on Samsung Galaxy S6 (zeroflte)

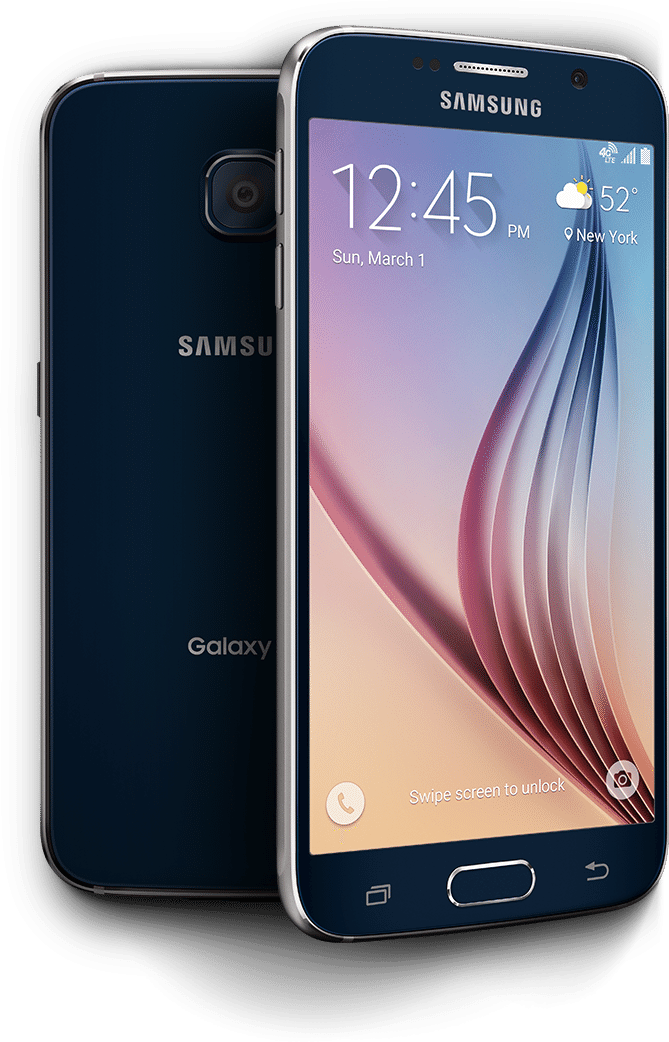
Well its about time but as usual, the very first to arrive on the battlefield is the TWRP Recovery for another flagship and this time the device is Samsung Galaxy S6, since Galaxy S6 and S6 Edge are the latest flagship from Samsung. In past we have also seen alot of flagship device receiving the TWRP recovery shortly after their release and this time it happened again, however unlike most of the other devices, Samsung has more than one way to Install this recovery on the device, every method is easy and free of any danger, but the preferred one is to install it from TWRP manager itself, so in case of any failure or mishap, everything can be reset back to normal, as your device was running before the installation.

However, the preferred method requires you to root your device, which in simple words, most of us haven’t done it yet, so we move on to the second one as recommended, since most of us uses the Odin to flash different stuff on it, why not use the same method to flash the TWRP recovery on it too, or if you have already installed any beta or previous version, just flash the new version within the old one and all is good to go. In this article, we will show you How to Install TWRP Recovery on Samsung Galaxy S6 (zeroflte), without further ado, let us continue.

Install TWRP Recovery on Samsung Galaxy S6 (zeroflte)

Early Preparations:

Downloads Required:

TWRP Recovery: Link

Odin Method: (Recommended for Non-rooted)

  1. Download and extract Odin3 v3.09.
  2. Download and Install Samsung USB drivers .

Installation:

  1. Wipe your device completely in order to attain a neat installation.
  2. Open Odin3.exe.
  3. Put your Galaxy S6 in download mode. To do so, turn it off and wait for 10 seconds. Turn it on by pressing and holding Volume Down + Home Button + Power Key simultaneously, You should see a warning, press Volume Up to continue. In case this method doesn’t work for you, try one from this guide.
  4. Connect your device to your PC.
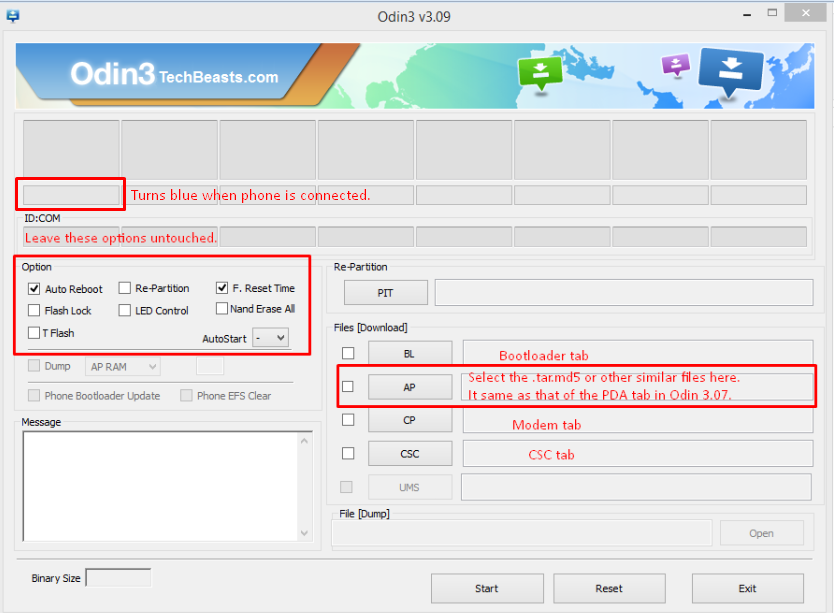
  5. As soon as Odin detects your phone, the ID:COM box should turn blue.  Make sure that you’ve installed Samsung USB drivers before connecting.
  6. For Odin 3.09 hit the AP tab. Select the firmware.tar.md5 or firmware.tar, that you downloaded and extracted above.
  7. If you’re using Odin 3.07, you will select “PDA” tab instead of the AP tab, rest of the options remain untouched.
  8. Make sure that the options selected in your Odin are exactly as shown in the pic.Odin-3.09-explained.-2
  9. Hit start and wait till the firmware  flashing is complete, as soon as your device restarts, remove it from PC.
  10. Wait for your device to reboot, as soon as it reboots check out the new firmware!
  11. That’s all!

TWRP App Method: (recommended for Rooted)

  1. Download and Install the App: Link
  2. Open it.
  3. Tap on Install TWRP.
  4. Select the device (zeroflte) from the list.
  5. Tap on Install Recovery.
  6. The File will be downloaded and installed automatically.
  7. Reboot the device and Enjoy!

List Of Samsung Galaxy S6 & S6 Edge Model Numbers

3
List Of Samsung Galaxy S6 & S6 Edge Model Numbers

Samsung Galaxy S6 & S6 Edge are making their way to the markets all around the world now. As usual, Samsung has rolled out both these devices under the umbrella of so many model numbers. You may get confused which model number will suite you the best and which one to get. To over come this confusion, we have compiled up a list of all Galaxy S6 & Galaxy S6 Edge model numbers and listed the regions in which these devices will be available. Let’s go ahead and learn about the devices a little bit more.

Samsung Galaxy S6 Model Numbers List

 Samsung-Galaxy-S6-official-images (7)

Samsung Galaxy S6 Edge Model Numbers List

Device NameModel NumberRegionConnectivity
Galaxy S6SM-G9200China (Hong Kong)SIM1:TDD-LTE+FDD-LTE+WCDMA+TD-SCDMA+GSM;SIM2:GSM
Galaxy S6SM-G920FGlobalFDD-LTE+WCDMA+GSM
Galaxy S6SM-G920TT-MobileFDD-LTE+WCDMA+GSM
Galaxy S6SM-G920SKorea SKTFDD-LTE+WCDMA+CDMA+GSM
Galaxy S6SM-G920AAt&tFDD-LTE+WCDMA+GSM
Galaxy S6SM-G920PSprintFDD-LTE+WCDMA+GSM
Galaxy S6SM-G920KKorea KT+FDD-LTE+WCDMA+GSM
Galaxy S6SM-G920lLATAM, Singapore, India, AustraliaFDD-LTE+WCDMA+GSM
Galaxy S6SM-G9209ChinaSIM1:TDD-LTE+FDD-LTE+CDMA;SIM2:GSM;Roaming:WCDMA+GSM
Galaxy S6SM-G9208ChinaSIM1:TDD-LTE+TD-SCDMA+GSM;SIM2:GSM;Roaming:FDD-LTE+WCDMA
Galaxy S6SM-G920R4USA US CellularFDD-LTE+WCDMA+GSM}
Galaxy S6SM-G920W8CanadaFDD-LTE+WCDMA+GSM
Galaxy S6SM-G920VVerizonFDD-LTE+WCDMA+CDMA+GSM
Galaxy S6SM-G920FDPakistan, UAE, PhillipinesSIM1:FDD-LTE+WCDMA+GSM;SIM2:GSM

Samsung-Galaxy-S6-edge-official-images (27)

Device NameModel NumberRegionConnectivity
Galaxy S6 EdgeSM-G9250China (Hong Kong)SIM1:TDD-LTE+FDD-LTE+WCDMA+TD-SCDMA+GSM;SIM2:GSM
Galaxy S6 EdgeSM-G925FGlobalFDD-LTE+WCDMA+GSM
Galaxy S6 EdgeSM-G925TT-MobileFDD-LTE+WCDMA+GSM
Galaxy S6 EdgeSM-G925SKorea SKTFDD-LTE+WCDMA+CDMA+GSM
Galaxy S6 EdgeSM-G925PSprintFDD-LTE+WCDMA+GSM
Galaxy S6 EdgeSM-G925AAt&tFDD-LTE+WCDMA+GSM
Galaxy S6 EdgeSM-G925KKorea KT+FDD-LTE+WCDMA+GSM
Galaxy S6 EdgeSM-G925lLATAM, Singapore, India, AustraliaFDD-LTE+WCDMA+GSM
Galaxy S6 EdgeSM-G9259ChinaSIM1:TDD-LTE+FDD-LTE+CDMA;SIM2:GSM;Roaming:WCDMA+GSM
Galaxy S6 EdgeSM-G9208ChinaSIM1:TDD-LTE+TD-SCDMA+GSM;SIM2:GSM;Roaming:FDD-LTE+WCDMA
Galaxy S6 EdgeSM-G925R4USA US CellularFDD-LTE+WCDMA+GSM}
Galaxy S6 EdgeSM-G925W8CanadaFDD-LTE+WCDMA+GSM
Galaxy S6 EdgeSM-G925VVerizonFDD-LTE+WCDMA+CDMA+GSM
Galaxy S6 EdgeSM-G925FQTurkeySIM1:FDD-LTE+WCDMA+GSM;SIM2:GSM

All these variants of the Galaxy S6 and S6 Edge sport same specifications. On the front we have a 5.1-inche QHD display accompanied by a 5 MP shooter. At the back we have a 16 MP shooter. Under the hood there’s an Exynos 7420 64-bit architecture CPU powering up this device, and a RAM of 3 GBs is fixed as well. Galaxy S6 & S6 Edge both have internal storages of 32/64/128 GB while there’s no external SD card slot. These devices have 2550 mAh batteries placed inside. Both these devices are all metal and pretty beautiful.

We have a That’s all we know about these devices for now. In case you find any of the info listed above wrong, make sure to inform us through the comment box below. Thank you all.

How To Take Screenshot On Samsung Galaxy S6

0
How To Take Screenshot On Samsung Galaxy S6

Samsung Galaxy S6 has started finding the place in user’s pockets now. The device is available almost all around the world now. Once you get your hands on the device, you may want to capture various screens for any kind of use. Just in case you don’t know how to capture / take screenshots on your all new Galaxy S6, the following tutorial is going to help you.

How To Take Screenshot On Samsung Galaxy S6

  1. Open the screen you want to capture.
  2. Press Power + Home button simultaneously and it will capture the screen.
  3. If the first method doesn’t work for you, then go to settings > motions & gesture > activate palm swipe to capture.
  4. Swipe your palm over your desired screen now to capture it.
  5. Find your capture screenshots in Gallery > Screenshots.
  6. That’s all.


Samsung-Galaxy-S6-official-images-311125996_10205754066183539_751370485_o

How To Take Screenshot On Samsung Galaxy S6 Edge

0
How To Take Screenshot On Samsung Galaxy S6 Edge

Samsung Galaxy S6 Edge is one of its-own-kind and one of the most beautiful device of the present time. Samsung took the Edge concept to a whole new level with this device and as of the writing this post, Galaxy S6 Edge has already started hitting the shelves in markets all around the world. Since the device is pretty unique, it is seeing a great response and tons of users are getting hands on it. If you happen to be a lucky Galaxy S6 Edge owner, you may want to capture some useful and important screens on your Galaxy S6 Edge. Just in case you don’t know how to capture the screenshots on your Galaxy S6 Edge, this tutorial may be of some help for you. Let’s learn it now.

How To Take Screenshot On Samsung Galaxy S6 Edge

  1. Open the screen you want to capture.
  2. Press Power + Home button simultaneously and it will capture the screen.
  3. If the first method doesn’t work for you, then go to settings > motions & gesture > activate palm swipe to capture.
  4. Swipe your palm over your desired screen from right to left now to capture it.
  5. Find your capture screenshots in Gallery > Screenshots.
  6. That’s all.

Samsung-Galaxy-S6-edge-official-images-20 11125996_10205754066183539_751370485_o

How To Install Official Android Lollipop On At&t Galaxy S5 G900A & Keep Root

How To Install Official Android Lollipop On At&t Galaxy S5 G900A & Keep Root

AT&T Galaxy S5 has joined the Lollipop squad. Samsung started rolling out the OTA based on Android 5.0 Lollipop for this device. As expected, it carries some major changes. The most prominent changes are in the UI department. Samsung TouchWiz has been revamped according to Google’s new Material Design UI. New UI is pretty smooth and eye-soothing, a flat design has been adopted by Google for the elements on the screen. New notifications on the lock screen, guest modes, priority modes and a lot more is there to check out which makes this upgrade worth installing.

It took quite a while for this update to roll out for At&t Galaxy S5 SM-G900A. When the At&t Galaxy S5, it was quite impossible for the developers to come up with a method to root this device and get a workaround for its locked bootloader. After months of hardwork, GeoHot came up with his TowelRoot application that rooted plethora of devices alongside the At&t Galaxy S5. This just explains how hard it may get for carrier branded device users and specifically At&t device users to get beyond the boundaries. The exploit worked on Android KitKat only and many of the Android power users have been enjoying the sweetness of KitKat as well, but they sure would love to try something new and different that is available in the Lollipop update. But before you make a move towards Lollipop, you would tend to make sure if your device’s life is going to be the same as it was on Lollipop. The answer is No. If you simply update your device to Android 5.0 Lollipop straight away, you will lose root access and you won’t be able to root the firmware easily after updating. You can either update to pure stock OTA update and wait for a root method to come up, or you can use a different approach to update your device in such a way that you do not lose the existing root of your device, or through some means you can flash a pre-rooted firmware on your At&t Galaxy S5.

The good news is, all of the approaches listed above are possible. In the on-going post we will be going through three different methods that will help you to install completely pure and stock Android 5.0 Lollipop through stock recovery of your device, a pre-rooted Lollipop firmware using Chainfire’s all new FlashFire and restore a pre-rooted firmware using Safestrap Recovery.

  1. Let’s go through some quick early preparations and then begin updating the device.
  2. This method is only for At&t Galaxy S5  G900A running Android 4.4.2 or 4.4.4 KitKat. Do not use this method if your device is already on Android 5.0 Lollipop. Check your device’s software version and model number in Settings > System/ General / More >  About Device.
  3. Make sure that your device’s battery is charged at least over 60%. This is important to avoid any power issues during the installation process.
  4. Make sure that you’ve already backed all of your important contacts, call logs, sms messages. Also backup your important media content.
  5. Do not forget to backup EFS of your Galaxy S5. We also recommend backing up Nandroid if you’ve flashed Safestrap recovery on your device. [Only if you wanted to install pre-rooted firmware, otherwise skip this step.]
  6. Non of these methods will void the warranty of your phone or trip the Knox counter. Follow the instructions carefully, and make sure that you do everything on your own responsibility. In case a mishap occurs, we or the device manufacturers may not be held responsible.

Grievous-BETA-ROMHow To Update At&t Galaxy S5 To Stock Android 5.0 Lollipop [No Root – Pure Stock]

  1. Make sure that you followed all the instructions listed above.
  2. For this method, your device must be running on Android  4.4.4 KitKat.
  3. Download Android 5.0 Lollipop Stock OTA.zip file and copy it to your phone’s external SD card.
  4. Now boot your At&t Galaxy S5 into recovery mode. To do so, turn off your device completely. Now turn it on by pressing and holding Volume Up + Home Button + Power Key. As soon as your device boots up, release the keys. You should be able to see the recovery mode now.
  5. Using the Volume Keys, navigate to “apply update from external storage” and press Power Key to make selection.
  6. Now select the Android 5.0 Lollipop OTA.zip file and then select “Yes” to proceed with the installation.
  7. Now wait for a few minutes till the update installation comes to an end.
  8. Once it ends, reboot your device. First reboot may take up to 10 minutes, hold on tighter in the meanwhile.
  9. That’s all! Your device is running on Android 5.0 Lollipop now 🙂 Enjoy!

How To Update At&t Galaxy S5 To Pre-Rooted Stock Android 5.0 Lollipop Using FlashFire

Your device must be rooted for this process. Make sure that your device is rooted. You can root it using TowelRoot.

  1. InstallFlashFire app, you must follow these steps to installFlashFire.
    1. Join Android-FlashFire community on Google+.
    2. Now open FlashFire Google Play Store link and hit “Become a beta tester”.
    3. It will take you to the installation page now, you can install it easily.
    4. You may install it using the FlashFire APK if you’re having difficulties with the procedure explained above.
  2. Now download the firmware file G900A_OC4_Stock_Rooted_ROM_wOA1_BL.
  3. Copy the downloaded .zip file to your phone’s SD card now.
  4. Now open the FlashFire App that you just installed on your device.
  5. Tap “Agree” to terms and conditions and allow the application for root privileges.
  6. Tap the “+” button twice in the lower right corner of FlashFire in order to bring up the actions menu.
  7. Now tap “Flash OTA or Zip” and select the G900A_OC4_Stock_Rooted_ROM_wOA1_BL.zip file. FlashFire will now scan the file.
  8. In the next screen, leave the Auto-mount option un-checked and press the tick mark on the top-right corner.
  9. Do not touch anything else, follow these instructions to the letter.
  10. Once you’re done with all this, you’re good to go now. Tap the “lightening” button on the lower-left corner now.
  11. That’s all. Sit back and wait for the application to do the job. It will take around 10-15 minutes for your device to reboot and it will be running on rooted Android 5.0 Lollipop.

How To Update At&t Galaxy S5 To Pre-Rooted Stock Android 5.0 Lollipop By Restoring Backup In SafeStrap

  • Your device must be rooted for this process. Make sure that your device is rooted. You can root it using TowelRoot. Also install Safestrap if you want to install pre-rooted firmware.
  • Enable USB debugging mode on your At&t Galaxy S5.
  • Download Odin3 on your PC.
  • Use stock data cable to establish connection between your device and your PC.

Install Instructions:

  1. Now download the firmware file, G900A_OC4_Stock_Rooted_Backup.rar and extract it.
  2. Also, download the partitions file: G900A_OC4_Stock_Partitions_wOA1_BL.tar.md5
  3. Now copy the extracted files the Backup folder on your phone’s SD card. This is the Nandroid Backup folder, that you created using Safestrap recovery, the path should be as “ext-sdcard/TWRP/BACKUPS/abc”. Just in case you couldn’t find any such folder in the external storage, you can simply boot into SafeStrap recovery, tap the Backup option and create a backup. This will create the folder in your phone’s SD card and you can copy the extracted file after this.
  4. Now boot into SafeStrap recovery once again and tap “Wipe”. Wipe everything except your external SD card.
  5. Now go back to the main menu in SafeStrap recovery and tap the “Restore” option. Restore the G900A_OC4_Stock_Rooted_Backup file.
  6. Once this file is flashed, tap the “Reboot > Download” mode option in the SafeStrap recovery. Your device should be in the download mode now.
  7. Now open Odin3 on your PC.
  8. Connect your At&t Galaxy S5 to your PC. Your phone should be in the download mode already. Odin3 will turn blue once it has detected your device.
  9. Now click on the “AP” tab in Odin3, if you’re using an older version of Odin, you will click on the “Modem” tab. Make sure that all options except F.Reset Time are unticked in your Odin3.
  10. Select the G900A_OC4_Stock_Parititions_wOA1_BL.tar.md5 file.
  11. Click on the “Start” button now and sit back while it flashes the file.
  12. Once flashed, disconnect your device and reboot it manually now.
  13. First boot may take up to 10 minutes, once your device boots up completely, it will be running on Android 5.0 Lollipop.
  14. That’s all, Enjoy 🙂

That’s it. We hope that you found the methods easy. Just in case you get stuck with something, do not hesitate to catch us up through the comment box below. Thank you all.

Download OnePlus One Oxygen OS Stock Wallpapers

Download OnePlus One Oxygen OS Stock Wallpapers

OnePlus finally brought up the long awaited Oxygen OS, its very own exclusive ROM based on Android 5.0.2 Lollipop. Oxygen OS came up as a result of OnePlus’s ways parting away from CyangenMod, which was running previously on the OnePlus One and also happened to be the official firmware out of the box for this device. OnePlus has managed to keep the changes minimal in this new Oxygen OS to allow the features to have a feel of stock Android OS. Oxygen OS is pretty fast and smooth OS. Indeed a great job has been done by OnePlus as it brought up a completely new firmware in a very short span of time after the official roll out of Android 5.0.2 Lollipop.

To add a little more charm to the Oxygen OS, OnePlus has added some cool wallpapers. Some of the users would love to grab these wallpapers and put on their devices. We’ve found all the official/stock wallpapers of Oxygen OS by OnePlus One and listed right here for you. Just go ahead, pick up your favourite one and add some feel of Oxygen to your device.

OxygenOS-Logo-Forums-e1422871963777


You can also download all stock wallpapers in one file from here.

Update Xperia Z3 Compact D5803/D5833 To Official Android 5.0.2 Lollipop 23.1.A.0.726 Firmware

2
Update Xperia Z3 Compact D5803/D5833 To Official Android 5.0.2 Lollipop 23.1.A.0.726 Firmware

Android 5.0.2 Lollipop started rolling out for Xperia Z3 and Z3 Compact a few days back. It took too long for Sony to bring up this update for the Z series, and even then there were so many annoying bugs that made this an unworthy update. In the previous build, Sony missed the close all button in recent apps menu of the device, some performance issues were there as well. Recently, Sony started rolling out another update in which these issues seem to have come to an end. The close all button is back as well. Build number has been changed from 23.1A.0..690 to 23.1.A.0.726 for non-branded devices and for carrier branded devices build number is .728.

As usual, this update is also hitting different regions one by one. So, if you haven’t received it yet, it’s going to take a while. If you can’t wait for this update to hit your device via OTA or through Sony PC Companion, you may want to find a workaround to update to this latest firmware through a different method, and that’s what exactly we are here for. In the on-going guide we are going to flash this latest Android 5.0.2 Lollipop based on build number 23.1.A.0.726 on our beloved Sony Xperia Z3 Compact D5803 and D5833. Let’s go through some early preparations and flash the firmware right away.

Here are the new firmware details:

  • Sony’s latest software experience, with Android 5.0 – Lollipop
  • A fresh look and feel, based on Google Material Design
  • Intelligent lock screen notifications and customisable settings
  • Multi-user profiles and guest mode
  • Storage optimisation; move apps to SD card


Early Preparations:

1. This is only for Sony Xperia Z3 Compact D5803 & D5833

This ROM is only for the device mentioned above. Make sure that your model number matches the one listed above. To do so, go to Settings > About Device on your device and see your model number. Flashing this firmware on any other device will result in bricking it so make sure that you meet this requirement first of all.

2. Battery should be charged at least over 60%.

Make sure that your battery is charged enough to complete the flashing process. In case your battery is low and your device goes dead during the flashing process, you may end up soft bricking your device as it won’t complete the flashing process.

3. Backup everything!

Just to be on the safe side, you may consider backing up each and everything from your Android device. This is highly recommended so that in case anything goes wrong, you still have the access to all of your data and you can restore it immediately. You may backup everything as listed below.

  • Backup SMS Messages
  • Backup Call Logs
  • Backup Contacts
  • Backup Media – Copy your files manually to your PC or Laptop.
  • Titanium Backup – If already rooted, use Titanium Backup to backup all of your apps, system data and other important content. If you haven’t rooted your device previously, skip this step.
  • Backup Nandroid – If CWM  or TWRP installed previously, otherwise skip this step and perform this at the end of flashing.

4. Enable USB Debugging Mode on your device.

Enable USB debugging mode on your device. To do so, tap settings>developer options>USB debugging. If you can’t find developer options in settings, then tap settings > about device and tap “Build Number” for 7 times and you’ll get em’ activated under settings.

5. Install and setup Sony Flashtool.

You must have installed Sony Flashtool. Find the full guide here.

After installing Sony Flashtool, open the Flashtool folder from the drive where you installed it. Now open Flashtool>Drivers>Flashtool-drivers.exe and install the Flashtool, Fastboot & Xperia Z3 Compact drivers from the list. If you do not find the Flashtool drivers in Flashmode, skip this step and install Sony PC Companion instead, for drivers support. [Important]

6. Use OEM data cable to establish connection.

Make sure that you use the phone’s original data cable to establish connection between your phone and the PC. Using a different data cable might result in interrupting the firmware installation.

xperia-z3-compact-mandarin-1240x840-6732d63f6eb7dfe080a35e4f4f04c920

How To Update Sony Xperia Z3 Compact To Official Android 5.0.2 Lollipop 23.1.A.0.726 Firmware

Before moving forward, please make sure that you’ve read the pre requisites and ensure that you are set to go ahead.

  1. Download the latest firmware Android 5.0.2 Lollipop 23.1.A.0.690 FTF file.
    1. For Xperia Z3 Compact D5803[Generic/Unbranded] Link 1 | You can also create your own FTF using this guide.
    2. For Xperia Z3 Compact D5833[Generic/Unbranded] Link 1 | You can also create your own FTF using this guide.
  2. Copy the file and paste in Flashtool>Firmwares folder.
  3. Open Flashtool.exe now.
  4. Hit the small lightening button on the top left corner and select Flashmode.
  5. Select the FTF firmware file that you placed in the Firmware folder.
  6. From the right side, select what do you want to wipe. Data, cache and apps log, all wipes are recommended, perhaps you may select if you don’t want.
  7. Click on OK, and it will start preparing the firmware for flashing. This may take a little while to load.
  8. As soon as the firmware is loaded, it will prompt you to attach the phone by turning it off and keeping the back key press.
  9. For Xperia Z3 Compact Volume Down key will do the job of back key, just turn off your phone, keep the Volume Down key pressed and plug in the data cable.
  10. As soon as the phone is detected in Flashmode, the firmware will start flashing, Do not leave the Volume Down key until the process is complete.
  11. As soon as you see “Flashing ended or Finished Flashing” leave the Volume Down key, plug the cable out and reboot.
  12. That’s All! Congrats! You’ve installed latest Android 5.0.2 Lollipop on your Xperia Z3 Compact. Enjoy

In case you got any queries or face any problems regarding this guide, please feel free to stop by the comment box below and let us know. We will get back to you as soon as possible. Thanks all!

Next: Root and Install CWM/TWRP on Xperia Z3 Compact D5803 23.1.A.0.726 Lollipop 5.0.2 Firmware