Home Blog Page 379

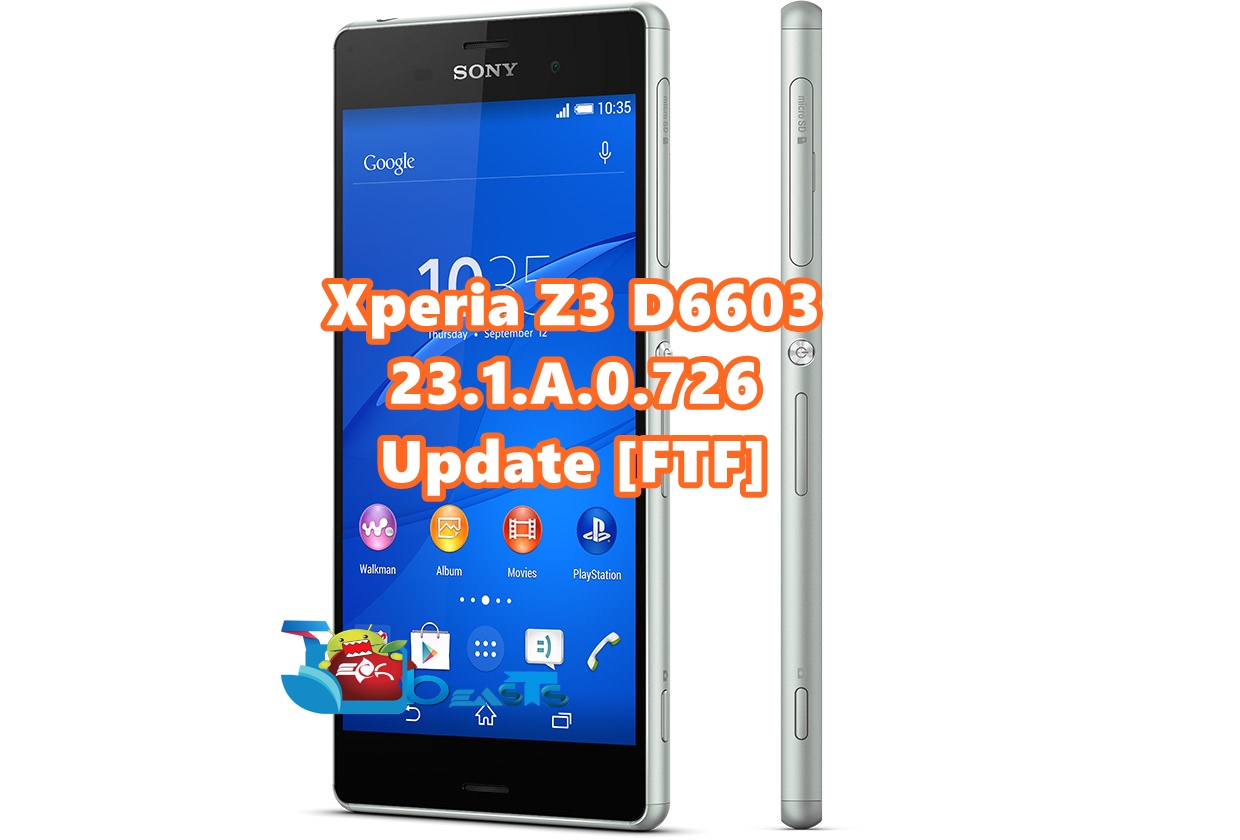
Update Xperia Z3 D6603 to 23.1.A.0.726 Android 5.0.2 Firmware FTF
0
Update Xperia Z3 D6603 to 23.1.A.0.726 Android 5.0.2 Firmware FTF

Sony Xperia Z3 received the Android 5.0.2 Lollipop update under .690 build number initially. Sony continues the tradition of releasing a buggy firmware for a new Android version first. Sony has reacted to the vows of its customers fast and released the new Android 5.0.2 Lollipop with build number 23.1.A.0.726 for Xperia Z3 D6603. Users experienced issues with battery and some FCs in the previous firmware which should be fixed in this firmware. The new firmware 23.1.A.0.726 for D6603 is rolling out and available for download.

The new firmware is not available for download over all countries yet. The rollout has begun but it always takes time before it receives all countries. Those who have updated their devices manually or those who have rooted their devices, must be looking for this guide. Those who have not installed the previous update can also use this guide to update their device manually. It should be made clear that although the installation method is manual but the firmware is official. It means that it has not special requirements like bootloader unlocking or root access. There are no risks involved in flashing the  23.1.A.0.726 ftf on Xperia Z3 D6603 as it does not void the warranty. The steps involved in the installation are given below. Make sure that you follow all the steps given below to install this firmware on your device.

Early Preparations:

1. This is only for Sony Xperia Z3 D6603

This ROM is only for the device mentioned above. Make sure that your model number matches the one listed above. To do so, go to Settings > About Device on your device and see your model number. Flashing this firmware on any other device will result in bricking it so make sure that you meet this requirement first of all.

2. Battery should be charged at least over 60%.

Make sure that your battery is charged enough to complete the flashing process. In case your battery is low and your device goes dead during the flashing process, you may end up soft bricking your device as it won’t complete the flashing process.

3. Backup everything!

Just to be on the safe side, you may consider backing up each and everything from your Android device. This is highly recommended so that in case anything goes wrong, you still have the access to all of your data and you can restore it immediately. You may backup everything as listed below.

4. Enable USB Debugging Mode on your device.

Enable USB debugging mode on your device. To do so, tap settings>developer options>USB debugging. If you can’t find developer options in settings, then tap settings > about device and tap “Build Number” for 7 times and you’ll get em’ activated under settings.

5. Install and setup Sony Flashtool.

You must have installed Sony Flashtool. Find the full guide here.After installing Sony Flashtool, open the Flashtool folder from the drive where you installed it.Now open Flashtool>Drivers>Flashtool-drivers.exe and install the Flashtool, Fastboot & Xperia Z3 drivers from the list. [Important]

6. Use OEM data cable to establish connection.

Make sure that you use the phone’s original data cable to establish connection between your phone and the PC. Using a different data cable might result in interrupting the firmware installation.

Install 23.1.A.0.726 FTF On Xperia Z3 D6603

 Before moving forward, please make sure that you’ve read the pre requisites and ensure that you are set to go ahead.

  1. Download the latest firmware Android 5.0.2 Lollipop 23.1.A.0.726 FTF file.
  2. Follow this link to get the ftf file for D6603 23.1.A.0.726 firmware.
  3. Copy the file and paste in Flashtool>Firmwares folder.
  4. Open Flashtool.exe now.
  5. Hit the small lightening button on the top left corner and select Flashmode.
  6. Select the FTF firmware file that you placed in the Firmware folder.
  7. From the right side, select what do you want to wipe. Data, cache and apps log, all wipes are recommended, perhaps you may select if you don’t want.
  8. Click on OK, and it will start preparing the firmware for flashing. This may take a little while to load.
  9. As soon as the firmware is loaded, it will prompt you to attach the phone by turning it off and keeping the back key press.
  10. For Xperia Z3, Volume Down key will do the job of back key, just turn off your phone, keep the Volume Down key pressed and plug in the data cable.
  11. As soon as the phone is detected in Flashmode, the firmware will start flashing, Do not leave the Volume Down key until the process is complete.
  12. As soon as you see “Flashing ended or Finished Flashing” leave the Volume Down key, plug the cable out and reboot.
  13. That’s All! Congrats! You’ve installed latest Android 5.0.2 Lollipop on your Xperia Z3 D6603. Enjoy

Got any questions? Ask me in the comments below

Next: Root Xperia Z3 D6603 23.1.A.0.726 5.0.2 Firmware Plus Dual Recovery

Update Xperia C3 D2533/D2502 To Official Android 5.0.2 Lollipop 19.3.A.0.470 Firmware

7
Update Xperia C3 D2533/D2502 To Official Android 5.0.2 Lollipop 19.3.A.0.470 Firmware

Sony’s Selfie Shooter, the Xperia C3 has started receiving Android 5.0 Lollipop update today. The new update brings a number of changes to the device. The prominent and notable changes include Google’s all new Material Design based UI, although Sony has kept the change very minimal, but the Material Design makes the device much more better and cool now. New multi-user and guest modes have arrived in this update and new notification cards on lock screen have made their way to this device as well. By updating a device like Xperia C3 to Android 5.0 Lollipop, Sony sure has done a great job.Screenshot at Apr 23 22-51-14

The new update carries the build number 19.3.A.0.470 and it’s based on Android 5.0.2 Lollipop. The update has started hitting different regions today and will take a while to hit your region if it hasn’t so far. If you’re an Android enthusiast who can’t wait for this update to arrive through OTA or through Sony PC Companion, you may want to flash it right away using some other method. Before you start looking for a workaround here and there, we have already done it for you. In the following guide, we are going to install this latest official Android 5.0.2 Lollipop with the build number 19.3.A.0.470 on our beloved Sony Xperia C3 D2533. The update isn’t available for D2502 at the time of writing this post, but as soon as it arrives, the same method will help you to update the dual SIM variant D2502 to Android 5.0.2 Lollipop.  Let’s go through the guide now and update Xperia C3 D2533 for now.


Early Preparations:

1. This is only for Sony Xperia C3 D2533/D2502

This ROM is only for the device mentioned above. Make sure that your model number matches the one listed above. To do so, go to Settings > About Device on your device and see your model number. Flashing this firmware on any other device will result in bricking it so make sure that you meet this requirement first of all.

2. Battery should be charged at least over 60%.

Make sure that your battery is charged enough to complete the flashing process. In case your battery is low and your device goes dead during the flashing process, you may end up soft bricking your device as it won’t complete the flashing process.

3. Backup everything!

Just to be on the safe side, you may consider backing up each and everything from your Android device. This is highly recommended so that in case anything goes wrong, you still have the access to all of your data and you can restore it immediately. You may backup everything as listed below.

  • Backup SMS Messages
  • Backup Call Logs
  • Backup Contacts
  • Backup Media – Copy your files manually to your PC or Laptop.
  • Titanium Backup – If already rooted, use Titanium Backup to backup all of your apps, system data and other important content. If you haven’t rooted your device previously, skip this step.
  • Backup Nandroid – If CWM  or TWRP installed previously, otherwise skip this step and perform this at the end of flashing.

4. Enable USB Debugging Mode on your device.

Enable USB debugging mode on your device. To do so, tap settings>developer options>USB debugging. If you can’t find developer options in settings, then tap settings > about device and tap “Build Number” for 7 times and you’ll get em’ activated under settings.

5. Install and setup Sony Flashtool.

You must have installed Sony Flashtool. Find the full guide here.

After installing Sony Flashtool, open the Flashtool folder from the drive where you installed it. Now open Flashtool>Drivers>Flashtool-drivers.exe and install the Flashtool, Fastboot & Xperia C3 drivers from the list. [Important]

6. Use OEM data cable to establish connection.

Make sure that you use the phone’s original data cable to establish connection between your phone and the PC. Using a different data cable might result in interrupting the firmware installation.

xperia-C3-white-1240x840-93cce7f956709d3e4d872de908d89b1e

How To Update Sony C3 D2533/D2502  To Official Android 5.0.2 Lollipop 19.3.A.0.470

Before moving forward, please make sure that you’ve read the pre requisites and ensure that you are set to go ahead.

  1. Download the latest firmware Android 5.0.2 Lollipop 19.3.A.0.470 FTF file.
    1. For Xperia C3 D2533/D2502 [Generic/Unbranded. Create your own FTF using this guide.
  2. Copy the file and paste in Flashtool>Firmwares folder.
  3. Open Flashtool.exe now.
  4. Hit the small lightening button on the top left corner and select Flashmode.
  5. Select the FTF firmware file that you placed in the Firmware folder.
  6. From the right side, select what do you want to wipe. Data, cache and apps log, all wipes are recommended, perhaps you may select if you don’t want.
  7. Click on OK, and it will start preparing the firmware for flashing. This may take a little while to load.
  8. As soon as the firmware is loaded, it will prompt you to attach the phone by turning it off and keeping the back key press.
  9. For Xperia C3 Volume Down key will do the job of back key, just turn off your phone, keep the Volume Down key pressed and plug in the data cable.
  10. As soon as the phone is detected in Flashmode, the firmware will start flashing, Do not leave the Volume Down key until the process is complete.
  11. As soon as you see “Flashing ended or Finished Flashing” leave the Volume Down key, plug the cable out and reboot.
  12. That’s All! Congrats! You’ve installed latest Android 5.0.2 Lollipop on your Xperia C3. Enjoy

In case you got any queries or face any problems regarding this guide, please feel free to stop by the comment box below and let us know. We will get back to you as soon as possible. Thanks all!

Root Xperia Z1 Compact D5503 14.5.A.0.242 5.0.2 Firmware Plus Recovery

50
Root Xperia Z1 Compact D5503 14.5.A.0.242 5.0.2 Firmware Plus Recovery

Sony Xperia Z1 Compact received the Android 5.0.2 Lollipop under the build number 14.5.A.0.242. This update was released a while ago and most of the people have already installed this update. The only thing left for Android power users after updating their devices is the root access and a custom recovery. There was not proper way to gain any of these both until now. Sony Xperia Z1 Compact with model number D5503 can now be rooted on Android 5.0.2 Lollipop firmware, with build number 14.5.A.0.242.

The rooting method that is used in this guide is different and easier from the traditional rooting methods for Xperia devices at this time. Moreover, this rooting method requires less steps that any other method at present.  The new lollipop update is based on the Material Design. Apart from the mainly visible changes, lot of changes have been made to the internals and architecture of OS. The Android OS is more secure now. Therefore, Android Power Users are well aware that rooting is alos difficult with Android 5.0.2 Lollipop update on Xperia Z1 Compact D5503.

This guide explains two methods; Rooting D5503 14.5.A.0.242 firmware and installing a custom recovery on Xperia Z1 Compact D5503. This guide is for rooting 14.5.A.0.242 firmware on Xperia Z1 Compact. Do not even attempt to try these files on any other smartphone. The recovery that will be installed during this guide depends on the user. The aroma installer allows the users to choose between installation of TWRP and CWM installation on Z1 Compact Lollipop firmware. This is done only once at the booting time. Both of these custom recoveries are good enough for most of the tasks. If you would like to use a touchscreen interface in the custom recovery, then install TWRP. Otherwise you can install CWM custom recovery. Follow the steps given below carefully to root Xperia Z1 Compact D5503 on 14.5.A.0.242 Android 5.0.2 Lollipop firmware and install a custom recovery.

1. This Guide Is Only For Sony Xperia Z1 Compact D5503

This rooting method is only for the device mentioned above. Make sure that your model number matches the one listed above. To do so, go to Settings > About Device on your device and see your model number. Flashing this firmware on any other device will result in bricking it so make sure that you meet this requirement first of all.

2. Battery should be charged at least over 60%.

Make sure that your battery is charged enough to complete the flashing process. In case your battery is low and your device goes dead during the flashing process, you may end up soft bricking your device as it won’t complete the flashing process.

3. Backup everything!

Just to be on the safe side, you may consider backing up each and everything from your Android device. This is highly recommended so that in case anything goes wrong, you still have the access to all of your data and you can restore it immediately. You may backup everything as listed below.

  • Backup SMS Messages
  • Backup Call Logs
  • Backup Contacts
  • Backup Media – Copy your files manually to your PC or Laptop.
  • Titanium Backup – If already rooted, use Titanium Backup to backup all of your apps, system data and other important content. If you haven’t rooted your device previously, skip this step.
  • Backup Nandroid – If CWM  or TWRP installed previously, otherwise skip this step and perform this at the end of flashing.

4. Enable USB Debugging Mode on your device.

Enable USB debugging mode on your device. To do so, tap settings>developer options>USB debugging. If you can’t find developer options in settings, then tap settings > about device and tap “Build Number” for 7 times and you’ll get em’ activated under settings.

5. Install and setup Sony Flashtool.

You must have installed Sony Flashtool. Find the full guide here.

After installing Sony Flashtool, open the Flashtool folder from the drive where you installed it. Now open Flashtool>Drivers>Flashtool-drivers.exe and install the Flashtool, Fastboot & Xperia Z1 Compact drivers from the list. If you do not find the Flashtool drivers in Flashmode, skip this step and install Sony PC Companion instead, for drivers support. [Important]

6. Use OEM data cable to establish connection.

Make sure that you use the phone’s original data cable to establish connection between your phone and the PC. Using a different data cable might result in interrupting the firmware installation.

7. Unlock Bootloader

Use the following guide to unlock the bootloader of your Xperia device before proceeding. THIS IS VERY IMPORTANT. Not doing it might brick your device.

8. Set Up ADB and Fastboot Drivers

Download and install ADB and Fastboot drivers on your computer. If you are using Windows, then you should use Windows 7 to use ADB Drivers. ADB Drivers for Mac and Windows are given below.

ADB & Fastboot For Windows | ADB & Fastboot For Mac

Steps To Root Xperia Z1 Compact D5503 14.5.A.0.242 Firmware

1. Install Custom Recovery on Xperia Z1 Compact .242 Firmware

  1. Make sure that ADB Drivers are working correctly.
  2. Also make sure that you have unlocked bootloader of your smartphone.
  3. Make sure that build number of your phone’s current firmware is 14.5.A.0.242.
  4. Make sure that phone’s model number os either D5503.
  5. Once you have ensure these above mentioned tips, move to step 6.
  6. Download Root+Recovery+BusyBox Zip from here and copy to phone’s internal storage.
  7. Download CM11 ROM for Xperia Z1 Compact from here.
  8. Extract boot.img from the download CM11 ROM only and place it anywhere on PC.
  9. Copy the boot.img to Fastboot folder or Minimal ADB Installation Folder.
  10. Now turn off Xperia Z1 Compact.
  11. Hold volume up button and connect with PC using USB cable.
  12. LED should turn blue indicating phone is in fastboot mode. It can be any other color but phone must not go in charging. If it goes into charging mode then it means that fastboot drivers are not installed correctly and you have to install drivers again. Then jump back to this step.
  13. Open the fastboot folder where boot.img is placed.
  14. Hold shift button on keyboard and right-click on mouse.
  15. Click on “Open Command Window Here” (For Windows).
  16. Type fastboot devices and press Enter
  17. If is shows only one device with random serial number, move ahead. If there are more than one devices than uninstall any Android Emulator on your PC and disconnect any other device. Also uninstall PC Companion if installed.
  18. Type fastboot flash boot boot.img and press Enter.
  19. The flashing will be done in few seconds.
  20. Now type fastboot reboot and press Enter.
  21. While phone is booting up, use the volume buttons or power button to boot into custom recovery.
  22. Select install in recovery and install the package you copied in the 6th step.
  23. Select the recovery that you want to install during flashing.
  24. After recovery has been installed, just reboot your device.
  25. Work here is done. Now move on to next step.

2. Root Xperia Z1 Compact .242 Firmware

  1. Download SuperSU flashable zip.
  2. Place it in the SD Memory of your phone.
  3. Now turn off phone.
  4. Turn it on.
  5. While phone is turning on, press volume buttons and power button to enter recovery mode.
  6. Once in TWRP, tap on install and locate the folder where you have placed the SuperSU zip.
  7. Install it (Flash it) and phone will be rooted automatically and SuperSU app will also be installed.
  8. Now go back to main menu and reboot the device.
  9. That’s all! Now your phone is rooted with custom recovery installed.

Got any question? Ask me in the comments below

Sony Xperia Z4 Is Official Now

0
Sony Xperia Z4 Is Official Now

Xperia-Z4_3Its been pretty much long since Sony Xperia enthusiasts have been waiting for the 4th iteration of the Z family to come up. Xperia Z4 has been making rounds in the rumor world, quite many times we had information which gave us a very good idea about this device but the wait is finally over today. At a press release in Japan, Sony announced its latest flagship, the Xperia Z4. The phone came up with very minor improvements over the Xperia Z3.

First of all, the Xperia Z4 sports the same design as that of the Xperia Z3, but has a metal chasis. The phone is 6.9 mm thin and weigh as 144 grams. Xperia Z4 will flaunt a 5.2 inch FHD screen, that means users will definitely miss the QHD screen once again. At the back we have a 21.7 MP shooter with a new cooking mode that will let users take shots of food. To treat the selfie freaks, Sony has added a 5.1 MP shooter on the front. Xperia Z4 is powered up with Qualcomm’s Snapdragon 810 64-bit CPU. A RAM of 3 GB is placed inside and under the hood we have a whopping 2930 mAh battery. Xperia Z4 is also IP6 certified for dust and IP5 & IP8 certified for water resistance. Xperia Z4 will be available in black, white, copper and aqua-green colors.Xperia-Z4_1-640x1024 Xperia-Z4_2-640x640

That’s all we know about this device for now. Stay tuned with us for more information.

Root Samsung Galaxy S6 Edge G925F via CF-Auto Root

0
Root Samsung Galaxy S6 Edge G925F via CF-Auto Root

Samsung Galaxy S6 Edge is the secondary flagship from Samsung, released with their Primary flagship of this year, Galaxy S6. Arrived in the market in April, with 5.1-inch screen size, powered by the Exynos 7420 Quad-core 1.5 GHz Cortex-A53 and Quad-core 2.1 GHz Cortex-A57, with Mali-T760MP8 for extreme gaming, although it will heat-up a little after an hour or so, available in 32, 64 and 128GB variants and ported with 3GB of RAM, with 16MP of Rear cam, featuring almost everything necessary in a Mobile cam, running Android 5.0.2 Lollipop from the start, this device can be the Best gadget of this year, I can assure you, unless we get to see something even amazing than this.

It has been quite a time since its announcement and we are seeing the rooting method of Samsung Galaxy S6 Edge SM-G925F and the best part it is CF-Auto root tool, that does the job in no time. For all those who don’t know much about CF-Auto root tool, this is a one-click tool to root any device that supports it and in case of Samsung, we have a flash tool to use this CF-Auto root file. Then afterwards, it is up-to you to flash the TWRP recovery and enter the world of ultimate customization.In this article, we will show you How to Root Samsung Galaxy S6 Edge G925F via CF-Auto Root, without further ado, let us continue.

Root Samsung Galaxy S6 Edge G925F via CF-Auto Root

Early Preparations:

Downloads Required:

CF-Auto Root: Link

How to Root Galaxy S6 Edge:

  1. Download and extract Odin3 v3.09.
  2. Download and Install Samsung USB drivers .

Installation:

  1. Wipe your device completely in order to attain a neat installation.
  2. Open Odin3.exe.
  3. Put your Galaxy S6 in download mode. To do so, turn it off and wait for 10 seconds. Turn it on by pressing and holding Volume Down + Home Button + Power Key simultaneously, You should see a warning, press Volume Up to continue. In case this method doesn’t work for you, try one from this guide.
  4. Connect your device to your PC.
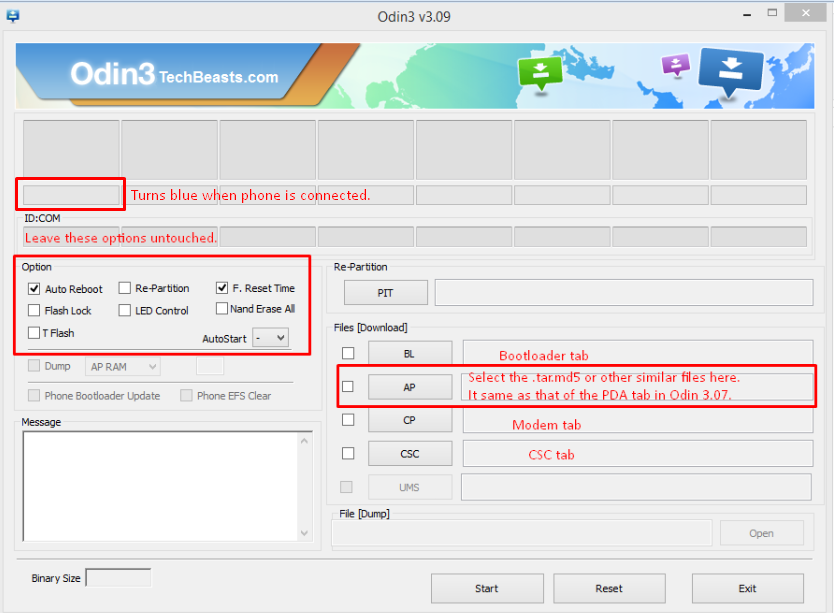
  5. As soon as Odin detects your phone, the ID:COM box should turn blue.  Make sure that you’ve installed Samsung USB drivers before connecting.
  6. For Odin 3.09 hit the AP tab. Select the CF-Auto-Root-zerolte-zeroltexx-smg925f.zip, that you downloaded and extracted above.
  7. If you’re using Odin 3.07, you will select “PDA” tab instead of the AP tab, rest of the options remain untouched.
  8. Make sure that the options selected in your Odin are exactly as shown in the pic.Odin-3.09-explained.-2
  9. Hit start and wait till the file flashing is complete, as soon as your device restarts, remove it from PC.
  10. Wait for your device to reboot, as soon as it reboots check out the new firmware!
  11. That’s all!

Root Xperia Z Ultra C6802,C6833,C6806 14.5.A.0.242 5.0.2 Lollipop Firmware

14
Root Xperia Z Ultra C6802,C6833,C6806 14.5.A.0.242 5.0.2 Lollipop Firmware

After delaying it for about two months, Sony has started seeding the Lollipop updates for Xperia Z series. Xperia Z Ultra received Android 5.0.2 Lollipop update under build number 14.5.A.0.242. Android 5.0.2 Lollipop update for Xperia Z Ultra is released for C6802, C6806 and C6833 model numbers. The Android Lollipop update for Xperia Z Ultra brings the Material design customisation to Sony’s own UI, which happens to be a pretty pleasant mixture. The 14.5.A.0.242 update for Xperia Z Ultra is one of the best and most awaited updates ever. As soon as the update was released, people rushed to their machines and starting updated their devices.

Android Power Users have to root Xperia Z Ultra 14.5.A.0.242 firmware after updating it. Unfortunately, the old rooting methods do not work with this firmware. Xperia Z Ultra can still be rooted without having to unlock the bootloader. For a Power user, this does not matter since they want to install custom ROMs and kernels and for that unlocked bootloader is required. This guide follows the method to root Xperia Z Ultra 14.5.A.0.242 firmware with one of the following model numbers; C6802, C6833 and C6806. If you have any other model number, then please do not attempt to use this guide on your device.

1. This is only for Sony Xperia Z Ultra C6802, Z Ultra C6806 and Z Ultra C6833

This rooting method is only for the device mentioned above. Make sure that your model number matches the one listed above. To do so, go to Settings > About Device on your device and see your model number. Flashing this firmware on any other device will result in bricking it so make sure that you meet this requirement first of all.

2. Battery should be charged at least over 60%.

Make sure that your battery is charged enough to complete the flashing process. In case your battery is low and your device goes dead during the flashing process, you may end up soft bricking your device as it won’t complete the flashing process.

3. Backup everything!

Just to be on the safe side, you may consider backing up each and everything from your Android device. This is highly recommended so that in case anything goes wrong, you still have the access to all of your data and you can restore it immediately. You may backup everything as listed below.

  • Backup SMS Messages
  • Backup Call Logs
  • Backup Contacts
  • Backup Media – Copy your files manually to your PC or Laptop.
  • Titanium Backup – If already rooted, use Titanium Backup to backup all of your apps, system data and other important content. If you haven’t rooted your device previously, skip this step.
  • Backup Nandroid  If CWM  or TWRP installed previously, otherwise skip this step and perform this at the end of flashing.

4. Enable USB Debugging Mode on your device.

Enable USB debugging mode on your device. To do so, tap settings>developer options>USB debugging. If you can’t find developer options in settings, then tap settings > about device and tap “Build Number” for 7 times and you’ll get em’ activated under settings.

5. Install and setup Sony Flashtool.

You must have installed Sony Flashtool. Find the full guide here.

After installing Sony Flashtool, open the Flashtool folder from the drive where you installed it. Now open Flashtool>Drivers>Flashtool-drivers.exe and install the Flashtool, Fastboot & Xperia Z Ultra drivers from the list. If you do not find the Flashtool drivers in Flashmode, skip this step and install Sony PC Companion instead, for drivers support. [Important]

6. Use OEM data cable to establish connection.

Make sure that you use the phone’s original data cable to establish connection between your phone and the PC. Using a different data cable might result in interrupting the firmware installation.

7. Unlock Bootloader

Use the following guide to unlock the bootloader of your Xperia device before proceeding.

Steps For Rooting Xperia Z Ultra 14.5.A.0.242 Firmware

1. Downgrade to .108 Firmware and Root It

  1. If you have already updated your smartphone to Android 5.0.2 Lollipop, then you have to downgrade your device to KitKat OS and Root it.
  2. Use this guide to Install .108 firmware.
  3. Root using this guide.
  4. Now Install XZ Dual Recovery.
  5. Now phone is rooted, USB Debugging must be enabled.
  6. Download latest installer for Xperia Z Ultra from here. (ZU-lockeddualrecovery2.8.10-RELEASE.installer.zip)
  7. Connect phone to PC using OEM date cable and run install.bat.
  8. It will install the custom recovery.
  9. Now work here is done. Lets move on to next step.

2. Make A Pre-Rooted Flashable Firmware For .242 FTF

  1. Download PRF Creator and install on your system.
  2. Download SuperSU zip and place anywhere on PC.
  3. Download .242 FTF and place it anywhere on PC (The Firmware must be specific to your device).
  4. Download ZU-lockeddualrecovery2.8.10-RELEASE.flashable.zip
  5. Now run PRFC and add all three required files in it.
  6. Then click on Create.
  7. Once the Flashable ROM is created, it will show the successful message.
  8. Do not touch any other option while creating the pre-rooted firmware.
  9. Now copy the pre-rooted firmware to the phone’s internal storage.
  10. Our work in this step is now done. Move on to next step.

Note: If you do not want to create a pre-rooted flashable zip for your device and skip few tests, then you can download the pre-rooted flashable zip from the link given below. However C6833 users will have to create their own flashable zip for now.

C6802 14.5.A.0.242 Pre-Rooted Flashable Zip | C6806 14.5.A.0.242 Pre-Rooted Flashable Zip

3. Root and Install Recovery on Z Ultra C6802/C6806/C6833 5.0.2 Lollipop Firmware

  1. Custom recovery was installed in the first step.
  2. The pre-rooted firmware was created and copied to phone in next step.
  3. Now you have to turn off phone.
  4. Turn it on again and press volume up or down repeatedly to enter custom recovery.
  5. Click on install and locate the folder where you placed the flashable zip earlier.
  6. Tap on it and install it.
  7. Now reboot the phone.
  8. If phone is still connected to PC via USB cable, disconnect it.
  9. Now go back to the .242 ftf you downloaded in second step and copy it to /flashtool/fimrwares
  10. Open flashtool and click on lightning icon in the top left.
  11. Click on it and click on flashmode.
  12. Select the .242 firmware.
  13. In the right bar, in the exclude options, exclude System only while flashing. Leave every other options as it is.
  14. While flashtool prepares the software for flashing, turn off your phone.
  15. Keep the volume down button pressed and connect it to PC via USB cable.
  16. The button must be pressed during it.
  17. The phone will enter flashmode.
  18. Flashtool will automatically detect it and start flashing.
  19. After flashing phone will reboot and you will be done 🙂
  20. That’s all 🙂 Enjoy
  21. Now your phone has a dual custom recovery, root access and of course latest Android 5.0.2 Lollipop Firmware.

Got any questions? Ask me in the comments below

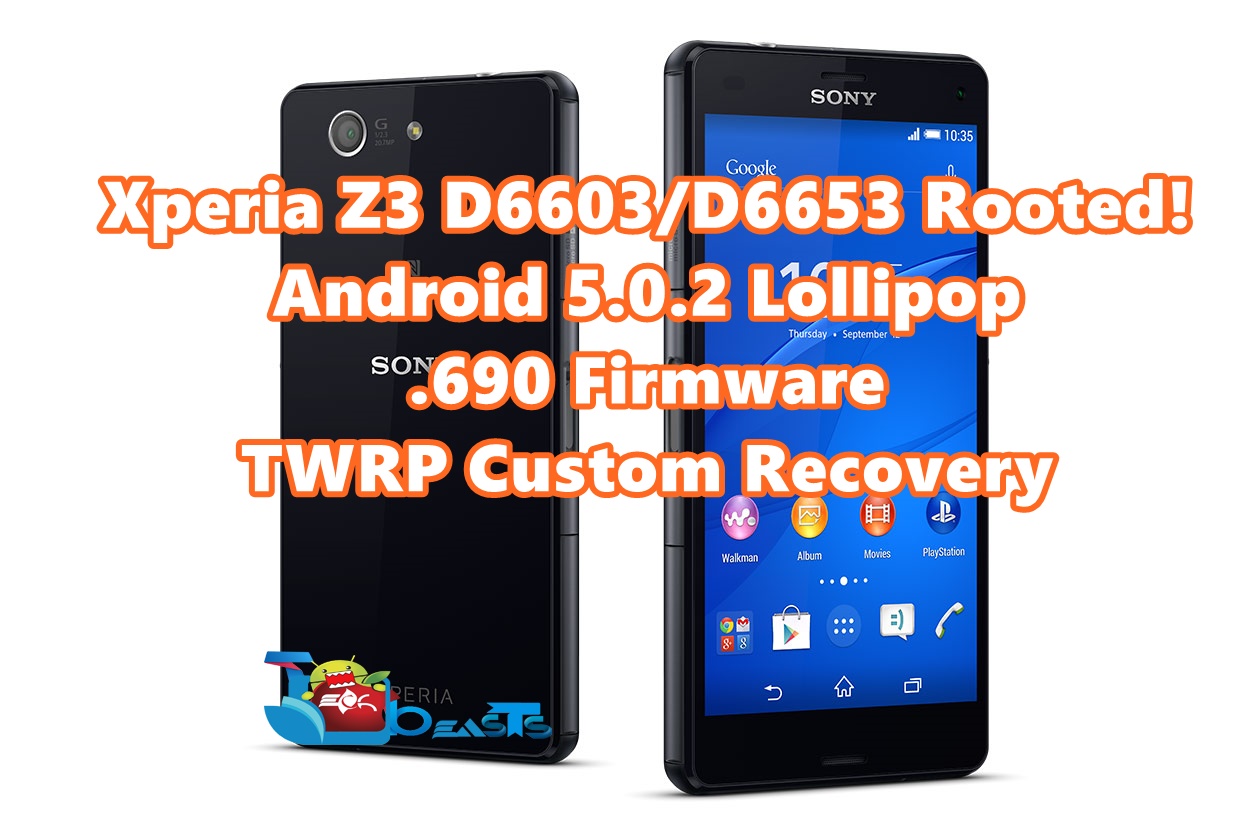
Root Xperia Z3 D6603, D6653 23.1.A.0.690 5.0.2 Lollipop Firmware Plus TWRP

11
Root Xperia Z3 D6603, D6653 23.1.A.0.690 5.0.2 Lollipop Firmware Plus TWRP

Sony released Android 5.0.2 Lollipop update for Xperia Z3 with build number 23.1.A.0.690. The new update was equipped with Google’s latest Material Design and Sony’s own UI customizations. Sony’s own UI is quite simple and elegant therefore these two elements blended quite well.  Android 5.0.2 Lollipop update is the biggest update since Gingerbread update for Android. It is more powerful and secure than any other Android version. Moreover, it is more efficient, both in terms of battery and RAM management. Xperia Z3 was already a very good performer, especially for battery and this update is supposed to make the experience even more sweet.

Those who have updated their deviced to Android 5.0.2 Lollipop 23.1.A.0.690 firmware have now lost root access. There are those too who have not rooted their devices yet and want to dive in to the world of Power Android Users. This guide is made for those who want to root 23.1.A.0.690 firmware on Xperia Z3 without having to face much hassle. Most of the rooting methods for Xperia Z3 at this time require users to make a flashable zip and then flash it, after downgrading the device and then updating the device again. Sound pretty difficult and long, right! This rooting method follows the old methods of flashing a modified kernel with integrated recovery so that users can have both custom recovery and root access by using it.

This guide explains the steps involved in installing TWRP on Xperia Z3 with model number D6603 and D6653. After installing the cusotm recovery, users can root their devices using the recovery. The detailed steps and downloads are given below. Below are the requirements that you must fulfill to be able to use this method.

1. This Guide Is Only For Sony Xperia Z3 D6603 and Xperia Z3 D6653

This rooting method is only for the device mentioned above. Make sure that your model number matches the one listed above. To do so, go to Settings > About Device on your device and see your model number. Flashing this firmware on any other device will result in bricking it so make sure that you meet this requirement first of all.

2. Battery should be charged at least over 60%.

Make sure that your battery is charged enough to complete the flashing process. In case your battery is low and your device goes dead during the flashing process, you may end up soft bricking your device as it won’t complete the flashing process.

3. Backup everything!

Just to be on the safe side, you may consider backing up each and everything from your Android device. This is highly recommended so that in case anything goes wrong, you still have the access to all of your data and you can restore it immediately. You may backup everything as listed below.

  • Backup SMS Messages
  • Backup Call Logs
  • Backup Contacts
  • Backup Media – Copy your files manually to your PC or Laptop.
  • Titanium Backup – If already rooted, use Titanium Backup to backup all of your apps, system data and other important content. If you haven’t rooted your device previously, skip this step.
  • Backup Nandroid – If CWM  or TWRP installed previously, otherwise skip this step and perform this at the end of flashing.

4. Enable USB Debugging Mode on your device.

Enable USB debugging mode on your device. To do so, tap settings>developer options>USB debugging. If you can’t find developer options in settings, then tap settings > about device and tap “Build Number” for 7 times and you’ll get em’ activated under settings.

5. Install and setup Sony Flashtool.

You must have installed Sony Flashtool. Find the full guide here.

After installing Sony Flashtool, open the Flashtool folder from the drive where you installed it. Now open Flashtool>Drivers>Flashtool-drivers.exe and install the Flashtool, Fastboot & Xperia Z3 drivers from the list. If you do not find the Flashtool drivers in Flashmode, skip this step and install Sony PC Companion instead, for drivers support. [Important]

6. Use OEM data cable to establish connection.

Make sure that you use the phone’s original data cable to establish connection between your phone and the PC. Using a different data cable might result in interrupting the firmware installation.

7. Unlock Bootloader

Use the following guide to unlock the bootloader of your Xperia device before proceeding. THIS IS VERY IMPORTANT. Not doing it might brick your device.

8. Set Up ADB and Fastboot Drivers

Download and install ADB and Fastboot drivers on your computer. If you are using Windows, then you should use Windows 7 to use ADB Drivers. ADB Drivers for Mac and Windows are given below.

ADB & Fastboot For Windows | ADB & Fastboot For Mac

Steps To Root Xperia Z3 D6603,D6653 23.1.A.0.690 Firmware

1. Install TWRP Custom Recovery on Xperia Z3 .690 Firmware

  1. Make sure that ADB Drivers are working correctly.
  2. Also make sure that you have unlocked bootloader of your smartphone.
  3. Make sure that build number of your phone’s current firmware is 23.1.A.0.690.
  4. Make sure that phone’s model number os either D6603 or D6653.
  5. Once you have ensure these above mentioned tips, move to step 6.
  6. Download Advanced Stock Kernel For Xperia Z3 .690 Firmware.
  7. Unzip and place the contents anywhere on your PC.
  8. Copy the boot.img extension to Fastboot folder or Minimal ADB Installation Folder.
  9. Now turn off Xperia Z3.
  10. Hold volume up button and connect with PC using USB cable.
  11. LED should turn blue indicating phone is in fastboot mode. It can be any other color but phone must not go in charging. If it goes into charging mode then it means that fastboot drivers are not installed correctly and you have to install drivers again. Then jump back to this step.
  12. Open the fastboot folder where boot.img is placed.
  13. Hold shift button on keyboard and right-click on mouse.
  14. Click on “Open Command Window Here” (For Windows).
  15. Type fastboot devices and press Enter
  16. If is shows only one device with random serial number, move ahead. If there are more than one devices than uninstall any Android Emulator on your PC and disconnect any other device. Also uninstall PC Companion if installed.
  17. Type fastboot flash boot boot.img and press Enter.
  18. The flashing will be done in few seconds.
  19. Work here is done. Now move on to next step.

2. Root Xperia Z3 .690 Firmware

  1. Download SuperSU flashable zip.
  2. Place it in the SD Memory of your phone.
  3. Now turn off phone.
  4. Turn it on.
  5. While phone is turning on, press volume buttons and power button to enter recovery mode.
  6. Once in TWRP, tap on install and locate the folder where you have placed the SuperSU zip.
  7. Install it (Flash it) and phone will be rooted automatically and SuperSU app will also be installed.
  8. Now go back to main menu and reboot the device.
  9. That’s all! Now your phone is rooted with TWRP custom recovery installed.

Got any question? Ask me in the comments below

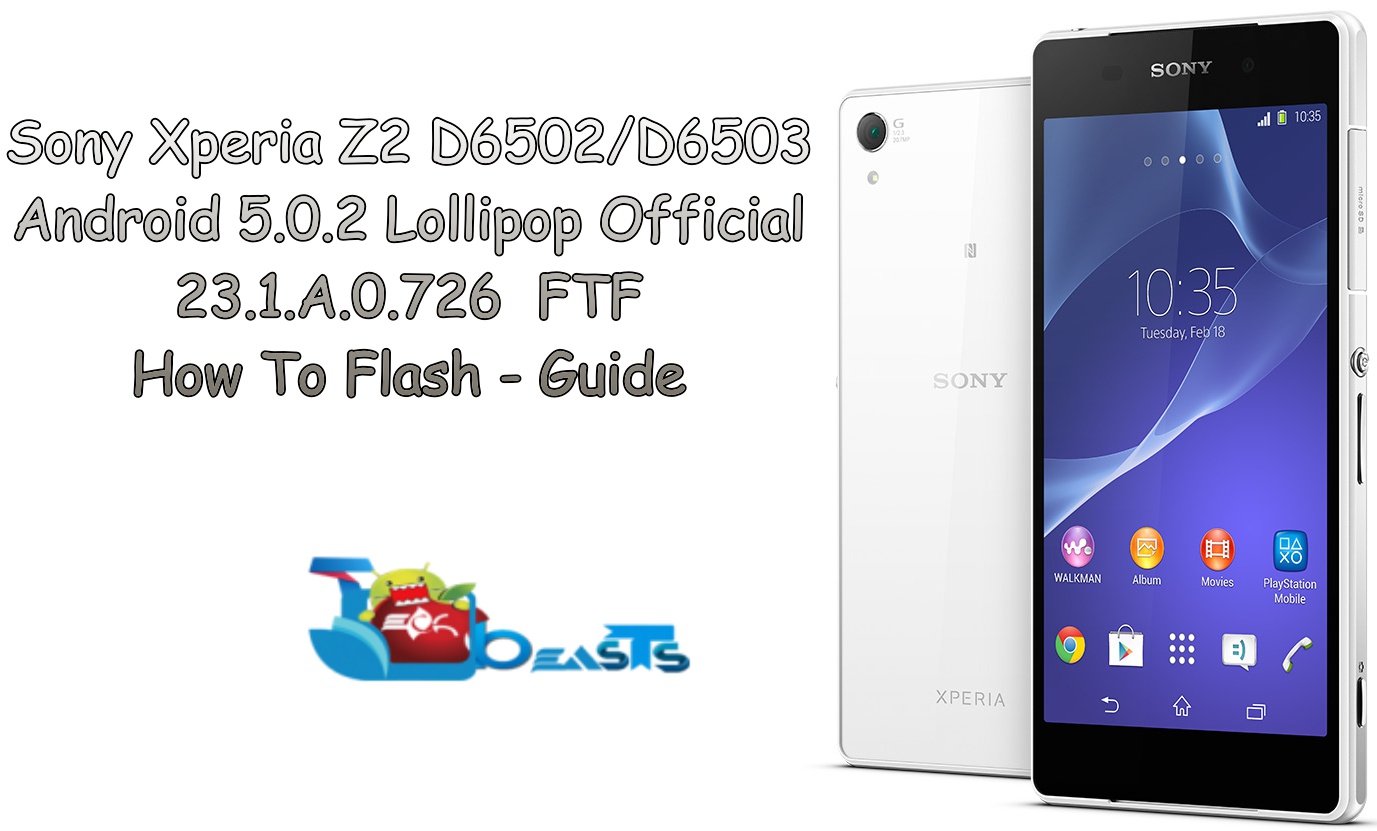
Root Xperia Z2 D6502, D6503 23.1.A.0.726 5.0.2 Lollipop Firmware Plus Recovery

28
Root Xperia Z2 D6502, D6503 23.1.A.0.726 5.0.2 Lollipop Firmware Plus Recovery

Sony released the first Android 5.0.2 Lollipop update for Xperia Z2 with build number ending in .690. This firmware had some bugs related to X-Reality Engine and other basic functions. Sony recently released the 23.1.A.0.726 firmware for Xperia Z2 D6502 and D6503. It is based on Android 5.0.2 Lollipop. This update is meant to fix the bugs that came with the first Android 5.0.2 released for Xperia Z2. Moreover, this update makes the devices much better performer as compared to before.

Those who have updated their devices to 23.1.A.0.726 5.0.2 Lollipop firmware must have lost root access. There are those who have not rooted their devices yet. This guide explains two basic things that any power Android user requires of his Android handset; Root and Custom Recovery. This guide explains how to root Xperia Z2 Lollipop Firmware and install Dual Recovery (TWRP and Philz Touch CWM). The guide is for two variants of Xperia Z2; D6502 and D6503. This guide must not be used on any other variant of Xperia Z2 or any other Xperia handset. Number of files are used in the rooting process which are specific for Xperia Z2. There are some pre-requisites for this guide as well like unlocking the bootloader. You must complete these prerequisites before moving on to the rooting process. All of the steps are explained in detail so if you are new to this stuff, you’ll find this guide to be pretty much easy-to-follow.

1. This is only for Sony Xperia Z2 D6503 and Xperia Z2 D6502

This rooting method is only for the device mentioned above. Make sure that your model number matches the one listed above. To do so, go to Settings > About Device on your device and see your model number. Flashing this firmware on any other device will result in bricking it so make sure that you meet this requirement first of all.

2. Battery should be charged at least over 60%.

Make sure that your battery is charged enough to complete the flashing process. In case your battery is low and your device goes dead during the flashing process, you may end up soft bricking your device as it won’t complete the flashing process.

3. Backup everything!

Just to be on the safe side, you may consider backing up each and everything from your Android device. This is highly recommended so that in case anything goes wrong, you still have the access to all of your data and you can restore it immediately. You may backup everything as listed below.

  • Backup SMS Messages
  • Backup Call Logs
  • Backup Contacts
  • Backup Media – Copy your files manually to your PC or Laptop.
  • Titanium Backup – If already rooted, use Titanium Backup to backup all of your apps, system data and other important content. If you haven’t rooted your device previously, skip this step.
  • Backup Nandroid  If CWM  or TWRP installed previously, otherwise skip this step and perform this at the end of flashing.

4. Enable USB Debugging Mode on your device.

Enable USB debugging mode on your device. To do so, tap settings>developer options>USB debugging. If you can’t find developer options in settings, then tap settings > about device and tap “Build Number” for 7 times and you’ll get em’ activated under settings.

5. Install and setup Sony Flashtool.

You must have installed the Sony Flashtool. Find the full guide here.

After installing Sony Flashtool, open the Flashtool folder from the drive where you installed it. Now open Flashtool>Drivers>Flashtool-drivers.exe and install the Flashtool, Fastboot & Xperia Z2 drivers from the list. If you do not find the Flashtool drivers in Flashmode, skip this step and install Sony PC Companion instead, for drivers support. [Important]

6. Use OEM data cable to establish connection.

Make sure that you use the phone’s original data cable to establish connection between your phone and the PC. Using a different data cable might result in interrupting the firmware installation.

7. Unlock Bootloader

Use the following guide to unlock the bootloader of your Xperia device before proceeding.

Steps For Rooting Xperia Z2 D6503/D6502 23.1.A.0.726 Firmware

1. Downgrade to .167 Firmware and Root It

  1. If you have already updated your smartphone to Android 5.0.2 Lollipop, then you have to downgrade your device to KitKat OS and Root it.
  2. Use this guide to Install .167 firmware.
  3. Root using this guide.
  4. Now Install XZ Dual Recovery.
  5. Now phone is rooted, USB Debugging must be enabled.
  6. Download latest installer for Xperia Z2 from here. (Z2-lockeddualrecovery2.8.10-RELEASE.installer.zip)
  7. Connect phone to PC using OEM date cable and run install.bat.
  8. It will install the custom recovery.
  9. Now work here is done. Lets move on to next step.

2. Make A Pre-Rooted Flashable Firmware For .726 FTF

  1. Download PRF Creator and install on your system.
  2. Download SuperSU zip and place anywhere on PC.
  3. Download .726 FTF and place it anywhere on PC.
  4. Download Z2-lockeddualrecovery2.8.10-RELEASE.flashable.zip
  5. Now run PRFC and add all three required files in it.
  6. Then click on Create.
  7. Once the Flashable ROM is created, it will show the successful message.
  8. Do not touch any other option while creating the pre-rooted firmware.
  9. Now copy the pre-rooted firmware to the phone’s internal storage.
  10. Our work in this step is now done. Move on to next step.

Note: If you do not want  to create a pre-rooted flashable zip yourself, then you can download flashable zip for your phone from one of the downlod links given below.

D6502 23.1.A.0.726 Pre-Rooted Flashable Zip | D6503 23.1.A.0.726 pre-Rooted Flashable Zip

3. Root and Install Recovery on Z2 D6502/D6503 5.0.2 Lollipop Firmware

  1. Custom recovery was installed in the first step.
  2. The pre-rooted firmware was created and copied to phone in next step.
  3. Now you have to turn off phone.
  4. Turn it on again and press volume up or down repeatedly to enter custom recovery.
  5. Click on install and locate the folder where you placed the flashable zip earlier.
  6. Tap on it and install it.
  7. Now reboot the phone.
  8. If phone is still connected to PC via USB cable, disconnect it.
  9. Now go back to the .726 ftf you downloaded in second step and copy it to /flashtool/fimrwares
  10. Open flashtool and click on lightning icon in the top left.
  11. Click on it and click on flashmode.
  12. Select the .726 firmware.
  13. In the right bar, in the exclude options, exclude System only while flashing. Leave every other options as it is.
  14. While flashtool prepares the software for flashing, turn off your phone.
  15. Keep the volume down button pressed and connect it to PC via USB cable.
  16. The button must be pressed during it.
  17. The phone will enter flashmode.
  18. Flashtool will automatically detect it and start flashing.
  19. After flashing phone will reboot and you will be done 🙂
  20. That’s all 🙂 Enjoy
  21. Now your phone has a dual custom recovery, root access and of course latest Android 5.0.2 Lollipop Firmware.

Got any questions? Ask me in the comments below

Update Xperia Z1 C6906 To Official Android 5.0.2 Lollipop 14.5.A.0.242 Firmware

2
Update Xperia Z1 C6906 To Official Android 5.0.2 Lollipop 14.5.A.0.242 Firmware

Xperia Z1 C6906 has also joined the Lollipop batch. The device is now being updated to latest and greatest Android version Android 5.0.2 Lollipop carrying build number 14.5.A.0.242. The update has landed with a new UI in accordance with Google’s Material Design UI. Some new features are there including notifications on the lock screen, multi-user and guest modes. Battery life and device’s performance have been enhanced as well. The update is hitting different regions all around the world at the moment but just in case you haven’t got it yet, it may increase your appetite for a while.

For users who haven’t got this update yet, we have written down this guide which will help you to update your beloved Sony Xperia Z C6906 to the latest Android 5.0.2 Lollipop 14.5.A.0.242 firmware. We will do this by flashing an FTF file using Sony Flashtool. Let’s go through some early preps and install the latest version of Android on your device now.

Early Preparations:

1. This is only for Sony Xperia Z1 C6906

This ROM is only for the device mentioned above. Make sure that your model number matches the one listed above. To do so, go to Settings > About Device on your device and see your model number. Flashing this firmware on any other device will result in bricking it so make sure that you meet this requirement first of all.

2. Battery should be charged at least over 60%.

Make sure that your battery is charged enough to complete the flashing process. In case your battery is low and your device goes dead during the flashing process, you may end up soft bricking your device as it won’t complete the flashing process.

3. Backup everything!

Just to be on the safe side, you may consider backing up each and everything from your Android device. This is highly recommended so that in case anything goes wrong, you still have the access to all of your data and you can restore it immediately. You may backup everything as listed below.

  • Backup SMS Messages
  • Backup Call Logs
  • Backup Contacts
  • Backup Media – Copy your files manually to your PC or Laptop.
  • Titanium Backup – If already rooted, use Titanium Backup to backup all of your apps, system data and other important content. If you haven’t rooted your device previously, skip this step.
  • Backup Nandroid – If CWM  or TWRP installed previously, otherwise skip this step and perform this at the end of flashing.

4. Enable USB Debugging Mode on your device.

Enable USB debugging mode on your device. To do so, tap settings>developer options>USB debugging. If you can’t find developer options in settings, then tap settings > about device and tap “Build Number” for 7 times and you’ll get em’ activated under settings.

5. Install and setup Sony Flashtool.

You must have installed Sony Flashtool. Find the full guide here.

After installing Sony Flashtool, open the Flashtool folder from the drive where you installed it. Now open Flashtool>Drivers>Flashtool-drivers.exe and install the Flashtool, Fastboot & Xperia Z1 drivers from the list. [Important]

6. Use OEM data cable to establish connection.

Make sure that you use the phone’s original data cable to establish connection between your phone and the PC. Using a different data cable might result in interrupting the firmware installation.

xperia-Z1-hero-black-1240x840-3c449514e1daf8b0652a5dc235530ebc

How To Update Sony Xperia Z1 To Official Android 5.0.2 14.5.A.0.242 Lollipop  Firmware

Before moving forward, please make sure that you’ve read the pre requisites and ensure that you are set to go ahead.

  1. Download the latest firmware Android 5.0.2 Lollipop 14.5.A.0.242 FTF file.
    1. For Xperia Z1 C6906 [Generic/Unbranded. Link 1 Create your own FTF using this guide.
  2. Copy the file and paste in Flashtool>Firmwares folder.
  3. Open Flashtool.exe now.
  4. Hit the small lightening button on the top left corner and select Flashmode.
  5. Select the FTF firmware file that you placed in the Firmware folder.
  6. From the right side, select what do you want to wipe. Data, cache and apps log, all wipes are recommended, perhaps you may select if you don’t want.
  7. Click on OK, and it will start preparing the firmware for flashing. This may take a little while to load.
  8. As soon as the firmware is loaded, it will prompt you to attach the phone by turning it off and keeping the back key press.
  9. For Xperia Z1 Volume Down key will do the job of back key, just turn off your phone, keep the Volume Down key pressed and plug in the data cable.
  10. As soon as the phone is detected in Flashmode, the firmware will start flashing, Do not leave the Volume Down key until the process is complete.
  11. As soon as you see “Flashing ended or Finished Flashing” leave the Volume Down key, plug the cable out and reboot.
  12. That’s All! Congrats! You’ve installed latest Android 5.0.2 Lollipop on your Xperia Z1. Enjoy

In case you got any queries or face any problems regarding this guide, please feel free to stop by the comment box below and let us know. We will get back to you as soon as possible. Thanks all!

Update Sony Xperia Z2 D6502/D6503 To Official Android 5.0.2 Lollipop 23.1.A.0.726 Firmware

1
Update Sony Xperia Z2 D6502/D6503 To Official Android 5.0.2 Lollipop 23.1.A.0.726 Firmware

A new Android 5.0.2 Lollipop update carrying the build number 23.1.A.0.726 has started rolling out for Sony Xperia Z2 D6502 and D6503. It looks like Sony has started fixing the issues that emerged up in the previous (23.1.A.0.690) update for the Xperia Z2. Changes in this new firmware are same, e.g. Google’s new Material Design, Notification Cards on lock screen, user modes and guest mode etc. The only difference is, Sony has fixed a number of bugs and the missing “Close All” button has made its way to the recent apps menu of the phone. Since this update is hitting different regions now, users will be updating their device to get the best out of their device.

If you haven’t received this update in your region yet, it will take a while for Sony to pack it up and push towards you. If you can’t wait for the update to arrive through OTA or through Sony PC Companion, you would like to use a different method to update your device immediately and that’s what we are here for at the moment. We are going to flash the latest Android 5.0.2 Lollipop update with the build number 23.1.A.0.726 on our beloved Sony Xperia Z2 D6502 and D6503. We will be flashing the FTF file using Sony Flashtool. Let’s go through some quick early preps and flash the firmware now.

Early Preparations:

1. This is only for Sony Xperia Z2 D6502 & D6503

This ROM is only for the device mentioned above. Make sure that your model number matches the one listed above. To do so, go to Settings > About Device on your device and see your model number. Flashing this firmware on any other device will result in bricking it so make sure that you meet this requirement first of all.

2. Battery should be charged at least over 60%.

Make sure that your battery is charged enough to complete the flashing process. In case your battery is low and your device goes dead during the flashing process, you may end up soft bricking your device as it won’t complete the flashing process.

3. Backup everything!

Just to be on the safe side, you may consider backing up each and everything from your Android device. This is highly recommended so that in case anything goes wrong, you still have the access to all of your data and you can restore it immediately. You may backup everything as listed below.

  • Backup SMS Messages
  • Backup Call Logs
  • Backup Contacts
  • Backup Media – Copy your files manually to your PC or Laptop.
  • Titanium Backup – If already rooted, use Titanium Backup to backup all of your apps, system data and other important content. If you haven’t rooted your device previously, skip this step.
  • Backup Nandroid – If CWM  or TWRP installed previously, otherwise skip this step and perform this at the end of flashing.

4. Enable USB Debugging Mode on your device.

Enable USB debugging mode on your device. To do so, tap settings>developer options>USB debugging. If you can’t find developer options in settings, then tap settings > about device and tap “Build Number” for 7 times and you’ll get em’ activated under settings.

5. Install and setup Sony Flashtool.

You must have installed Sony Flashtool. Find the full guide here.

After installing Sony Flashtool, open the Flashtool folder from the drive where you installed it. Now open Flashtool>Drivers>Flashtool-drivers.exe and install the Flashtool, Fastboot & Xperia Z2 drivers from the list. [Important]

6. Use OEM data cable to establish connection.

Make sure that you use the phone’s original data cable to establish connection between your phone and the PC. Using a different data cable might result in interrupting the firmware installation.


20140228T021828

How To Update Sony Xperia Z2 D6502/D6503 To Official Android 5.0.2 Lollipop 23.1.A.0.726  Firmware

Before moving forward, please make sure that you’ve read the pre requisites and ensure that you are set to go ahead.

  1. Download the latest firmware Android 5.0.2 Lollipop 23.1.A.0.726  FTF file.
    1. For Xperia Z2 D6502 [Generic/Unbranded] Link 1 | You can also create your own FTF using this guide.
    2. For Xperia Z2 D6503 [Generic/Unbranded] Link 1 [download and extract this one] | You can also create your own FTF using this guide.
  2. Copy the file and paste in Flashtool>Firmwares folder.
  3. Open Flashtool.exe now.
  4. Hit the small lightening button on the top left corner and select Flashmode.
  5. Select the FTF firmware file that you placed in the Firmware folder.
  6. From the right side, select what do you want to wipe. Data, cache and apps log, all wipes are recommended, perhaps you may select if you don’t want.
  7. Click on OK, and it will start preparing the firmware for flashing. This may take a little while to load.
  8. As soon as the firmware is loaded, it will prompt you to attach the phone by turning it off and keeping the back key press.
  9. For Xperia Z2 Volume Down key will do the job of back key, just turn off your phone, keep the Volume Down key pressed and plug in the data cable.
  10. As soon as the phone is detected in Flashmode, the firmware will start flashing, Do not leave the Volume Down key until the process is complete.
  11. As soon as you see “Flashing ended or Finished Flashing” leave the Volume Down key, plug the cable out and reboot.
  12. That’s All! Congrats! You’ve installed latest Android 5.0.2 Lollipop on your Xperia Z2. Enjoy


Please note that, this is an official firmware and it won’t brick your device and it won’t void the warranty of your device. This firmware is not pre-rooted, it is purely untouched and stock firmware.

In case you got any queries or face any problems regarding this guide, please feel free to stop by the comment box below and let us know. We will get back to you as soon as possible. Thanks all!

Next: Root Xperia Z2 D6502, D6503 23.1.A.0.726 5.0.2 Lollipop Firmware Plus Recovery

Install Android 5.0.2 Lollipop OxygenOS on OnePlus One

0
Install Android 5.0.2 Lollipop OxygenOS on OnePlus One

OnePlus One has recently received the CyanogenMod 12S official update, although, there are people who are still looking for the OxygenOS to try on their OnePlus One. The ROM is based on Pure Android and exclusively made for OnePlus One, yet not available for any other device, just like CyanogenMod S series, but who knows there might be a chance that it will be released for other devices too, till then those who has OnePlus One can enjoy this ROM on their device, others can check this Firmware on their friends device or purchase a OnePlus One to try it on. Since this is a Custom ROM, you’ll need a rooted device along with a custom Recovery installed on it.

Not much of an interface difference, but under the hood, this OS is quite faster and stable than most of the other ROMs available. Double Tap to wake is already ported in it, so no need to install custom Mods for that. The ROM has just made its way to the market, so it is better if user give their opinions about it for better support in near future. In this Article,we will show you How to Install Android 5.0.2 Lollipop OxygenOS on OnePlus One,  If you are interested in Other ROMs, you can Visit our Custom ROMs section or you can install this ROM on your Nexus 4 by following our tutorial below. This is not an official release from Google but a Custom ROM. Installation procedure uses the Fastboot commands to install this custom ROM. Your device must be rooted. Let’s go through the ROM features and early preparations and then flash this ROM.

Install Android 5.0.2 Lollipop OxygenOS on OnePlus One

Early Preparations:

  • This is only for OnePlus One!
  • Battery should be charged at least over 60%
  • Unlock Bootloader Of Your Device.
  • Flash a Custom Recovery and Root Your device
  • Backup SMS Messages
  • Backup Call Logs
  • Backup Contacts
  • Backup Media – Copy your files manually to your PC or Laptop.
  • Titanium Backup – If already rooted, use Titanium Backup to backup all of your apps, system data and other important content.
  • Backup Nandroid –  If CWM  or TWRP installed previously, otherwise skip this step and perform this at the end of flashing

Disclaimer

The methods involved in flashing custom recoveries, roms and rooting your phone are highly custom and may result in bricking your device, and has nothing to do with Google or the device manufacturer that is OnePlus in our case. Also rooting your device will void its warranty and you will be no longer eligible for any kind of free device services by the manufacturers/warranty providers. In case of any mishap we may not be held responsible. Follow these instructions to the letter to avoid any mishap or bricking. Make sure that whatever you do, you are doing it at your own responsibility.

Downloads Required:

OxygenOS ROM: Link

How to Install OxygenOS ROM:

  • Connect your device with PC.
  • Copy and Paste the Above zip files to the root of your sdcard.
  • Open Recovery mode. How?
  1. Connect your device with PC
  2. Open Command Prompt in Fastboot folder. (ADB and Fastboot Tools Installer)
  3. Now Type: adb reboot bootloader
  4. Choose Recovery from Bootloader

CWM/PhilZ Touch Recovery:

  1. Back-up your ROM using the Recovery.
  2. To Perform a Back-up, Navigate to Back-up and Restore on Next screen, Choose Back-up again.
  3. Go back to Main Screen after the Back-up is complete.
  4. Then Navigate to ‘advance’ and choose ‘Dalvik Wipe Cache’, so you won’t get in any bootloop.
  5. Navigate to ‘Install zip from sd card’ another windows will open in front of you.
  6. Finally Select “Wipe Data/Factory Reset”
  7. Select ‘choose zip from sd card’ from the Options.
  8. Select the OxygenOS.zip file and confirm the installation on next screen.
  9. Once the Installation is Over, Select +++++Go Back+++++
  10. Select Reboot Now to Reboot the System.

TWRP Users.

  1. Tap On Back-Up and Select System and Data
  2. Swipe the Confirmation Slider
  3. Tap on Wipe Button and Select Cache, System, Data.
  4. Swipe the Confirmation Slider.
  5. Go back to Main Menu and Tap Install Button.
  6. Locate the OxygenOS.zip and Swipe the Slider To install it.
  7. Once the Installation is Over, you will be promoted to Reboot System Now
  8. Select Reboot Now to Reboot the System.

The First boot might take up-to 5 minutes, so please be patient.

Root Xperia Z1 C6902/C6903 14.5.A.0.242 5.0.2 Lollipop With Dual Recovery

108
Root Xperia Z1 C6902/C6903 14.5.A.0.242 5.0.2 Lollipop With Dual Recovery

The latest firmware build number for Xperia Z1 C6902 and C6903 is 14.5.A.0.242. It is based on Android 5.0.2 Lollipop. The firmware has been released a while ago. For power users, it is necessary to find the rooting method for the new firmware before updating their devices. This is important because most of power applications and modifications require root access. As soon as the firmware for Xperia Z1 is released, a new rooting method has also been designed for it.

This guide covers two topics; Rooting Xperia Z1 C6902 and C6903 on Android 5.0.2 Lollipoo 14.5.A.0.242 firmware, and the second topic is to install Dual Recovery (Philz Touch and TWRP) on Xperia Z1 Lollipop firmware. The Dual recovery is developed by NUT who is a recognized XDA developer and is currently supporting number of Xperia devices. To be able to follow this guide, you should keep in mind that there are three major steps. All the steps are explained in detail. All steps are explained will complete details so that any kind of error can be avoided. There are three main steps. Rooting KitKat firmware and downgrading if you have updated the device already. Creating the pre-rooted firmware and the third step is to root and install dual recovery in Xperia Z1. Make sure that you follow all the steps given below and complete all pre-required steps to avoid all kind of errors. The model number and build numbers are mentioned again and again throughout the post so that you do not mistakenly use this guide on any other smartphone or any other variant  of Xperia Z1.

1. This is only for Sony Xperia Z1 C6902 and Xperia Z1 C6903

This rooting method is only for the device mentioned above. Make sure that your model number matches the one listed above. To do so, go to Settings > About Device on your device and see your model number. Flashing this firmware on any other device will result in bricking it so make sure that you meet this requirement first of all.

2. Battery should be charged at least over 60%.

Make sure that your battery is charged enough to complete the flashing process. In case your battery is low and your device goes dead during the flashing process, you may end up soft bricking your device as it won’t complete the flashing process.

3. Backup everything!

Just to be on the safe side, you may consider backing up each and everything from your Android device. This is highly recommended so that in case anything goes wrong, you still have the access to all of your data and you can restore it immediately. You may backup everything as listed below.

  • Backup SMS Messages
  • Backup Call Logs
  • Backup Contacts
  • Backup Media – Copy your files manually to your PC or Laptop.
  • Titanium Backup – If already rooted, use Titanium Backup to backup all of your apps, system data and other important content. If you haven’t rooted your device previously, skip this step.
  • Backup Nandroid  If CWM  or TWRP installed previously, otherwise skip this step and perform this at the end of flashing.

4. Enable USB Debugging Mode on your device.

Enable USB debugging mode on your device. To do so, tap settings>developer options>USB debugging. If you can’t find developer options in settings, then tap settings > about device and tap “Build Number” for 7 times and you’ll get em’ activated under settings.

5. Install and setup Sony Flashtool.

You must have installed Sony Flashtool. Find the full guide here.

After installing Sony Flashtool, open the Flashtool folder from the drive where you installed it. Now open Flashtool>Drivers>Flashtool-drivers.exe and install the Flashtool, Fastboot & Xperia Z1 drivers from the list. If you do not find the Flashtool drivers in Flashmode, skip this step and install Sony PC Companion instead, for drivers support. [Important]

6. Use OEM data cable to establish connection.

Make sure that you use the phone’s original data cable to establish connection between your phone and the PC. Using a different data cable might result in interrupting the firmware installation.

7. Unlock Bootloader

Use the following guide to unlock the bootloader of your Xperia device before proceeding.

Steps For Rooting Xperia Z1 C6902/C6903 14.5.A.0.242 Firmware

1. Downgrade to .108 Firmware and Root It

  1. If you have already updated your smartphone to Android 5.0.2 Lollipop, then you have to downgrade your device to KitKat OS and Root it.
  2. Use this guide to Install .108 firmware.
  3. Root using this guide.
  4. Now Install XZ Dual Recovery.
  5. Now phone is rooted, USB Debugging must be enabled.
  6. Download latest installer for Xperia Z1 from here. (Z1-lockeddualrecovery2.8.10-RELEASE.installer.zip)
  7. Connect phone to PC using OEM date cable and run install.bat.
  8. It will install the custom recovery.
  9. Now work here is done. Lets move on to next step.

2. Make A Pre-Rooted Flashable Firmware For .242 FTF

  1. Download PRF Creator and install on your system.
  2. Download SuperSU zip and place anywhere on PC.
  3. Download .242 FTF and place it anywhere on PC.
  4. Download Z1-lockeddualrecovery2.8.10-RELEASE.flashable.zip
  5. Now run PRFC and add all three required files in it.
  6. Then click on Create.
  7. Once the Flashable ROM is created, it will show the successful message.
  8. Do not touch any other option while creating the pre-rooted firmware.
  9. Now copy the pre-rooted firmware to the phone’s internal storage.
  10. Our work in this step is now done. Move on to next step.

Note: If you do not want to create a pre-rooted flashable zip for your phone yourself, then you can download it for your phone’s specific model number and use it in the guide.

C6902 14.5.A.0.242 Pre-Rooted Flashable Zip | C6903 14.5.A.0.242 Pre-Rooted Flashable Zip

3. Root and Install Recovery on Z1 C6902/C6903 5.0.2 Lollipop Firmware

  1. Custom recovery was installed in the first step.
  2. The pre-rooted firmware was created and copied to phone in next step.
  3. Now you have to turn off phone.
  4. Turn it on again and press volume up or down repeatedly to enter custom recovery.
  5. Click on install and locate the folder where you placed the flashable zip earlier.
  6. Tap on it and install it.
  7. Now reboot the phone.
  8. If phone is still connected to PC via USB cable, disconnect it.
  9. Now go back to the .242 ftf you downloaded in second step and copy it to /flashtool/fimrwares
  10. Open flashtool and click on lightning icon in the top left.
  11. Click on it and click on flashmode.
  12. Select the .242 firmware.
  13. In the right bar, in the exclude options, exclude System only. It means that tick System only there. Leave every other options as it is.
  14. While flashtool prepares the software for flashing, turn off your phone.
  15. Keep the volume down button pressed and connect it to PC via USB cable.
  16. The button must be pressed during it.
  17. The phone will enter flashmode.
  18. Flashtool will automatically detect it and start flashing.
  19. After flashing phone will reboot and you will be done 🙂
  20. That’s all 🙂 Enjoy
  21. Now your phone has a dual custom recovery, root access and of course latest Android 5.0.2 Lollipop Firmware.

Got any questions? Ask me in the comments below