Home Blog Page 322

Android: Block Text Messages From Specific Person [ Tutorial ]

Android: Block Text Messages From Specific Person [ Tutorial ]

If you are an Android user and want to block texts from a specific person who is giving you headaches, you have come to right place. I’ve prepared a step by step tutorial on how to block Text Messages From Specific Person on Android.

android-block-text-messages-from-specific-person

You can block anyone through block list in your messaging settings, also you can use third party apps to do so. Let’s start with the stock messaging app.

I am using Samsung Galaxy Note 5 running Android 6.0, so in older version settings may be not as in Android 6.0.

  • Open messaging app on your Android device.
  • Tap on more.
  • Tap on Settings.
  • Tap on Block messages.
  • You’ll see three options, Block List, Blocked Phrases and Blocked messages,Tap on Block List.
  • There you have to enter the number of the specific person whom you want to block, in order to not receive any message from him/her.
  • Once you have selected the number, tap on + icon.

All Done .

Option 2:

  • Download and install Handcent SMS.
  • Now tap on menu,  located on upper left corner.
  • Tap on Gear icon.
  • Tap on “Security & privacy” > “Manage blacklist“.
  • Tap on + icon, There you have to enter the number of the specific person whom you want to block, in order to not receive any message from him/her.

That’s all for now, Please keep visiting Techbeasts for more interesting guides and tips. If you found this guide helpful please share it with your friends.

Android: Find Your Phone Number [ How To ]

0
Android: Find Your Phone Number [ How To ]

If you are new to Android and switched from iPhone, you’ll be wondering how you can see your phone number. In iPhone, all you have to do is go to contacts and you’ll see ” My Number on the Top “. When it comes to Android you have to go through few steps to find your own number, I have prepared a step by step guide to Find Your Phone Number on Android device.

Read more: 4 Ways to connect Android with Car Stereo

what is my phone number

Android: Find Your Phone Number [ How To ]:

  1. First go to settings on your Android device.
  2. Now scroll down and select “About phone” or “About device“. ” If you are running older version of Android you’ll see your number in this section.”
  3. Now if you are running Android 5.0+, then in About device tap on status>SIM card Status>My phone number.
  4. If you are seeing Unknown in My phone number that means, either you have ported your number or your SIM was not inserted properly.

That’s all for now, Please keep visiting Techbeasts for more interesting guides and tips. If you found this guide helpful please share it with your friends.

Read more: Set Wallpaper on Android without Cropping – How to Guide.

iTunes: Fix iPhone or iPod Not Detected in Windows 10-8

0
iTunes: Fix iPhone or iPod Not Detected in Windows 10-8

I just bought a Dell XPS and Windows 10 is on it, working fine but when I tried to connect with iPhone 6s and I got to know that iTunes no longer detected my device. I tried several solutions and got one working, so I thought let’s share it with you. Here’s how to Fix iPhone or iPod Not Detected in Windows.

iphone not showing up in itunes

iTunes: Fix iPhone or iPod Not Detected in Windows 10-8

  • Make sure latest version of iTunes is installed.
  • Open “Control Panel“>“Hardware and Sound“>“Devices and Printers“.
  • Here you’ll see your iPhone or iPad showing in “Unspecified” tab, right click on your device and select “Properties“.
  • In next Windows, you’ll see two tabs ( General – Hardware ). Select Hardware and then properties.
  • In “General” tab, select the “Change settings” button.
  • Now select the driver tab, then select “Update Driver“.
  • Next option “Browse my computer for driver software“.
  • You have to choose the path now, check this one ” C:\Program Files\Common Files\Apple\Mobile Device Support\Drivers “
  • Click “Next” > “Close.

All done.

How To Enter Recovery Mode on Rooted and Locked Android devices

0
How To Enter Recovery Mode on Rooted and Locked Android devices

Following are the instructions on how to Enter Recovery Mode on Rooted and Locked Android devices, I’ve got many emails regarding this topic ” I have a rooted device cannot enter in recovery mode” -” boot into recovery“, ” how to enter recovery mode“, reboot into recovery and more. I’ve prepared a step by step tutorial on how you can enter into recovery  mode if you have a rooted Android device or locked Android device. Follow all the instruction carefully .

android recovery mode

How To Enter Recovery Mode on Rooted and Locked Android devices:

Now for both situations I’ve prepared different tutorials, let’s start with the rooted devices first.

  1. Open Google Play and download Quick Boot tool.
  2. For some reasons if you cannot download it from Google Play, use this link.
  3. Once the app is installed, launch it.
  4. You’ll see 4 options on the app home page, (Recovery, Reboot, Bootloader and Power Off) Tap on Recovery.
  5. Now your device will reboot and takes you to the Recovery Mode.

Enter Recovery Mode on Locked Android devices:

When it comes to locked Android devices, you have to do few things more as compared to rooted Android devices.

  • First, you must have USB Debugging option enabled on your device.
  • Install Android Adb & Fastboot Drivers on Your Windows PC.
  • Now connect your device with Pc using USB cable.
  • Open Fastboot folder and right click anywhere in that folder to open command prompt.
  • Type the: “adb reboot recovery” command.
  • Your device will reboot into recovery mode.

All done.

How To Force Desktop Version of YouTube in Safari for iPhone & iPad

0
How To Force Desktop Version of YouTube in Safari for iPhone & iPad

For those who want to use desktop version of Youtube in Safari for iPhone and iPad, We’ve prepared a step by step guide to force Desktop Version of YouTube in Safari on iPhone. All you have to do is follow this tutorial and all of the Youtube desktop features will be on your iOS device.

youtube-force-desktop-ios


How To Force Desktop Version of YouTube in Safari for iPhone & iPad:

1.Before moving on to the tutorial, you have to enable JavaScript in your browser settings. Open “Settings” > “Safari” > “Advanced“>“JavaScript”>“On“.

2.Open Safari app on your iPhone and type “www.youtube.com/?app=desktop” and Tap on Go.This will take you to the desktop version of Youtube.

3.Now if you don’t want to use the 2nd method, follow the steps below.

  • Open Safari and type “http://youtube.com”, Tap Go.
  • You’ll see mobile version of Youtube, Tap on the menu and scroll down.
  • All you have to do is tap on “Desktop“. There you go desktop version of Youtube is live.

4.iOS 9 & Later:

  • Open Youtube in Safari.
  • You’ll see a circle icon located on the top right side of the screen, Tap and hold on to circle button.
  • A pop-up will show up, select “Request Desktop Site“.

5.iOS 8:

  • Open Youtube in Safari.
  • Now tap on the URL to highlight and bring up bookmark menu.
  • Swipe downwards and you’ll see “Request Desktop Site” option.
  • Tap on it and all done.

How To Set Out of Office Message : Outlook 2016

If you work in office environment, where you use Outlook for your official emails and need to set out of Office Message while you are on holidays or business trip, you can easily set out of message in Outlook 2016. I have prepared a step by step tutorial on how To Set Out of Office Message in Outlook 2016. Before going any further, let me tell you about Out of Office Message, this feature automatically reply to received messages if you are on vacation for a few days or traveling.

Read more: How To Fix Outlook 2016 Crashes at Startup

How To Set Out of Office Message : Outlook 2016

  1. Open Outlook on your PC, select the “File” menu. 
  2. Now select “Info” from the left sidebar.
  3. Choose “Automatic Replies (Out of Office)“.
  4. You’ll see different options on next page, select “Send automatic replies”. Also, you can set time duration to send automatic emails.
  5. In Automatic replies you’ll see two tabs, first select “Inside My Organization”. Now type the message you want to send to your co-workers who are on the same mail system.
  6. Now select “Outside My Organization” tab, type the message you want to send the people outside of your organization.


All Done!. You have successfully configured an automatic Out of Office Message in Microsoft Outlook 2016. 

Set Wallpaper on Android without Cropping – How to Guide.

0
Set Wallpaper on Android without Cropping – How to Guide.

Android is an Awesome Platform for Several Tablets and Smartphones, it offers more features and Choices of devices to users. Most of the World OEMs are now using Android as their Primary Operating System. But Because of Different Screen Size, Android doesn’t offers Universal Wallpaper Size. Thus, if you have a Small Screen Resolution Smartphone, you won’t be able to Fit a Wallpaper with Bigger Resolution. So, while setting a Wallpaper for your Android device, you will experience a process, where you have to crop the photo, to a limit to set it as Wallpaper.

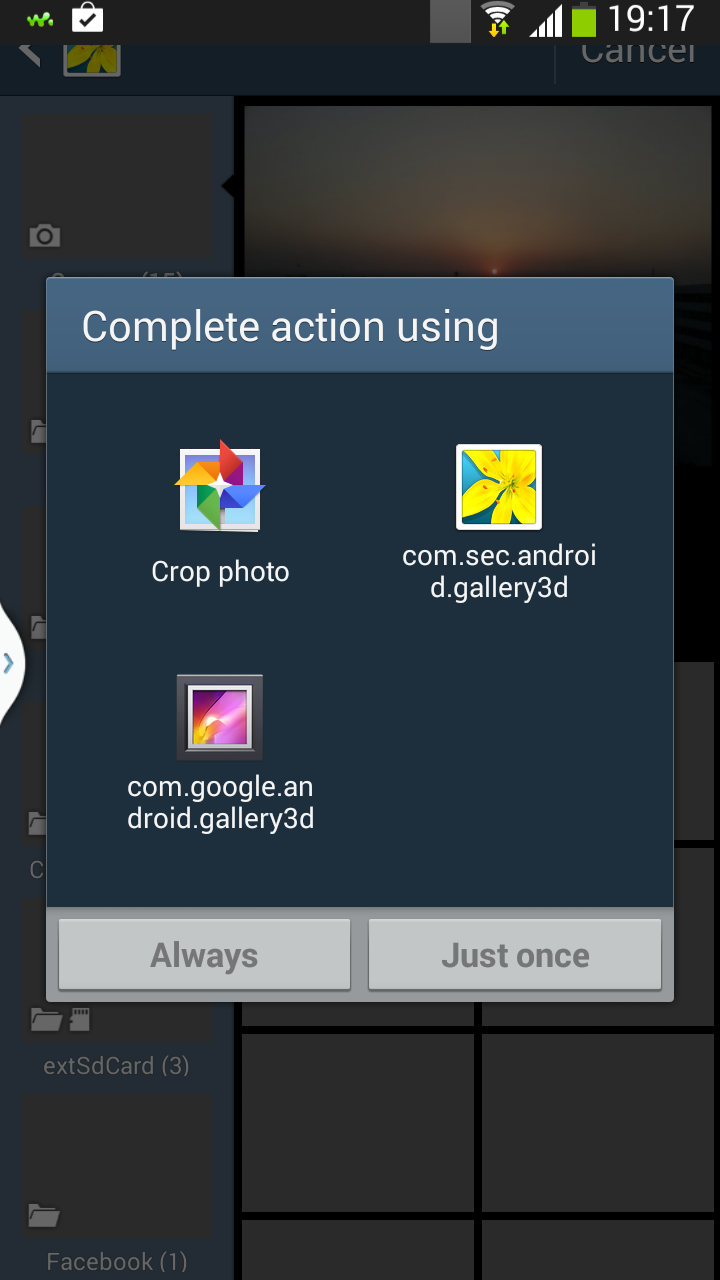
Screenshot_2013-12-29-19-17-55

I, Myself have been teased by such cropping, and searched for its solution for a log a time, then finally found a solution, not a very good one but it still is better than cropping. Cropping for Wallpaper is a great feature but sometimes, you just don’t like it. Sometimes you want to set a Specific thing on your device as Wallpaper, then Cropping comes in handy, but when it comes set the Full Fledged wallpaper, then Cropping will almost kill you.

One of good solutions is to download wallpapers according to the Resolution of your device, but it’s like a temporary solution, you can’t just have all Wallpaper with the exact same resolution. Today, We will provide you some applications that will help you in setting the Wallpaper as whole to your screen, but make sure that you have the Wallpaper whose Resolution is bigger then your device Screen resolution.

Image 2 Wallpaper

Screenshot_31

Simple Image Wallpaper

Screenshot_30

Wallpaper WizardiiScreenshot_32

Cloud VPN for PC Download Free – Windows / Mac

1
Cloud VPN for PC Download Free – Windows / Mac

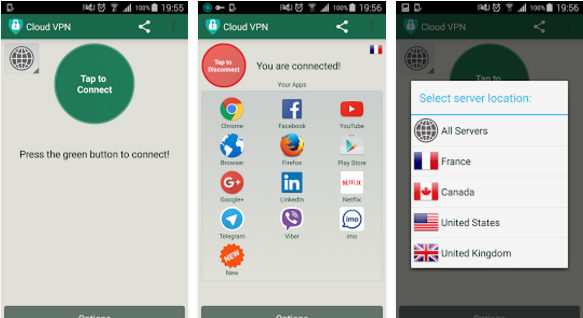
There are hundreds of VPN apps available on Google Play, but all of the apps have something common they don’t give free and unlimited access. But today I’ve an app Cloud VPN which gives you Free & Unlimited browsing without any trials, No registrations, No logins and No bandwidth limitations. I think this is the best VPN till now and today I’ll tell you how to download and install Cloud VPN for Pc.

Cloud VPN for Pc

Before moving on let tell you one thing Cloud VPN is specifically designed for smartphones and tablets, although you can install Cloud VPN for Pc running Windows XP/7/8/8.1/10 Desktop PC and Mac OS X Macbook, iMac. You will need to install an emulator like BlueStacks to use Cloud VPN for PC. 

Download Cloud VPN for PC and Mac

  1. Download Cloud VPN Free Unlimited.
  2. Download and install Bluestacks: Bluestacks Offline Installer | Rooted Bluestacks |Bluestacks App Player | Rooted BlueStacks 2
  3. Once you’ve installed Bluestacks, double click the downloaded Cloud VPN APK.
  4. The APK will be installed using Bluestacks, once installed open Bluestacks and locate the recently installed Cloud VPN.
  5. Click the Cloud VPN icon to open it, follow the on-screen instructions to use it.

You can also use Andy OS or Remix OS to install Cloud VPN, here’s the tutorial: How To Run Android Apps On Mac OS X With Andy | How to launch Remix OS for PC and install Apps for PC via Remix OS.

The Andy OS and Remix OS tutorial explains how to play a game on your Mac OS X, but the same guide will also work for a Windows PC.

That’s all. In case you’re stuck with anything, reach us out through the comment box below.

How to Enable or Disable Driving Mode on Verizon Galaxy S7

0
How to Enable or Disable Driving Mode on Verizon Galaxy S7

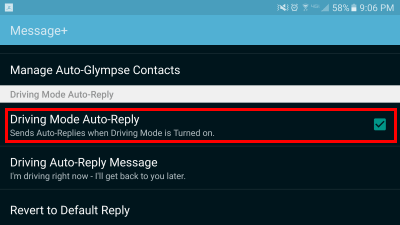
Verizon Samsung Galaxy S7 has a built-in feature which sends automated text while you are driving, this feature is called Driving Mode. When you receive a text or calls it automatically reply to text messages by saying “I’m driving right now – I’ll get back to you later.” I find this feature were handy, but not everyone thinks like that. In the following guide, I’ll show you how to Enable or Disable Driving Mode on Verizon Galaxy S7.

S7-Driving-Mode-Auto-Reply

How to Enable or Disable Driving Mode on Verizon Galaxy S7:

  1. Open Messaging app on your Galaxy S7.
  2. Tap on menu icon located at upper-left corner of the screen.
  3. Tap on “Driving Mode“.
  4. Now if you want to disable driving uncheck the option Driving Mode Auto-Reply.
  5. Whenever you want to enable it, repeat the same process and this time tap on check box to enable.
  6. You can edit the Driving Auto Reply Message, when this option is enabled.

How To Fix Outlook 2016 Crashes at Startup

How To Fix Outlook 2016 Crashes at Startup

If you are facing problems with Microsoft Outlook 2016 crashing when you try to strat it, follow the instructions below in order to fix Outlook 2016 crashes at startup.

Read more: Android: Setup RoadRunner Email [ How To ]

outlook-crashes-at-startup

How To Fix Outlook 2016 Crashes at Startup:

  1. Open Microsoft’s website and write down the current/latest version number.
  2. Now hold down the Windows key and press R, it will open a dialog box.
  3. Type the following command as per your system bit version.
  • 64-bit version, type:
    "%programfiles%\Microsoft Office 15\ClientX64\OfficeClickToRun.exe" /update user updatetoversion=(version)
  • 32-bit version, type:
    "%programfiles%\Microsoft Office 15\ClientX86\OfficeClickToRun.exe" /update user updatetoversion=(version)

4.Add the version number you wrote in 1st step.

5.As soon as Windows prompted shows up, Select “Repair” Office.

How To Fix Outlook 2016 Crashes at Startup [Method 2]:

  • After trying the 1st method, you have no success then try the 2nd one below.
  • Open Outlook while holding down “CTRL” key.
  • Choose “File” > “Manage Add-Ins“.
  • Disable all the plugins to check if the plugins are causing crashes, select the “Disable this add-in” button.
  • Click on Close.
  • Restart Outlook normally