Home Blog Page 319

How To Fix Unfortunately Gallery has Stopped error on Android

How To Fix Unfortunately Gallery has Stopped error on Android

In this post, I’ll tell you how to fix Unfortunately Gallery has Stopped error on Android, this error is referring to gallery app which is crashing or force closing. As on Android there are many errors like this and we are here to fix them all. Let’s fix unfortunately Gallery has stopped error.

[note] Learn how to fix Unfortunately, Settings has stopped error on Android [/note]

fix-unfortunately-Gallery-has-stopped

How To Fix Unfortunately Gallery has Stopped error on Android:

Before going any further you must see our ultimate guide on how to Fix ‘Unfortunately app has stopped’ errors.

Step#1: Open Settings on your Android device.

Step#2: Now tap on More tab.

Step#3: Tap on Application Manager from the list.

Step#4: Now select All Application by swipe to left.

Step#5: There you’ll see all your installed apps, Tap on Gallery.

Step#6: Now all you have to do tap on Clear Cache and Clear data.

Step#7: Now goto home screen and restart your device.

All Done ….

Method#2:

  • Turn off your device.
  • Now press and hold home+Power+Volume Up key.
  • Release the power button once you see logo, but keep holding home and Volume up keys.
  • Now when you see Android logo, let go both buttons.
  • Use the volume down button to navigate and highlight wipe cache partition.
  • Now use the power key to select the option.
  • You have to select ‘Yes‘ when you’ll be prompted to next menu.
  • Now wait for the process to be completed, once it’s done highlight ‘Reboot system now’ and press power button to select it.
  • All Done.

Method#3:

  • Turn off your device.
  • Now press and hold home+Power+Volume Up key.
  • Release the power button once you see logo, but keep holding home and Volume up keys.
  • Now when you see Android logo, let go both buttons.
  • Use the volume down button to navigate and highlight wipe data / factory reset.
  • Now use the power key to select the option.
  • You have to select ‘Yes‘ when you’ll be prompted to next menu.
  • Now wait for the process to be completed, once it’s done highlight ‘Reboot system now’ and press power button to select it.
  • All Done.

How To Fix Unfortunately, Settings has stopped Error on Android

18
How To Fix Unfortunately, Settings has stopped Error on Android

In this post, I’ll tell you how to fix Unfortunately, Settings has stopped error on Android. You can get this situation any Android device and trust me once you start getting this error, you won’t be able to use anything on your device. Let’s fix Unfortunately, Settings has stopped.

fix Unfortunately, Settings has stopped

How To Fix Unfortunately, Settings has stopped Error on Android:

Before going any further you must see our ultimate guide on how to Fix ‘Unfortunately app has stopped’ errors.

Step#1: Open Settings on your Android device.

Step#2: Now tap on More tab.

Step#3: Tap on Application Manager from the list.

Step#4: Now select All Application by swipe to left.

Step#5: There you’ll see all your installed apps, Tap on Touch Settings.

Step#6: Now all you have to do tap on Clear Cache and Clear data.

Step#7: Now goto home screen and restart your device.

All Done ….

Method#2:

  • Turn off your device.
  • Now press and hold home+Power+Volume Up key.
  • Release the power button once you see logo, but keep holding home and Volume up keys.
  • Now when you see Android logo, let go both buttons.
  • Use the volume down button to navigate and highlight wipe cache partition.
  • Now use the power key to select the option.
  • You have to select ‘Yes‘ when you’ll be prompted to next menu.
  • Now wait for the process to be completed, once it’s done highlight ‘Reboot system now’ and press power button to select it.
  • All Done.

Method#3:

  • Turn off your device.
  • Now press and hold home+Power+Volume Up key.
  • Release the power button once you see logo, but keep holding home and Volume up keys.
  • Now when you see Android logo, let go both buttons.
  • Use the volume down button to navigate and highlight wipe data / factory reset.
  • Now use the power key to select the option.
  • You have to select ‘Yes‘ when you’ll be prompted to next menu.
  • Now wait for the process to be completed, once it’s done highlight ‘Reboot systemnow’ and press power button to select it.
  • All Done.

Download Gello Browser APK for Android

0
Download Gello Browser APK for Android

CyanogenMod happens to be the most popular Android custom operating system. CyanogenMod team has developed a handful of applications to entertain the CyanogenMod enthusiasts. To add further to its list, CyanogenMod team came up with the Gello Browser after almost a year of its development. The Gello Browser was teased in 2015 and it was pulled out of the curtains just recently.

CyanogenMod’s Gello browser is intended for the CyanogenMod 13 builds. Developers are free to push the Gello browser into their custom ROMs, the arrival of Gello browser in an Android custom ROM entirely depends on the developer. Gello browser shares the likes of Google Chrome. Gello is based on the Chromium code, which makes it stand in-line with the Google Chrome browser. Google Chrome lovers might find the Gello browser a nice replace just in case Chrome is occupying a major portion of RAM in their smartphone. Apart from carrying the likes of Chrome, Gello comes with tons of new features which include Edge navigation, inverted colors for night mode, powersave, LockLock mode, save for offline, customisable privacy settings for individual websites and a lot more.

Gello is compatible with the CyanogenMod 13 only, but it depends on your luck whether its going to support your phone or not. You can always grab the APK file of an application and install it manually. Luckily, the Gello browser APK file is available and you can give it a try on your Android smartphone. Gello has been found working for some users with a One Plus 2, Galaxy S7 Edge and a few more devices. However, it also had compatibility issues with some of the smartphones. Just in case you’re willing to test out the Gello Browser, you can simply go ahead and download the APK and the install it using the installation instructions given below.


Download and install Gello Browser APK

  1. Download Gello Browser APK.
  2. Download the file to your phone straight away, or copy it to your phone from your PC.
  3. Now on your phone, go to settings > security > allow unknown sources > check this.
  4. Now using a file manager, locate the APK file that your just copied or downloaded.
  5. Tap the APK file and finish installation using the on-screen instructions.
  6. Once installed, access the newly installed game through app drawer.
  7. That’s all. Enjoy Gello Browser!

How To Fix Slither.io Lag issues [ Windows, Android, Mac – iPhone ]

0
How To Fix Slither.io Lag issues [ Windows, Android, Mac – iPhone ]

Slither.io is rocking the charts every where, this old snake concept game with multilayer has set new records. This game is getting 163,711 new users on daily basis and also generating an handsome amount of revenue. Since that many users are playing this game I’ve seen many people are reporting about Lag issues while playing Slither.io. In this Post I’ll tell you how to fix Slither.io lag issues on Windows, Android and iOS.

Fix Slither.io Lag issues

How To Fix Slither.io Lag issues [ Windows, Android – iPhone ]:

Fix Slither.io Lag Issue on Android:

Step#1: Open Settings on your Android device.

Step#2: Now tap on More tab.

Step#3: Tap on Application Manager from the list.

Step#4: Now select All Application by swipe to left.

Step#5: There you’ll see all your installed apps, Tap on Slither.io.

Step#6: Now all you have to do tap on Clear Cache.

Step#7: Now goto home screen and restart your device.

Method2:

  • Turn off your Android device.
  • Now press and hold home+Power+Volume Up key.
  • Release the power button once you see logo, but keep holding home and Volume up keys.
  • Now when you see Android logo, let go both buttons.
  • Use the volume down button to navigate and highlight wipe cache partition.
  • Now use the power key to select the option.
  • You have to select ‘Yes‘ when you’ll be prompted to next menu.
  • Now wait for the process to be completed, once it’s done highlight ‘Reboot system now’ and press power button to select it.
  • All Done.

Fix Slither.io Lag Issue on Windows/Mac:

If you are playing Slither.io on your Windows and Mac, follow the steps below in order to fix lag issue while playing Slither.io.

Chrome:

  • Open Chrome.
  • Click on 3 lines located at top right corner of your screen.
  • Click on Settings.
  • Now scroll down and click on show advance settings.
  • In Privacy tab, Click on Clear browsing data.
  • A new windows will pop-up, select Cached images and files.
  • Now click on clear browsing data.

Set Priority to High:

  • Open task manger on your Windows.
  • Now Click on details tab.
  • Check which app is taking the most of the resources, right click on it and select set priority->high.

Fix Samsung Galaxy S7 “Unfortunately, the process com.android.phone has stopped” error

Fix Samsung Galaxy S7 “Unfortunately, the process com.android.phone has stopped” error

IF you are facing Unfortunately, the process com.android.phone has stopped error on your Samsung Galaxy S7. Follow the instruction below in order to fix this issue.

[note]

Read more: Fix Unfortunately “com.samsung.faceservice has stopped” Error

Read more: How To Fix Unfortunately Facebook Messenger Has Stopped on Android

Read more: How To Fix Unfortunately Snapchat Has Stopped on Android [/note]

Galaxy-S7-com-android-phone-stopped

[note] Learn how to Fix Unfortunately the process com.android.phone has stopped on any Android device.[/note]

Fix Samsung Galaxy S7 “Unfortunately, the process com.android.phone has stopped” error:

Before going any further you must see our ultimate guide on how to Fix ‘Unfortunately app has stopped’ errors.

Step#1: Open Settings on your Android device.

Step#2: Now tap on More tab.

Step#3: Tap on Application Manager from the list.

Step#4: Now select All Application by swipe to left.

Step#5: There you’ll see all your installed apps, Tap on Phone.

Step#6: Now all you have to do tap on Clear Cache and Clear data.

Step#7: Now goto home screen and restart your device.

All Done ….

CLEAR CACHE AND DATA OF THE SIM TOOLKIT:

Step#1: Open Settings on your Android device.

Step#2: Now tap on More tab.

Step#3: Tap on Application Manager form the list.

Step#4: Now select All Application by swipe to left.

Step#5: There you’ll see all your installed apps, Tap on SIM TOOLKIT.

Step#6: Now all you have to do tap on Clear Cache and Clear data.

Step#7: Now goto home screen and restart your device.

Fix Unfortunately App Has Stopped [ Video Tutorial ]


How To Fix Samsung Galaxy S7 slow charging issue

0
How To Fix Samsung Galaxy S7 slow charging issue

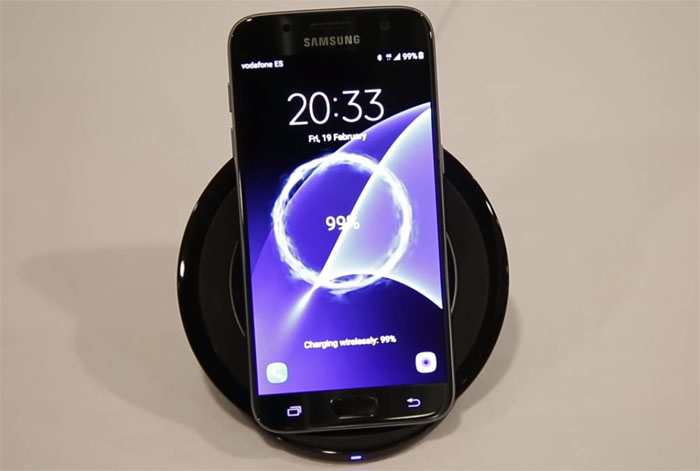
Samsung Galaxy S7 is the best device so far, this device is full package when it comes to processing, take photos, watching videos, playing games and battery end is also very good. In this post, I’ll tell you how to Fix Samsung Galaxy S7 slow charging issue, although I haven’t seen such issue with my Galaxy S7, but I’ve seen many users reporting about it. Let’s fix slow charging issues on Samsung Galaxy S7.

[note] Learn how to fix Samsung Galaxy S7 “Unfortunately, System UI has stopped” error[/note]

Galaxy-S7-slow-charging-issue

How To Fix Samsung Galaxy S7 slow charging issue:

First let me tell you few reason cause of which you are facing such issues, it can be firmware glitch, an app is causing this issue, if you are running a custom rom, charging port has got something in it and you are not using original charger.

Check Which app is causing slow charging issue:

  • To check this you have to perform the following steps.
  • First, Press and hold power key.
  • Now when you see the  ‘Samsung Galaxy S7’ logo on the screen, release the power and hold Volume down key.
  • Don’t let go the volume down key until your device finishes rebooting.
  • When you see Safe mode in the bottom left corner of your screen, release the volume down button.

Now you’ll be in safe mode and all of your third-party apps will be temporarily disabled, now plug-in the charger. If your device start charging normally as it used to do, that means some third party app was causing this issue.

Turn off your phone and charge.

This might help us to know, what is the main issue. If for some reason first step was a total failure, this will help. Now if your device charge normally while no apps are running in background, that means either pre-installed apps are causing this, firmware glitch, battery or a hardware issue.

Try deleting the system cache and then charge:

  • Turn off your Samsung Galaxy S7.
  • Now press and hold home+Power+Volume Up key.
  • Release the power button once you see Samsung Galaxy S7 logo, but keep holding home and Volume up keys.
  • Now when you see Android logo, let go both buttons.
  • Use the volume down button to navigate and highlight wipe cache partition.
  • Now use the power key to select the option.
  • You have to select ‘Yes‘ when you’ll be prompted to next menu.
  • Now wait for the process to be completed, once it’s done highlight ‘Reboot system now’ and press power button to select it.
  • All Done.

factory default settings and try charging it again:

  • Turn off your Samsung Galaxy S7.
  • Now press and hold home+Power+Volume Up key.
  • Release the power button once you see Samsung Galaxy S7 logo, but keep holding home and Volume up keys.
  • Now when you see Android logo, let go both buttons.
  • Use the volume down button to navigate and highlight wipe data / factory reset.
  • Now use the power key to select the option.
  • You have to select ‘Yes‘ when you’ll be prompted to next menu.
  • Now wait for the process to be completed, once it’s done highlight ‘Reboot system now’ and press power button to select it.
  • All Done.

Now after performing all these steps, still you have no luck with Slow Charging issues. I think it would be better to take your device to nearest Samsung Store.

How To Fix Samsung Galaxy S7 “Unfortunately, System UI has stopped” error

How To Fix Samsung Galaxy S7 “Unfortunately, System UI has stopped” error

In this following post, I’ll tell you how to fix Samsung Galaxy S7 “Unfortunately, System UI has stopped” error. If you are wandering how come System UI has stopped, well there can be many reasons like you updated a new firmware, you are running an old firmware and many more. Now let’s fix “Unfortunately, System UI has stopped” error.

[note]how to fix Unfortunately Email has Stopped Error on Samsung Galaxy S7[/note]

fix Unfortunately, System UI has stopped

How To Fix Samsung Galaxy S7 “Unfortunately, System UI has stopped” error:

Delete System Cache: 

  • Turn off your Samsung Galaxy S7.
  • Now press and hold home+Power+Volume Up key.
  • Release the power button once you see Samsung Galaxy S7 logo, but keep holding home and Volume up keys.
  • Now when you see Android logo, let go both buttons.
  • Use the volume down button to navigate and highlight wipe cache partition.
  • Now use the power key to select the option.
  • You have to select ‘Yes‘ when you’ll be prompted to next menu.
  • Now wait for the process to be completed, once it’s done highlight ‘Reboot system now’ and press power button to select it.
  • All Done.
[note] Learn how to fix 401 Error: disabled_client. The OAuth client was disabled [/note]

Master Reset:

  • Turn off your Samsung Galaxy S7.
  • Now press and hold home+Power+Volume Up key.
  • Release the power button once you see Samsung Galaxy S7 logo, but keep holding home and Volume up keys.
  • Now when you see Android logo, let go both buttons.
  • Use the volume down button to navigate and highlight wipe data / factory reset.
  • Now use the power key to select the option.
  • You have to select ‘Yes‘ when you’ll be prompted to next menu.
  • Now wait for the process to be completed, once it’s done highlight ‘Reboot systemnow’ and press power button to select it.
  • All Done.

Fix “UNFORTUNATELY, EMAIL HAS STOPPED” On Samsung Galaxy S7

0
Fix “UNFORTUNATELY, EMAIL HAS STOPPED” On Samsung Galaxy S7

In the post, I’ll tell you how to fix Unfortunately Email has Stopped Error on Samsung Galaxy S7. This is the most common error ” Unfortunately App has Stopped ” on Android devices. We’ve have posted many articles regarding this same issue on specific apps, you can check it from here.

[note]Learn how to fix 401 Error: disabled_client. The OAuth client was disabled.[/note]

“UNFORTUNATELY, EMAIL HAS STOPPED” ON GALAXY S7

Fix “UNFORTUNATELY, EMAIL HAS STOPPED” On Samsung Galaxy S7:

We are posting two methods on how to fix unfortunately Email has stopped on Samsung Galaxy S7, After trying these solutions, still no luck I would suggest your try third party Email apps for Android devices.

[note] Turn on Screen Mirroring on Samsung Galaxy S7 and Connect With SmartTV. [/note]
  • Turn off your Samsung Galaxy S7.
  • Now press and hold home+Power+Volume Up key.
  • Release the power button once you see Samsung Galaxy S7 logo, but keep holding home and Volume up keys.
  • Now when you see Android logo, let go both buttons.
  • Use the volume down button to navigate and highlight wipe cache partition.
  • Now use the power key to select the option.
  • You have to select ‘Yes‘ when you’ll be prompted to next menu.
  • Now wait for the process to be completed, once it’s done highlight ‘Reboot system now’ and press power button to select it.
  • All Done.

Method2:

Step#1: Open Settings on your Android device.

Step#2: Now tap on More tab.

Step#3: Tap on Application Manager from the list.

Step#4: Now select All Application by swipe to left.

Step#5: There you’ll see all your installed apps, Tap on Email.

Step#6: Now all you have to do tap on Clear Cache and Clear data.

Step#7: Now go to home screen and restart your device.

All Done ….

Fix 401 Error: disabled_client. The OAuth client was disabled

Fix 401 Error: disabled_client. The OAuth client was disabled

A few days back one of my friend told me that he is facing 401 Error: disabled_client. The OAuth client was disabled on Samsung Galaxy S7. I haven’t faced such error till now, but as I dig deeper I’ve found out many people are reporting on different forums about this same error. In this post, I’ll tell you how to fix 401 Error: disabled_client. The OAuth client was disabled.

401 Error: disabled_client. The OAuth client was disabled

Fix 401 Error: disabled_client. The OAuth client was disabled:

Before moving on let me tell you what is this error, as I have seen on a forum:

I followed the instructions here and cleared data & cache. This deleted all of my 
email accounts on the phone. I have re-added 1 Gmail & 1 Yahoo.ca account no 
problem. When trying to add second Gmail account & the account that was already 
receiving an error message. I get the following error:

 401. That’s an error

Error: disabled_client

The OAuth client was disabled
  • First, go to settings on your device and then accounts.
  • Select the account on which you’re having issues.
  • You’ll see the settings of that account, Disable all Syncs.
  • Restart your device.
  • Now go back to the settings->Accounts->Choose Account->re-enable all syncs.
  • Open the Email app and log in.
  • You’ll be asked to re-enter the password.

Once you entered the password it will take few seconds to configure your account and it should work now.

Right now this is the perfect solution to fix 401 Error: disabled_client. The OAuth client was disabled on Samsung Galaxy S7. After trying this solution still you are facing the same issue, Try the following steps.

Step#1: Open Settings on your Android device.

Step#2: Now tap on More tab.

Step#3: Tap on Application Manager from the list.

Step#4: Now select All Application by Swipe to left.

Step#5: There you’ll see all your installed apps, Tap on Email App.

Step#6: Now all you have to do tap on Clear Cache and Clear data.

Step#7: Now go to home screen and restart your device.

All Done ….

Download Jungle Clash for PC (Windows and Mac)

0
Download Jungle Clash for PC (Windows and Mac)

Jungle Clash is a new strategy game under the umbrella of My.com B.V. Players are supposed to collect a deck of their favourite fighters, weaponry, armoured vehicles etc. The game prompts the players to collect this data from the famous game Jungle Heat.  Like other strategy games around, you’ve to destroy the enemy towers in this game as well. You will be fighting against the enemies all across the world. Your land is in danger and you must defend it now. Watch for the best time to attack your enemies. Your strategy will mark your win. You can collect a lot of cards and engage in the card wars. Jungle Clash also offers real-time PvP combat. You can fight against thousands of players around the world on your Jungle Clash board. You can also form clans to from alliances with your friends, loot with them, make your enemies taste the dust and leave your name in the history. Jungle Clash is an absolutely free to play game. Android uJungle Clash for PCsers can start playing this game by installing it from the Google Play Store while Apple users can also get it from the App Store.

Those of you looking for a way to run Jungle Clash on their computers, we have a treat for them here. You can now easily run Jungle Clash on your computers. Jungle Clash for PC can be installed and played on a Windows XP/7/8/8.1/10 Desktop PC / Laptop and also Mac OS X powered Macbook Pro, iMac and Macbook Air. All you need to play Jungle Clash for PC is an Android emulator like BlueStacks, BlueStacks 2, Andy OS or Remix OS. Move towards the method now and start playing Jungle Clash for PC.

Download and install Offline Jungle Clash for PC (Windows and Mac)

  1. Download Jungle Clash APK
  2. Download and install Bluestacks: Bluestacks Offline Installer | Rooted Bluestacks | Bluestacks App Player | Rooted BlueStacks 2
  3. Once you’ve installed Bluestacks, double click the downloaded Jungle Clash APK.
  4. The APK will be installed using Bluestacks, once installed open Bluestacks and locate the recently installed Jungle Clash.
  5. Click the Jungle Clash icon to open it, follow the on-screen instructions to play it.

You can also use Andy OS or Remix OS to install Jungle Clash, here’s the tutorial:  How To Run Android Apps On Mac OS X With Andy | How to launch Remix OS for PC and install Apps for PC via Remix OS.

The Andy OS and Remix OS tutorial explains how to play a game on your Mac OS X or how to run Apps for PC as well, but the same guide will also work for a Windows PC.

That’s all. In case you’re stuck with anything, reach us out through the comment box below.

Case Clicker for Windows PC and Mac

0
Case Clicker for Windows PC and Mac

Case Clicker is one of the newest entries in to the Google Play Store. Case Clicker makes you an ammunition dealer. You’ve to buy keys and open various cases in this case. The cases hold different stuff which includes weapons to be exchanged with other people in the town. An online Jackpot system is available so that you don’t have to go through tough times. Case Clicker makes you conduct your arm deals just as you’d do in your real life. Case Clicker brings a number of upgrades to make sure that you don’t get your hands off from the screen. Case Clicker is an absolutely free to play game. Android users can easily get it from the Google Play Store. However if you’re a Windows or Mac user and you want to get Case Clicker on one of the aforementioned PCs, you will have to adapt a little different approach.Case Clicker for PC

Case Clicker can be easily played on a computer powered up with Windows XP/7/8/8.1/10 and also a Mac OS X powered Macbook and iMac. To play Case Clicker for PC, all you need is an Android emulator like BlueStacks or BlueStacks 2. In the succeeding guide, you will learn how you can easily install and play Case Clicker for PC.

Download and install Offline Case Clicker for PC (Windows and Mac)

  1. Download Case Clicker APK
  2. Download and install Bluestacks: Bluestacks Offline Installer | Rooted Bluestacks | Bluestacks App Player | Rooted BlueStacks 2
  3. Once you’ve installed Bluestacks, double click the downloaded Case Clicker APK.
  4. The APK will be installed using Bluestacks, once installed open Bluestacks and locate the recently installed Case Clicker.
  5. Click the Case Clicker icon to open it, follow the on-screen instructions to play it.

You can also use Andy OS or Remix OS to install Case Clicker, here’s the tutorial:  How To Run Android Apps On Mac OS X With Andy | How to launch Remix OS for PC and install Apps for PC via Remix OS.

The Andy OS and Remix OS tutorial explains how to play a game on your Mac OS X, but the same guide will also work for a Windows PC.

That’s all. In case you’re stuck with anything, reach us out through the comment box below.

Fix Samsung Galaxy S3 that’s not charging [ Tips ]

Fix Samsung Galaxy S3 that’s not charging [ Tips ]

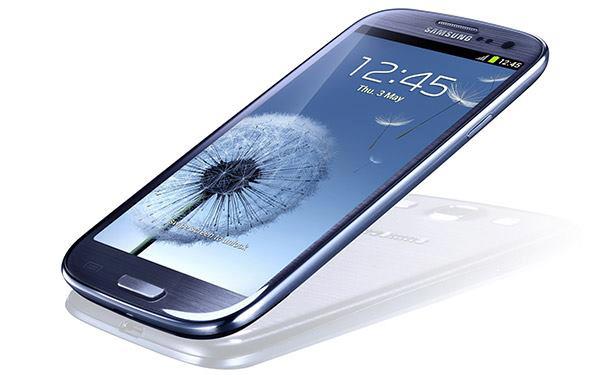
In this post, I’ll tell you how to fix Samsung Galaxy S3 that’s not charging. Although Samsung Galaxy S3 is an old goat, but still there are hundred’s of users who are using Samsung Galaxy S3 as a daily driver. I got many emails regarding this issue that Samsung S3 is not Charging. Now let’s start the method to fix Samsung Galaxy S3 that’s not charging.

[note] Learn how to install Android 6.0 on Samsung Galaxy S3[/note]

samsung s3 not charging

Fix Samsung Galaxy S3 that’s not charging:

Before moving on let me tell you few things, there can be several issues causing this problem. I’ll tell you all the possible troubleshooting methods which  can help you fix Samsung Galaxy S3 not Charging issue. After trying all of these methods still your facing not charging issue on Galaxy S3 then you have to take your device to Samsung service center to get it fixed.

Liquid damage: If water or any liquid made its way to your phone and its start acting weird, then the best possible solution is to take it to service center and get it checked by officials.

Physical damage: If you have dropped your device and your screen is cracked, bent covers, bulges and more. You cannot fix it through any solutions. The best scenario is get it repaired through Samsung service center.

VERIFY YOUR CHARGE IS WORKING:

Now if you are facing battery not charging issue on Galaxy S3, First thing you should do is check if your sockets are working properly. Try charging other devices, use another charger, try changing cables and after that if you see that other devices are not getting charge, that means you have problems with your sockets or extensions.

VERIFY THE USB CABLE/CORD IS GOOD:

This is most basic step change your cable or use the same cable with other device, if the other device is charging that means you have problem with your device charging port.

CHECK IF THE USB/UTILITY PORT IS LOOSE:

Connect your device with USB cable and wiggled the cable in different direction, it may help to know that your charging port is loose or not.

VERIFY THE BATTERY IS FINE:

  • Take the battery out and check the connectors to see that they are properly aligned. If any of the connectors are miss placed your device won’t charge.
  • Spin your battery on the table, if it’s spinning that means it’s time to change your battery.
  • IF none of these factors are there then you should change your battery to see it working or not.

Now as I said before if your Samsung Galaxy S3 is not charging after trying all these methods, it means your device needs to get checked by the officials.