Home Blog Page 317

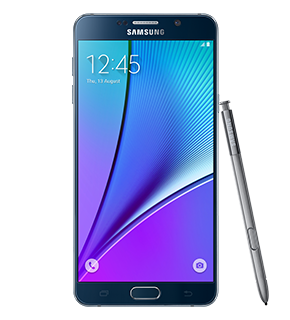
How to fix Samsung Galaxy Note 5 texting issues after Marshmallow update
0
How to fix Samsung Galaxy Note 5 texting issues after Marshmallow update

I am back with another part of Marshmallow issues on Samsung Galaxy Note 5 in this post, I’ll tell How to fix Samsung Galaxy Note 5 texting issues after Marshmallow update. Now there are several issues that users are reporting, I’ll try to address all of them. Following is the list of all Samsung Galaxy Note 5 texting issues after Marshmallow update.

List of Errors:

  • Samsung Galaxy Note 5 can no longer send and receive text messages (SMS) after the Marshmallow update.?
  • SMS notifications on Note 5 stopped working. 
  • Keyboard takes out and replaces letters while texting. 
  • Recipients see question marks and/or boxes when receiving emojis from the Note 5. 
  • Messages shows it’s “Refreshing” but messages are nowhere to be found. 
  • Note 5 no longer sends and receives text messages after the Marshmallow update. 
  • Phone’s text prediction not working properly. Here’s what you need to do to make it work.

How to fix Samsung Galaxy Note 5 texting issues after Marshmallow update:

Let’s start the methods to fix texting issues on Samsung Galaxy Note 5 after updating to Android marshmallow 6.0.

Fix Samsung Galaxy Note 5 can no longer send and receive text messages (SMS) after the Marshmallow update.?

You try booting your device into Safe Mode, Do a Factory Reset or Clear Cache, these are the basic steps you must do before doing anything else. Now after trying all these options still no luck, contact your service provider.

Fix SMS notifications on Note 5 stopped working.

Just go to Settings > Device > Sounds and Notifications > App notifications > set Block notifications to Off.

Fix Keyboard takes out and replaces letters while texting.

Step#1: Open Settings on your Android device

Step#2: Now tap on More tab.

Step#3: Tap on Application Manager from the list.

Step#4: Now select All Application by the swipe to left.

Step#5: There you’ll see all your installed apps, Tap on Samsung Keyboard.

Step#6: Now all you have to do tap on Clear Cache and Clear data.

Step#7: Now go to home screen and restart your device.

Fix Recipients see question marks and/or boxes when receiving emojis from the Note 5:

Most of you may do not know that whenever you put a special character in your SMS it automatically converts it in MMS, now the issue will be at recipients end his of her device doesn’t support MMS.

Fix Messages shows it’s “Refreshing” but messages are nowhere to be found:

Now it seems you are having the issue with your emails, the best thing you can do is check your internet connection, open your browser, use others apps which required an internet connection. Connect with your device with other WiFi connection and use your mobile data to check which is working perfectly with email.

Fix Note 5 no longer sends and receives text messages after the Marshmallow update. 

  • Turn off your device.
  • Now press and hold home+Power+Volume Up key.
  • Release the power button once you see the logo, but keep holding home and Volume up keys.
  • Now when you see Android logo, let go both buttons.
  • Use the volume down button to navigate and highlight wipe cache partition.
  • Now use the power key to select the option.
  • You have to select ‘Yes‘ when you’ll be prompted to next menu.
  • Now wait for the process to be completed, once it’s done highlight ‘Reboot system now’ and press power button to select it.
  • All Done.

Fix Phone’s text prediction not working properly.

Step#1: Open Settings on your Android device

Step#2: Now tap on More tab.

Step#3: Tap on Application Manager from the list.

Step#4: Now select All Application by the swipe to left.

Step#5: There you’ll see all your installed apps, Tap on Samsung Keyboard.

Step#6: Now all you have to do tap on Clear Cache and Clear data.

Step#7: Now go to home screen and restart your device.

[Android N-ify Xposed Module] Convert your Android Lollipop, Marshmallow device into Android N

0
[Android N-ify Xposed Module] Convert your Android Lollipop, Marshmallow device into Android N

Xposed has eased the lives of Android power users. Instead of flashing a custom ROM for a some handy features, users can now install Xposed Modules and play with the features according to their liking. Xposed Framework is best known for bringing in features that one would desire in a custom ROM to your current ROM. Xposed’s beauty is that you can instantly uninstall the features which you don’t like. Xposed pretty much beats the functionality of a custom ROM when it comes to tweaks and MODs. Having Xposed installed on your Android phone can help you modify the behaviour of your device up to the maximum possible extent. Over the past few years, Xposed’s development has been improved by a giant leap. With the updated versions of Android, we also saw Xposed getting updated. Xposed Framework supports Android Lollipop and Android Marshmallow as well at the moment. It took a bit for the developers to enable Xposed Framework to work with Android Lollipop due to the system changes made by Google, but what matters in the end is that it works at the least. 

Few months ago, Google announced the next variation of Android, the all new Android N. Android N’s developer previews are out for select devices. The developer previews have given the users a glimpse of what this new operation system is going to have. While we live in an open source world of Android, it’s almost impossible that something lands in and it doesn’t get ported to other Android devices. It didn’t take long for developers to port the features of Android N and allow users to experience it beforehand. Xposed Framework’s Android N-ify Module  came out to play  its role and allow almost all Android users with supported devices to enjoy some lovely features of Android N on their Android Lollipop+ devices.

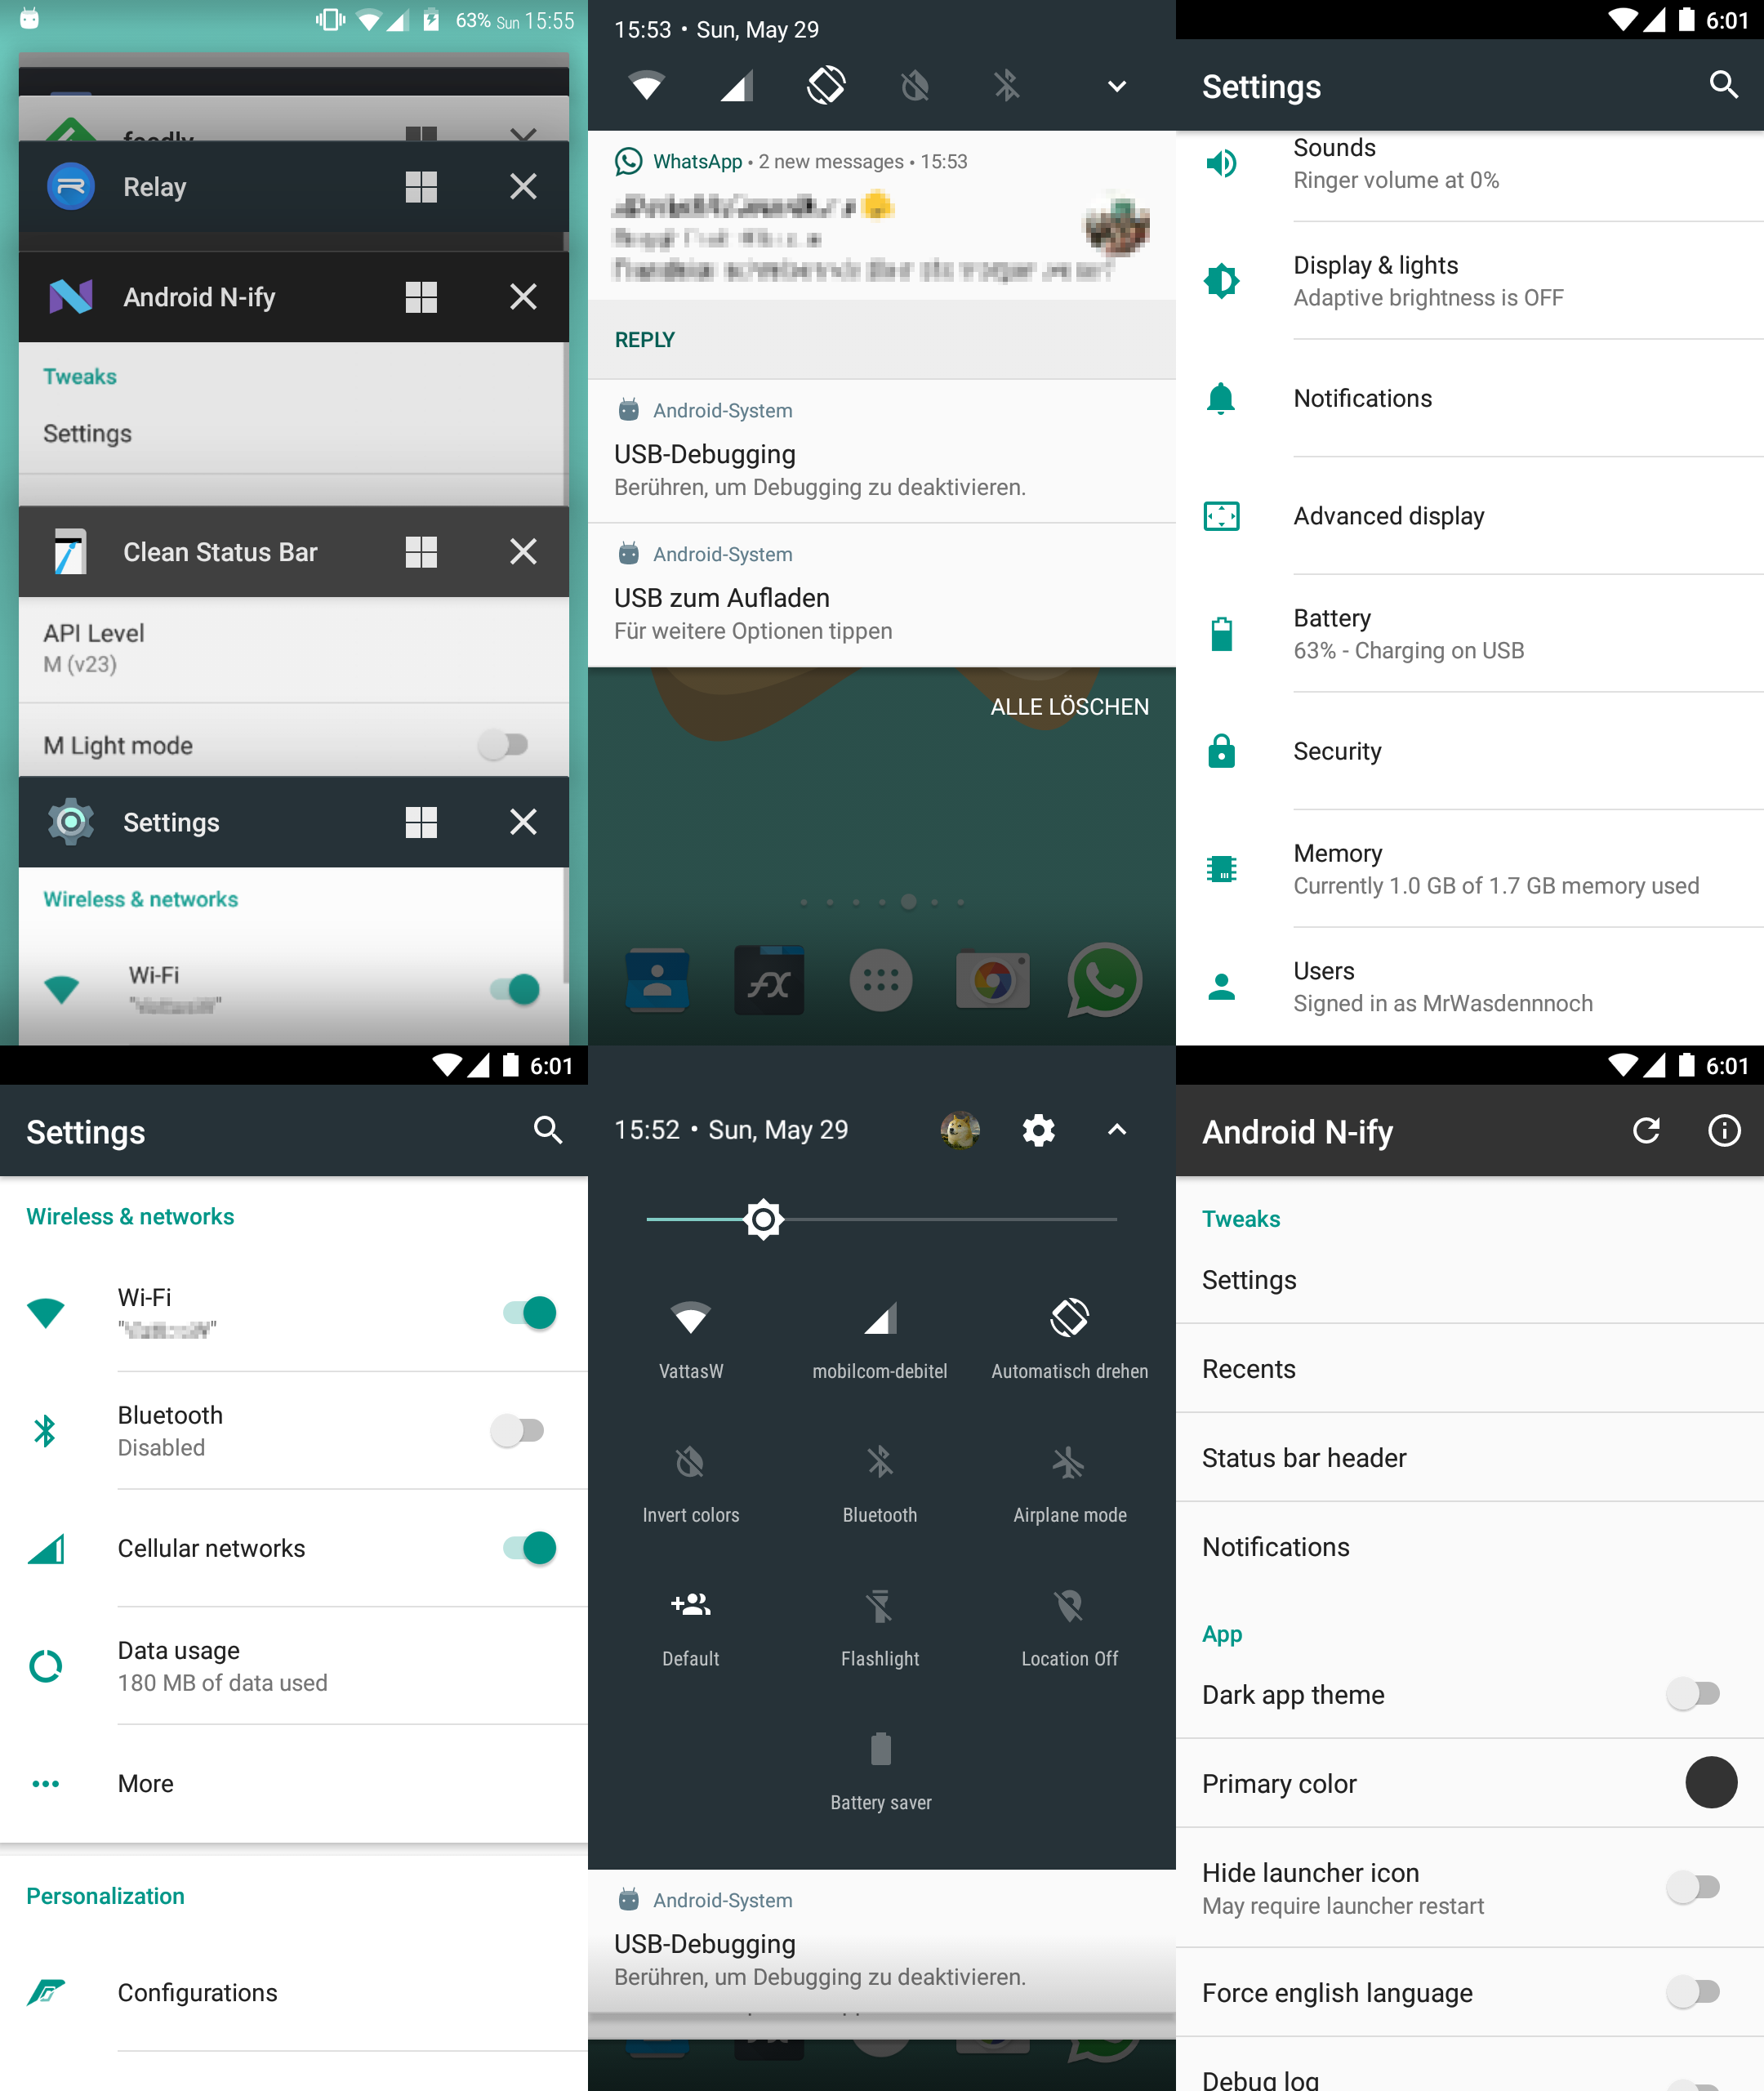
Android N-ify Xposed Module supports the new notifications and quick settings from the Android N. Furthermore, it also adapts the new design changes and also brings tile summaries. You can also enjoy the Quick Switch feature from Android N and also use the recent button to navigate through the recents of your device. Android N-ify plans to bring some handy features in the future. The expected/planned features include Quick Reply, Night Mode, Doze Mode etc.  Android N-ify is the choice to go with if you want to transform your Android Lollipop or Android Marshmallow powered Android device into Android N. The future updated might enhance your experience up to your expectations. Let’s have a look on how to convert your Android Lollipop or Android Marshmallow into an Android N device by means of Android N-ify Xposed Module.

How to install Xposed Framework

How to install Android N-ify Xposed Module

  1. Make sure that you’ve installed Xposed Framework on your Android smartphone.
  2. Now download the Android N-ify Xposed Module on your Android device.
  3. Now install the Android N-ify Xposed Module using one of the guides linked above.
  4. You can now access the Android N-ify module from your installed Xposed modules and start applying your desired changes.
  5. That’s all! You’re done!
Credits: MrWasdennnoch

Android N-ify Credits: MrWasdennnoch,

Install TWRP Recovery and Root Lenovo Vibe K5

2
Install TWRP Recovery and Root Lenovo Vibe K5

Lenovo has been doing pretty good with its new Android devices recently. Lenovo Vibe K5 was pulled out of curtains by Lenovo back in February 2016. It’s another mid-ranger by Lenovo which is a great choice for Android users looking for a device fitting their needs in a friendly budget. Lenovo Vibe K5 touts a 5.0 inch display with 720 x 1280 pixels and 294 ppi. Lenovo equipped the Vibe K5 with a Qualcomm Snapdragon Quad-Core 415 CPU and Adreno 405 GPU. We can find a 2 GB RAM plugged inside accompanying an internal storage chip of 16 GB. There’s an option for expanding this storage by means of a microSD card slot as well. Lenovo Vibe K5 has got a 13 MP camera on its back and a 5MP camera on the front which has become a standard front camera for the smartphones of today. Although this device came out in February 2016, but it still runs on Android 5.1.1 Lollipop out of the box.

Lenovo Vibe K5’s development has just begun. This device has already been blessed by a custom recovery and root access. Now that the custom recovery is out for our beloved device, this paves a way for custom ROMs and other custom .zip files. Having rooted your Vibe K5 means freedom. You’re all set to enhance the performance, battery life and bring in some new features by means of root-specific applications. Obviously you need to root your device and flash a custom recovery to be able to do what we just talked about. Our sole purpose to be here is to help you out with installing the custom recovery and root your Lenovo Vibe K5. We can proceed now to flash the TWRP 3.0.2-1 recovery and root our beloved Lenovo Vibe K5

Precautions

  1. This guide is only for Lenovo Vibe K5. Do not try this on any other device except the following variants.
    1. A6020a40
    2. A6020i36
    3. A6020a46
  2. Charge your phone up to 50% to avoid any power issues during the recovery installation and root process.
  3. Backup your important contacts, call logs, sms messages and media content as a safety measure: Backup Guide
  4. Enable USB debugging mode on your Vibe K5. To do so, go to settings > about device > tap build number for 7 times. You will have developer options in settings now. Open developer options and enable USB debugging mode.
  5. Enable OEM Unlocking on your Lenovo Vibe K5
  6. Use original data cable to establish connection between your phone and your PC.
  7. Follow this guide to the letter.

Disclaimer: This is a custom process which will void the warranty of your phone. Make sure that you’re doing it at your own risk. In case of a mishap, Techbeasts or Lenovo may not be held responsible.

Required downloads and installations

How To Install CWM & Root Lenovo Vibe K5

  1. Open the Minimal ADB & Fastboot folder that you got after extracting the Minimal ADB & Fastboot drivers zip file.
  2. From the Minimal ADB & Fastboot folder open “py_cmd.exe” file.
  3. Now connect your Lenovo Vibe K5 with your PC. Make sure that you’ve enabled USB debugging mode before doing this. Upon connecting having USB debugging mode enabled, it will ask you on your phone to allow connection with your PC. Allow the connection and proceed.
  4. In py_cmd.exe type “adb devices“. You will see the list of attached devices in command line, which will show some codes against your device as well. This means that your device is properly connected now.
  5. Now enter following commands in the py_cmd.exe one by one.
    1. adb reboot bootloader

  6. Your device will now reboot in fastboot / bootloader mode.
    1. fastboot devices

  7. It will verify your device’s connection in fastboot mode.
    1. fastboot flash recovery recovery.img

  8. It will flash CWM recovery in your Vibe K5.
    1. fastboot reboot

  9. It will reboot your device from fastboot mode.
  10. Now turn off your phone completely as we are going to boot in to recovery mode.
  11. After you’ve turned off your phone, turn it on by pressing and holding Volume Up + Volume Down + Power Key. As it boots up, it will ask you for language selection, select English and proceed.
  12. Now you will have access to the newly installed CWM recovery. In CWM recovery navigate using Volume Up & Down keys and use power key to make selection.
  13. Select “Install Zip > Choose from sdcard > select the SuperSu.zip file that you downloaded and copied in your phone”. Let it flash the SuperSu.zip file, once done, reboot your phone.
  14. Find SuperSu application in app drawer. You can verify root access using Root Checker application.

That’s all. Don’t forget to check out the 10 best root applications listed on our site. In case you’re stuck with anything, reach us out through the comment box below.

Recovery Credits: Shreps

Online and Offline Doodle Army 2 Mini Militia for PC

0
Online and Offline Doodle Army 2 Mini Militia for PC

Doodle Army 2 Mini Militia is the successor of the famous Doodle Army. The new game happens to be a multiplayer in which you can form teams with up to either 6 or 12 people depending upon your network. Once you’ve formed a team, you’re all set to jump into battles and shoot the enemies down. You can train your army in the offline mode. Practice with the heaviest weapons and sharpen your skills as much as possible. There’s a co-op and a survival mode in which you will be fighting against the enemy armies. Doodle Army 2 Mini Militia is based on Stickman concept. Another interesting fact about this game is that it has evolved on the basis of suggestions and feedback submitted by the users. Doodle Army 2 Mini Militia sports eye-catching graphics that perfectly fit its Action category. Doodle Army 2 Mini Militia is a free to play game for Android and iOS users. If you’re willing to play this game on your desktop PC or laptop, that is possible too but the method is a bit different.

Online and Offline Doodle Army 2 Mini Militia for PC can be played on a computer powered up with Windows XP/7/8/8.1/10 desktop/Laptop or a Mac OS X powered Macbook/iMac. All you need to run Doodle Army 2 Mini Militia for PC is an emulator like BlueStacks or BlueStacks 2. The detailed tutorial is right ahead. You can go through the installation instructions now and start playing Doodle Army 2 Mini Militia for PC.

Download Doodle Army 2 Mini Militia For Windows PC & Mac (Online and Offline)

  1. Download Doodle Army 2 Mini Militia APK
  2. Download and install Bluestacks: Bluestacks Offline Installer | Rooted Bluestacks |Bluestacks App Player
  3. Once you’ve installed Bluestacks, double click the downloaded Doodle Army 2 Mini Militia APK.
  4. The APK will be installed using Bluestacks, once installed open Bluestacks and locate the recently installed Doodle Army 2 Mini Militia.
  5. Click the Doodle Army 2 Mini Militia icon to open it, follow the on-screen instructions to play it.

You can also use Andy OS to install Doodle Army 2 Mini Militia, here’s the tutorialHow To Run Android Apps On Mac OS X With Andy

The Andy OS tutorial explains how to play a game on your Mac OSX, but the same guide will also work for a Windows PC.

That’s all. In case you’re stuck with anything, reach us out through the comment box below.

Doodle Army 2 Mini Militia APK for Android Download

0
Doodle Army 2 Mini Militia APK for Android Download

The successor of Doodle Army is pretty interesting. The new Doodle Army is named as Doodle Army 2 Mini Militia. Doodle Army 2 Mini Militia is a pure multi-player game in which you can jump into the combat forming a team with up to 6 players online on different servers or you can form a team of 12 players available on a same local Wi=Fi connection. You can train your army offline and then join the battles online to show off your skills. There are Co-op and survival modes to test your skills. There’s a variety of weapons to power up your shooting skills in this game. Doodle Army 2 has got some nice graphics to make the gameplay look more enchanting. Doodle Army 2 is based on stickman aesthetics. Doodle Army 2 basically evolved out of the ideas and suggestions given to the developers by the users. Doodle Army 2 Mini Militia is a free to play game and offers some in-app purchases. You can get your hands on this game for free from the Google Play Store or the Apple App Store.

Just in case your location isn’t showing the Doodle Army 2 in the Play Store or you are unable to access the play store due to some unfortunate reason and you still want to install this game then having an APK file maybe the only solution you got. We’ve extracted the APK file of latest version of Doodle Army 2 Mini Milita and linked it here alongside the installation instructions. All you have to do is to go ahead and hit the download link  and install it using the tutorial given below.

Doodle Army 2 Mini Militia APK and How to Install

  1. Download Doodle Army 2 Mini Militia APK
  2. Download the file to your phone straight away, or copy it to your phone from your PC.
  3. Now on your phone, go to settings > security > allow unknown sources > check this.
  4. Now using a file manager, locate the APK file that your just copied or downloaded.
  5. Tap the APK file and finish installation using the on-screen instructions.
  6. Once installed, access the newly installed game through app drawer.
  7. That’s all. Enjoy Doodle Army 2 Mini Militia !

Just in case you’re willing to play the new version of Temple Run 2 on your PC then checkout Doodle Army 2 Mini Militia for PC!


Root and Install TWRP Recovery on Galaxy Tab S2 8.0 2016 [T713N/T719N]

Root and Install TWRP Recovery on Galaxy Tab S2 8.0 2016 [T713N/T719N]

Samsung launched a refreshed version of the Galaxy Tab S2 earlier in 2016. The 2016 Galaxy Tab S2 also comes in two variants i.e. the 8.0-inch and the 9.7-inch. Galaxy Tab S2 8.0 2016 carries some minor improvements over its predecessors. Samsung used a Snapdragon 652 Octa-Core 64 bit CPU to power up the 2016 Tab S2.

Samsung plugged its own Exynos 5433 CPU in the original Tab S2. Addition of the Snapdragon 652 CPU in the refreshed Tab S2 improves its performance, however, there’s a slight decrease in the GPU of this new Tab S2. The RAM remains the same i.e. 3 GB and in the internal storage begins from 32 GB with an option of microSD card slot. Tab S2 carries an 8 MP shooter at the back and a 2.1 MP shooter on the front. While the original Tab S2 ran on Android Lollipop, this successor runs on Android 6.0.1 Marshmallow out of the box.

Root and Install TWRP Recovery on Galaxy Tab S2 8.0 2016 [T713N/T719N]

Folks getting their hands on the Tab S2 2016 edition have some good stuff to play with now. The Galaxy Tab S2 has already been rooted and blessed by a TWRP recovery as well. This now means that you can customize your Tab S2, enhance its performance, improve the battery time, pull in some new features and also try some new custom operating systems. But to begin with all the aforementioned stuff, you definitely need to bypass the root boundaries and then flash the recovery as well.

We’ve managed to put together this tutorial which will help you to flash the TWRP 3.0.2-1 Recovery on your 2016 Galaxy Tab S2 8.0 SM-T713N and SM-T719N running Android 6.0.1 Marshmallow. After flashing the TWRP, you can easily root your Tab S2 as well. It’s time for us to go ahead and get this done.Install TWRP Recovery on Galaxy Tab S2

Preparations

  • This guide is only for the devices mentioned above. Do not try this on any other device.
  • Charge your device up to 50%.
  • Use original data cable to establish a connection between your PC and your phone.
  • Backup your important data as a safety measure. Use the backup guides linked below.
  • Follow this guide to the letter to avoid any mishap.

DISCLAIMER: FLASHING CUSTOM RECOVERY AND ROOTING THE DEVICE VOID ITS WARRANTY. IN CASE OF A MISHAP, TECHBEASTS OR SAMSUNG MAY NOT BE HELD RESPONSIBLE. MAKE SURE THAT YOU’RE DOING EVERYTHING AT YOUR OWN RISK AND WITH YOUR FULL UNDERSTANDING.

Required Downloads:

Install TWRP Recovery and Root Galaxy 2016 Galaxy Tab S2 8.0

  1. Open Odin3 V3.10.6.exe that you extracted on your PC.
  2. Enable OEM Unlock on your 2016 Galaxy Tab S2 8.0. To do so on your phone, go to settings > about device > tap the build number for 7 times to enable developer options. Get back to the settings and open developer options. Under developer, options turn on “OEM unlock.
  3. Put your 2016 Galaxy Tab S2 8.0 in download mode now. To do so, turn it off completely. Now turn it on by pressing and holding Volume Down + Home + Power Key. Once your phone boots up, press the Volume Up key to continue.
  4. Connect your phone to your PC now. The ID:COM box in the top-left corner of Odin3 should turn blue. This indicates that your phone is connected properly.
  5. Click the “AP” tab in Odin and select the TWRP recovery.tar file that you downloaded. It will take a second or two for Odin3 to load this file.
  6. Make sure that your Odin3 looks like this. The only option ticked should be F. Reset Time.

  7. Odin 3.10.6 Explained_Techbeasts
  8. You’re all set to flash the recovery now. Just click the start button in Odin3 and sit back.
  9. Once the process box above ID:COM box shows a green light and flashing process is finished, disconnect your device.
  10. Turn off your device properly as we are going to boot into recovery mode.
  11. Now turn it on by pressing and holding Volume Up + Home + Power Key. This will boot your device in recovery mode. It should be a TWRP recovery that you just installed.
  12. In TWRP Recovery, tap Wipe > Format Data to remove encryption. This will erase your device completely.
  13. Tap “Wipe > Format Data > type “yes” to format data. This is important to disable encryption. This step will factory reset your phone, so make sure that you’ve backed up the entire data at hand.
  14. Go back to the main menu in TWRP Recovery and tap “Reboot > Recovery”. This will once again reboot your phone in TWRP.
  15. Make sure that you’ve copied the SuperSU.zip and dm-verity.zip files in external SD Card or USB OTG, if not then transfer both these files to your external SD Card by using MTP mode in TWRP now. Once you have the files, tap “Install > locate the SuperSU.zip according to the location where you copied > flash it”.
  16. Once again tap “Install > locate the dm-verity.zip file > flash it”.
  17. After flashing, reboot your phone to the system.
  18. That’s all. You’re rooted and have a TWRP recovery installed. Best of luck.
  19. As it boots up, check out the SuperSu in the application drawer. Also, install BusyBox from Play Store.
  20. Verify root access using Root Checker.
  21. That’s all. You’re now set to unleash the open source nature of Android.

Don’t forget to backup Nandroid now.

Stuck with anything? Reach us out through the comment box below!

Credits: Ahsyx 

Root and Install TWRP Recovery on Galaxy Tab S2 9.7 2016 [T813N/T819N]

Root and Install TWRP Recovery on Galaxy Tab S2 9.7 2016 [T813N/T819N]

Galaxy Tab S2 received an update earlier in 2016. We are not talking about the software update, the Tab S2 actually got a hardware update. Samsung released a successor of the Tab S2 8.0 and 9.7 almost 2 months back. The refreshed version carried a Quad Core Snapdragon 652 64-bit CPU accompanied by a 3 GB RAM and 32 GB internal storage. An external mircoSD card slot was also there.

The refreshed version carried the same 8 MP shooter at the back and a 2.1 MP shooter on the front. Another notable update was the software of this device. The 2016 9.7-inch Tab S2 ran on Android 6.0.1 Marshmallow out of the box while the original Tab S2 was still running on Android 5.1.1 Lollipop.

It didn’t take long for the developers to void the boundaries of the 2016 Galaxy Tab S2. Good news for Android power users with a Tab S2 2016 came out quite early. This device has already been rooted and flashed with a custom recovery. The latest version of TWRP recovery i.e. TWRP 3.0.2-1 made its way to the Galaxy Tab S2 9.7 and 8.0 (2016 editions). In case you own this device, it may be the time for you to start tweaking it and get the best out of it.

Root and Install TWRP Recovery on Galaxy Tab S2 9.7 2016 [T813N/T819N]

As you scroll down, you will come across a comprehensive guide to flash TWRP recovery and then root your 2016 Galaxy Tab S2 9.7 SM-T813N (Wi-Fi only) and SM-T819N (LTE) running Android 6.0.1 Marshmallow. Before installing the recovery and rooting the phone, we will apply some precautions to make sure that we are keeping the process and device safe and sound.

Preparations

  • This guide is only for the devices mentioned above. Do not try this on any other device.
  • Charge your device up to 50%.
  • Use original data cable to establish a connection between your PC and your phone.
  • Backup your important data as a safety measure. Use the backup guides linked below.
  • Follow this guide to the letter to avoid any mishap.

DISCLAIMER: FLASHING CUSTOM RECOVERY AND ROOTING THE DEVICE VOID ITS WARRANTY. IN CASE OF A MISHAP, TECHBEASTS OR SAMSUNG MAY NOT BE HELD RESPONSIBLE. MAKE SURE THAT YOU’RE DOING EVERYTHING AT YOUR OWN RISK AND WITH YOUR FULL UNDERSTANDING.

Required Downloads:

Install TWRP Recovery and Root Galaxy 2016 Galaxy Tab S2 9.7

  1. Open Odin3 V3.10.6.exe that you extracted on your PC.
  2. Enable OEM Unlock on your 2016 Galaxy Tab S2 9.7. To do so on your phone, go to settings > about device > tap the build number for 7 times to enable developer options. Get back to the settings and open developer options. Under the Developer options turn on “OEM unlock.
  3. Put your 2016 Galaxy Tab S2 9.7 in download mode now. To do so, turn it off completely. Now turn it on by pressing and holding Volume Down + Home + Power Key. Once your phone boots up, press the Volume Up key to continue.
  4. Connect your phone to your PC now. The ID:COM box in the top-left corner of Odin3 should turn blue. This indicates that your phone is connected properly.
  5. Now click the “AP” tab in Odin and select the TWRP recovery.tar file that you downloaded. It will take a second or two for Odin3 to load this file.
  6. Make sure that your Odin3 looks like this. The only option ticked should be F. Reset Time.

  7. Odin 3.10.6 Explained_Techbeasts
  8. Once the process box above ID:COM box shows a green light and flashing process is finished, disconnect your device.
  9. Turn off your device properly as we are going to boot into recovery mode.
  10. Now turn it on by pressing and holding Volume Up + Home + Power Key. This will boot your device in recovery mode. It should be a TWRP recovery that you just installed.
  11. In TWRP Recovery, tap Wipe > Format Data to remove encryption. This will erase your device completely.
  12.  Tap “Wipe > Format Data > type “yes” to format data. This is important to disable encryption. This step will factory reset your phone, so make sure that you’ve backed up the entire data at hand.
  13. Go back to the main menu in TWRP Recovery and tap “Reboot > Recovery”. This will once again reboot your phone in TWRP.
  14. Make sure that you’ve copied the SuperSU.zip and dm-verity.zip files in external SD Card or USB OTG, if not then transfer both these files to your external SD Card by using MTP mode in TWRP now. Once you have the files, tap “Install > locate the SuperSU.zip according to the location where you copied > flash it”.
  15. Now once again tap “Install > locate the dm-verity.zip file > flash it”.
  16. Once done flashing, reboot your phone to the system.
  17. That’s all. You’re rooted and have a TWRP recovery installed.
  18. Once flashed, tap the Reboot > System option from the main TWRP screen. If TWRP asks you to root your device, cancel this option and proceed to the reboot.
  19. As it boots up, check out the SuperSu in the application drawer. Also, install BusyBox from Play Store.
  20. Verify root access using Root Checker.
  21. That’s all. You’re now set to unleash the open source nature of Android.

Don’t forget to backup Nandroid now.

Stuck with anything? Reach us out through the comment box below!

Credits: Ahsyx 

Root Samsung Galaxy Tab E and Install TWRP – Working

Root Samsung Galaxy Tab E and Install TWRP  – Working

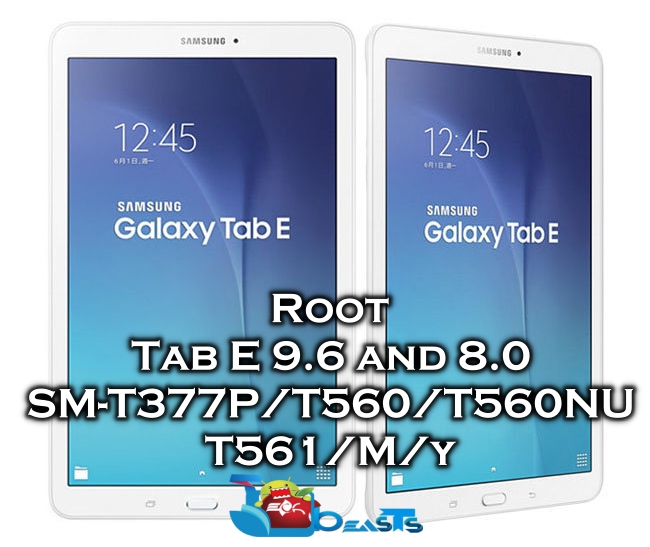
Samsung Galaxy Tab E was released last year as a mid-range device. Samsung has been bringing a variety of Galaxy Tab devices falling in the premium category, mid-range and also in the low-price category. Galaxy Tab E may be one of the devices which are pretty easy for users to get their hands on. Following the tradition, Samsung released the Galaxy Tab E in two sizes as well. The Galaxy Tab E comes as a 9.6-inch slate and as well as an 8.0-inch handheld. Galaxy Tab E 9.6 and 8.0 only differ in terms of display, the rest of the hardware is almost the same.Root Samsung Galaxy Tab E

Both the Tab E 9.6 and 8.0 are equipped with either a Spreadtrum Quad-core 1.3 GHz CPU or a  Qualcomm Snapdragon Quad-core 1.3 GHz Cortex-A53 CPU and a RAM of 1.5 GB. At the back, a 5 MP shooter is fixed and on the front, a 2 MP Shooter is placed. Tab E 9.6 comes with 8 GB internal storage and the Tab E 8.0 comes with 16 GB internal storage. Both of these devices are equipped with a 5000 mAh battery. This Tab duo runs on Android Lollipop out of the box but it’s upgradable to Android 6.0.1 Marshmallow.

Galaxy Tab E is around for quite a while now. You may find a little bit of custom stuff to play with this device as well now. To begin customizing your Galaxy Tab E, you need to gain the root access first of all. To flash custom files on it, you need a custom recovery. Luckily a custom recovery (TWRP 3.0.2-1 or TWRP 2.) is available for our beloved Tab E which means it’s pretty easy to root it now.

Install TWRP and Root Samsung Galaxy Tab E

Let’s go ahead and flash the TWRP recovery on the Galaxy Tab E 9.6 and Galaxy Tab E 8.0. Once we have flashed the TWRP recovery, we will flash SuperSU to root the device. The on-going guide works with Galaxy Tab E 9.6 Spreadtrum SM-T560, 561, 561Y, 561M and Qualcomm Snapdragon 8.0-inch SM-T377P (Sprint) and 9.6 Tab E SM-T560NU running Android Lollipop or Android Marshmallow.

Preparations

  • This guide is only for the devices mentioned above. Do not try this on any other device.
  • Charge your device up to 50%.
  • Use original data cable to establish connection between your PC and your phone.
  • Backup your important data as a safety measure. Use the backup guides linked below.
  • Follow this guide to the letter to avoid any mishap.

DISCLAIMER: FLASHING CUSTOM RECOVERY AND ROOTING THE DEVICE VOID ITS WARRANTY. IN CASE OF A MISHAP, TECHBEASTS OR SAMSUNG MAY NOT BE HELD RESPONSIBLE. MAKE SURE THAT YOU’RE DOING EVERYTHING AT YOUR OWN RISK AND WITH YOUR FULL UNDERSTANDING.

Required Downloads:

  • Download and install Samsung USB drivers.
  • Also, Download and extract Odin 3.10.6.
  • Download SuperSU.zip file and copy it to your Galaxy Tab E’s internal storage.
  • Download  TWRP Recovery file according to your device and model number and copy it to your desktop.

How to Install TWRP Recovery and Root Galaxy Tab E

  1. Open Odin3 V3.10.6.exe that you extracted on your PC.
  2. Enable OEM Unlock on your Tab E. To do so on your phone, go to settings > about device > tap the build number for 7 times to enable developer options. Get back to the settings and open developer options. Under developer, options turn on “OEM unlock.
  3. Put your Tab E in download mode now. To do so, turn it off completely. Now turn it on by pressing and holding Volume Down + Home + Power Key. Once your phone boots up, press the Volume Up key to continue.
  4. Connect your phone to your PC now. The ID:COM box in the top-left corner of Odin3 should turn blue. This indicates that your phone is connected properly.
  5. Now click the “AP” tab in Odin and select the TWRP recovery.tar file that you downloaded. It will take a second or two for Odin3 to load this file.
  6. Make sure that your Odin3 looks like this. The only option ticked should be F. Reset Time.

  7. Odin 3.10.6 Explained_Techbeasts
  8. Now you’re all set to flash the recovery. Just click the start button in Odin3 and sit back.
  9. Once the process box above ID:COM box shows a green light and flashing process is finished, disconnect your device.
  10. Now again press and hold Volume Down + Home + Power key. As soon as the screen of your Tab E goes black, immediately switch from Volume Down to Volume Up key. This will take you to TWRP recovery now.
  11. Once you’ve verified that TWRP recovery is working fine, tap Install option in the TWRP recovery.
  12. Now after tapping install, locate the copied SuperSU.zip file and flash it.
  13. Once flashed, tap the Reboot > System option from the main TWRP screen. If TWRP asks you to root your device, cancel this option and proceed to the reboot.
  14. As it boots up, check out the SuperSu in the application drawer. Also, install BusyBox from Play Store.
  15. Verify root access using Root Checker.
  16. That’s all. You’re now set to unleash the open source nature of Android.

Don’t forget to backup Nandroid now.

Stuck with anything? Reach us out through the comment box below! This is how you can Root Samsung Galaxy Tab E.

Credits: Ahsyx 

How To Find Who has Access to your Google Drive Files and Folders

0
How To Find Who has Access to your Google Drive Files and Folders

Google drive allows us to upload files, create documents and share them with others, you can also create folders. Now by default these files and folder are private unless you gave permission to someone to access these files and folders. Alos you can set permissions to allow anyone on the internet can access it, now the main reason for which I’ve created this post. How To Find Who has Access to your Google Drive Files and Folders, Unfortunately, there is no such option provided by Google but we can find out who has access to our Google drive by using Permissions Auditor for Google Drive.

google drive access

How To Find Who has Access to your Google Drive Files and Folders:

  • First, Open your browser, Open Gmail and login with your account associated with your Gmail account.
  • Now click on this link to install Chrome add-on ( Permissions Auditor for Google Drive ).
  • Click on Free to install the add-0n, as soon as the installation is completed you’ll see a spreadsheet opens up.
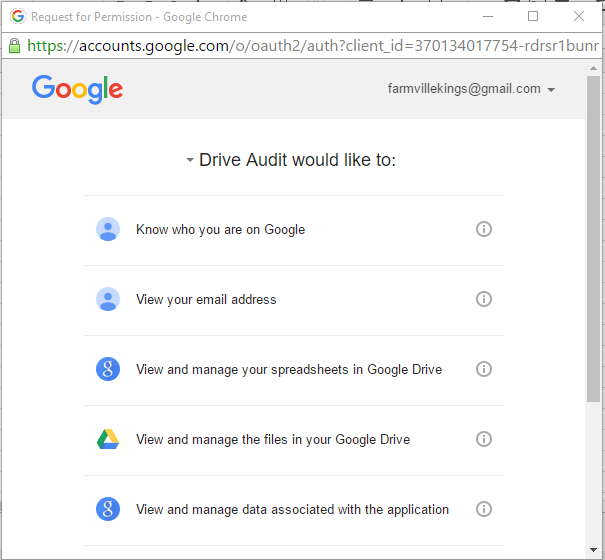
  • You have to grant permission to this add-on, Click on Allow when permission prompt shows.
  • Go back to the spreadsheet and click on Add-ons -> Drive Permissions Auditor.
  • You’ll see few things highlighted on the top of the spreadsheet, on the right side of the screen you’ll see a pop-up, scroll down and click on Start Audit.
  • Now the audit process will start and you’ll see spreadsheet will start updating with the files details as shown in the picture below.

google drive access

All Done.

How To Fix Samsung Galaxy S6 Apps Not Updating On Wi-Fi Issue

0
How To Fix Samsung Galaxy S6 Apps Not Updating On Wi-Fi Issue

If you recently started facing an issue with Apps Not Updating On Wi-Fi on your Samsung Galaxy S6. You have come to right place in this post, I’ll tell you how to fix Samsung Galaxy S6 Apps Not Updating On Wi-Fi Issue. You can also check our guide on how to fix problems on Samsung Galaxy S6 after updating to Marshmallow.

How To Fix Samsung Galaxy S6 Apps Not Updating On Wi-Fi Issue:

Now in order to Fix Samsung Galaxy S6 App not updating in Wi-Fi issue, follow all the steps carefully.

  • First you need to check WiFi connection, use the same internet on other devices and see they are working or not.
  • Open setting on your device and tap on WiFi->Tap on the current WiFi network->Forget it. Restart your device and connect with the same network to check its working or not.
  • Turn off/On your WiFi router, now wait for network to connect with your device. Now Open Google Play and try to update the apps.

If none of these worked for you try the following method.

Backup your device and factory reset your device using the following steps:

  • Turn off your device.
  • Now press and hold home+Power+Volume Up key.
  • Release the power button once you see logo, but keep holding home and Volume up keys.
  • Now when you see Android logo, let go both buttons.
  • Use the volume down button to navigate and highlight wipe data / factory reset.
  • Now use the power key to select the option.
  • You have to select ‘Yes‘ when you’ll be prompted to next menu.
  • Now wait for the process to be completed, once it’s done highlight ‘Reboot system now’ and press power button to select it.
  • All Done.

Now your device will be in factory state, setup your device as new. Connect with your WiFi network and i am sure that this time it will work for sure.

Fix Samsung Galaxy Note 5 Constantly Not Charging Issue

0
Fix Samsung Galaxy Note 5 Constantly Not Charging Issue

If you are a Samsung Galaxy Note 5 user and facing Galaxy Note 5 Constantly Not Charging Issue then you have come to right place. In this post, I’ll tell you how to fix Samsung Galaxy Note 5 Constantly Not Charging Issue and if you have recently updated your device to Android 6.0 and facing problems, visit the link.

Fix Samsung Galaxy Note 5 Constantly Not Charging Issue

How To Fix Samsung Galaxy Note 5 Constantly Not Charging Issue:

Galaxy Note 5 Constantly Not Charging:

Once you start facing this issue, perform a simple a reset and it will work. Now if your charging is working fine after a simple reset then that means its software issue but there are few thing that you must do before doing a factory reset or flashing the stock Rom etc.

  • Clean the charging port of your phone to clear the dirt stuck in port.
  • Try using a different charging cord
  • Try using a different wall charger

After trying all these steps still there is no success then backup your device, save all the important files and perform a factory reset. You can reinstall the official firmware using Odin.

  • Turn off your device.
  • Now press and hold home+Power+Volume Up key.
  • Release the power button once you see logo, but keep holding home and Volume up keys.
  • Now when you see Android logo, let go both buttons.
  • Use the volume down button to navigate and highlight wipe data / factory reset.
  • Now use the power key to select the option.
  • You have to select ‘Yes‘ when you’ll be prompted to next menu.
  • Now wait for the process to be completed, once it’s done highlight ‘Reboot system now’ and press power button to select it.
  • All Done.

Method#2:

Note 5 Not Charging:

You can try the instruction give above and it will help you fix this issue, but in case nothing worked for you then the best option is go to Samsung Service center and get it checked.

Temple Run 2 Blazing Sands for PC (Windows and Mac)

0
Temple Run 2 Blazing Sands for PC (Windows and Mac)

Good bye Frozen Shadows! It’s time for us to enter the Blazing Sands. Our favourite endless-runner game Temple Run 2 has a new version which takes the users into the Blazing Sands for new adventures in the new locations. Temple Run 2 developers are working at their best to keep the interest of users alive in this game. The new update comes after exactly 6 months of the Frozen Shadows update which gives us a few hints that we might be seeing new locations every few months in the Temple Run 2 from now on.

The Blazing Sands Temple Run 2 is going to make the users experience some thrill. You can now navigate through cliffs, cross the forests, go through the zip lines and mines. There are going to be new obstacles on your way. New power-ups to fuel up your gameplay, new achievements to put on the leaderboard, new graphics which make the game look much more beautiful than before. The monkey running after you is slightly bigger now, make sure that he doesn’t get his hands on your avatar. The new Temple Run 2 Blazing Sands update is live in the Google Play Store and the App Store. You can easily get your hands on it right away.Temple-Run-2-Blazing-Sands-Android

Those of you who’re looking for a way to install Temple Run 2 Blazing Sands on their desktop PCs or laptops may have spotted the right place. You can easily install Temple Run 2 Blazing Sands for PC on your Windows XP/7/8/8.1/10 PC/Laptop and also iMac / Macbook powered up with Mac OS X. You have to install an emulator like BlueStacks, BlueStacks 2 or Andy OS. Let’s go through the instructions to get this game running on a PC.

Download Temple Run 2 Blazing Sands For Windows PC & Mac

  1. Download Temple Run 2 Blazing Sands APK
  2. Download and install Bluestacks: Bluestacks Offline Installer | Rooted Bluestacks |Bluestacks App Player
  3. Once you’ve installed Bluestacks, double click the downloaded Temple Run 2 Blazing Sands APK.
  4. The APK will be installed using Bluestacks, once installed open Bluestacks and locate the recently installed Temple Run 2 Blazing Sands.
  5. Click the Temple Run 2 Blazing Sands icon to open it, follow the on-screen instructions to play it.

You can also use Andy OS to install Temple Run 2 Blazing Sands, here’s the tutorialHow To Run Android Apps On Mac OS X With Andy

The Andy OS tutorial explains how to play a game on your Mac OSX, but the same guide will also work for a Windows PC.

That’s all. In case you’re stuck with anything, reach us out through the comment box below.