Home Blog Page 312

Fix commonly camera issues with Samsung Galaxy S7 Edge

Fix commonly camera issues with Samsung Galaxy S7 Edge

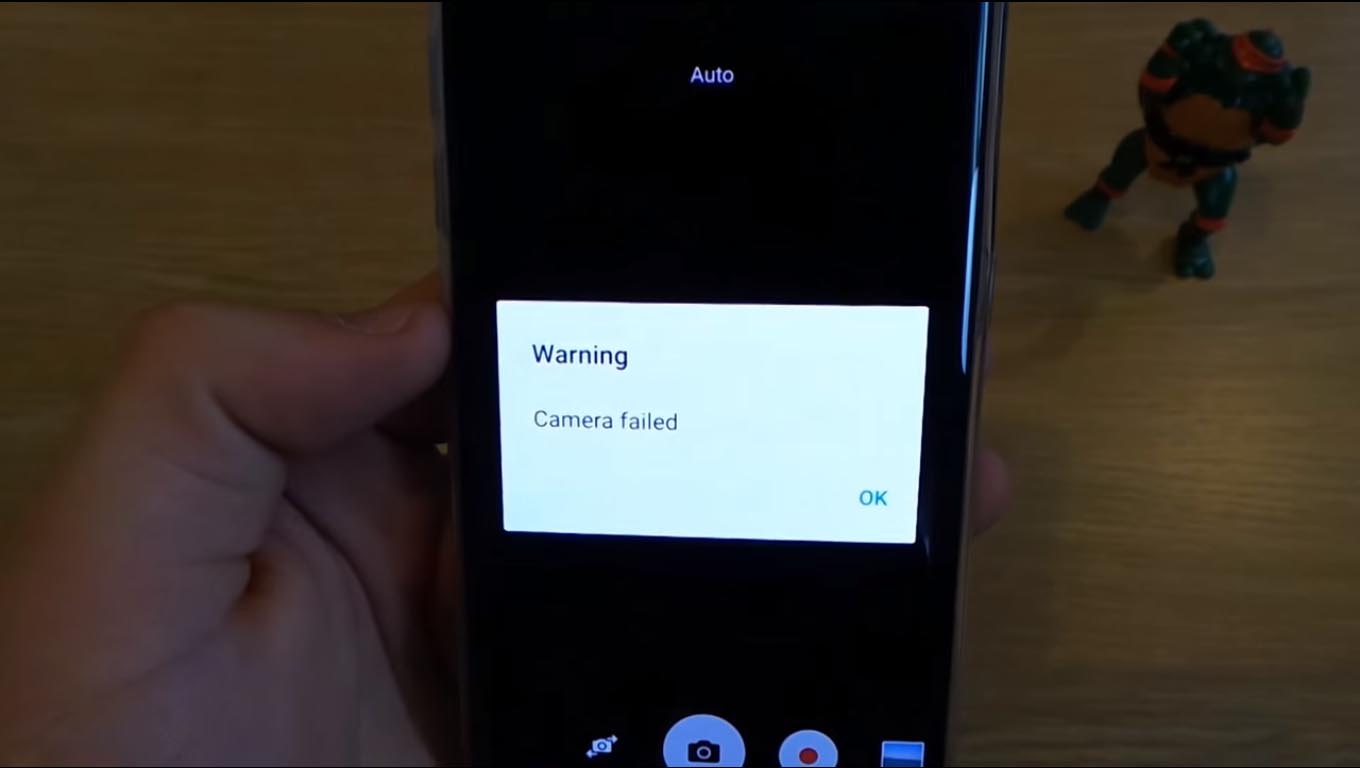
Samsung Galaxy S7 Edge has the best camera among all the other smartphones, In this post, I’ll tell you how to fix commonly camera issues with Samsung Galaxy S7 Edge. Galaxy S7 Edge users have reported many issues while using the camera for e.g, records blurry videos, only record 1-second video, the camera has failed, take blurry photos and more. Let’s start the guide to fix Samsung Galaxy S7 Edge camera issues.

Galaxy-S7-Edge-Camera-problems

Fix commonly camera issues with Samsung Galaxy S7 Edge:

Fix records videos for only 1 second and stops:

Following are the best working solutions which will help you to fix records videos for only 1 second and stops on Samsung Galaxy S7 Edge.

  • Turn off your Samsung Galaxy S7.
  • Now press and hold home+Power+Volume Up key.
  • Release the power button once you see Samsung Galaxy S7 logo, but keep holding home and Volume up keys.
  • Now when you see Android logo, let go both buttons.
  • Use the volume down button to navigate and highlight wipe cache partition.
  • Now use the power key to select the option.
  • You have to select ‘Yes‘ when you’ll be prompted to next menu.
  • Now wait for the process to be completed, once it’s done highlight ‘Reboot system now’ and press power button to select it.
  • All Done.

Now that you have cleared the system cache of your Samsung Galaxy S7 Edge, now open the camera and try to record video. I am sure that it will start working properly but if it’s still recording for 1-second and the stops. Follow the steps below to fix it.

  • Turn off your Samsung Galaxy S7.
  • Now press and hold home+Power+Volume Up key.
  • Release the power button once you see Samsung Galaxy S7 logo, but keep holding home and Volume up keys.
  • Now when you see Android logo, let go both buttons.
  • Use the volume down button to navigate and highlight wipe data / factory reset.
  • Now use the power key to select the option.
  • You have to select ‘Yes‘ when you’ll be prompted to next menu.
  • Now wait for the process to be completed, once it’s done highlight ‘Reboot system now’ and press the power button to select it.
  • All Done.

Before going any further you must see our ultimate guide on how to Fix ‘Unfortunately app has stopped’ errors.

Step#1: Open Settings on your Android device.

Step#2: Now tap on More tab.

Step#3: Tap on Application Manager from the list.

Step#4: Now select All Application by a swipe to left.

Step#5: There you’ll see all your installed apps, Tap on Camera.

Step#6: Now all you have to do tap on Clear Cache and Clear data.

Step#7: Now goto home screen and restart your device.

All Done.

Re-Jailbreak Pangu / PP On iOS 9.3.3 After Reboot

0
Re-Jailbreak Pangu / PP On iOS 9.3.3 After Reboot

As we all know that Pangu latest Jailbreak is semi-untethered/tethered, means everytime you reboot your device you have to put your device back into Jailbreak state. I have seen many users reporting about the issue that when they reboot their device Cydia start crashing and it won’t work. In this post, I’ll tell you all how to Re-Jailbreak Pangu / PP On iOS 9.3.3 After Reboot.

Also Read:

Re-Jailbreak Pangu PP On iOS 9.3.3 After Reboot

Re-Jailbreak Pangu / PP On iOS 9.3.3 After Reboot:

Now you have Jailbroken your device and it got reboot, When your device is boots up locate the PP app but keep that in mind you’ll see two PP Apps, so you have to choose the one which is shown in the following Pic.

pangu jailbreak tool

  • Tap on PP app icon to launch it.
  • You have to accept the prompt for push notifications.
  • Now you have to Tap on the big circle, it will start the process. Lock your device manaully using power button and sit back.
  • After few minutes, you’ll see a notificationon your lockscreen. It will be inChiness language, don’t act at the moment because it will respring automatically.
  • Once your device comes back to lock screen, open it and you’ll see the Cydia is there and it work normally with all the Jailbreak tweaks.

All Done.

How To Jailbreak iPad Pro, iPod touch 6 On iOS 9.3.3 With Updated Pangu / PP Tool

0
How To Jailbreak iPad Pro, iPod touch 6 On iOS 9.3.3 With Updated Pangu / PP Tool

Pangu Team is working hard to set things right with their Jailbreak tool, a few days back when Pangu released their latest iOS 9.3.3 Jailbreak tool, it was said that it supports all the devices but recently we’ve seen people reporting that they are facing issues with 64-bit devices. Today Pangu has released a new update which now support all the devices even 64-bit. This new update supports iPhone 6s, 6, 6 Plus, 6s Plus, 5s, SE, 9.7-inch and 12.9-inch iPad Pro models, iPad mini 4/3/2, iPad Air 2/1 and iPod touch 6.

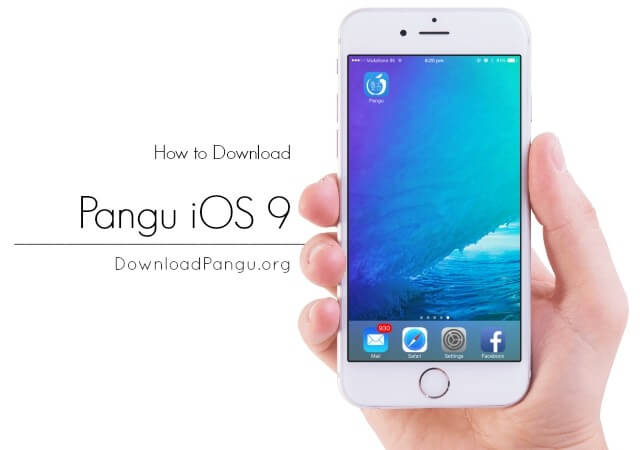
pangu-ios-9-iphone-6-640x450

How To Jailbreak iPad Pro, iPod touch 6 On iOS 9.3.3 With Updated Pangu / PP Tool:

  • Connect your device with your PC.
  • Now once you have downloaded the Pangu Jailbreak Tool, Right click on it and run it as administrator.
  • In the main Windows, you’ll see a button with Chinese text on it click on it. It will install PP Helper 5.0.
  • Once the PP Helper 5.0 is installed on your PC, Right click on it and run as administrator, when a new window is opened you’ll see a green button with Chinese text on it click on it. It will start the Jailbreak process.
  • After a while, you’ll see a captcha page where you have to entered the text shown in the image. Now this tool will install a profile on your device and also you might have to enter your Apple ID.
  • An app called PP will be installed on your device and in order to run it you have to change few settings ( Settings > General > Device Management > General > Profile and then trust the developer).
  • Now open the app and accept prompt for push notifications.
  • You’ll see a big circle in PP app, tap on the big circle in the center and it will start the process to install Cydia on your device. Once the installation process is completed, you’ll be notified.
  • Unlock your device and you’ll see the PP app will be setting the environment for Cydia. Once it’s done your device will automatically reboot.

All Done.

How To Fix iOS 9.3.3 Jailbreak Errors: Cydia Crashes, FaceTime Not Working

0
How To Fix iOS 9.3.3 Jailbreak Errors: Cydia Crashes, FaceTime Not Working

In this post, I’ll tell you how to fix all the error after Jailbreaking iOS 9.3.3 and more. The main issue people are telling are Cydia Crashes, FaceTime Not Working and more. I’ll address all the issue in this post, Few, days back Pangu released their new tool which can Jailbreak iOS 9.3.3 and iOS 9.3.2. Now this is a sort of stable version but it’s not perfect there are many bugs which are making it hard to stick with Jailbreak. Let’s start the guide to fix iOS 9.3.3 Jailbreak Errors.

complete-list-ios-9-compatible-jailbreak-tweaks-which-cydia-apps-work-pangus

How To Fix iOS 9.3.3 Jailbreak Errors: Cydia Crashes, FaceTime Not Working:

Following is the list of the issues that people are reporting after they used Pangu Jailbreak tool for iOS 9.3.3. I’ll help you fix all the issues, just follow the steps carefully.

  • Jailbreak tool fails to accept my Apple ID
  • Why does Cydia crash for me?
  • Getting “failed in buffer_write(fd) (8, ret=-1)” error in Cydia after jailbreak
  • Can i jailbreak without using a computer?
  • What tweaks can i install after the jailbreak?
  • FaceTime is not working for me after the jailbreak
  • Trouble with Location Services or GPS
  • Jailbreak fails on my iPad Pro/iPod touch 6
  • “Storage Almost Full” warning after jailbreak

Fix Jailbreak tool fails to accept my Apple ID:

This happens because most of the time we have special characters in our Email ID, make sure to use the Apple ID without special characters and also Pangu team is working on this issue, soon you’ll get an update and issue like these will be gone for good.

Fix Why does Cydia crash for me:

At this moment Pangu Jailbreak is semi-untethered/tethered, so everytime you restart your device you have to put your device back into jailbroken state.

Fix Getting “failed in buffer_write(fd) (8, ret=-1)” error in Cydia after jailbreak:

Follow all the steps in given links. How To Fix Getting “failed in buffer_write(fd) (8, ret=-1)” error in Cydia after jailbreak.

Can i jailbreak without using a computer?:

Yes, You can. Here is the link of the guide in which we have explained how you can Jailbreak without PC. How To Jailbreak iOS 9.3.3 Using Safari (Without PC).

  • What tweaks can i install after the jailbreak?: I am making the list of all tweaks that are compatible with iOS 9.3.3 Jailbreak.

Fix FaceTime is not working for me after the jailbreak:

Now to fix FaceTime is not working after Jailbreak, Reboot your device and put your device back into Jailbreak state. Open FaceTime and it will start working again.

How To Jailbreak iOS 9.3.3 Using Safari (Without PC)

0
How To Jailbreak iOS 9.3.3 Using Safari (Without PC)

Here is how you can Jailbreak iOS 9.3.3 Using Safari. We received a surprise release of Pangu jailbreak for iOS 9.3.3 and the new jailbreak tool has made the entire jailbreak community yet again excited and everyone now seems to be trying to figure out how to Jailbreak iOS 9.3.3 Using Safari.
Here you will learn how to Jailbreak iOS 9.3.3 Using Safari without using computer. Interestingly, Totoateam has introduced a way to install the new jailbreak for iOS 9.3.3 directly from your device using the Safari browser. So, you donot have to rush for a PC in order to jailbreak your iPhone, iPad or iPod touch. This makes things a lot simpler. The tool will work on all the 64-bit Apple devices that support iOS 9.2 to 9.3.3 firmwares.

iOS-9-main

How To Jailbreak iOS 9.3.3 Using Safari (Without PC):

  • Firstly, before installation, if you do not have iOS 9.3.3, you should update your device. Go to your phone’s Settings> General> Software Updates to install iOS 9.3.3 OTA.
  • Take a backup of your entire data on iTunes or iCloud.
  • Disable the passcodes, Touch ID and Find My Phone from your device.
  • Having done the above mentioned steps, now you can proceed with the installation of jailbreak.
  • Copy and paste the link below in Notes. Now tap on the pasted link to open it with the Safari browser.

itms-services://?action=download-manifest&url=itms-services://?action=download-manifest&url=https://raw.githubusercontent.com/imayoub/AYIPA/master/PPJailbreak.plist.

  • Click on the Install button when prompted. This will install the PP app and once the app has been installed, you will be able to see its icon on your homescreen.
  • Once the app has been installed, go to your device’s Settings> General> Device Management and allow the device to trust AKRAM AL NEAMI BUILDING MATERIALS TRADING CO (L.L.C) certificate.
  • Next, open the PP app from your homescreen and allow Push notification while unchecking the PP checkbox.
  • You will see a big circle in the centre on the screen in PP app. Click on this circle and wait for the process to begin. Now, lock the screen while remaining in the app by pressing the power or sleep button.
  • Once the process ahs been completed, you will get a push notification on the lock screen. Now, unlock the device. The PP app will now prepare Cydia and restart your device automatically once Cydia has been installed.

That’s all you need to Jailbreak your iOS 9.3.3 using Safari. Note that each time your device is re-booted, you will have to re-initiate jailbreak by re-running the PP app on your device. This is because this jailbreak is semi-tethered.

How to Fix Prisma Force Close Error on Android

0
How to Fix Prisma Force Close Error on Android

Force close errors are something very common with Android applications. An error can come up anytime while you are using an application on your Android smartphone. The error will simply interrupt your use and annoy you. Right now, Prisma has become the favorite Android application of everyone and according to some users, they have started facing force close errors on it. Prisma force close errors won’t let you edit your photos and make them beautiful. In order to keep using Prisma flawlessly, you need to fix all the force close errors in the first place.prisma

One of the most annoying Prisma force close error is “Unfortunately Prisma has stopped on Android“. In case you’re facing this issue or any other force close error, then it is the time for you to fix it and keep making your pictures look stunning. Let’s have a look on multiple methods to learn how to fix Prisma force close error on Android.

How to Fix Prisma Force Close Error on AndroidMethod#1

Update Prisma

The error may be  coming up because there’s a latest version of Prisma available in the Google Play Store and the one installed on your Android device has outdated. To fix this issue, simply tap the Google Play Store and search for “Prisma”. If an update is available, hit update and let it install the latest version of the game. Once it has updated, you will not get the Force Close error anymore.

Prisma Google Play Store: Link

Method#2

Clear Prisma Data and Cache.

  1. One your Android device, open Settings > Applications / Applications Manager > All Apps
  2. Scroll all the way down and locate Prisma.
  3. Tap Prisma to open it settings.
  4. If you’re using Android Marshmallow or higher, you will have to tap Prisma > Storage to open cache and data options.
  5. Now tap Clear Data and Clear Cache.
  6. Now restart your Android device now.
  7. Once done, open Prisma and the issue should have been resolved by now.

Method#3

Clear cache of your Android device

Just in case you’ve recently updated your Android device or made any potential changes in the system of your phone, it may have hampered the working of Prisma. To resolve this issue, you simply need to wipe the cache of your device. In order to clear the cache, boot into the stock or custom recovery of your Android device and locate “Wipe Cache or Cache Partition” option. Wipe the cache and restart the phone. After restarting, try opening the Prisma app and it should be working fine.c03754848

That’s all. We hope that your issue has been resolved. In case you have got any queries, reach us out through the comment box below.

Download Samsung Galaxy Note 7 Stock Wallpapers

0
Download Samsung Galaxy Note 7 Stock Wallpapers

Samsung Galaxy Note 7 is just around the corner. The leaks haven’t stopped pouring in. Every now and then we are coming across some cool stuff about the Samsung Galaxy Note 7. The rumored specifications, design, dimensions, build and everything that has surfaced on the internet so far has just spiced up the wait for this device. Samsung is all set to unveil the Galaxy Note 7 at an exclusive event taking place on August 2, 2016 in New York. We’ve already covered everything that you need to know about the Galaxy Note 7 here.Samsung_Galaxy_Note_7-default_wallpaper-840x840

Galaxy Note 7 is going to sport a stunning QHD display which is likely to be an edge screen. Samsung always adds a bunch of beautiful wallpapers to its flagship devices to make the display look a little more glamorous and also to show off the capability of the screen. Galaxy Note 7 is also going to house a bunch of cool wallpapers. Before the device crosses the curtains officially, its wallpapers have already made their way to the web and are not floating around. We’ve collected the official/stock Samsung Galaxy Note 7 wallpapers and put them right here for our beloved users.

Those willing to enjoy the Note 7 wallpapers on their smartphones can go ahead, pick up their favorite and apply on their smartphones right away. All the leaked Galaxy Note 7 Stock wallpapers  linked here are in HD resolution, but if you’re willing to download the full QHD wallpapers, you may download the zip file attached at the bottom.


Download all in one .zip file of Galaxy Note 7 Stock Wallpapers

Fix Samsung Galaxy Note 5 problems after Marshmallow update [ Updated ]

Fix Samsung Galaxy Note 5 problems after Marshmallow update [ Updated ]

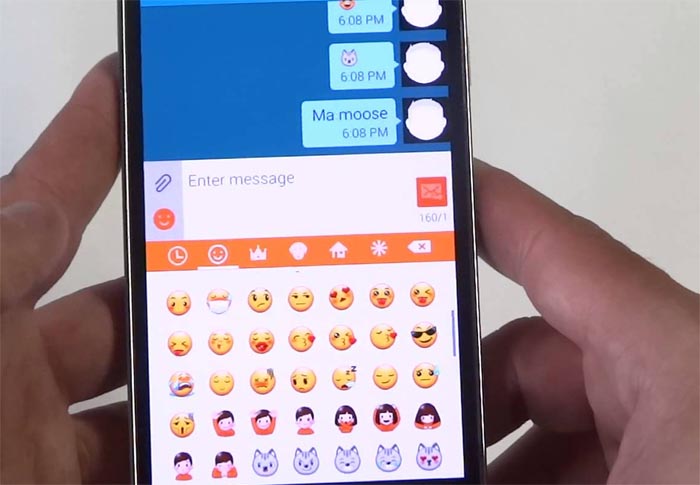
After updating to Android Marshmallow many Galaxy Note 5 users are facing, the different type of issues including Messages app won’t open, notifications are not playing in safe mode, Facebook security code SMS is not coming, Microphone icon is gone missing and much more. In this post, I’ll tell you how to fix all these problems. Following is the list of all the errors which users are facing on Samsung Galaxy Note 5 after updating to Android 6.

New Errors Fixed:

  1. High pitched sound during calls on Galaxy Note 5
  2. Galaxy Note 5 sound not working properly following Android update
  3. Galaxy Note 5 won’t install system update after upgrading to Marshmallow
  4. Galaxy Note 5 slow charging issue
  5. Galaxy Note 5 boots to recovery mode when trying to install an update
galaxy note 5 marshmallow problems

Samsung Galaxy Note 5 Problems after updating to Android 6.0:

  • Messages and other third-party apps won’t open.
  • Notifications aren’t playing when the phone is in Power Saving Mode
  • People who are using Facebook through Chrome they didn’t get the security code through SMS.
  • Microphone icon missing on the Note 5 keyboard.
  • Verizon Note 5 not able to send MMS over ATT network.
  • No option to block messages on the Note 5.
  • Note 5 takes more than usual time to send text messages and calls don’t come through.
  • The user wants to send the same message to multiple recipients.
[note] You can install Install Dr.Ketan ROM L9.2 on Galaxy Note 5 N920X [/note]

1.Text Message and Facebook App Won’t open up:

  • First, turn off your Galaxy Note 5.
  • Now press and hold the power key.
  • When you see Samsung Galaxy Note 5 logo, release the button and then press+hold the volume down button.
  • Don’t let go until your phone finishes the reboot process.
  • When you see Safe Mode in the lower left corner of the screen let go the volume down button.

Now once you are in the Safe mode, try using the both apps because in Safe Mode none of the third party apps have permission to run in the background. If still your app is not working I would suggest clearing the system cache, that will help you fix it.

  • Turn off your device.
  • Now press and hold home+Power+Volume Up key.
  • Release the power button once you see the logo, but keep holding home and Volume up keys.
  • Now when you see Android logo, let go both buttons.
  • Use the volume down button to navigate and highlight wipe cache partition.
  • Now use the power key to select the option.
  • You have to select ‘Yes‘ when you’ll be prompted to next menu.
  • Now wait for the process to be completed, once it’s done highlight ‘Reboot system now’ and press power button to select it.
  • All Done.

2.Fix Notifications aren’t playing when the phone is in Power Saving Mode:

Now if you are facing this issue that you are not getting the notification while using power saving mode on your Galaxy Note 5. I don’t think there is anything to do with Android 6.0 because I’ve heard people saying, only a few of the apps are getting this issue, I would suggest that you should see apps settings to check what is stoping them to send notification in power saving mode.

3.People who are using Facebook through Chrome they didn’t get the security code through SMS:

Yes, I’ve faced this problem and I’ll tell you what I did. First, text on your own number to see your phone is getting texts and you have no problem with your cellular network if you received the text then all I can say is that sometimes Facebook server get because tons of request. You can wait for few minutes and you’ll receive the text.

[note] learn how to fix blurry photos issue on Galaxy Note 5. [/note]

4.Microphone icon missing on the Note 5 keyboard:

If you are facing this issue then try this. First, Tap and hold the key right next to space bar where microphone icon once was located, to enable voice typing. Now if you see the microphone icon there and after sometime it’s vanished, that means you are facing the same issue like all others. This is a bug in Android 6.0 and Samsung will soon fix it.

5.Verizon Note 5 not able to send MMS over ATT network:

Now this can be solved by contacting your service provider because every network has a MMS limit to avoid network congestion. You can also find this information online to see what are the basic limit for MMS.

6.No option to block messages on the Note 5:

Now I think that’s rude of Samsung because the service providers have taken off this feature and Samsung let it happen. You can get this feature back by contacting your service provider and also paying few extra dollars.

[note] learn how to Fix Samsung Galaxy Note 5 stuck on the logo during boot up [/note]

7.Note 5 takes more than usual time to send text messages and calls don’t come through:

This is your device problem, I am 100% sure about it because there are defective devices which won’t work properly. If you think that is not the issue then contact your service provider and ask them that are you in the coverage area? and if they say yes you are that leave no choice, then to get a new device.

8.User wants to send the same message to multiple recipients:

This issue is discussed on many forums and nobody has a proper solution, but no need to worry we’ve. Open Settings > Applications > Messages > More settings > Multimedia messages. Now, enable Group conversations. That’s all there is to it.

9.Text message sent to one, Shown in Group conversation:

As I told you in my last step how you can enable group messaging. If you are sending a text someone with whom you no conversation history and that message was delivered to anyone else. Try this to fix it. Open Settings > Applications > Messages > More settings > Multimedia messages> Disable Group conversations.

If this solution is no good for your try the following steps below:

  • Open Settings on your device.
  • Tap on Application manager.
  • Swipe left and go to All Applications.
  • Tap on Messaging app.
  • Tap on Clear Cache and Clear Data.

10.Fix High pitched sound during calls on Galaxy Note 5:

The first thing you should do is boot into Safe mode, now when you are in Safe mode only stock apps will be running and all the third party apps are disabled. Now make a call and check still you are hearing high-pitched sound during calls if this time it’s working fine that means one of the third-party apps you have installed is causing the issue. Reboot your device and delete the apps one by one in order to fix the issue.

11.Fix Galaxy Note 5 sound not working properly following Android update:

If you are facing this issue after updating to Android 6.0, that means it’s  a system cache or firmware glitch problem. Follow the steps below.

  • Turn off your device.
  • Now press and hold home+Power+Volume Up key.
  • Release the power button once you see logo, but keep holding home and Volume up keys.
  • Now when you see Android logo, let go both buttons.
  • Use the volume down button to navigate and highlight wipe cache partition.
  • Now use the power key to select the option.
  • You have to select ‘Yes‘ when you’ll be prompted to next menu.
  • Now wait for the process to be completed, once it’s done highlight ‘Reboot system now’ and press power button to select it.
  • All Done.

12.Fix Galaxy Note 5 boots to recovery mode when trying to install an update

Use the instruction in this link : Galaxy Note 5 won’t install system update after upgrading to Marshmallow

If you have any issue on Samsung Galaxy Note 5 after updating to Android 6.0, Kindly share it with us in the comments section. We’ll help you fix it.

13.Note 5 Fast Battery Drain After Marshmallow Update:

Battery drain problem is very common it doesn’t matter what you have done, but still there is solution to prevent it. First, check out how many apps are running in the background because this is the biggest issue which causes battery drain. I would suggest that use a third party app like Greenify, Clean master or Boost+ to set things right. Whenever you update your device to the latest OS, the apps which you were using are designed for old OS environment. Try updating your apps.

If none of this helped you in any way, the best solution left is Factory reset. First, Backup your device and all the important data then perform a factory reset.

fix Samsung Galaxy Note 5 that keeps rebooting after Marshmallow:

First, the step is to check which app or apps are causing the reboot.Follow the instruction below.

  • First, turn off your Galaxy Note 5.
  • Now press and hold the power key.
  • When you see Samsung Galaxy Note 5 logo, release the button and then press+hold the volume down button.
  • Don’t let go until your phone finishes the reboot process.
  • When you see Safe Mode in the lower left corner of the screen let go the volume down button.

Now When you are in the Safe mode, use your device for few hours to investigate that still, you are facing reboot problem. If your device works normally then some app was causing the reboot issue and if after booting into the Safe Mode your device is keep rebooting that means you have a bad firmware problem. Follow the steps below.

Delete the system cache of your phone:

  • Turn off your device.
  • Now press and hold home+Power+Volume Up key.
  • Release the power button once you see logo, but keep holding home and Volume up keys.
  • Now when you see Android logo, let go both buttons.
  • Use the volume down button to navigate and highlight wipe cache partition.
  • Now use the power key to select the option.
  • You have to select ‘Yes‘ when you’ll be prompted to next menu.
  • Now wait for the process to be completed, once it’s done highlight ‘Reboot system now’ and press power button to select it.
  • All Done.

After deleting the system cache nothing changed then follow the steps below, but before moving I would suggest you to backup all your data.

  • Turn off your device.
  • Now press and hold home+Power+Volume Up key.
  • Release the power button once you see logo, but keep holding home and Volume up keys.
  • Now when you see Android logo, let go both buttons.
  • Use the volume down button to navigate and highlight wipe data / factory reset.
  • Now use the power key to select the option.
  • You have to select ‘Yes‘ when you’ll be prompted to next menu.
  • Now wait for the process to be completed, once it’s done highlight ‘Reboot system now’ and press power button to select it.
  • All Done.

Download Prisma for PC (Windows and Mac)

1
Download Prisma for PC (Windows and Mac)

There are many photo editing applications available for Android and iOS devices. A new photo editing application won’t be successful unless it provides something different and new to the users. Prisma, which is a very new application, has something cool to offer. Prisma has managed to cater in millions of users in just a few weeks after its release for the iOS platform. The application has made its way to the Android OS in its beta form now and is all set for its final release.

Prisma is inspired by world-famous art, artists, design, and nature. Prisma brings tons of photo effects and styles that you can select from and quickly turn your photos into something entirely different and stupendous. The prismatic effects on your photos make them something enchanting. Prisma fever is already reaching its peaks and the app probably makes its way to the top charts pretty soon. As mentioned, Prisma was previously available for iOS so desktop users were not able to run this application on their Windows or Mac powered computers. Now that this application is out for Android, Windows/Mac users can install it on their desktop PCs/Laptops as well and enjoy editing their memories giving them a prismatic sense.prisma

Prisma for PC can be installed and used on a computer powered up with Windows (XP/7/8/8.1/10) Desktop PC/Laptop and MacOS/OS X powered Macbook Air, Macbook Pro and iMac. In order to be able to get Prisma for PC, you need an Android emulator like BlueStacks or Andy OS. We have this guide going down explaining the method to grab Prisma for PC right away. Go ahead and use your next favorite photo editing application on your computer.

Download Prisma For Windows PC & Mac

  1. Download Prisma APK
  2. Now, download and install Bluestacks: Bluestacks Offline Installer | Rooted Bluestacks |Bluestacks App Player
  3. Once you’ve installed Bluestacks, double click the downloaded Prisma APK.
  4. The APK will be installed using Bluestacks, once installed open Bluestacks and locate the recently installed Prisma.
  5. Click the Prisma icon to open it, follow the on-screen instructions to play it.

You can also use Andy OS to install Prisma, here’s the tutorialHow To Run Android Apps On Mac OS X With Andy

The Andy OS tutorial explains how to play a game on your Mac OSX, but the same guide will also work for a Windows PC.

That’s all. In case you’re stuck with anything, reach us out through the comment box below.

Download Prisma APK for Android (Prisma Art Photo Editor)

0
Download Prisma APK for Android (Prisma Art Photo Editor)

Prisma, the all-time famous iOS photo editing app has finally stepped up on the road towards Android. Prisma’s cool photo editing options are the reason for this application to count in the likes of many. Just in case you’re not an iPhone user and you haven’t got a chance of coming across Prisma then let’s have a brief overview first.

Prisma is inspired by famous artists like Levitan, Van Gogh, Picasso and also some world-wide famous expressions. Prisma helps you to convert your beautiful memories captured inside stunning pictures into priceless art. Prisma was previously available for iOS only and the application already hit a record number users. It also managed to topple the app charts in over 40+ countries. After attracting a huge audience on iOS, Prisma developers finally decided to release their application for Android as well. Prisma for Android is bringing a lot of additional features like Video feature, 360-degree images, some new styles and frames and new enchanting digital art as well. Prisma is pretty simple and easy to use. It’s all about taking a nice snap, picking up a style and then keeping a watch on the end result which is set to stun you!Prisma APK Download

At the time of writing this post, Prisma for Android is in its beta stage and the APK file has started floating around the web, which means you can definitely install and start using it right away.

Time to take the advantage of owning an Android device, you can install Prisma and use it before it officially makes its way to the Google Play Store. We’ve managed to grab the Prisma for Android APK and linked it right here alongside the installation instructions. Let’s move ahead and apply some nice makeover to some of your memories to make them a little more lovable.

Download Prisma APK for Android and How to Install it

  1. Download Prisma APK (V1.1 Updated)
  2. Download the file to your phone straight away, or copy it to your phone from your PC.
  3. Now on your phone, go to settings > security > allow unknown sources > check this.
  4. Now using a file manager, locate the APK file that your just copied or downloaded.
  5. Tap the APK file and finish installation using the on-screen instructions.
  6. Once installed, access the newly installed game through app drawer.
  7. That’s all. Enjoy Prisma!

Just in case you’re willing to play the new version of  Pokemon Go on your  PC then checkout Prisma for PC!

How to fix Samsung Galaxy S7 Edge black screen of death

How to fix Samsung Galaxy S7 Edge black screen of death

Samsung Galaxy S7 Edge is the best device for everything but it’s not perfect, Today I’ll tell you how to fix Samsung Galaxy S7 Edge black screen of death. Now let me tell you about (BSoD) black screen of death, there are many other screen problems but ( BSoD ) is the worst among them. One you start facing this problem you cannot use your screen becomes unresponsive, button won’t work and also nothing happens when you tap the screen. Let’s us fix Samsung Galaxy S7 Edge black screen of death problem.

fix Samsung Galaxy S7 Edge black screen of death

How to fix Samsung Galaxy S7 Edge black screen of death:

Following are the all possible solutions you can find to fix Samsung Galaxy S7 Edge black screen of death problem.

Forced reboot: Now this is temporary fix, hold and press volume down button together for 10 seconds. Your device will reboot normally and it will take few seconds to get your device back to working. But keep that in mind, it will not permantly fix this issuse. Follow the steps below to get rid of this error.

Safe Mode:

  • Turn off your device.
  • Now press and hold the power button.
  • When you see  ‘Samsung Galaxy S7 EDGE’ on your screen, let go the power button and hold volume downbutton.
  • You have to hold the volume down button until your device boots up and when you can see ‘Safe mode’ in the bottom left corner of the screen.

Once your device is in Safe Mode use it for a day or two, keep monitoring your device to see that still you are facing black screen of death problem. If it does, that means you have a serious problem and i would suggest you to go to the near Samsung service center and get it fixed. On the other hand, if your device is working perfectly and there no black screen of death problem that means an app is causing this, the best solution is factory reset your device and install the apps again.

Method#3:

  • Turn off your device.
  • Now press and hold home+Power+Volume Up key.
  • Release the power button once you see logo, but keep holding home and Volume up keys.
  • Now when you see Android logo, let go both buttons.
  • Use the volume down button to navigate and highlight wipe data / factory reset.
  • Now use the power key to select the option.
  • You have to select ‘Yes‘ when you’ll be prompted to next menu.
  • Now wait for the process to be completed, once it’s done highlight ‘Reboot system now’ and press power button to select it.
  • All Done.

Charge the phone: Sometimes your device runs out of battery and cause of this your phone become unresponsive. Charge your device again and wait untill the battery is full chargerd. Now turn on your device and use it.

Boot it up in recovery mode: It will help you to power up all the hardware in your device and by booting into recovery mode might help you to power on your device. Follow the instruction below.

  • Turn off your device.
  • Now press and hold home+Power+Volume Up key.
  • Release the power button once you see logo, but keep holding home and Volume up keys.
  • Now when you see Android logo, let go both buttons.

This is all for now, I’ll keep updating this post with new solutions to fix Samsung Galaxy S7 Edge black screen of death.

How to fix Samsung Galaxy S7 Edge error “Unfortunately, Settings has stopped”

0
How to fix Samsung Galaxy S7 Edge error “Unfortunately, Settings has stopped”

In this post, I’ll tell you how you can fix Samsung Galaxy S7 Edge error “Unfortunately, Settings has stopped. When you are an Android user you are familiar with the Unfortunately App has stopped error. This is the most common error and every Android user has faced it. We’ve covered many errors related to Unfortunately App has stopped, Follow the instruction below to get rid of, Unfortunately, Settings has stopped error on Samsung Galaxy S7.

How to fix Samsung Galaxy S7 Edge error “Unfortunately, Settings has stopped”

Read more:

How to fix Samsung Galaxy S7 Edge error “Unfortunately, Settings has stopped”:

Before going any further you must see our ultimate guide on how to Fix ‘Unfortunately app has stopped’ errors.

Step#1: Open Settings on your Android device.

Step#2: Now tap on More tab.

Step#3: Tap on Application Manager from the list.

Step#4: Now select All Application by swipe to left.

Step#5: There you’ll see all your installed apps, Tap on Settings.

Step#6: Now all you have to do tap on Clear Cache and Clear data.

Step#7: Now goto home screen and restart your device.

All Done ….

Method#2:

  • Turn off your device.
  • Now press and hold home+Power+Volume Up key.
  • Release the power button once you see logo, but keep holding home and Volume up keys.
  • Now when you see Android logo, let go both buttons.
  • Use the volume down button to navigate and highlight wipe cache partition.
  • Now use the power key to select the option.
  • You have to select ‘Yes‘ when you’ll be prompted to next menu.
  • Now wait for the process to be completed, once it’s done highlight ‘Reboot system now’ and press power button to select it.
  • All Done.

Method#3:

  • Turn off your Samsung Galaxy S7.
  • Now press and hold home+Power+Volume Up key.
  • Release the power button once you see Samsung Galaxy S7 logo, but keep holding home and Volume up keys.
  • Now when you see Android logo, let go both buttons.
  • Use the volume down button to navigate and highlight wipe data / factory reset.
  • Now use the power key to select the option.
  • You have to select ‘Yes‘ when you’ll be prompted to next menu.
  • Now wait for the process to be completed, once it’s done highlight ‘Reboot system now’ and press power button to select it.
  • All Done.