Home Blog Page 305

Fix iPhone / iPad That Won’t Charge

0
Fix iPhone / iPad That Won’t Charge

When your device is not charging up its a hell of a problem, when it comes to Android you can find hundreds of working solution when you Google about it, But when it comes to iPhone you really don’t have many options. No need to be worry, In this post, I’ll tell how you can fix iPhone / iPad That Won’t Charge. Now before going any further, let me clear one thing. After trying all of the methods mentioned below still there is luck, then you might go to Apple store to get technical help. Let’s start the guide on how to Fix iPhone / iPad That Won’t Charge.

iphone wont charge

Here’s What To Do If Your iPhone Or iPad Won’t Charge?

Following are different methods which will help you fix iPhone won’t charge. If a method doesn’t work for you then try the other one and if any of the methods worked for you, Please tell me in comments.

Following is video tutorial made by our friends at TechnoBezz to fix iPhone won’t charge.

Force Restart:

Now this will help you get rid of your charging problem, sometimes an app or software get the crash and because of it, your device become unresponsive so in that condition a force restart will help you.  Follow the steps below.

  • Press and hold Power+Home button together for 10 seconds.
  • Once Apple logo shows up on your screen let the buttons go.
  • Try charging your device now.

Clean The Charging Port:

We never notice sometimes charging port become so dirty because of dust and other things, when you plug your device to charge the connect cannot be completed because of dirt and other particles in your charging port. You need to clean your charging port by using a needle or a toothpick.

Change The Charging Method:

This might come handy in such conditions, some of us use wall charger all the time so try charging your device with a laptop or computer. If you charge your device with PC or Laptop all the time you should try charging it with wall charger and make sure you use the official USB cable and charger.

Turn Off The IPhone Or IPad And Charge It:

I do this to charge my device quickly because when your device is off no resource is being used, there is no load on battery so it charges up device quickly. In order to fix iPhone won’t charge, turn off your iPhone or iPad and charge it. This method worked for many users.

USB Cable:

Try using different USB cables, sometimes our USB charging cable is damaged and we don’t know about it. The best option is that you should use Apple-certified cables. There are hundreds of cables available in markets but not all are certified by Apple.

Software Update:

Your device may be not charging up because of bad or corrupt software, in this condition you need to update your software to the latest version or install a fresh update using iTunes, but before doing this you need to back your device using iTunes in order to save all your data.

Restore Your IPhone /IPad To Factory Settings:

I considered it as a last resort when nothing is working for you then you need to restore your iPhone to its factory settings. Follow the steps below to factory reset your iPhone or iPad.

  • First you need to go to settings->iCloud->turn off Find my iPhone.
  • Connect your device with iTunes.
  • Click on your device when it is connected.
  • In summary panned click on restore.
  • Next, Click on restore to confirm it.
  • Now sit back and let iTunes do its work.
  • iTnues will erase all content and settings on your iPhone and it will install the latest version of iOS
  • Once the process is completed, disconnect your device from your PC.
  • Follow the on screen options in order to configure your iPhone as a new device.

This is all for now, I’ll be keep updating this post as soon as I get a new solution to fix iPhone won’t charge. Please do tell me in comments if you have any Questions. Also Share it with your friends and family.

Fix “Unfortunately, Touchwiz Home has stopped” error on Galaxy S5

0
Fix “Unfortunately, Touchwiz Home has stopped” error on Galaxy S5

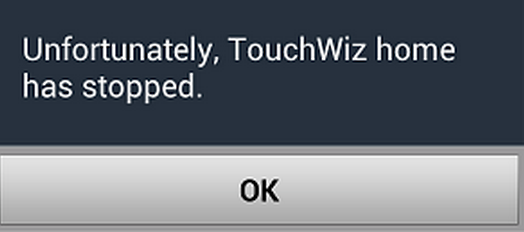
Samsung Galaxy S5 device might be old, but there are still plenty of users who used it as a daily driver. Samsung Galaxy S5 was the first device which was launched with Samsung’s own TouchWiz interface, today in this post, I’ll tell you how you can fix “Unfortunately, Touchwiz Home has stopped” error on Galaxy S5. We have covered this issue before, but this time it’s specifically for Samsung Galaxy S5. You can check our guide ” How To Fix “Unfortunately, TouchWiz Home has stopped” On Samsung Galaxy “.

Fix “Unfortunately, Touchwiz Home has stopped” error on Galaxy S5

Fix “Unfortunately, Touchwiz Home has stopped” error on Galaxy S5:

  1. First of all you need to boot your device in safe mode. To do so turn off your device completely.
  2. Now turn it on, while it boots up, keep the volume down key pressed.
  3. Leave the key as soon as your phone completely boots up. You will find “Safe Mode” notification on the bottom left. Now you’re set to fix the TouchWiz Home.
  4. Now while you’re in the safe mode, tap the app drawer and navigate to settings app.
  5. In settings open application manager > now open all applications > select TouchWiz Home.
  6. You will have TouchWiz Home settings now. Wipe TouchWiz Home data and cache.
  7. Now reboot your device.
  8. Your issue should be resolve now.

11354527_10206209937700042_1091202624_o-side

Method#2: 

  1. If the solution written above doesn’t help you, you may try wiping your device’s cache.
  2. To do so, simply turn off your phone.
  3. Now turn it on while pressing and holding Volume Up + Home + Power Key.
  4. Leave the keys as soon as your device boots up.
  5. Now using Volume Up & Down keys navigate to Wipe Cache Partition, select it using Power Key and wipe it.
  6. Once you’ve wiped it, reboot your device and check if your issue has been resolved or not.
  7. That’s all.

Method #3:

  • Turn off your Samsung Galaxy S7 Edge.
  • Now press and hold home+Power+Volume Up key.
  • Release the power button once you see Samsung Galaxy S7 logo, but keep holding home and Volume up keys.
  • Now when you see Android logo, let go both buttons.
  • Use the volume down button to navigate and highlight wipe data / factory reset.
  • Now use the power key to select the option.
  • You have to select ‘Yes‘ when you’ll be prompted to next menu.
  • Now wait for the process to be completed, once it’s done highlight ‘Reboot system now’ and press power button to select it.
  • All Done.

That’s all. If your issue still persists, reach us out through the comment box below. We will try to help you out. Thank you all.

Download Splix.io for PC (Windows and Mac)

1
Download Splix.io for PC (Windows and Mac)

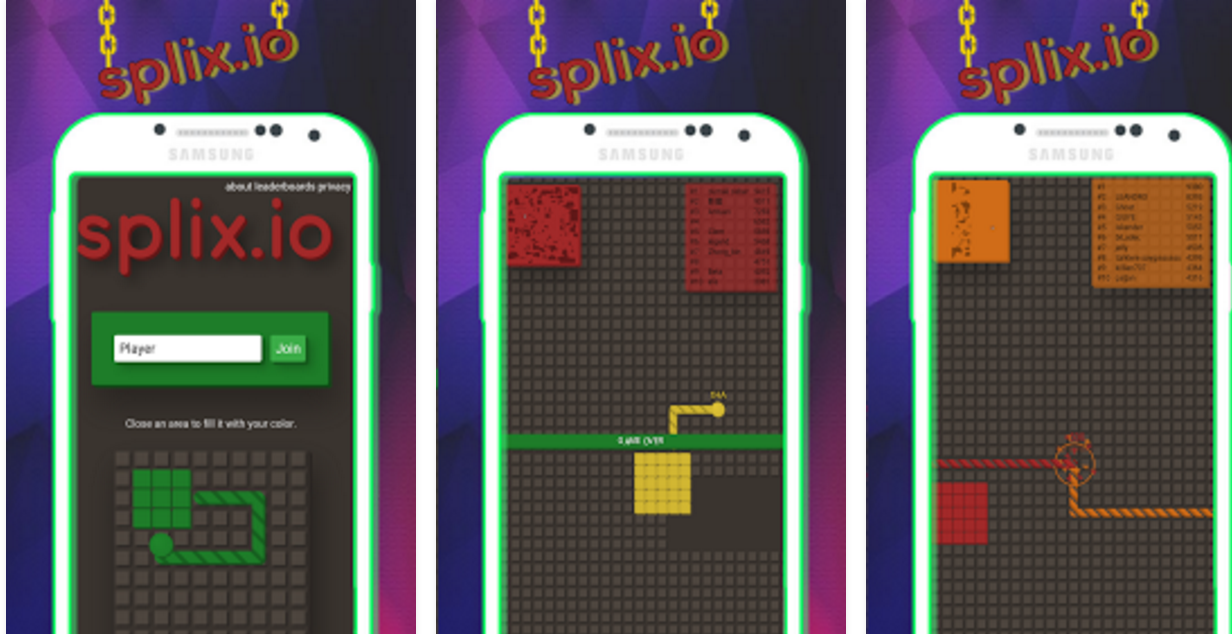
Splix.io is a new game to find its way to the smartphone gaming world. The game comes from Vision.inc. Splix.io pretty much follows the footsteps of Slither.io. In this game you have to catch any many blocks as you can which is instated by the game developers as capturing the territory. There are many other players roaming around with their snake-like beam. Do not run into another player or a hurdle as it will immediately result in ending your game. In the same way, you can attack other people and destroy their beams. The has a knot at its end followed by a line, which looks like a snake. You can move your beam in all the directions. Splix.io is currently in its beta stage and it has already attracted a huge audience. Splix.io is available for free. Android users can grab it from the Google Play Store for free.Splix.io for PC

You can also play Splix.io on your computer to pass your boring moments. Splix.io for PC works quite good on a computer powered up with Windows (XP/7/8/8.1/10) and also a Mac OS X powered Macbook or iMac. You will need an Android emulator like the BlueStacks, BlueStacks 2 or the Andy OS to run Splix.io for PC. Let’s go ahead and have a look on the method to run  Splix.io for PC.

Download Splix.io For Windows PC & Mac

  1. Download Splix.io APK
  2. Download and install Bluestacks: Bluestacks Offline Installer | Rooted Bluestacks |Bluestacks App Player
  3. Once you’ve installed Bluestacks, double click the downloaded Splix.io APK.
  4. The APK will be installed using Bluestacks, once installed open Bluestacks and locate the recently installed Splix.io.
  5. Click the Splix.io icon to open it, follow the on-screen instructions to play it.

You can also use Andy OS to install Splix.io, here’s the tutorialHow To Run Android Apps On Mac OS X With Andy

Update Android One to Android 7.0 Nougat CyanogenMod 14

3
Update Android One to Android 7.0 Nougat CyanogenMod 14

Here’s how you can install and update Android One phone to Android 7.0 Nougat CyanogenMod 14. The CM 14 ROM will work for both Sprout 4 and Sprout 8 Android One phones.

Android One devices are intended Android beginners. Google’s Android One experiment was quite successful as various manufacturers all around the world joined hands with Google to pull out Android One phones. These phones are cheap and easy to get your hands on. Android One provides a very close to stock Android experience and tweaking this specific firmware has remained easy. Over the past few years, the Android One development has been improving. Android One phones are blessed with a plethora of custom ROMs. Whenever Google introduces a new version of Android OS, Android One phones are the part of the league to get the Custom ROM based on that OS in the very early stages.

Continuing the trend, Android One phones have now received the CyanogenMod 14 before other Android handsets. The CM 14 for Android One is currently in the testing stage, however most of the features except the video decoding/encoding and cellular data are working. If these features are not a big deal for you, you may give CM 14 a try on your Android One phone and taste the new Android 7.0 Nougat. The available ROM is for the Sprout 4 devices, that means this ROM will also work on Sprout 8 devices. Sprout 4 devices are the ones which have 4 GB internal storage while the Sprout 8 devices have 8 GB internal storage. Another thing to keep in mind is that this ROM is working on Android One first generation devices only. Do not try to flash it on 2nd gen Android One devices or else you will result in bricking your phone. Here’s a list of first gen Android One handsets.

  • Karbon Sparkle V
  • Micromax Canvas A1
  • Spice Dream UNO
  • Symphony Roar A50
  • Mito Impact
  • Evercoss One X
  • Nexian Journey One
  • Cherry Mobile 1
  • Q Mobile A1
  • MyPhone UNO

Preparations

  • The guide works for first generations Android One phones only. Do not try this on 2nd gen Android One phones or else you will result in bricking your device.
  • Charge your phone’s battery up to 50% to avoid power issues during flashing process.
  • Backup your important contacts, call logs, sms messages and also copy the media content to your computer.
  • If your phone is rooted previously then consider backing up your applications with data using Titanium Backup.
  • If you already have a custom recovery installed, then consider making a Nandroid backup. If not installed already, then you will install a custom recovery prior to installation so make sure that you backup the Nandroid before flashing new ROM.
  • Install latest TWRP 3.0.2.x custom recovery on your Android One.
  • Follow this guide to the letter to avoid any mishap.

Update Android One phone to Android 7.0 Nougat CyanogenMod 14

  1. Download CyanogenMod 14 custom ROM.zip file: cm-14.0-20160904-UNOFFICIAL-sprout4.zip
  2. Download Google GApps for Android 7.0 Nougat.
  3. Copy both the downoaded.zip files into your phone’s internal or external storage.
  4. Now boot your Android One phone into TWRP recovery. To do so, turn off your phone first. Now turn it on by pressing and holding Volume Up + Power Key.
  5. Once you are in TWRP, tap Install > Locate the CM 14 ROM file > Select the file > Flash it > Swipe to confirm.
  6. After flashing the ROM, flash GApps.zip file in the same way.
  7. Once done, reboot your device into system.
  8. You will now boot up into CyanogenMod 14. That’s all.

Source

How to install TWRP custom recovery on Android One

1
How to install TWRP custom recovery on Android One

Here’s a comprehensive guide to install latest TWRP custom recovery on your 1st gen, 2nd gen and 3rd gen Android One phone. Apart from the TWRP, you will also learn how to root your Android One handset.

This recovery is compatible with first generation Android One phones only. Here’s a list of all 1st gen phones.

  • Karbon Sparkle V
  • Micromax Canvas A1
  • Spice Dream UNO
  • Symphony Roar A50
  • Mito Impact
  • Evercoss One X
  • Nexian Journey One
  • Cherry Mobile 1
  • Q Mobile A1
  • MyPhone UNO

2nd gen Android One Phones

  • Qualcomm Snapdragon
    • General Mobile 5 Plus
    • General Mobile 4G
    • i-Mobile IQ II
    • Cherry Mobile One G1
  • MTK Chipset
    • Bq Aquarius A4.5
    • Infinix Hot 2 X510
    • Lava Pixel V1

3rd gen Android One Phones

Disclaimer: Flashing TWRP requires unlocking bootloader and unlocking bootloader voids the warranty of your Android phone. In case of a mishap, Techbeasts or the device manufacturer may not be held responsible.

Unlock the bootloader of your Android One handset

  1. Download and install Minimal ADB and Fastboot drivers.
  2. Enable USB debugging mode on your Android One phone. To do so, go to settings > about device > tap the build number for 7 times. It will activate developer options in your phone’s settings. Now go to settings > developer options > Enable USB debugging.
  3. Once done, open the Minimal ADB and Fastboot.exe from your computer’s desktop. If you do not have this shortcut on the desktop then go to your Windows installation drive which should be Drive C. Now go to C:\Program Files (x86)\Minimal ADB and Fastboot > Press and hold the shift key and right-click on an empty area within this folder > Open command window here.
  4. Now connect your phone to your computer now using its original data cable.
  5. I the command window, enter the following commands one by one.
    • adb reboot bootloader

    • Wait for the device to boot into bootloader/fastboot mode.
  6. Now enter these commands and hit enter to complete the unlock procedure.
    • fastboot oem unlock

      1. This will unlock the bootloader.
    • fastboot format userdata

      1. This will format the device.
    • fastboot reboot

      1. This will reboot the device.
  7. That’s all. Your Android One’s bootloader is now unlocked.

How to install TWRP custom recovery on Android OneTWRP Android One

  1. Make sure that you have unlocked the bootloader and the ADB and Fastboot drivers are still installed on your PC.
  2. Now download the latest TWRP Recovery
  3. Rename the downloaded recovery file to twrp.img only.
  4. Now copy this file to Minimal ADB and Fastboot folder in C:\Program Files (x86)\Minimal ADB and Fastboot.
  5. Open the Minimal ADB and Fastboot.exe now or simply launch the command window using the step 3 in the bootloader unlock method above.
  6. Having USB debugging enabled on your Android One phone, connect it to your PC.
  7. Now enter the following commands one by one.
    • adb reboot bootloader

      • Wait for device to boot into bootloader mode.
    • fastboot erase recovery

      • This will erase the previous recovery.
    • fastboot flash recovery twrp.img

      • This will flash the new recovery.
    • fastboot reboot

  8. Once done, reboot your device into recovery mode by entering the following command in command window.
    • adb reboot recovery

How to root Android One with SuperSU

  1. Download SuperSU.zip file.
  2. Copy the downloaded file to your phone’s internal or external storage.
  3. Boot your Android One phone into TWRP recovery. To do so, turn off your phone. Now turn it on by pressing and holding Volume Up + Power Key.
  4. Once it boots into TWRP, tap Install > Locate the SuperSU.zip file from where you placed > Select file > Flash > Swipe to confirm.
  5. Once SuperSU.zip has been flashed, reboot your phone.
  6. Install Root Checker from the Play Store to verify root now. That’s it.

That’s all. Facing any issues? Reach us out through the comment box below.

Download Sony Xperia XZ Stock Wallpapers

0
Download Sony Xperia XZ Stock Wallpapers

Sony Xperia XZ’s stock wallpapers have already landed the web. You can now Download Sony Xperia XZ Stock Wallpapers.

Sony has released the all new Xperia XZ. The new Xperia XZ is said to be the true flagship from Sony for the year 2016. Sony introduced many new features in a completely new build which makes the Xperia XZ stand apart from the Sony’s previous flagship, the Xperia X Performance. Xperia XZ might undo some damage that the Xperia X Performance caused to the company. The XZ flaunts a 5.2-inch full HD display with 424 ppi. It brings a 23 MP shooter at the back which has a lot of new features, a 13 MP camera on the front. The device is powered up with Snapdragon 820 CPU and there is a RAM of 3 GB. Internal storage is 32 GB and the device also has a microSD card slot. Xperia XZ is water and dust resistant. The phone runs on Android 6.0.1 Marshmallow out of the box.

To add some beauty to the display of Sony Xperia XZ, Sony has added some cool wallpapers. These wallpapers might mesmerise some Android users and urge them to grab the wallpapers for their Android phones or tablets. We’ve managed to get our hands on all the official/stock wallpapers of the Xperia XZ and put them all here for download. These wallpapers are in in a resolution of 2160 x 1920 pixels and can be applied on any Android phone or tablet. Just go ahead, pick up your favorite wallpaper and save it straight away to your phone or computer.

Download all 8 Sony Xperia XZ Stock wallpapers

Source


Best GBA Games of All Time

0
Best GBA Games of All Time

Here are the Best GBA Games for the fans. The list includes 50 Best GBA Games of all times. These GBA Games include the most popular, action packed and quite addictive GameBoy Adnvance games. Let’s see what the requirements are for playing these games before we move on to the list of the Best GBA Games.

Firstly, you will require a GBA Player or console. You will also require an emulator to run these games. You can get any of the suitable Android gaming emulator. These games can also be played on the PC however, they might not run as well as they do on the GBA Player.

Let’s move on to the list of the Best GBA Games of All Times.
best gba games

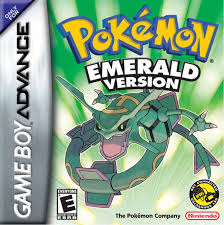
Pokemon Emerald

First up in the list is the famous combination of Pokemon Ruby and Pokemon Sapphire with all the different Pokemon and incredible missions. If you are a fan of Pokemon series, you should try this game out.

Dragon Ball: Advanced Adventure

This game belongs to the fighting genre of games and feature the anime series Dragon Ball and 30 of its characters.

The Legend of Zelda: A Link to the Past

Third in the list is the action adventure game by Nintendo. The game supports two modes including solo mode and combat mode which is battling between four players.

Mortal Kombat: Deadly Alliance

The game belongs to the action genre and includes great battle system, beautiful and stunning graphics and visuals that make the game quite appealing.

Mario & Luigi Superstar Saga

Mario & Luigi Superstar Saga is a role playing game by Nintendo which was launched in 2003 for GameBoy Advance and still remains one of the best GBA games.

BeyBlade: G-Revolution

Next we have the absolutely addictive BeyBlade G-Revolution, an onlinemultiplayer game that you can play for free.

Harvest Moon: Friends of Mineral Town

If you love farming, harvesting crops and keeping pets this game is for you. The game is much similar to Farmville, the game on Facebook. You can harvest different types of crops in your farm as well as breed various types of animals and have hours of fun.

Harvest Moon: More Friends of Mineral Town

This is the sequel of the above game with more things to harvest, more animal to breed and new missions and events. The concept of the game remains the same.

Fire Emblem

This turn based action game includes incredible battles and has a really appealing storyline that unwinds as you play the game.

Pokemon Leaf Green

Next, we have another game featuring the Pokemon series and remains as one of the best GBA games of all times.

Final Fantasy – I

This game is for the Final Fantasy fans. This Role Playing fantasy game by square includes so many heroes and weapon types and a good battling system that can keep you busy for hours.

Final Fantasy Tactics Advance

Another one from the Final Fantasy franchise which is also an action packed fantasy adventure game that takes players to a journey where they have to battle to save themselves from the magic spell.

Grand Theft Auto

GameBoy is incomplete if you do not own atleast one good Racing game and here is the best of all the times. GTA with so many cars to choose from, beautiful tracks to race on and so many missions and challenges.

Grand Theft Auto: San Andreas

Fans of GTA also love to play Grand Theft Auto: San Andreas which the newer version of the game with the mission to secure your family and survive in the city of San Andreas.

Grand Theft Auto 2

Next up is the second sequel of GTA with features like multiplayer racing and saving passwords.

Need for Speed Underground 2

We have another racing game from a famous racing franchise, Need for Speed. This game is definitely one of the best GBA games of all times.

F1 2002

For the racing game fans, F1 is also a thrilling one that has good quality graphics, fast paced races and so many racing cars to choose from.

Metal Slug

The run and gun action game is another one of the best GBA games of all times that you should definitely try if you like the arcade style games.

Sonic Advance

This game features Sonic Advance series and has so many of your favorite characters from the series itself. The game can be played upto 3 players.

Fifa 07

We also have a game for the sports lovers. Fifa 07 is a soccer game which is quite famous among the fans despite of its low graphics.

Fifa World Cup Germany 2006

Here’s another Soccer game that you can play on your GameBoy Advanced.  This is also a finely designed game with a lot missions and World Cup matches.

Donkey Kong Country

The game is about the journey of Donkey Kong and Diddy Kong through the forests, temples and other adventurous places to find the things that got robbed and you are their guide.

Donkey Kong Country 2

Next is the second sequel of Donkey Kong Country. In this one you can also add one of your friends as your partner, both of you choosing your roles to be one of the two main characters.

Donkey Kong Country 3

The 3rd sequel bring even more fun and adventure where players have to defeat the opponents using various techniques and skills.

Super Mario Bros

When talking about the Best GBA games of all times, Super Maria Bros is one game that can not be ignored. This action adventure game is bound to give you a good game time and energy boost.

Mario Kart: Super Circuit

Next we have another game featuring Mario as the main character. This however is a racing game with more than forty different tracks to race on and many other characters as well.

Super Mario World: Super Mario Advance 2

This is another one of the Mario games, quite different when it comes to gameplay but equally fun and addictive.

Kirby Nightmare in Dream Land

This one is an action-adventure with an adorable character that has a special ability to transform into 20 different shapes. You go on an adventure journey to blow away the enemies.

Kirby and the Amazing Mirror

This is another game from the same franchise that features Kirby as the main character. Players have to help trapped Kirby find his way out.

Mega Man Zero

Mega Man Zero an adventure game that features Ciel as the main character of the game. Ciel is a scientist who will require your assistance in many of his missions.

Lego Star Wars: The Video Game

Lego Star Wars: The Video Game is next in line as one of the best GBA games. The game features Lego characters with Star Wars theme. The game assigns players to many exciting missions in far off galaxies.

Star Wars Trilogy: Apprentice of the Force

Coming from the Star Wars franchise the game is packed with action and has so many sides to explore. The game also includes all the famous characters from the movie.

Ultimate Spider-Man

When we talk about Best GBA Games, we have the game from Spider Man franchise included in the list. This is a comic based game unveiling different parts of becoming a super hero from an ordinary human.

Yu-Gi-Oh The Sacred Cards

This is the RPG style card based game where Yugi Muto and Joey Wheeler are the two characters preparing for the Battle City Tournament. The game includes more than 900 cards to collect and many trading opportunities.

Wario Land 4

This is a high graphic is a maze runner treasure hunt type of game where Wario is on the mission to recover different pieces of the treasure.

Pac-Man

The arcade game is bound to give you several hours of fun time. This is more like the classic pac-man game where players run through a maze and eat bits while staying away from the monsters.

Kingdom Hearts Chain of Memories

This game brings so much excitement for the Final Fantasy fans as well as Disney fans. This is basically an action based role playing game where you can collect cards and use them to defeat the enemies through the skills you have mastered and collected weapons.

Crash and Spyro Super Pack

The game gives you an extensive gameplay with over 40 different and exciting levels. The game features three characters Coco, Crash and Crunch and you can choose to be any one of them.

Capcom Classics Mini Mix

This action game lets players become a commando who is there to fight the enemies through his incredible skills and to take them down.

Spyro: Season of Ice

Another one of the action games featuring the famous Spyro the Dragon. The goal of this game is to free the fairies from the ice prisons.

Avatar: The Last Airbender

This one is all about mastering the Kung Fu art form and use it to demolish the enemies. The game supports multiplayer mode as well.

Final Fantasy – II

Next is the sequel to the famous Final Fantasy game with a relatively different story but a lot action and cool missions.

Tetris Worlds

I have added this classic game in the list of Best GBA Games because it is fun, colorful, and addictive and the game is designed with so many themes and various modes included.

Dragon Ball Z: Buu’s Fury

The game features the famous Dragon Ball series and includes its famous characters and a good storyline as well.

Naruto: Ninja Council

This one features the theme and characters from the Naruto series. You can play the game with Sasuke and Naruto in the multiplayer mode.

One Piece: Dragon Dream

This action oriented game is about a boy who has to fight a strong enemy under the sea and save the lives of those who live there.

Sk8 – Tony Hawk’s Pro Skater 2

For the fan of Sports games, this one feature Skating and you can go ahead to show your skating skills, perform stunts and tricks in various challenges with the characters from the original Sk8.

Super Black Bass Advance

This casual game is a patience tester where players go on fishing trip and throw bait at perfect timing to catch the fish.

Yoshi’s Island: Super Mario Advance 3

The game is built around a wonderful storyline that players unwind as they play through various levels. The goal is unite the twins but you have to avoid the hurdles and traps set on the way.

Golden Sun

This is a fantasy role playing game which includes two different game modes; solo and Player vs Player.  The game includes 10 different characters, good graphics and fun missions.

Update Galaxy Grand Duos I9082 to Android 6.0.1 Marshmallow

4
Update Galaxy Grand Duos I9082 to Android 6.0.1 Marshmallow

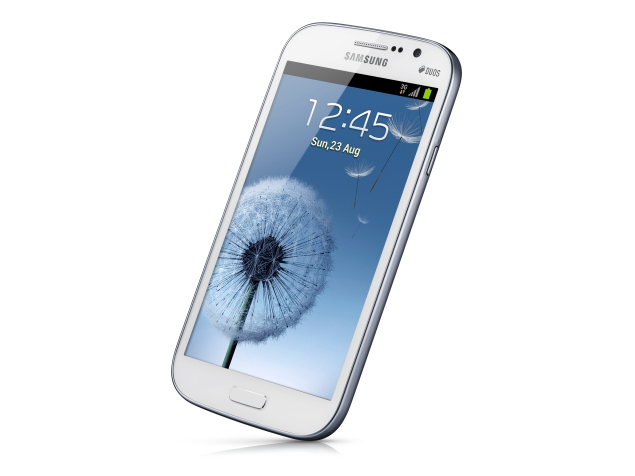
Here’s how you can install and Update Galaxy Grand Duos I9082 to Android 6.0.1 Marshmallow using Resurrection Remix custom ROM.

Galaxy Grand Duos I9082 which was upgadable to only Android 4.2.2 Jelly Bean officially is now upgradable to Android 6.0.1 Marshmallow. Yes, you read it perfectly right. You can now install the all new Android Marshmallow on your 4 years old Android smartphone. This awesomeness has been brought to the Galaxy Grand Duos by means of Resurrection Remix custom ROM. Resurrection Remix is one of the few popular custom ROMs which is also one of the most trusted custom ROM available for a lot of Android smartphones.5292013114820PM_635_samsung_galaxy_grand

The Resurrection Remix Android Marshmallow for Galaxy Grand Duos is based on famous ROMs like CyanogenMod, Slim ROM, OmniROM and others. These ROMs altogether add to performance, stability and feature enhancement of this ROM. The ROM comes with countless features that you may never be able to find on any other custom ROM available for the Galaxy Grand Duos. You can have a look at the full feature list here. As far as the bugs are concerned, this ROM is quite stable. You don’t need to worry about your everyday use as this ROM will probably fulfil all of your everyday tasking needs. You just need a compatible recovery to flash this ROM. There are no other hard and fast rules to follow at all. As you head next, you will find the comprehensive guide to flash the custom recovery in order to flash this ROM and then you will find the complete to the point instructions to flash this ROM on your Galaxy Grand Duos I9082.

Pre-install instructions

  1. This guide is only intended for Galaxy Grand GT-I9082. Do not try flashing this ROM on any other device, otherwise you will result in bricking it.
  2. Your device must be running stock Android 4.2.2 Jelly Bean before flashing this ROM. Do not flash this ROM over Android 4.1.2 Jelly Bean or any other custom ROM.
  3. Make sure that your phone is charged at least 50% to avoid power issues during the process.
  4. Install TWRP recovery on your Galaxy Grand. This guide will work for both I9082 and I9082L variants.
  5. Create a Nandroid backup of your Galaxy Grand using the recovery.
  6. Also create an EFS Backup of your Galaxy Grand.
  7. Also backup your Contacts, Call Logs and SMS Messages.
  8. Follow the instructions carefully to avoid any mishap.

Disclaimer: Flashing custom ROMs is a highly risky process. In case of a mishap, TechBeasts or the ROM developer may not be held responsible. Make sure that you’re doing everything at your own risk.

How to Install Android 6.0 Marshmallow on Galaxy Grand  I9082 via Resurrection Remix ROM

  1. Download latest Resurrection Remix Marshmallow.zip file for your device.
  2. Download Gapps.zip (PICO) file for Android Marshmallow.
  3. Connect your phone to your PC now.
  4. Copy all .zip files to the storage of your phone.
  5. Now disconnect your phone and turn it off complete.
  6. Boot into TWRP recovery now, in order to do so, turn it on by pressing and holding Volume Up + Home Button + Power Key. You should see the recovery mode in a while.
  7. Now in TWRP recovery wipe cache, dalvik cache and factory data reset under advanced options.
  8. After wiping all these three, tap “Install” option.
  9. Now select “Install > Locate Zip from SD card > Select Resurrection Remix Marshmallow.zip file > Yes”.
  10. This will flash the ROM in your phone, once done get back to the main menu in recovery.
  11. Now once again select “Install  > Locate Zip from SD card > Select Gapps.zip file > Yes”
  12. This will flash the Gapps in your phone.
  13. Reboot your device.
  14. You should see the Android 6.0 Marshmallow running on your device in a while.
  15. That’s all!

Got any queries? Reach us out through the comment box below.

Source

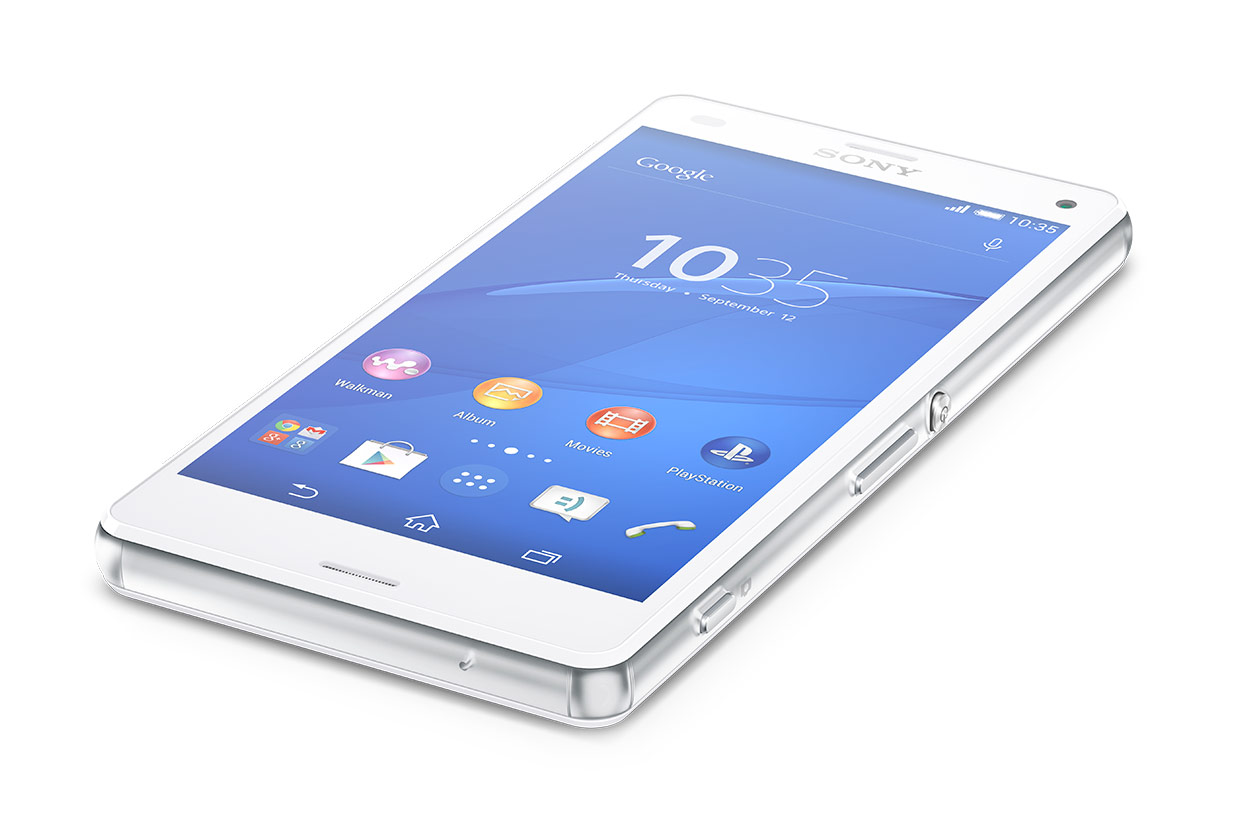
Root Xperia Z3 Compact D5803/D5833 on 23.5.A.1.291 Android Marshmallow

20
Root Xperia Z3 Compact D5803/D5833 on 23.5.A.1.291 Android Marshmallow

Sony Xperia Z3 Compact was updated to latest Android 6.0.1 Marshmallow 23.5.A.1.291 build number. Sony has always remained consistent and bringing the stable and bug free software updates for its Xperia smartphones. The recent release replicates the same. The new build brings a number of fixes to the existing bugs. With the 23.5.A.1.291 build, Sony introduced its new and enhanced stamina mode into Android Marshmallow. Sony also fixed the multi-tasking bug and improved the overall performance and stability of the device. Sony has released a number of Android Marshmallow updates earlier, so this update only seems to improve the device experience. Rest of the features remain the same as previous build of Android Marshmallow. The update was rolled out in select regions, but it’s been already a month since Sony rolled this out. At the time of writing this, we expect to have this update hit almost all regions across the globe.

As soon as a new build from Sony comes up, users tend to update their devices. For average users, updating the device is not an issue as they don’t have to go through any hard and fast rules. The real issues comes up for Android power users who loose root immediately after updating their Sony Xperia smartphone to the latest firmware. This was supposed to happen with the Xperia Z3 Compact power users as well who update to the latest .291 firmware and probably it has. We have the good news for users looking for a method to root their Xperia Z3 Compact once again.xperia-z3-compact-gallery-04-1240x840-094c91770d9add70e8aee7cb743c8f05

The succeeding guide iterates how you can install a custom recovery like TWRP on your Xperia Z3 Compact and then flash a pre-rooted Android 6.0.1 Marshmallow 23.5.A.1.291 firmware to gain the root access alongside a latest build of TWRP recovery. The method involves a bit of downgrading and upgrading the device so you need a lot of patience while following it. Have a look on it and head towards the open source world of Android customisation.

Early preparations:

  1. This is only for Sony Xperia Z3 Compact D5803, D5833. This rooting method is only for the device mentioned above. Make sure that your model number matches the one listed above.
  2. Battery should be charged at least over 60%. Make sure that your battery is charged enough to complete the flashing process.
  3. Backup everything!Just to be on the safe side, you may consider backing up each and everything from your Android device. This is highly recommended so that in case anything goes wrong, you still have the access to all of your data and you can restore it immediately. You may backup everything as listed below.
    1. Backup SMS Messages
    2. Backup Call Logs
    3. Backup Contacts
    4. Backup Media – Copy your files manually to your PC or Laptop.
  4. Enable USB debugging mode on your device. To do so, tap settings>developer options>USB debugging. If you can’t find developer options in settings, then tap settings > about device and tap “Build Number” for 7 times and you’ll get em’ activated under settings.
  5. You must have installed Sony Flashtool. Find the full guide here.
  6. After installing Sony Flashtool, open the Flashtool folder from the drive where you installed it. Now open Flashtool>Drivers>Flashtool-drivers.exe and install the Flashtool, Fastboot & Xperia Z3 Compact drivers from the list. If you do not find the Flashtool drivers in Flashmode, skip this step and install Sony PC Companion instead, for drivers support. [Important]
  7. Make sure that you use the phone’s original data cable to establish connection between your phone and the PC. Using a different data cable might result in interrupting the firmware installation.
  8. Use the following guide to unlock the bootloader of your Xperia device before proceeding.

Disclaimer: The methods involved in flashing custom recoveries, roms and rooting your phone are highly custom and may result in bricking your device, and has nothing to do with Google or the device manufacturer that is SONY in our case. Also rooting your device will void its warranty and you will be no longer eligible for any kind of free device services by the manufacturers/warranty providers. In case of any mishap we may not be held responsible. Follow these instructions to the letter to avoid any mishap or bricking. Make sure that whatever you do, you are doing it at your own responsibility.

Steps For Rooting Xperia Z3 Compact D5803, D5833 23.5.A.1.291 Firmware

1. Downgrade to .77/.93 Firmware and Root It

  1. If you have already updated your smartphone to Android 6.0.1 Marshmallow, then you have to downgrade your device to KitKat OS and Root it.
  2. Use this Flashtool Guide to Install 23.0.A.2.93 firmware.
  3. Root using this guide.
  4. Now Install XZ Dual Recovery.
  5. Now phone is rooted, USB Debugging must be enabled.
  6. Download latest installer for Xperia Z3 Compact: Z3-lockeddualrecovery2.8.26-RELEASE.installer.zip
  7. Connect phone to PC using OEM date cable and run install.bat.
  8. It will install the custom recovery.
  9. Now work here is done. Lets move on to next step.

2. Root and Install Recovery on Xperia Z3 Compact D5803/D5833 on 23.5.A.1.291 Firmware

Download the pre-rooted firmware.zip file according to your device and copy it to your phone’s internal or external storage.

  1. Custom recovery was installed in the first step.
  2. The pre-rooted firmware was downloaded and copied to phone just above.
  3. Now you have to turn off phone.
  4. Turn it on again and press volume up or down repeatedly to enter custom recovery. You should boot into TWRP recovery here. If pressing Volume Up boots into CWM/Philz, then pressing down will boot into TWRP and vice versa.
  5. Once you are in TWRP, tap Install > Locate the pre-rooted firmware.zip file > swipe to flash it and complete flashing.
  6. As flashing ends, reboot your phone.
  7. Your phone will now boot into latest Android 6.0.1 Marshmallow 23.5.A.1.91 rooted firmware and you will have the recovery installed as well.
  8. That’s all.

Got any questions? Ask me in the comments below

Update Xperia Z1 to Android Marshmallow with Resurrection Remix

2
Update Xperia Z1 to Android Marshmallow with Resurrection Remix

Here’s you can update your Sony Xperia Z1 to Android 6.0.1 Marshmallow using Resurrection Remix custom ROM.

Sony Xperia Z1 has been dropped off from the Android Marshmallow list. The device will never get official Android 6.0.1 Marshmallow, however this doesn’t mean that we will never get a chance to taste the sweet Marshmallows on this phone. If it’s not possible officially then the only way we are left with is to have our eyes up for a stable and a perfect custom ROM meeting all our needs to run the Marshmallow firmware on Xperia Z1. Thankfully, the Resurrection Remix Android Marshmallow for Sony Xperia Z1 is now available.xperia-Z1-hero-black-1240x840-3c449514e1daf8b0652a5dc235530ebc

Resurrection Remix has a wide background. This is among the most popular and most widely used Android custom ROMs. What makes Resurrection Remix more cool is the fact that it is based on popular custom ROMs like CyanogenMod, Slim ROM, Omni ROM and then itself. All these builds help Ressurrction Remix to become a stable, fast and an easy to customise ROM. To know more about Resurrection Remix, you can have at its features below.

[showhide type=”link” more_text=”Resurrection Remix Android Marshmallow Features” less_text=”Hide…..”] Based On Latest Google Android 6.0.1 Release
Based On Cyanogenmod 13 Sources
RR Customizations:-
-Navigation Bar
-Enable/Disable Navbar
-Navbar Button Customization
-Navbar Slim Dim
-Animate Dim
-Dim Timeout Duration
-Dim Alpha
-Double Tap To sleep navbar
-Navigation Bar left/Right handed mode Switch for landscape

-Statusbar
-Brightness Slider
-Enable/Disable Show Notification Count
-SuperUser Indicator Switch
-Double Tap To sleep Statusbar
-Carrier Label
-Carrier Label Switch
-Carrier label Colour
-Carrier Label Size
-Clock Customizations
-Time & date
-Clock Colour
-Day & date Toogle
-Center/Right/Left Clock Choice
-Date Format
-Clock Font Styles
-Battery
-Battery Bar customization
-Battery Icon Customization(circle/landscape/Potrait and more)
-Battery % Text
-Network Traffic Indicator
-Network Traffic Arrows Switch
-Incoming/OutGoing Traffic
-Network traffic Color
-Statusbar RR Logo
-RR logo Color
-StatusBar Weather
-Weather Color
-Weather Position(left/right)
-Weather Style
-Weather Size

-Animations
-Toast Animations
-ListView Animations
-System Animations

-Gestures
-Gestures Anywhere Feature
-3 Finger Swipe Screenshot Gesture

-App Circle Bar
-Choose apps in AppSidebar
-Trigger Width
-Trigger Hieght
-Trigger Position
-App Sidebar
-Choose apps in App circle
-Trigger Width
-Trigger Hieght
-Trigger Position
-Pie
-Pie Trigger(left ,Right ,Bottom)
-Pie Targets
-Pie Colors
-More Pie Features

-Recents Panel
-Clear All button Switch
-Clear All Tasks Switch
-Clear All Button Location(Top right,Top Left,Top Center,Bottom Left,Bottom Right,Bottom Center)
-Recents Search Bar
-Full Screen Recents
-Slim Recents
-OmniSwitch

-Cclock Widget
-CLock And Alarm Customizations
-Weather Panel Customizations
-Calender Events

-LockScreen
-Lockscreen Bottom Shortcuts
-Lockscreen General Shorcuts
-100+ Icons for Shortcuts
-Double Tap to Sleep Lockscreen
-Lockscreen Media Art/Enable Disable
-Quick PIN/Patter Unlock
-LockScreen Blur
-Lockscreen Blur Intensity
-LockScreen Wallpaper
-Lockscreen Weather Widget
-Lockscreen Icons Color

-Quick Settings Draggable Tiles
-Customizable Tiles
-Show Two Main Tiles Per Row
-Dyanamic Tiles Adjustment
-Notification Drawer
-Weather Display Switch
-LongPress Toogles to Enter Settings
-Disable Immersive Mode Messages
-Force Expand Notification
-Task Manager Switch
-Time Contextual Header(HD,Modern,Poly)
-Quick PullDown Switch

-Buttons
-Backlight Timer
-Backlight Strength

-Advanced Reboot Menu
-Power Menu Customizations
-Power Off
-Reboot(Recovery, Bootloader, Hot Reboot)
-ScreenShot
-Power Menu End Calls Switch
-Restart SystemUI
-Airplane Mode
-ScreenRecord
-On the Go Mode
-Sound Panel

-Home Button(For devices with HW keys Only)
-Home Button answer call
-Long Press Actions
-Double Tap Actions

-Menu Button(For devices with HW keys Only)
-Short Press Actions
-Long Press Actions

-Search Button(If Device Supports)
-Short Press Action
-Long Press Action

-Volume Buttons
-Wake Up Device
-Playback Control
-Ringtone Volume Control
-Keyboard Cursor Control
-Swap Buttons on Landscape mode
-Volume Key Answer

-Miscellaneous
-Selinux Switch (Switch Between Permissive and Enforcing Selinux if Device has Selinux Enabled)
-cLock Shortcut
-Disable Battery Saver Warning Color
-Disable Fc Notifications
-Wakelock Blocker
-Media Scanner On Boot Behaviour
-Cammera Shutter Sound Enable/Disable

-SystemUI Tuner
-Enabled By default
-Removed Demo mode and Tweaked SystemUI Tuner As compared To AOSP
-StatusBar Icons Cuzomizations
-Quick Settings Customizations

Other Features
-Perfomance Profiles
-LCD Density
-Expanded Desktop Mode
-Audio FX
-Heads Up Switch
-Live Display
-Configurable 0,90,180,270 Degree Rotation
-Lock Screen Autorotate Switch
-Native Tap to Wake From Marshmallow
-Double Tap Power Button To enable Camera gesture
-Prevent Accidental Wakeup
-Wake Phone on Charging Plug
-Battery Light Customizations
-Notification Light Customizations
-Font Size
-CM privacy guard
-Performance Tweaks(Kernel Aduitor Inbuilt)

-SuperSU Inbuilt

-RR OTA
-CM Theme Chooser
-OverAll Smoothness Improvements
-Optimizations to Improve Battery
-Includes All Android Marhsmallow Features
-Includes ALL CM13 Features
-AND MUCH MUCH MORE

[/showhide]

Early preparations

  1. This ROM is intended for the Sony Xperia Z1 only. Do no try this on any other device at all.
  2. Charge your phone up to 75% to avoid power issues during flashing process.
  3. Unlock Bootloader, Flash TWRP Recovery on your Sony Xperia Z1. Here’s a complete guide.
  4. Backup your important contacts, call logs, sms messages and also copy your media content to your PC. Here’s a complete guide to backup everything.
  5. Follow this guide to the letter to avoid any mishap.

Disclaimer: Unlocking bootloader, rooting and flashing custom recoveries, custom ROMS are highly custom processes. Doing any of these will result in voiding the warranty of your device. Ensure that you’re doing everything at your own risk. In case of a mishap, TechBeasts or the device manufacturer may not be held liable. 

How To Install Android 6.0.1 Marshmallow Resurrection Remix Custom ROM on Sony Xperia Z1

  1. Download the latest build of  for your Sony Xperia Z1: ResurrectionRemix-M-v5.7.3-20160822-honami.zip
  2. Download the GApps for Resurrection Remix ROM: Download Google GApps for Android 6.0.x Marshmallow [All ROMs]
  3. Copy the Resurrection Remix ROM.zip and GApps.zip  files to your Sony Xperia Z1’s external or internal SD card.
  4. Make sure that you’ve unlocked the bootloader, flashed TWRP on your Sony Xperia Z1.
  5. Now boot your Sony Xperia Z1 into TWRP recovery mode. To do so, turn off your Sony Xperia Z1 completely and then turn it on, while it boots up, press the Volume Up and Down keys simultaneously to boot into TWRP. Once your phone is in bootloader mode, select recovery mode here and it will boot your phone into TWRP recovery.
  6. Create a Nandroid backup of your device’s system and boot.img under the Backup options in TWRP recovery.
  7. Get back to the homescreen in TWRP Recovery and tap Wipe.
  8. Perform a factory reset using the Wipe options in TWRP and then get back to the main screen in recovery.
  9. Now get back to TWRP home and  tap Install > Locate the Resurrection Remix Custom ROM.zip file > swipe to confirm ROM installation.
  10. Similarly, flash the GApps.zip file.
  11. Once done, reboot your device to system and it should launch the newly installed Resurrection Remix Custom ROM.

That’s all. If you are stuck with something, reach us out through the comment box or our contact us page.

Source

How to install ARISE (A.R.I.S.E) Sound Mod on Android phones

0
How to install ARISE (A.R.I.S.E) Sound Mod on Android phones

Here’s how to How to install ARISE (A.R.I.S.E) Sound Mod on Android phones.

For Android, you can find a number of MODs which will help you to enhance the sound experience on it. In the past few years, MODs like VIPER, Surround Sound, Dolby Atmos etc have remained quite popular among Android users. Manufacturers like HTC, Asus, Huawei, Lenovo, and LG have been working hard on bringing out a unique sound quality on their Android smartphones. While most of the sound enhancements worked because of the particular hardware installed in those smartphones, but the software libraries did play a role as well.

It is not possible for you to enhance the sound effects on your Android phone by installing new hardware, but the charm of Android is that you can definitely pull out those sound libraries and flash them manually on your phone. This will enhance the sound effects, provide you the desired beat, bass, and other sound properties up to a great extent (if not completely).11819091_f520

If you go after selecting the best Sound MOD for your Android phone, you might get confused among the popular options like VIPER, Dolby Atmos, and others. This confusion can be paved off by flashing a composite of all these. By flashing a composite MOD, you will be able to select the sound effects of your choice, activate and deactivate the one you like on the go. The MOD we are going to flash today fulfills our needs. We are talking about A.R.I.S.E which stands for Auditory Research in Sound Enhancements.

ARISE puts together sound enhancements like VIPER4Android, Asus Zenfone 3 libraries with DTS effect, Huawei MediaPad M2 Harman & Kardon sound effects, Huawei P9 sound libraries, Lenovo K3 Note MaxxAudio, LeTv Max 2 Dolby Atmos, Sony LDAC Bluetooth codec etc. Apart from this, it also brings sound libraries from some of the most famous Android music players like the USB Audio PlNeutronNetron Music Player and the Sony Music DSP. ARISE is compatible with Android OS from Android Jelly Bean to Android 7.0 Nougat. ARISE requires no configuration, it installs all the sound effects in your system. Viper4Android and Dolby Atmos applications may appear in your app drawer, no other applications will appear there. What more would you ask for? Isn’t it already cool enough? Well, let’s go ahead to flash the A.R.I.S.E sound MOD on your phone and start using it.

Have a look on:

How to install ARISE (A.R.I.S.E) Sound Mod on Android phones

  1. Make sure that you have a rooted Android phone and a recovery installed on it as well. Here’s a guide to install TWRP 3.0.x on your Android phone.
  2. Also make sure that you have no sound MOD previous installed on your phone. If so, then dirt flash your same ROM before beginning. Dirty flash means you don’t need to wipe your phone before flash the ROM over it again, just flash and you are good to go as it will simply uninstall any previous MOD.
  3. Now download the ARISE Sound Systems Numbers 3.3.zip  and copy it to your phone’s internal or external storage.
  4. Now on your phone, boot into TWRP or CWM recovery depending on the one you have installed.
  5. Boot into custom recovery using the button combo or using the adb and fastboot commands.
  6. Now tap or select Install > Find the ARISE Sound Systems Numbers 3.3.zip file > Flash it.
  7. Once flashed, wipe cache and dalvik cache from within the custom recovery.
  8. Reboot your device.
  9. Play the music and enjoy!

Source

Fix ”DNS Server is Not Responding” Error [ Fixed ]

Fix ”DNS Server is Not Responding” Error [ Fixed ]

In this post, I’ll tell you how to fix ”DNS Server is Not Responding” Error, this error occurs while you are browsing the internet.  You’ll see a blank page saying ” DNS Server is Not Responding “. No the main reason of this error is that when the DNS server that translates a domain name doesn’t respond. No need to worry about that, all you have to do is follow the steps given below and you’ll be able to fix it.

dns-server-not-responding-fixed

How To Fix ”DNS Server is Not Responding” Error:

Now before going any further, you can perform few tricks in order to narrow down the problem. Fist try another browser to check if it’s browser related problem, you can also connect a smartphone or tablet and try opening the same website. If you have two internet connections then use the other one to troubleshoot the DNS server is not responding error. In the end, you can try clearing your browser cache and load the domain again. If still there is no luck try the methods below.

Method 1: Change The DNS Server Addresses:

  • Click on the Network icon located at the bottom right corner of your screen. Select Open Network and Sharing Center.
  • Now click on Local Area Connection, right click the icon and select Properties.
  • Here you’ll see different options in a list view, Click and Internet Protocol Version 4 (TCP/IPv4) and then hit Properties again.
  • A new Windows will open, Click on Use the following DNS server Addresses.
  • Now you have to add custom DNS servers, in Preferred DNS Server ( 8.8.8.8 ), Alternate DNS Server ( 8.8.4.4 ). Before you move on and save settings you need to check Validate Settings Upon Exit box. Click on Ok.

Open your browser and try loading the domain you are getting the error if this time its working you don’t need to go further. But if the result is same like before, move onto next method.

Method 2: Flush The DNS of Your Computer:

Click the start button, type CMD, and press enter.

A command prompt window will open. Now the following command in the same order as they are written.

ipconfig /registerdns

ipconfig /release

ipconfig /renew

netsh winsock reset

Method 3: Power Cycle Your Router and Computer:

This method is pretty effective, you have to turn off your router and also unplug it from your computer. Wait for at least 4-5 mins and then turn on your router and plug it back to your computer. Don’t do anything first, let the router boot-up properly and make sure your connection is live.

These are the main method that will work for you, but by chance, if they don’t then follow the methods below in order to fix DNS Server is Not Responding error. 

Disable Your Firewall: Many users have reported that after disabling their firewall, DNS Server is Not Responding error stop poping up.

Disable any Extra Connection: Start > Control Panel> Network and Sharing Center > Change Adapter Settings.

This is all for now, I am sure these methods will work for you. I will be updating this post as soon as I get more methods. Till then enjoy these troubleshooting tips to fix DNS Server is Not Responding error.