Home Blog Page 240

How to install Android Nougat on At&t Galaxy S6 Active

5
How to install Android Nougat on At&t Galaxy S6 Active

Android Nougat for the Galaxy S6 Active Active is out now. At&t hasn’t released the final build of the firmware yet. The firmware is in the 4th beta stage at the moment and it is pretty close to the final build that we are yet to see. To update your phone from Marshmallow right now, you have to flash several files one by one on your phone. The files must be flashed in a proper manner to avoid any issues.

Updating your Galaxy S6 Active Active to Android Nougat beta firmware right now will not update its bootloader. This means you can always flash a stock Marshmallow firmware using Odin and update it to a final build later on. The Nougat firmware right now will let you have a glimpse of everything new that’s going to be a part of this firmware. Samsung has made a lot of UI changes in the application drawer, in the settings application and also in the calendar of the phone. Changes have emerged in the notification panel and toggles menu as well. Samsung has also added a lot of new options and features in the phone. The update overall is worth flashing as the phone as it carries notable upgrades and changes.

While going through the procedure to update your Galaxy S6 Active Active, you have to be very much careful with the file downloads particularly. Read every single instruction carefully, once you are ready, you can go ahead to install Android Nougat on At&t Galaxy S6 Active Active SM-G890A.

Install Android Nougat on At&t Galaxy S6 Active Active

Preparation

  1. The update is intended only for the At&t Galaxy S6 Active SM-G890A. Do not try this on any other phone.
  2. Backup everything including text messages, contacts, call logs and media content.
  3. Charge your phone up to 50%.
  4. Enable OEM Unlocking on your At&t Galaxy S6 Active.
  5. Allow USB debugging mode on your phone.
  6. Download and install Samsung USB drivers on your computer.
  7. Turn of reactivation lock in settings > Lock screen and security > Find my mobile.
  8. Follow the instructions very, very carefully.

Important instructions

If your Galaxy S6 Active is running on Android Lollipop or Marshmallow build prior to the Marshmallow G890AUCU5CPK3, you will download the PK3 Odin file and flash it using this guide. The guide is for Galaxy S7, but you will follow the same procedure to flash the PK3 firmware on your At&t Galaxy S6 Active.

After flashing PK3 firmware, you will have to flash PK3 to PK4 and then PK4 to PK5 update in order to prepare your phone for flashing Nougat OTA files. You can update your phone from PK5 to PK8 as well, but that’s not necessary as you can flash a Nougat build over PK5 update as well.

You can update your phone to Android 7.0 Nougat either from CPK5, CPK8 or DBQ8 firmware.

In order to install the firmware successfully, your phone must follow the proper sequence. You have two pathways to follow. If your Galaxy S6 Active G890A is currently running CPK5, CPK8 or DBQ8 firmware, you can skip the Andorid Marshmallow OTA.zip files given below and start flashing the files of Android Nougat in the following manner: DPK5 —> DQD1 or CPK8 —> DQD1 or DBQ8 —> DQD1

Download the files now

Marshmallow build

Nougat builds 

How to install Android Nougat on your At&t Galaxy S6 Active now

Make sure that you have read all the instructions carefully.

  1. Now Install and setup Minimal Android ADB & Fastboot drivers.
  2. Now open your respective ADB & Fastboot drivers directory.Minimal ADB & Fastboot drivers, you will open your installation drive > program files > Minimal ADB & Fastboot folder.
  3. Now copy your desired update.zip files, for example SS-G890AUCU5CPK3-to-S5CPK4-UP or SS-G890AUCS6CPK8-to-U6DQD1-UP and all other update files according to your build number in the folder mentioned above.
  4. Now open the Minimal ADB and Fastboot folder and hold the shift key on your keyboard. While holding it, right click on an empty area and click on “Open command window here”.
  5. Put your Galaxy S6 Active in recovery mode using Volume Up + Power + Home Key simultaneously. Once it boots up in recovery, connect it to your computer.
  6. In the command window, issue the following command to verify connection: adb devices – This command will result in some code making sure your phone is connected properly in the adb mode.
  7. On your phone, use Volume buttons to navigate to apply update from adb and then press Power key to make a selection.
  8. Once this mode is selected, get back to the command window and enter the following commands one by one.
    1. adb sideload UPDATEFILENAME.zip

  9. Replace the UPDATEFILENAME with the name of the file you are flashing. e.g.

    adb sideload SS-G890AUCS6CPK8-to-U6DQD1-UP.zip

  10. Flash all the  files by copying in the ADB directory and replacing the name like this.
  11. Repeat the process unless you have flashed all the files to reach latest Nougat build.
  12. Reboot your phone after installing all files correctly.
  13. That’s all.

Method#2

  1. Access your phone’s external SD card either on your phone or on your computer.
  2. Create a new folder named as “fota” in the root (main) directory of the external SD card.
  3. Copy the update.zip file that you got above in this “fota” folder.
  4. Turn off your phone now.
  5. Boot it into download mode. To do so, press the Volume Down + Power + Home Key. Upon getting a warning, press Volume Up to continue.
  6. In the download mode, make sure that the bootloader status is “Official” and not custom. If it says custom, then go back to the preparations and follow step# 4.
  7. Now boot into recovery mode. To do so, turn off your phone again. Now turn it on by pressing and holding Volume Up + Power + Home button. As the phone turns on, leave the keys.
  8. As your phone brings the recovery up, navigate using Volume Up/Down keys and press power key to select “apply update.zip from sd card”.
  9. Now in the apply update.zip from sd card menu, select the update.zip file that you copied to fota folder and press the power key once again.
  10. Press power key on the “Yes” option and it will quickly flash the OTA on your At&t Galaxy S6 Active.
  11. Flash all required files one by one in the same sequence give above to reach the latest build of Android Nougat.
  12. That’s all.

Found this method working well? Don’t forget to reach us out if you have got any queries. That’s all.

Source

Update At&t Galaxy S7 Active to Android Nougat

0
Update At&t Galaxy S7 Active to Android Nougat

Samsung is updating all of its flagship devices to Android Nougat one by one. Following Samsung’s footsteps, carriers like At&t, Verizon and others have also started updating their phones now. At&t has already updated its Galaxy S7 and Galaxy Note 5 to Android 7.0 Nougat. The update for Galaxy S7 Active which also falls under the umbrella of At&t has been released.

Nougat update for Galaxy S7 Active brings loads of new features. The update will give your phone a brand new look as there are UI elements crafted from scratch. The icons have a transparent background now. Settings application has a new UI with all new icons. Calendar application is completely new. New toggles in notification panel with extra options are there. Samsung has added a bluelight filter in the phone to make the screen easy on your eyes. Samsung phones running on Nougat have the option now to change the resolution, which something worth having on your phone if it’s equipping a QHD display. You can now double press the home button to switch between your front and back camera. There is a lot more to discuss regarding this new update, but you can understand it better once you are running it on your phone.

Official Android 7.0 Nougat update for the At&t Galaxy S7 Active came out with the build number G891AUCU2BQB2. Updating your S7 Active to this latest firmware is possible through multiple pathways. Since this update is in the .zip format and it’s a stock OTA, it requires your phone running on the most recent Marshmallow firmware. If your Galaxy S7 Active is currently running on the PL1, PK2 or the QA1 firmware, you should be easily able to update your phone. If your phone is running on a previous build of Marshmallow, you will first need to update your phone to the one of the firmwares mentioned above and only then you can update it.

We will jump up to the method now. You need to be very, very careful while downloading the correct file for your device and then you can follow the instructions to update At&t Galaxy S7 Active to Android Nougat.

Update At&t Galaxy S7 Active to Android Nougat

Preparation

  1. The update is intended only for the At&t Galaxy S7 Active G891A. Do not try this on any other phone.
  2. Backup everything including text messages, contacts, call logs and media content.
  3. Charge your phone up to 50%.
  4. Enable OEM Unlocking on your At&t Galaxy S7 Active.
  5. Allow USB debugging mode on your phone.
  6. Download and install Samsung USB drivers on your computer.
  7. Turn of reactivation lock in settings > Lock screen and security > Find my mobile.
  8. Follow the instructions very, very carefully.

Important instructions

You can update your phone to Android 7.0 Nougat either from PK2, PL1 or QA1 firmware.

In order to install the firmware successfully, your phone must follow the path of files given below. You have two pathways to follow. If your Galaxy S7 Active is currently running PK2 firmware, you can skip the Andorid Marshmallow OTA.zip files given below and start flashing the files of Android Nougat in the following manner: PK2 —> BQB2, BQB2 to QBC2, QBC2 to QBC4.

If your device is running on APL1, you will flash the APL1 —> BQB2, BQB2 to QBC2, QBC2 to QBC4.

If your device is running on AQA1, you will flash the AQA1 —> BQB2, BQB2 to QBC2, QBC2 to QBC4.

If your Galaxy S7 Active is running on Android 6.0.1 Marshmallow APE7 firmware, you will flash the files to update it to PG7, then PH1, after that PI2, then PK2. These are Marshmallow builds. Once you are running on the latest Marshmallow build, you can follow the sequence given in above steps to flash Nougat.

Please note that the files are in stock state. The Nougat firmware is still in beta stages. At the moment, you can flash the beta firmware to check if it works well. As soon as the final build rolls out, I will add the links here and update our viewers about it.

Download the firmware now:

Android 6.0.1 Marshmallow to higher Marshmallow files

G891AUCU1APE7 -> G891AUCU1APG7: v1.1. G891AUCU1APE7-the SS-to-U1APG7 the UP 
G891AUCU1APG7 -> G891AUCS1APH1: v1.2. G891AUCU1APG7-the SS-to-S1APH1 the UP 
G891AUCS1APH1 -> G891AUCS2API2: v1.3. G891AUCS1APH1 the SS to-S2API2
G891AUCS2API2 -> G891AUCU2APK2: v1.4. G891AUCS2API2-SS-to U2APK2 
G891AUCU2APK2 -> G891AUCS2APL1: v1.5. G891AUCU2APK2-the SS-to-S2APL1 the UP 
G891AUCS2APL1 -> G891AUCS2AQA1: v1.6 SS-G891AUCS2APL1-to-S2AQA1-the UP

Marshmallow to Android 7.0 Nougat files

Beta builds

G891AUCU2APK2 v1.4 -> G891AUCU2BQB2 v2.3: v2.3. SSG891AUCU2APK2-SS-to U2BQB2-UP
G891AUCS2APL1 v1.5 -> G891AUCU2BQB2 v2.3 : or SS-G891AUCS2APL1-to-U2BQB2-UP 
G891AUCS2AQA1 v1.6 -> G891AUCU2BQB2 v2.3 : or SS-G891AUCS2AQA1-to-U2BQB2-UP

Nougat to Nougat files

G891AUCU2BQB2 v2.3 -> G891AUCS2BQC2 v2.4: v2.4. SS-G891AUCU2BQB2-the SS-to-S2BQC2 the UP 
G891AUCS2BQC2 -> G891AUCU2BQC4: v2.5. beta SSG891AUCS2BQC2-the SS-to-U2BQC4 the UP 

How to install Android Nougat on your At&t Galaxy S7 Active now

Make sure that you have read all the instructions carefully.

  1. Now Install and setup Minimal Android ADB & Fastboot drivers.
  2. Now open your respective ADB & Fastboot drivers directory.Minimal ADB & Fastboot drivers, you will open your installation drive > program files > Minimal ADB & Fastboot folder.
  3. Now copy your desired update.zip files, for example G891AUCU2APK2 v1.4 -> G891AUCU2BQB2 and all other update files [BQB2 > BQC2, BQC2 > BQC4] according to your build number in the folder mentioned above.
  4. Now open the Minimal ADB and Fastboot folder and hold the shift key on your keyboard. While holding it, right click on an empty area and click on “Open command window here”.
  5. Put your Galaxy S7 Active in recovery mode using Volume Up + Power + Home Key simultaneously. Once it boots up in recovery, connect it to your computer.
  6. In the command window, issue the following command to verify connection: adb devices – This command will result in some code making sure your phone is connected properly in the adb mode.
  7. On your phone, use Volume buttons to navigate to apply update from adb and then press Power key to make a selection.
  8. Once this mode is selected, get back to the command window and enter the following commands one by one.
    1. adb sideload UPDATEFILENAME.zip

  9. Replace the UPDATEFILENAME with the name of the file you are flashing. e.g.

    adb sideload SS-G891AUCU2APK2-SS-to U2BQB2-UP.zip

  10. Flash all the  files by copying in the ADB directory and replacing the name like this.
  11. Repeat the process unless you have flashed all the files to reach latest Nougat build.
  12. Reboot your phone after installing all files correctly.
  13. That’s all.

Method#2

  1. Access your phone’s external SD card either on your phone or on your computer.
  2. Create a new folder named as “fota” in the root (main) directory of the external SD card.
  3. Copy the update.zip file that you got above in this “fota” folder.
  4. Turn off your phone now.
  5. Boot it into download mode. To do so, press the Volume Down + Power + Home Key. Upon getting a warning, press Volume Up to continue.
  6. In the download mode, make sure that the bootloader status is “Official” and not custom. If it says custom, then go back to the preparations and follow step# 4.
  7. Now boot into recovery mode. To do so, turn off your phone again. Now turn it on by pressing and holding Volume Up + Power + Home button. As the phone turns on, leave the keys.
  8. As your phone brings the recovery up, navigate using Volume Up/Down keys and press power key to select “apply update.zip from sd card”.
  9. Now in the apply update.zip from sd card menu, select the update.zip file that you copied to fota folder and press the power key once again.
  10. Press power key on the “Yes” option and it will quickly flash the OTA on your At&t Galaxy S7 Active.
  11. Flash all required files one by one in the same sequence give above to reach the latest build of Android Nougat.
  12. That’s all.

Found this method working well? Don’t forget to reach us out if you have got any queries. That’s all.

Files credit

How to Update Galaxy Note 5 N9208 to Nougat

0
How to Update Galaxy Note 5 N9208 to Nougat
Update Galaxy Note 5 N9208 to Nougat

Galaxy Note 5 Duos with the model number N9208 has started receiving the Android 7.0 Nougat update. The update first landed in the Philippines region. Note 5 in this new update has got a bunch of new features. If you don’t already know what’s new, then we will have a flashback on what’s new in Android Nougat for the Note 5.

Update Galaxy Note 5 N9208 to Nougat

The Android 7.0 Nougat for Galaxy Note 5 has several notable new features. Note 5 on Nougat has the ability to change the display resolution. You can change this setting to get more power out of your phone’s battery. The phone’s font size can be further resized now. Calendar application has been revamped as well. The settings application is new as well, all icons are new as well. Application drawer has got all icons revamped as well. There are new power saving modes in the phone. There is a brand new Camera UI. You can even switch between front and back cameras by double tapping the Home button. Samsung has added a blue light filter in the phone to ease your eyes. Notification bar has new toggles which will make it easy for users to change any settings on the go. In the Nougat update, Samsung also introduced device maintenance mode using which you can give a boost to the performance and battery life of your phone. You can also remove junk using this mode in the phone.

That’s not it, there are many other features in Nougat that you will discover upon using it. The update is currently rolling out through OTA. If you own the N9208 variant of the Note 5 and you haven’t got the update yet, your only way to update the phone may be through Odin. The firmware files have surfaced over the web now. Users can download the firmware and flash it on their phone through Odin. The firmware is completely stock. It will not void the warranty of your phone or cause any harm. I have written the steps below to update Galaxy Note 5 N9208 to Nougat. Have a look now and get it done.

Update Galaxy Note 5 N9208 to Nougat

Early Preparations

  • Make sure that your device is exactly as mentioned above. To check out what device you have, go to Settings > More/General > About Device or Settings > About Device and match the model number. Be careful about the device model number, flashing a file on a device not listed here might result in bricking it up. In that case, we may not be held responsible.
  • Your device’s battery should not be weak. In case your device goes dead during the flashing process, your device may get soft bricked and you might be in need of flashing stock firmware and that will ultimately result in wiping up your data as well.
  • Always use the original data cable to establish connection between your Android device and your computer / laptop. Using ordinary data cables might interrupt the flashing process, so to avoid any mishap, you need to meet this requirement as well.
  • Backup everything!

    Backup SMS Messages
    Backup Call Logs
    Backup Contacts
    Backup Media – Copy your files manually to your PC or Laptop.
    Backup EFS – If rooted, otherwise skip this step.

  • Make sure that you turn off Samsung Kies while using Odin3 flashtool. Samsung Kies will interrupt Odin3 and will result in causing errors and may not let you flash your desired firmware. Also, make sure that you turn off any antivirus software you’ve installed and also disable firewall to avoid any connection and flashing issues.

Required Downloads & Installations

  1. Download and install Samsung USB Drivers on your PC.
  2. Download and extract Odin3 v3.12.3
  3. Firmware for N9208: Download Android 7 Nougat for N9208
  4. Extract the downloaded firmware file to get the .tar.md5 files.
  5. Image only used for reference here.

How to Install Official Android 7.0 Nougat on Galaxy Note 5 N9208

  1. Make sure that you read the instructions listed above carefully and you’re all set to go ahead now.
  2. Wipe your device complete in order to attain a neat installation. You may boot into the recovery mode and perform a factory data reset.
  3. Open Odin3.exe.
  4. Put your Galaxy Note 5 in download mode. To do so, turn it off and wait for 10 seconds. Turn it on by pressing and holding Volume Down + Home Button + Power Key simultaneously, You should see a warning, press Volume Up to continue. In case this method doesn’t work for you, try one from this guide.
  5. Connect your device to your PC.
  6. As soon as Odin detects your phone, the ID:COM box should turn blue.
  7. Now in Odin, selects the files one by one as shown in the picture.
    1. Select BL tab and select the BL file in it.
    2. Select AP tab and select the PDA or AP file in it.
    3. Select CP tab and select the CP file in it.
    4. Select CSC tab and select HOME_CSC file in it.
  8. Make sure that the options selected in your Odin are exactly as shown in the pic.
  9. Hit start and wait till the firmware  flashing is complete, The flashing process box will turn green upon successful flashing.
  10. Once the flashing process has been completed successfully, disconnect your device and reboot it manually.
  11. Once the device boots up, checkout the new firmware now.
  12. Your device will be running on official Android 7.0 Nougat firmware.
  13. Once updated to stock, do not try to downgrade, or else you will result in messing up EFS partition of your device.
  14. That’s all!

These are some useful guides for Note N9208 owners:

Got any queries? Make sure that you drop em’ in the comment box below. Good Luck!

How to Install TWRP Recovery and Root Galaxy C9 Pro C900F/C9000

3
How to Install TWRP Recovery and Root Galaxy C9 Pro C900F/C9000

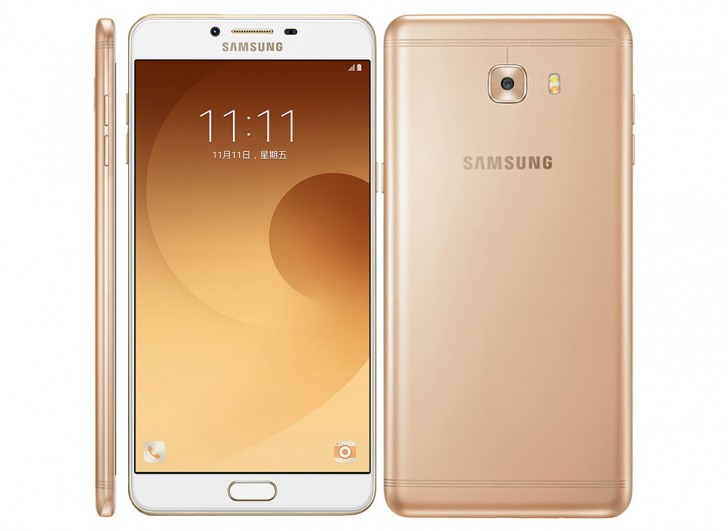
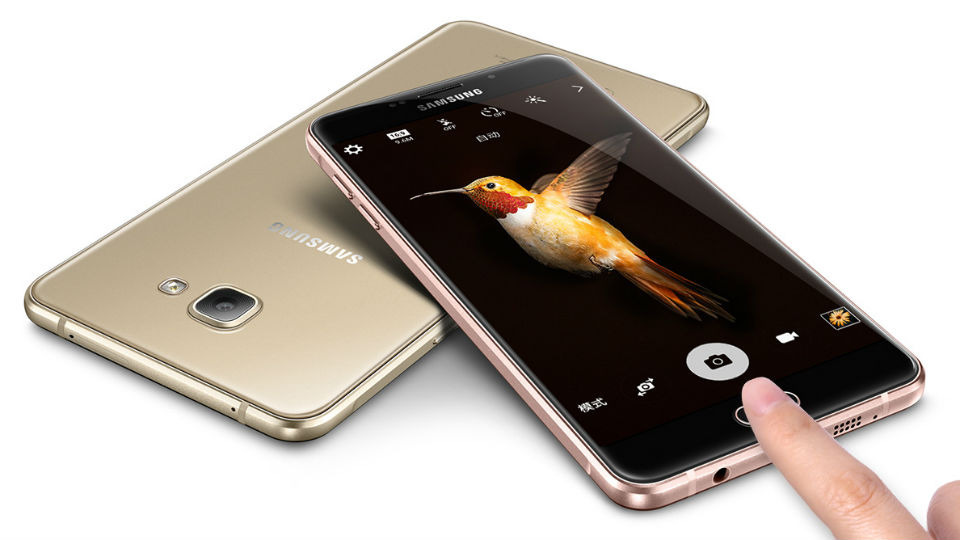
The Galaxy C series by Samsung is something worth a look. Samsung built these phones with a beautiful design and packed inside a premium build. Galaxy C smartphones did not show off what Samsung’s designers are capable of, it also showed that Samsung can make a beautiful smartphone and make it a powerhouse as well – both things at the same time. It was a slight disappointment for the users when they came to know that Samsung crafted these phones for the Chinese market primarily. Samsung realized the need of these smartphones in other regions soon and released it in other markets outside China as well. In the Galaxy C series, Galaxy C9 is one smartphone that tops the list. Galaxy C9 Pro stand inline next to Samsung’s Galaxy A9 from the Galaxy A series.

The Galaxy A9 comes with a 6.0-inch 1080p display. The phone runs on Qualcomm Snapdragon 653 CPU accompanied by Adreno 510 GPU. It has a whopping 64 GB internal memory chip, a monstrous 6 GB RAM, a 16 MP camera at its back and also a same shooter on the front. Galaxy C9 also incorporates a fingerprint scanner. It runs on Android 6.0.1 Marshmallow out of the box and it does have a huge 4000 mAh battery to entertain smartphone geeks.

It gives us a clear idea that Galaxy C9 Pro is a device that’s not meant to just make calls or text someone. It’s a device that deserves some out of the way treatment. If you own one, you can definitely check out what this phone is actually capable off. Tweaking your phone starts right from installing a custom recovery on it and then rooting it to open all the gates. Galaxy C9 Pro is one lucky device that can be rooted and it also has been blessed by custom recoveries. The custom recoveries and root access also originated from China. These phones do not have a lot of development in progress, but it’s not a bad deal to enjoy what you have for now.

There are certain benefits of rooting and install TWRP on your Galaxy C9 Pro. You can install applications like Greenify, install Xposed framework, flash MODs that are compatible and other stuff like that on your C9 Pro at the moment. Chinese C9 Pro users can also install Google Play Apps including Google Play Services, Google Play Store and more as that is more of a blessing for them. All this falls back on the availability of root access and a custom recovery on your device and that is exactly what we are about to do.

If you have understood everything well then we are all good to go ahead to install TWRP recovery and root Galaxy C9 Pro C900F/C9000.

Important instructions that you must follow before going ahead

  • This tutorial will only work for Galaxy C9 Pro SM-C900 and the Chinese variant SM-C9000.
  • Charge your phone up to 50% to avoid power issues during the process.
  • Backup everything on your phone as the process involves going through a data wipe.
  • Use OEM data cable to connect your phone to your PC.
  • Your C9 Pro must be running HK firmware.
  • Galaxy C9 Pro SM-C9000 owners need to unlock the bootloader of their device first.
  • Disable reactivation lock and find my mobile as well using settings > security.
  • Enable OEM Unlocking and USB debugging mode on your phone.
  • Get a micro SD card or a USB OTG as we will need to copy some files to it.

Files you need to download:

  1. Install Samsung USB drivers on your PC.
  2. Download Odin 3.11.1 on your PC and extract it to get Odin3.exe.
  3. Download TWRP Recovery.img.tar file for Galaxy C9 Pro according to your device model number and firmware.
  4. Download modified SuperSU.zip and copy it to your device’s internal or external storage.

Note: These processes are highly custom and they will end up voiding your device’s warranty. In case of a mishap, Techbeasts or the device manufactuerer may not be held responsible. Make sure that you are doing everything at your own risk.

Install TWRP Recovery and Root Galaxy C9 Pro C910F/C9000

  1. Open Odin3 V3.11.1.exe that you extracted on your PC.
  2. Put your C9 Pro in download mode now. To do so, turn it off completely. Now turn it on by pressing and holding Volume Down + Home + Power Key. Once your phone boots up, press the Volume Up key to continue.
  3. Connect your phone to your PC now. The ID:COM box in the top-left corner of Odin3 should  turn blue. This indicates that your phone is connected properly.
  4. Now click the “AP” tab in Odin and select the TWRP recovery.tar file that you downloaded. It will take a second or two for Odin3 to load this file.
  5. Make sure that your Odin3 looks like this. The only option ticked should be F. Reset Time.


  6. Now you’re all set to flash the recovery. Just click the start button in Odin3 and sit back.
  7. Once the process box above ID:COM box shows green light and flashing process is finished, disconnect your device.
  8. Now turn off your device properly as we are going to boot into recovery mode.
  9. Now turn it on by pressing and holding Volume Up + Home + Power Key. This will boot your device in recovery mode. It should be TWRP recovery that you just installed.
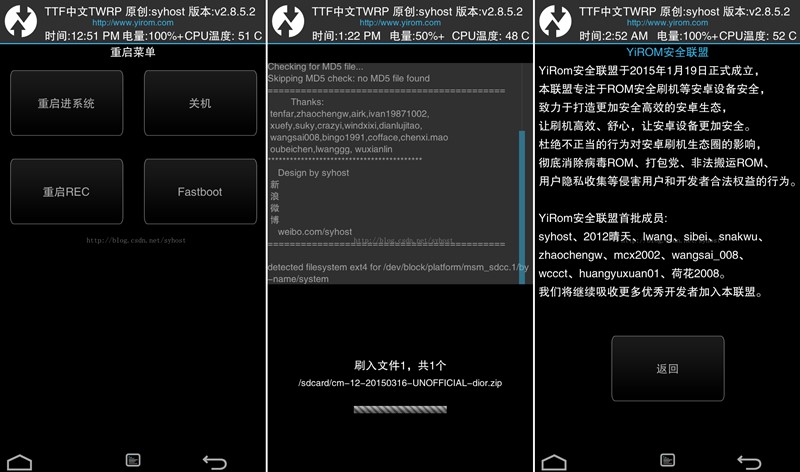
  10. TWRP recovery will boot up in the Chinese language, the very first screen requires you to swipe finger on screen. Do it and get to the home-screen. Now on the home-screen of TWRP, tap the 6th button, or the 2nd button in the third row. In the screen that opens up next, tap the 5th button in the top row or tap the right most button in the row showing above. This will take you to the language selection menu. Select English language and get back to the main screen of TWRP.
  11. Now in TWRP recovery, tap Install > locate SuperSU.zip file and flash it.
  12. Once done, reboot your device using recovery.
  13. As it boots up, checkout the SuperSu in application drawer. Also install BusyBox from Play Store.
  14. That’s all. You’re now set to unleash the open source nature of Android.

Let me know if I can help you guys any further. That’s all for now.

Source

How to change TWRP recovery language to English

0
How to change TWRP recovery language to English
change TWRP recovery language to English

TWRP is undoubtedly the best custom recovery ever developed. It is also the only custom recovery available for most of the Android smartphones today. We had CWM recovery to perform custom operations on Android devices earlier, but because of no active development, we had to say it goodbye. Since then, TWRP recovery has been uplifting all the Android custom development. It doesn’t matter whether you want to flash custom MODs, custom ROMs, other zip files or you want to wipe a certain partition, cache, dalvik cache from your phone, TWRP is your friend in all the cases.

TWRP recovery is also used to flash SuperSU.zip file, which is the method in most of the cases to root a smartphone. Other important use of TWRP recovery involves flashing gapps over custom ROMs and in some cases over stock ROMs to bring in all Google goodies. It is also useful at times when you have soft bricked your smartphone and you need to recover your data before you wipe it off. If we just start discussing all the uses of a custom recovery like TWRP, it can take a few hours to get done with this.

TWRP recovery comes in different languages now. If you own a smartphone belonging to the Chinese region and you get your hands on its compatible TWRP recovery, you will discover that the recovery is in Chinese language. Using TWRP recovery in Chinese or any other language like Russian, Dutch, Czech or any other. If your native language or your secondary language is English, you would want to set that as your main TWRP recovery language. Doing this is actually more than easy, the options resides within TWRP recovery.

Assuming that you have understood what we are here for, let’s have a look on a method to change TWRP recovery language to English.

Change TWRP recovery language to English

  1. Make sure that you have installed a TWRP recovery on your Android phone.
  2. Boot your phone into TWRP recovery. Methods to boot into TWRP are different for different phones. If you own a Samsung phone, you can turn it off and then turn it on by pressing and holding Volume Up + Home + Power Key. If you own any other smartphone, you can power it off and then turn it on by pressing and holding Volume Down + Power or the Volume Up + Power key.
  3. Once you are in TWRP recovery mode, you will find 8 different buttons the on the screen.
  4. Tap the 6th button, or the 2nd button in the third row.
  5. This button will open a new screen, in this new screen, tap the small icon on the top-right, or the last icon in the row appearing at the top.
  6. This will now open languages you can choose from. Select English from this list and tap the big button the bottom left. You’ve changed TWRP recovery language to English.
    change TWRP recovery language to English

How to Unlock Bootloader of Chinese Samsung Galaxy using CROM

2
How to Unlock Bootloader of Chinese Samsung Galaxy using CROM

Samsung has a really cool list of devices released under the Chinese region. To cope up with the powerful challenge between smartphone giants in China, Samsung also manufactures smartphones in a good budget having high end specifications. If you just have a look at devices like Galaxy C5, Galaxy C9, Galaxy A9 and others, you will find out that these devices carry the specifications almost similar to the specifications of Samsung’s flagship devices all around the world. Now these devices in China come with certain limitations.

The limits include no sign of anything Google on the phone. Galaxy smartphones in China do not have any applications like the Google Play Store, Google Play Music, Youtube etc. Another restriction on these devices is the locked bootloader. That sounds weird right? A Samsung Galaxy with a locked bootloader? Well, that’s actually right. The phones in China are as same as the phones released by different carriers. The bootloader is kept locked to keep the users away from modifying or tweaking their smartphone.

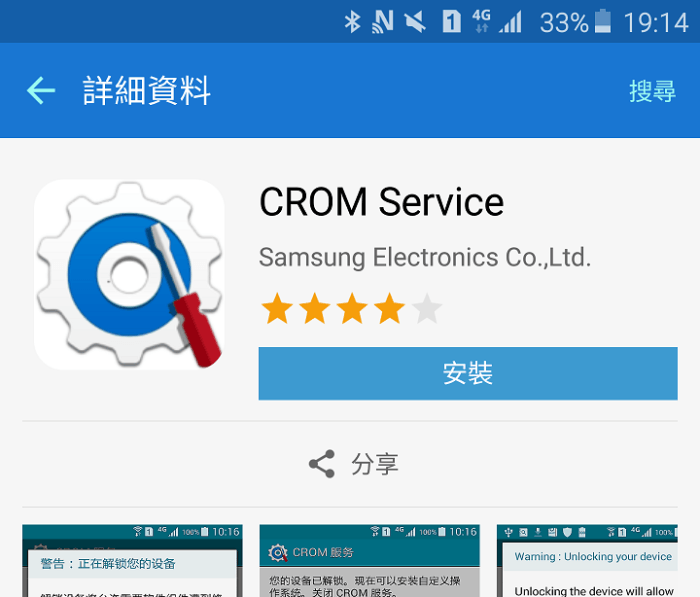
The bootloader is definitely locked, but unlocking it is not as hard as unlocking the bootloader of a carrier branded Galaxy smartphone. To make it more than easy for the Galaxy smartphone owners in China, Samsung has its own CROM Service application. CROM Service takes only a few taps to kill the bootloader lock on the device. Once you have unlocked the bootloader, you are free to flash a custom recovery on the phone or root it. Doing this on your device will ultimately lead you towards the installation of applications and features which are not apparently meant for the Chinese region.

Using CROM Service is fairly simply, but to help Chinese Samsung phone owners a little guide Unlock Bootloader of Chinese Samsung Galaxy using CROM is given below.  By using CROM by Samsung Electronics, you can unlock the bootloader of phones like Samsung Galaxy A8, Galaxy A9, A9 Pro, Galaxy C5, Galaxy C7, Galaxy C9, Galaxy C9 Pro and all other similar Samsung phones lying in the Chinese region. Follow it now and get it done.

Unlock Bootloader of Chinese Samsung Galaxy using CROM

  • Charge your phone up to 50% to avoid power issues during the process.
  • Backup everything on your phone as the process will wipe your phone.
  • Disable reactivation lock and find my mobile as well using settings > security.
  • Enable OEM Unlocking on your Chinese Samsung Galaxy smartphone.
  • Now download CROM Service by Samsung APK file and copy it to your phone. On your phone, go to settings > security > allow unknown sources. After doing this, open the file manager and locate CROM APK. Install CROM now.
  • Open CROM from the App Drawer on your phone.
  • As soon as you open CROM, it will ask you if you want to unlock bootloader. Tap yes/ok to begin the process. It will immediately unlock the bootloader and you are good to go with.

Need help? reach me out through the comments section below.

Install TWRP Recovery and Root Galaxy A9 Pro A910/A9100

2
Install TWRP Recovery and Root Galaxy A9 Pro A910/A9100
Galaxy A9 Pro

Samsung has a handful of nice devices in the Galaxy A lineup and the Galaxy A9 Pro is one of them. Just as its name suggests, this device equips some top-notch hardware specifications. The Galaxy A9 Pro touts a huge 6-inch Super AMOLED display and has a resolution of 1080p. Gorilla Glass protects this phone on its front and the back. Samsung has powered it up using Qualcomm’s Snapdragon 652 CPU accompanied by Adreno 510 GPU and a RAM of 4 GB. Internal storage is 32 GB but the device also supports external SD cards of up to 256 GB. Galaxy A9 has a 16 MP camera at its back and an 8 MP shooter on the front. The device is a powerhouse when it comes to battery. It has a monstrous 5000 mAh battery under the hood. It runs on Android 6.0.1 Marshmallow out of the box.

Galaxy A9 Pro

While these specifications make this phone a pure beast, it will be a great injustice if you own it and you are unable to unleash its true power. Making the best out of your device begins right when you root it and bring in a custom recovery like the TWRP recovery. Luckily, both the aforementioned mechanisms are available for the Galaxy A9 Pro SM-A910F and the Chinese variant A9100.

Thanks to XDA member Ashyx, who has always worked hard to bring up the custom recoveries a number of devices. His TWRP recovery builds for the Galaxy A9 Pro work pretty well. You can flash the recovery on your device on whatever Marshmallow build it is running. After flashing the TWRP recovery, you can flash the SuperSU and root the phone as well.

To disable forced encryption, users have to flash a dm-verity.zip file in order to make the recovery mount your internal storage. The process is slightly trick once you flash the TWRP recovery. In order to make everything go plain smooth, you have to follow the instructions with all eyes open. Make sure you are ready to do this and then let’s take a swing through the process to install TWRP recovery and root Galaxy A9 Pro A910/A9100.

Important instructions that you must follow before going ahead

  • This tutorial will only work for Galaxy A9 Pro SM-A910 and the Chinese variant SM-A9100.
  • Charge your phone up to 50% to avoid power issues during the process.
  • Backup everything on your phone as the process involves going through a data wipe.
  • Use OEM data cable to connect your phone to your PC.
  • Galaxy A9 Pro SM-A9100 owners need to unlock the bootloader of their device first.
  • Disable reactivation lock and find my mobile as well using settings > security.
  • Enable OEM Unlocking and USB debugging mode on your phone.
  • Get a micro SD card or a USB OTG as we will need to copy some files to it.

Files you need to download:

  1. Install Samsung USB drivers on your PC.
  2. Download Odin 3.11.1 on your PC and extract it to get Odin3.exe.
  3. Download TWRP Recovery for Galaxy A9 Pro A910/A9100: twrp_3.0.2-1_sm-a910_a9100_7217
  4. Download SuperSU.zip and DM-Verity file and copy these files to an external SD card or a USB OTG.

How to Install TWRP Custom Recovery and Root Galaxy A9 Pro SM-A910/A9100

  1. Open Odin3.exe file from the extracted Odin files that you downloaded above.
  2. Put your Galaxy A9 Pro in download mode now. To do so, turn off your phone first. Now turn it on by pressing and holding Volume Down + Power + Home button. As soon as your device boots up showing a Downloading screen, leave the keys.
  3. Connect your phone to your PC now. Odin should show an “Added” message in the logs and also show the blue light in the ID:COM box. This will verify a successful connection between your phone and your PC.
  4. Now click on the “AP” tab in Odin and select the TWRP Recovery.img.tar file according to your device carefully.
  5. The options ticked in Odin should be only “F.Reset Time“. Make sure that the Auto-Reboot option is not checked, we do not want to reboot the phone after flashing TWRP recovery.
  6. After selecting the file and checking/unchecking the options carefully, hit the start button. Odin will now flash the TWRP and show you a PASS message in a few minutes.
  7. Once done, disconnect your device from your PC now. Do not reboot your device.

Root and disable forced encryption

  1. Now you need to boot directly into TWRP Recovery. Turn off your phone completely and turn it on by pressing and holding Volume Up + Home + Power key now. Your phone should successfully boot into newly installed custom recovery.
  2. TWRP will ask you whether you want to allow modifications or not, you will need to swipe finger to the right to enable modifications. Swiping the finger to right will trigger dm-verity, if you will need to disable it immediately. Leaving it enabled will not let you boot the phone neither root it. This is an important stuff since we want to be able to modify the system.
  3. Now tap “Wipe > Format Data > type “yes” to format data. This is important to disable encryption. This step will factory reset your phone, so make sure that you’ve backed up the entire data at hand.
  4. Now make sure that you’ve copied the SuperSU.zip and dm-verity.zip files in external SD Card or USB OTG, if not then transfer both these files to your external SD Card by using MTP mode in TWRP now.
  5. Once you’ve the files, tap “Install > locate the SuperSU.zip according to the location where you copied > flash it”.
  6. Now once again tap “Install > locate the dm-verity.zip file > flash it”.
  7. Once done flashing, reboot your phone to system.
  8. That’s all. You’re rooted and have a TWRP recovery installed. Best of luck.

Let me know if I can help you guys any further. That’s all for now.

Club Penguin Island for PC – Windows and Mac

1
Club Penguin Island for PC – Windows and Mac

Club Penguin Island is the brand new game from Disney’s house. It’s time to embark on a new adventure in the company of little cute penguins. A lot of cool destinations are awaiting you to explore them and discover the ages old treasures, unearth the secrets and myths and bag up some achievements. Your Penguins have a lot of friends to have fun with. You will meet other creatures in the game and party hard with them. Dive in the sea to find out gems. The penguins in the game are highly customisable. You can make them wear the cloth and jewelry of your choice. Penguins deserve to boast off the best fashion, so make them look like the best in town. 

Penguins are not only meant to go on adventures, but they have good eating habits as well. They eat a lot and they eat everything they find. Make your Penguins some cheesy pizzas, find them tasty fruits and keep their tummy filled if you want them to do what you wish to achieve in the game. The game offers beautiful graphics with an appropriate combination of sound effects. It comes for free and it can be played on computers as well.

In order to be able to play Club Penguin Island for PC, you need an Android emulator like the BlueStacks, BlueStacks 2, Remix OS Player or Andy OS running on your computer. You cane easily play Club Penguin Island for PC on Windows XP/7/8/8.1/10 and MacOS/OS X by following these steps now.

Club Penguin Island for PC – Windows and Mac

  1. Download and install BlueStacks or Remix OS
    Player: Bluestacks Offline Installer | Rooted Bluestacks |Bluestacks App Player | Remix OS Player for PC
  2. Open the installed BlueStacks or Remix OS Player and open the Google Play Store in it.
  3. Now search for “Club Penguin Island” using the Play Store.
  4. Install the game and open the app drawer or all apps in the emulator.
  5. Click the Club Penguin Island icon to open it, follow the on-screen instructions to play it

You can also use Andy OS  to install Club Penguin Island for PC, here’s the tutorial: How To Run Android Apps On Mac OS X With Andy.

Download Dinotrux for Windows PC and Mac

0
Download Dinotrux for Windows PC and Mac

Dinosaurs existed thousands of years ago. We, the new generation will never be able to witness those monstrous creatures ever. All we can do is to either watch them in cartoons or play the games based on them. The new game called Dinotrux is also something that will make you interact with the artificial Dinosaurs in the screens of your handheld devices. Dinotrux brings trucks, which are made out of Dinosaurs.

This game is based on the TV series by DreamWorks. The vehicles in this game are half dinosaurs and half of the part is of the construction vehicle. These vehicles will be used to re-build the community of dinosaurs. It also brings all the characters from the TV series. These characters include Ty Rux, Skya, Dozer, Garby and Revvit. You can team up with these characters to get your work done quick. While driving your Trux, you will go through all the constructions activities like crushing the material, smashing it up, moving it here and there and also lifting it up to move tit from one place to another. During the construction, you will be given new tasks to have fun and also earn extra-rewards.

That’s not it about this game. A dangerous enemy is watching your progress throughout the work. He will try to destruct whatever you are constructing. Resist him and don’t let him blink near your constructions sites. This game has got easy-on-the-eyes graphics as well. It’s currently available for free on the Android OS. You can play it on computers as well.

Dinotrux for PC is easily playable on a Windows PC or a Mac. You can download this game on a Windows XP, Windows 7, Windows 8, Windows 8.1, Windows 10 and MacOS/OS X powered Laptop or Desktop PC. A few steps to help you with the installation of Dinotrux for PC are given below.

Download Dinotrux for Windows PC and Mac

  1. Download and install BlueStacks or Remix OS
    Player: Bluestacks Offline Installer | Rooted Bluestacks |Bluestacks App Player | Remix OS Player for PC
  2. Open the installed BlueStacks or Remix OS Player and open the Google Play Store in it.
  3. Now search for “Dinotrux” using the Play Store.
  4. Install the game and open the app drawer or all apps in the emulator.
  5. Click the Dinotrux icon to open it, follow the on-screen instructions to play it

You can also use Andy OS  to install Dinotrux for PC, here’s the tutorial: How To Run Android Apps On Mac OS X With Andy.

Download Crash of Cars for PC on Windows and Mac

0
Download Crash of Cars for PC on Windows and Mac

Crash of Cars is a new racing game bringing exactly what the name suggests. First off, it’s a real-time multiplayer game. Each player is given a car in an are where he can roam all around freely. The area is full of coins, crowns and many other collectible items. The area even has weapons. Drive your car the way you want, and collect as many crowns, coins and weapons as you can. Use the collected power-ups to destroy other players as they come in. Crash all other cars trying to approach you. If you will not crash other cars, they will crash you and end your game.

Crash of Cars has 4 different maps to enjoy. A huge collection of cars is packed inside the game that you can unlock upon leveling up. You can customise and upgrade your cars the way you wish to. Perform upgrades for your power-ups as well so that it doesn’t take too long for you to handle an enemy. The game also offers everyday tasks and challenges for extra rewards. Crash of Cars is an absolutely free game and it is worth playing on computers as well.

You can play Crash of Cars for PC on your Windows 7, Windows 8, Windows 8.1, Windows 10 and MacOS powered desktop PCs and Laptops. All you have to do is to follow a few steps given below to start playing the game without going through any complexity.

Download Crash of Cars for PC on Windows and Mac

  1. Download and install BlueStacks or Remix OS
    Player: Bluestacks Offline Installer | Rooted Bluestacks |Bluestacks App Player | Remix OS Player for PC
  2. Open the installed BlueStacks or Remix OS Player and open the Google Play Store in it.
  3. Now search for “Crash of Cars” using the Play Store.
  4. Install the game and open the app drawer or all apps in the emulator.
  5. Click the Crash of Cars icon to open it, follow the on-screen instructions to play it

You can also use Andy OS  to install Crash of Cars for PC, here’s the tutorial: How To Run Android Apps On Mac OS X With Andy.

How to Update At&t Galaxy S6 Edge to Android Nougat

0
How to Update At&t Galaxy S6 Edge to Android Nougat

At&t Galaxy S6 Edge users can now enjoy the Android 7.0 Nougat update on their phone. The official OTA update files have surfaced over the web. At&t is currently rolling out the update as well. If you own the G925A variant of the S6 Edge, you can go to settings > about device > software updates and check if an OTA is available for your or not. If the OTA doesn’t appear at your end now, you can flash the files manually and force-update your phone to Nougat.

The Nougat update brings a lot of changes. The new firmware will not only boost the performance of your device, it will also enhance the battery life. A number of new options come embedded in the toggles buttons in the notification panel. Samsung has changed the colors of toggle menu and also updated the notification panel. The settings application has been rebuilt from scratch. You will find new icons in the application drawer and also in the settings application. Android 7.0 Nougat for the Galaxy S6 Edge is an update you must install in order to keep the security of your device intact.

Follow the steps given below very carefully in order to update At&t Galaxy S6 Edge to Android Nougat.

Preparation

  1. The update is intended only for the At&t Galaxy S6 Edge. Do not try this on any other phone.
  2. Backup everything including text messages, contacts, call logs and media content.
  3. Enable OEM Unlocking on your At&t Galaxy S6 Edge.
  4. Allow USB debugging mode on your phone.
  5. Turn of reactivation lock in settings > Lock screen and security > Find my mobile.

Required Downloads & Installations

  1. Download and install Samsung USB Drivers on your PC.
  2. Download and extract Odin3 v3.12.3

Flashing the firmware is simple. You need to have the latest Marshmallow firmware installed on your device in order to flash this firmware. The Marshmallow firmware currently installed on your phone must be PK5. In case your phone is not running the PK5 firmware yet, you can download it from below and flash it using Odin. Once you have the PK5 firmware running, you can go down further and then follow the procedure to install Nougat firmware on your At&t Galaxy S6 Edge.

Download G925AATT5DPK5.zip file. Extract the downloaded .zip file to get the following files.

  • AP_G925AATT5DPK5………….ship.tar.md5
  • BL_G925AATT5DPK5………….ship.tar.md5
  • CP_G925AATT5DPK5…………..tar.md5
  • CSC_ATT_G925AATT5DPK5_………….tar.md5
    NOBLELTE_USA_ATT.pit

Flashing Marshmallow for Nougat Update

  1. Make sure that you read the instructions listed above carefully and you’re all set to go ahead now.
  2. Wipe your device complete in order to attain a neat installation. You may boot into the recovery mode and perform a factory data reset.
  3. Open Odin3.exe.
  4. Put your At&t S6 Edge in download mode. To do so, turn it off and wait for 10 seconds. Turn it on by pressing and holding Volume Down + Home Button + Power Key simultaneously, You should see a warning, press Volume Up to continue. In case this method doesn’t work for you, try one from this guide.
  5. Connect your device to your PC.
  6. As soon as Odin detects your phone, the ID:COM box should turn blue.
  7. Now in Odin, selects the files one by one as shown in the picture.
    1. Select BL tab and select the BL file in it.
    2. Select AP tab and select the PDA or AP file in it.
    3. Select CP tab and select the CP file in it.
    4. Select CSC tab and select CSC file in it.
  8. Make sure that the options selected in your Odin are exactly as shown in the pic.
  9. Hit start and wait till the firmware  flashing is complete, The flashing process box will turn green upon successful flashing.
  10. Once the flashing process has been completed successfully, disconnect your device and reboot it manually.
  11. Now follow the steps given below to finally flash the latest Nougat update.

Update AT&t Galaxy S6 Edge to Android Nougat

  1. Download S5DPK5 to U6EQC9 – Nougat.
  2. Now Install and setup Minimal Android ADB & Fastboot drivers.
  3. Now open your respective ADB & Fastboot drivers directory.Minimal ADB & Fastboot drivers, you will open your installation drive > program files > Minimal ADB & Fastboot folder.
  4. Now copy your update.zip files, for example SS-G925AUCS5DPK5-to-U6EQC9-UP.zip in the folder mentioned above.
  5. Now open the Minimal ADB and Fastboot folder and hold the shift key on your keyboard. While holding it, right click on an empty area and click on “Open command window here”.
  6. Put your Galaxy S6 Edge in recovery mode using Volume Up + Power + Home Key simultaneously. Once it boots up in recovery, connect it to your computer.
  7. In the command window, issue the following command to verify connection: adb devices – This command will result in some code making sure your phone is connected properly in the adb mode.
  8. On your phone, use Volume buttons to navigate to apply update from adb and then press Power key to make a selection.
  9. Once this mode is selected, get back to the command window and enter the following commands one by one.
    1. adb sideload UPDATEFILENAME 
    2. adb sideload SS-G925AUCS5DPK5-to-U6EQC9-UP.zip

  10. Replace the UPDATEFILENAME with the name of the file you are flashing. E.g. adb sideload SS-G925AUCS5DPK5-to-U6EQC9-UP.zip
  11. Reboot your phone once you have successfully flashed the Nougat update.
  12. That’s all.

Method# 2

  1. Access your phone’s external SD card either on your phone or on your computer.
  2. Create a new folder named as “fota” in the root (main) directory of the external SD card.
  3. Copy the update.zip file that you got above in this “fota” folder.
  4. Turn off your phone now.
  5. Boot it into download mode. To do so, press the Volume Down + Power + Home Key. Upon getting a warning, press Volume Up to continue.
  6. In the download mode, make sure that the bootloader status is “Official” and not custom.
  7. Now boot into recovery mode. To do so, turn off your phone again. Now turn it on by pressing and holding Volume Up + Power + Home button. As the phone turns on, leave the keys.
  8. As your phone brings the recovery up, navigate using Volume Up/Down keys and press power key to select “apply update.zip from sd card”.
  9. Now in the apply update.zip from sd card menu, select the update.zip file that you copied to fota folder and press the power key once again.
  10. Press power key on the “Yes” option and it will quickly flash the Nougat OTA on your G925A S6 Edge.
  11. That’s all.

File Source


How to Update At&t Galaxy Note 5 to Android Nougat

0
How to Update At&t Galaxy Note 5 to Android Nougat

At&t just aired the Note 5 Nougat update. At&t’s Nougat update for Galaxy Note 5 comes right after Samsung updated the N920G variant of the Note 5 to Nougat. So far, Galaxy Note 5 N920C, N920G reveived the update. N920A, the At&t variant happens to be the third note variant to join this league, which is quite an efficient move from At&T as other carriers are still not showing any signs of Note 5 Nougat update.

The new update brings tons of new features and UI changes. Galaxy Note 5 on Nougat sees a new notification menu with new toggle buttons. There is a completely new settings application with new icons. The application icons in the application drawer are new as well. Samsung has added additional features to the toggle buttons. There are new options like changing the screen resolution in the phone now. Android Nougat looks more crispy on the screen. It also enhances the battery life and performance of the phone.

At&t has rolled out the Nougat update through OTA. If you own an At&t Note 5 within the At&t’s coverage region, you can go to settings > about device > software section and check for latest updates. If you find an update, you can download it and install it on your device without going through any complexities. Just in case you are out of luck with the in-built OTA, you will have to choose a different method. Luckily, the OTA files have surfaced the web and you can now flash them manually to Update AT&t Galaxy Note 5 to Android Nougat.

Preparation

  1. The update is intended only for the Galaxy Note 5 N920A At&t. Do not try this on any other phone.
  2. Backup everything including text messages, contacts, call logs and media content.
  3. Enable OEM Unlocking on your At&t Galaxy Note 5.
  4. Allow USB debugging mode on your phone.
  5. Turn of reactivation lock in settings > Lock screen and security > Find my mobile.

Required Downloads & Installations

  1. Download and install Samsung USB Drivers on your PC.
  2. Download and extract Odin3 v3.12.3

In order to install Android Nougat OTA.zip on your Galaxy Note 5 N920A, you phone must be running N920AUCS4CQB2 firmware. In case your phone is not running this firmware yet, you will flash this Marshmallow firmware first and then flash the Nougat OTA over this firmware to update. The instructions given below will first explain how you can flash the CQB2 firmware and then install Nougat. Users have this firmware already installed can skip the Odin part and jump over to the Nougat procedure.

Download N920AUCS4CQB2_Recovery.zip file. Extract the downloaded .zip file to get the following files.

  • AP_N920AUCS4CQB2_CL8961126_QB12615386_REV00_user_low _ship.tar.md5
  • BL_N920AUCS4CQB2_CL8961126_QB12615386_REV00_user_low _ship.tar.md5
  • CP_N920AUCS4CQB2_CL8961126_QB12615386_REV00_user_low _ship.tar.md5
  • CSC_ATT_N920AATT4CQB2_CL8961126_QB12615386_REV00_user _low_ship.tar.md5
    NOBLELTE_USA_ATT.pit

Flashing Marshmallow for Nougat Update

  1. Make sure that you read the instructions listed above carefully and you’re all set to go ahead now.
  2. Wipe your device complete in order to attain a neat installation. You may boot into the recovery mode and perform a factory data reset.
  3. Open Odin3.exe.
  4. Put your At&t Note 5 in download mode. To do so, turn it off and wait for 10 seconds. Turn it on by pressing and holding Volume Down + Home Button + Power Key simultaneously, You should see a warning, press Volume Up to continue. In case this method doesn’t work for you, try one from this guide.
  5. Connect your device to your PC.
  6. As soon as Odin detects your phone, the ID:COM box should turn blue.
  7. Now in Odin, selects the files one by one as shown in the picture.
    1. Select BL tab and select the BL file in it.
    2. Select AP tab and select the PDA or AP file in it.
    3. Select CP tab and select the CP file in it.
    4. Select CSC tab and select CSC file in it.
  8. Make sure that the options selected in your Odin are exactly as shown in the pic.
  9. Hit start and wait till the firmware  flashing is complete, The flashing process box will turn green upon successful flashing.
  10. Once the flashing process has been completed successfully, disconnect your device and reboot it manually.
  11. Now follow the steps given below to finally flash the latest Nougat update.

Update AT&t Galaxy Note 5 to Android Nougat

  1. Access your phone’s external SD card either on your phone or on your computer.
  2. Create a new folder named as “fota” in the root (main) directory of the external SD card.
  3. Copy the update.zip file that you got above in this “fota” folder.
  4. Turn off your phone now.
  5. Boot it into download mode. To do so, press the Volume Down + Power + Home Key. Upon getting a warning, press Volume Up to continue.
  6. In the download mode, make sure that the bootloader status is “Official” and not custom.
  7. Now boot into recovery mode. To do so, turn off your phone again. Now turn it on by pressing and holding Volume Up + Power + Home button. As the phone turns on, leave the keys.
  8. As your phone brings the recovery up, navigate using Volume Up/Down keys and press power key to select “apply update.zip from sd card”.
  9. Now in the apply update.zip from sd card menu, select the update.zip file that you copied to fota folder and press the power key once again.
  10. Press power key on the “Yes” option and it will quickly flash the Nougat OTA on your N920A Note 5.
  11. That’s all.

You can also sideload this file by using our ADB Sideload guide.

I hope that this guide worked perfectly well for all of you. Got any queries? Make sure that you drop em’ in the comment box below. Good Luck!

Source | Source 2