Home Blog Page 504

CyanogenMod Installer Apk For Android – Download Here

6
CyanogenMod Installer Apk For Android – Download Here

When it comes to Custom ROM for Android CyanogenMod is undoubtedly the biggest name. Good news is that CyanogenMod installer App is here for Android device now it’s easier to install custom Rom on your Android Device. And Once again Techbeasts Team is first to provide CyanogenMod Installer apk. Download CyanogenMod installer app and get access of your device and install as many custom ROM as you want.

CM-installer-logo

Description

Companion application for the CyanogenMod Installer. Following this process will provide your device with the latest version of CyanogenMod, a custom Android OS. (compatibility restrictions apply).
How To Install CyanogenMod Installer.
1. Download CyanogenMod Installer apk file from here. [ download ]
2. Install through package installer.
3. Now open the app and follow the instruction. The Good thing about CyanogenMod Installer is that it will guide you and also provide the site from you can download the supported rom for your device.


How to: make the most of Mavericks’s Finder tags

0
How to: make the most of Mavericks’s Finder tags

People who upgraded their Macbook to Maverick they must be confused of the new option ” Tagging “. How to use Finder tags in OS Mavericks a new cool and different feature, today i will tell you how to make most of Mavericks Finder tags. This new tag feature help to  assign labels and keywords to your files and folders. Basiclay this new feature is to organize your files and folder so that you can easily find your files and also after assiging tags your files and folders will be categories. Mavericks’s Finder Tags feature is not so easy to configure you have to use few tools. So lets begin :).

OS X Mavericks Finder Tag


Following are the simple steps through you can easily Use Mavericks’s many built-in tagging options:

1.Tag when you save:

Tag when you save:

2. Drag to tag:

If you forget to tag anything find the file and then drag and drop it the desired tag you want to add it adopt the tag.

3. Use an iCloud shortcut:

You can easily add Tag with the help of iCloud options. click the small triangle > next to the document’s name > window that appears, add the tag in the Tags field.

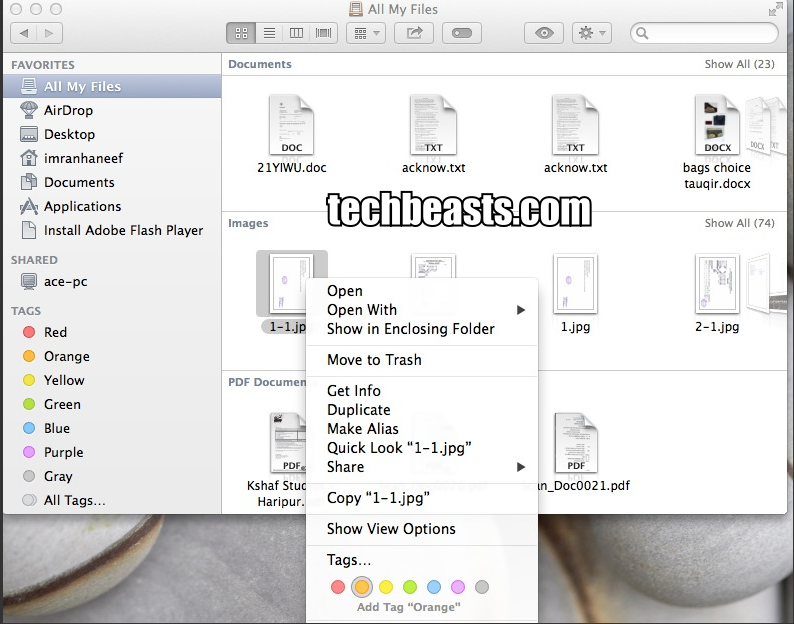
4.Control-click (or right-click) to tag:

Control-click (or right-click) to tag


Well for that was not so difficult please do tell me in comments that its helpfull or not stay tuned to Techbeasts.com for more Mac Tutorials.

How to Root and Install CWM Recovery on Verizon HTC One [Guide]

0
How to Root and Install CWM Recovery on Verizon HTC One [Guide]

HTC introduced its flagship device HTC One back in February, 2013. The device eventually became the world’s most beautiful and best smartphone. It sports a beautiful 4.7” inch full HD display with 469 ppi and is powered up with Qualcomm’s Snapdragon 600 Quad Core CPU clocked at 1.7 Ghz. There is a RAM of 2 GB installed, and a massive battery of 2300 mAh under the hood. HTC introduced the new camera that is an Ultrapixel ranged at 4 MP and is said to be better than that of an ordinary Megapixel camera. Out of the box, HTC One runs on Android 4.1.2 Jelly Bean, the device has been updated to Android 4.3 now.

Back to the topic, Having a device like HTC One without root access is kinda boring and incomplete. While Android is an open source operating system, the developments have never taken a break and there is something new to try out everyday. Flashing mods, custom roms, playing with clock speed of your CPU, optimizing battery and performance of your phone is all what needs the root access. Not only that, to flash custom roms and zip you need to have a custom recovery installed on your device. In the following post we will be having a look on a method to install custom recovery on your Verizon HTC One  and how we can root it.

htcone-home-screen

Before we begin, here are some pre-requisites that you need to follow.

  1. Unlock your Verizon HTC ONE’s  Bootloader. Follow our guide here.
  2. You need to install Android ADB & Fastboot drivers carefully. Follow our full guide hereIn case you are have problems making fastboot folder, simply install the Android SDK from the guide and get the Fastboot folder here.
  3. Make sure that your phone’s battery is charged over at least 60%. This is highly recommended in order to prevent any power issues on the device during the flashing process.
  4. Make sure that your device is Verizon HTC ONE. Do not try this on any other device.
  5. Make sure that you have backed up all your important ContactsCall Logs & Messages. It is highly recommended in case of any mishap or data loss to backup all your important data.
  6. Make sure that you use the original data cable to establish the connection between your PC and phone.
  7. Disable the Fastboot option under the power settings on your device.
  8. In case of USB connection problems, enable USB debugging mode on your device. To do so, open Settings>General>Developer Options>USB debugging mode.
  9. Make sure that you followed the above instructions carefully, and go ahead now.

The methods involved in flashing custom roms and rooting your phone is highly custom and may result in bricking your device, and has nothing to do with Google or the device manufacturer that is Samsung in our case. In case of any mishap we may not be held responsible. Follow these instructions to the letter to avoid any mishap or bricking. Make sure that whatever you do, you are doing it at your own responsibility.

Files you need to download:

  • Download CWM Recovery.img file – Download Here.

Here’s How to Flash Custom Recovery:

      1. Make sure that your correctly installed the Android ADB & Fastboot setup guide.
      2. Now open the Fastboot folder and place the downloaded CWM recovery.img file in the fastboot folder.
      3. Turn off your HTC One and then boot into HBoot. To do so, press and hold Volume Down + Power Key.
      4. Select ”Fastboot” in Hboot, once in Fastboot mode, connect your device to your PC.
      5. In the Fastboot folder, hold shift and right click on an empty area and click on ”open command prompt here’‘.
      6. Now you are in the command prompt under the fastboot folder.
      7. Type the command first ”Fastboot Erase Cache”. It will erase your device’s cache only.
      8. Now type the command ‘‘Fastboot Flash Recovery Recovery.img”. Recovery.img is the philz recovery image file. Rename it for your ease of use.
      9. It will flash the philz advanced cwm recovery on your device. Congrats! You’ve done it. To boot into recovery mode, you need to boot your device into HBoot (Volume Down + Power) and then select recovery. It will open up the CWM recovery on your Verizon HTC One.

How to Root your Verizon HTC One:

      1. You must install the cwm recovery following the above method once.
      2. Place the downloaded SuperSu.zip file on your device’s sd card.
      3. Boot into Hboot, to do so turn off your device and turn it on by pressing and holding Volume Down + Power Key. Once in HBoot, select Recovery.
      4. In the Recovery mode, select ”install zip > choose zip from sd card” and give it the SuperSu.zip file that you placed on your sd card, in the next step select ”yes”.
      5. It will take a while to flash SuperSu in your device, once the process is finished, reboot your device and find SuperSu app in your app drawer.
      6. Phewww! You’ve successfully rooted your device as well now.

Now wondering what to do with your rooted phone and custom recovery? 

Here’s the answer for you!

Rooting your phone gives you complete access over all the data which is apparently locked by the manufacturers. This includes removal of the factory restrictions and making changes to the internal system and the operating system. Gaining the root access gives you the privileges to install various applications to enhance the performance of your device, allows you to remove the built-in applications/programs, helps you to upgrade the battery life of your device &install the apps which require the root access for the proper functionality and modify your device in so many other ways e.g using mods and custom roms. By installing custom recovery, you can flash custom roms in the phone easily. Custom recovery also let’s you backup your current rom and restore it in case of any mishap. There is a laundry list of things you can do after having your device rooted and installed the custom recovery, now once you’re rooted go ahead and enjoy it on your phone. Here’s our collection of 10 Best Root Apps.

How to keep Root after OTA Updates

The OTA updates rolled out by the manufacturers wipe the root access on your phone. In case you don’t know how you can restore the root access after OTA update, you’ll have to root your phone once again, but there is no need to do it as you can restore it using the OTA Rootkeeper App which is available in the Google Play Store. The app creates backup of your root and simply restores it after any OTA update.

That’s All! In case you got any queries or any difficulties, feel free to leave us a comment in the box below. We will try our best to help you out. Thanks.

Install KingKobra 4.2.2 On HTC Sensation XL – How To Tutorial.

28
Install KingKobra 4.2.2 On HTC Sensation XL – How To Tutorial.

Since HTC Sense 5 is only available for those devices who are released in 2012 like HTC One X and above. Devices like HTC Sensation XL or Sensation XE won’t be getting sense 5 update because there is no update of Android 4.1 Jelly Bean or above. While on the other hand, Developers at XDA are doing everything they can to giver users the taste of Sense 5 along with Jelly Bean 4.2.2. This ROM can be installed on both S-Off and S-On devices, but Bootloader must be unlocked for this tutorial.

Screenshot_8

In this Article, we will show you How To Install KingKobra 4.2.2  On HTC Sensation XL. But before we begin, Make sure that you have battery charged over 60 % and have backed up all your important ContactsCall Logs & Messages.It is highly recommended in case of any mishap or data loss to back up all your important data.

See More: How To Install Android 4.3 Jelly Bean On HTC Sensation/ Sensation XE.

Disclaimer:

The methods involved in flashing custom roms and rooting your phone is highly custom and may result in bricking your device,and has nothing to do with Google or the device manufacturers which is Samsung in our case. In case of any mishap we may not be held responsible. Follow these instructions to the letter to avoid any mishap or bricking. Make sure that whatever you do, you are doing it at your own responsibility.

Important things:

  • Your Device must be Rooted and Latest TWRP or CWM Recovery must be installed on it.
  • Enable USB debugging mode.
  • Make sure that battery level is at 85% or more.
  • This Tutorial is Only For HTC 4.2.2 + Sense 5 On HTC Sensation XL.
  • S-Off is preferred but you can still install it with S-On.

See More: Root HTC Sensation XE on Android 4.0.3 Official Firmware.

How To Install KingKobra 4.2.2 + Sense 5 For HTC HTC Sensation XL.

Untitled_1

Before we begin, let me clear one thing. If you are S-Off in hboot then you don’t need to flash the boot.img separately, but if you are S-On in hboot then Flashing boot.img will let you get out of bootloop.

Note: It’s look like that many Users are having problem with the Previous ROM, So, I have updated the link to KingKobra ROM, you can try it on your Sensation XL

Screenshot_3

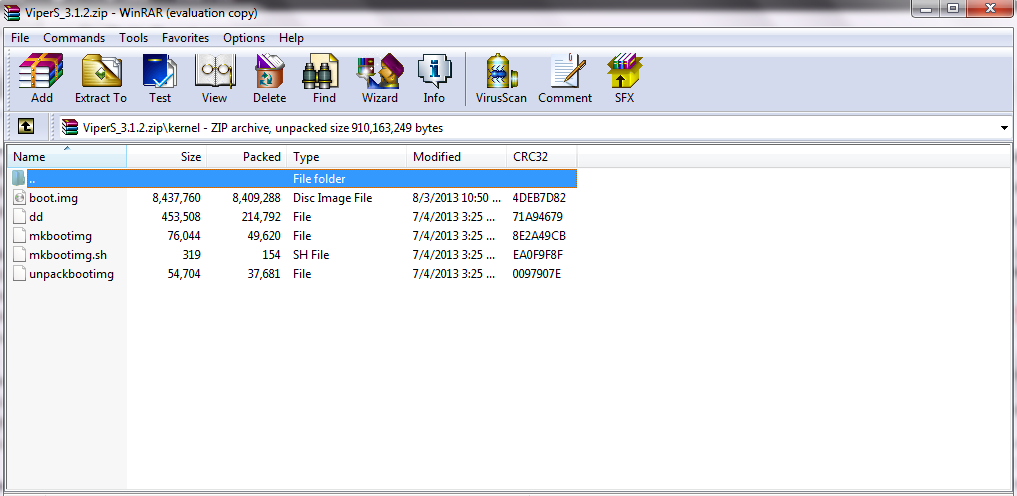
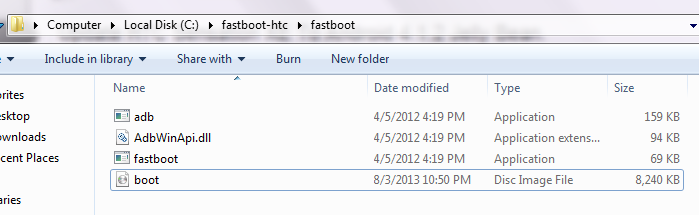
  •  Copy and paste the boot.img to the Fastboot Folder.

Screenshot_4

  • Now copy and paste the Android 4.2 zip and  file to the root of your SD card.
  • Turn off your phone and open Bootloader/Fastboot mode. How? Press and hole Volume Down + Power button until you see some text on screen.
  • Now Open Command prompt in Fastboot Folder, How? Hold Shift Key and Right Click anywhere in the Fastboot folder.

Screenshot_17

  • Now type in the following command: fastboot flash boot boot.img Press Enter.

Screenshot_1


  • Then type in the following command: fastboot reboot.

Screenshot_2

  • After the reboot, take out the battery and wait for at least 10 seconds.
  • Then re-insert the battery and enter Bootloader mode. How? Press and hold Power + Volume Down button till you see some text on screen, From bootloader select recovery.
  • Choose “Wipe Cache” Partition first.
  • Choose ‘advance’ and select ‘Devlik wipe cache’, so you won’t stuck in any Boot loop.
  • The finally choose ‘Wipe Data/Factory Reset’.
  • Now select ‘Install zip from sd card’, then select ‘choose zip from sd card’.
  • Select the JB 4.2.zip file and confirm the installation on next screen.
  • After that, +++++Go back. and Reboot System now. Wait for 5-minutes for the first run.

Voila that’s it you  On HTC Sensation XL is now upgraded to Android 4.2.2 KingKobra Jelly Bean, to check Goto settings> About > Software Version.

How To Install Android 4.3 ProBam Jelly Bean On HTC One X.

0
How To Install Android 4.3 ProBam Jelly Bean On HTC One X.

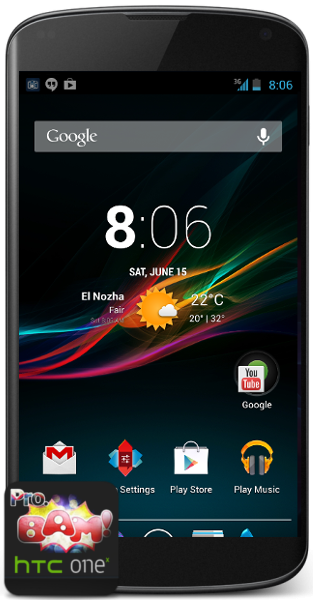
ProBam ROM is based on the resources of Android 4.3 Jelly Bean, it is basically a good combination of all the great ROMs of Android. If you are interested in Android 4.3 you can try it by following our tutorial for HTC One X. HTC One X can be upgraded to Android 4.2.2 Jelly Bean, but the official ROM of Android 4.3 has not been released for HTC One X, so the only option right now is the Custom ROMs, going for CM Roms is just like going for the stability, but if choosing something that is already stable is the best option.

slide-1-white

In this Article, we will show you How To Install Android 4.3 ProBam Jelly Bean On HTC One X. But before we begin, Make sure that you have battery charged over 60 % and have backed up all your important ContactsCall Logs & Messages.It is highly recommended in case of any mishap or data loss to back up all your important data.

Disclaimer:

The methods involved in flashing custom roms and rooting your phone is highly custom and may result in bricking your device, and has nothing to do with Google or the device manufacturers which is Samsung in our case. In case of any mishap we may not be held responsible. Follow these instructions to the letter to avoid any mishap or bricking. Make sure that whatever you do, you are doing it at your own responsibility.

Important things:

  • Your Device must be Rooted and Latest TWRP or CWM Recovery must be installed on it.
  • Enable USB debugging mode.
  • Make sure that battery level is at 85% or more.
  • This Tutorial is Only For Sprint HTC One X.

How To Install Android 4.3 ProBam Jelly Bean On HTC One X.

hb8g

Screenshot_3

  •  Copy and paste the boot.img to the Fastboot Folder.

Screenshot_4

  • Now copy and paste the Android 4.3.zip and Google Apps file to the root of your SD card.
  • Turn off your phone and open Bootloader/Fastboot mode. How? Press and hole Volume Down + Power button until you see some text on screen.
  • Now Open Command prompt in Fastboot Folder, How? Hold Shift Key and Right Click anywhere in the Fastboot folder.

Screenshot_17

  • Now type in the following command: fastboot flash boot boot.img Press Enter.

Screenshot_1


  • Then type in the following command: fastboot reboot.

Screenshot_2

  • After the reboot, take out the battery and wait for at least 10 seconds.
  • Then re-insert the battery and enter Bootloader mode. How? Press and hold Power + Volume Down button till you see some text on screen, From bootloader select recovery.
  • Choose “Wipe Cache” Partition first.
  • Choose ‘advance’ and select ‘Devlik wipe cache’, so you won’t stuck in any Boot loop.
  • The finally choose ‘Wipe Data/Factory Reset’.
  • Now select ‘Install zip from sd card’, then select ‘choose zip from sd card’.
  • Select the JB 4.3.zip file and confirm the installation on next screen.
  • After the installation, Again select ‘install zip from sd card’ and ‘choose zip from sd card’ and select Gapps.zip file and confirm installation on next screen.
  • After that, +++++Go back. and Reboot System now. Wait for 5-minutes for the first run.

Voila that’s it you HTC One X is now upgraded to Android 4.3 ProBam Jelly Bean, to check Goto settings> About > Software Version.

How to Root and Install CWM Recovery on At&t HTC One [Guide]

0
How to Root and Install CWM Recovery on At&t HTC One [Guide]

HTC introduced its flagship device HTC One back in February, 2013. The device eventually became the world’s most beautiful and best smartphone. It sports a beautiful 4.7” inch full HD display with 469 ppi and is powered up with Qualcomm’s Snapdragon 600 Quad Core CPU clocked at 1.7 Ghz. There is a RAM of 2 GB installed, and a massive battery of 2300 mAh under the hood. HTC introduced the new camera that is an Ultrapixel ranged at 4 MP and is said to be better than that of an ordinary Megapixel camera. Out of the box, HTC One runs on Android 4.1.2 Jelly Bean.

Back to the topic, Having a device like HTC One without root access is kinda boring and incomplete. While Android is an open source operating system, the developments have never taken a break and there is something new to try out everyday. Flashing mods, custom roms, playing with clock speed of your CPU, optimizing battery and performance of your phone is all what needs the root access. Not only that, to flash custom roms and zip you need to have a custom recovery installed on your device. In the following post we will be having a look on a method to install custom recovery on your AT&T HTC One and how we can root it.

htc-one-silver

Before we begin, here are some pre-requisites that you need to follow.

    1. Unlock your AT&T HTC One’s Bootloader. Follow our guide here.
    2. You need to install Android ADB & Fastboot drivers carefully. Follow our full guide hereIn case you are have problems making fastboot folder, simply install the Android SDK from the guide and get the\ Fastboot folder here.
    3. Make sure that your phone’s battery is charged over at least 60%. This is highly recommended in order to prevent any power issues on the device during the flashing process.
    4. Make sure that your device is AT&T HTC One. Do not try this on any other device.
    5. Make sure that you have backed up all your important ContactsCall Logs & Messages. It is highly recommended in case of any mishap or data loss to backup all your important data.
    6. Make sure that you use the original data cable to establish the connection between your PC and phone.
    7. Disable the Fastboot option under the power settings on your device.
    8. In case of USB connection problems, enable USB debugging mode on your device. To do so, open Settings>General>Developer Options>USB debugging mode.
    9. Make sure that you followed the above instructions carefully, and go ahead now.

The methods involved in flashing custom roms and rooting your phone is highly custom and may result in bricking your device, and has nothing to do with Google or the device manufacturer that is Samsung in our case. In case of any mishap we may not be held responsible. Follow these instructions to the letter to avoid any mishap or bricking. Make sure that whatever you do, you are doing it at your own responsibility.

Files you need to download:

      • Download CWM recovery image advanced editionphilz_touch_5.18.5-m7att.img

Here’s How to Flash Custom Recovery, that is philz_touch 5.18.5-m7att.img

      1. Make sure that your correctly installed the Android ADB & Fastboot setup guide.
      2. Now open the Fastboot folder and place the downloaded philz recovery.img file in the fastboot folder.
      3. Turn off your HTC One and then boot into HBoot. To do so, press and hold Volume Down + Power Key.
      4. Select ”Fastboot” in Hboot, once in Fastboot mode, connect your device to your PC.
      5. In the Fastboot folder, hold shift and right click on an empty area and click on ”open command prompt here’‘.
      6. Now you are in the command prompt under the fastboot folder.
      7. Type the command first ”Fastboot Erase Cache”. It will erase your device’s cache only.
      8. Now type the command ‘‘Fastboot Flash Recovery Recovery.img”. Recovery.img is the philz recovery image file. Rename it for your ease of use.
      9. It will flash the philz advanced cwm recovery on your device. Congrats! You’ve done it. To boot into recovery mode, you need to boot your device into HBoot (Volume Down + Power) and then select recovery. It will open up the CWM recovery on your AT&T HTC One.

 How to Root your AT&T HTC One:

      1. You must install the cwm recovery following the above method once.
      2. Place the downloaded SuperSu.zip file on your device’s sd card.
      3. Boot into Hboot, to do so turn off your device and turn it on by pressing and holding Volume Down + Power Key. Once in HBoot, select Recovery.
      4. In the Recovery mode, select ”install zip > choose zip from sd card” and give it the SuperSu.zip file that you placed on your sd card, in the next step select ”yes”.
      5. It will take a while to flash SuperSu in your device, once the process is finished, reboot your device and find SuperSu app in your app drawer.
      6. Phewww! You’ve successfully rooted your device as well now.

Now wondering what to do with your rooted phone and custom recovery? 

Here’s the answer for you!

Rooting your phone gives you complete access over all the data which is apparently locked by the manufacturers. This includes removal of the factory restrictions and making changes to the internal system and the operating system. Gaining the root access gives you the privileges to install various applications to enhance the performance of your device, allows you to remove the built-in applications/programs, helps you to upgrade the battery life of your device &install the apps which require the root access for the proper functionality and modify your device in so many other ways e.g using mods and custom roms. By installing custom recovery, you can flash custom roms in the phone easily. Custom recovery also let’s you backup your current rom and restore it in case of any mishap. There is a laundry list of things you can do after having your device rooted and installed the custom recovery, now once you’re rooted go ahead and enjoy it on your phone. Here’s our collection of 10 Best Root Apps.

How to keep Root after OTA Updates

The OTA updates rolled out by the manufacturers wipe the root access on your phone. In case you don’t know how you can restore the root access after OTA update, you’ll have to root your phone once again, but there is no need to do it as you can restore it using the OTA Rootkeeper App which is available in the Google Play Store. The app creates backup of your root and simply restores it after any OTA update.

That’s All! In case you got any queries or any difficulties, feel free to leave us a comment in the box below. We will try our best to help you out. Thanks.


Install Android 4.3 on Samsung Galaxy Note GT-N7000 using CM 10.2 Custom ROM.

19
Install Android 4.3 on Samsung Galaxy Note GT-N7000 using CM 10.2 Custom ROM.

Samsung’s trendsetter device and the first phablet, the Galaxy Note caught the user’s eye in 2011. The very first device of its own kind, smaller than a tablet and bigger than a smartphone. The Samsung Galaxy Note sported a 5.3 inch Super AMOLED display. The device occupied 1.5 Dual Core processor and 1 GB RAM while the battery ranged at 2500 mAh. To capture the moments, Samsung installed an 8 MP camera at the back, while a 2 MP on the front. The Stylus added charm to the phone’s functionality.

Out of the box, Samsung Galaxy Note ran on Android 2.3 Gingerbread. Samsung took the phone to Android 4.1.2 Jelly Bean through software updates, but its been long now and there is no further update for the Galaxy Note and it seems like that Samsung decided to end the updates here, but wait, there is no need to get worried. We are lucky enough to have the great developers over the CyanogenMod and XDA-Developers. The developers have managed to build a custom rom for Galaxy Note based on Android 4.3 Jelly Bean. CyanogenMod 10.2 lets the users enjoy most features of the Android 4.3 on their Galaxy Note, while the official updates have stopped, you may go for this ROM to tasted the upgraded operating system on your device. In the following post we’ll be having a look on how you can install the CyanogenMod 10.2 custom ROM based on Android 4.3 on your Galaxy Note GT-N7000.

samsung-galaxy-note_1

Before we begin, here are some pre-requisites you must have.

  1. Your phone must be rooted and have installed the CWM recovery. Follow our full guide here to root and install CWM.
  2. When the CWM installed, make sure that you make a Nandroid Backup using the recovery, this is highly recommended in case something goes wrong. You can easily restore the previous ROM.
  3. Make sure that your phone’s battery is charged over at least 60%. This is highly recommended in order to prevent any power issues on the device during the flashing process.
  4. Make sure that you have backed up all your important ContactsCall Logs & Messages. It is highly recommended in case of any mishap or data loss to backup all your important data.
  5. Make sure that your device is GT-N7000, check the model under Settings>About Device>Model.
  6. In case of USB connection problems, enable USB debugging mode on your device. To do so, open Settings>General>Developer Options>USB debugging mode.
  7. Please keep in mind that, the ROM is custom and may have bugs, what ever you are doing, do it at your own risk.
  8. Install the listed files carefully, follow this guide to letter in order to prevent any mishap.

The methods involved in flashing custom roms and rooting your phone is highly custom and may result in bricking your device, and has nothing to do with Google or the device manufacturer that is Samsung in our case. In case of any mishap we may not be held responsible. Follow these instructions to the letter to avoid any mishap or bricking. Make sure that whatever you do, you are doing it at your own responsibility.

How to Install Android 4.3 using CM 10.2 on Galaxy Note:

      1. Download the CM 10.2 Nightly for Galaxy Note GT-N7000 from HERE.
      2. Download the Gapps .zip file HERE: gapps-jb-20130813-signed.zip
      3. Place both the downloaded .zip files to your phone’s internal or external sd card.
      4. Boot into cwm recovery. To do so, turn off your device and the turn it on by pressing and holding Volume Up+Home Button + Power Key.
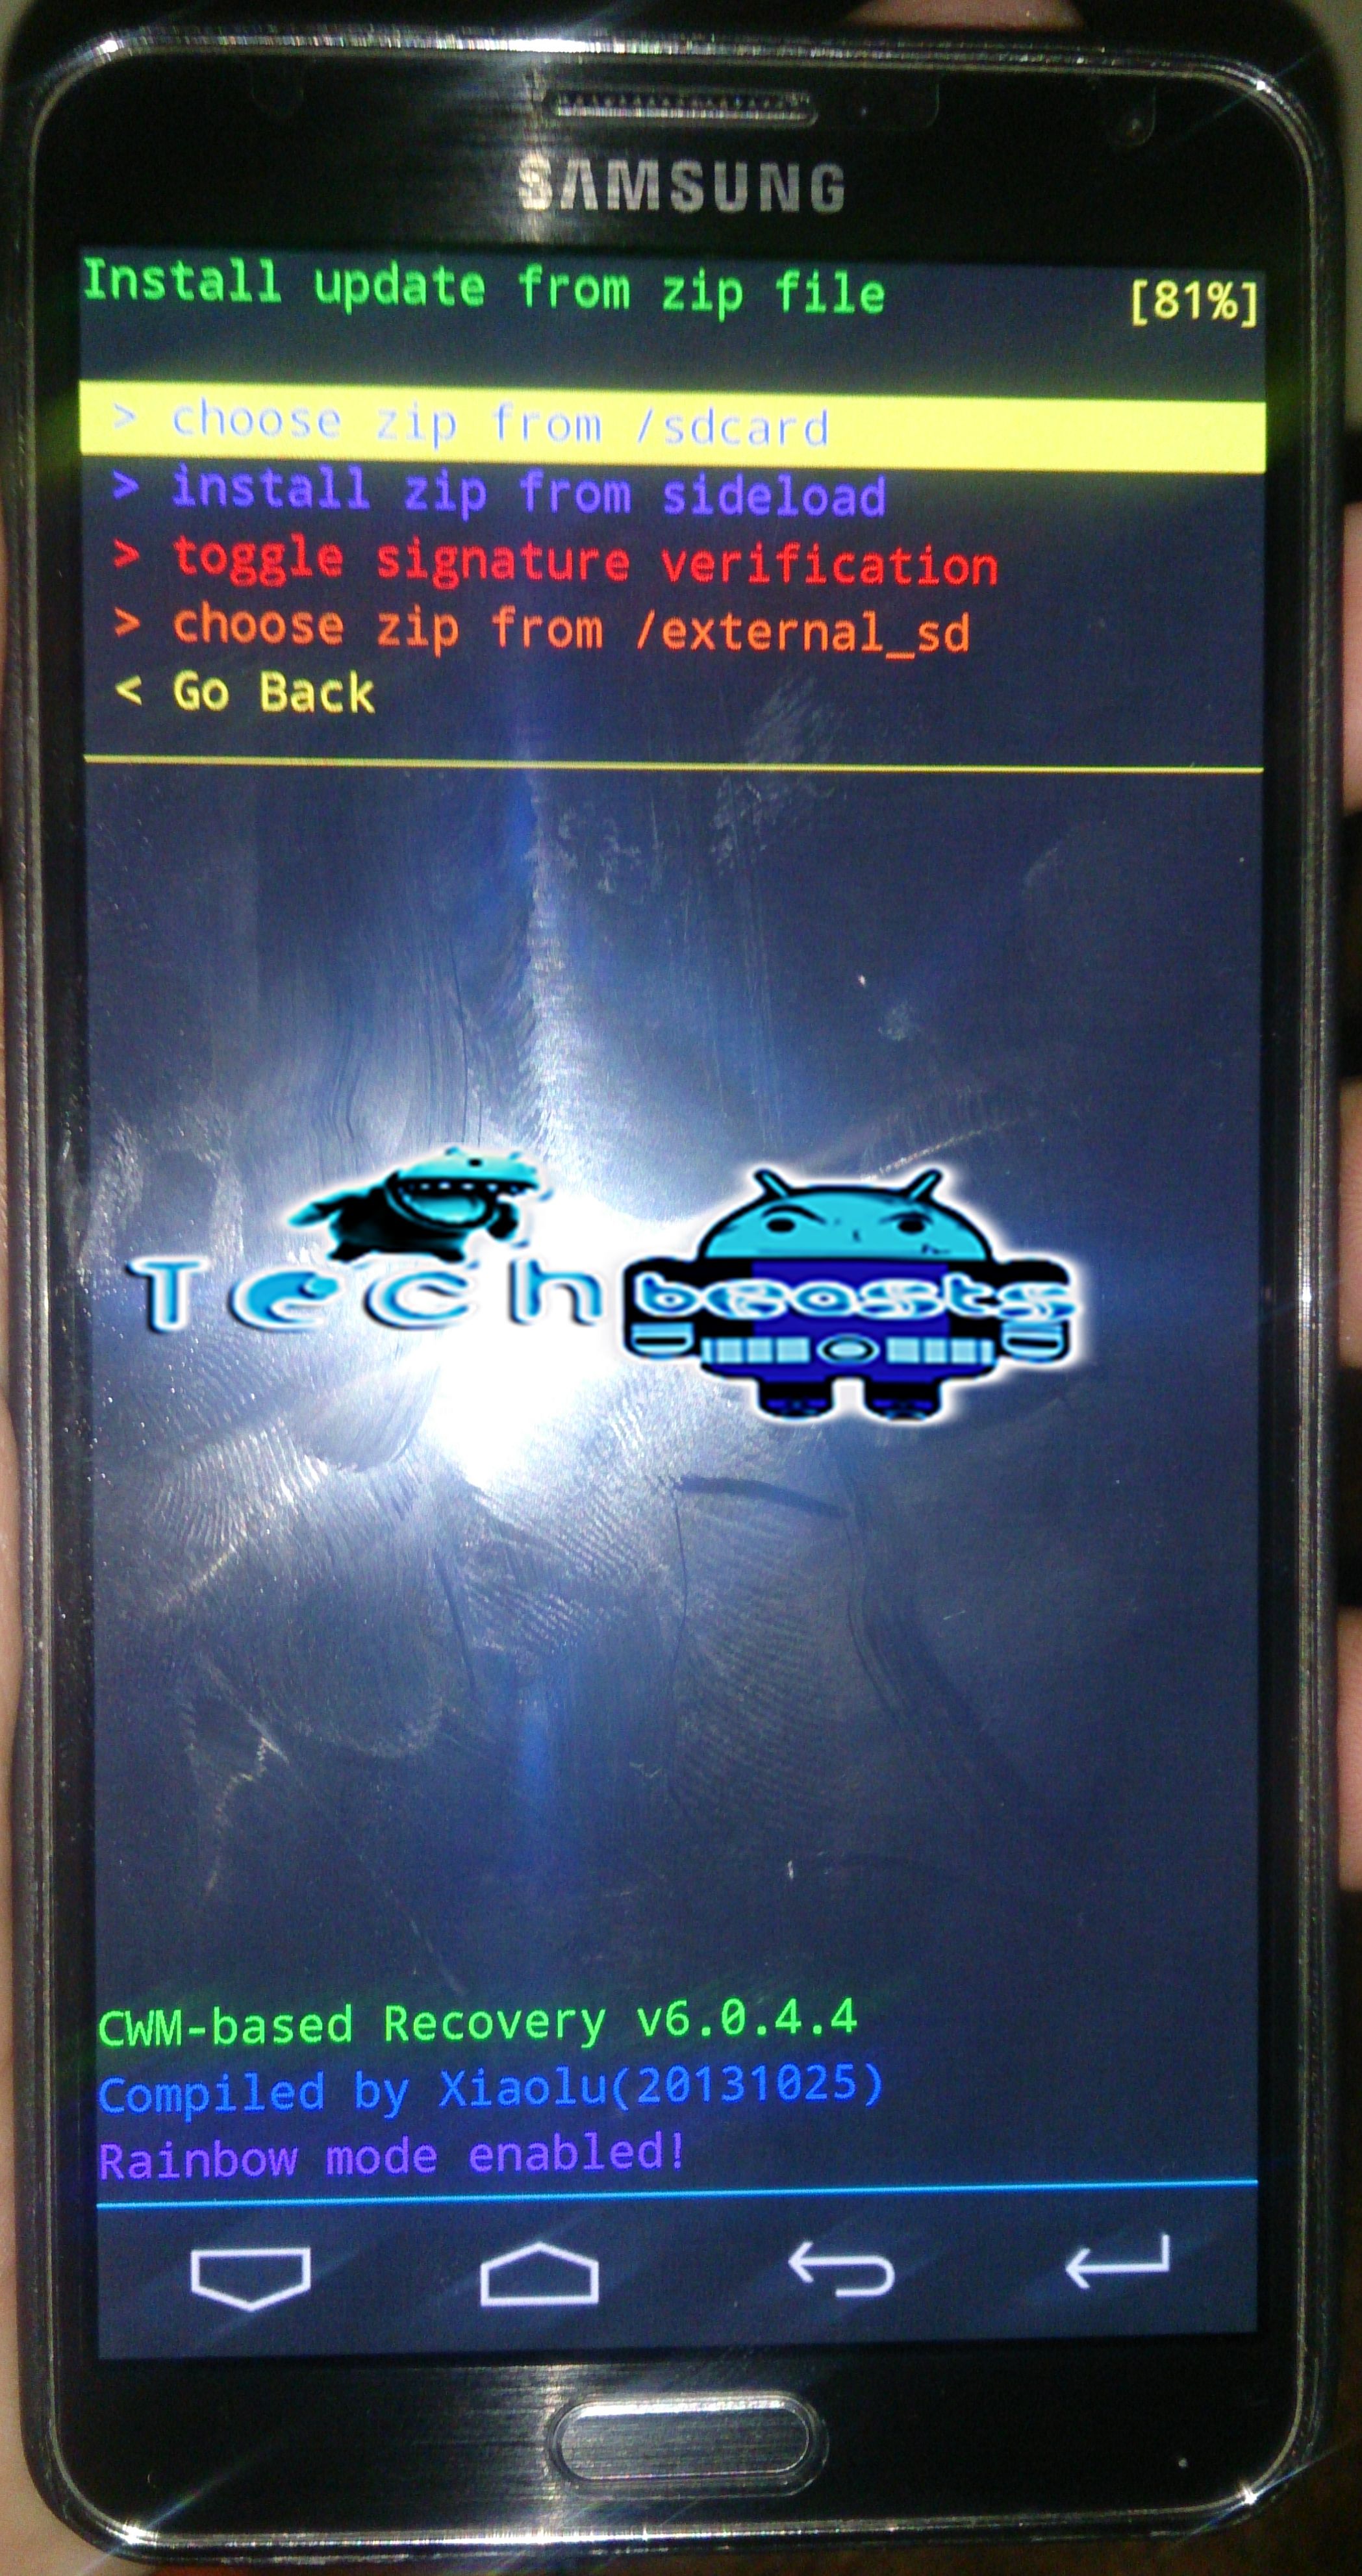
      5. Once in the cwm recovery mode, select ”Install Zip>Choose Zip from sd card / external sd card”. Select the option depending upon the path where you placed that file.
      6. DSC_0026 DSC_0027 DSC_0028DSC_0029
      7. Select the CM 10.2 file first and select ”yes”. It will take a short time to flash the CM 10.2 custom ROM on your Galaxy Note GT-N7000.
      8. Once it flashes the ROM, select ”’Install Zip>Choose Zip from sd card / external sd card”. This time, select the gapps zip file and select ”yes” in next step, this will flash the Google gapps in your phone.
      9. In the next step select ”reboot”, and enjoy the newly installed CM 10.2 custom ROM based on Android 4.3 on your Galaxy Note GT-N7000.


Troubleshooting:

In case of a bootloop, boot into the recovery mode>advanced and wipe dalvik cache, this should fix the issue now. In case it still doesn’t work, try wiping data/factory reset using the recovery or simply use our guide to return to the stock firmware.

That’s all. We hope that the guide worked perfect for you. In case of any queries or difficulties, feel free to write us in the comment box below. We’ll try our best to help you out.

How to Root & Install Custom Recovery on Samsung Galaxy S4 Google Play Edition I9505G on Android 4.3

How to Root & Install Custom Recovery on Samsung Galaxy S4 Google Play Edition I9505G on Android 4.3

Following the release of Samsung’s flagship device, the Galaxy S4, Google joined hands with Samsung too and got the Google Play Edition of the Galaxy S4 unveiled. The Google Play Edition offers the hefty hardware with powerful specs and the freedom a user wants, the phone simply outdated LG’s Nexus 4 and took its charm, but the price is pretty high.

The Galaxy S4 Google Play Edition sports a full HD 5 inch Super AMOLED display with 441 ppi, there is a 13 MP camera at the back, while a 2 MP on the front. The device is powered up by Qualcomm’s Snapdragon 600 Quad Core CPU clocked at 1.9 GHz, while there is a RAM of 2 GB to boost up the processes. Under the hood, it has got a massive 2600 mAh battery.

HT_GS4_cellphone_jef_130626_v16x9_16x9_992

The Galaxy S4 Google Play Edition has been caught up by the developers and they have managed to get the phone rooted and also got success in developing a custom recovery. In the following post we’ll be having a look on how we can root the phone and also how we can install a custom recovery on the Galaxy S4 Google Play Edition, we’ll also be having a look on how we can play with the device after having it rooted.

Before we begin to the root process, here are some pre-requisites that you must have:

  1. Make sure that your phone’s battery is charged over at least 60%. This is highly recommended in order to prevent any power issues on the device during the flashing process.
  2. Make sure that you have backed up all your important ContactsCall LogsMessages. It is highly recommended in case of any mishap or data loss to backup all your important data.
  3. Make sure that you use the original data cable to connect your device to your PC.
  4. Make sure that your device is GT-I9500G, check the model under Settings>General>About Device>Model.
  5. In case of USB connection problems, enable USB debugging mode on your device. To do so, open Settings>General>Developer Options. If you can’t find the developer options, simply open About device and tap ”Build Number” for 7 times and you should have the developer options enabled under the ”General Tab”.
  6. Install the listed files carefully, follow this guide to letter in order to prevent any mishap.

While rooting your phone, please keep it in mind that the Root Process isn’t  official and has nothing to deal with Google Inc and the device manufacturer, which is Samsung in our case. Follow the guide carefully to prevent any damages to the device as the method is completely custom.

Files you need to download:

  1. Download and extract Odin PC – Get it here
  2. Download and Samsung USB Drivers – Get here
  3. Download & Unzip Cf Auto Root Package file once on your desktop

How to Root Samsung Galaxy S4 Google Play Edition GT-I9505G on Android 4.3 Jelly Bean:

    • Put your GS4 I9505G in download mode by pressing and holding Volume Down + Home + Power key at the same time, you should get a screen showing a warning and asking to continue, press Volume Up to continue.
    • Now your phone should be in downloading mode. Connect your phone to your PC.
    • As soon as Odin detects your phone the ID:COM box will turn light blue.
    • Click on the PDA tab and select the CF-autoroot file that you extracted above.
    • Your Odin screen should look like exactly as shown below.
  • odin_explained
      • Click Start and the root process should start showing you a process bar in the first box above ID:COM.
      • The process is quite fast and will finish in a few seconds, as soon as it ends, your phone will restart and you’ll see the CF Auto root installing SuperSu on your phone.
      • Congratulations you have your Samsung Galaxy S4 Google Play Edition rooted now!

How to Install Custom Recovery on Samsung Galaxy S4 Google Play Edition GT-I9505G:

The method explained above is basically for beginners and does not install a custom recovery in your phone, it simply installs a stock recovery with having your phone rooted. Custom recovery allows you to modify in your phone in so many other ways like flashing custom roms, flashing mods etc.

In order to flash a custom recovery after rooting your SGS4 download the following file.

      • Download TWRP Recovery for your Galaxy S4 GT-I9500G

Now you need to follow the same procedure explained above to root your phone but this time instead of giving it CF Auto Root file in the PDA tab you need to give it the downloaded openrecovery-twrp-2.6.3.0-jgedlte.tar file for your phone, the recovery will be flashed within a few seconds. You can enter the custom recovery now pressing and holding Volume Up + Home + Power Key.

Now wondering what to do with your rooted phone? 

Here’s the answer for you!

Rooting your phone gives you complete access over all the data which is apparently locked by the manufacturers. This includes removal of the factory restrictions and making changes to the internal system and the operating system. Gaining the root access gives you the privileges to install various applications to enhance the performance of your device, allows you to remove the built-in applications/programs, helps you to upgrade the battery life of your device & install the apps which require the root access for the proper functionality and modify your device in so many other ways e.g using mods and custom roms. By installing custom recovery, you can flash custom roms in the phone easily. Custom recovery also let’s you backup your current rom and restore it in case of any mishap. There is a laundry list of things you can do after having your device rooted and installed the custom recovery, now once you’re rooted go ahead and enjoy it on your phone. Here’s our collection of 10 Best Root Apps.

How to keep Root after OTA Updates

The OTA updates rolled out by the manufacturers wipe the root access on your phone. In case you don’t know how you can restore the root access after OTA update, you’ll have to root your phone once again, but there is no need to do it as you can restore it using the OTA Rootkeeper App which is available in the Google Play Store. The app creates backup of your root and simply restores it after any OTA update.

That’s All! In case you got any queries or any difficulties, feel free to leave us a comment in the box below. We will try our best to help you out. Thanks.

How To Install Android 4.4 Kit-Kat CM11 Beta on AT&T Samsung Galaxy S3 SGH-1747.

How To Install Android 4.4 Kit-Kat CM11 Beta on AT&T Samsung Galaxy S3 SGH-1747.

Well i don’t think that Samsung will give the update of Android 4.4 Kit-Kat for Samsung Galaxy S3 and by any chance even if it will be released for Galaxy S3, there are even less chances of releasing it for Carriers Galaxy S3, so if you are interested in Android 4.4 Kit-Kat the best option you have right now is the Custom ROMs, CM11 has been released for AT&T Samsung Galaxy S3 SGH-1747 and you can install it on your AT&T Samsung Galaxy S3 SGH-1747 by following our tutorial.

20121217T012235

In this Article,we will show you How To Install CM11 Android 4.4 Kit-Kat Beta On AT&T Samsung Galaxy S3 SGH-1747. But before we begin, Make sure that you have battery charged over 60 % and have backed up all your important ContactsCall Logs & Messages.It is highly recommended in case of any mishap or data loss to back up all your important data.

Disclaimer:

The methods involved in flashing custom roms and rooting your phone is highly custom and may result in bricking your device, and has nothing to do with Google or the device manufacturers which is Samsung in our case. In case of any mishap we may not be held responsible. Follow these instructions to the letter to avoid any mishap or bricking. Make sure that whatever you do, you are doing it at your own responsibility.

Important things:

  • Your Device must be Rooted and CWM Recovery must be installed on it. 
  • Enable USB debugging mode.
  • Make sure that battery level is at 85% or more.
  • This Tutorial is Only For AT&T Samsung Galaxy S3 SGH-1747.

How To Install Android 4.4 Kit-Kat CM11 Beta on AT&T Samsung Galaxy S3 SGH-1747.

CyanogenMod-11-android-4-4

  1. Download Android 4.4 CM11 KitKat ROM and Google Apps for Galaxy S3 to your computer.
  2. Connect Galaxy S3 PC. Make sure to use original USB cable. Download Samsung USB Drivers.
  3. Copy and Paste the downloaded files to the root of your sd card.
  4. Disconnect the cable.
  5. Turn off your tablet.
  6. Now go to Recovery mode, Press and hold Power + Volume Up + Home Buttons till you see some text on-screen.
  7. From Recovery, First Choose ‘Wipe Cache’.
  8. Then Navigate to ‘advance’ and choose ‘Devlik Wipe Cache’ so you won’t get in any bootloop.
  9. Then finally select ‘Wipe Data/Factory Reset’.
  10. Navigate to ‘Install zip from sd card’ then select ‘choose zip from sd card’.
  11. Select the Android 4.4 file and confirm the installation on next screen.
  12. Wait for the process to over, then select ‘reboot system now’.

Note: Repeat Step 10 and 11, but select Gapps instead of Android 4.4, to install Google Apps.

Voila! your Samsung Galaxy S3 SGH-1747 has been updated to Android 4.4 Kit-Kat CM11 Beta Custom Firmware , Wait for at least 5-minutes for the first run.

How To Install CM11 Android 4.4 Kit-Kat Beta On T-Mobile Samsung Galaxy S3 T999.

How To Install CM11 Android 4.4 Kit-Kat Beta On T-Mobile Samsung Galaxy S3 T999.

One of the fine decisions is to purchase mobile devices from Carriers, since they provide you with low cost and best part is the installments, you can buy a high-end device with maximum installments of 24-months and most of them are provide the update of the mobile phone, means that if you give your old phone back , pay the extra money and you will receive the brand new successor of your old set and you won’t have any problem updating the software either.

T-Mobile-Galaxy-S3

In this Article,we will show you How To Install CM11 Android 4.4 Kit-Kat Beta On T-Mobile Samsung Galaxy S3 T999But before we begin, Make sure that you have battery charged over 60 % and have backed up all your important ContactsCall Logs & Messages.It is highly recommended in case of any mishap or data loss to back up all your important data.

Disclaimer:

The methods involved in flashing custom roms and rooting your phone is highly custom and may result in bricking your device, and has nothing to do with Google or the device manufacturers which is Samsung in our case. In case of any mishap we may not be held responsible. Follow these instructions to the letter to avoid any mishap or bricking. Make sure that whatever you do, you are doing it at your own responsibility.

Important things:

  • Your Device must be Rooted and CWM Recovery must be installed on it. 
  • Enable USB debugging mode.
  • Make sure that battery level is at 85% or more.
  • This Tutorial is Only For T-Mobile Samsung Galaxy S3 T999.

How To Install CM11 Android 4.4 Kit-Kat Beta On T-Mobile Samsung Galaxy S3 T999.

7-13-2012cm10cid-1338807413

  1. Download CM11 Android 4.4 ROM and Google Apps for Galaxy S3 to your computer.
  2. Connect Galaxy S3 T999to PC. Make sure to use original USB cable. Download Samsung USB Drivers.
  3. Copy and Paste the downloaded files to the root of your sd card.
  4. Disconnect the cable.
  5. Turn off your tablet.
  6. Now go to Recovery mode, Press and hold Power + Volume Up + Home Buttons till you see some text on-screen.
  7. From Recovery, First Choose ‘Wipe Cache’.
  8. Then Navigate to ‘advance’ and choose ‘Devlik Wipe Cache’ so you won’t get in any bootloop.
  9. Then finally select ‘Wipe Data/Factory Reset’.
  10. Navigate to ‘Install zip from sd card’ then select ‘choose zip from sd card’.
  11. Select the Android 4.4 file and confirm the installation on next screen.
  12. Wait for the process to over, then select ‘reboot system now’.

Note: Repeat Step 10 and 11, but select Gapps instead of Android 4.3, to install Google Apps.

Voila! your Samsung Galaxy S3 T999 has been updated to Android 4.4 Kit-Kat CM11 Beta Custom Firmware , Wait for at least 5-minutes for the first run.

Exclusive: Install DK’s Custom ROM with many mods on Samsung Galaxy Note 3 SM-N900

12
Exclusive: Install DK’s Custom ROM with many mods on Samsung Galaxy Note 3 SM-N900

Samsung Galaxy Note 3 was unveiled by Samsung on Sept 4th, 2013. The device sports a beautiful 5.7 inch full HD display with 386 ppi, there is a 13 MP camera at the back while a 2.1 MP camera on the front. Under the hood, it has got a massive 1.9 GHz Octa Core processor and a 3 GB RAM. With the advent of time, Samsung has brought up the best stuff in its Galaxy Note series, there is a number of features that add charm to the Galaxy Note 3, these include Air command, pen window etc.

Its been over 2 months now and we’ve been waiting for the developers to get their hands on the device and prepare some cool stuff to play with, while most of the developers have got the Snapdragon version of the Note 3 that is SM-N9005, there is not much to do on the Exynos one that is N900. Most of the custom roms, mods are only for Galaxy Note 3 Snapdragon version. Finally Dr Ketan, XDA-developers recognized contributor has managed to cook a custom rom for Galaxy Note 3 SM-N900.

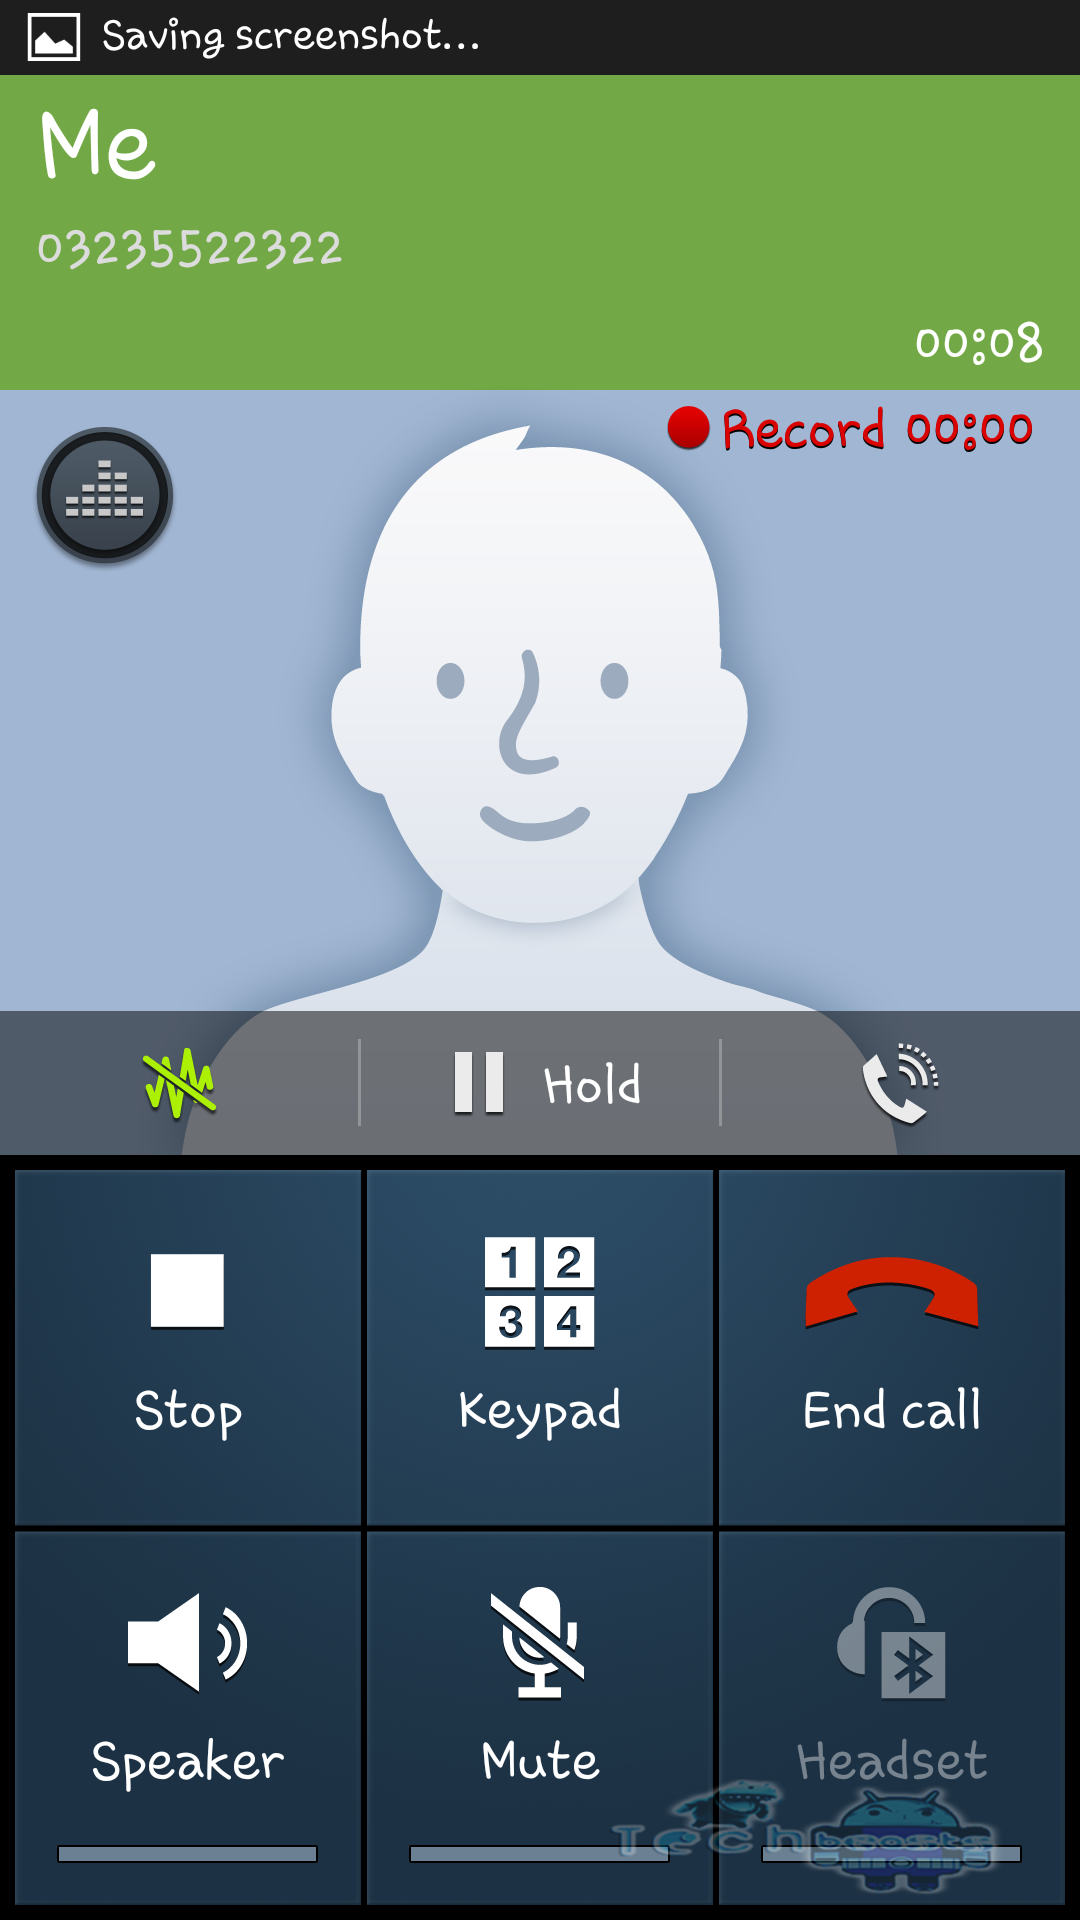
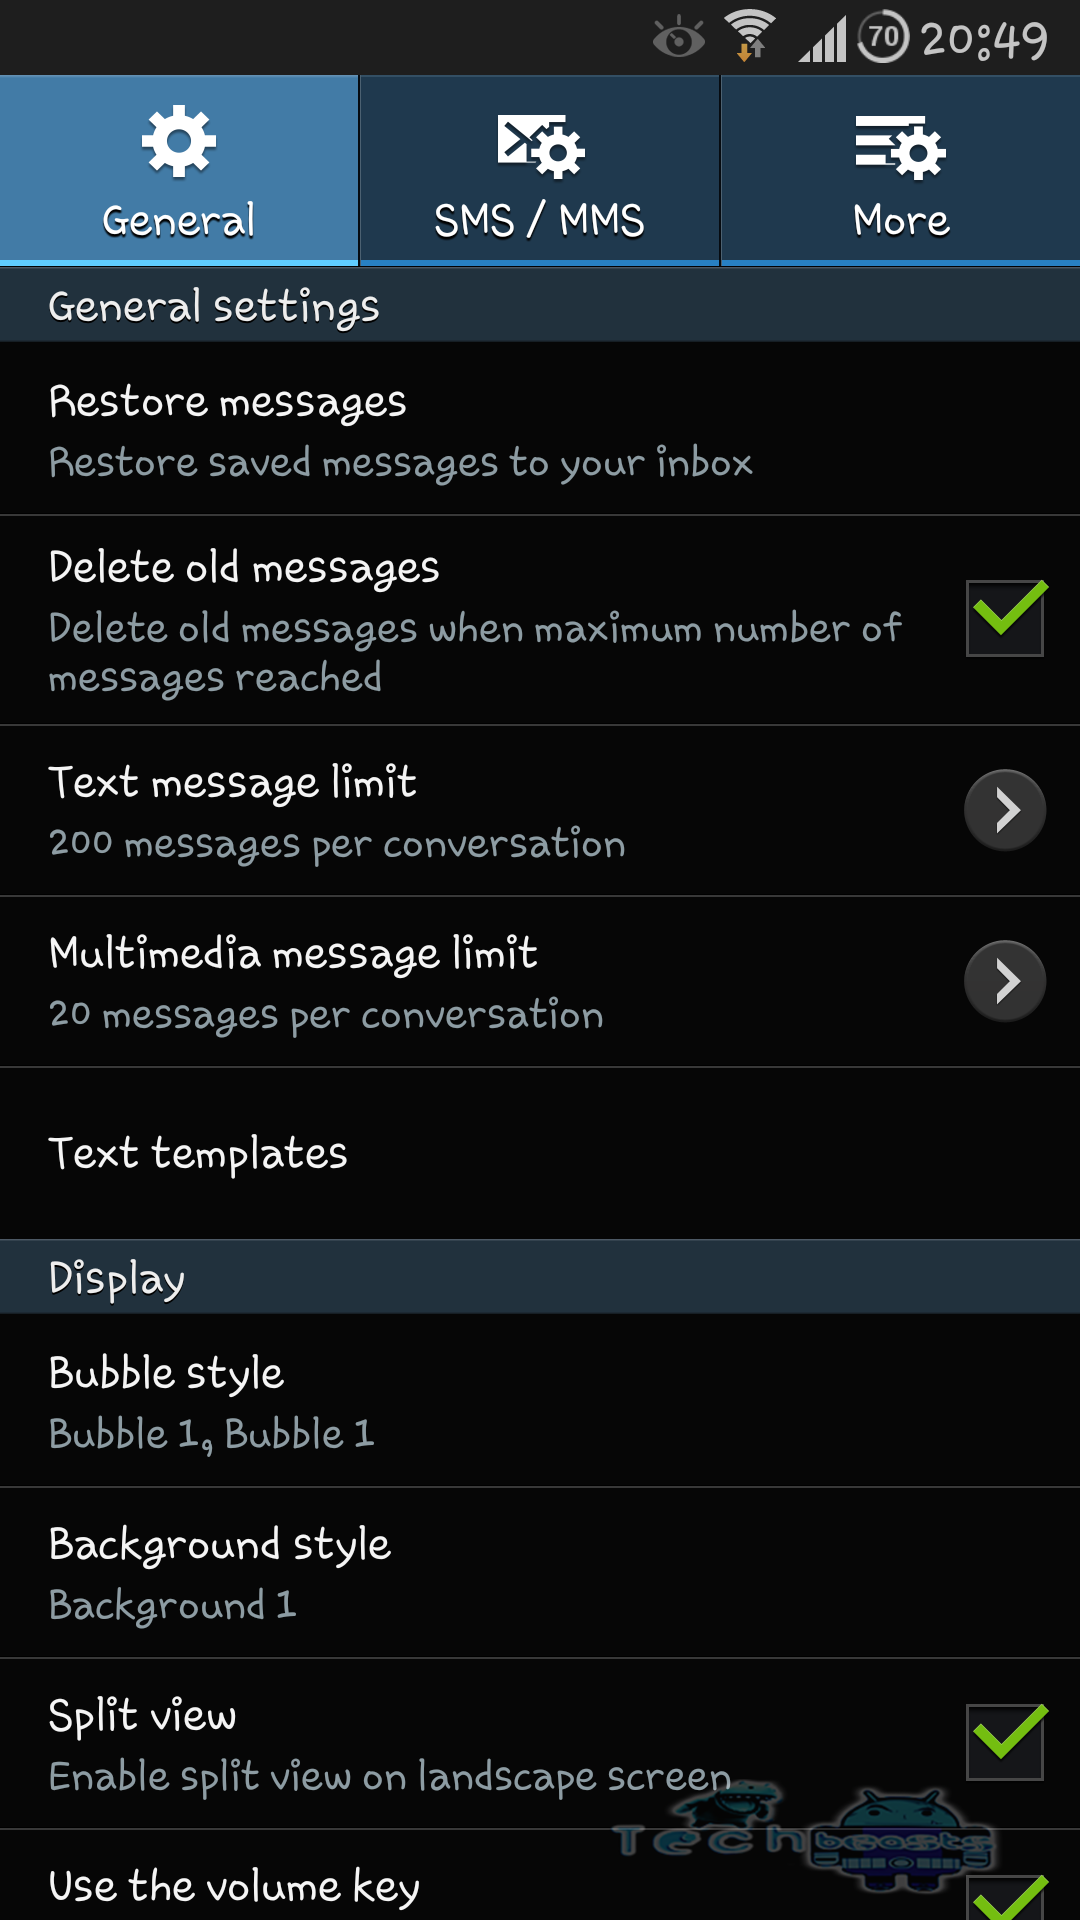
I’ve tested Dr Ketan’s ROM on my Note 3 and found no lag, no issues at all. It works flawlessly, and the mods are quite awesome to go with. The key features of the ROM include All apps in the pen window, Camera shutter sound on/off option, Screen on/off on Message Arrival and Call recording. While the rest of the features as stated by Dr Ketan are as follows:

Based on N900XXUCMJ7_N900ODDCMJ2_INU,Deodexed, ZipAligned, PreRooted 
-Inbuilt Aroma file manager in case anything go wrong while playing device with different mods, you can manage to explore device from recovery
-EFS Backup/Restore
-Recovery Flasher Chenglu’s/TWRP/Stock (optional)
-Backup of various parts of ROM like System/app and System Framework folder, before trying any MODs (Optional)
-Various kind of restore utility – As reversal from above said backup
-Customized Bloatware remover, select only app you don’t want.(including Knox)

Inbuilt features 
-Pre rooted (No need to flash SuperSU zip)
-Ad Free, Optional Knox free
-Call Recording
-Advanced function SecMMs

  • Group messeging
  • Schedule msg
  • Backup/Restore SMS to SD card
  • Recipient limit 999
  • Original time stamps
  • Disable SMS-MMS
  • Raise SMS/hr limit
  • Split view toggle in setting menu
  • Increased MMS max size
  • Increased size of image

-Transparent Status bar
-MultiWindow manager for all apps
-Multi PenWindow app for all app (Without third party app)
-NFC offscreen Polling
-Camera Hack

  • Shutter sound on/off menu (CSC Features)

So, Here’s how to get this ROM installed in your Galaxy Note 3 SM-N900, but before we begin, let’s have a look at some pre-requisites.

    1. You must be rooted and have installed the CWM recovery, check out our Guide and root your Galaxy Note 3 SM-N900.
    2. Make sure that your device is charged over at least 60%. This is highly recommended in order to prevent any power loss during the flashing process on the phone.
    3. Make sure that you have battery charged over 60 % and have backed up all your important ContactsCall Logs & Messages. It is highly recommended in case of any mishap or data loss to backup all your important data.
    4. Make sure that your device is SM-N900, check the model under Settings>General>About Device>Model.
    5. Install the listed files carefully, follow this guide to letter in order to prevent any mishap.

How to Install Dr. Ketan’s Custom ROM:

  • Download the ROM from HERE.
  • Place the downloaded file on your phone’s internal or external sd card.
  • Boot into cwm recovery on your phone, to do so, press and hold Volume Up + Home Button + Power Key.
  • Now in recovery select ”Install Zip > Choose Zip from SdCard/External SD” (Where you placed the downloaded ROM).
  • Select the .zip ROM file and select yes in next step.
  • DSC_0026 DSC_0027 DSC_0028 DSC_0029
  • It will open Dr Ketan’s Multi Tool. The Multi Tool is not modified for the model number yet and shows GT-N7100 as device, but it is for SM-N900 actually, you can select what you want to do from the available options. I recommend you to make EFS backup.
  • Skip the options that you can’t understand or you don’t want to mess with, and proceed to ROM installation.
  • It will take a few minutes for you to complete the installation process, as soon as the installation gets finished, reboot your device and check out the awesome mods 😀

Here are some screenshots from Dr. Ketan’s ROM:

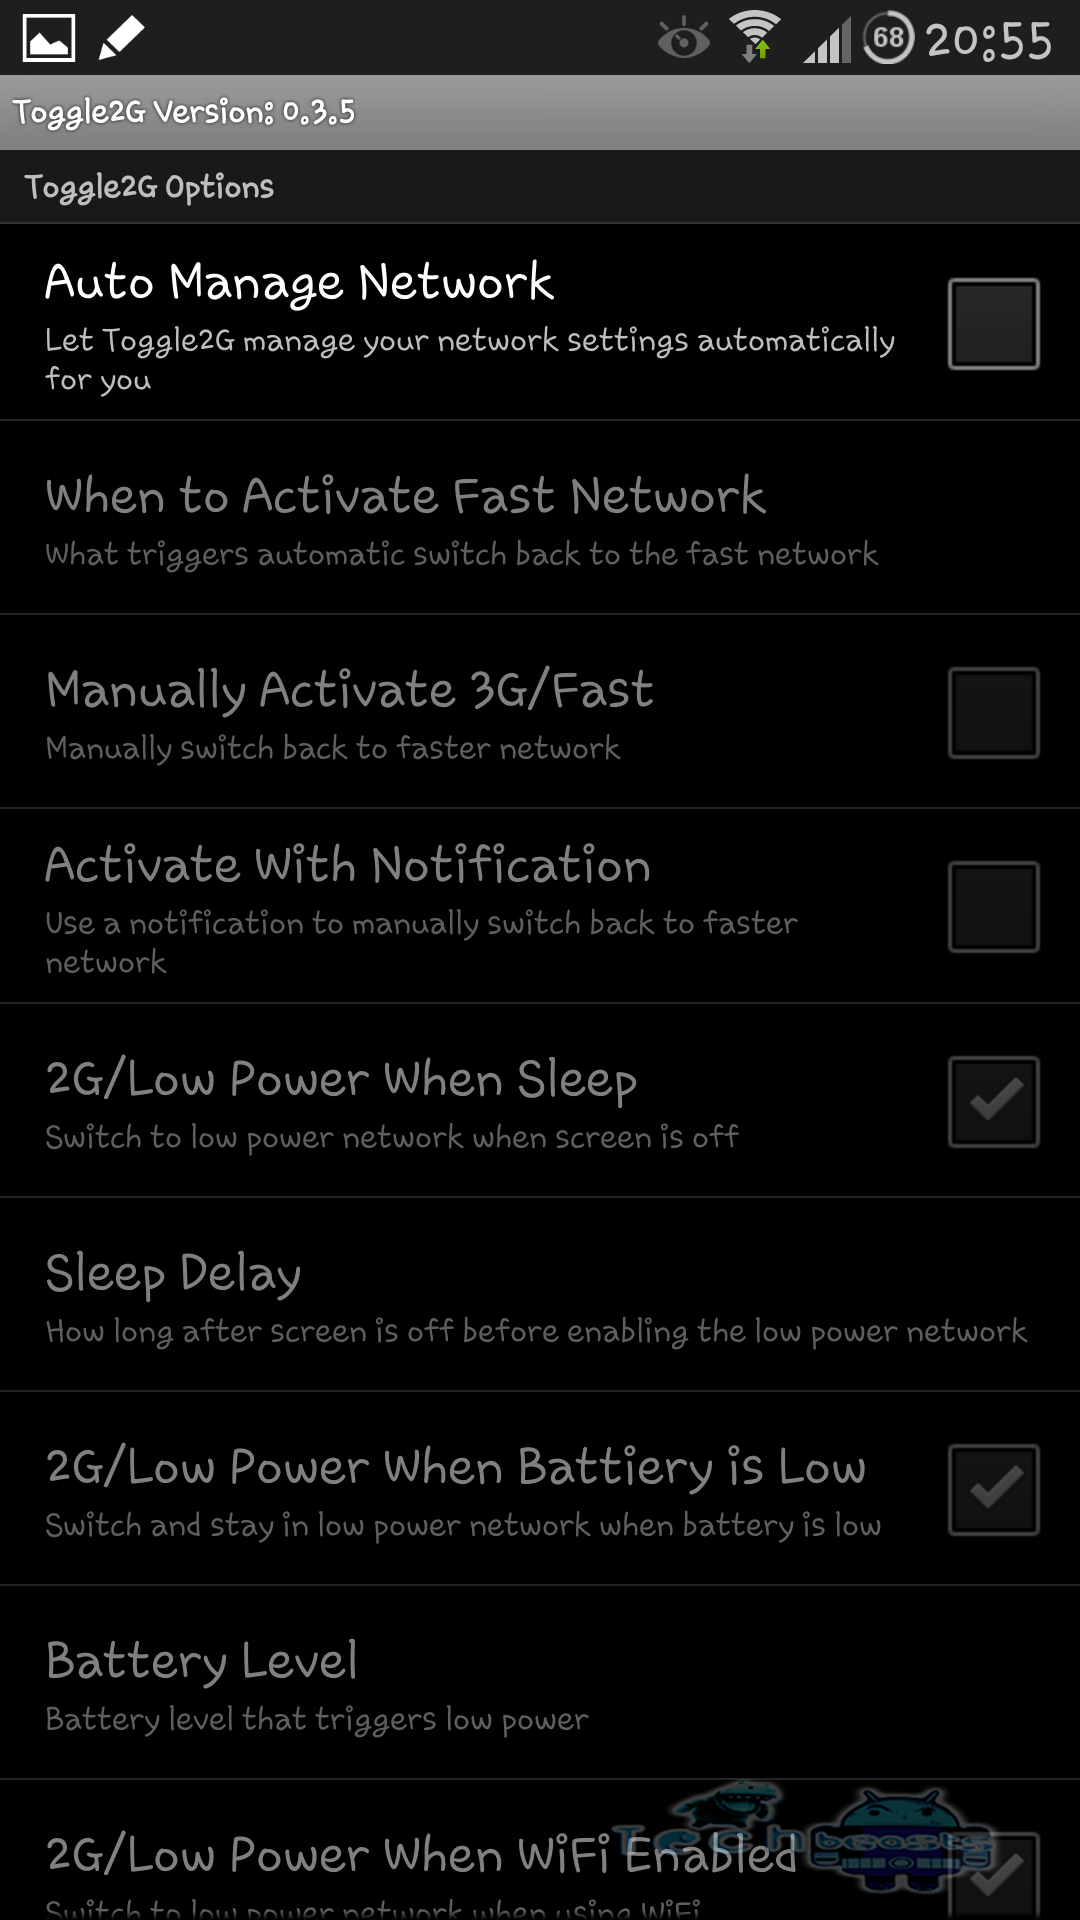
  • Screenshot_2013-11-10-20-55-31Screenshot_2013-11-10-20-53-19 Screenshot_2013-11-10-20-52-42 Screenshot_2013-11-10-20-51-49 Screenshot_2013-11-10-20-51-45 Screenshot_2013-11-10-20-57-33 Screenshot_2013-11-10-20-49-43 Screenshot_2013-11-10-20-49-51 Screenshot_2013-11-10-20-50-03 Screenshot_2013-11-10-20-51-10 Screenshot_2013-11-10-20-57-19 Screenshot_2013-11-10-20-55-55

That’s All! In case of any difficulties or queries, feel free to write us in the comment box below. We will try our best to help you out. Thanks.

Root and Install CWM Recovery on Samsung Galaxy S4 GT-I9500/GT-I9505 on Android 4.3 [Guide]

Root and Install CWM Recovery on Samsung Galaxy S4 GT-I9500/GT-I9505 on Android 4.3 [Guide]

Samsung has pulled out Android 4.3 Jelly Bean update for its flagship device, Samsung Galaxy S4 recently. Samsung has concentrated on device’s security through Samsung Knox and stability and performance through the Android 4.3 update on Samsung Galaxy S4, the device was running on Android 4.2.2 out of the box.

Samsung-Galaxy-S4-44358_2628

Well, let’s get back to the topic. In the following post we will learn how we can gain root access on the Galaxy S4 GT-I9500 & GT-I9505 and also how we can install the Clockwork Mod Recovery on these devices. You need to follow the simple steps explained below, but before we begin here are some precautionary measures you must take before beginning.

  1.  Make sure that your phone’s battery is charged over at least 60%. This is highly recommended in order to prevent any power issues on the device during the flashing process.
  2. Make sure that you have backed up all your important ContactsCall LogsMessages. It is highly recommended in case of any mishap or data loss to backup all your important data.
  3. Make sure that you use the original data cable to connect your device to your PC.
  4. Make sure that your device is GT-I9500 or I9505, check the model under Settings>General>About Device>Model.
  5. Install the listed files carefully, follow this guide to letter in order to prevent any mishap.

While rooting your phone, please keep it in mind that the Root Process isn’t  official and has nothing to deal with Google Inc and the device manufacturer, which is Samsung in our case. Follow the guide carefully to prevent any damages to the device as the method is completely custom.

Files you need to download:

  1. Download and extract Odin PC – Get it here
  2. Download and Samsung USB Drivers – Get here
  3. Download & Unzip Cf Auto Root Package file once on your desktop

How to Root Samsung Galaxy S4 on Android 4.3 Jelly Bean:

      • Put your GS4 in download mode by pressing and holding Volume Down + Home + Power key at the same time, you should get a screen showing a warning and asking to continue, press Volume Up to continue.
      • Now your phone should be in downloading mode. Connect your phone to your PC.
      • As soon as Odin detects your phone the ID:COM box will turn light blue.
      • Click on the PDA tab and select the CF-autoroot file that you extracted above.
      • Your Odin screen should look like exactly as shown below.odin_explained
      • Make sure that the options selected in your Odin are same as shown above.
      • Click Start and the root process should start showing you a process bar in the first box above ID:COM.
      • The process is quite fast and will finish in a few seconds, as soon as it ends, your phone will restart and you’ll see the CF Auto root installing SuperSu on your phone.
      • Congratulations you have your Samsung Galaxy S4 rooted now!

How to Install ClockworkMod [CWM] Recovery on Samsung Galaxy S4 on Android 4.3 Jelly Bean:

The method explained above is basically for beginners and does not install a custom recovery in your phone, it simply installs a stock recovery with having your phone rooted. Custom recovery allows you to modify in your phone in so many other ways like flashing custom roms, flashing mods etc.

In order to flash a custom recovery after rooting your SGS4 download the following file.

    • Download CWM Advanced Edition for your Galaxy S4 GT-I9500
    • Download CWM Advanced Edition for your Galaxy S4 GT-I9505

Now you need to follow the same procedure explained above to root your phone but this time instead of giving it CF Auto Root file in the PDA tab you need to give it the downloaded CWM Advanced Edition [Philz Touch] file for your phone, the recovery will be flashed within a few seconds. You can enter the custom recovery now pressing and holding Volume Up + Home + Power Key.


Now wondering what to do with your rooted phone? 

Here’s the answer for you!

Rooting your phone gives you complete access over all the data which is apparently locked by the manufacturers. This includes removal of the factory restrictions and making changes to the internal system and the operating system. Gaining the root access gives you the privileges to install various applications to enhance the performance of your device, allows you to remove the built-in applications/programs, helps you to upgrade the battery life of your device & install the apps which require the root access for the proper functionality and modify your device in so many other ways e.g using mods and custom roms. Here’s our collection of 10 Best Root Apps.

How to keep Root after OTA Updates

The OTA updates rolled out by the manufacturers wipe the root access on your phone. In case you don’t know how you can restore the root access after OTA update, you’ll have to root your phone once again, but there is no need to do it as you can restore it using the OTA Rootkeeper App which is available in the Google Play Store. The app creates backup of your root and simply restores it after any OTA update.


Root Credits: Chainfire – Recognized Developer XDA

Recovery Credits: Phil3759 – Recognized Developer XDA

Got any questions? Feel free to leave a comment below, we’ll try our best to help you out :D Good Luck