Home Blog Page 503

Root and Install CWM Recovery on Samsung Galaxy Note 8.0 [How to – Guide]

Root and Install CWM Recovery on Samsung Galaxy Note 8.0  [How to – Guide]

After the success of Samsung Galaxy Note 1, Note 2 and Note 10.0 Samsung brought up the regular tablet version of the Galaxy Note sized at 8.0 inches. The device is powered up with Exynos 4412 Quad Core CPU clocked at 1.6 GHz with a 2 GB RAM, a 5 MP camera at the back while a 1.3 MP on the front. 16/32 GB internal storage variants are there, as well, the storage is expandable through microSD card. Most of all, the device has an S Pen that adds to its functionality. Under the hood, this device got a massive 4600 mAh. Over all, Galaxy Note 8.0 outdated the rival tablets on the basis of its hefty hardware specifications.

While there is a lot to play with on the Android devices, and Galaxy Note 8.0 is one of those, the root access becomes essential if you want to go beyond the boundaries and tweak your device. So, let’s get back to the topic, if you are finding the root method then you’ve spotted the right place as I’ve explained the method in easy, simple and detailed steps below. But before we begin, you may be actually wondering about the proper know-how off the root access and custom recovery. Well, here’s the answer for you.

galaxy-note-8-0

Rooting your phone gives you complete access over all the data which is apparently locked by the manufacturers. This includes removal of the factory restrictions and making changes to the internal system and the operating system. Gaining the root access gives you the privileges to install various applications to enhance the performance of your device, allows you to remove the built-in applications/programs, helps you to upgrade the battery life of your device & install the apps which require the root access for the proper functionality and modify your device in so many other ways e.g using mods and custom roms. By installing custom recovery, you can flash custom roms in the phone easily. Custom recovery also let’s you backup your current rom and restore it in case of any mishap. There is a laundry list of things you can do after having your device rooted and installed the custom recovery, now once you’re rooted and have installed custom recovery, go ahead and enjoy it on your phone. Here’s our collection of 10 Best Root Apps.

Let’s move forward to the root process…

Disclaimer: The methods involved in flashing custom roms and rooting your phone is highly custom and may result in bricking your device, and has nothing to do with Google or the device manufacturer that is Samsung in our case. Also rooting your device will void its warranty and you will be no longer eligible for any kind of free device services by the manufacturers/warranty providers. In case of any mishap we may not be held responsible. Follow these instructions to the letter to avoid any mishap or bricking. Make sure that whatever you do, you are doing it at your own responsibility.

Before we go ahead, here are some pre-requisites that you need to follow:

      1. Make sure that your phone’s battery is charged over at least 60%. This is highly recommended in order to prevent any power issues on the device during the flashing process.
      2. Make sure that you have backed up all your important ContactsCall Logs & Messages. It is highly recommended in case of any mishap or data loss to backup all your important data.
      3. Make sure that you use the original data cable to connect your device to your PC.
      4. Make sure that your device is  Galaxy Note 8.0 and one of these GT-N5100, GT-N5110, GT-N5120, check the model under Settings>General>About Device>Model.
      5. In case of USB connection problems, enable USB debugging mode on your device. To do so, open Settings>General>Developer Options. If you can’t find the developer options, simply open About device and tap “Build Number” for 7 times and you should have the developer options enabled under the ”General Tab”.
      6. Install the listed files carefully, follow this guide to letter in order to prevent any mishap.

Files you need to download:

    1. Download and extract Odin PC – Get it here
    2. Download and Samsung USB Drivers – Get here
    3. Download the CF Auto Root Package file for your device and extract it once: 

How to Root your Galaxy Note 8.0 :

      • Download the root package file for your Galaxy Note 8.0’s model number carefully from above.
      • Put your Galaxy Note 8.0 in download mode. To do so, turn off your phone completely and then turn it on  by pressing and holding Volume Down + Home + Power key at the same time, you should get a screen showing a warning and asking to continue, press Volume Up to continue.
      • Now your phone should be in downloading mode. Connect your phone to your PC.
      • As soon as Odin detects your phone the ID:COM box will turn light blue.
      • Click on the PDA tab and select the CF Auto Root Package file that you downloaded and extracted once above.
      • Your Odin screen should look like exactly as shown below.odin_explained
      • Click Start and the root process should start showing you a process bar in the first box above ID:COM.
      • The process is quite fast and will finish in a few seconds, as soon as it ends your device will get rebooted now, unplug it from the computer.
      • You will see the SuperSu installation on your phone now, it will start in a few seconds automatically.
      • Congrats! You’ve rooted your phone successfully now!

How to Install CWM Recovery on your Galaxy Note 8.0:

The method explained above is basically for beginners and does not install a custom recovery in your phone, it simply installs a stock recovery with having your phone rooted. Custom recovery allows you to modify in your phone in so many other ways like flashing custom roms, flashing mods etc.

Download Philz Advanced Touch CWM Recovery for your device:

      • CWM Advanced Touch Recovery for Galaxy Note 8.0 GT-N5100
      • CWM Advanced Touch Recovery for Galaxy Note 8.0 GT-N5110
      • CWM Advanced Touch Recovery for Galaxy Note 8.0 GT-N5120

Now you need to follow the same procedure explained above to root your phone but this time instead of giving it CF Auto Root file in the PDA tab you need to give it the downloaded recovery file that is in .tar.md5  format,  for your phone, the recovery will be flashed within a few seconds. You can enter the custom recovery now pressing and holding Volume Up + Home + Power Key.

Congrats! You’ve successfully rooted and installed CWM recovery on your Galaxy Note 8.0 In case you got any queries or facing any difficulties, feel free to write us in the comment box below. We will try out our best to help you. Thanks.

Install CWM Recovery and Root Samsung Galaxy S4 Active GT-I9295 [Guide]

55
Install CWM Recovery and Root Samsung Galaxy S4 Active GT-I9295 [Guide]

Samsung rolled out the waterproof and dust proof version of the Galaxy S4 modeled as Galaxy S4 Active soon after the official release of the Galaxy S4. The device sports a full HD 5 inch TFT capacitive touchscreen display with 441 ppi, and is powered up with Qualcomm’s Snapdragon 600 Quad Core CPU clocked at 1.9 Ghz, a RAM of 2 GB’s is placed under the hood. The main difference is in the camera, Galaxy S4 Active has got an 8 MP camera at the back while a 2. MP on the front while the original Galaxy S4 has a 13 MP camera at the back.  Out of the box, Galaxy S4 Active runs on Android 4.2.2, and the device is expected to get Android 4.3 update soon.

So getting back to the topic, Are you a Galaxy S4 Active owner? and looking to root your device but finding it hard? Well, no worries anymore. In the following post i’ve explained the steps to root your device in so simple words, and it should be really easy to go with. But in case you are wondering what root access is and why do you need to root your device then here’s the answer for you.

samsung-galaxy-s4-active-urban-gray

Rooting your phone gives you complete access over all the data which is apparently locked by the manufacturers. This includes removal of the factory restrictions and making changes to the internal system and the operating system. Gaining the root access gives you the privileges to install various applications to enhance the performance of your device, allows you to remove the built-in applications/programs, helps you to upgrade the battery life of your device & install the apps which require the root access for the proper functionality and modify your device in so many other ways e.g using mods and custom roms. By installing custom recovery, you can flash custom roms in the phone easily. Custom recovery also let’s you backup your current rom and restore it in case of any mishap. There is a laundry list of things you can do after having your device rooted and installed the custom recovery, now once you’re rooted and have installed custom recovery, go ahead and enjoy it on your phone. Here’s our collection of 10 Best Root Apps.

Let’s move forward to the root process…

Disclaimer: The methods involved in flashing custom roms and rooting your phone is highly custom and may result in bricking your device, and has nothing to do with Google or the device manufacturer that is Samsung in our case. Also rooting your device will void its warranty and you will be no longer eligible for any kind of free device services by the manufacturers/warranty providers. In case of any mishap we may not be held responsible. Follow these instructions to the letter to avoid any mishap or bricking. Make sure that whatever you do, you are doing it at your own responsibility.

Before we go ahead, here are some pre-requisites that you need to follow:

      1. Make sure that your phone’s battery is charged over at least 60%. This is highly recommended in order to prevent any power issues on the device during the flashing process.
      2. Make sure that you have backed up all your important ContactsCall Logs & Messages. It is highly recommended in case of any mishap or data loss to backup all your important data.
      3. Make sure that you use the original data cable to connect your device to your PC.
      4. Make sure that your device is  Galaxy S4 Active that is GT-I9295, check the model under Settings>General>About Device>Model.
      5. In case of USB connection problems, enable USB debugging mode on your device. To do so, open Settings>General>Developer Options. If you can’t find the developer options, simply open About device and tap “Build Number” for 7 times and you should have the developer options enabled under the ”General Tab”.
      6. Install the listed files carefully, follow this guide to letter in order to prevent any mishap.

Files you need to download:

  1. Download and extract Odin PC – Get it here
  2. Download and Samsung USB Drivers – Get here
  3. Download the CWM-Recovery-gt-i9295_v1-2.tar.md5  Get here.
  4. Download the SuperSu.zip file – Get here.

How to Install CWM Recovery on Galaxy S4 Active:

      • Put your GS4 GT-I9295 in download mode. To do so, reboot your device while holding the Volume Down key, you should get a screen showing a warning and asking to continue, press Volume Up to continue.
      • Now your phone should be in downloading mode. Connect your phone to your PC.
      • As soon as Odin detects your phone the ID:COM box will turn light blue.
      • Click on the PDA tab and select the CWM-Recovery-gt-i9295_v1-2.tar.md5 file that you downloaded above.
      • Your Odin screen should look like exactly as shown below.
      • odin_explainedClick Start and the root process should start showing you a process bar in the first box above ID:COM.
      • The process is quite fast and will finish in a few seconds, as soon as it ends your device will get rebooted now, unplug it from the computer.
      • Congratulations you have your installed CWM recovery on your device now. To boot into CWM recovery, restart your phone while holding the Volume Up key, you should now see the CWM recovery.

How to Root your Galaxy S4 Active:

      1. Place the SuperSu.zip file on your phone’s sd card.
      2. Boot into the CWM Recovery.
      3. In CWM recovery select “Install Zip > Choose Zip from Sd Card” and select the SuperSu zip file and in the next step select “yes”.
      4. It will take a while to flash SuperSu and you’ve rooted your device now.
      5. Reboot and find the SuperSu installed in app drawer.
      6. Congrats 😀 You’ve rooted your phone successfully.

That’s All! We hope that the method worked well for you. In case you got any queries, feel free to stop by the comment box below. Thanks.

Install Android 4.3 Jelly Bean I9300XXUGMJ9 Official Firmware on Samsung Galaxy S3 GT-I9300

0
Install Android 4.3 Jelly Bean I9300XXUGMJ9 Official Firmware on Samsung Galaxy S3 GT-I9300

Samsung has officially rolled out Android 4.3 update for the Galaxy S3 GT-I9300. Indeed, this is a good news for those who’ve been waiting anxiously for the update as Samsung took a very long time to bring it up. The Android 4.2.2 update has been skipped and the device can be directly updated to Android 4.3 now.

The device has Galaxy Gear support now, this update is more stable, and the performance has been improved. A lot of bugs has been fixed. The core UI has been changed to that of the Galaxy S4 and Note 3 as well, settings app has been divided into tabs but the device still runs on its old launcher. As off now, Samsung hasn’t implemented Knox in Android 4.3 for Galaxy S3 yet but we are hoping that Samsung will implement it in the future updates.

In order to update your device to Android 4.3, you may check the OTA updates under Settings > About Device > Software Update, or simply check for updates by connecting your device to your PC on Samsung KIES.

Android-4.3-Update

While the OTA updates take some time to reach different regions, some of the users can’t wait and they want to taste the new firmware as soon as possible. As Android 4.3 is a major update, we are expecting a huge number of users looking for the update, if you are one of those who can’t wait, then here is our full guide on how you can update your device to this latest firmware.

Here are some pre requisites you must have:

      • Make sure that your phone’s battery is charged over at least 60%.
      • Make sure that you use original data cable for establishing connection between your computer and the phone.
      • Backup all your important data on internal storage, also backup your important ContactsCall Logs & Messages. This is important as you will have to wipe your factory data after flashing this firmware. It is not necessary but it is highly recommended to achieve the best performance results.
      • Make sure that your device is GT-I9300. Check the model number in Settings>About Device.
      • All Set? Go Ahead.

Things you need to download: 

  1. Download OdinPC and extract it. – Get it Here
  2. Download and install Samsung USB Drivers – Get Here
  3. Download and extract Android 4.3 Jelly Bean I9300XXUGMJ9 Firmware – Get it Here

Firmware Details:

  • Model: GT-I9300
  • Country: United Kingdom
  • Version: Android 4.3
  • Changelist: 1902166
  • Build date: Sat, 26 Oct 2013.
  • Region: BTU – United Kingdom

How to Update Galaxy S3 to Android 4.3:

      • Open Odin.
      • Put your phone in download mode, to do so power off your phone, and then turn it by pressing and holding Volume Down + Home Button + Power key simultaneously, keep the keys pressed until your phone shows you a warning, press Volume Up to continue.
      • Connect your phone to your PC. The ID:COM box in Odin should turn blue as soon as your phone is detected by the PC
      • Hit the PDA tab and give it the .tar.md5* file from the extracted firmware folder.
      • Make sure that the rest of the options selected in Odin are exactly as shown below.
      • odin_explained1
      • After selecting all the files and setting up Odin, hit Start, the flashing process should take a while to install the Android 4.3 Jelly Bean firmware on your Galaxy S III.
      • As soon as the process is finished, your device will restart automatically and you’ve the latest firmware installed on your device.
      • In case you face any issues like bootloop or lag, boot into recovery mode (press and hold Volume Up  + Home Button + Power Key) and wipe factory data / cache partition. This will wipe your device completely including media content as well.Reboot your device now and your device should be working fine.

That’s all. In case of any queries, or difficulties, feel free to leave us a comment. We will try our best to help you out.

How to Install and Use BBM on Windows PC or MAC.

0
How to Install and Use BBM on Windows PC or MAC.

Blackberry recently brought up the BlackBerry Messenger for Android and IOS. No doubts, BBM fever has always remained high when it comes to chat. It was a time when people used to have Blackberry phones only for its services, and BBM always helped Blackberry to be on the top of the list in terms of chat messengers. Since Android came in competition, the social networks like whatsapp, viber became a serious threat to BBM. To overcome its insecurities, Blackberry introduced this messenger in the Play Store and in the iTunes. It has already hit over 20 million downloads and counting…

Well, let’s get back to the topic. Many you might be looking out for having BBM installed on your Windows PC or MAC, or some of the people might not have an Android phone, and they want to enjoy BBM on their PC, to overcome this need we are going to have a look on a method to install BlackBerry Messenger [BBM] on the computer.

  1. First of all you need to download and install an Android Emulator, we recommend BlueStacks. Follow our full guide HERE.
  2. Now download this BBM apk file on your PC.
  3. Make sure that you’ve installed and settled up Bluestacks using our guide, now open the downloaded apk file and install it using Bluestacks.
  4. After you’ve installed BBM using Bluestacks, an icon will appear on your Bluestacks screen.
  5. Open BBM and set it up using your BlackBerry ID. If you haven’t signed up for Blackberry, then create and ID HERE.
  6. Once signed in with your BlackBerry ID, it will run a short intro and show you your PIN.
  7. That’s all! You’ve successfully installed BBM on your Windows PC, you can add your friends here now using their BBM PIN.

BBM on PC (3)BBM on PC (4)BBM on PC (6)BBM on PC (1)

That’s all. In case you got any queries, feel free to stop by the comment box below. Thanks.


How To Download and Install Proxy Switcher For Windows XP/7/8 For Free.

0
How To Download and Install Proxy Switcher For Windows XP/7/8 For Free.

Internet is becoming popular now a days and with that the chances of threat are getting higher too as the Internet is use to contain a lot of personal data. These days we use our Credit Card to pay the expenses for all the things we purchase online and that is how Internet get the information of our Credit Card which we need to protect for sure. The easiest way to protect yourself is to hide your IP address or you can use a Proxy switcher. You can download and Install Proxy Switcher by following our guide.

Proxy-Switcher-for-Windows-Proxy-Switcher-Standard

There are a lot of features that you can use while running this software, number one is that it will keep your ID private and let no one knows your identity on Internet. If your privacy is critically important to you then you should need this software. Sometimes you can use this Switcher to increase the speed of the Internet, the Software i will show you is only for 15-days trail, try it and you won’t regret buying it.

Proxy Switcher Standard.

This application is a simple and clean tool that will make the task extremely easy for you, you won’t find any difficulty while using this Software. When you will run this Software, you will find the list of working or available servers, you can choose from anyone on it. You ca either choose between Normal Servers or Anonymous Servers to surf anonymously, you can also test servers using this tool.

All of your Activities can be found in History Section, the servers on the list are also provided with deep information like Country Location, Speed etc. Using a different proxy will let you open such sites which are called Un-safe by your country or the ISP, while accessing internet from School or College, this app is your best friend.

Download And Install Proxy Switcher For Windows XP/7/8.

You can download Proxy Switcher from their official site using the Following Link:

Download Proxy Switcher for Windows

As soon as the Downloading is over start the installation and start using this app.


How To Downgrade From Maverick To Any other Mac OS X version.

0
How To Downgrade From Maverick To Any other Mac OS X version.

Though everyone wants to stand on the updated versions of Software and it is said that every other updates brings improvements and bug fixes. But sometimes an update let you loose your touch with the Machine and all you want is to go back to your old OS. Further below you will find a tutorial regarding how to downgrade the OS X From Maverick to Mountain Loin OS X. You can use this Article, to downgrade to any version.

But before we begin, make sure to create a Back-up of your Current OS along with other Media Files and current Volume. Since this tutorial requires a back-up from Time Machine, so if you haven’t made any back-up of your previous back-up before installing OS X Maverick, this tutorial will not work for you. Remember to create a Back-up otherwise you will loose everything that you have, between the process of Downgrading.

Screenshot_1

All Done! Let’s head towards the Tutorial.

How To Downgrade From Maverick To Any other Mac OS X Version.

This Process will show you how to Downgrade from Mavericks OS X (10.9) to Mountain Loin OS X (10.8), It all depends upon you how much you want to downgrade but we prefer to downgrade only to Mountain Loin, because OS X Loin is a bit buggy and slower than Mountain Loin.

  1. Back-up your current Mac in Time Machine, simply by choosing “Back-up Now” or for the least Back-up all the important files.
  2. If the Drive is not already connected, connect the Time Machine Volume to Mac, which contains the Back-up of OS X Mountain Loin (10.8).
  3. Reboot the Mac and Press and Hold Command + R buttons to enter the restore menu.
  4. At the OS X Utilities Menu, choose “Restore from Time Machine Back-up“.
  5. Read the Instruction to make sure what you are doing and Click Continue.
  6. Select the Restore Source, this should be the Time Machine Drive containing the Back-up.
  7. Select the Back-up make sure to select the Mountain Loin OS X (10.8) correspondence to the Date and Time.
  8. Select the Primary Disk, where you want to install the OS X, it should be the Macintosh HD, then choose Restore to start the Process.
  9. Let Time Machine do the rest of the Process, after the Restore, Mac will Reboot itself when the process will finish.

when the Reboot is over, you will find that your Mac is back to the situation where it was running OS X Mountain Loin and everything will be exact as it was before. Now will be the good time to restore the Back-up of the Applications you made, whether individually or through Time Machine.


Latest Facebook Messenger Apk For Android – Download here

1
Latest Facebook Messenger Apk For Android – Download here

Here we go wait is over Facebook Messenger got pimped this time Facebook messenger is all new you can say developer used Skype concepts but not same total different and kool look. Once again Techbeasts is giving you Facebook Messenger apk so that who are using old Android devices they also can use it. All you have to do is download the apk and install.

Screen Shot 2013-11-14 at 17.20.15

Also See: 2014′s Top Expected Smartphones

Description:

Instantly reach the people you care about.Messenger is a fast, free and reliable way to stay in touch. It’s just like texting, but you don’t have to pay for every message (it works with your data plan).Features:
Get to your messages without opening Facebook.
Chat with groups and make plans on the go.
Bring messages to life with stickers.
Send photos privately.
Keep the conversation going: with chat heads, you can chat while using other apps.
Text your phone contacts, even if you’re not Facebook friends.
Share your location so people know when you’re nearby.
Record voice messages.
Make free calls, even to friends in other countries.
Know when people have seen your messages.
See who’s available on Messenger and who’s active on Facebook.
Stay logged in so you never miss a message.
Turn off notifications when you’re working, sleeping or just need a break.What’s New

A completely new design and custom sounds.
Not just for Facebook friends: Now you can message people in your phone book. And it’s easy to add new contacts—just enter a phone number.
How To Download & Install Latest Facebook Messenger Apk:
1. Download Facebook Messenger Apk from here.
2. Open apk file and install it through package installer.
3. For those who are using devices that are running 4.o.x they will get autoupdate.

How to Root and Install CWM Recovery on Canadian Galaxy S4 SGH-I337M

How to Root and Install CWM Recovery on Canadian Galaxy S4 SGH-I337M

It’s always been difficult to root and install custom recoveries on the carrier dependent variants of the smartphones. Canadian carriers like  Bell, Rogers, Virgin Mobile, Telus rolled out Samsung Galaxy S4 soon after the official unveiling of the Galaxy S4,  and we have always been lucky when it comes to the development of Android. The awesome developers over XDA-developers have the root method, and also a custom recovery for the Canadian Galaxy S4 . In the following post i’ll be explaining the method about how you can do the process on your device. This method is only for Canadian Galaxy S4 SGH-I337M.

In case you are wondering what is root and why do we need to root our phone, also why do we need a custom recovery, that is ClockworkMod [CWM] in our case, then here’s the answer for you:

Rooting your phone gives you complete access over all the data which is apparently locked by the manufacturers. This includes removal of the factory restrictions and making changes to the internal system and the operating system. Gaining the root access gives you the privileges to install various applications to enhance the performance of your device, allows you to remove the built-in applications/programs, helps you to upgrade the battery life of your device & install the apps which require the root access for the proper functionality and modify your device in so many other ways e.g using mods and custom roms. By installing custom recovery, you can flash custom roms in the phone easily. Custom recovery also let’s you backup your current rom and restore it in case of any mishap. There is a laundry list of things you can do after having your device rooted and installed the custom recovery, now once you’re rooted and have installed custom recovery, go ahead and enjoy it on your phone. Here’s our collection of 10 Best Root Apps.

GALAXY-S-4-Product-Image-11-630x945

Let’s move forward to the root process…

Disclaimer: The methods involved in flashing custom roms and rooting your phone is highly custom and may result in bricking your device, and has nothing to do with Google or the device manufacturer that is Samsung in our case. Also rooting your device will void its warranty and you will be no longer eligible for any kind of free device services by the manufacturers/warranty providers. In case of any mishap we may not be held responsible. Follow these instructions to the letter to avoid any mishap or bricking. Make sure that whatever you do, you are doing it at your own responsibility.

Before we go ahead, here are some pre-requisites that you need to follow:

      1. Make sure that your phone’s battery is charged over at least 60%. This is highly recommended in order to prevent any power issues on the device during the flashing process.
      2. Make sure that you have backed up all your important ContactsCall Logs & Messages. It is highly recommended in case of any mishap or data loss to backup all your important data.
      3. Make sure that you use the original data cable to connect your device to your PC.
      4. Make sure that your device is Canadian Galaxy S4 that is SGH-I337M, check the model under Settings>General>About Device>Model.
      5. In case of USB connection problems, enable USB debugging mode on your device. To do so, open Settings>General>Developer Options. If you can’t find the developer options, simply open About device and tap “Build Number” for 7 times and you should have the developer options enabled under the ”General Tab”.
      6. Install the listed files carefully, follow this guide to letter in order to prevent any mishap.

Files you need to download:

      1. Download and extract Odin PC – Get it here
      2. Download and Samsung USB Drivers – Get here
      3. Download & Unzip Cf Auto Root Package file once on your desktop

Note:

This method will work with:

      • At&t Galaxy S4.
      • Canadian Bell Galaxy S4.
      • Canadian Rogers Galaxy S4.
      • Canadian Virgin Galaxy S4.
      • Canadian Telus Galaxy S4.

How to Root Samsung Canadian Galaxy S4 SGH-I337M:

      • Put your GS4 SGH-I337M in download mode by pressing and holding Volume Down + Home + Power key at the same time, you should get a screen showing a warning and asking to continue, press Volume Up to continue.
      • Now your phone should be in downloading mode. Connect your phone to your PC.
      • As soon as Odin detects your phone the ID:COM box will turn light blue.
      • Click on the PDA tab and select the CF-autoroot file that you extracted above.
      • Your Odin screen should look like exactly as shown below.
  • odin_explained
      • Click Start and the root process should start showing you a process bar in the first box above ID:COM.
      • The process is quite fast and will finish in a few seconds, as soon as it ends, your phone will restart and you’ll see the CF Auto root installing SuperSu on your phone.
      • Congratulations you have your Samsung Galaxy S4 by Canadian Variants rooted now!

How to Install Custom Recovery (ClockworkMod) on your Canadian Galaxy S4:

The method explained above is basically for beginners and does not install a custom recovery in your phone, it simply installs a stock recovery with having your phone rooted. Custom recovery allows you to modify in your phone in so many other ways like flashing custom roms, flashing mods etc.

In order to flash a custom recovery after rooting your SGS4 download the following file.

    • Download Philz Advanced CWM Touch Recovery for Canadian Galaxy S4

Now you need to follow the same procedure explained above to root your phone but this time instead of giving it CF Auto Root file in the PDA tab you need to give it the downloaded recovery file that is in .tar.md5  format,  for your phone, the recovery will be flashed within a few seconds. You can enter the custom recovery now pressing and holding Volume Up + Home + Power Key

Congrats! You’ve successfully rooted and installed CWM recovery on your Canadian Galaxy S4. In case you got any queries or facing any difficulties, feel free to write us in the comment box below. We will try out our best to help you. Thanks.

How to Root and Install CWM Recovery on T-Mobile Samsung Galaxy S4 SGH-M919 [Guide]

How to Root and Install CWM Recovery on T-Mobile Samsung Galaxy S4 SGH-M919 [Guide]

Rooting your Samsung Galaxy S4 is a bit difficult task, specially when the device is variant dependent. Different variants have different terms and conditions of use, and do not allow much tweaking with their devices. In the following post, we are going to have a look on a method to root T-Mobile Galaxy S4, that is SGH-M919 [Model].

In case you are wondering what is root and why do we need to root our phone, also why do we need a custom recovery, that is ClockworkMod [CWM] in our case, then here’s the answer for you:

Rooting your phone gives you complete access over all the data which is apparently locked by the manufacturers. This includes removal of the factory restrictions and making changes to the internal system and the operating system. Gaining the root access gives you the privileges to install various applications to enhance the performance of your device, allows you to remove the built-in applications/programs, helps you to upgrade the battery life of your device & install the apps which require the root access for the proper functionality and modify your device in so many other ways e.g using mods and custom roms. By installing custom recovery, you can flash custom roms in the phone easily. Custom recovery also let’s you backup your current rom and restore it in case of any mishap. There is a laundry list of things you can do after having your device rooted and installed the custom recovery, now once you’re rooted and have installed custom recovery, go ahead and enjoy it on your phone. Here’s our collection of 10 Best Root Apps.

Samsung-Galaxy-S4-Black-Spin_11.0001

Let’s move forward to the root process…

Disclaimer: The methods involved in flashing custom roms and rooting your phone is highly custom and may result in bricking your device, and has nothing to do with Google or the device manufacturer that is Samsung in our case. Also rooting your device will void its warranty and you will be no longer eligible for any kind of free device services by the manufacturers/warranty providers. In case of any mishap we may not be held responsible. Follow these instructions to the letter to avoid any mishap or bricking. Make sure that whatever you do, you are doing it at your own responsibility.

Before we go ahead, here are some pre-requisites that you need to follow:

  1. Make sure that your phone’s battery is charged over at least 60%. This is highly recommended in order to prevent any power issues on the device during the flashing process.
  2. Make sure that you have backed up all your important Contacts, Call Logs & Messages. It is highly recommended in case of any mishap or data loss to backup all your important data.
  3. Make sure that you use the original data cable to connect your device to your PC.
  4. Make sure that your device is T-Mobile Galaxy S4 that is SGH-M919, check the model under Settings>General>About Device>Model.
  5. In case of USB connection problems, enable USB debugging mode on your device. To do so, open Settings>General>Developer Options. If you can’t find the developer options, simply open About device and tap “Build Number” for 7 times and you should have the developer options enabled under the ”General Tab”.
  6. Install the listed files carefully, follow this guide to letter in order to prevent any mishap.

Files you need to download:

  1. Download and extract Odin PC – Get it here
  2. Download and Samsung USB Drivers – Get here
  3. Download & Unzip Cf Auto Root Package file once on your desktop

How to Root Samsung T-Mobile Galaxy S4 SGH-M919:

      • Put your GS4 SGH-M919 in download mode by pressing and holding Volume Down + Home + Power key at the same time, you should get a screen showing a warning and asking to continue, press Volume Up to continue.
      • Now your phone should be in downloading mode. Connect your phone to your PC.
      • As soon as Odin detects your phone the ID:COM box will turn light blue.
      • Click on the PDA tab and select the CF-autoroot file that you extracted above.
      • Your Odin screen should look like exactly as shown below.
  • odin_explained
      • Click Start and the root process should start showing you a process bar in the first box above ID:COM.
      • The process is quite fast and will finish in a few seconds, as soon as it ends, your phone will restart and you’ll see the CF Auto root installing SuperSu on your phone.
      • Congratulations you have your Samsung Galaxy S4 by T-Mobile rooted now!

How to Install Custom Recovery (ClockworkMod) on your T-Mobile Galaxy S4:

The method explained above is basically for beginners and does not install a custom recovery in your phone, it simply installs a stock recovery with having your phone rooted. Custom recovery allows you to modify in your phone in so many other ways like flashing custom roms, flashing mods etc.

In order to flash a custom recovery after rooting your SGS4 download the following file.

      • Download Philz Advanced CWM Touch Recovery for T-Mobile Galaxy S4

Now you need to follow the same procedure explained above to root your phone but this time instead of giving it CF Auto Root file in the PDA tab you need to give it the downloaded recovery file that is in .tar.md5  format,  for your phone, the recovery will be flashed within a few seconds. You can enter the custom recovery now pressing and holding Volume Up + Home + Power Key

Congrats! You’ve successfully rooted and installed CWM recovery on your T-Mobile Galaxy S4. In case you got any queries or facing any difficulties, feel free to write us in the comment box below. We will try out our best to help you. Thanks.

How to Root and Install CWM Recovery on Sprint Galaxy S4 SPH-L720

How to Root and Install CWM Recovery on Sprint Galaxy S4 SPH-L720

Samsung’s flaghship device, the Galaxy S4 is going well in the market, and is available by most of the variants through out the world now. The Galaxy S4 headed to Sprint soon after its official unveiling at IFA, Berlin. Sporting a 4.99” inch Full HD display with 441 ppi, the device is powered up with Qualcomm’s Snapdragon 600 Quad Core CPU clocked at 1.9 Ghz along with Adreno 320 GPU, under the hood it has got a 2 GB RAM, and a massive 2600 mAh battery. At the back there is a 13 MP camera, while a 2.1 MP on the front.

Getting back to the topic, a device like Galaxy S4 and no root seems quite incomplete. Well, in case you want to know what root access is and what we can do after having it, here’s the answer for you.

Rooting your phone gives you complete access over all the data which is apparently locked by the manufacturers. This includes removal of the factory restrictions and making changes to the internal system and the operating system. Gaining the root access gives you the privileges to install various applications to enhance the performance of your device, allows you to remove the built-in applications/programs, helps you to upgrade the battery life of your device & install the apps which require the root access for the proper functionality and modify your device in so many other ways e.g using mods and custom roms. By installing custom recovery, you can flash custom roms in the phone easily. Custom recovery also let’s you backup your current rom and restore it in case of any mishap. There is a laundry list of things you can do after having your device rooted and installed the custom recovery, now once you’re rooted and have installed custom revcoery, go ahead and enjoy it on your phone. Here’s our collection of 10 Best Root Apps.

GALAXY-S-4-Product-Image-11-630x945

Disclaimer: The methods involved in flashing custom roms and rooting your phone is highly custom and may result in bricking your device, and has nothing to do with Google or the device manufacturer that is Samsung in our case. In case of any mishap we may not be held responsible. Follow these instructions to the letter to avoid any mishap or bricking. Make sure that whatever you do, you are doing it at your own responsibility.

Before we go ahead, here are some pre-requisites that you need to follow:

  1. Make sure that your phone’s battery is charged over at least 60%. This is highly recommended in order to prevent any power issues on the device during the flashing process.
  2. Make sure that you have backed up all your important ContactsCall Logs & Messages. It is highly recommended in case of any mishap or data loss to backup all your important data.
  3. Make sure that you use the original data cable to connect your device to your PC.
  4. Make sure that your device is Sprint Galaxy S4 that is SPH-L720, check the model under Settings>General>About Device>Model.
  5. In case of USB connection problems, enable USB debugging mode on your device. To do so, open Settings>General>Developer Options. If you can’t find the developer options, simply open About device and tap “Build Number” for 7 times and you should have the developer options enabled under the ”General Tab”.
  6. Install the listed files carefully, follow this guide to letter in order to prevent any mishap.

Files you need to download:

  1. Download and extract Odin PC – Get it here
  2. Download and Samsung USB Drivers – Get here
  3. Download & Unzip Cf Auto Root Package file once on your desktop

How to Root Samsung Sprint Galaxy S4 SPH-L720:

    • Put your GS4 SPH-L720 in download mode by pressing and holding Volume Down + Home + Power key at the same time, you should get a screen showing a warning and asking to continue, press Volume Up to continue.
    • Now your phone should be in downloading mode. Connect your phone to your PC.
    • As soon as Odin detects your phone the ID:COM box will turn light blue.
    • Click on the PDA tab and select the CF-autoroot file that you extracted above.
    • Your Odin screen should look like exactly as shown below.
  • odin_explained
    • Click Start and the root process should start showing you a process bar in the first box above ID:COM.
    • The process is quite fast and will finish in a few seconds, as soon as it ends, your phone will restart and you’ll see the CF Auto root installing SuperSu on your phone.
    • Congratulations you have your Samsung Galaxy S4 by Sprint rooted now!

How to Install Custom Recovery (ClockworkMod) on your Sprint Galaxy S4:

The method explained above is basically for beginners and does not install a custom recovery in your phone, it simply installs a stock recovery with having your phone rooted. Custom recovery allows you to modify in your phone in so many other ways like flashing custom roms, flashing mods etc.

In order to flash a custom recovery after rooting your SGS4 download the following file.

      • Download Philz Advanced CWM Touch Recovery for Sprint Galaxy S4

Now you need to follow the same procedure explained above to root your phone but this time instead of giving it CF Auto Root file in the PDA tab you need to give it the downloaded recovery file that is in .tar.md5  format,  for your phone, the recovery will be flashed within a few seconds. You can enter the custom recovery now pressing and holding Volume Up + Home + Power Key

Congrats! You’ve successfully rooted and installed CWM recovery on your Sprint Galaxy S4. In case you got any queries or facing any difficulties, feel free to write us in the comment box below. We will try out our best to help you. Thanks.

How To Root Nexus 4 2013 Nexus 7 On Android 4.4 Kit-Kat and Install CWM Recovery.

6
How To Root Nexus 4 2013 Nexus 7 On Android 4.4 Kit-Kat and Install CWM Recovery.

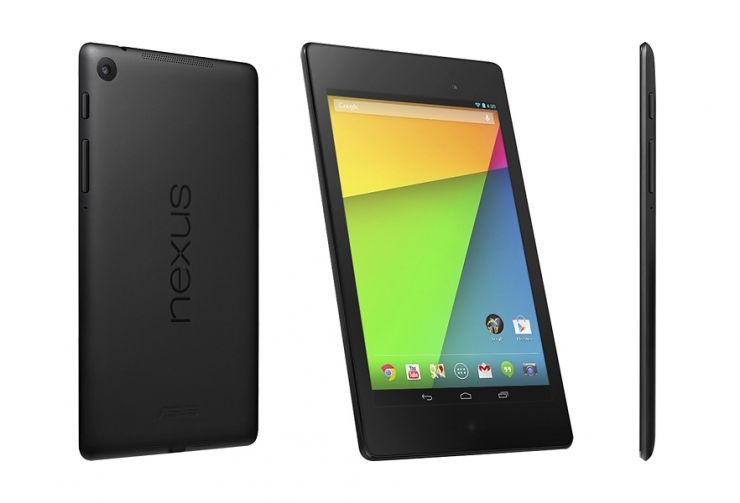
After installing or updating Nexus 7 to Android 4.4 Kit-Kat, now the next step is to Root it and Install Custom Recoveries on it. In this tutorial we will provide you both the TWRP and CWM Recovery, so if the one doesn’t work you can try the Other. You will first need to install recovery then you will be able to root this device. Rooting your device allows you to get full control over your device, allows you to install custom ROMs and try different tweaks and Mods on your device.

nexus-7-2013

In this Article, we will show you How To Root Nexus 4 2013 Nexus 7 On Android 4.4 Kit-Kat and Install CWM Recovery. But before we get any further, follow the link to install Android 4.4 Kit-Kat on Nexus 7.

How To Update Nexus 7 2013 To Android 4.4 Kit-Kat KRT160 Official Firmware.

How To Update Nexus 4 to Factory Image Android 4.4 Kit-Kat KRT16O.

And Make sure that you have battery charged over 60 % and have backed up all your important ContactsCall Logs & Messages.It is highly recommended in case of any mishap or data loss to back up all your important data.

Disclaimer:

The methods involved in flashing custom roms and rooting your phone is highly custom and may result in bricking your device,and has nothing to do with Google or the device manufacturers which is Samsung in our case. In case of any mishap we may not be held responsible. Follow these instructions to the letter to avoid any mishap or bricking. Make sure that whatever you do, you are doing it at your own responsibility.

Important things:

  • Your Device must be Running Android 4.4 Kit-Kat.
  • Enable USB debugging mode.
  • Make sure that battery level is at 85% or more.
  • This Tutorial is Only For Nexus 7.

How To Root Nexus 4 2013 Nexus 7 On Android 4.4 Kit-Kat and Install CWM Recovery.

  • Make sure that Fastbboot/ADB is configured on PC. How? How to Install Android Adb & Fastboot Drivers on Your Windows PC [Guide].
  • Download SuperSU v1.69 (UPDATE-SuperSU-v1.69.zip) and copy it to your sdcard on your Nexus 7 tablet.
  • Download CWM Recovery 6.0.4.3 or download TWRP 2.6.3.1 and copy/paste it in the Fastboot Folder.
  • Turn Off your Tablet.
  • Now go to Bootloader mode, Press and hold Volume Down + Power buttons till you see some text on-screen.
  • Open Command Prompt in Fastboot folder, Press and hold Shift Key + Right Click anywhere in the folder and click ‘Open Command Window here’.
  • Type in the following command in cmd: fastboot flash recovery recovery-clock-work-touch-6.0.4.3-flo.img
  • Once done, choose Recovery from Bootloader.
  • Navigate to ‘Install zip from sd card’ then select ‘choose zip from sd card’.
  • Select the Update SuperSu v1.69.zip file and confirm the installation on next screen.
  • Wait for the process to over.
  • Navigate to ‘++++++++Go Back‘ then select “reboot system now’.

That’s all your Nexus 7 running Android 4.4 Kit-Kat is now rooted, check the Super SU or Download any Root Checker app to verify.

How To Root Nexus 4 On Android 4.4 Kit-Kat and Install CWM Recovery.

  • Make sure that Fastbboot/ADB is configured on PC. How? How to Install Android Adb & Fastboot Drivers on Your Windows PC [Guide].
  • Download SuperSU v1.69 (UPDATE-SuperSU-v1.69.zip) and copy it to your sdcard on your Nexus 4.
  • Download CWM 6.0.3.3 or download TWRP 2.6.3.3 and copy/paste it in the Fastboot Folder.
  • Turn Off your Tablet.
  • Now go to Bootloader mode, Press and hold Volume Down + Power buttons till you see some text on-screen.
  • Open Command Prompt in Fastboot folder, Press and hold Shift Key + Right Click anywhere in the folder and click ‘Open Command Window here’.
  • Type in the following command in cmd: fastboot flash recovery recovery-clock-work-touch-6.0.4.3-flo.img
  • Once done, choose Recovery from Bootloader.
  • Navigate to ‘Install zip from sd card’ then select ‘choose zip from sd card’.
  • Select the Update SuperSu v1.69.zip file and confirm the installation on next screen.
  • Wait for the process to over.
  • Navigate to ‘++++++++Go Back‘ then select “reboot system now’.

That’s all your Nexus 4 running Android 4.4 Kit-Kat is now rooted, check the Super SU or Download any Root Checker app to verify.

How To Update Nexus 7 2013 To Android 4.4 Kit-Kat KRT160 Official Firmware.

6
How To Update Nexus 7 2013 To Android 4.4 Kit-Kat KRT160 Official Firmware.

Nexus 7 Wi-Fi version can now be updated to Android 4.4 Kit-Kat, the official firmware update has been rolling out for several devices and Nexus 7 is one of them. This new update brings a lot of new features with improved battery life, enhanced performance and much less lag. If you haven’t received the OTA update of Android 4.4 Kit-Kat for your Nexus 7, you can install it manually by following our tutorial below. This is an OTA update not a full Firmware, so your Nexus 7 must be running Android 4.3 JSS15R before installing this ROM, or you can always install the factory image of Android 4.4 Kit-Kat, which does not require any sort of above mentioned restrictions.

Android-Kit-Kat-4.4-in-google-Gem-Drumbeez

In this Article,  we will show you How To Update Nexus 7 2013 To Android 4.4 Kit-Kat KRT160 Official Firmware. But before we begin, Make sure that you have battery charged over 60 % and have backed up all your important ContactsCall Logs & Messages.It is highly recommended in case of any mishap or data loss to back up all your important data.

Disclaimer:

The methods involved in flashing custom roms and rooting your phone is highly custom and may result in bricking your device,and has nothing to do with Google or the device manufacturers which is Samsung in our case. In case of any mishap we may not be held responsible. Follow these instructions to the letter to avoid any mishap or bricking. Make sure that whatever you do, you are doing it at your own responsibility.

Important things:

  • Your Device must be Rooted and Latest TWRP or CWM Recovery must be installed on it.
  • Enable USB debugging mode.
  • Make sure that battery level is at 85% or more.
  • This Tutorial is Only For Nexus 7.

How To Update Nexus 7 2013 To Android 4.4 Kit-Kat KRT160 Official Firmware.

nexus-7-2013

Installation Process: (For Non-Rooted Users)

  1. Download Android 4.4 (3a3951e8243c82bc01a620ab858f4454c8ebd65c.signed-razor-KRT16O-from-JSS15R.3a3951e8.zip) for Nexus 7 but don’t extract it.
  2. Connect Nexus 7 to PC.
  3. Copy and Paste the downloaded file to the root of your sd card.
  4. Disconnect the cable.
  5. Turn Off your tablet.
  6. Now go to Bootloader mode, Press and hold Volume Down + Power buttons till you see some text on-screen.
  7. Choose Recovery from Bootloader.
  8. First Choose ‘Wipe Cache’.
  9. Then Navigate to ‘advance’ and choose ‘Devlik Wipe Cache’ so you won’t get in any bootloop.
  10. Then finally select ‘Wipe Data/Factory Reset’.
  11. Navigate to ‘Install zip from sd card’ then select ‘choose zip from sd card’.
  12. Select the Android 4.4.zip file and confirm the installation on next screen.
  13. Wait for the process to over.
  14. Navigate to ‘++++++++Go Back‘ then select “reboot system now’.

Voila! your Nexus 7 has been updated to Android 4.4 Kit-Kat KRT160, Wait for at least 5-minutes for the first run.

Installation Process: (For Rooted Users)

  1. Download Android 4.4 KRT16O OTA Update for your Rooted Nexus 7.
  2. Connect Nexus 7 to PC.
  3. Copy and Paste the downloaded file to the root of your sd card.
  4. Disconnect the cable.
  5. Turn Off your tablet.
  6. Now go to Bootloader mode, Press and hold Volume Down + Power buttons till you see some text on-screen.
  7. Choose Recovery from Bootloader.
  8. Navigate to ‘Install zip from sd card’ you might have to turn Off “Signature Verification” from ‘toggle signature verification’ option.
  9. select ‘choose zip from sd card’.
  10. Select the Android 4.4.zip file and confirm the installation on next screen.
  11. Wait for the process to over.
  12. Navigate to ‘++++++++Go Back‘ then select “reboot system now’.

Voila! your Nexus 7 has been updated to Android 4.4 Kit-Kat KRT160 and your device will remain rooted.Wait for at least 5-minutes for the first run.