Home Blog Page 494

Remove Bloatware/ System Apps From Samsung Galaxy Note 3.

Remove Bloatware/ System Apps From Samsung Galaxy Note 3.

Apps are love-able things in Smartphone, after all they are the life of Smartphones, the only reason why Android has become most popular OS in Market. However, there are some apps loaded in OS, that are no use for some Users and yet there is no way they can remove them, because they are a part of Package from the OEMs and they feed on battery, more than any other thing. Such Apps are Properly called Bloats and most of the users feel a strong desire to eliminate them from the device. Because of them, when you use Galaxy Devices, they do not perform well and despite having such Powerful Processors and that Much RAM, they lag and perform slow.

bloats-removed-on-Note-3

Samsung Flagship device Galaxy Note 3 has also arrived with a Quad-Core processor and 3GB of RAM, yet at some points it lags and starting to get slow, like Opening Contacts and especially after a time even try to Open it, it delays at Lock-Screen. It arrives with almost 3 pages of System apps that is most likely not to be used by a User. There might be a different in Opinion, but still most of them are useless.

Downloads:

Galaxy Note 3 Cleaner v0.5.zip

Complete List of Deleted Bloats

Note Pad ++

How To Remove Bloatwares.

  1. Download the GALAXY Note 3 Cleaner.Zip but do-not extract it.
  2. Open it >META-INF\com\google\android\ and Right click Updater-Script and Select Open With.
  3. Now Select Note Pad ++ from the Suggested Apps.
  4. The Updater-Script will open now and you will see the list of all the Stock apps.
  5. You can now Add or Remove the Stock apps. Just delete the Line Number from the Note Pad ++ of the App you want to remove.
  6. Once you have deleted the Desired apps, Copy the Zip to the Phone.
  7. Open Recovery.How? Press and hold Volume Up +Home + Power buttons until you see some text on screen.
  8. Navigate to ‘Install zip from sd card’ another windows will open in front of you.
  9. Select ‘choose zip from sd card’ from the Options.
  10. Select the GALAXY Note 3 Cleaner.Zip file and confirm the installation on next screen.
  11. If the Recovery Prompts you, Root access possibly lost, Fix? Tap Yes
  12. Once the Installation is Over, Go Back
  13. Select Reboot Now to Reboot the System.


Once the boot is done, Open App Drawer to see a cleaner App drawer.
Enjoy Transparent TouchWiz On Your Samsung Galaxy S3.

Enjoy Transparent TouchWiz On Your Samsung Galaxy S3.

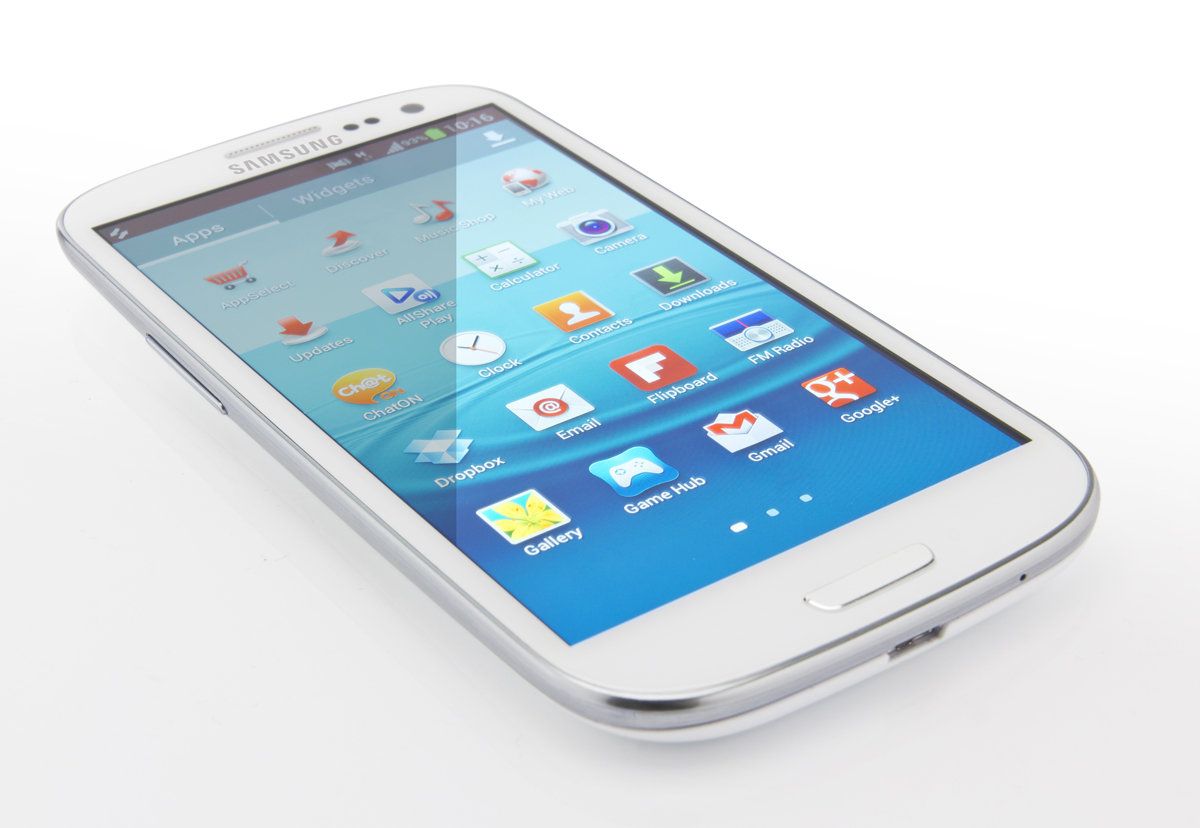
The Samsung Galaxy S3 is one of the best Smartphone, released by Samsung and it is still Samsung’s Best Seller. The device popularity gives developers to create some ROMs that are totally exceptional. One of them will give you the same TouchWiz but with the feature of Transparency. If you are a TouchWiz fan, but want something new in the same Interface, we have something to share with you people. If you have a Rooted Galaxy S3, then prepare to Install this Awesome ROM on Galaxy S3.

Samsung_Galaxy_S3IMG_0044

Thanks to Developer seatone, who have created a ROM based on same TouchWiz, but everything else have a Transparent looks. Your Homescreen, Wallpapers will be lurking beneath the Settings, Contacts, Phone, Music, My Files, even the Pop-up windows will be transparent.

If you have ever installed a Custom ROM on your device, then this might not be very Difficult for you, Otherwise pay more attention to the Tutorial.Make sure that you have battery charged over 60 % and have backed up all your important ContactsCall Logs & Messages.It is highly recommended in case of any mishap or data loss to back up all your important data.

Disclaimer:

The methods involved in flashing custom roms and rooting your phone is highly custom and may result in bricking your device,and has nothing to do with Google or the device manufacturers which is Samsung in our case. In case of any mishap we may not be held responsible. Follow these instructions to the letter to avoid any mishap or bricking. Make sure that whatever you do, you are doing it at your own responsibility.

Important things:

  • Your Device must be Rooted and Latest TWRP or CWM Recovery must be installed on it.
  • Make Sure that USB Cable is not Connected With PC While The Installation in Process.
  • Enable USB debugging mode.
  • Make sure that battery level is at 85% or more.
  • This Tutorial is Only For Samsung Galaxy S3 I9300.
  • Back-Up your Mobiles EFS DataHow To Restore and Back-Up EFS Data On Samsung Galaxy Devices.

ScreenShots:

Extra Downloads:

modz S4 for sone™ rom: Click here

Removed applications: Click here

How To Install sone 5.7 On Samsung Galaxy S3.

la-foto-764x1024

  • Turn off your phone and open Recovery mode. How? Press and hold Volume Up +Home + Power buttons until you see some text on screen.
  • First Choose ‘Wipe Cache’.
  • Then Navigate to ‘advance’ and choose ‘Devlik Wipe Cache’ so you won’t get in any bootloop..
  • Finally Select Wipe Data/Factory Reset
  • Navigate to ‘Install zip from sd card’ another windows will open in front of you.
  • Select ‘choose zip from sd card’ from the Options.
  • Select the Sone 5.7.zip file and confirm the installation on next screen.
  • Once the Installation is Over, you will promoted to Reboot System Now
  • Select Reboot Now to Reboot the System.

TWRP Users.

TWRP-2.3.3.0

  • Tap on Wipe Button and Select Cache, System, Data.
  • Swipe the Confirmation Slider.
  • Go back to Main Menu and Tap Install Button.
  • Locate the Sone5.1.zip , Swipe the Slider To install it.
  • Once the Installation is Over, you will promoted to Reboot System Now
  • Select Reboot Now to Reboot the System.

Voila! your Samsung Galaxy S3 I9300 has been updated to Sone 5.1 Custom ROM,  Wait for at least 5-minutes for the first run.

Set/Fix Permissions On Android Devices- How To Guide

2
Set/Fix Permissions On Android Devices- How To Guide

You cannot enjoy the Android OS, no matter which version, until you root your device. The Power of freedom you get after rooting your device unlocks doors to another world far away from Google Play Store and Faulty Firmware updates. Rooting is another level which allows enjoy the Experience the next-Level tweaking. Being the owner of Rooted Android device gives the advantage, where you can extract the best performance of your device. You can Flash Custom Kernels, Mods, Modems, Themes and Patches, thus leaving things the way you want to be.

fixperms


The open Source Feature or should I say Attribute allows developers to create the Richest things for your Android devices. Their Hard-Work allows us to enjoy the Features that you seen in other devices, in your own. Sometimes,  Some Mods and Ports requires a little more effort then only installing, you have to set Permissions for them, you need to Change the Read and Write Rule to make sure the app works. This Type of Knowledge removes most of the bugs and problems, that mostly users face when they try to Change the Default files of the OS. Today we will share with you an Article, regarding such Knowledge.

Important Things:

If you want to install Custom Mods and stuff on your device, you first need to Root it. You need to install any Explorer, File Manager, who allows you to make changes in the Root folders.

How To Fix Permissions On Android Devices:

  • First download the Apk/File that you want use on your device.
  • Then Copy and Paste it to the Place suggested by the Developer, If it is an app, Push it to system/app Directory.
  • Set Permissions to rw-r-r and Reboot your device, All done.

If you give wrong set of Instructions to the Copied file/app on your Rooted device, you will stuck in Bootloop, to Escape Bootloop, follow:

  • Go to Recovery > Advance and Select “Fix Permissions”.
  • Then “Devlik Wipe Cache”
  • And Reboot your device.


Detailed Step-By-Step Guide.

Copy the Downloaded file to your Phone/Sdcard.

Open root explorer from App Drawer.

To set the Permissions, you must copy the file to the root Directories, like /system/etc/ directory.

Now Tap and Hold on to the File, you will see a pop-up.

Tap “Permissions”

Screenshot_2014-01-02-00-36-55

Now you will see another pop-up showing the Current Attributes, read (r) write (w) execute (x) rules for that file.

You can Edit it by marking the the Boxes, all you need to do is Owner= Read+Write, Group=Read and Others= Read. Simply rw-r-r.

Screenshot_2014-01-02-00-34-02


Unless, the developers gives you the instructions about setting permissions, then and only then edit them Accordingly.

Jailbreak iOS 6.1.3, 6.1.4, 6.1.5 Untethered Using P0sixspwn, A5+ Devices Only.

0
Jailbreak iOS 6.1.3, 6.1.4, 6.1.5 Untethered Using P0sixspwn, A5+ Devices Only.

The Wait for Jailbreak is over, if you are still using an iOS Device that is still running iOS 6.1.3 or above but not iOS 7. The untethered Jailbreak is ready to rock on. It supports all those devices which are running, iOS 6.1.3, 6.1.4, 6.1.5. But the Tool is currently available for Mac only and Windows version is on the way.Evad3rs Jailbreak version is now available for iOS 7, so those who are using iOS 6.1.3, 4, 5. They can try to Jailbreak their device using P0sixspwn.

Supported iOS Versions:

  • iOS 6.1.3
  • iOS 6.1.4
  • iOS 6.1.5

Supported Devices:

  • iPhone 5
  • iPhone 4S
  • iPhone 4
  • iPhone 3GS
  • iPod Touch 5
  • iPod touch 4
  • iPad
  • iPad 2
  • iPad 3
  • iPad 4
  • iPad Mini 1

P0sixspwn was first released for iPhone 3GS and all A4 devices and has made its way for A5+ devices. In case if you are still running iOS 6 then you can try jailbreaking it through P0sixspwn, you can download it from P0sixspwn.com, or directly from the Link below.

ppwn


To Jialbreak your Device Running iOS 6, Follow our Guide:

Jailbreak iOS 6.1.3, 6.1.4, 6.1.5 Untethered On All Devices With P0sixspwn.

Jailbreak iOS 6.1.3, 6.1.4, 6.1.5 Untethered On All Devices With P0sixspwn.

0
Jailbreak iOS 6.1.3, 6.1.4, 6.1.5 Untethered On All Devices With P0sixspwn.

It is probably fair to say that Past two weeks were pretty busy for Jailbreak community. With the release of new iOS 7 most of the users upgraded their devices to iOS 7, while those who purchase iPad Mini 2 and iPhone 5s, were already using iOS7, the Evad3rs Jailbreak tutorial suddenly jumped from iOs 6.1.x to iOS, skipping iOS 6.1.3, 6.1.4, 6.1.5. That means those who didn’t upgraded their devices to iOS 7 can’t able to use Evad3rs Jailbreak version, but still they have to Jailbreak their device somehow.

1707

Due to this exact reason, release of P0sixspwn is important, P0sixspwn supports all the iOS devices including the likes of iPhone 5 and all others running iOS 6.1.3, 6.1.4, 6.1.5, it’s Untethered too. Now, who wants to Plug Their device with PC, every time they restart their device. P0sixspwn is currently available for Mac only, Windows version will be released soon, we have put a little guide to show you how to jailbreak your device, it is quite easy.

The good thing is that nothing will be restored with this thing, everything will remain the same, except your device will be Jailbroken, no risk of loosing your data, no need to re-install your stuff, sounds good doesn’t it.

How To Jailbreak iOS 6.1.3, 6.1.4, 6.1.5.

Download P0sixspwn for your Mac, Windows Version is on the way and the process will be the same as Mac.

ppwn

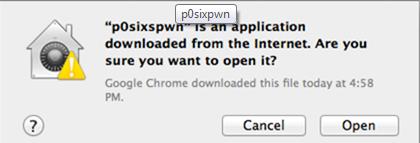
Extract the Download, If you See “P0sixspwn can’t be opened because it is from an unidentified developer”  on OS X, simply right click the App icon and Click Open. Click on Open again if you see “p0sixspwn is an application downloaded from the Internet.Are you sure you want to open it?“.

Screenshot_15

Turn Off the Passcode lock on your device, Settings –> General –> Passcode Lock –> Off. Now Plug your device with PC.

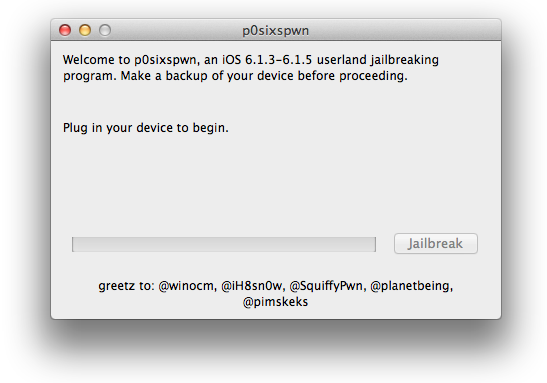
On the Open P0sixspwn, Click Jailbreak and Follow the On-Screen instructions.

P0sixspwn-for-Mac-OS-X

Don’t worry if you see your iOS device getting restart a few times while the process is running, do not try to do anything, just sit back and watch the magic.

After A Reboot or Two, it will be done automatically and you are all set to go. Your iOS Device is Jailbroken now.


List Of Android Phones Who Will Get the Android 4.4 Kit-Kat.

0
List Of Android Phones Who Will Get the Android 4.4 Kit-Kat.

Android 4.4 Kit-Kat is the Latest Version of Android released for Many devices and yet there is a huge list of Phones waiting for their turn. Releasing updates for Smartphones is a pretty good thing, as every update brings new things, remove bugs and performance issues. But releasing them with the Speed of Light is not good, the same thing happened with Android, form 4.2.2 to 4.4.2, all the updates are just released in a period of 8-10 months. While Most of the Flagship devices are still stuck on Android 4.1.2, Google has released 4.4.2 for it’s Flagship devices.

android_kitkat

The List of those Devices, who will get the Update of Android 4.4 Kit-Kat has been released by all the Popular OEMs and we will share with you the List of Such devices. Galaxy Nexus will not received the update of Android 4.4, because Google Said that it has reached the 18-months Window and all other devices like Nexus 7, Nexus 4, Nexus 10 got the update via OTA.

Samsung List Of Devices:

  • Samsung Galaxy S4
  • Samsung Galaxy S4 Zoom
  • Samsung Galaxy S4 Active
  • Samsung Galaxy Note 3
  • Samsung Galaxy Mega (no confirmation whether the 5.8, 6.3 or both)
  • Samsung Galaxy S3
  • Samsung Galaxy Note II
  • Samsung Galaxy S4 Mini
  • Samsung Galaxy Tab 3 & Tab 2

These devices are from the Leaked Samsung Knox Document, Galaxy S3 and Note 2 has some Regional Lock issues, which stops Samsung from releasing the Update for Them, but again in Knox Document, S3 with 2GB of RAM will receive the Android 4.4 Update, which is US Version.

Another Report form SamMobile Suggest that Galaxy S4 mini, Galaxy S3 mini, Galaxy S Advance, Galaxy Ace 3, Galaxy Core, Galaxy Fame, Galaxy Ace 2 and Galaxy Fresh are the Devices on which they test the Firmware, so Possibilities are that they might received it too.

Sony List of Devices:

  • Sony Xperia Z1
  • Sony Xperia Z
  • Sony Xperia Z Ultra
  • Sony Xperia ZL
  • Sony Xperia Tablet Z
  • Sony Xperia SP (the official website has listed KitKat in the future updates of the smartphone)

Some of the Devices like  Xperia T, Xperia TX and Xperia V will get the Android 4.3 Directly after 4.1 and all the Above mentioned devices will first get the Android 4.3 before getting Android 4.4 Kit-Kat.

HTC List Of Device:

  • HTC One
  • HTC One X+
  • HTC One X
  • New Desire series phones launched in 2013
  • HTC Droid DNA
  • HTC J
  • HTC Butterfly
  • HTC One Max

According to Official HTC Twitter Page, HTC One (Verizon Wireless), will get the update in January 2014 and HTC Droid DNA will get the update at the End of Q1,2014.

LG List Of Devices:

  • LG G2
  • LG Nexus 4
  • LG Optimus L7, L5, L3
  • LG Optimus G
  • LG Optimus G Pro
  • LG Optimus VU

LG Optimus G Pro, will also get the Update but a little later, the first one to get it will be the LG G2.

Of Course, this is just an Initial list, the Official list will be announced as the First device from the Mentioned ones will get the update. Do comment your device and we will tell you whether it will get the Update or not.

Lenovo Ideatab A1000 One Click Rooting Method is Available.

2
Lenovo Ideatab A1000 One Click Rooting Method is Available.

Well I don’t have much Information on Lenovo Ideatab A1000, but the final update for A1000 has increased the Internal Storage to 1.5GB. Released in May 2013, Arrived with Android 4.1.2, upgrade-able to Android 4.2.2. Powered By Cortex A9 Dual-Core 1.2GHz and because of Less Popularity, the rooting method of such devices are rare to find. But thanks to Team Cyanogen, we are providing you How to Root Lenovo Ideatab A1000.

lenovo-tablet-ideatab-a1000-black-front-back-2

Here goes the Cyanogenmod disclaimer. The same applies here:

CyanogenMod members or anyone else on this website is not responsible for bricked devices, dead SD cards, thermonuclear war, or you getting fired because the alarm app failed. Please do some research if you have any concerns about features included in the products you find here before flashing it! YOU are choosing to make these modifications, and if you point the finger at us for messing up your device, we will laugh at you. Your warranty will be void if you tamper with any part of your device / software.”

How To Root Lenovo Ideatab A1000.

  1. Go to Settings > Developer Options and Enable USB Debugging.
  2. Download Rooting tool. Link
  3. Make sure the drivers Are install.
  4. Connect your device with PC.
  5. Open The Package and Click Root, just make sure that you are connected to an Active Internet.
  6. That’s It.


If your Restart your device after rooting and it doesn’t turn on Like Normal, or Drained all the Battery, follow:

  1. Make sure that the Battery has not been drained, charge it and then Restart.
  2. If the Tab is not Starting after Recharge, Press the Small Button, which is in the Hole Below the Memory Card, using Pin. This is the Reset Button, which will reset the Tablet.
  3. If that Doesn’t Work either, Go to a Near Service Center and Apply Stock ROM on your device.

How To Update Galaxy Star Pro S7262 To XEUAML1 Android 4.1.2 Jelly Bean Official Firmware.

0
How To Update Galaxy Star Pro S7262 To XEUAML1 Android 4.1.2 Jelly Bean Official Firmware.

Android 4.1.2 Jelly Bean is now available for Galaxy Start Pro, the OTA Update is on the Roll and it will be arrived at every region. There is not much changes happen in it, except some Minor Bug are now Fixed and the changes are those, which can’t be noticed that easily. The XEUAML1 Android 4.1.2 Jelly Bean is an Official Firmware released by Samsung Over Kies for only a Few regions, other Regions will get their Firmware very soon. If you haven’t received the OTA update, you can install it manually. Just follow our Guide till end and you will see your device running XEUAML1 Android 4.1.2 Jelly Bean Official Firmware.

samsung-galaxy-star-screen-big

If you are familiar with Odin and it’s working, then this tutorial might not be difficult for you. Otherwise read the whole tutorial first before trying it on your device. In this Article, we will show you How ToUpdate Galaxy Star Pro S7262 To XEUAML1 Android 4.1.2 Jelly Bean Official Firmware. But before we begin, Make sure that you have battery charged over 60 % and have backed up all your important ContactsCall Logs & Messages.It is highly recommended in case of any mishap or data loss to back up all your important data.

Disclaimer: 

The methods involved in flashing custom roms and rooting your phone is highly custom and may result in bricking your device,and has nothing to do with Google or the device manufacturers which is Samsung in our case. In case of any mishap we may not be held responsible. Follow these instructions to the letter to avoid any mishap or bricking. Make sure that whatever you do, you are doing it at your own responsibility.

Important things:.

How To Update Galaxy Star Pro S7262 To XEUAML1 Android 4.1.2 Jelly Bean Official Firmware.

odin_explained

  •  Download Android 4.1.2 S7262XEUAML1 for Star Pro S7262 to your computer and extract the zip file.
  • Download Odin.
  • Turn off your Phone and Turn it On While Pressing, Power + Volume Down + Home button until you see some text on-screen, Press Volume Up to continue.
  • Make Sure that the USB drivers are installed.
  • Open Odin in Computer and connect your device to PC, while it is in the Download mode.
  • If your Phone is successfully connected to PC, the Odin port will turn Yellow with COM port number.
  • Now Click on PDA and select the File with  .tar in its name, or the one who has the biggest size.
  • In Odin, Check Auto reboot and F.Reset Options.
  • Now Click the start button and wait for the process to complete.
  • After the installation is complete you device will restart and once you see the Home Screen, unplug the cable.

That;s it your Samsung Galaxy Star Pro S7262 has been updated to XEUAML1Android 4.1.2 Jelly Bean. Go to Settings > About To verify.

How To Install S4 Revolution Android 4.3 Jelly Bean Custom ROM on Galaxy S3 I9300.

How To Install S4 Revolution Android 4.3 Jelly Bean Custom ROM on Galaxy S3 I9300.

Ever Thought of having the Samsung Galaxy S4 Features on its Predecessor Galaxy S3, despite the Android 4.3 Update have brought some features from Galaxy S4 to Galaxy S3, but the Problem in Official Android 4.3 is still there. It is slow and filled with bugs and performance issues. Developers are there to do everything they can to give Galaxy S3, the Features of Galaxy S4, but since the Sensors are not present there, most of those features will not work. Like Air-View and most of the Air-Gestures, but Eye Scrolling and Smart Stay, Smart Rotation will work Perfectly. S4 Revolution is another ROM that is filled with S4 Features and can be installed on Samsung Galaxy S3. Just Follow our Guide and All Is Well.

Screenshot_2013-12-29-22-35-46

If you have ever installed a Custom ROM on your device, then this might not be very Difficult for you, Otherwise pay more attention to the Tutorial. In this Article,  we will show you How To Install S4 Revolution Android 4.3 Jelly Bean Custom ROM on Galaxy S3 I9300. But before we begin, Make sure that you have battery charged over 60 % and have backed up all your important ContactsCall Logs & Messages.It is highly recommended in case of any mishap or data loss to back up all your important data.

Disclaimer:

The methods involved in flashing custom roms and rooting your phone is highly custom and may result in bricking your device,and has nothing to do with Google or the device manufacturers which is Samsung in our case. In case of any mishap we may not be held responsible. Follow these instructions to the letter to avoid any mishap or bricking. Make sure that whatever you do, you are doing it at your own responsibility.

Important things:

  • Your Device must be Rooted and Latest TWRP or CWM Recovery must be installed on it.
  • Make Sure that USB Cable is not Connected With PC While The Installation in Process.
  • Enable USB debugging mode.
  • Make sure that battery level is at 85% or more.
  • This Tutorial is Only For Samsung Galaxy S3 I9300.
  • Back-Up your Mobiles EFS DataHow To Restore and Back-Up EFS Data On Samsung Galaxy Devices.

How To Install S4 Revolution Android 4.3 Jelly Bean Custom ROM on Galaxy S3 I9300.

CWM Recovery Users.

la-foto-764x1024

  • Turn off your phone and open Recovery mode. How? Press and hold Volume Up +Home + Power buttons until you see some text on screen.
  • First Choose ‘Wipe Cache’.
  • Then Navigate to ‘advance’ and choose ‘Devlik Wipe Cache’ so you won’t get in any bootloop..
  • Navigate to ‘Install zip from sd card’ another windows will open in front of you.
  • Select ‘choose zip from sd card’ from the Options.
  • Select the S4 Revolution.zip file and confirm the installation on next screen.
  • Select Wipe Data in Aroma Installer.
  • Install MG4 Modem if you are already running it, otherwise don’t install it.
  • Once the Installation is Over, you will promoted to Reboot System Now
  • Select Reboot Now to Reboot the System.

TWRP Users.

TWRP-2.3.3.0

  • Tap on Wipe Button and Select Cache.
  • Swipe the Confirmation Slider.
  • Go back to Main Menu and Tap Install Button.
  • Locate the S4 Revolution.zip , Swipe the Slider To install it.
  • Select Wipe Data in Aroma Installer.
  • Install MG4 Modem if you are already running it, otherwise don’t install it.
  • Once the Installation is Over, you will promoted to Reboot System Now
  • Select Reboot Now to Reboot the System

Voila! your Samsung Galaxy S3 I9300 has been updated to Android S4 Revolution Android 4.3 Jelly Bean Custom ROM,  Wait for at least 5-minutes for the first run.

Hotspot Shield VPN 1.6.1/ 1.6.6 APK for Android – Download Here

0
Hotspot Shield VPN 1.6.1/ 1.6.6 APK for Android – Download Here

Hotspot Shield VPN is the best Vpn for Android and System. It recently got a update now you can download the latest Hotsopt Shield for your Android devices. Unblock any websites – unblock YouTube, unblock Facebook, and others such as Hulu, Netflix and BBC where it is blocked. Give unrestricted access to mobile VOIP and messaging services such as Skype and Viber anywhere. Secure your mobile WiFi connection with HTTPS encryption. Prevent hackers from stealing your private information. Browse the web privately & anonymously. Compatible with Android OS version 2.x and 4.x.

Hotspot Shield VPN 1.6.1 APK

Features: Enjoy great features you love on the desktop version!

* Protect yourself while using Wi-Fi hotspots (VPN encrypts all internet traffic); protect your identity, your IP address and stop unwanted tracking. Share and communicate privately.
* Gives you access to your favorite sites: Unblock any blocked content and services – get Facebook, Skype, BBC, YouTube, Twitter, Flickr, Netflix, Hulu, Pandora, Viber, VOIP, messaging and other services wherever you are: at work, school or while traveling
* Quickly share the app to your loved ones via email or SMS, so they can secure their connection too! It provides the best recommendations from your contact list. We DO NOT store any personal information.

What’s New

★ Now it supports Japanese, Arabic, Turkish, Vietnamese, Chinese, Spanish, Portuguese, German and Korean!
★ Ability to switch country to access blocked content; now with Japan IP addresses!
★ More robust VPN connection to secure your Internet access

Download Hotspot Shield VPN 1.6.6 Android APK

  • You can Download Hotspot Shield VPN 1.6.6.0 APK / Download Hotspot Shield VPN for Android 1.6.1 apk – (Google Play Store).

Now Follow our step by step guide on How to Install Hotspot Shield VPN for Android 1.6.6.0/1.6.1 APK.

How to Install Hotspot Shield VPN for Android 1.6.6.0 APK:

Carefully follow all the simple steps so that you can install Hotspot Shield VPN for Android on your device.

Step 1: First download apk file on your system or you can download directly on your device.

Step 2: Download ES Explorer File Manager or the one you like.

Step 3: Now goto settings> Applications > check “Unknown sources” box. Tap ‘OK” on the warning.

Step 4: Now connect your device with pc and copy the downloaded apk file to your SD Card.

Step 5: Disconnect your device and navigate to the folder on your device where you placed the  Hotspot Shield VPN apk file.

Step 6: Tap on apk file a pop-up will appear with 2 options package installer / verify and install select package installer and press ok.

Done now you can use Hotspot Shield VPN on your Android device and Surf freely .. 🙂

How To Fix Red Frame Border/Strict Mode in Android devices.

2
How To Fix Red Frame Border/Strict Mode in Android devices.

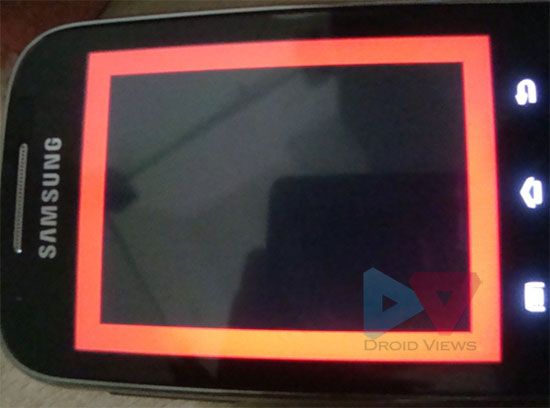
Strict Mode in Android devices allows users to learn whether their device is getting to much load to run apps. Simply means when you open a lot of apps and your device can’t take anymore or when an App is taking a lot of Processing power to run, You will get Red Frame around the Border of the Device, letting users to know that their device is taking more load than it can. Some users, while experiencing this gets a bit nervous, because they think that this is some fault in LCD, but i can assure you that this thing has nothing to do with LCD except the Blinking.

red-line-frame-on-screen


Image Credits: DroidViews

According to the official Android Developers blog:

StrictMode is not a security mechanism and is not guaranteed to find all disk or network accesses. Future versions of Android may catch more (or fewer) operations, so you should never leave StrictMode enabled in applications distributed on Google Play.

How To Disable Strict Mode:

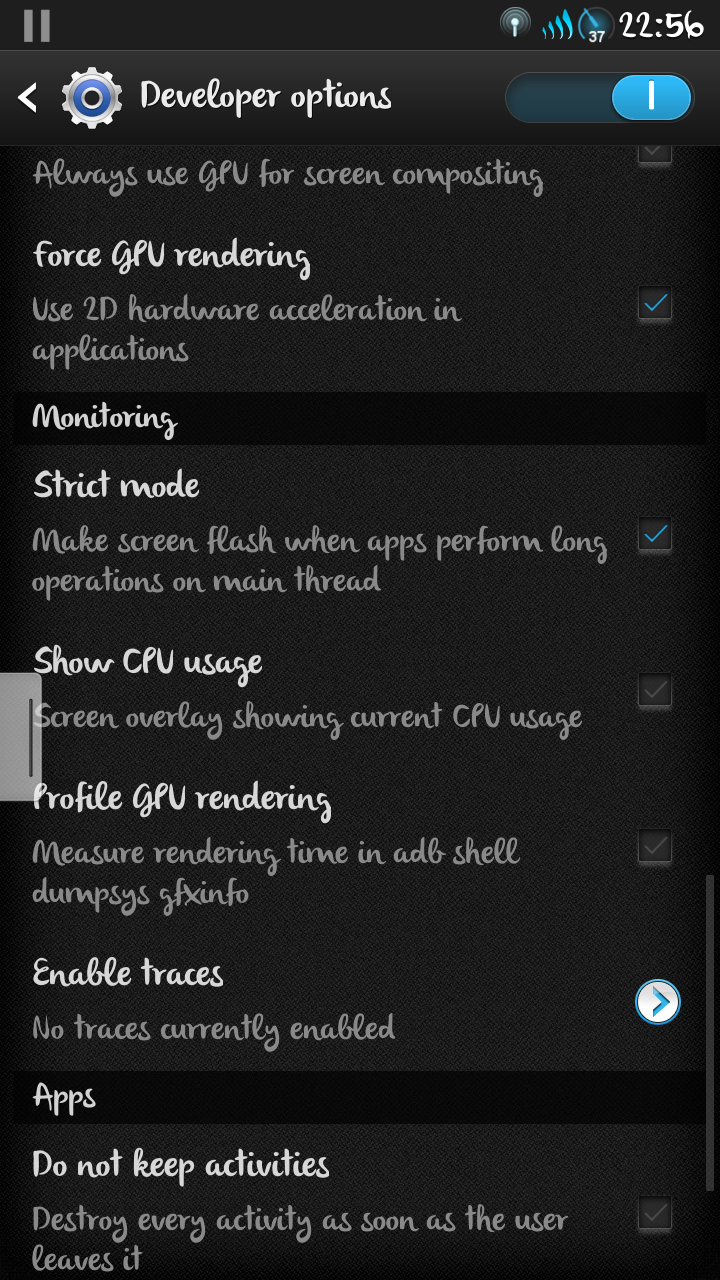
Go to Settings.

Open Developer Options, if you can’t see them, then Go to About and Tap Build Number 7-8 times, once you get the message that Developers Option are enable, go to Developer Options.

Untick the Strict Mode.

Now Reboot Your device, to take effects.

Screenshot_2013-12-28-22-56-54


Another Solution is that you should Factory Reset the Device and don’t enable the Developer Options. But it will cost you all your apps and Settings, So, used the first one and Enjoy, But on the Record you should Enable the Strict mode just to learn the Potential of your Device

How to Install Applications using APK Files on Samsung Galaxy Gear [Guide]

5
How to Install Applications using APK Files on Samsung Galaxy Gear [Guide]

Samsung’s Galaxy Gear is not warmly welcomed by the audiences, but those who have it, they must be enjoying the small screen with a few features and options that it brought along with it installed inside. But, have you ever wondered going beyond the limits on the Galaxy Gear and putting some cool games on it? Seriously, that’s actually awesome and that’s actually possible. Few days back, I bought a Galaxy Gear for myself, and wanted to install some apps on it as it comes with 4 GB of internal storage, you can’t probably fill it with pictures captured on a 2 MP camera, perhaps you can surely install some apps but there is no play store or a way to access files within Galaxy Gear.

So, as the topic suggests, in the following post I’ve explained different methods to install APK files on your Samsung Galaxy Gear SM-V700. You just got to follow the method to the letter. Galaxy-Gear_001_Front_Mocha-Gray

Before we head towards the method, just in case you don’t know about the Galaxy Gear, then let’s have a recap. Galaxy Gear is Samsung’s very first smart watch, that it introduced as an accessory to the Galaxy Note 3 in the same event where it launched the Note 3. The device sports a beautiful 1.63 inches Super AMOLED display, a 2 MP camera on the strap,  800 MHz Exynos CPU, 512 MB RAM and a 315 mAh battery under the hood. Other features include Android 4.2.2, Bluetooth 4.0, 720P video recording and some more to check out there.

Well, let’s install some apps on it now.

How to Install Applications through APK files on Samsung Galaxy Gear:

There are two methods I’ll explain, pick up the one you find easy to use as one of these is totally manual and one includes using a software and pushing apps in gear.

Method 1: At first, Let’s have a look on the easier one, using WonderShare Mobile Go.

      1. First off all you need to download and install WonderShare Mobile Go for Android (Trial Version works for 15 Days, buy it if you want the pro version). or Just in case you don’t want to try this, head towards method 2.
      2. After installing WonderShare Mobile Go for Android, turn on your  Galaxy Gear, and pass the activation screen.
      3. Swipe through the menu and tap Settings.
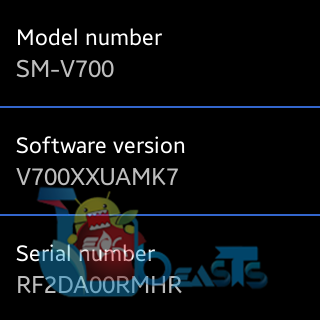
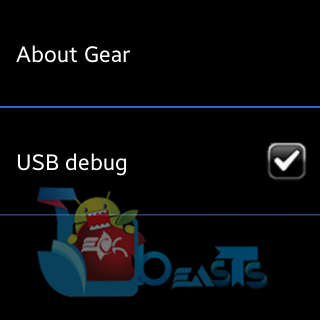
      4. In Settings > tap Gear Info > Tap Version Number of 7 times to enable the USB debugging mode. [Skip this if already enabled].
      5. Go back to Gear Info by swiping from top to bottom, and check USB debugging mode.
      6. screenshot_1227230647screenshot_1227230702screenshot_1227230710
      7. Connect your Gear to your PC now, it will prompt you for turning on USB debugging mode for the PC on gear, allow it.
      8. WonderShare Mobile Go for Android will start and connect Gear now.
      9. In WonderShare Mobile Go click on Samsung SM – V700 and in the panel click on “Install Apps”.
      10. After you click on install apps, it will ask you for the APK file’s location, you must have downloaded the APK file of the app you want to install. In case you don’t know how to download APK files on your PC, follow our guide here, or simply look for the APK file of your desired app on the web.installing apps1
      11. Select the APK file and it will begin installing it on your device.installing apps
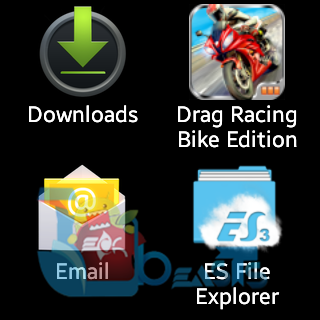
      12. As soon as installation is done, find the installed app in “Apps” on your Gear.installing apps 2
      13. Use the App and have fun.
      14. To manage the apps, simple click on “Apps” under your device in the WonderShare Mobile Go for Android.
      15. That’s All with this method.
      16. screenshot_1228014012 screenshot_1228014024 screenshot_1228014108 screenshot_1228014128 screenshot_1228014141 screenshot_1228014159

Method 2: Install APK files using Android ADB:

      1. Download and Install Android ADB and Fastboot drivers: Full Setup Guide | Quick Setup Guide.
      2. Download the APK file of your desired App.
      3. Enable USB debugging mode on your Galaxy Gear and connect it with your PC.
      4. Place the downloaded ADB file in the folder that you created using our Android ADB & Fastboot Guide. i.e If made using Full Setup Guide, place it in Fastboot Folder, else if made using Quick Setup Guide, place it in Minimal Android ADB and Fastboot Drivers that you will find in the installation directory.
      5. Open the folder where you placed the APK file i.e Fastboot or Minimal one.
      6. Press and hold shift key and then right click on any empty area within that folder.
      7. Click on “Open Command Window Here“.ADB and Fastboot Installation Guide
      8. Now in the command window write this command: Adb install Appname.apk
        ADb Install APK file Galaxy Gear
      9. Replace the Appname with the name of the app you placed in the folder – You may rename it for your ease of access.
      10. Hit Enter and it will install the app quickly and show you the logs in the command shell.
      11. Find the installed app in “Apps” on your Gear.
      12. To uninstall any app, simply type: Adb uninstall apkname.apk
      13. That’s all with this method.
      14. screenshot_1228020331 screenshot_1228020359 screenshot_1228020418 screenshot_1228020431 screenshot_1228020442 screenshot_1228020454

That’s All! We hope that you found this guide useful. In case you got any queries or face any difficulties, please feel free to stop by the comment box below and drop us your words. We will get back to you as soon as possible. Thanks All.